My “Phone Home” Wood Cube
You may also like:
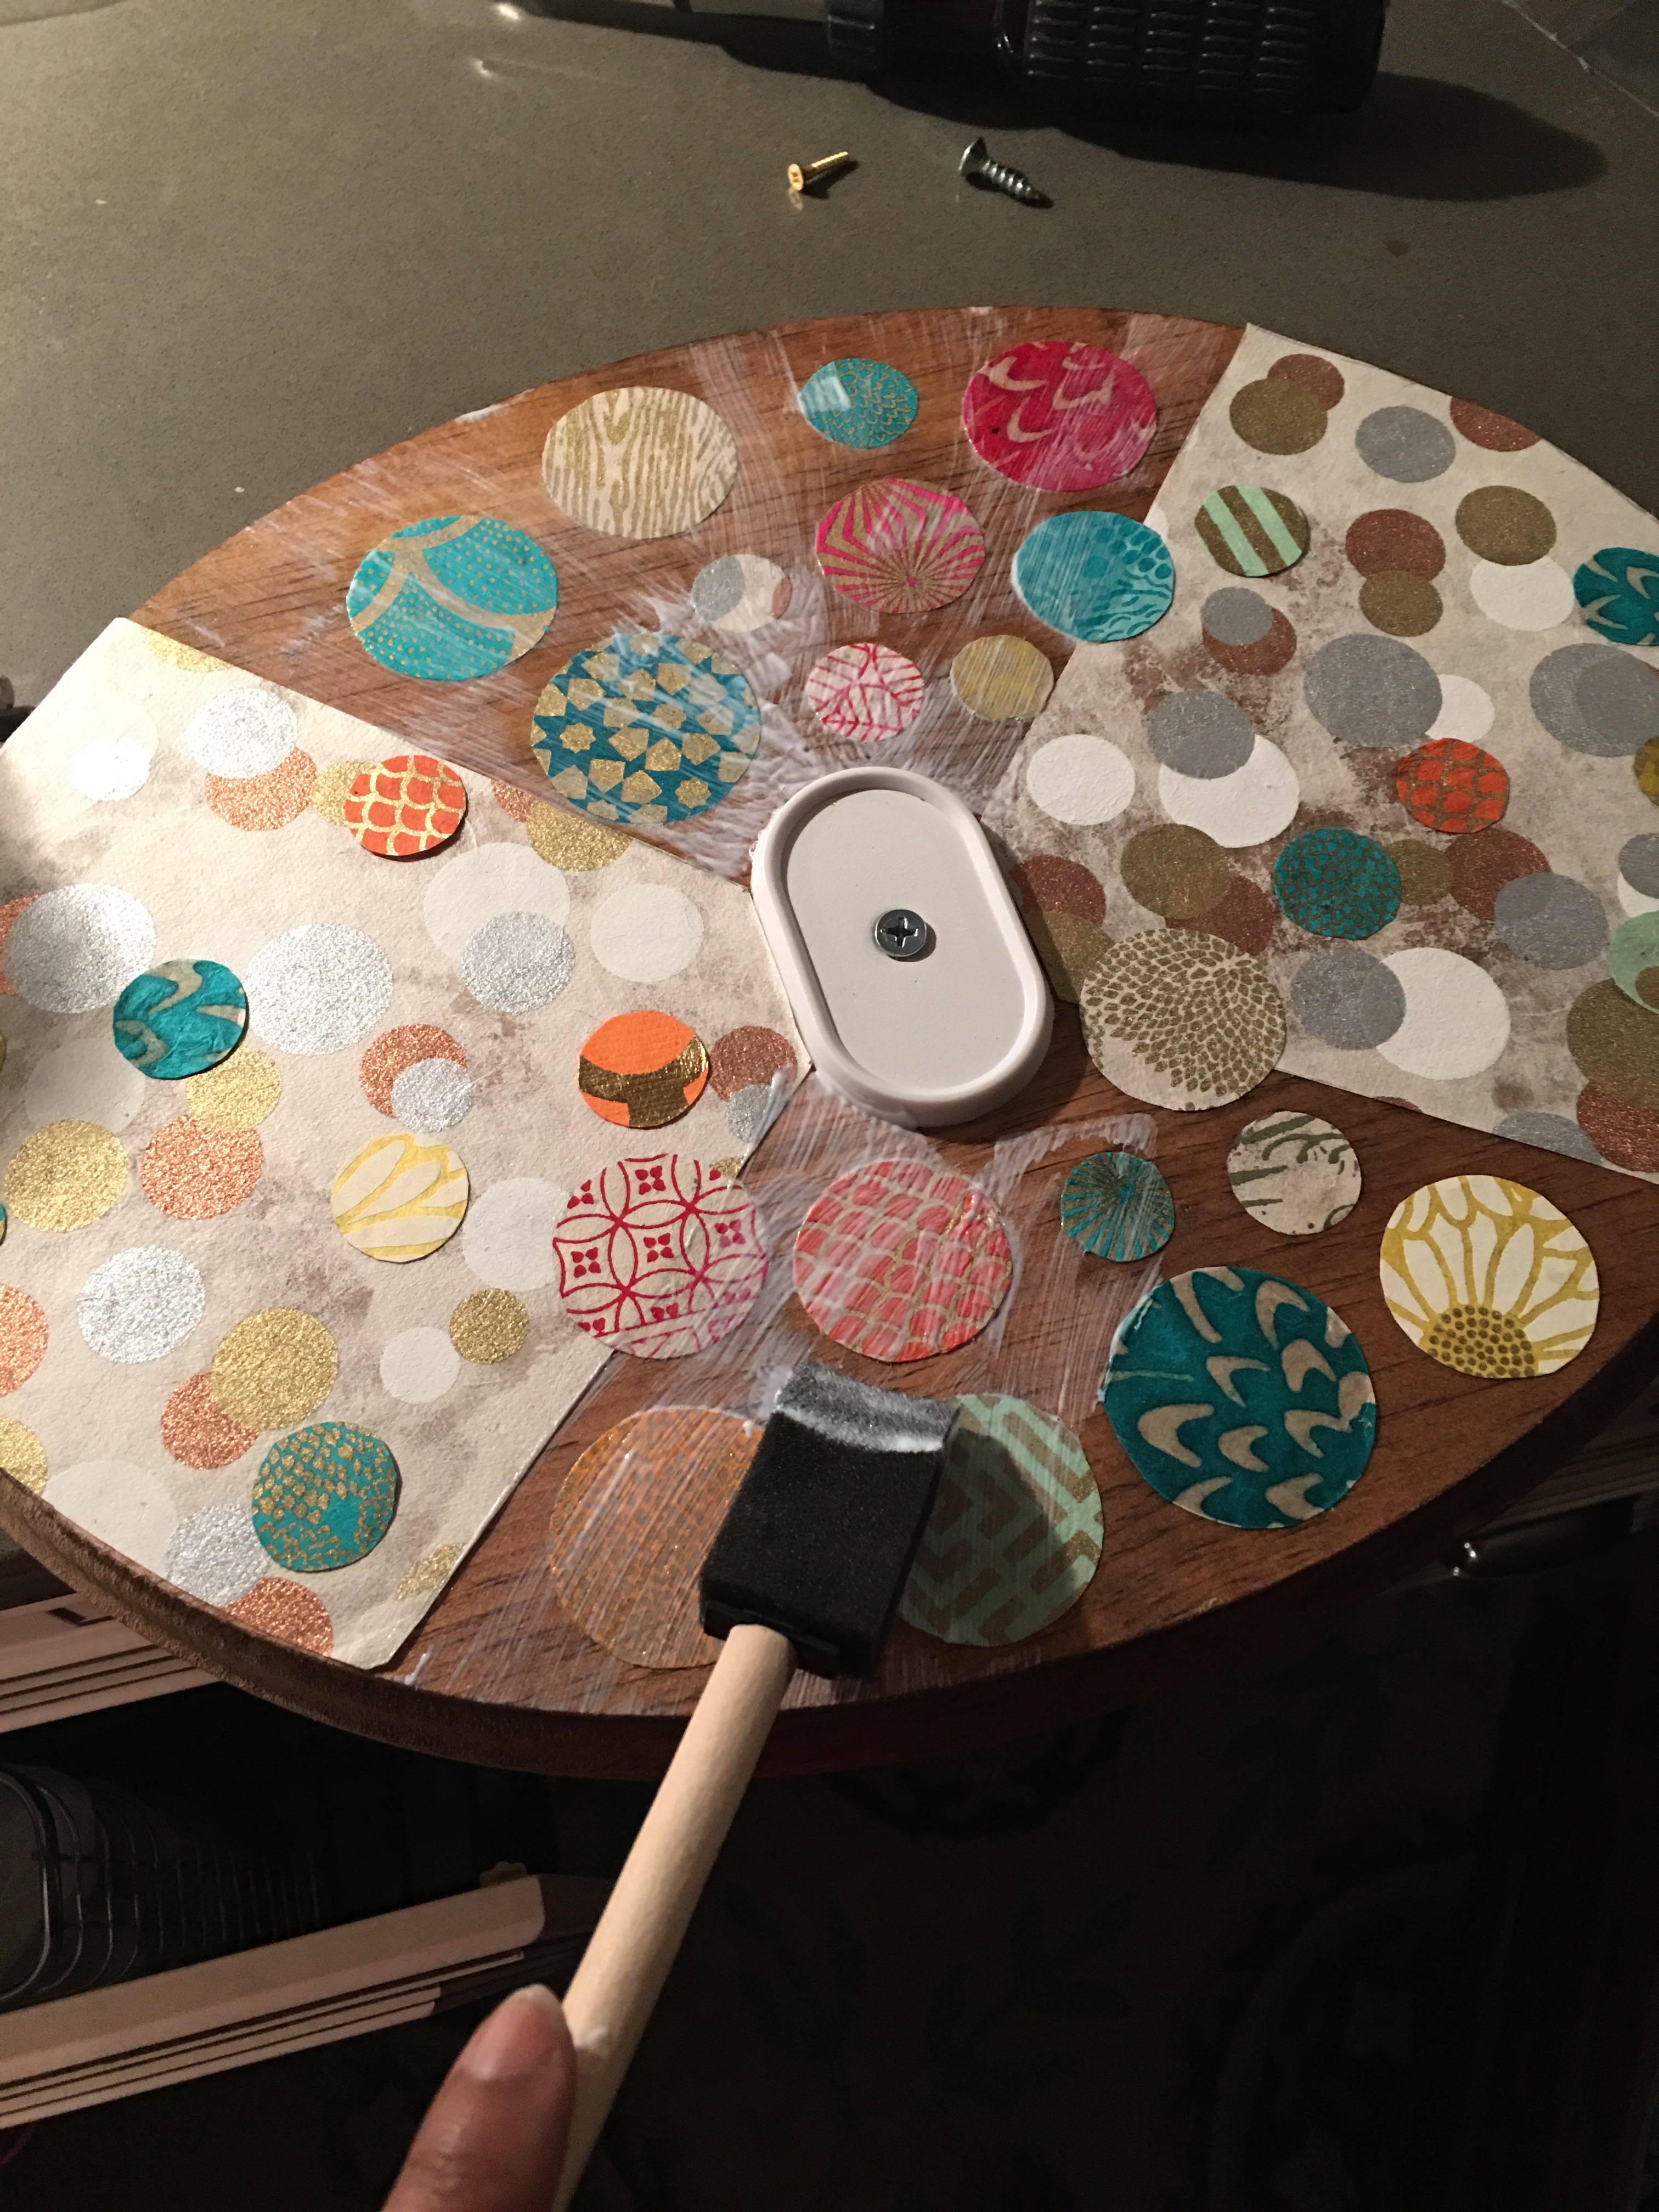
October 22, 2015: There was this project I started a while back where I mounted an Urbio planter puck to a $3 wood plaque that I bought from AC Moore. It lay sitting on my desk for months with me having no idea what to do with it because I didn’t particularly like the look of a white Urbio planter vessel in the middle of a sea of stained wood. It looked odd and out of place. So I left it propped on the desk until I could figure out how to fix it.Then one day, months later, as I was brainstorming ideas for my Connectwise “If it’s not a ticket” plywood art display project, the solution for the Urbio wood plaque just came to me in a snap. I immediately fished out the piles of paper-decorated circles I’ve been aimlessly making from scrap decorative papers (well, an aimless exercise up until now).
I laid out different circles and paper shapes onto the wood plaque surrounding the center Urbio vessel and grinned with satisfaction. With a flourish, I whipped out my bottle of Mod Podge to decoupage the shapes onto the wood. And I came up with this on October 19.
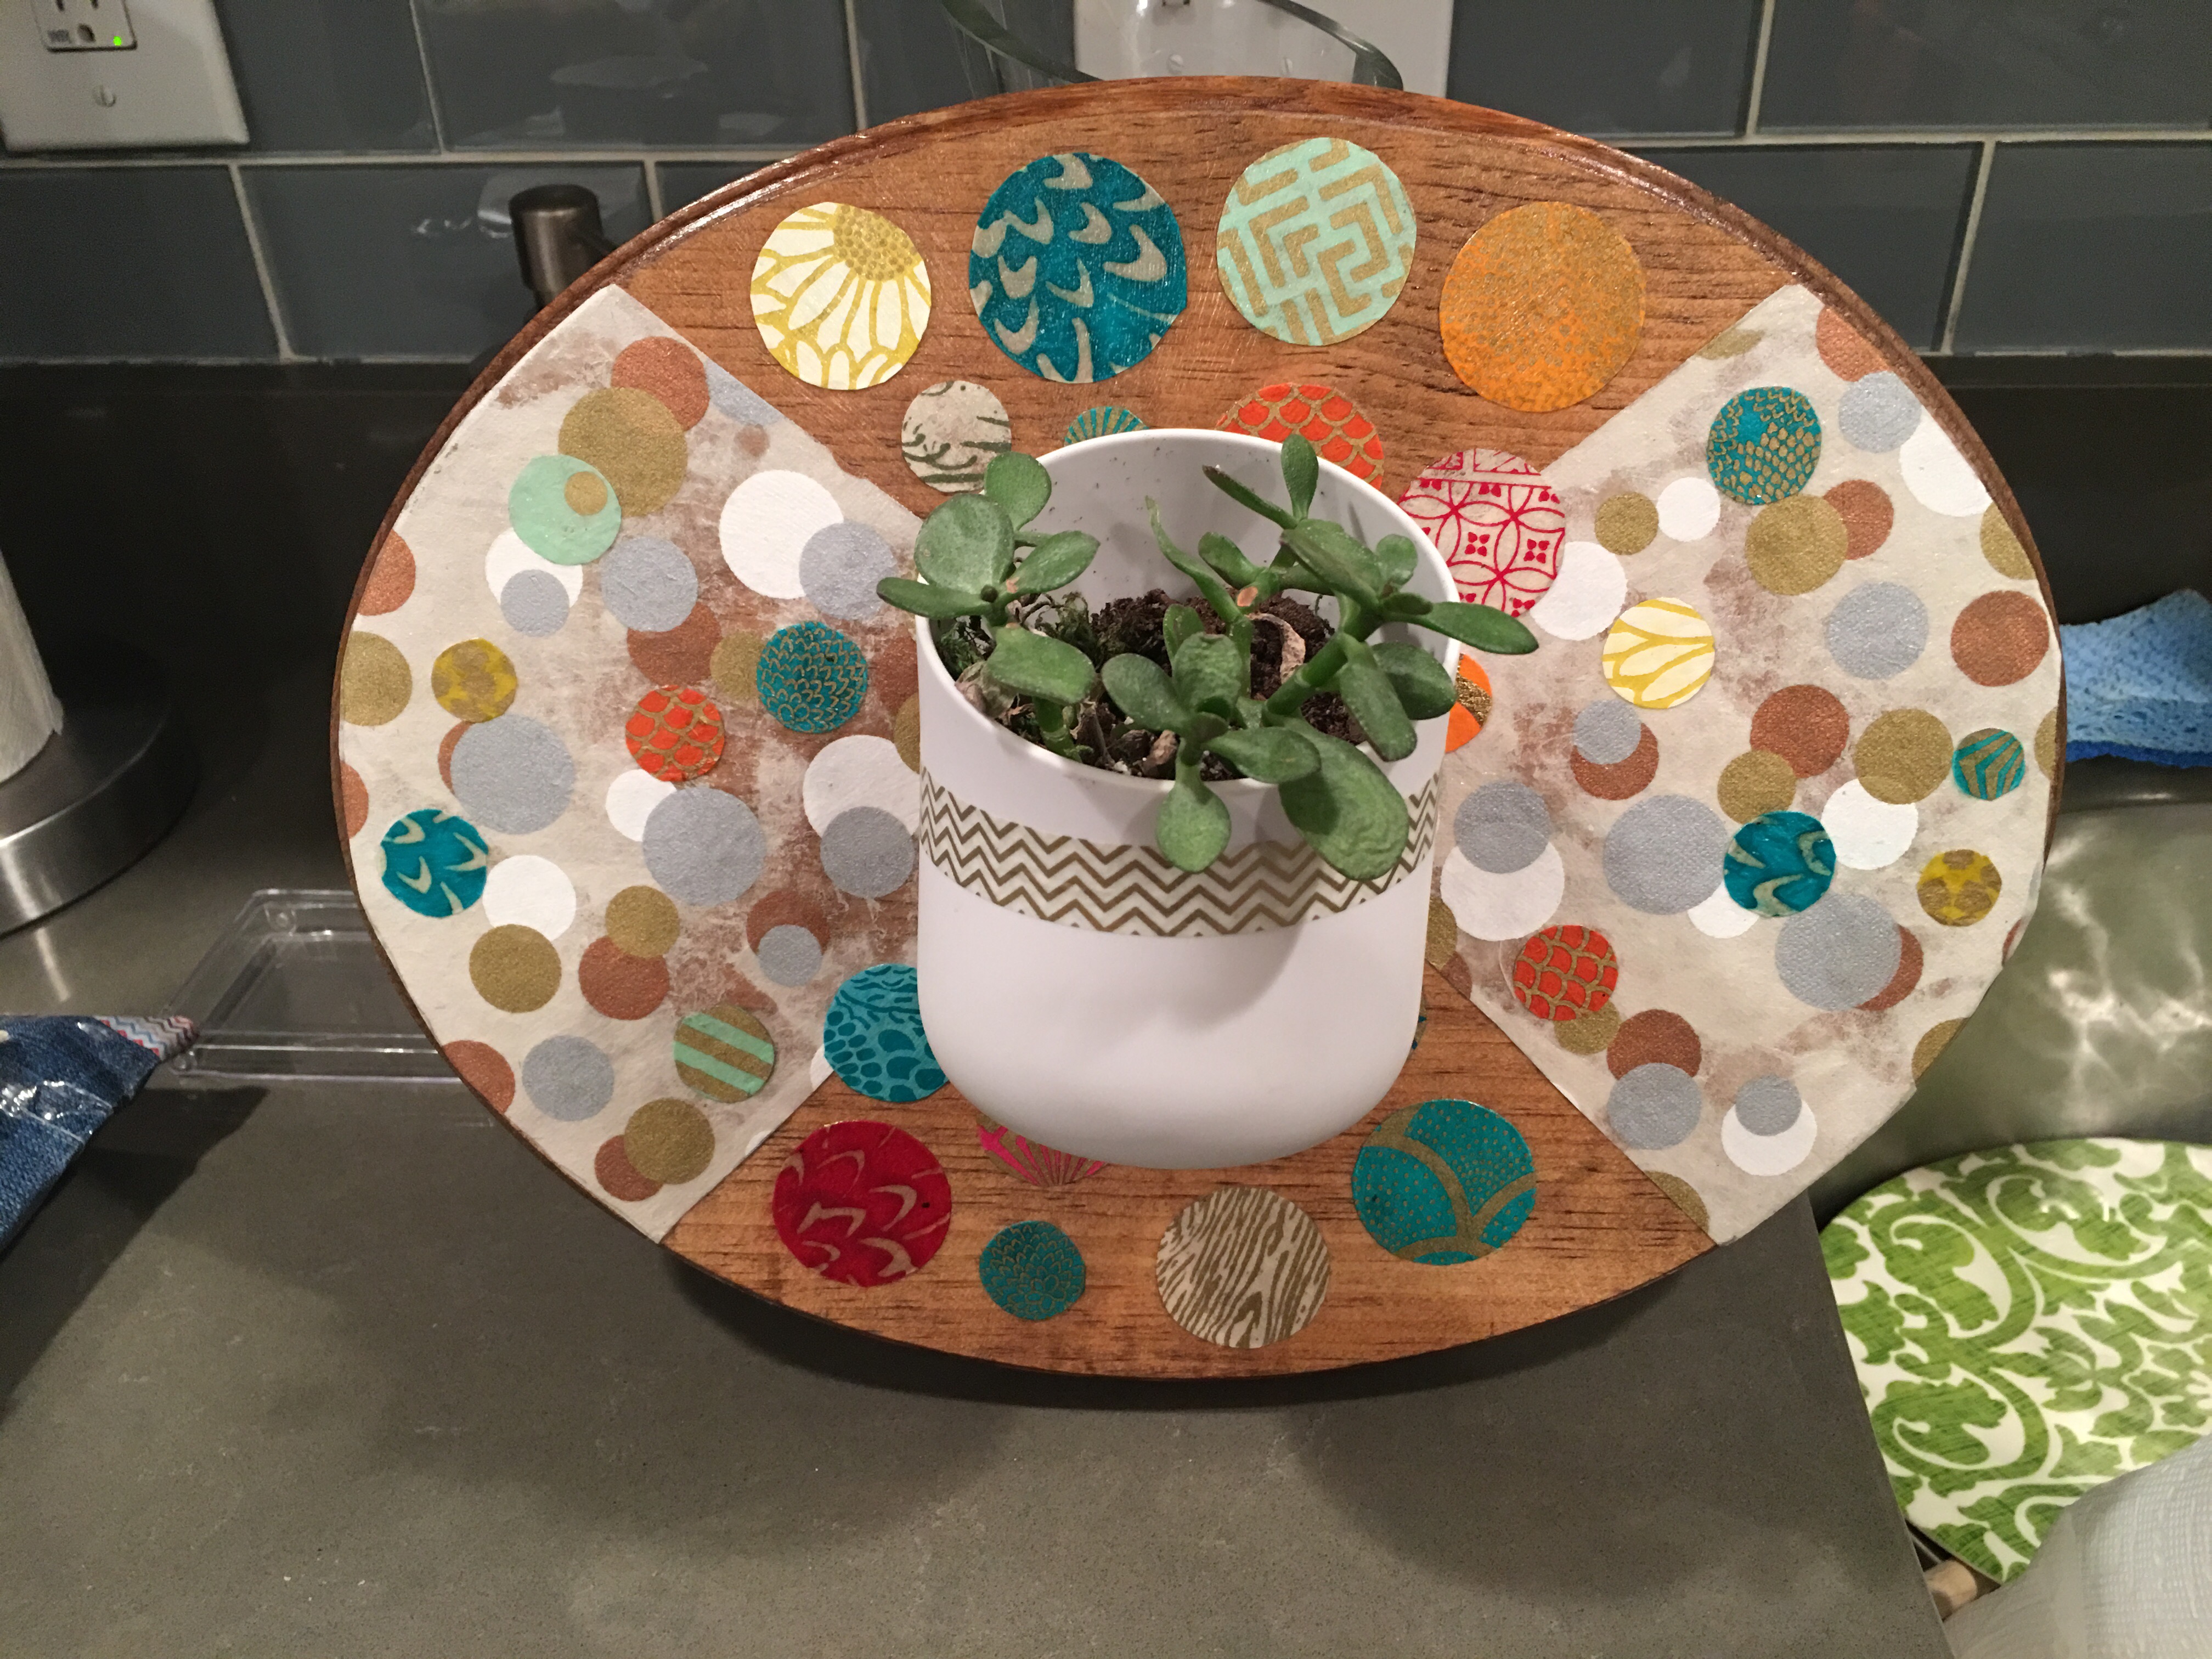
I instantly fell in love. I truly wish I had a before picture for this one.
So began my obsession with decoupaging decorative paper shapes to wood.
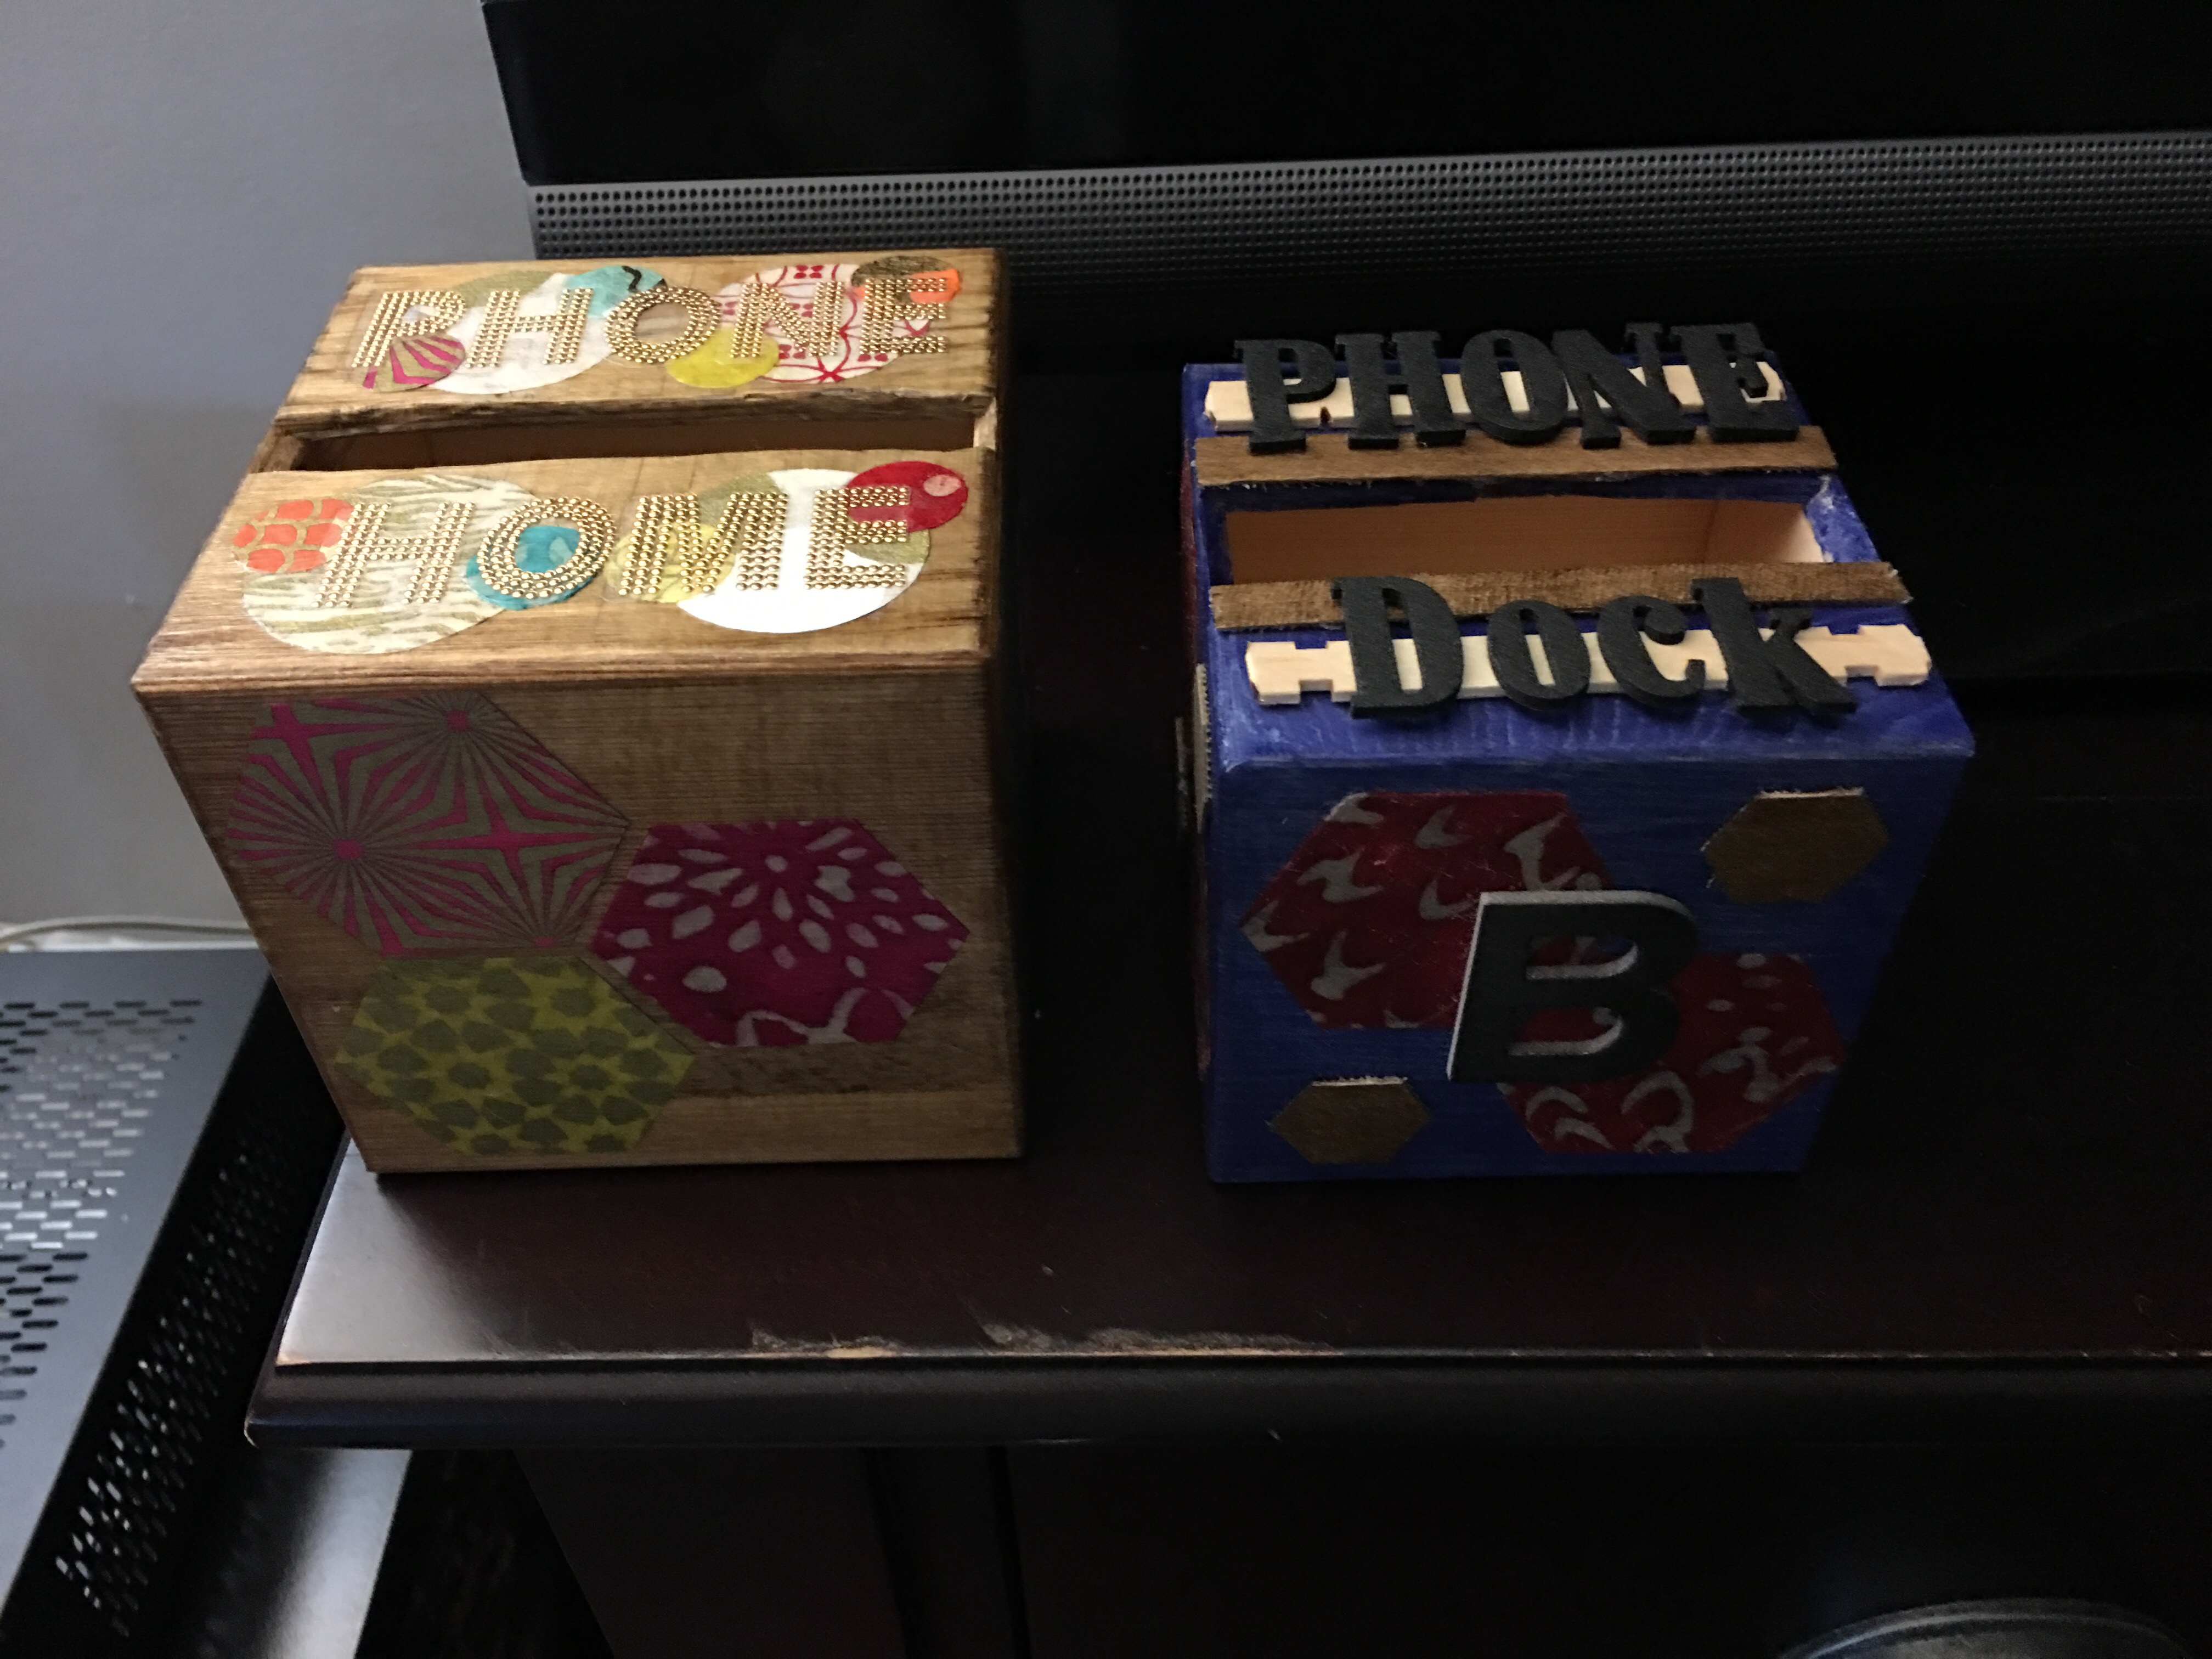
Skipping ahead to my “Phone Home” cube project: I found these unfinished hollow Nicole Wood Photo blocks at AC Moore.
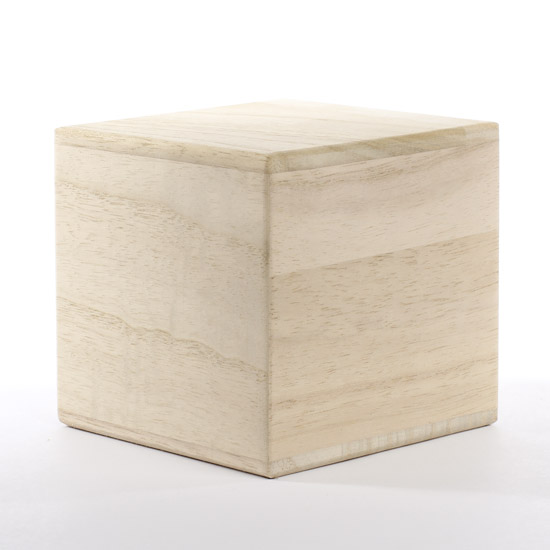
No link to the Nicole craft wood photo block currently exists, unfortunately, byt here’s a similar photo wood block found from factorydirectcraft.com. But I bought a small and a large photo cube from AC Moore and brought them home for use on some unknown craft piece.
I loved the look of them and knew that, one, I wanted to stain it a pretty wood stain color and, two, do something clever and functional with it.
This was during the time I was about to do my iPhone 5C to 6S Plus transition. I took this photo of the new phone brick I brought home next to the case I used for my iPhone 5C.
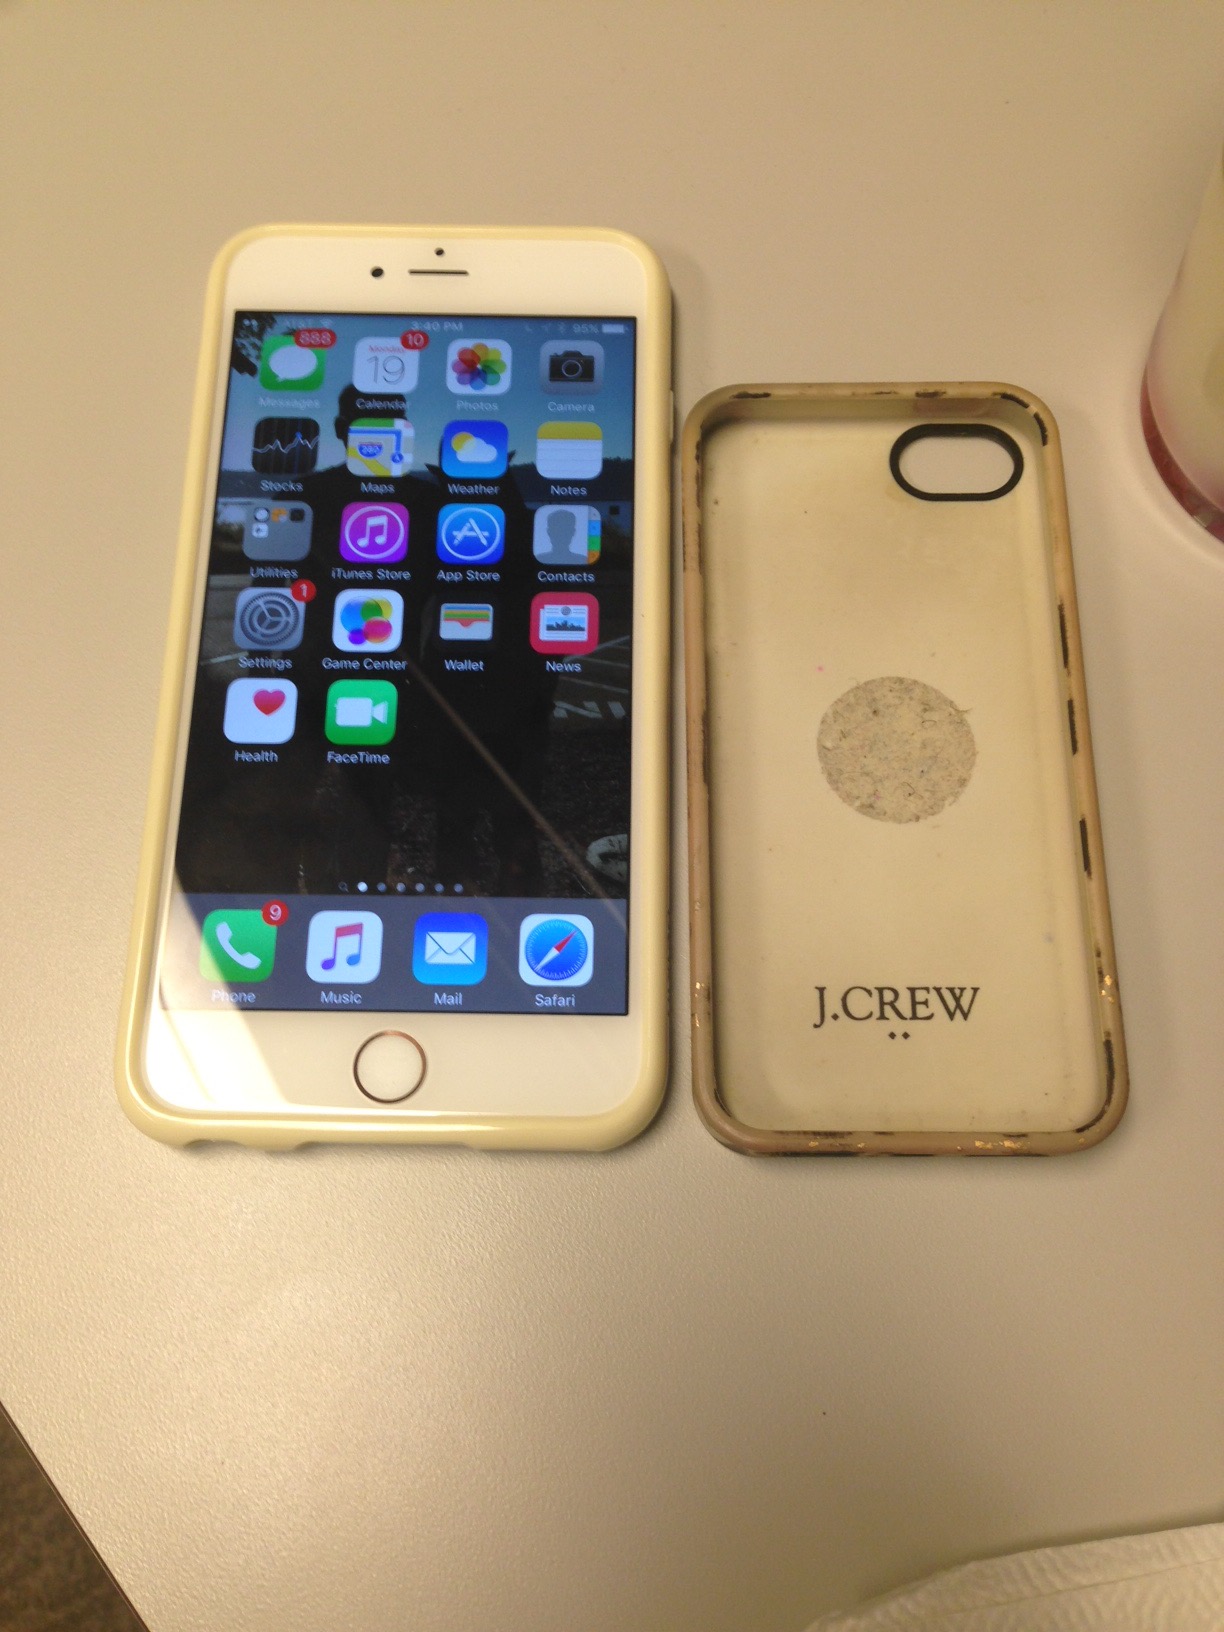
It will not fit in most cases much less docking charging stations. How the heck am I going to dock it?!!!
The answer, once again, came to me in a flash. And I immediately reached for one of my unfinished wood photo cubes.
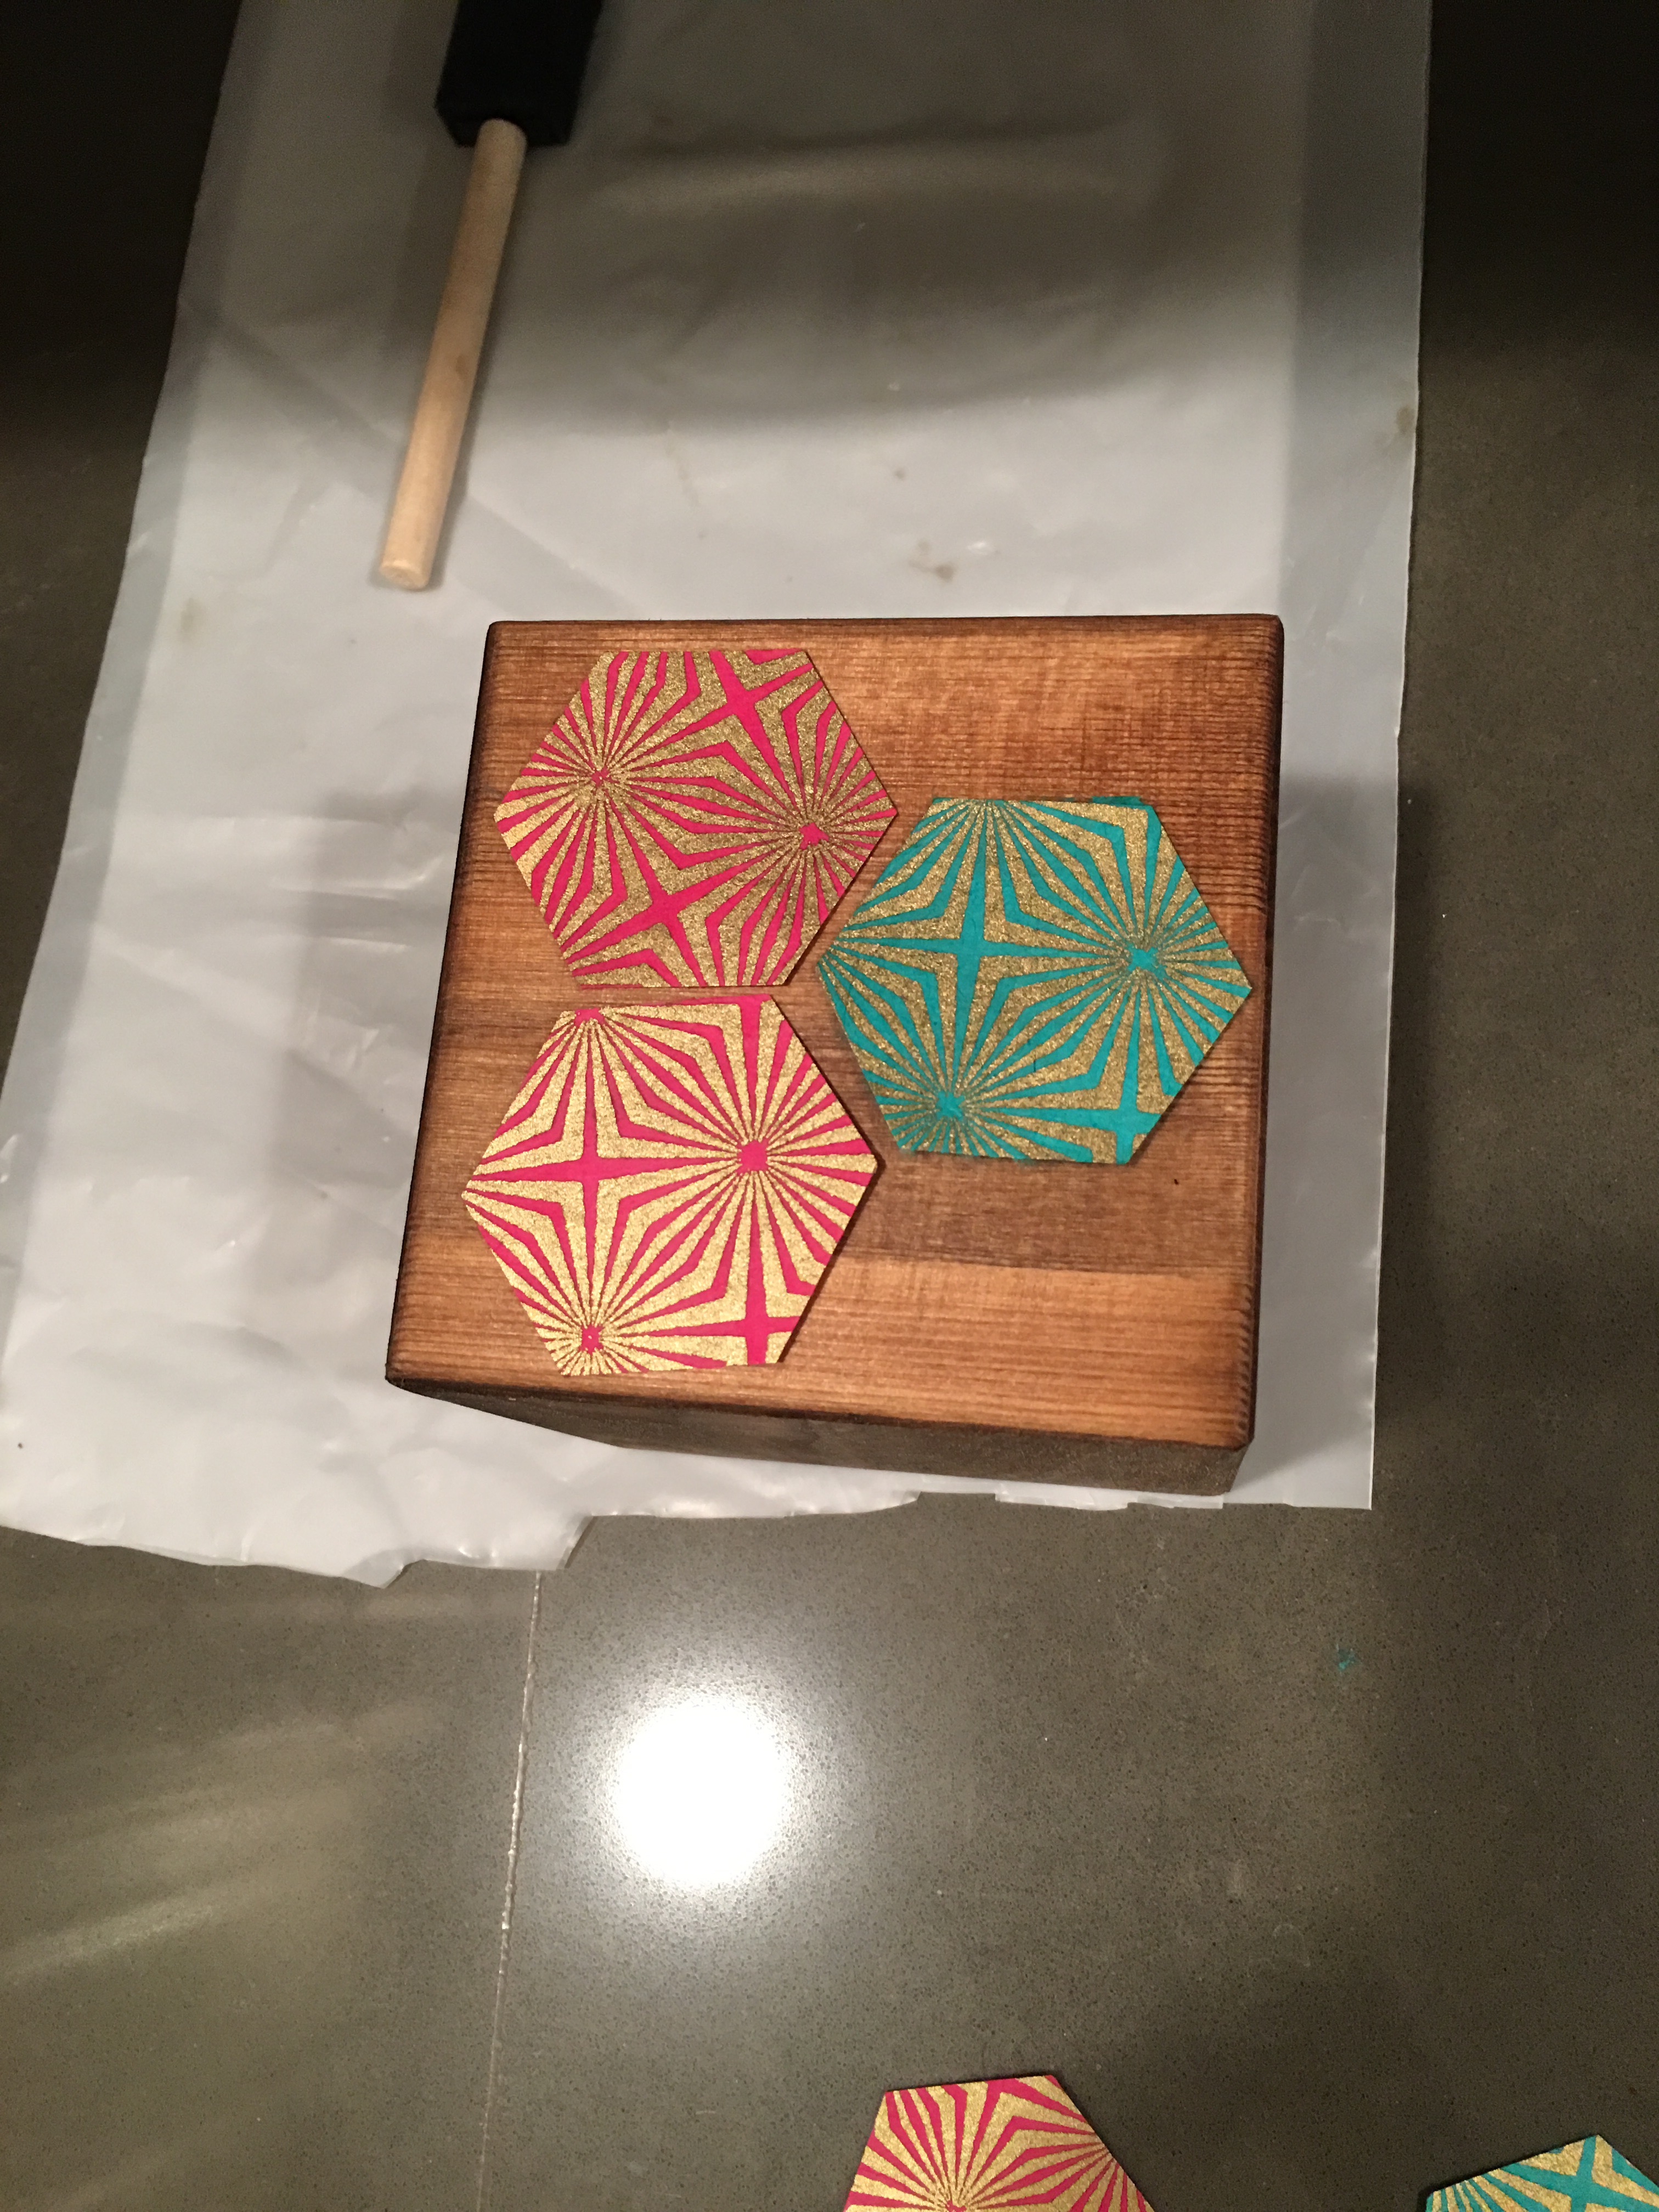
- Step 1: Stain the cube with your favorite wood stain color. (I chose Minwax Early American, of course).
- Step 2: Using wood chisel tools, cut open a slit wide enough to slip in your phone at the top of the cube.
- Step 3: My favorite step. Decorate the cube with paper decoupage!
On each side of the cube I added three large hexagon paper punch-outs, carefully arranged.
For added decoration and dimension, I added smaller circle paper punch-outs of various colors and patterns.
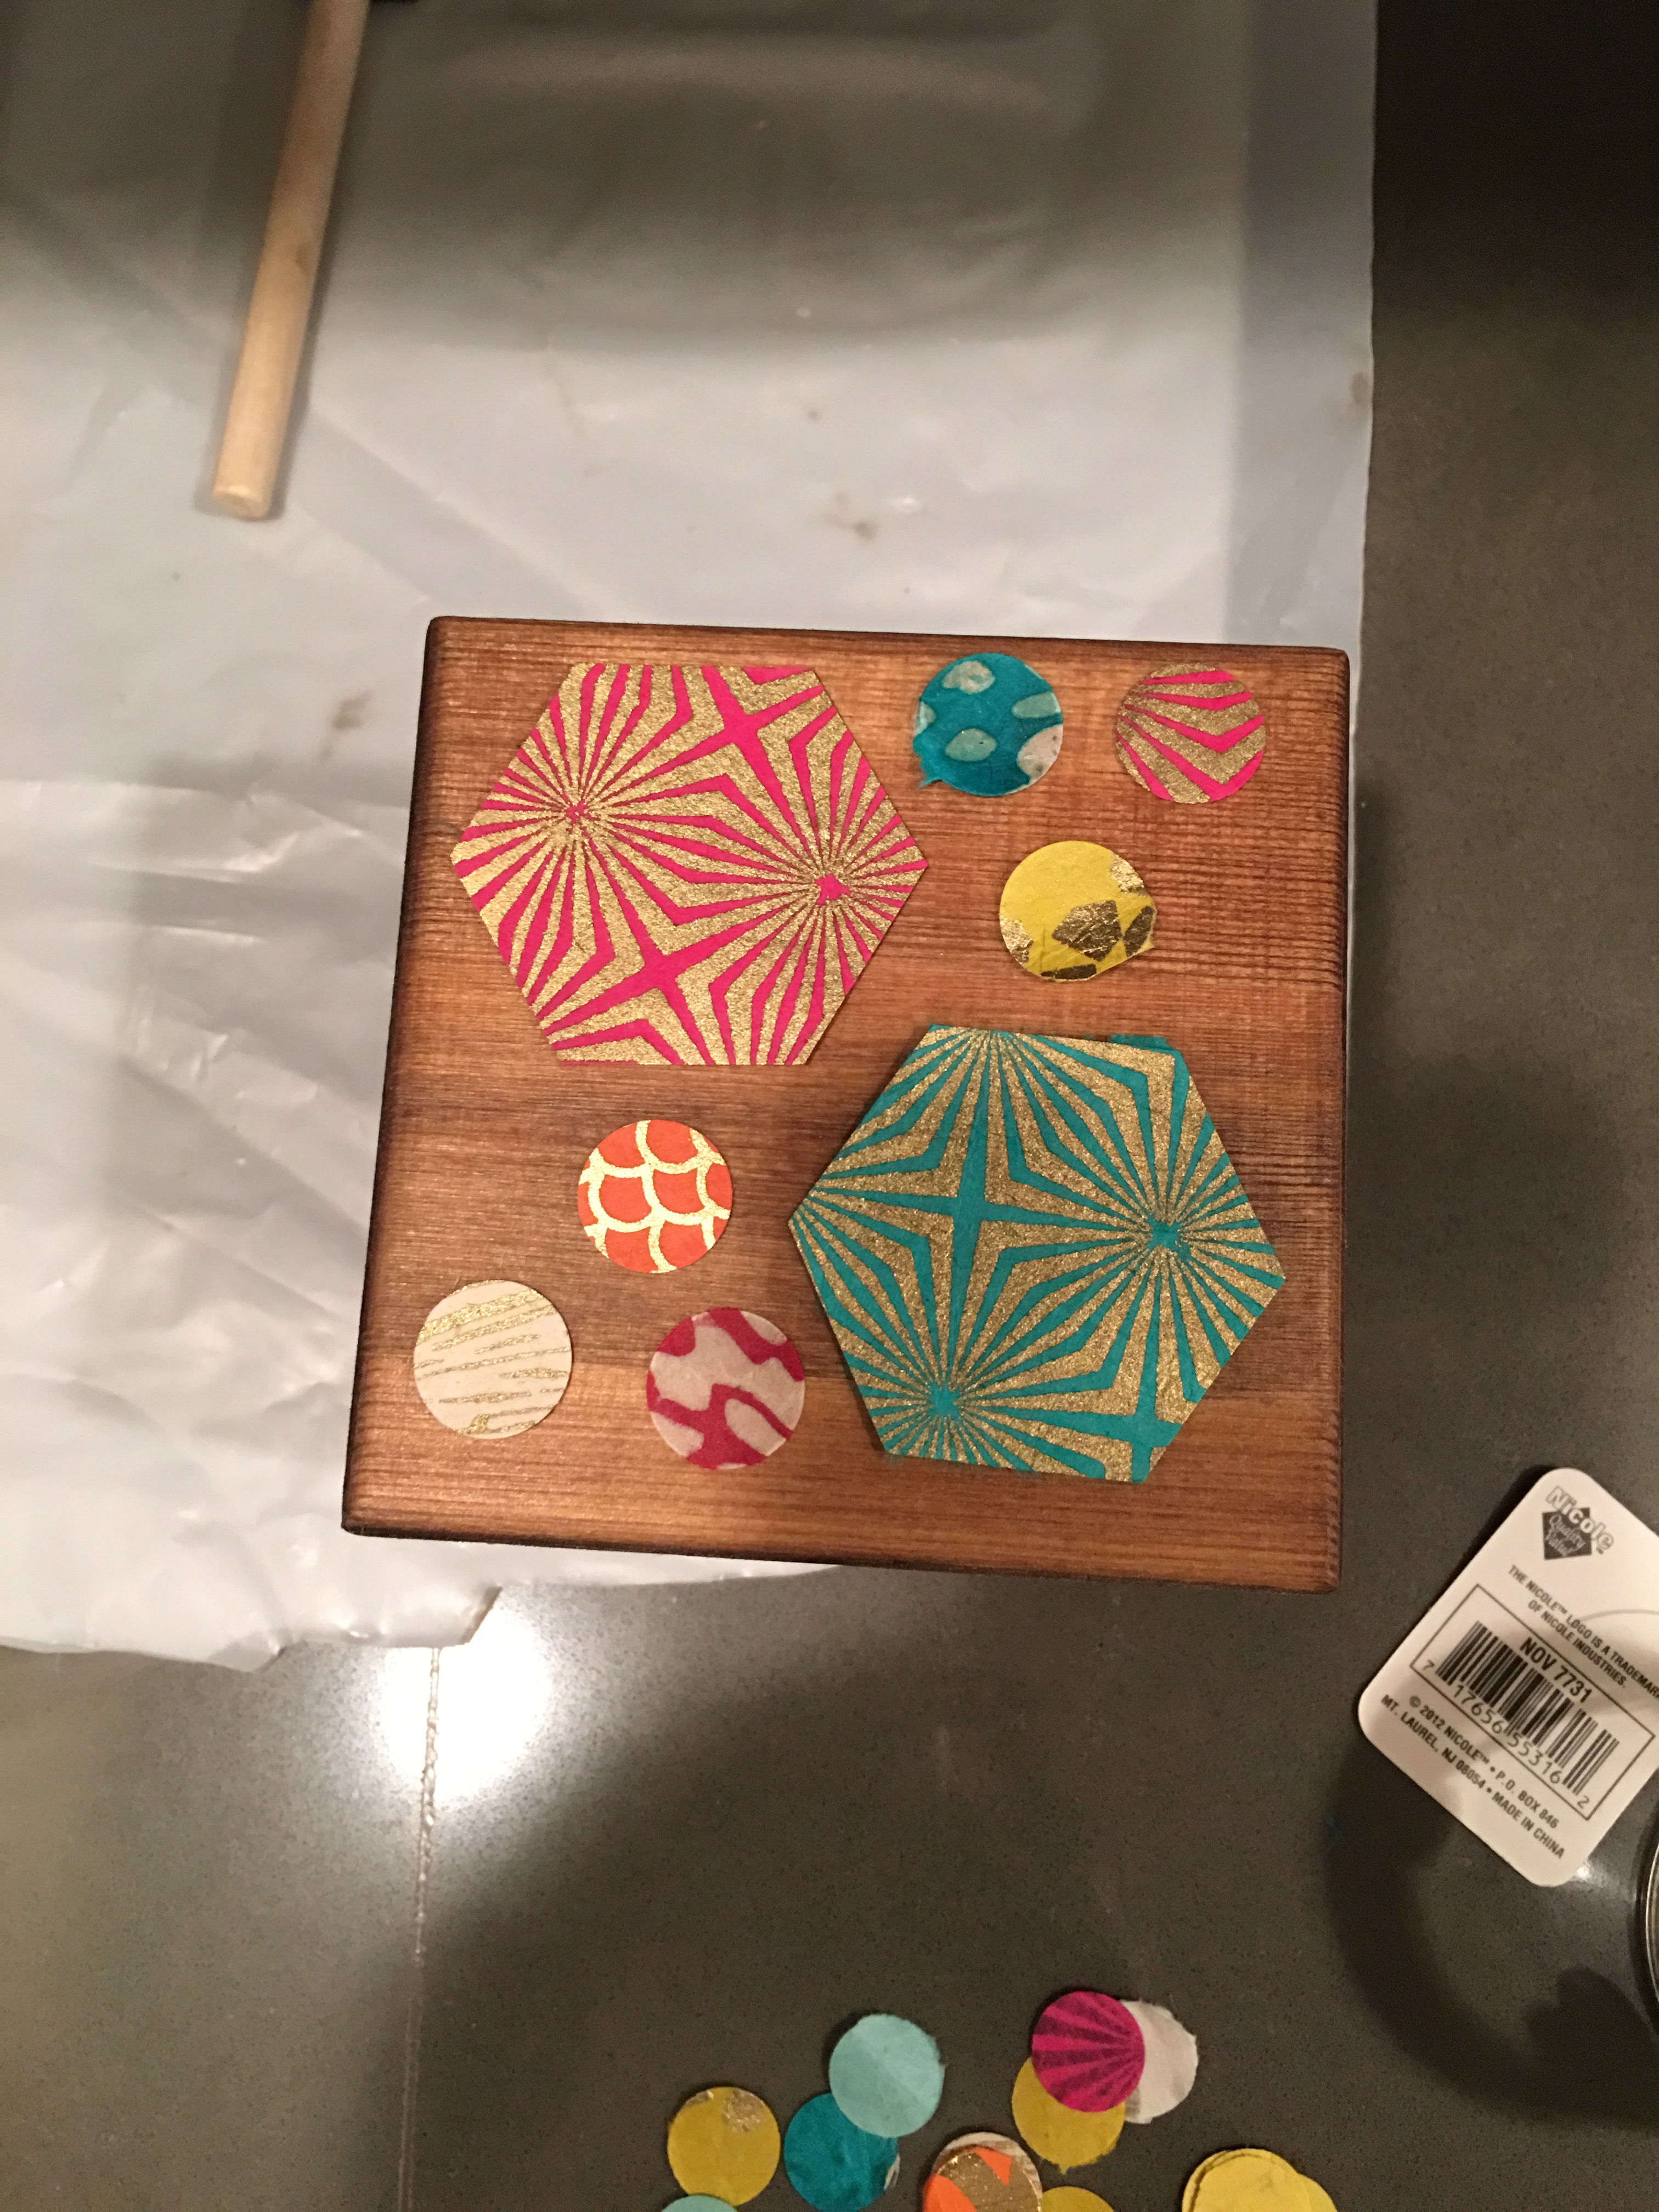
After applying the paper shapes to the cube with Mod Podge, I used stickers to spell out my clever little “Phone Home” name for my cube. Using Michaels Gold Foil Embossed Alphabet Stickers, I added these words above and below the slit opening over decoupaged paper circles.
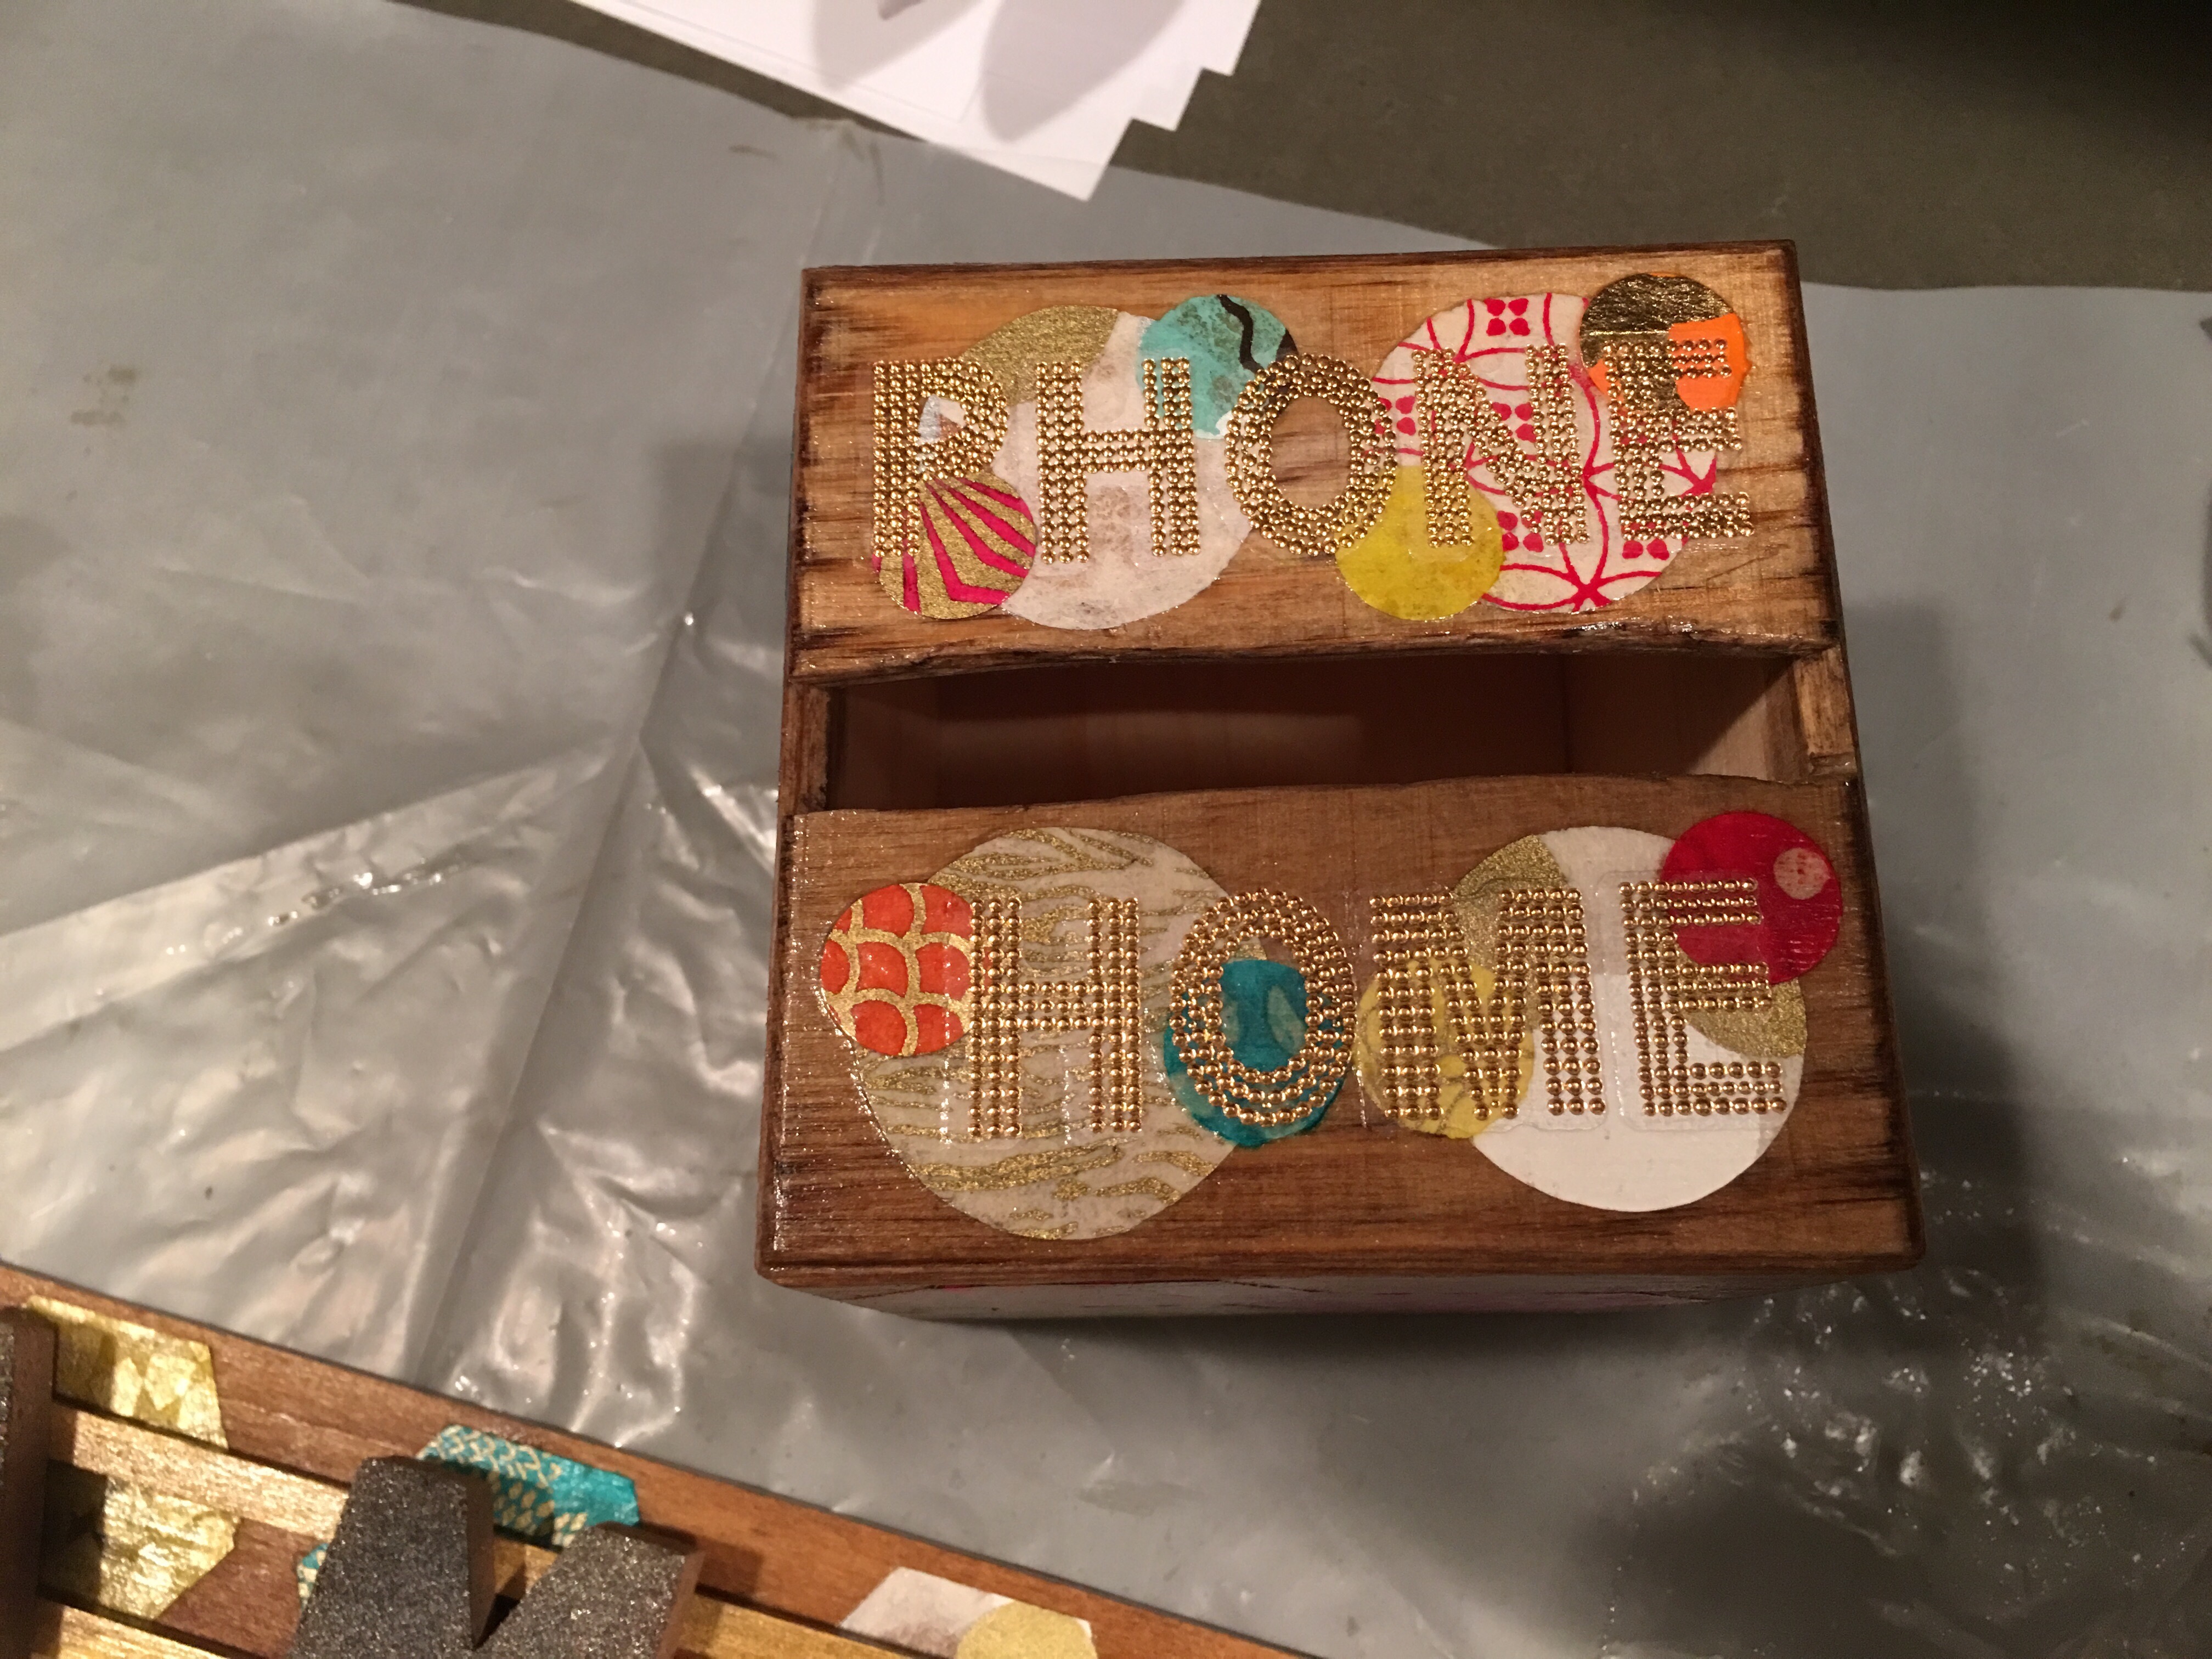
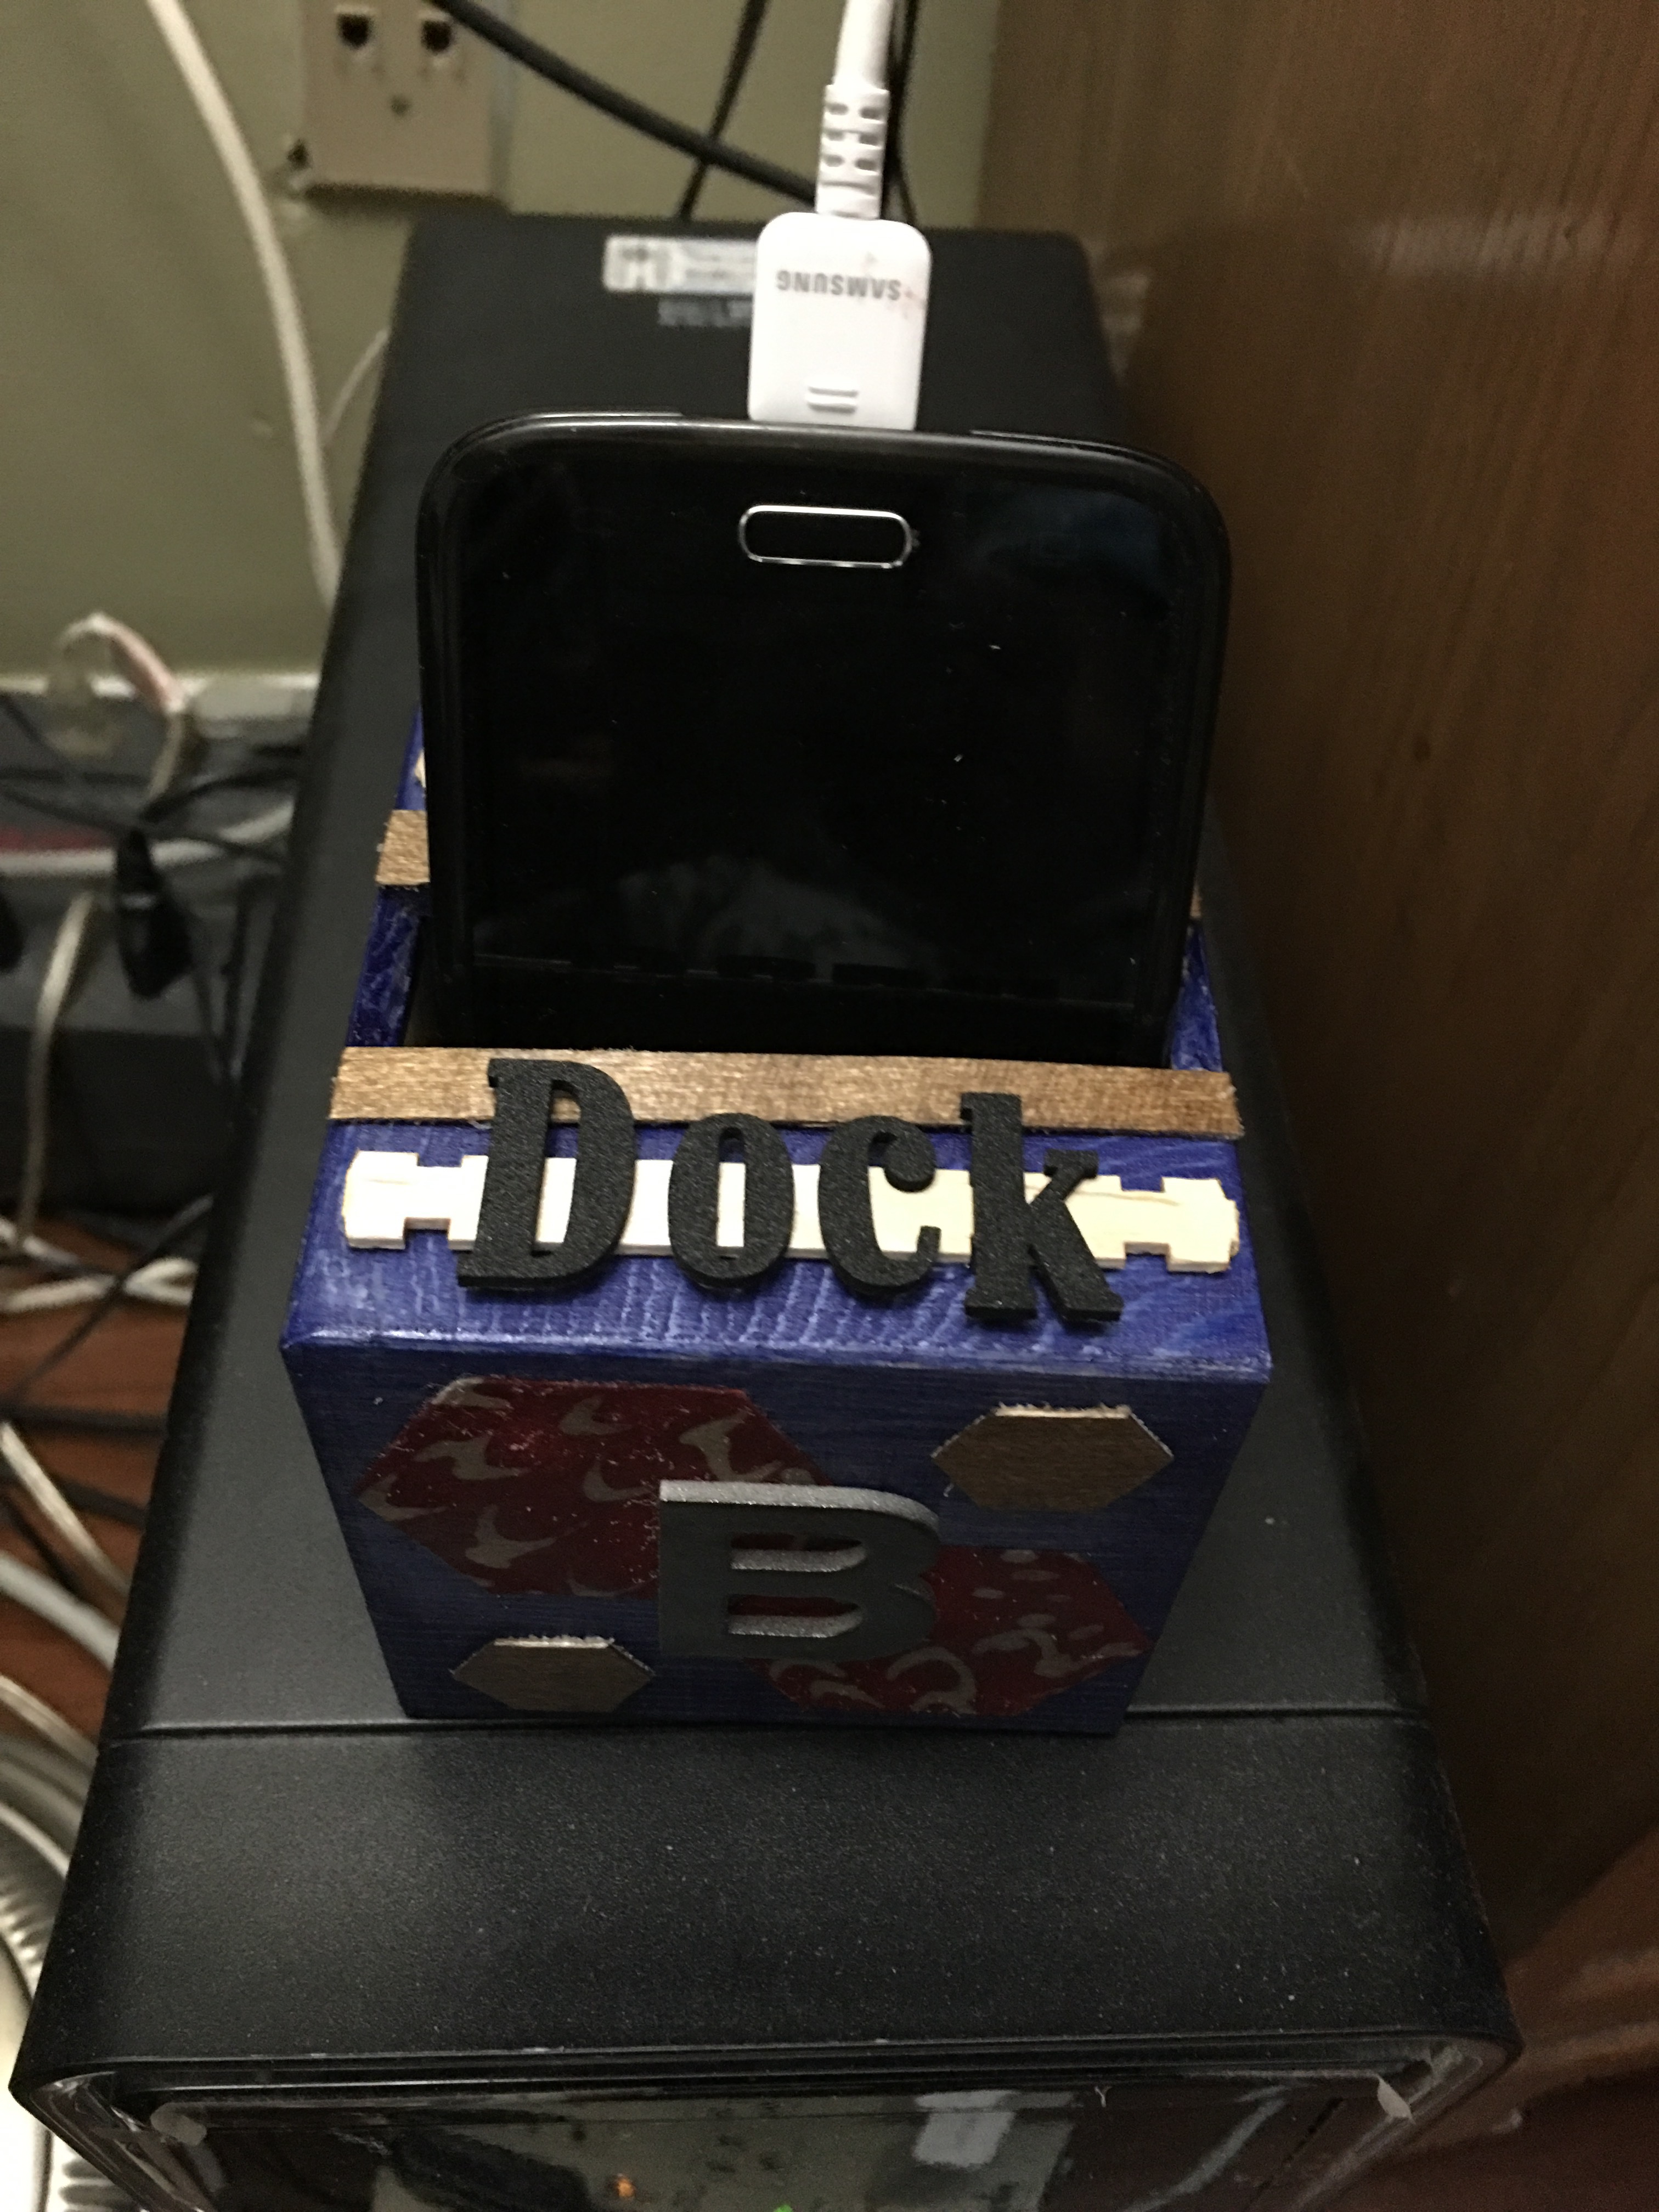
I loved the way the phone cube came out. I can slip my phone in upside down and connect the charging cable at the top. I unfortunately do not have pictures of my phone inside the cube (since it’s always used to snap pictures). But take it from me…it is the most adorable thing. And what I love most about it is that it serves a purpose that is custom-tailored to my needs.
Instead of searching aimlessly for my phone that I put down somewhere thoughtlessly (and yes, I will lose track of this phone, no matter how big it is), my eyes will immediately be pulled towards my beautiful phone wood cube dock. And, if I reliability use it as my “Phone Home” dock, I should always find my phone propped inside, happily charging. Well, we’ll see if it actually works out that way.
I’ll keep reminding myself when I walk in from work or errands or whatever to don’t forget to “Phone Home” (and drop it in its dock!). V-