
DIY Mobile Pipe Hall Tree
You may also like:
August 23, 2015: After spending a Saturday afternoon with my friend Nakesha (helping her to make a hanging bathroom shelf unit of her own), I immediately began brainstorming on my next build project. So on Sunday I was back in my local Home Depot shopping for wood to build a mobile pipe hall tree.
I decided that the space between the living room TV and the entry wall hanging pipe bar could use a hall tree. One that’s free standing and mobile (bonus: no drilling and hammering anchors into walls required…WooHoo!).
One that’s similar to the pipeline hall tree available from West Elm.
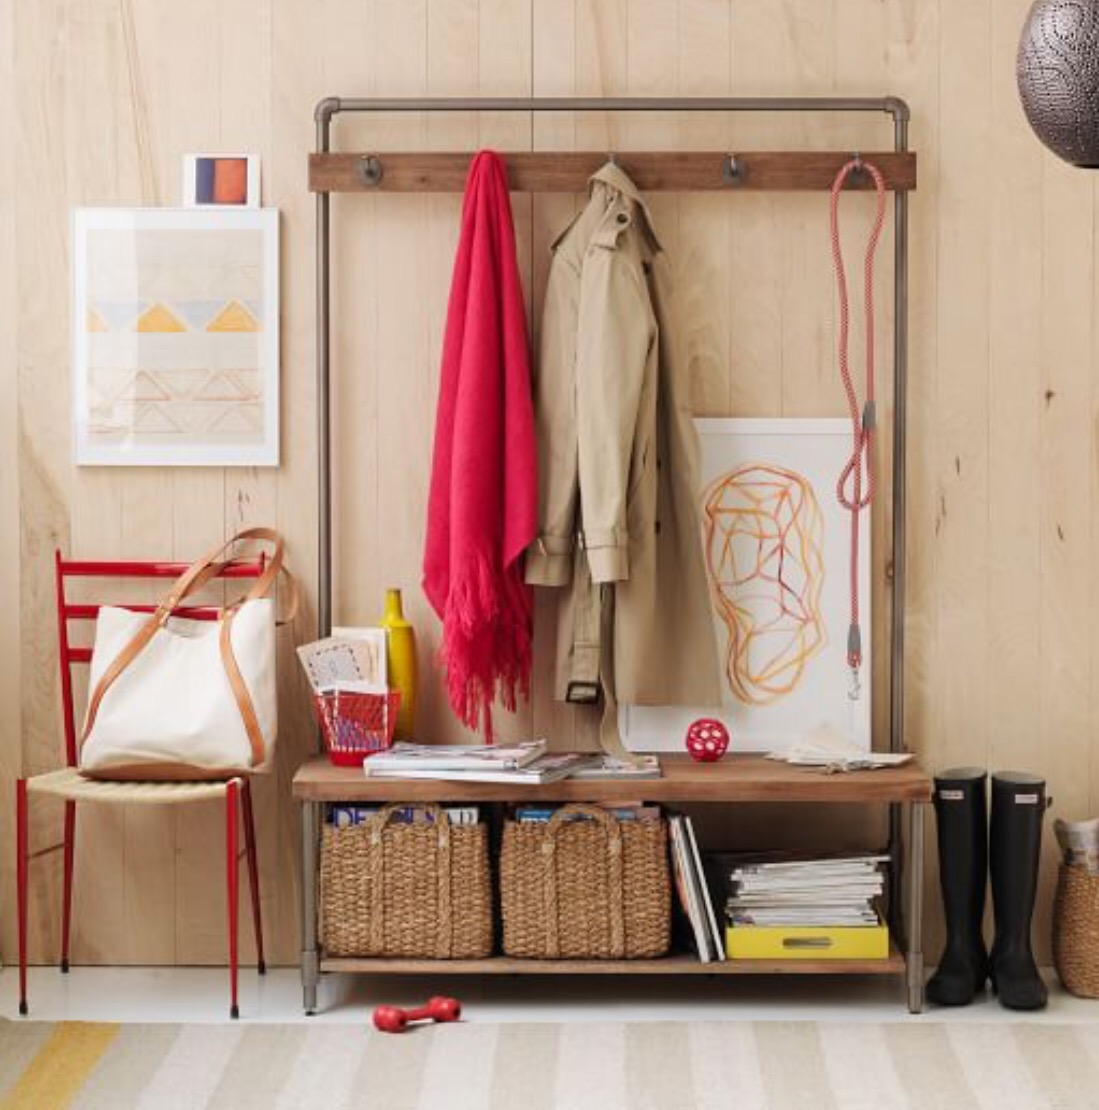
I got the idea from Ana White’s Wood and Pipe Trendwatch post. The pipe tree would allow us to extend the condo entry into the living room by adding more storage and hooks to stow coats, shoes, bags, etc.
It would include a bench where we could sit and take off our shoes after coming in. Because the entry next to the front door is so narrow, we chose not to put a bench there. So a pipe hall tree placed further into the space in the living room is an ideal solution.

There are three key differences I wanted for our pipe tree:
- I want it on wheels so that it can be moved around the condo. This is so that it can be moved into other rooms and can double as a clothes rack and a privacy screen for guests that stay in the den.
- I want to be able to hang curtains from the back (so that I can add a fabric element to the wall decor where the pipe tree is positioned.
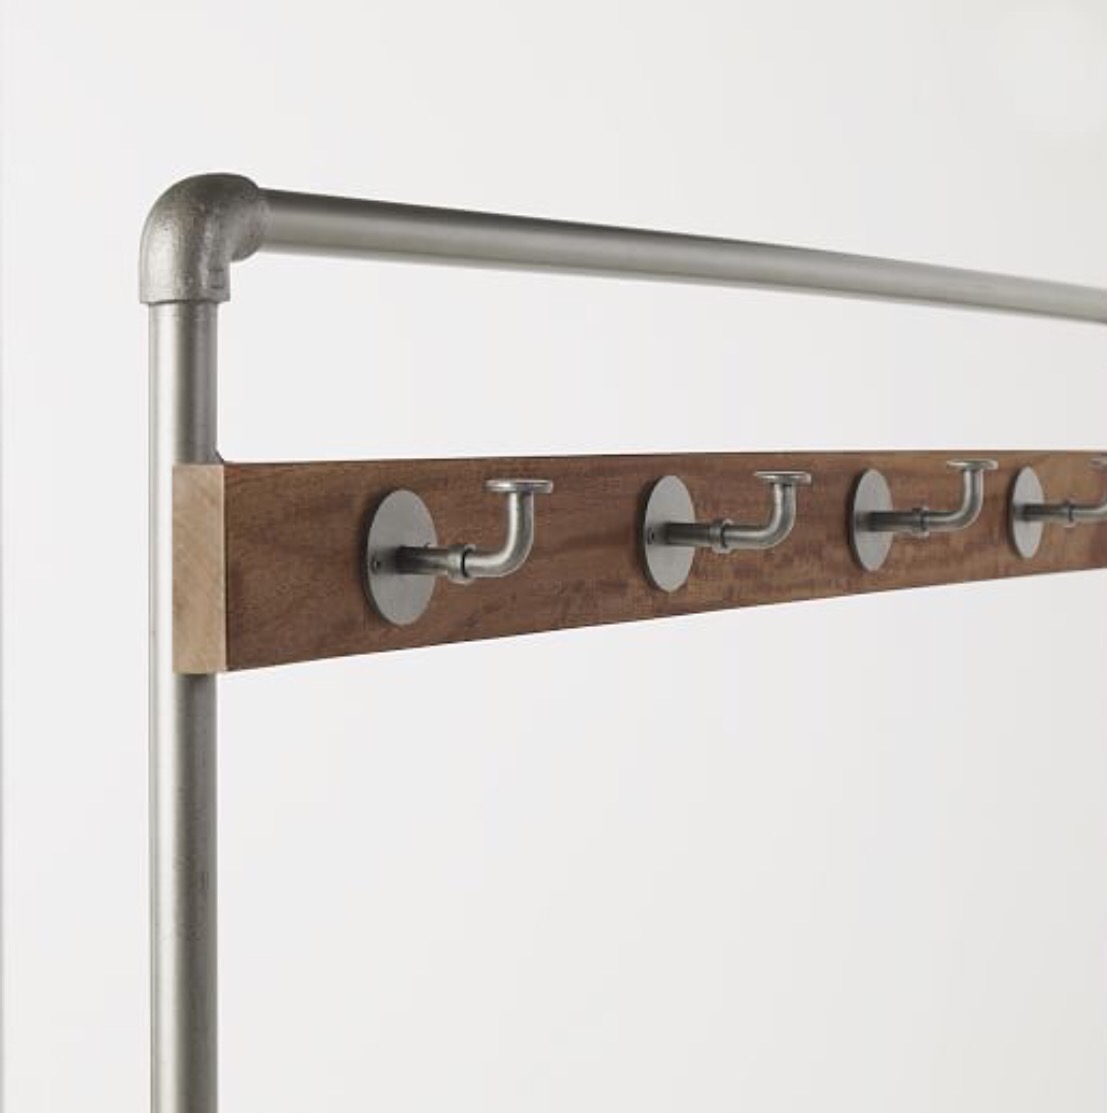
3. And it must have movable hooks. I want to be able to add and remove hooks at will so that I can update the look and function of the hall tree at any time.
I had a pretty clear picture of how I wanted to build this. But my key challenge with this project is that I had no build plan to work off of. None. Couldn’t find an exact one that meets all of my requirements. The one that comes closest to what I have in mind is this one from this post on making a wood and pipe entryway stand from Making Home Base.
So going off a rough sketch I put together Sunday morning, I’m in the Home Depot Lumber department shopping wood to pull this all together.
This project was completed in eight days from start to finish (including wood and pipe shopping, measuring, cutting, assembling, sanding, staining, along with full-time day job working, eating and sleeping). So, given my DIY build track record, this was blazing fast.
Here’s the breakdown (both timeline and details).
Day One: Sunday – Design, shop for and pre-assembly a prototype.
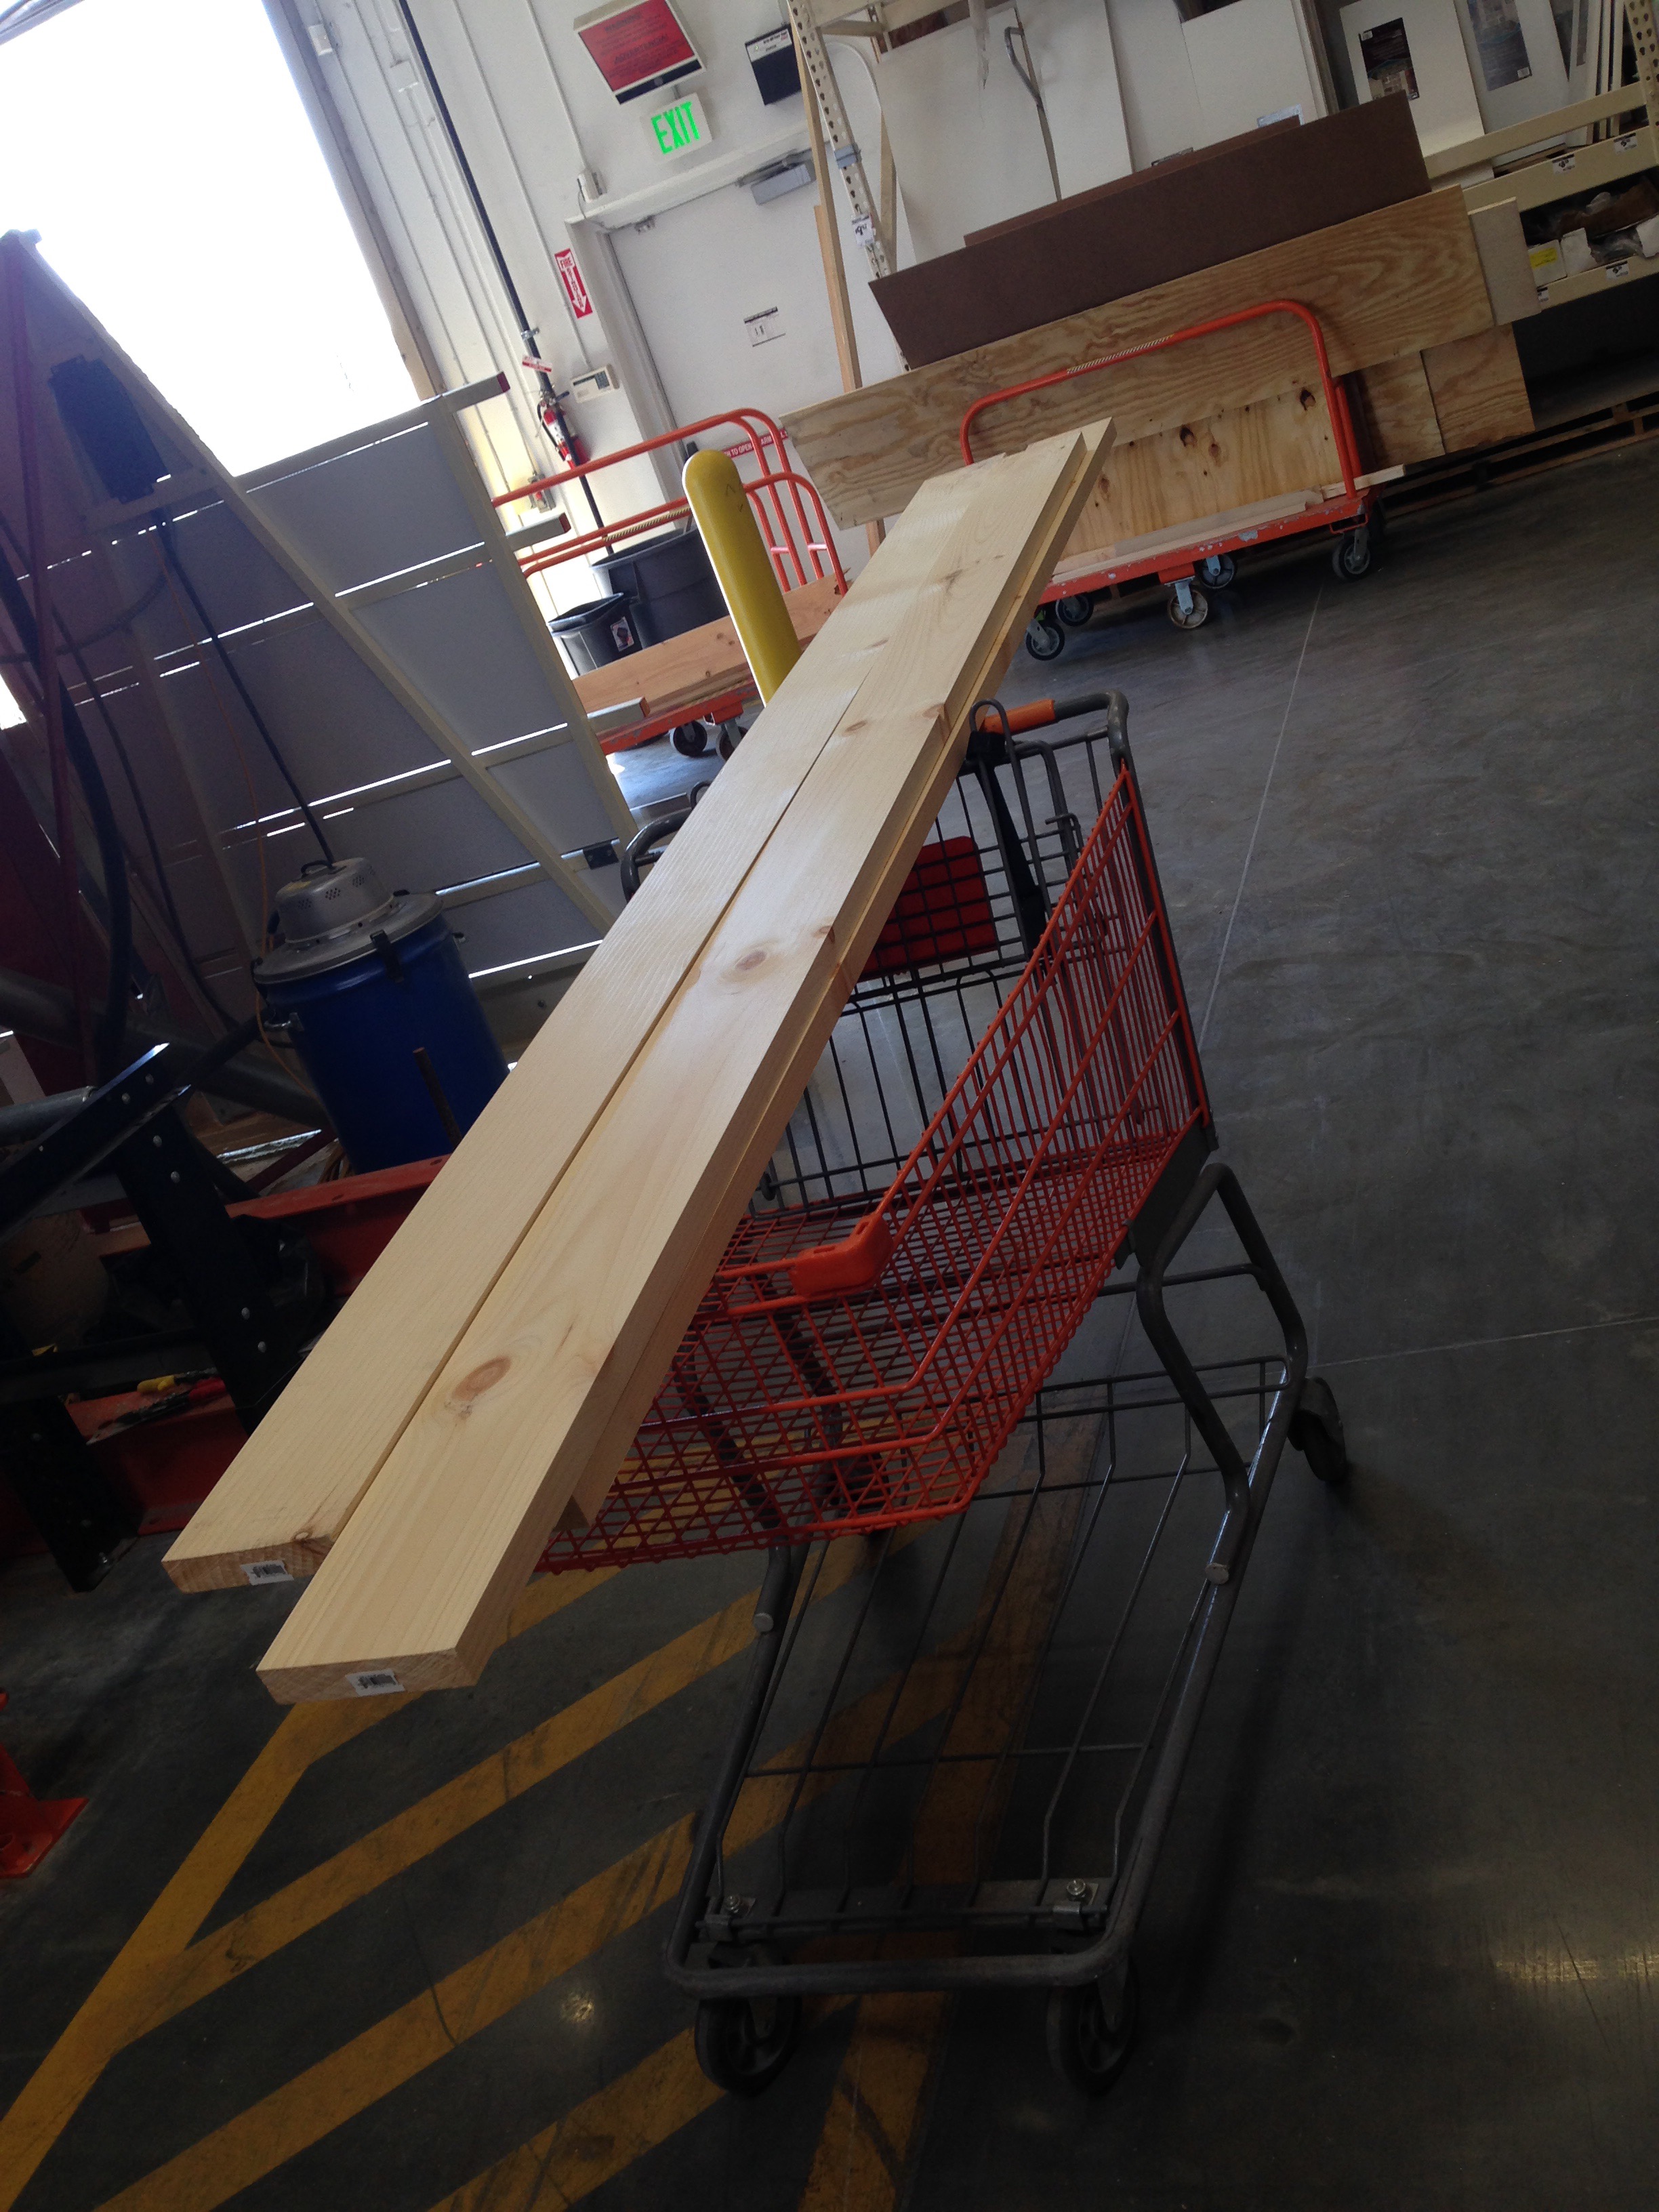
With my crude sketch in hand, I added the following materials to my cart.
- Three pine wood boards: 1.75″ x 6″ x 64″
- One pine wood board: 1″ x 4″ x 64″
- One 1/2″ diameter 60″ black pipe nipple
- Two 1/2″ diameter 48″ black pipe nipples
- Four 1/2″ diameter 24″ black pipe nipples (NOTE: I later change the length of these to 10″ for reasons I’ll go into later)
- Two 1/2″ 90 degree galvanized pipe elbows
- Six 1/2″ black pipe flanges
- Four threaded caster wheels
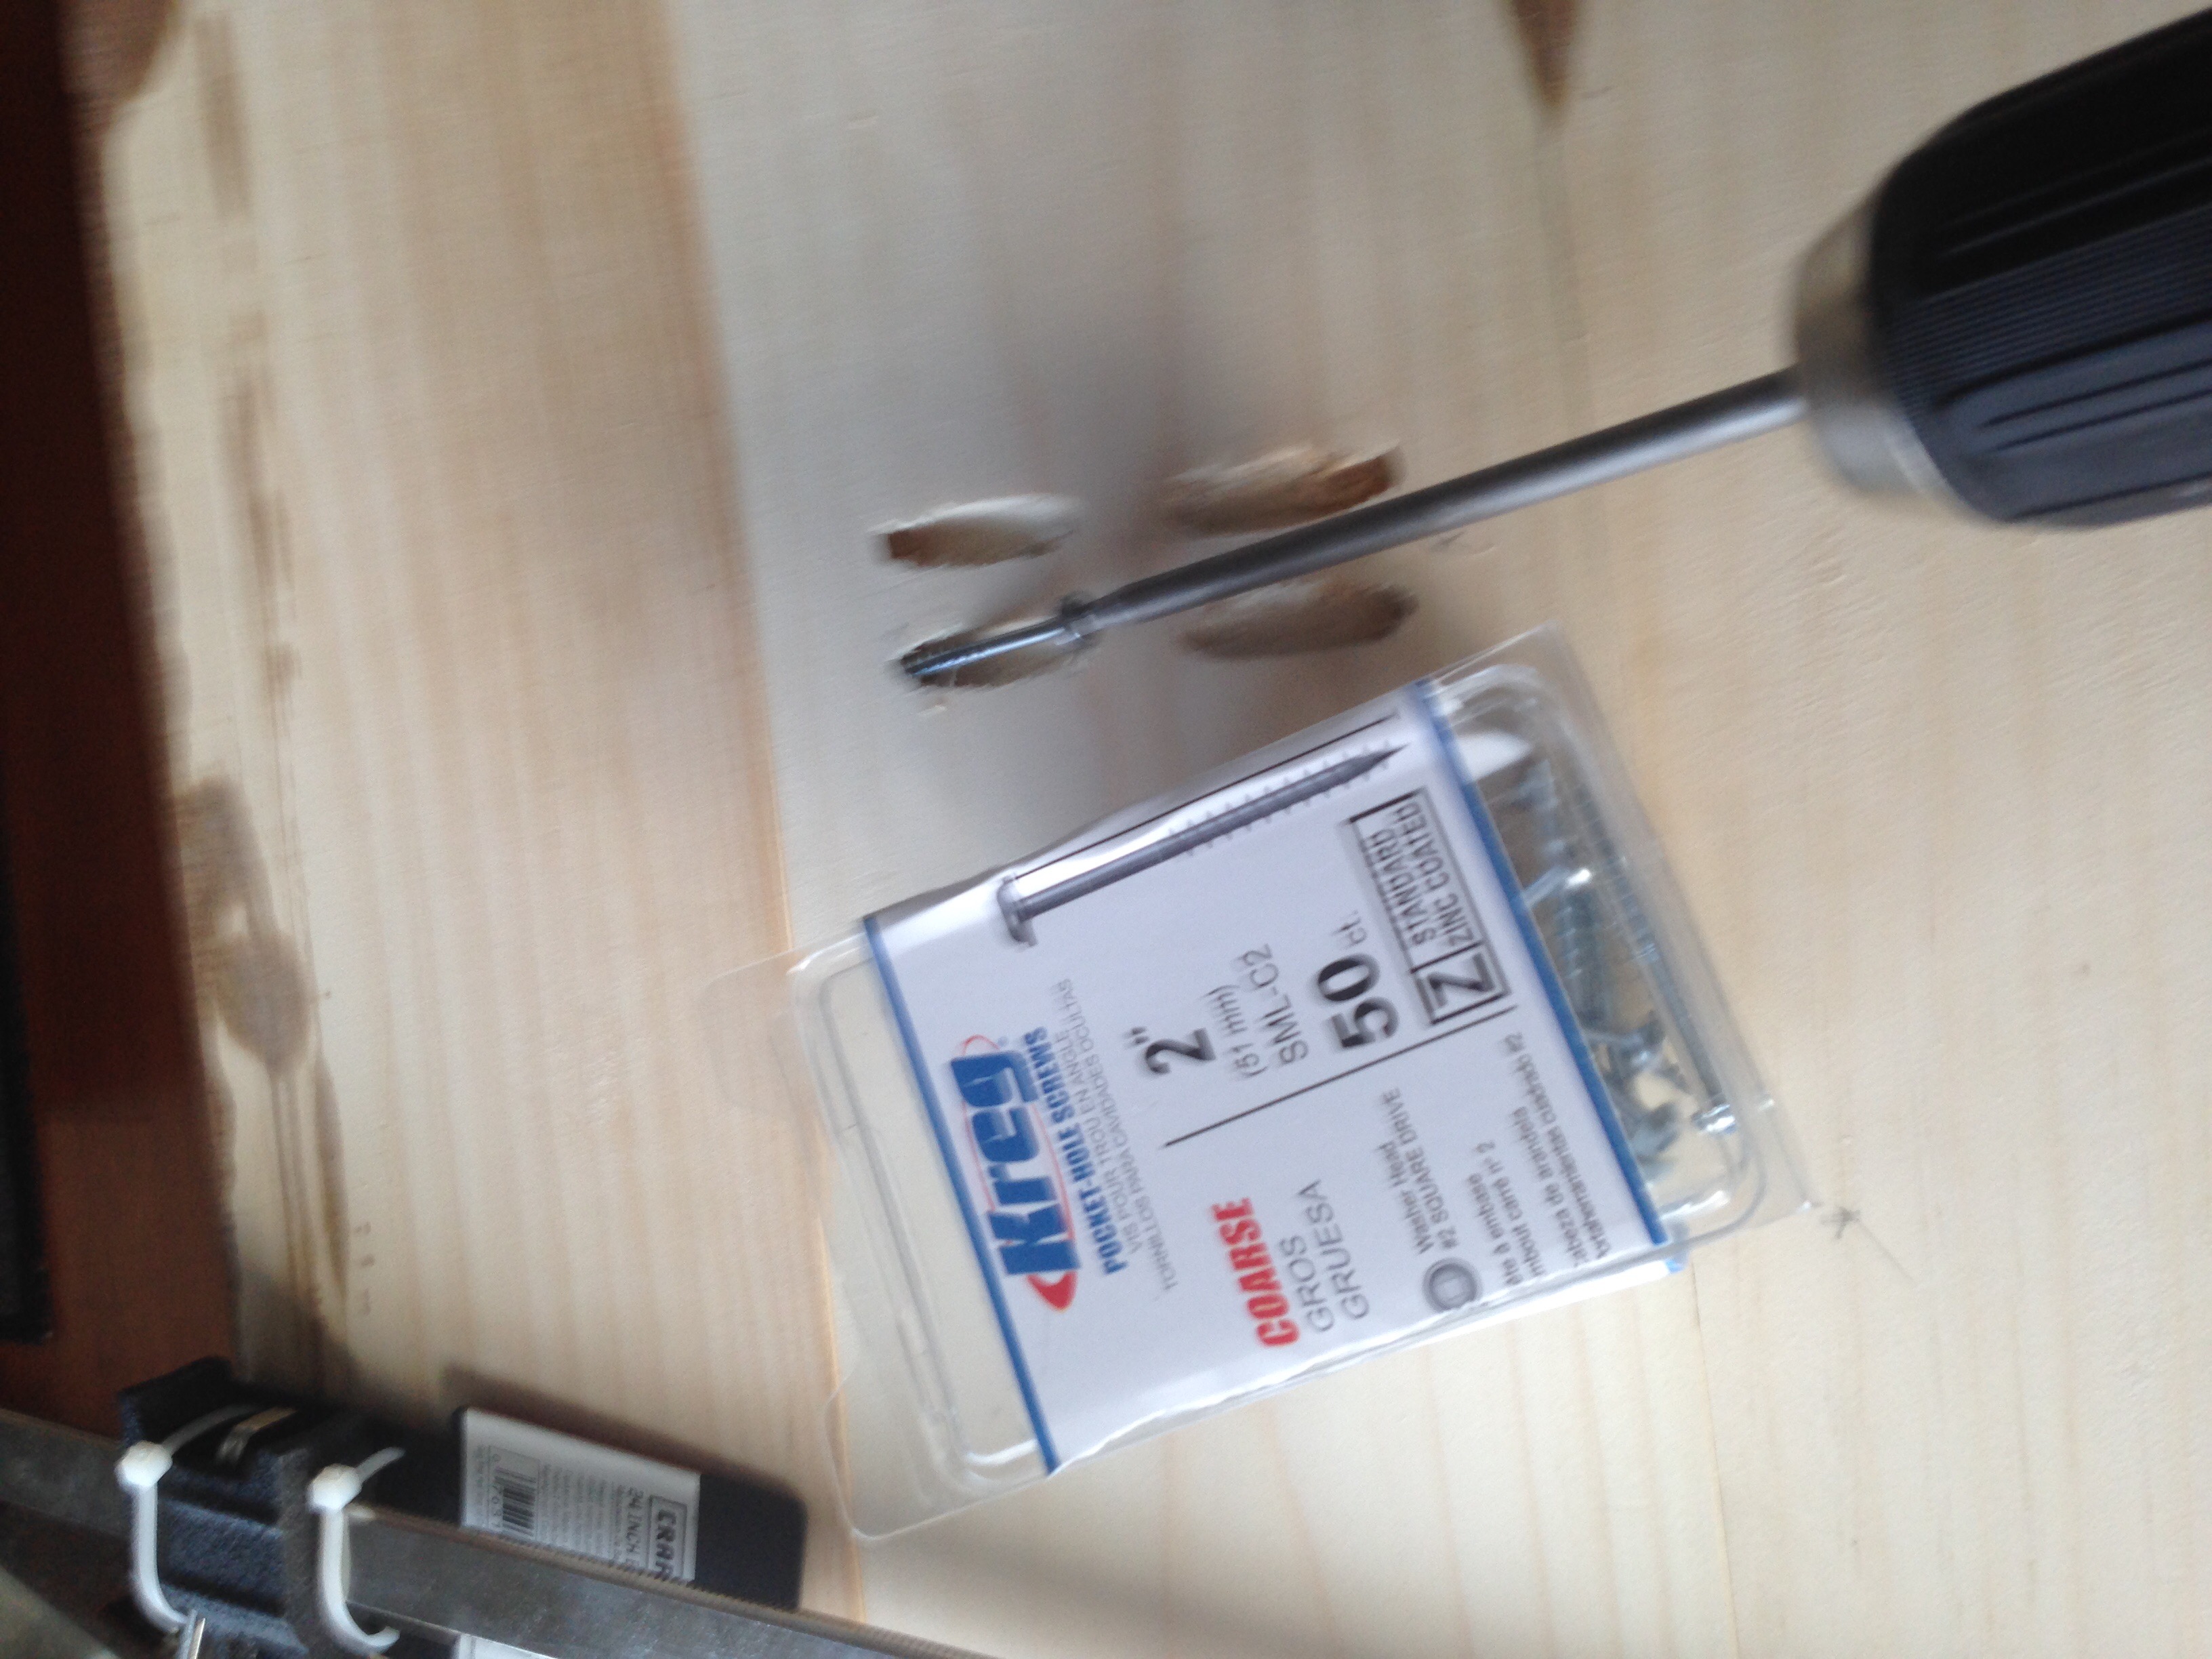
- A box of Kreg 2″ pocket hole screws
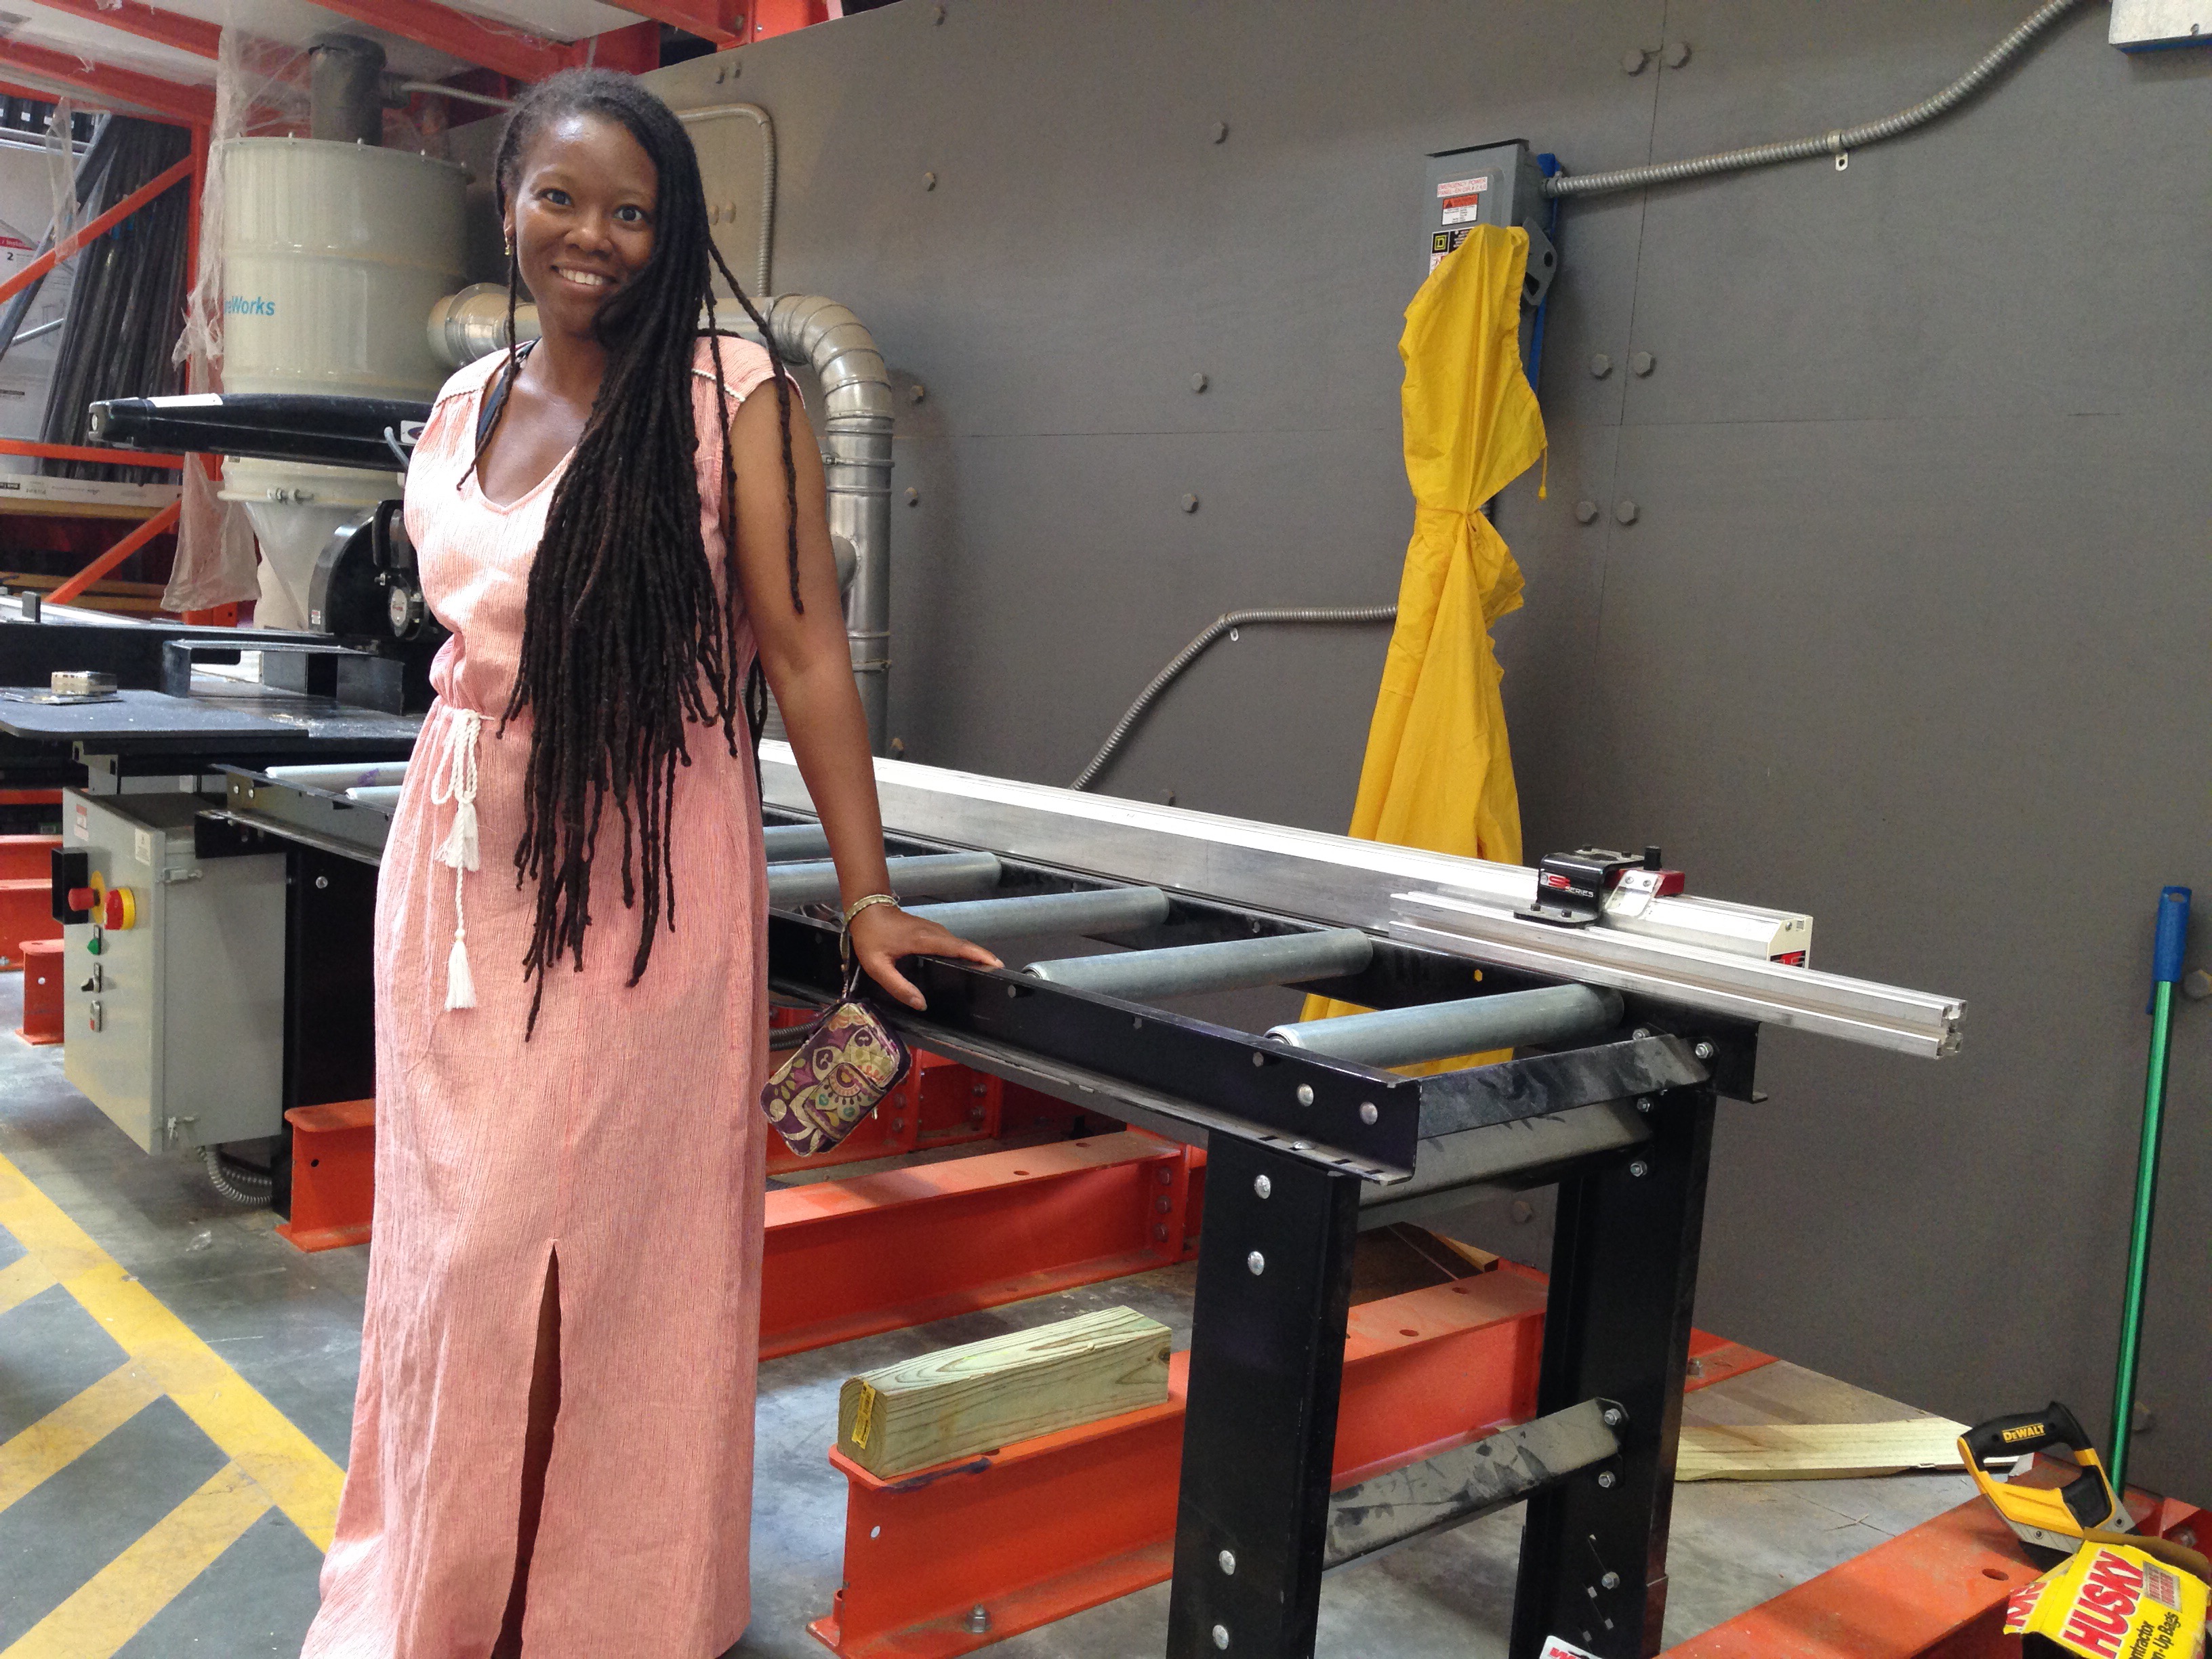
After ripping through Home Depot in record time (Only one wood cut required for the 60″ 1 x 4), I headed to our friend Tim’s place to make my pocket hole drills.
I’m using the three 64 x 1.75 x 6″ boards to make the top of the bench. The three boards will be joined together side by side lengthwise (so that the bench will be 64 x 18″).
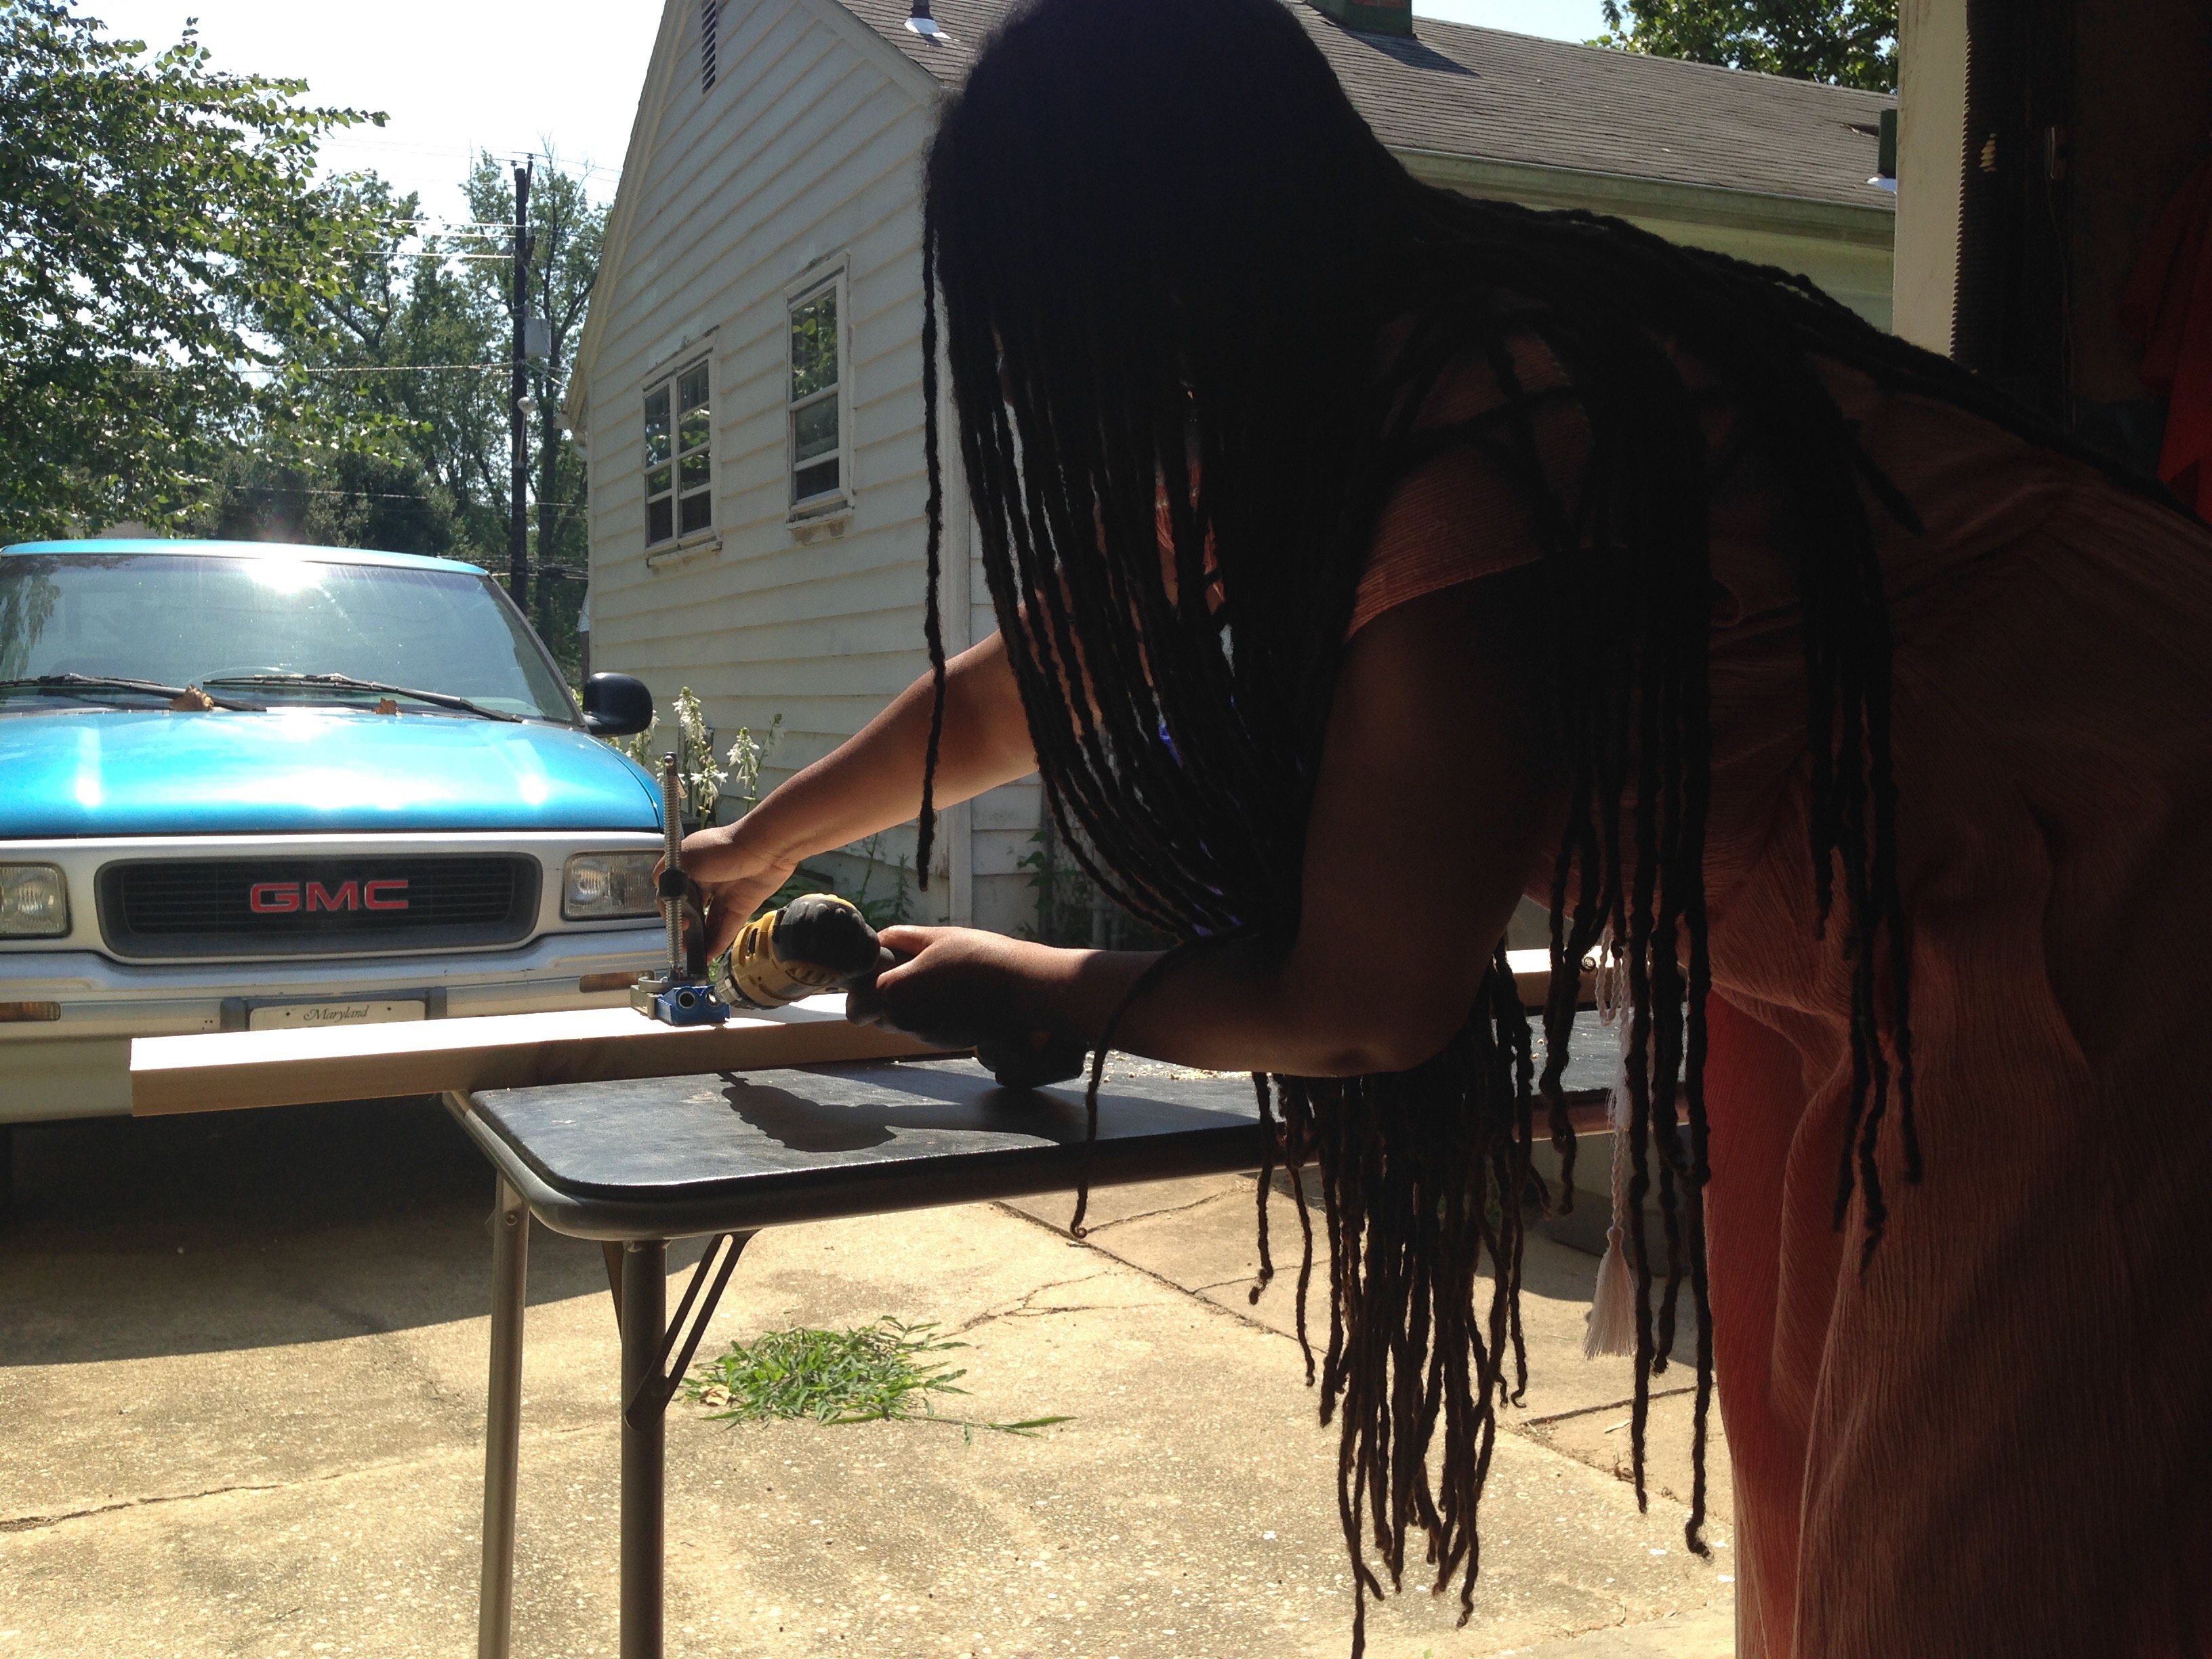
I used my Kreg jig and power drill to make pocket holes on each side of the center board. Later these will be used to join it to the other boards using 2″ pocket screws.
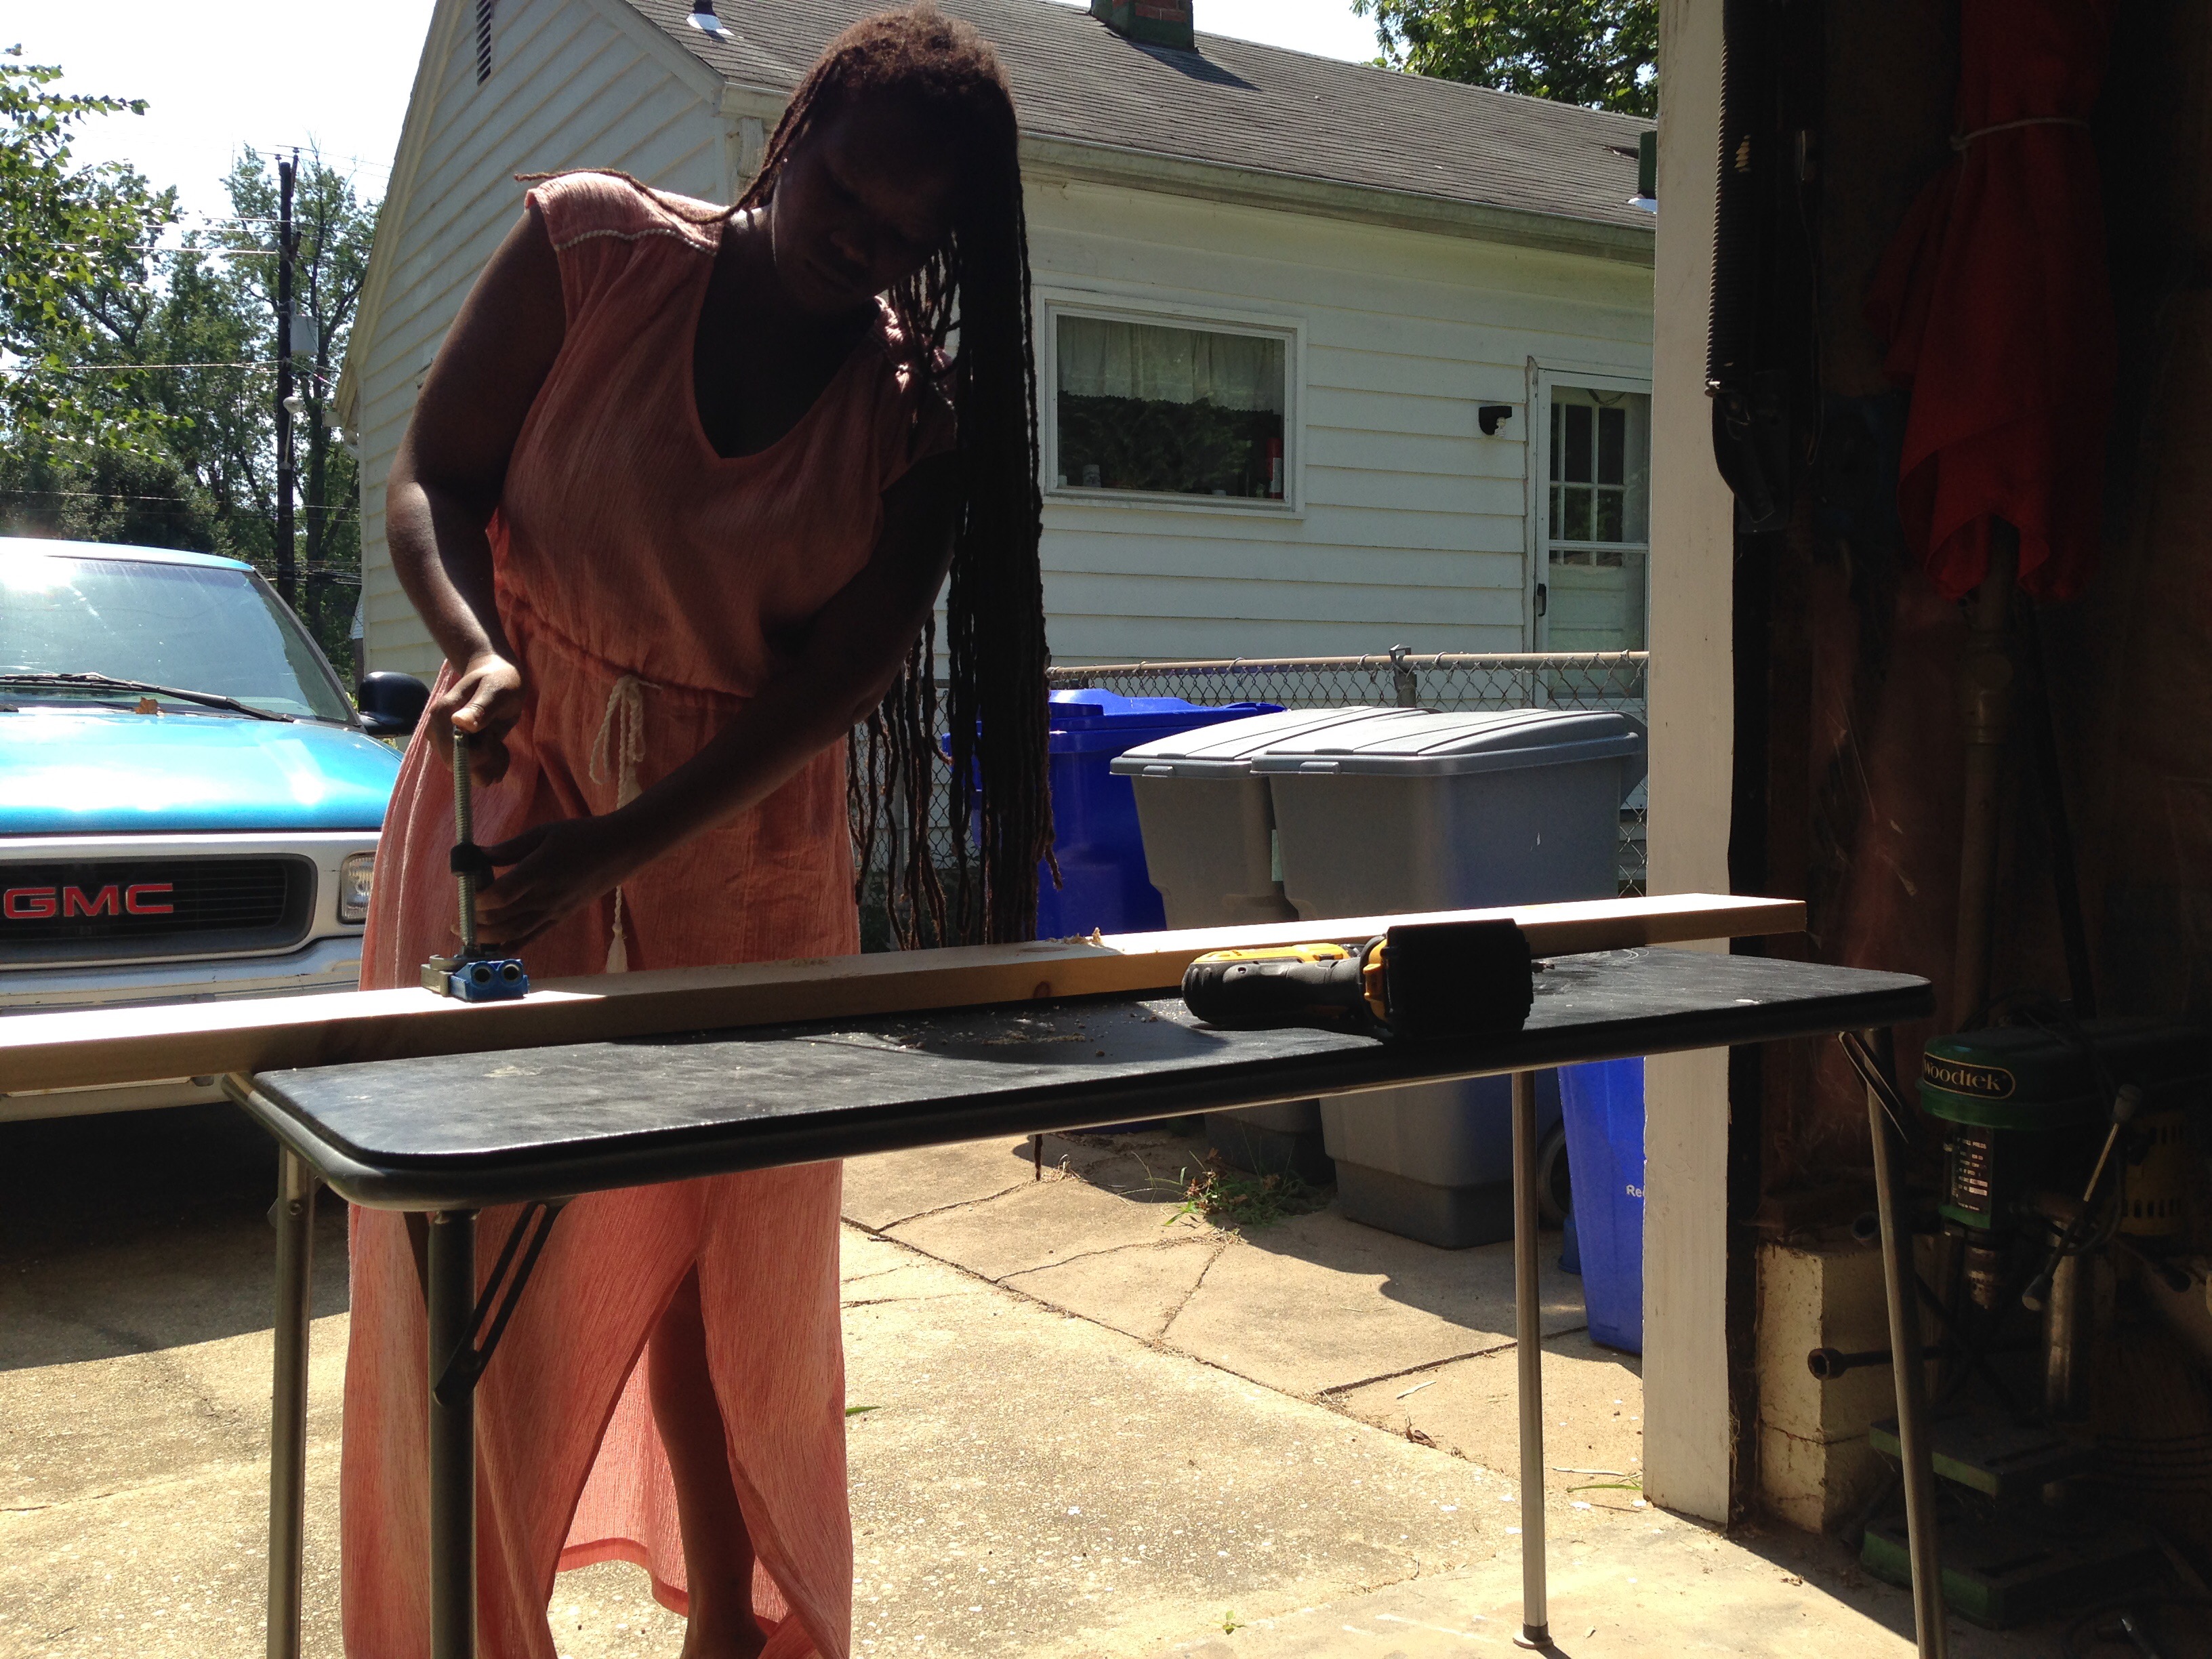
To join wood of this thickness together, I need my Kreg drill bit setting at 1.25″ depth setting. So using the clamp to hold the jig and the wood in place, I’m drilling a row of pocket holes along both sides.
Rather than join the wood together at Tim’s (and struggle to get the assembled piece back in the car to head home), I chose to do the staining step next. I stained each board individually using Early American Minwax wood stain.
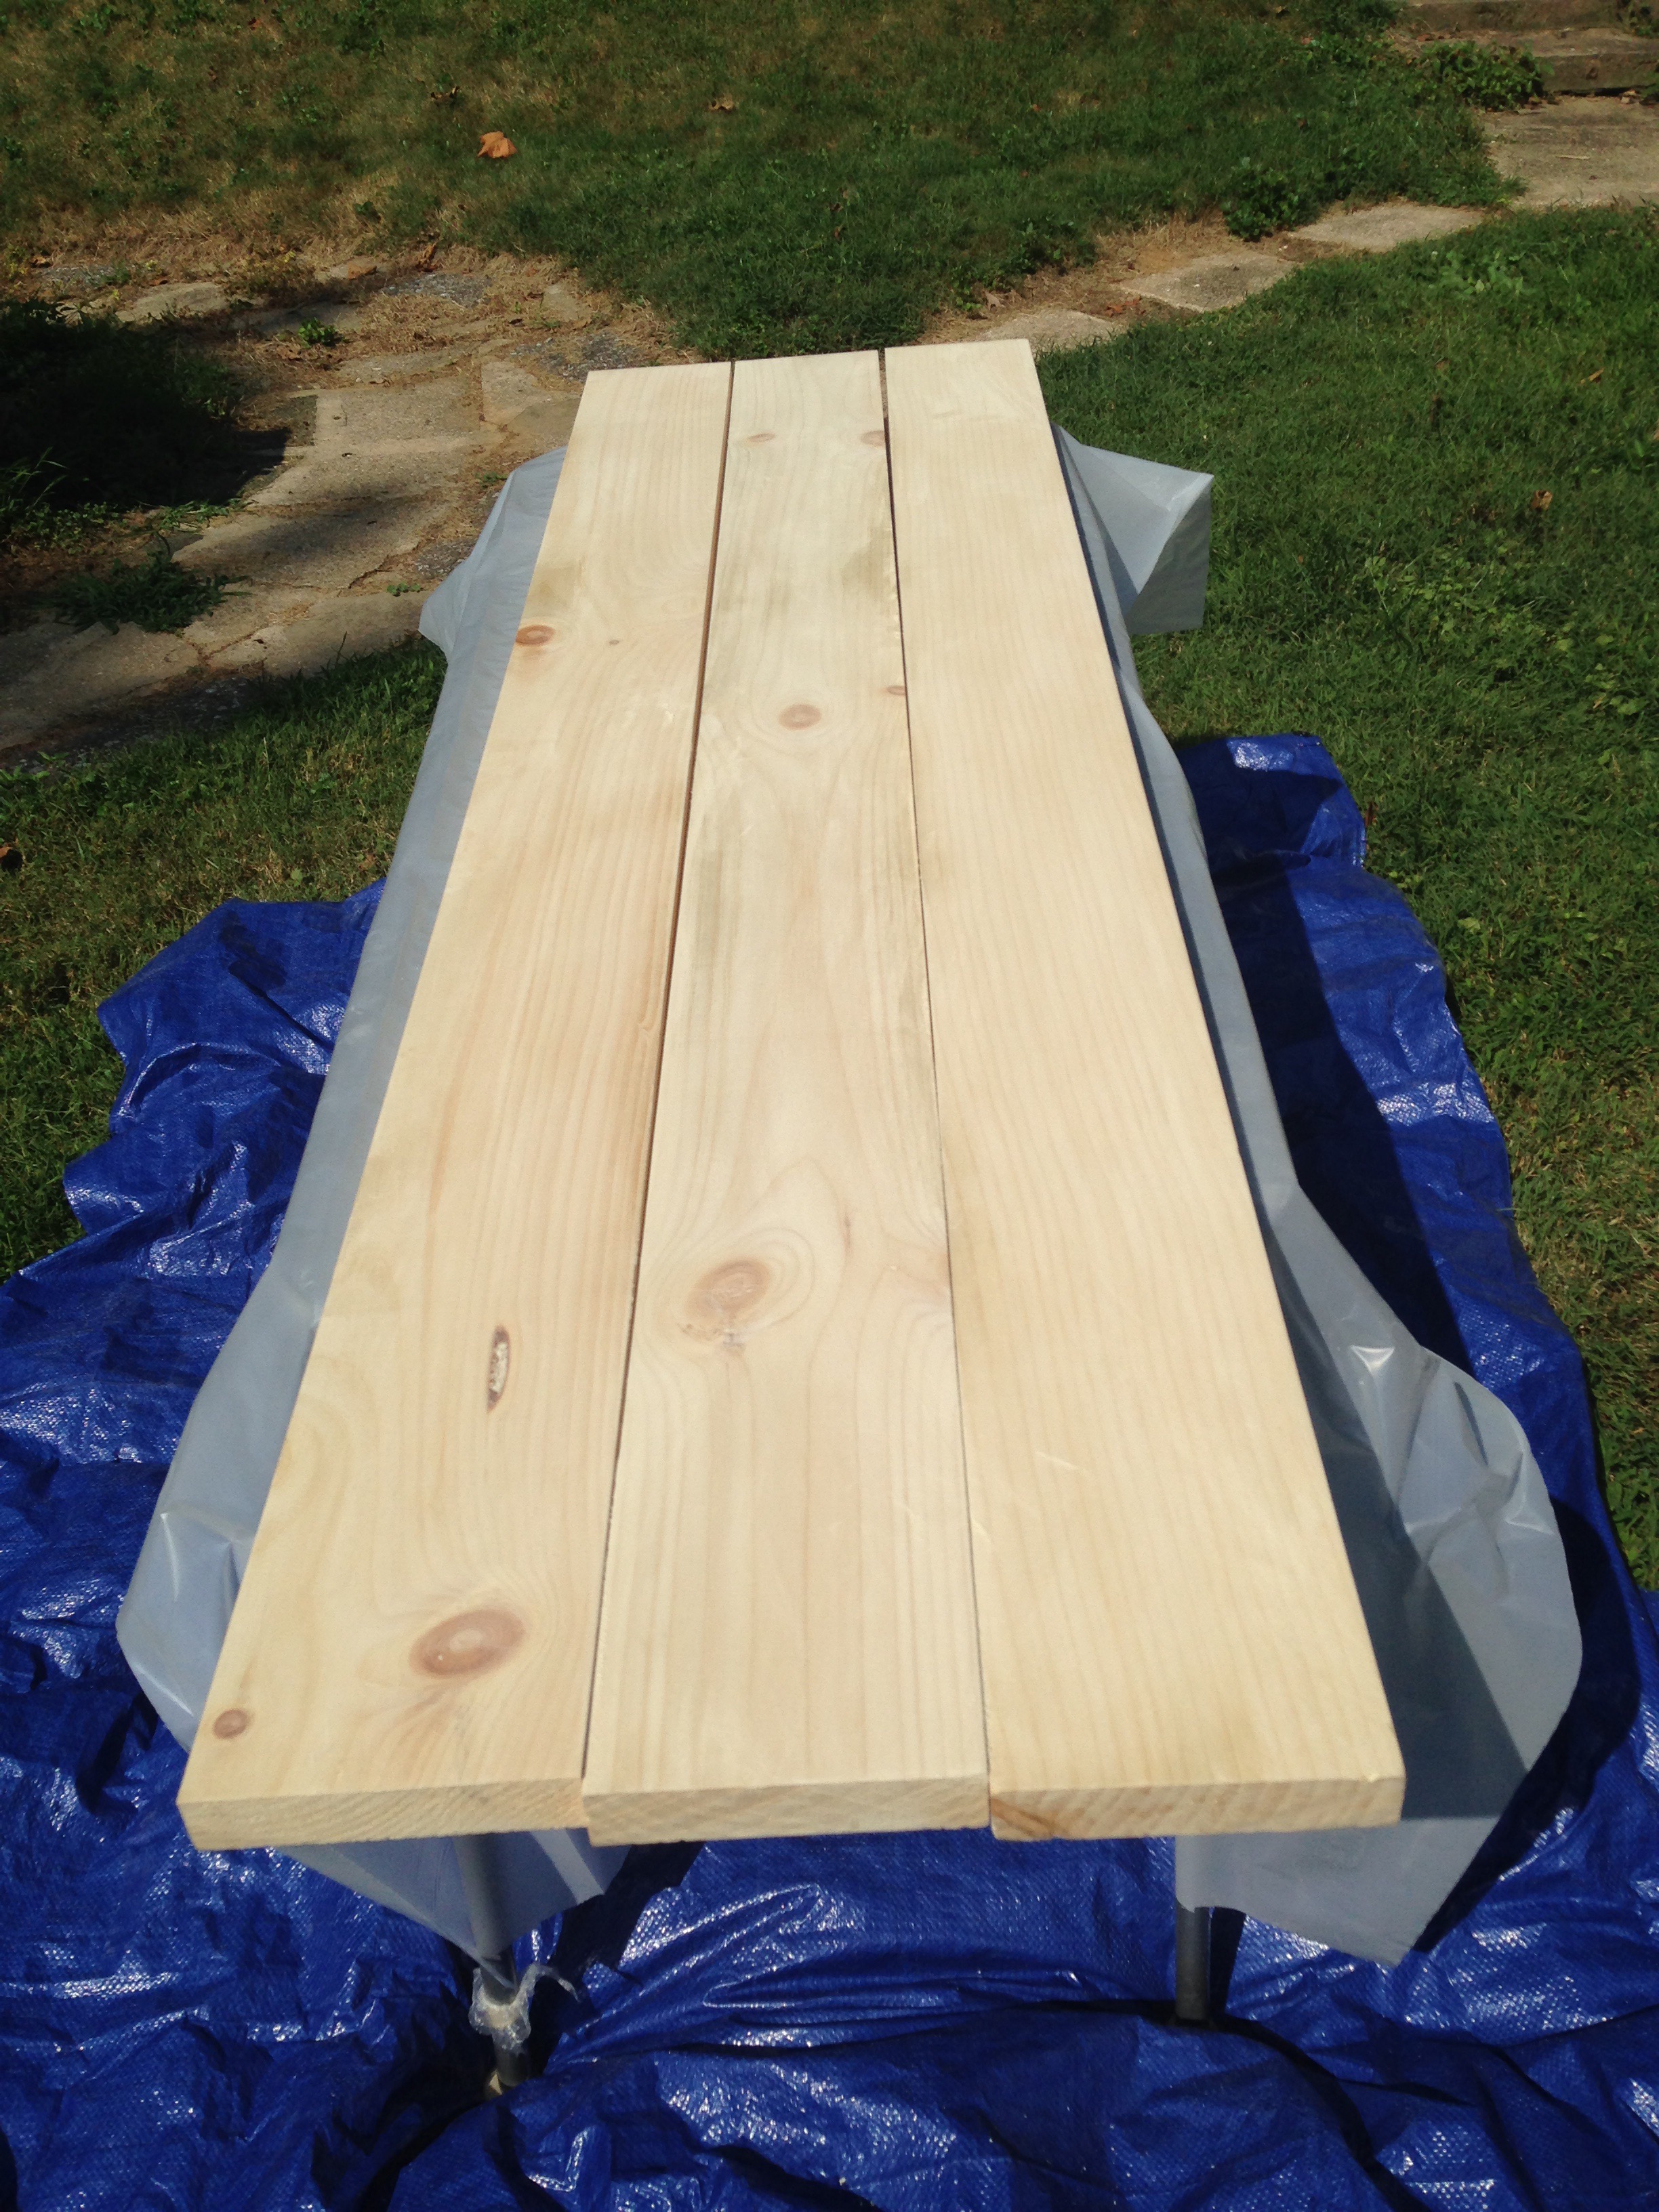
Since it’s a bench, I only stained the top and sides of the boards. I left the bottom of the board (with the pocket holes) unstained.
Day Two: Monday – Assemble the prototype in the condo.
After work on Monday, I use my folding work table to lay out the boards for bench assembly.

After lining up the boards, I anchored them together using 24″ and 36″ bar clamps. Then, using a power drill, I joined the wood together via the pockets using 2″ pocket hole screws.
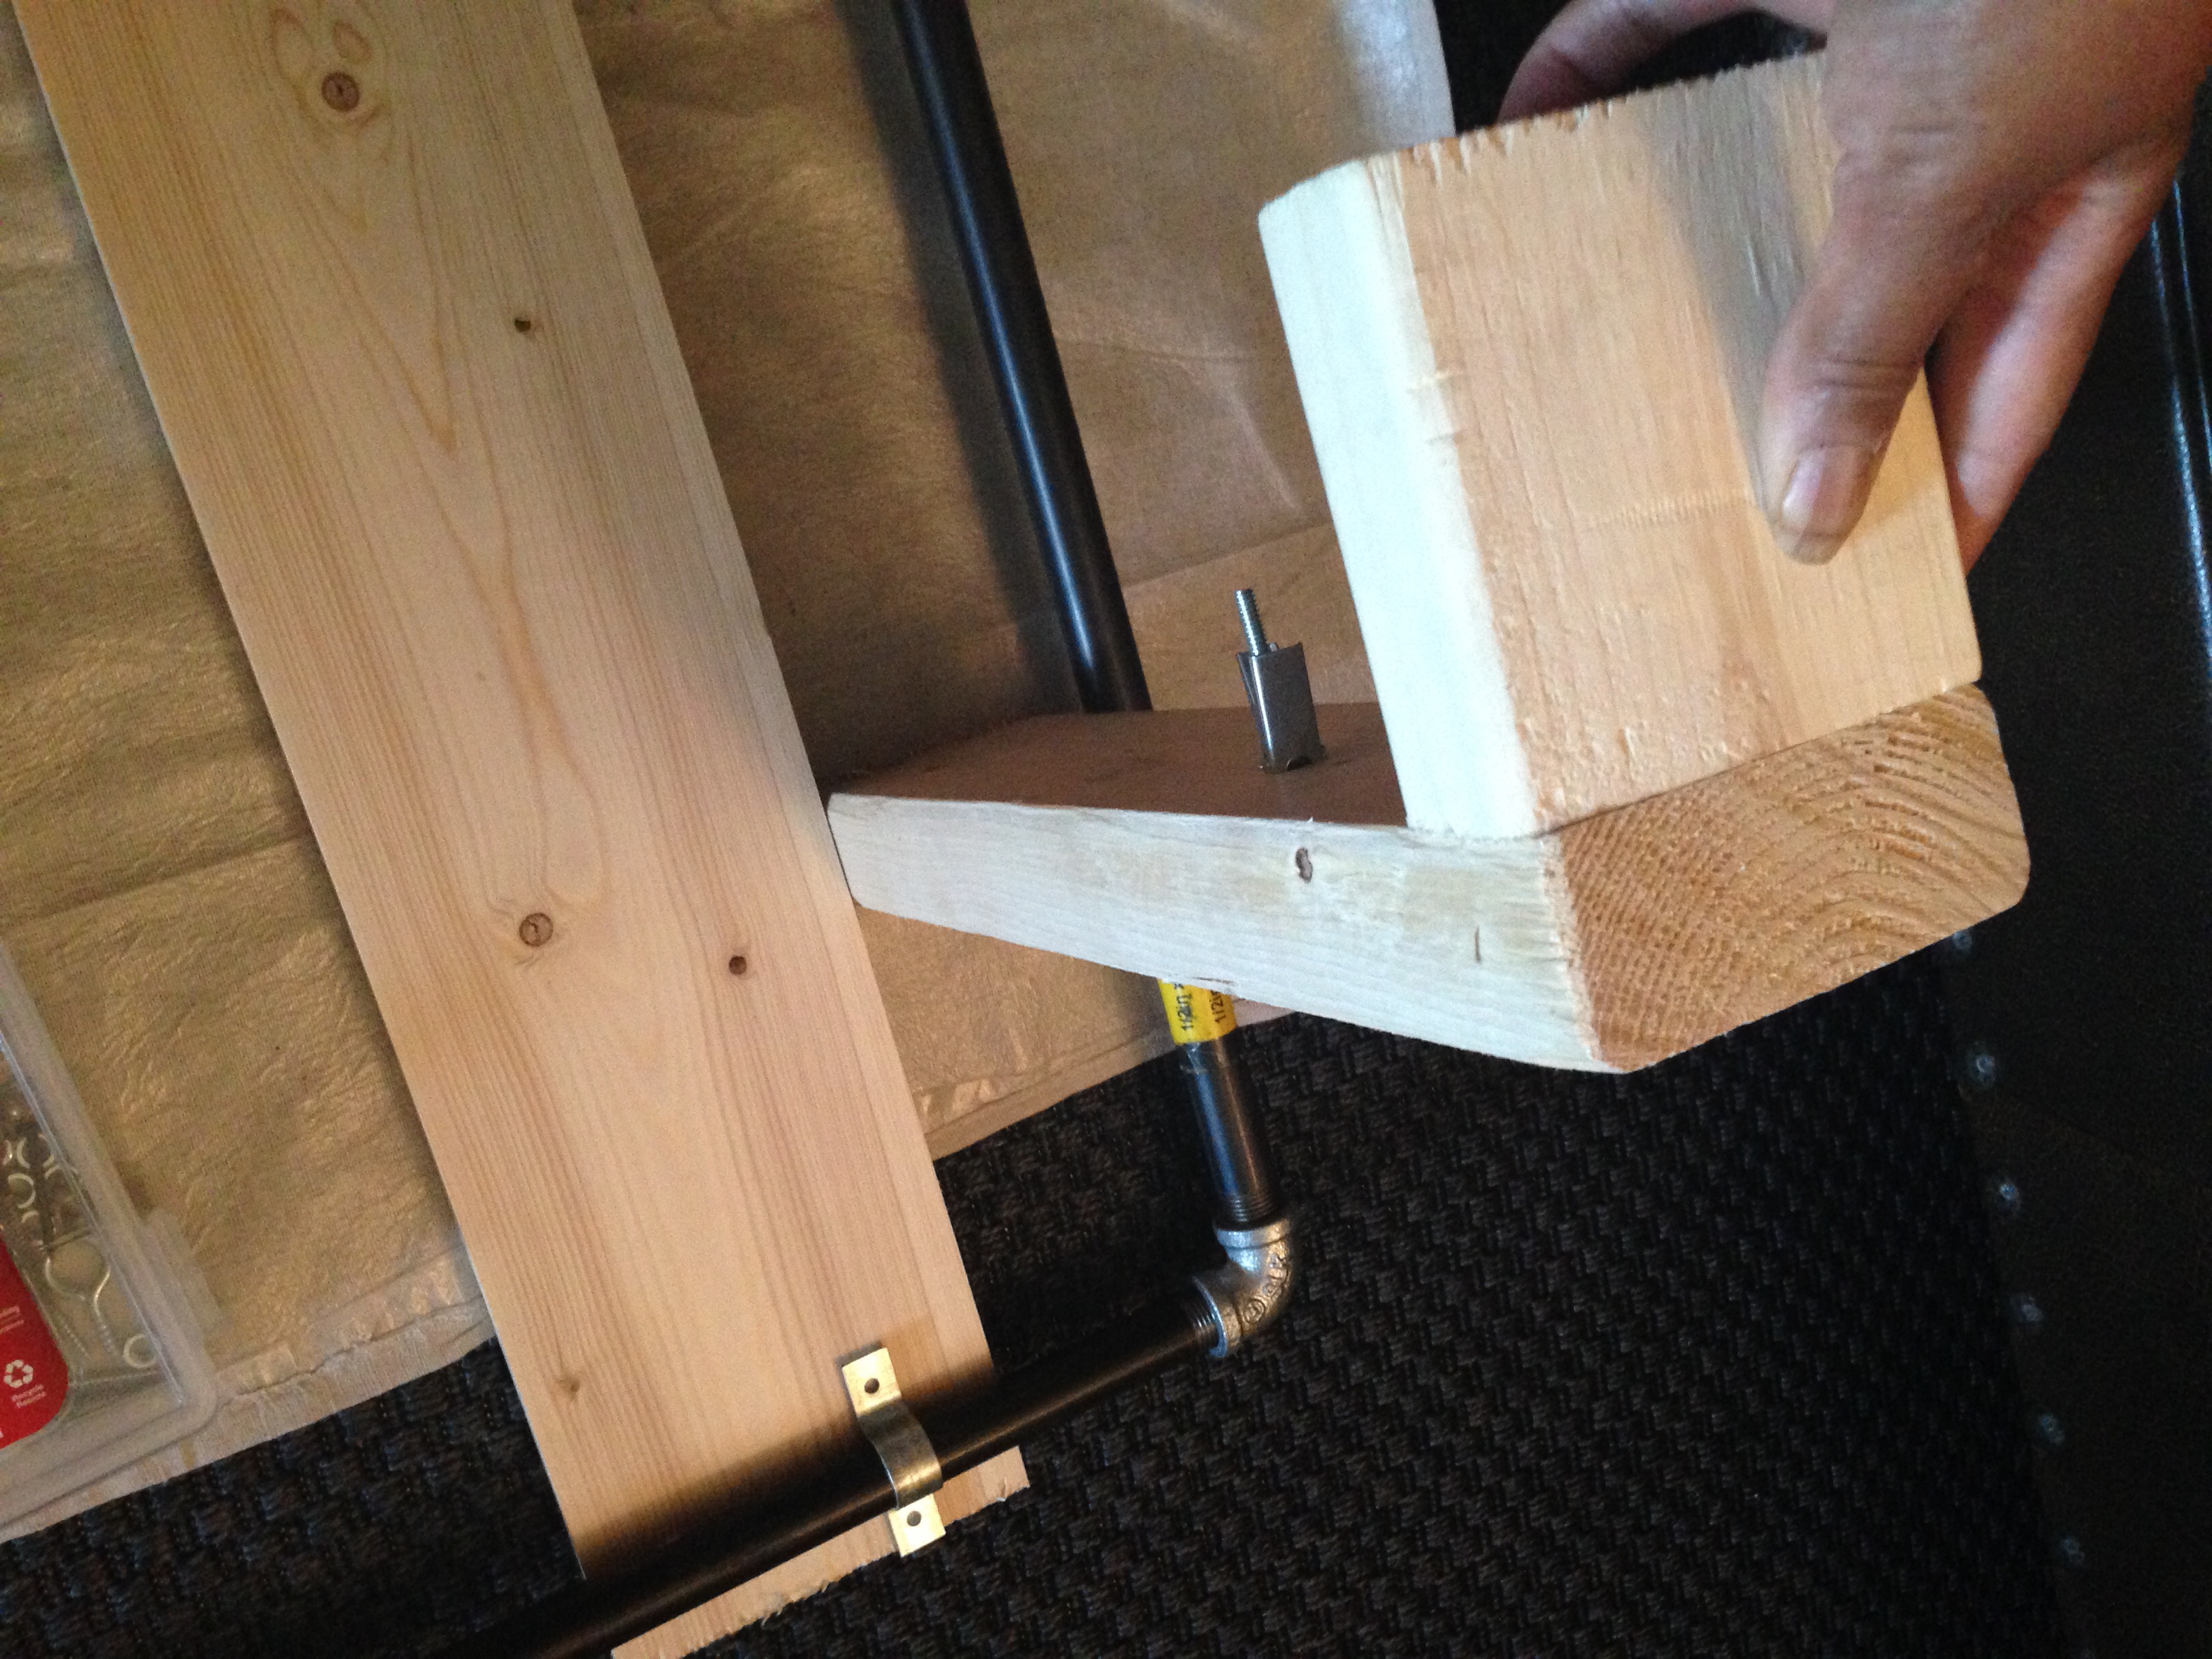
Next, I added the flanges on each corner of the bench (on the bottom side). These will be used to hold the legs of the bench.
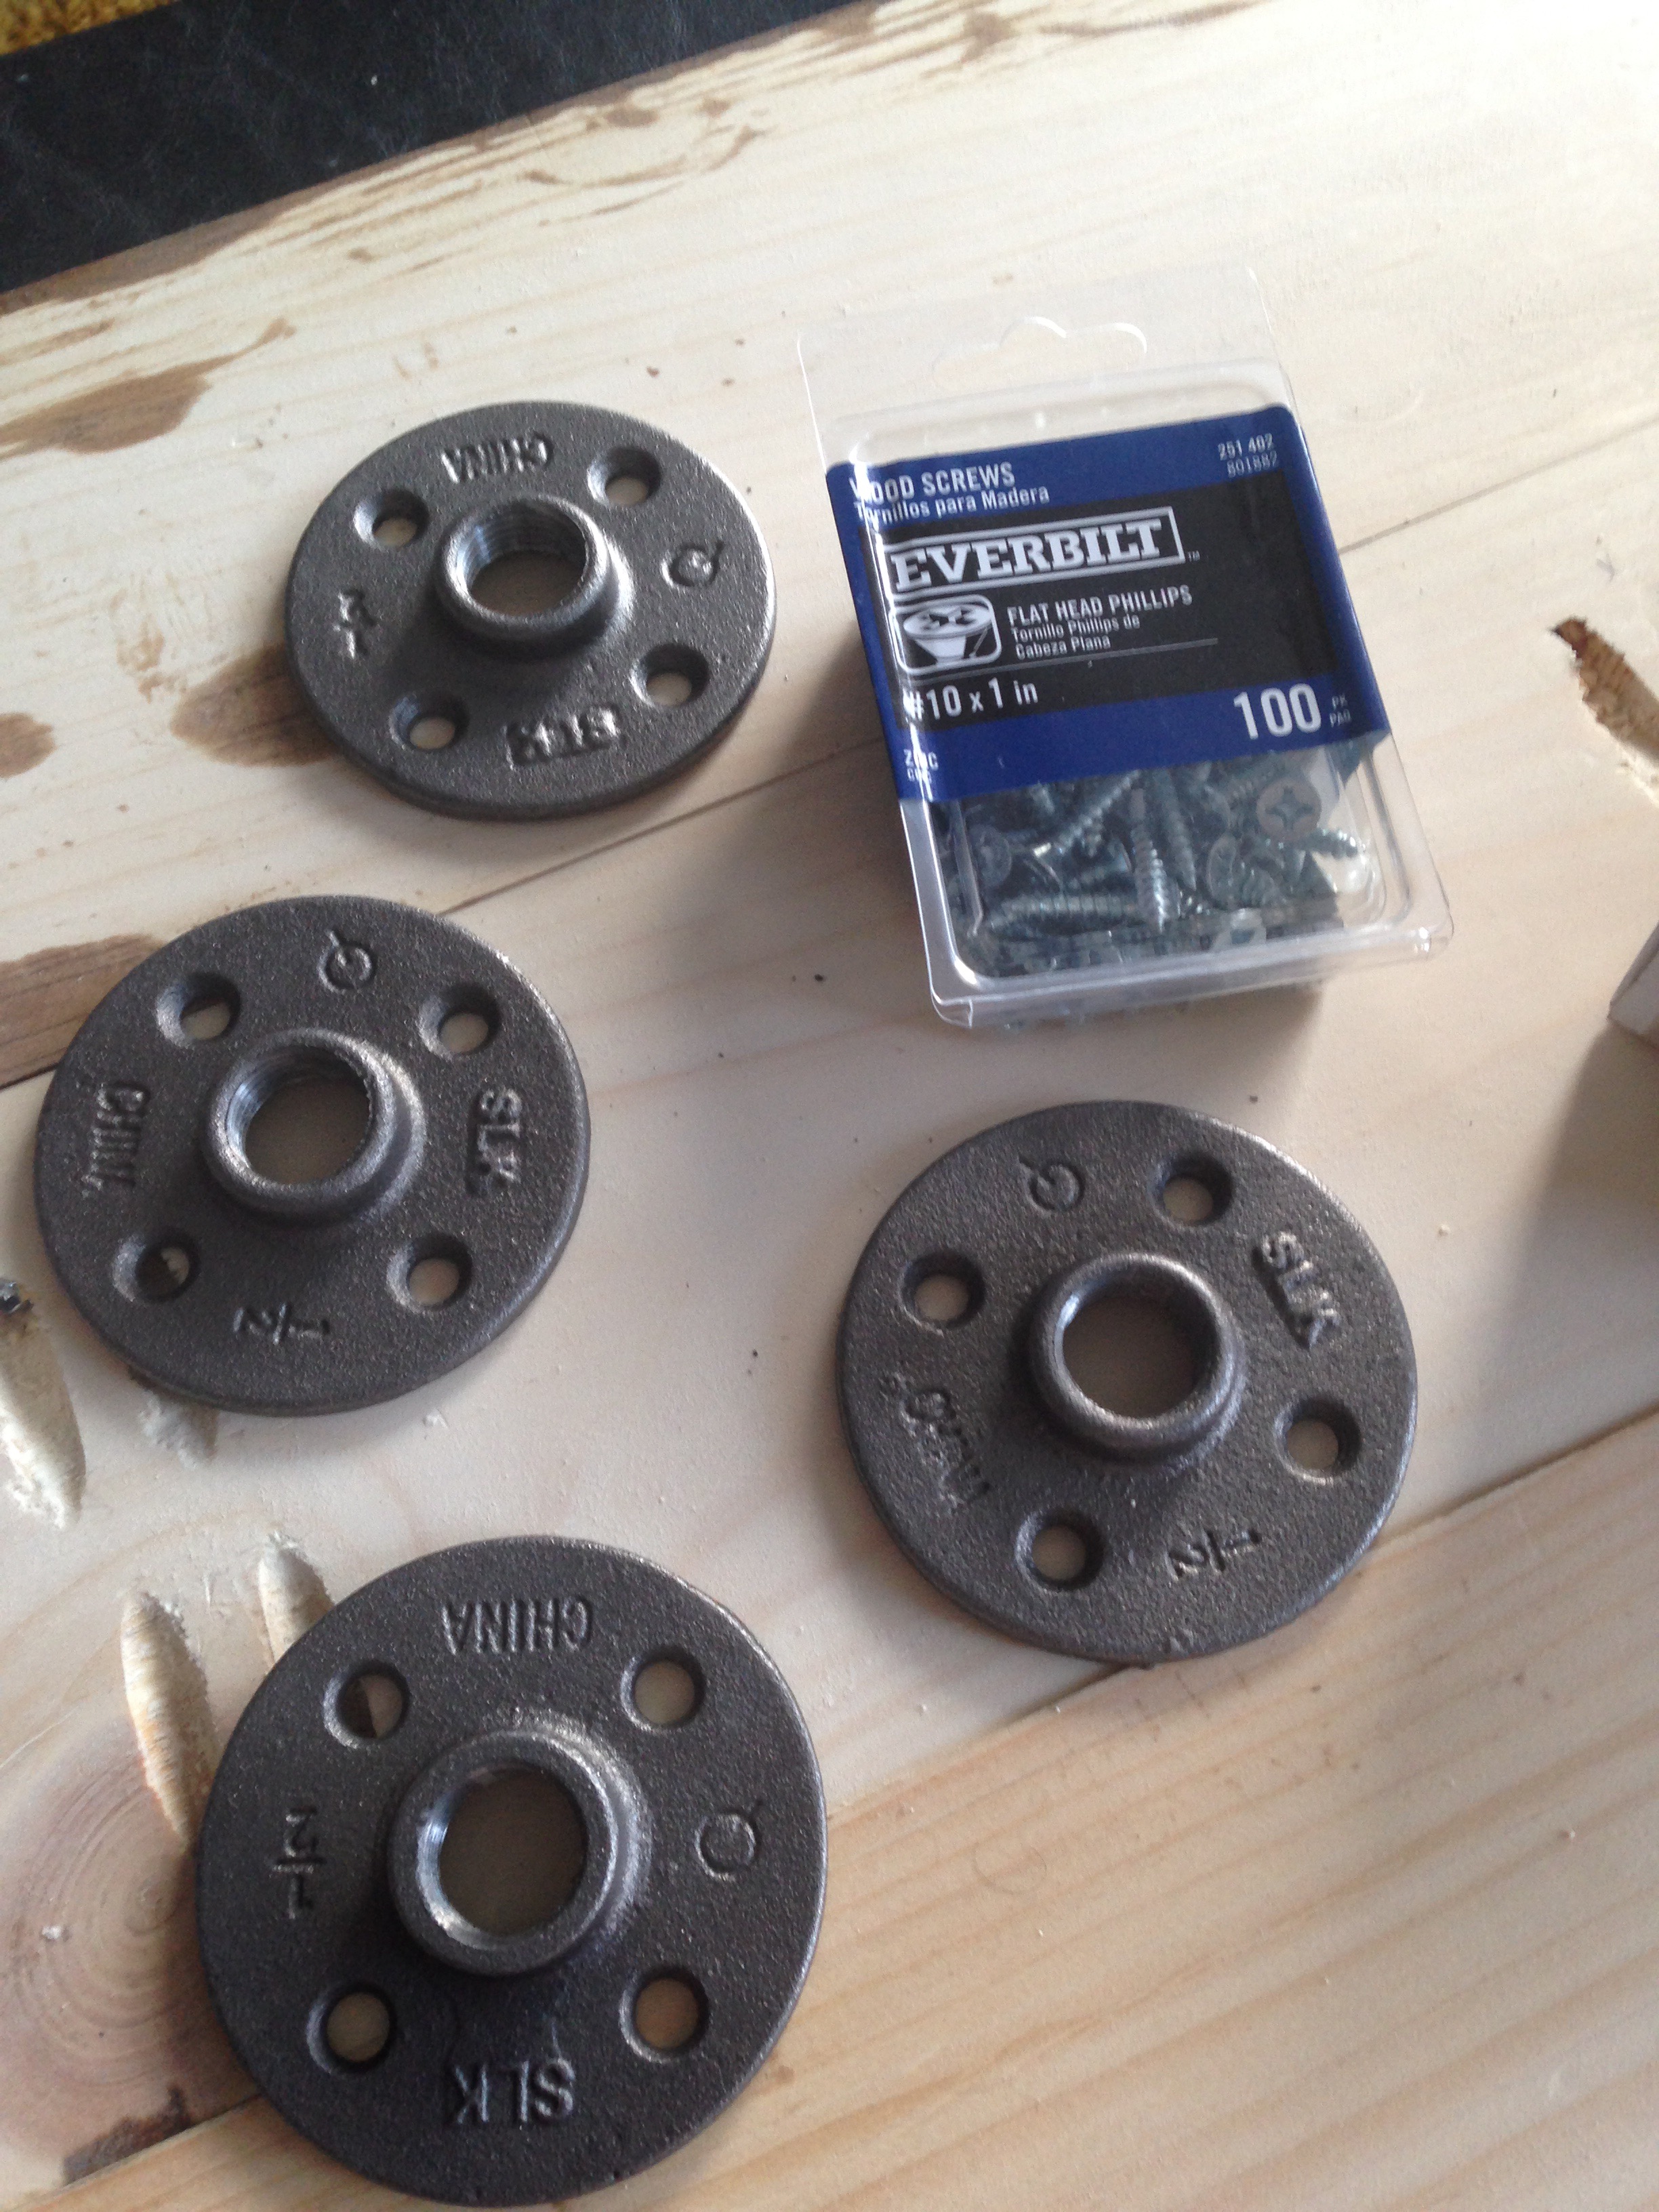
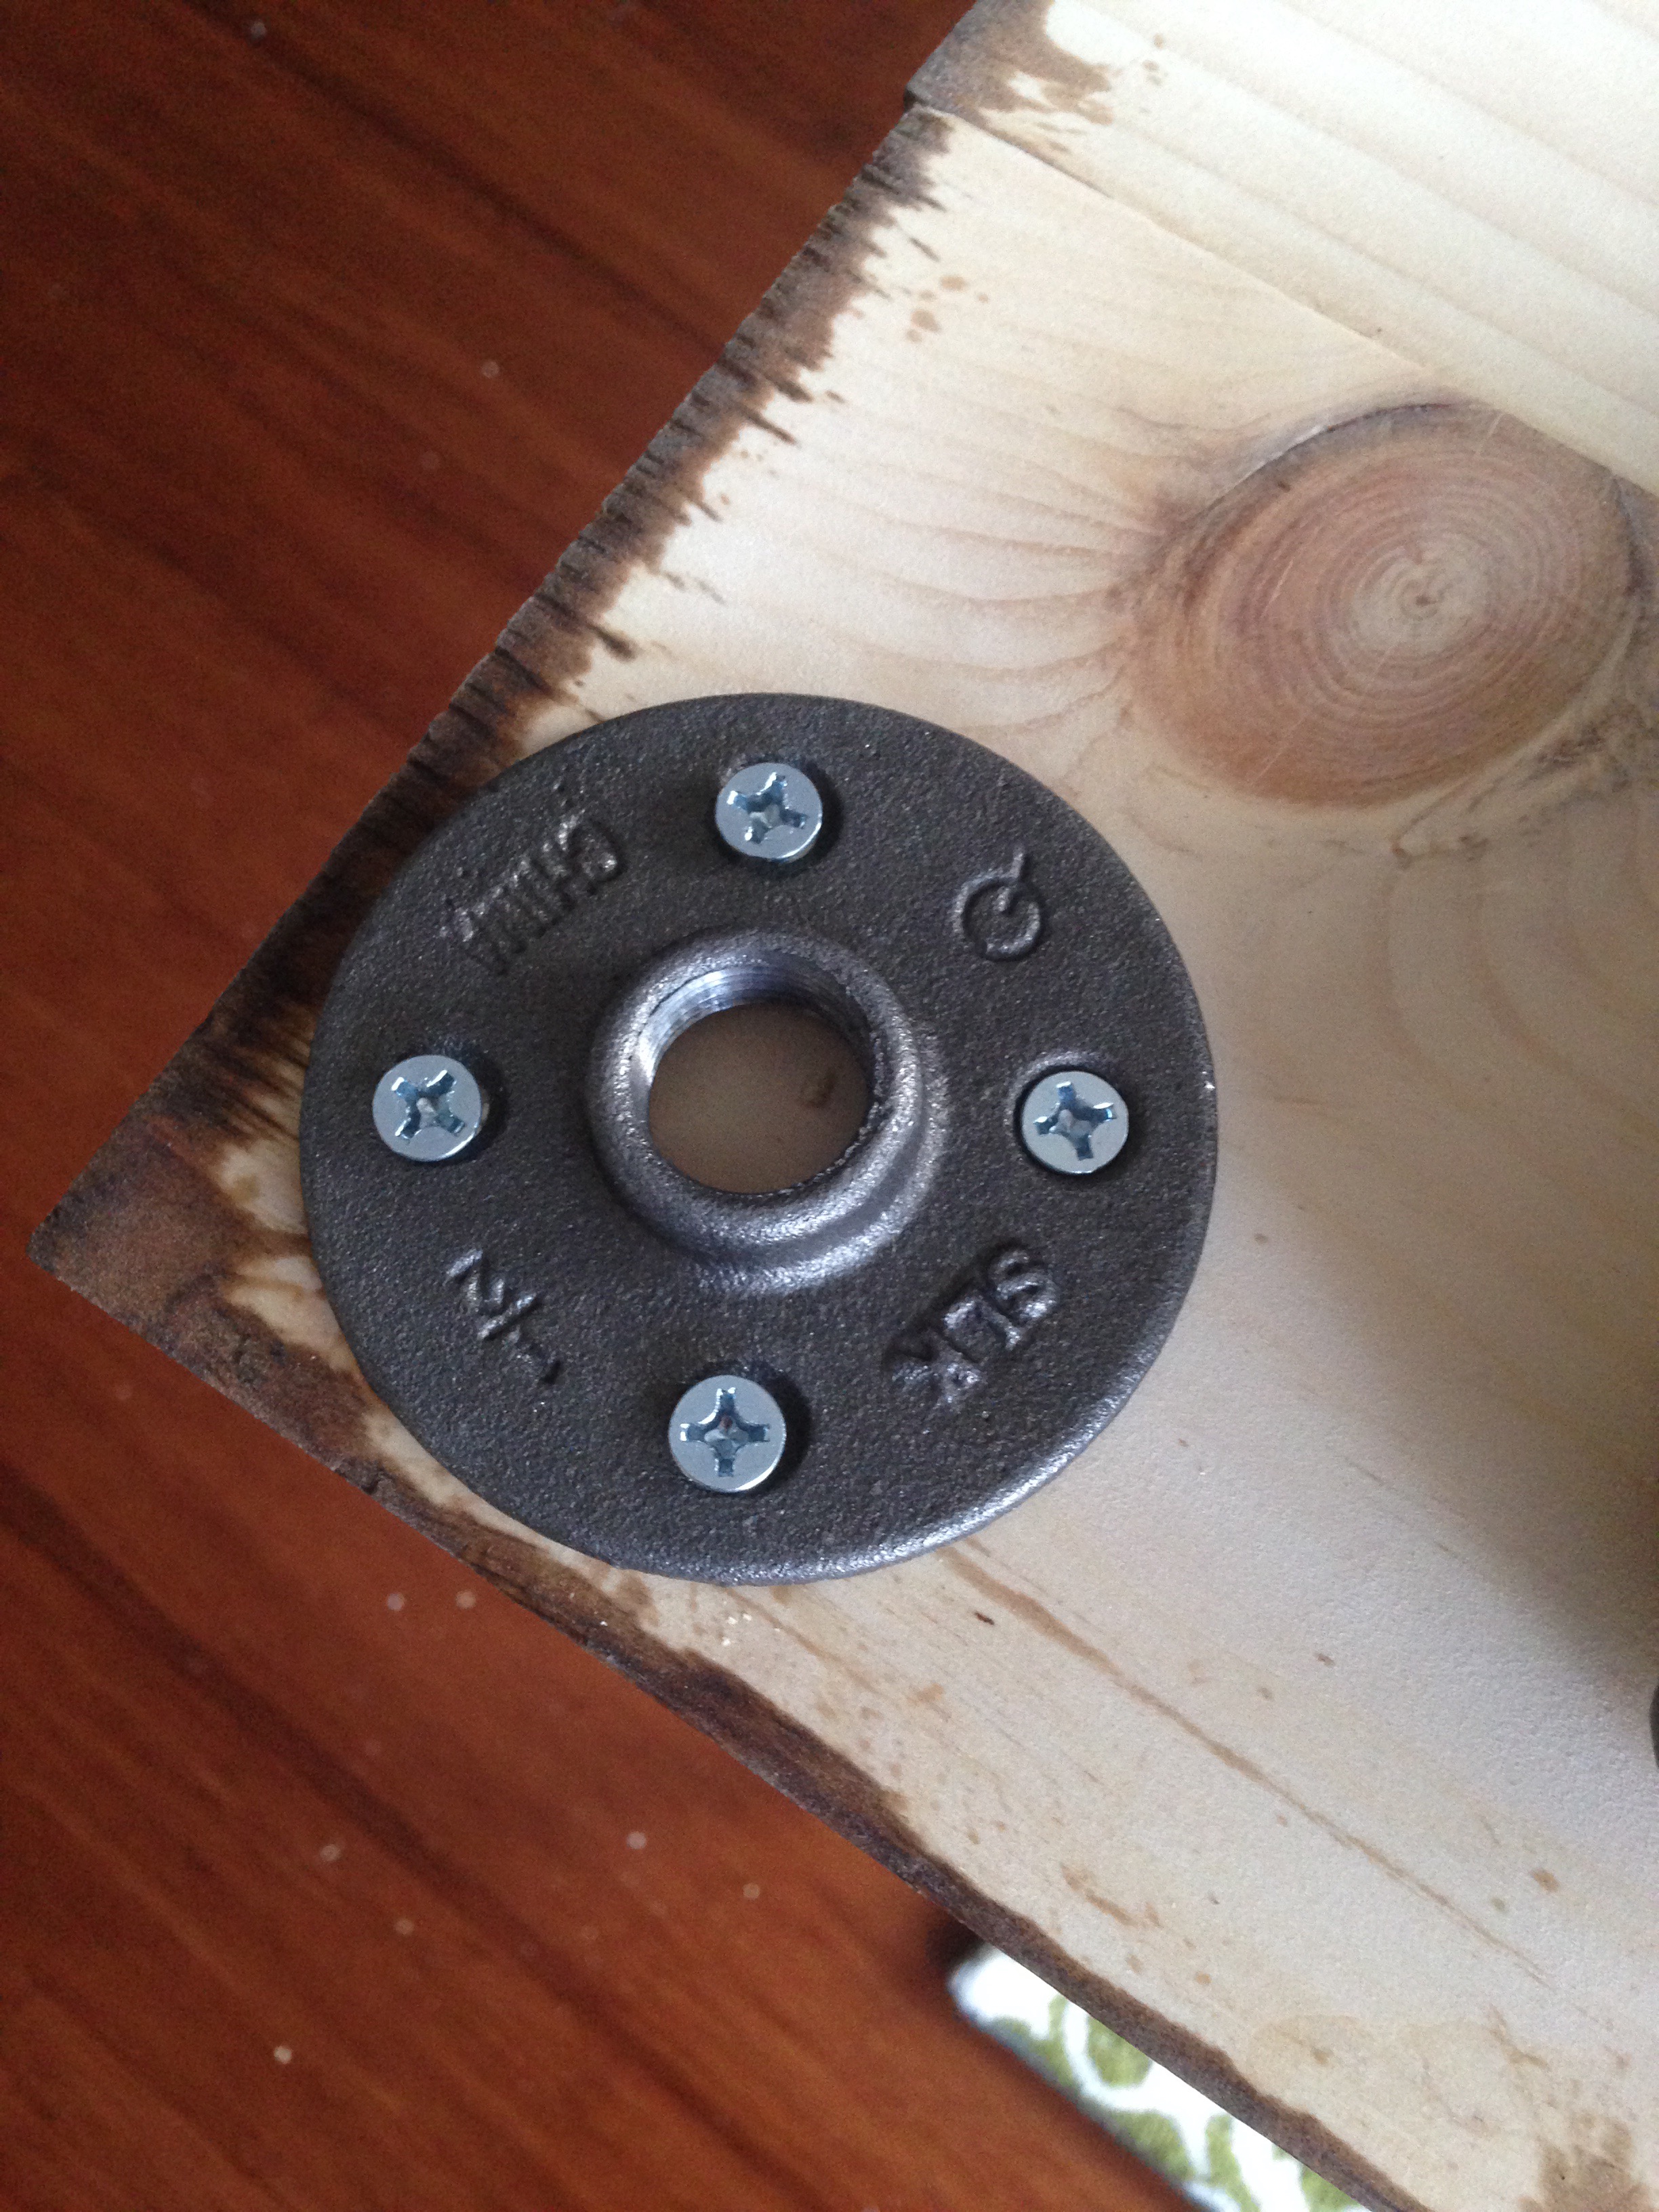
I screwed in a 24″ pipe nipple in each flange.
And here’s the bench with the 24″ pipe legs…
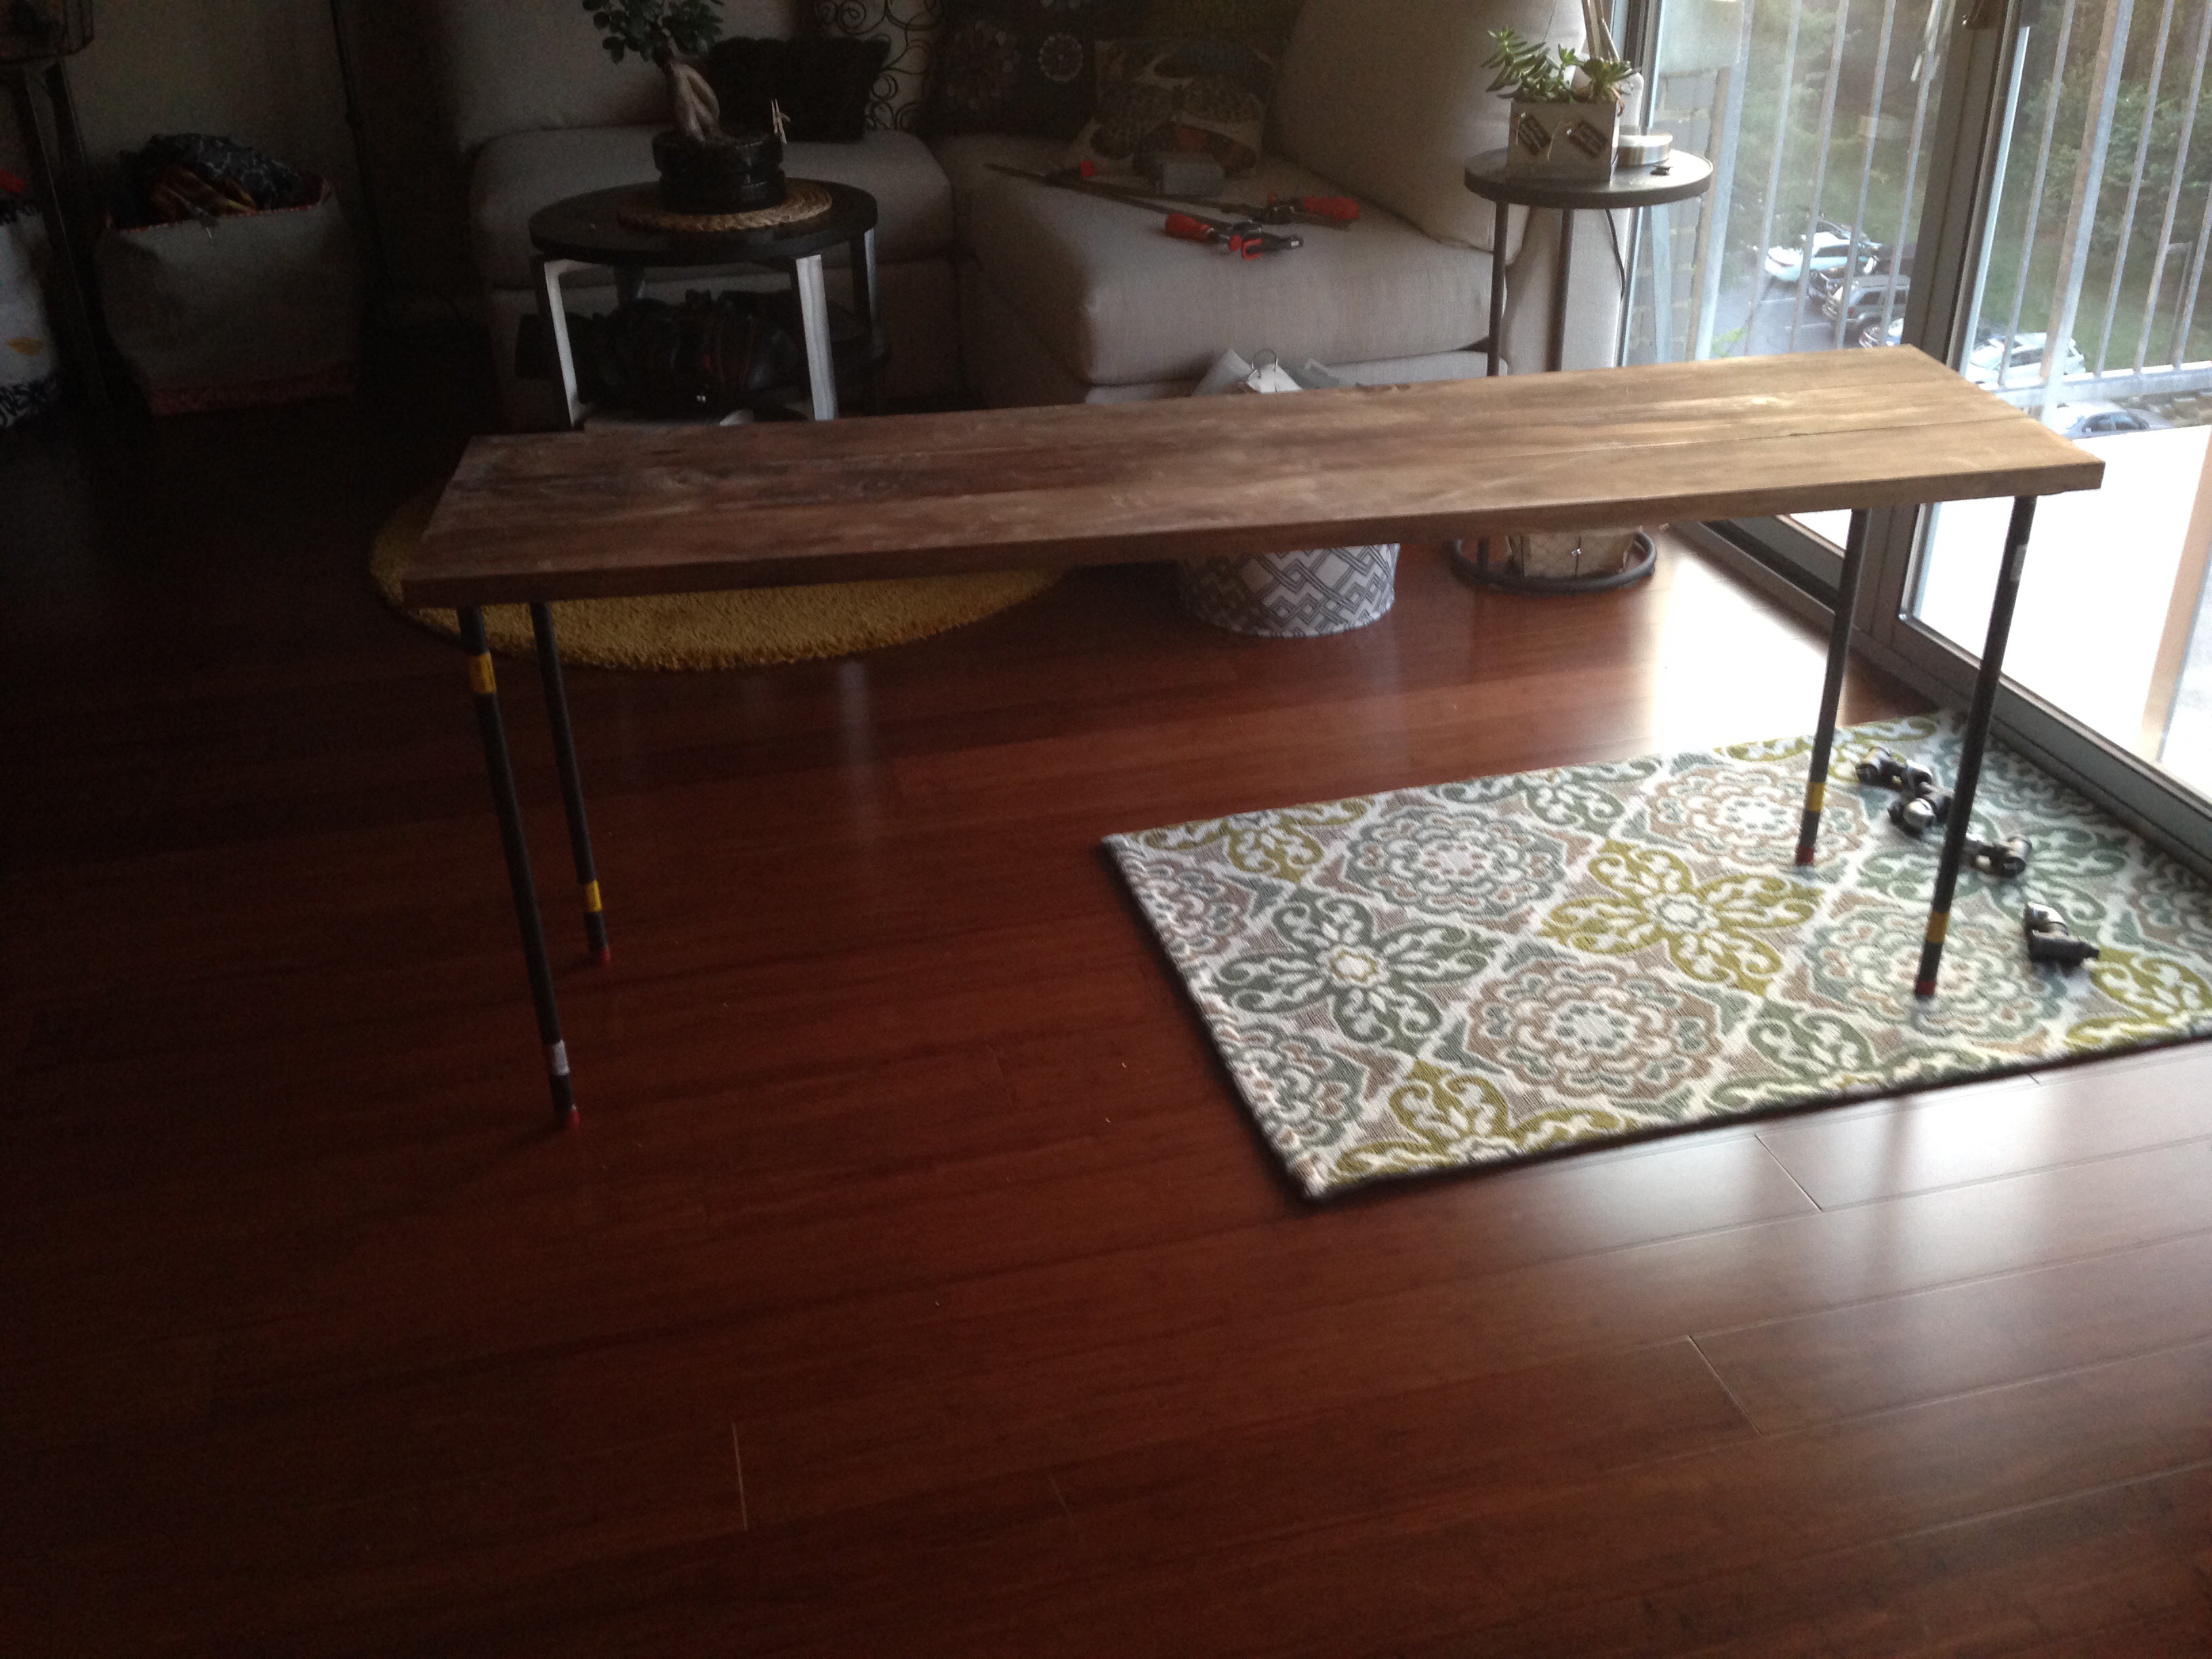
…which looks more like a low table. So my pipe nipples for the bench legs are too high. Groan.
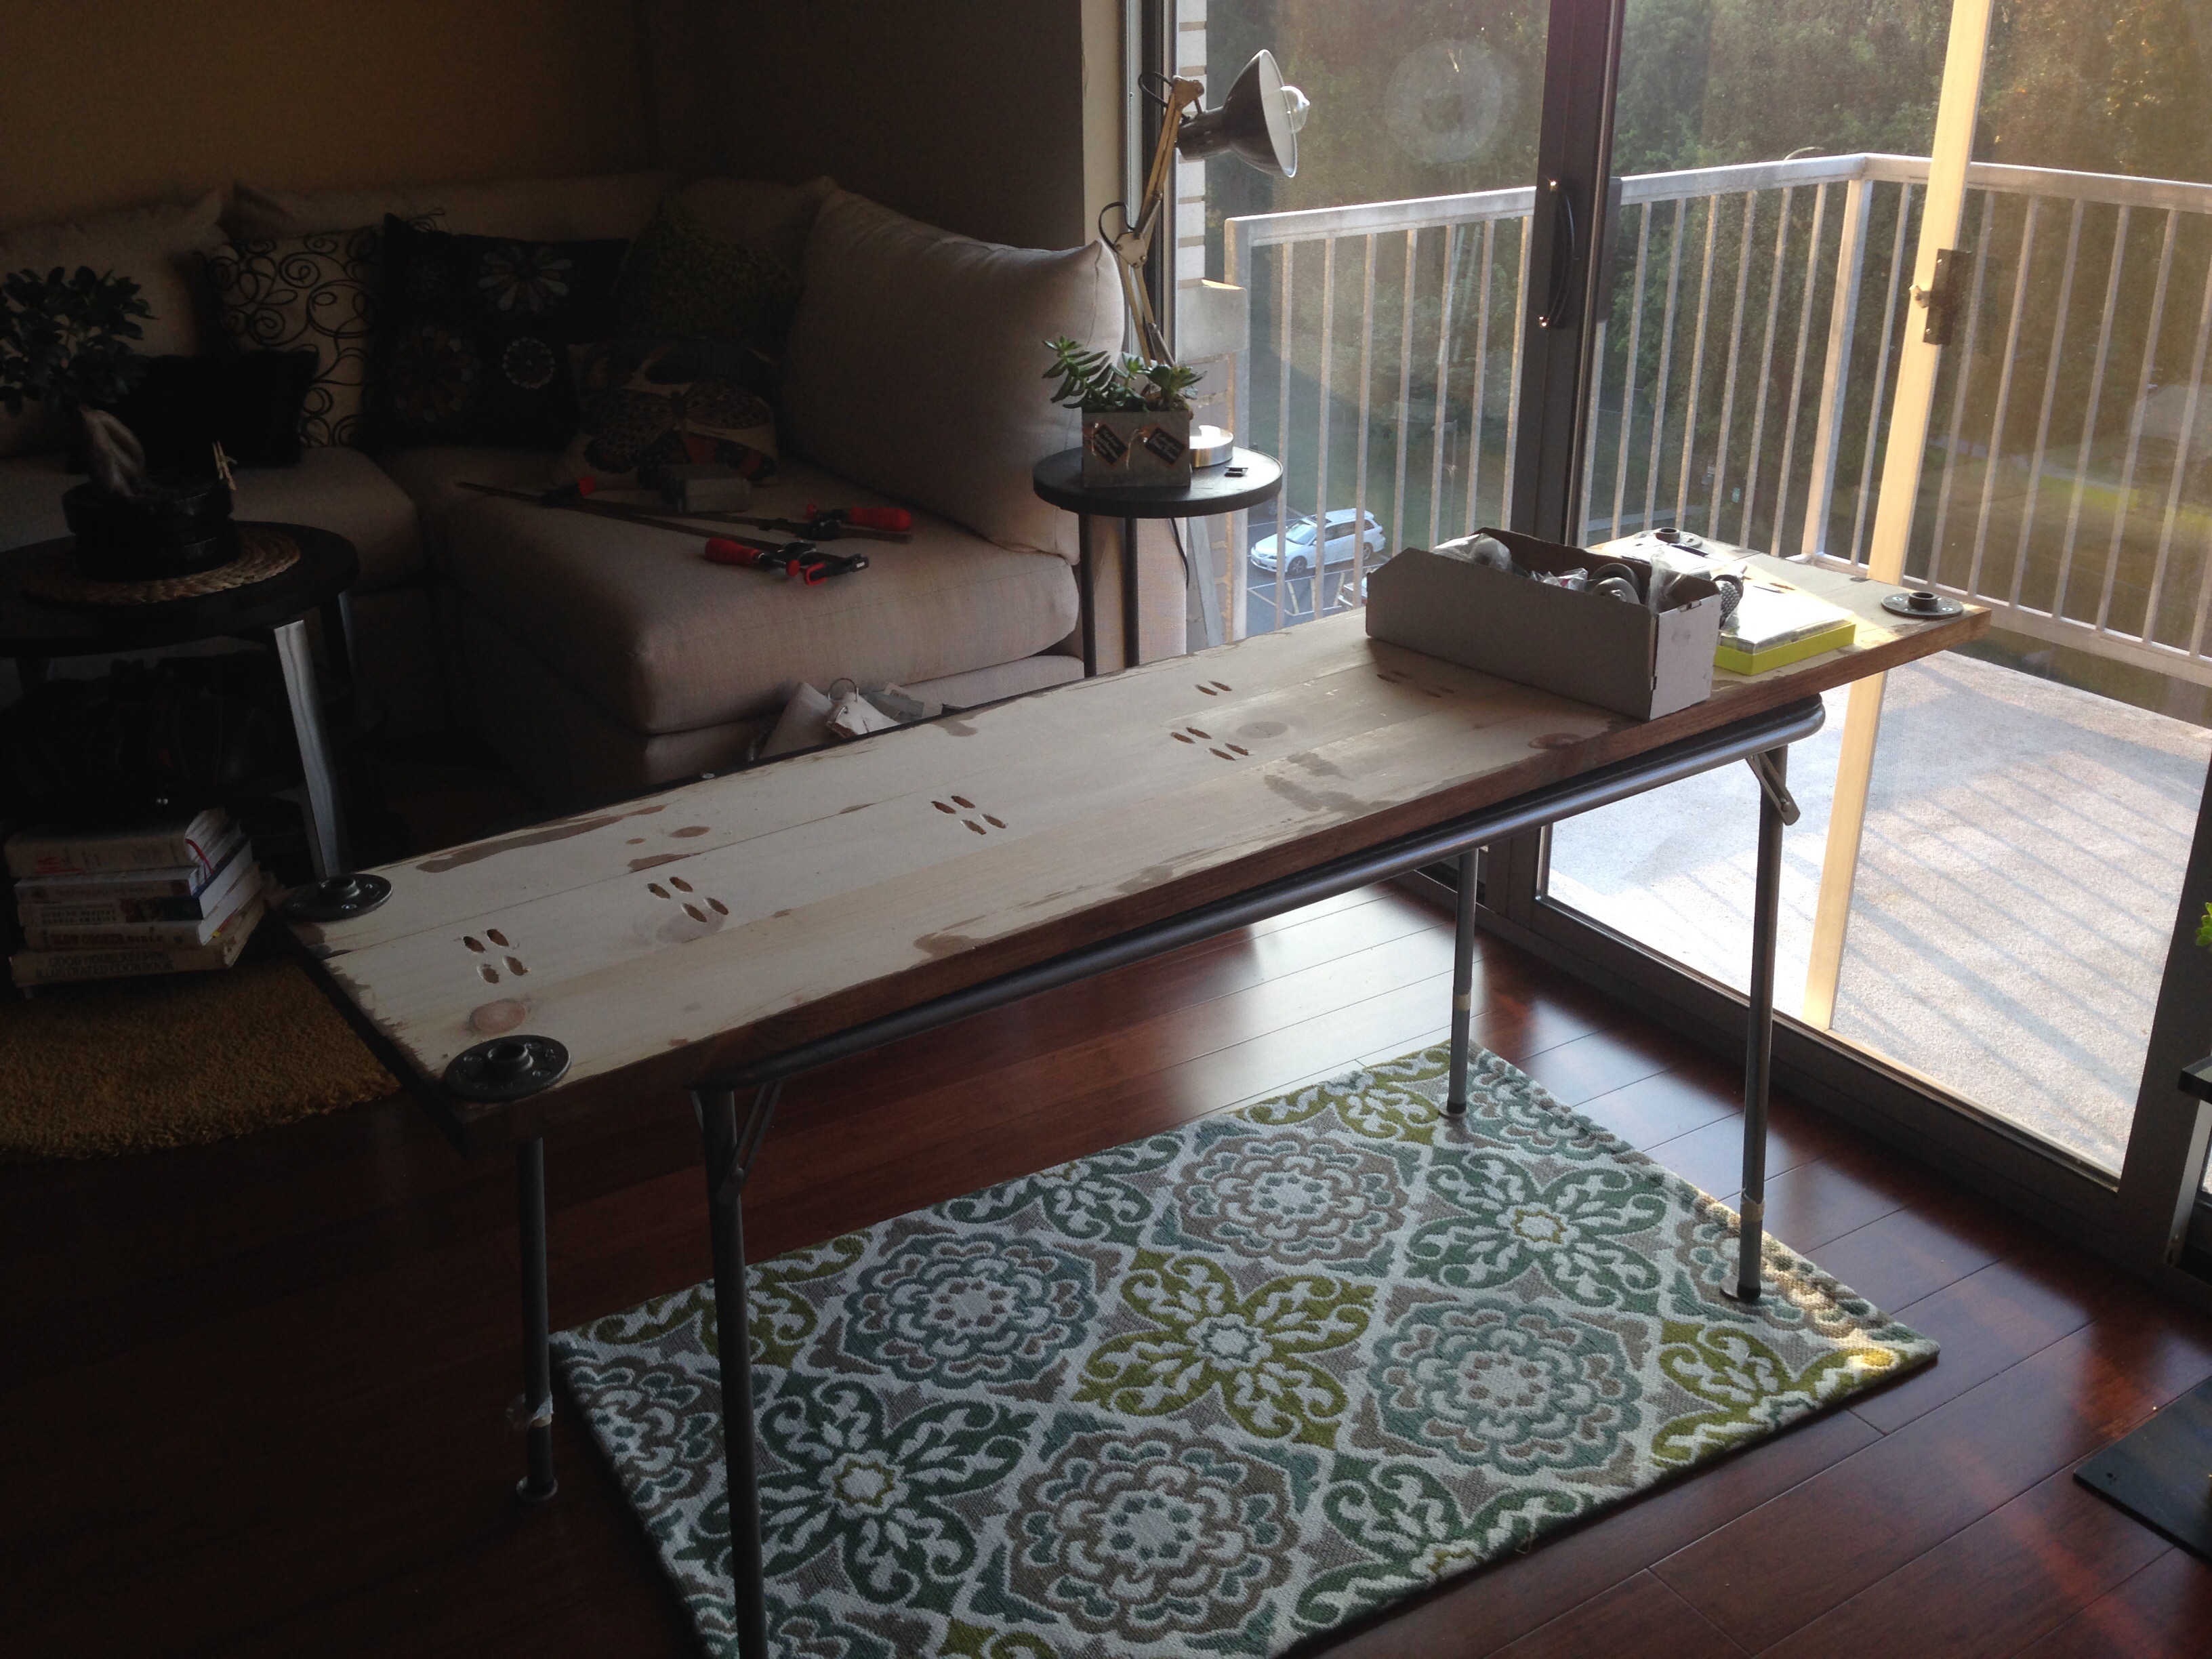
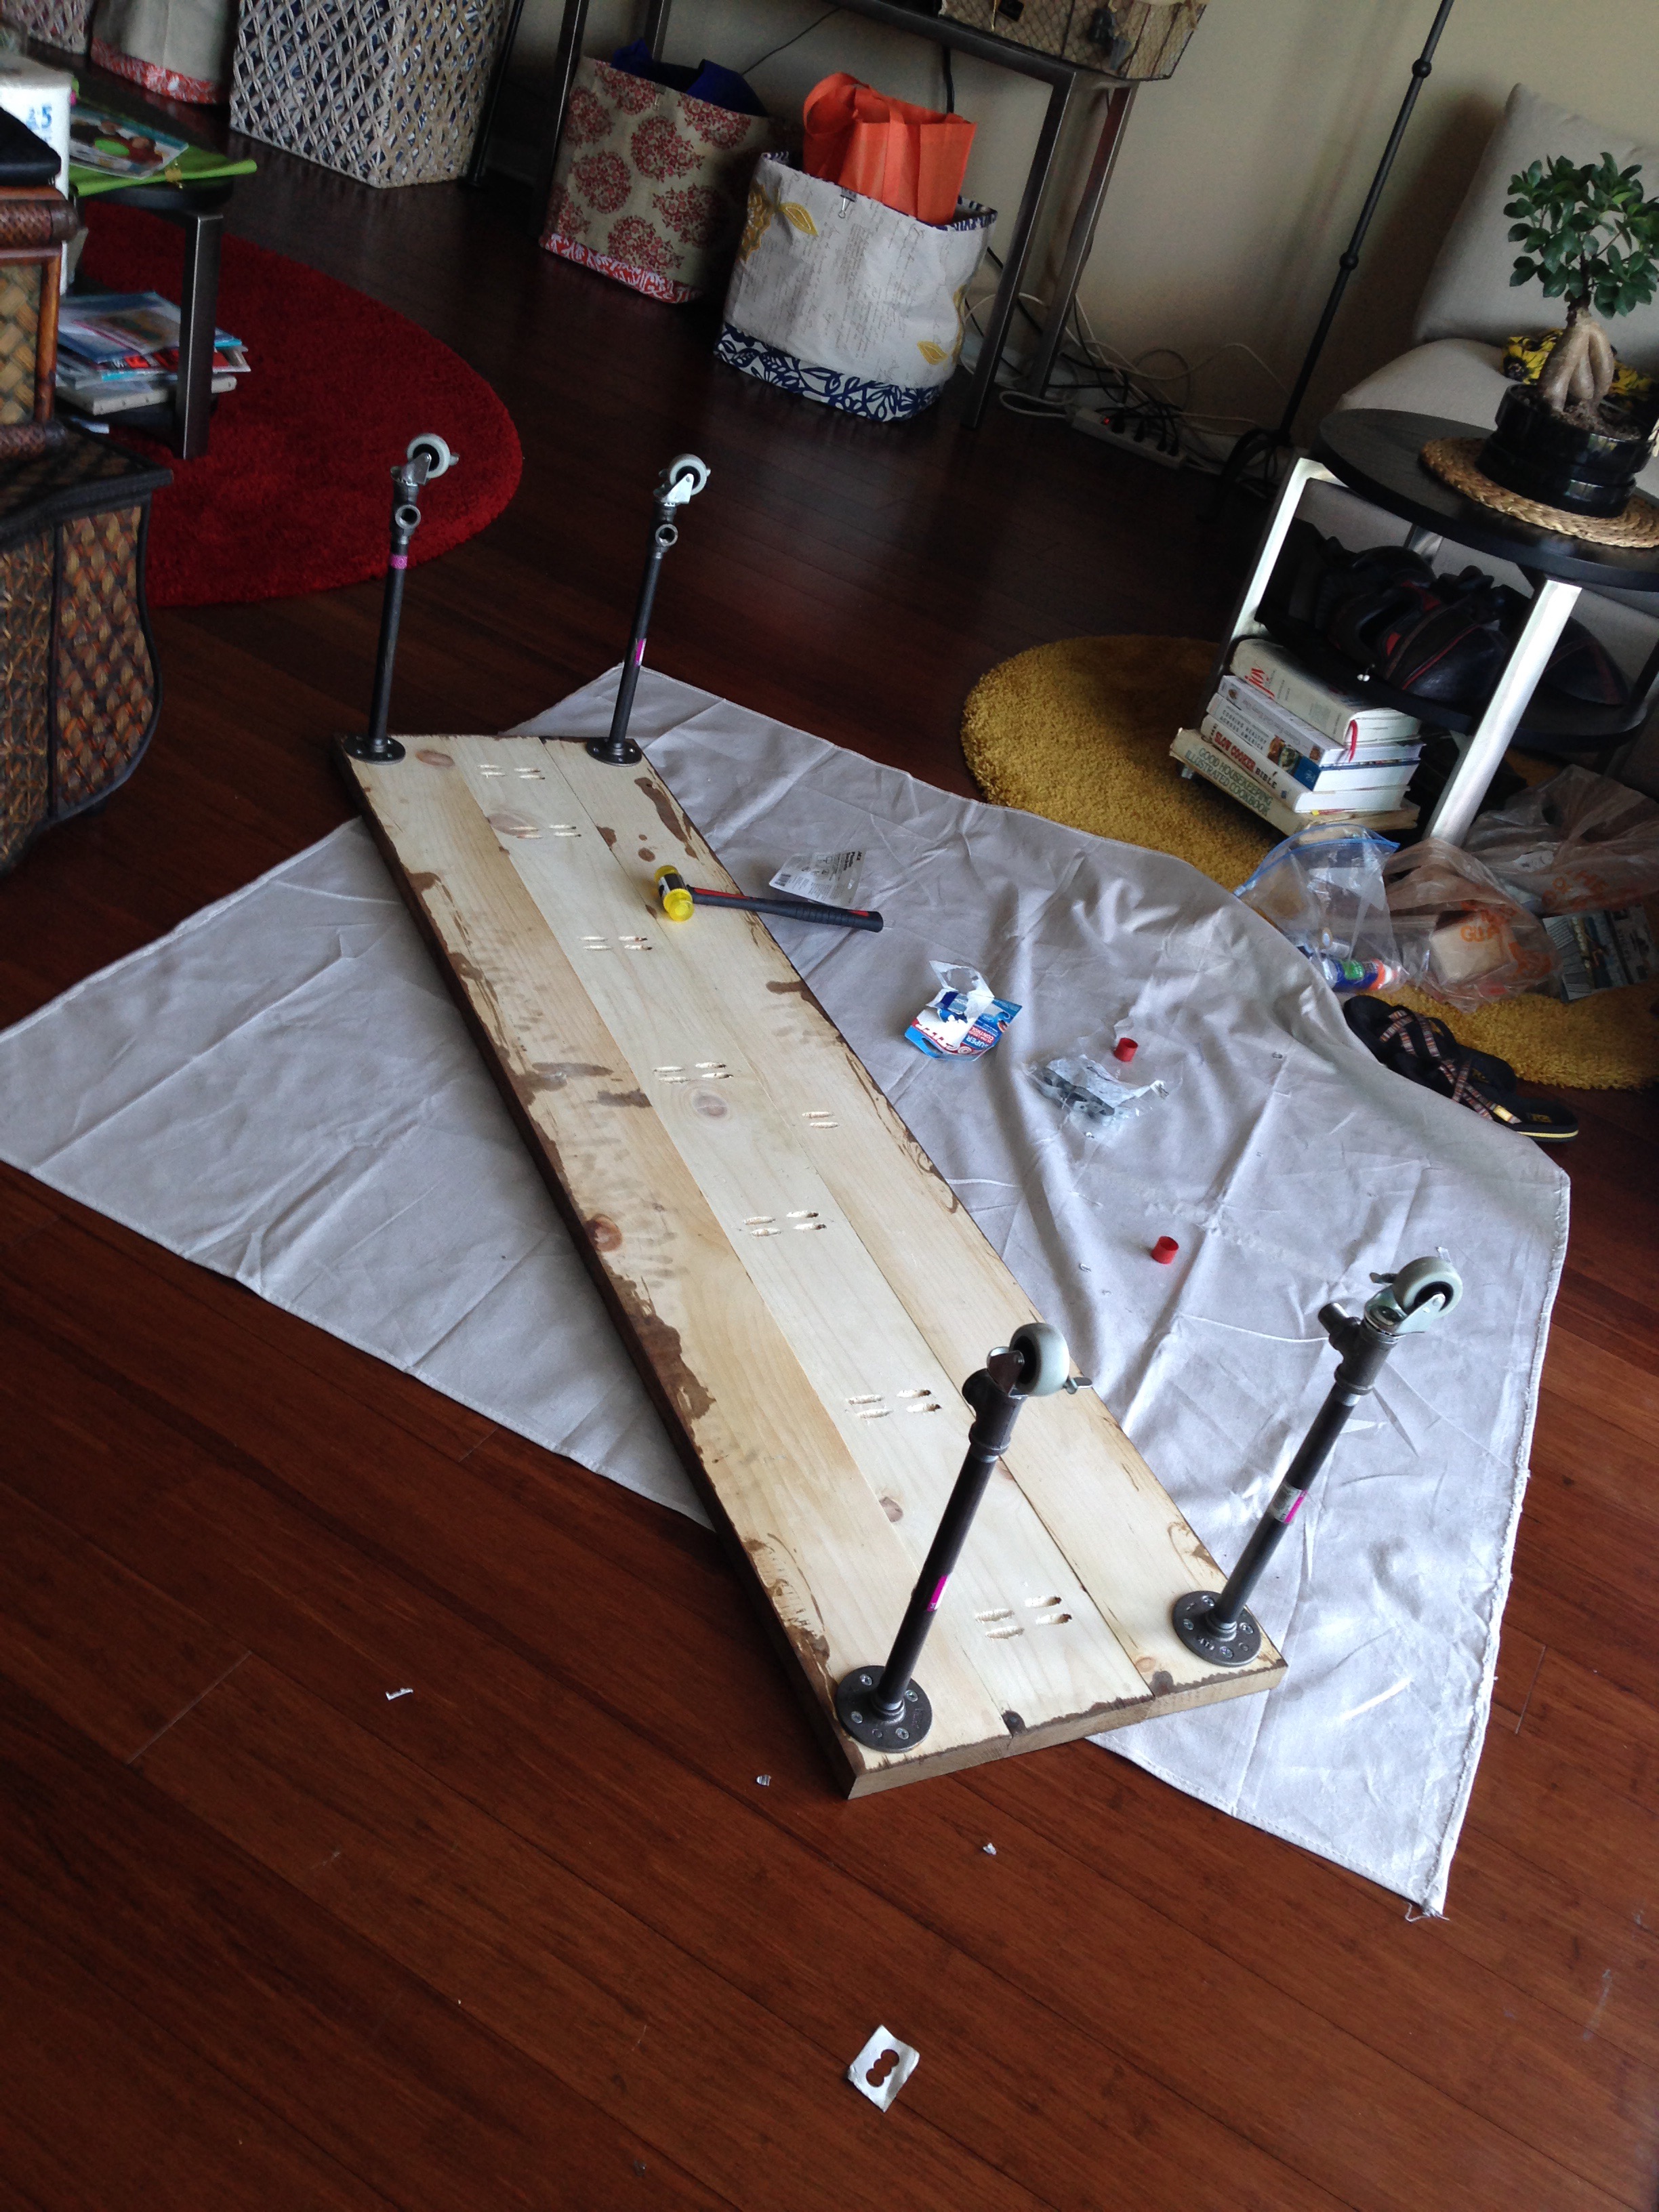
A plan B featuring a return trip to Home Depot is now required. In the meantime, I continued with the assembly of the pipe bar stand that will be added above the bench. I took the 60″ pipe nipple for the bar and connected it to the two 48″ pipe nipples using the 90 degree pipe elbows (making them vertical sides for the horizontal bar). Flanges are screwed on at bottom of each side pipe to form the feet (and will be used to anchor the pipe bar stand to the bench).
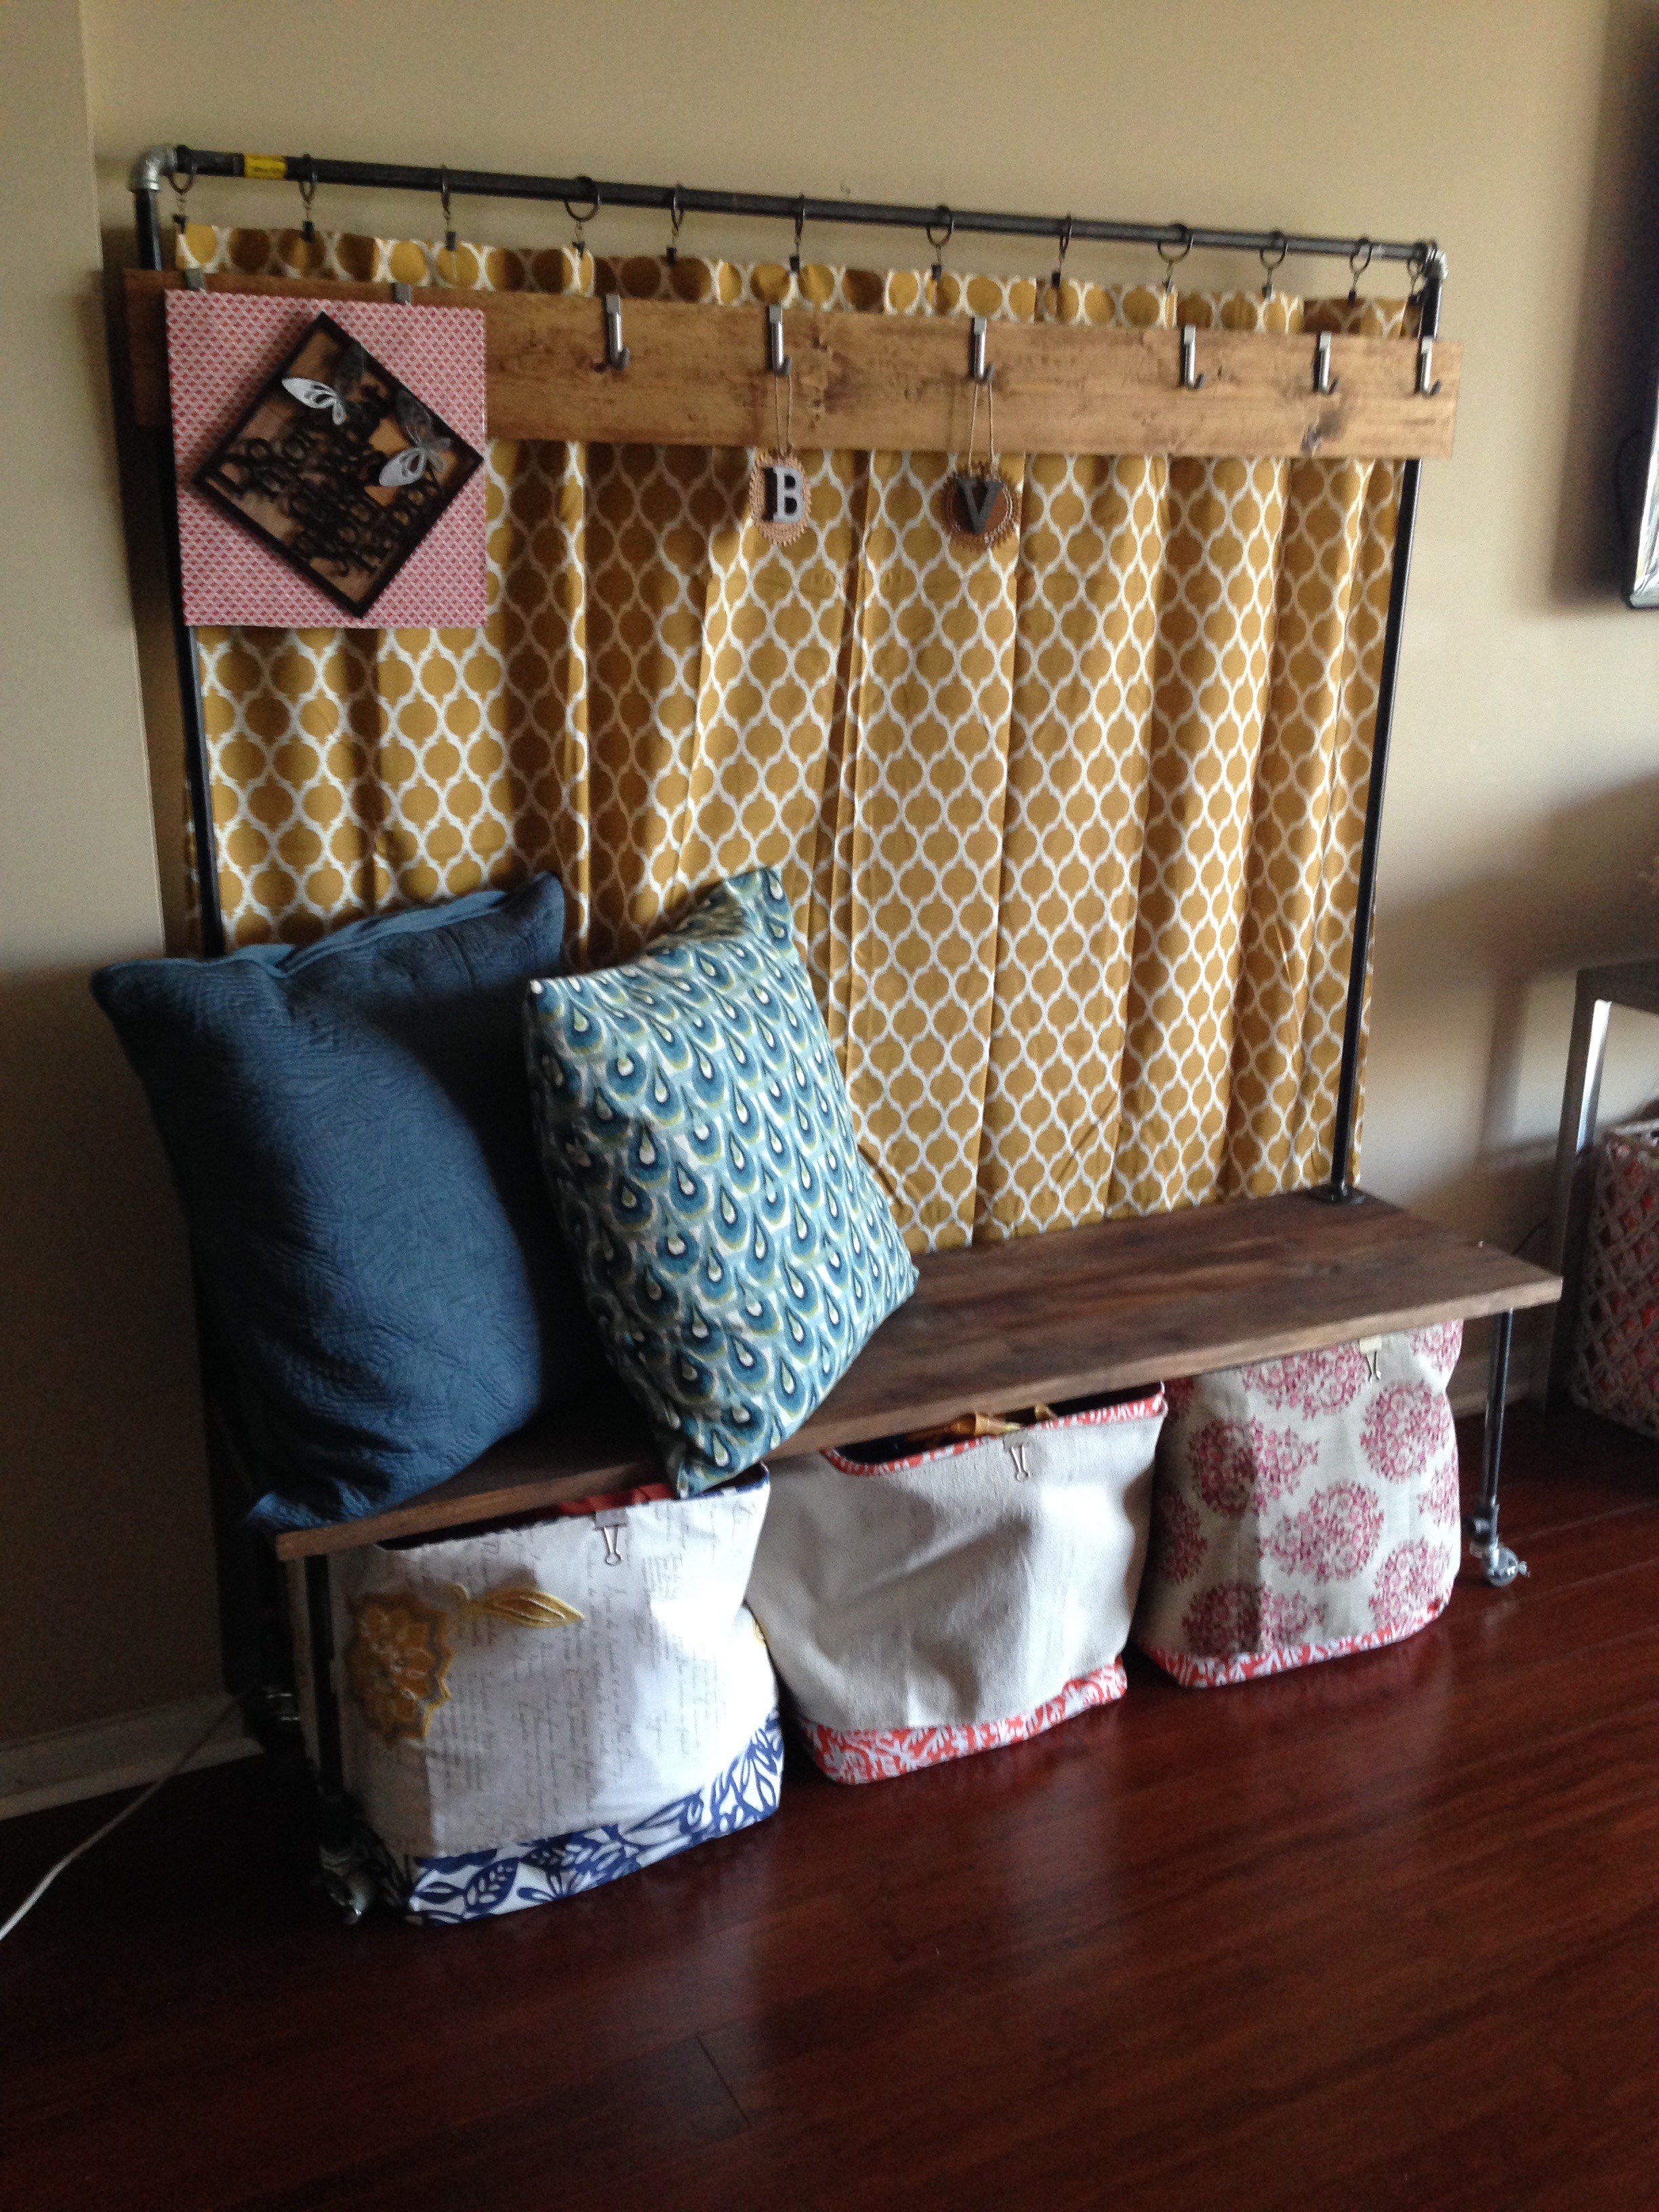
Here’s an assembled prototype of the bench on Monday night. Note how much space there is between the 18″ bins and the bench top.
Day 3: Saturday – Bench height reboot with caster upgrade.
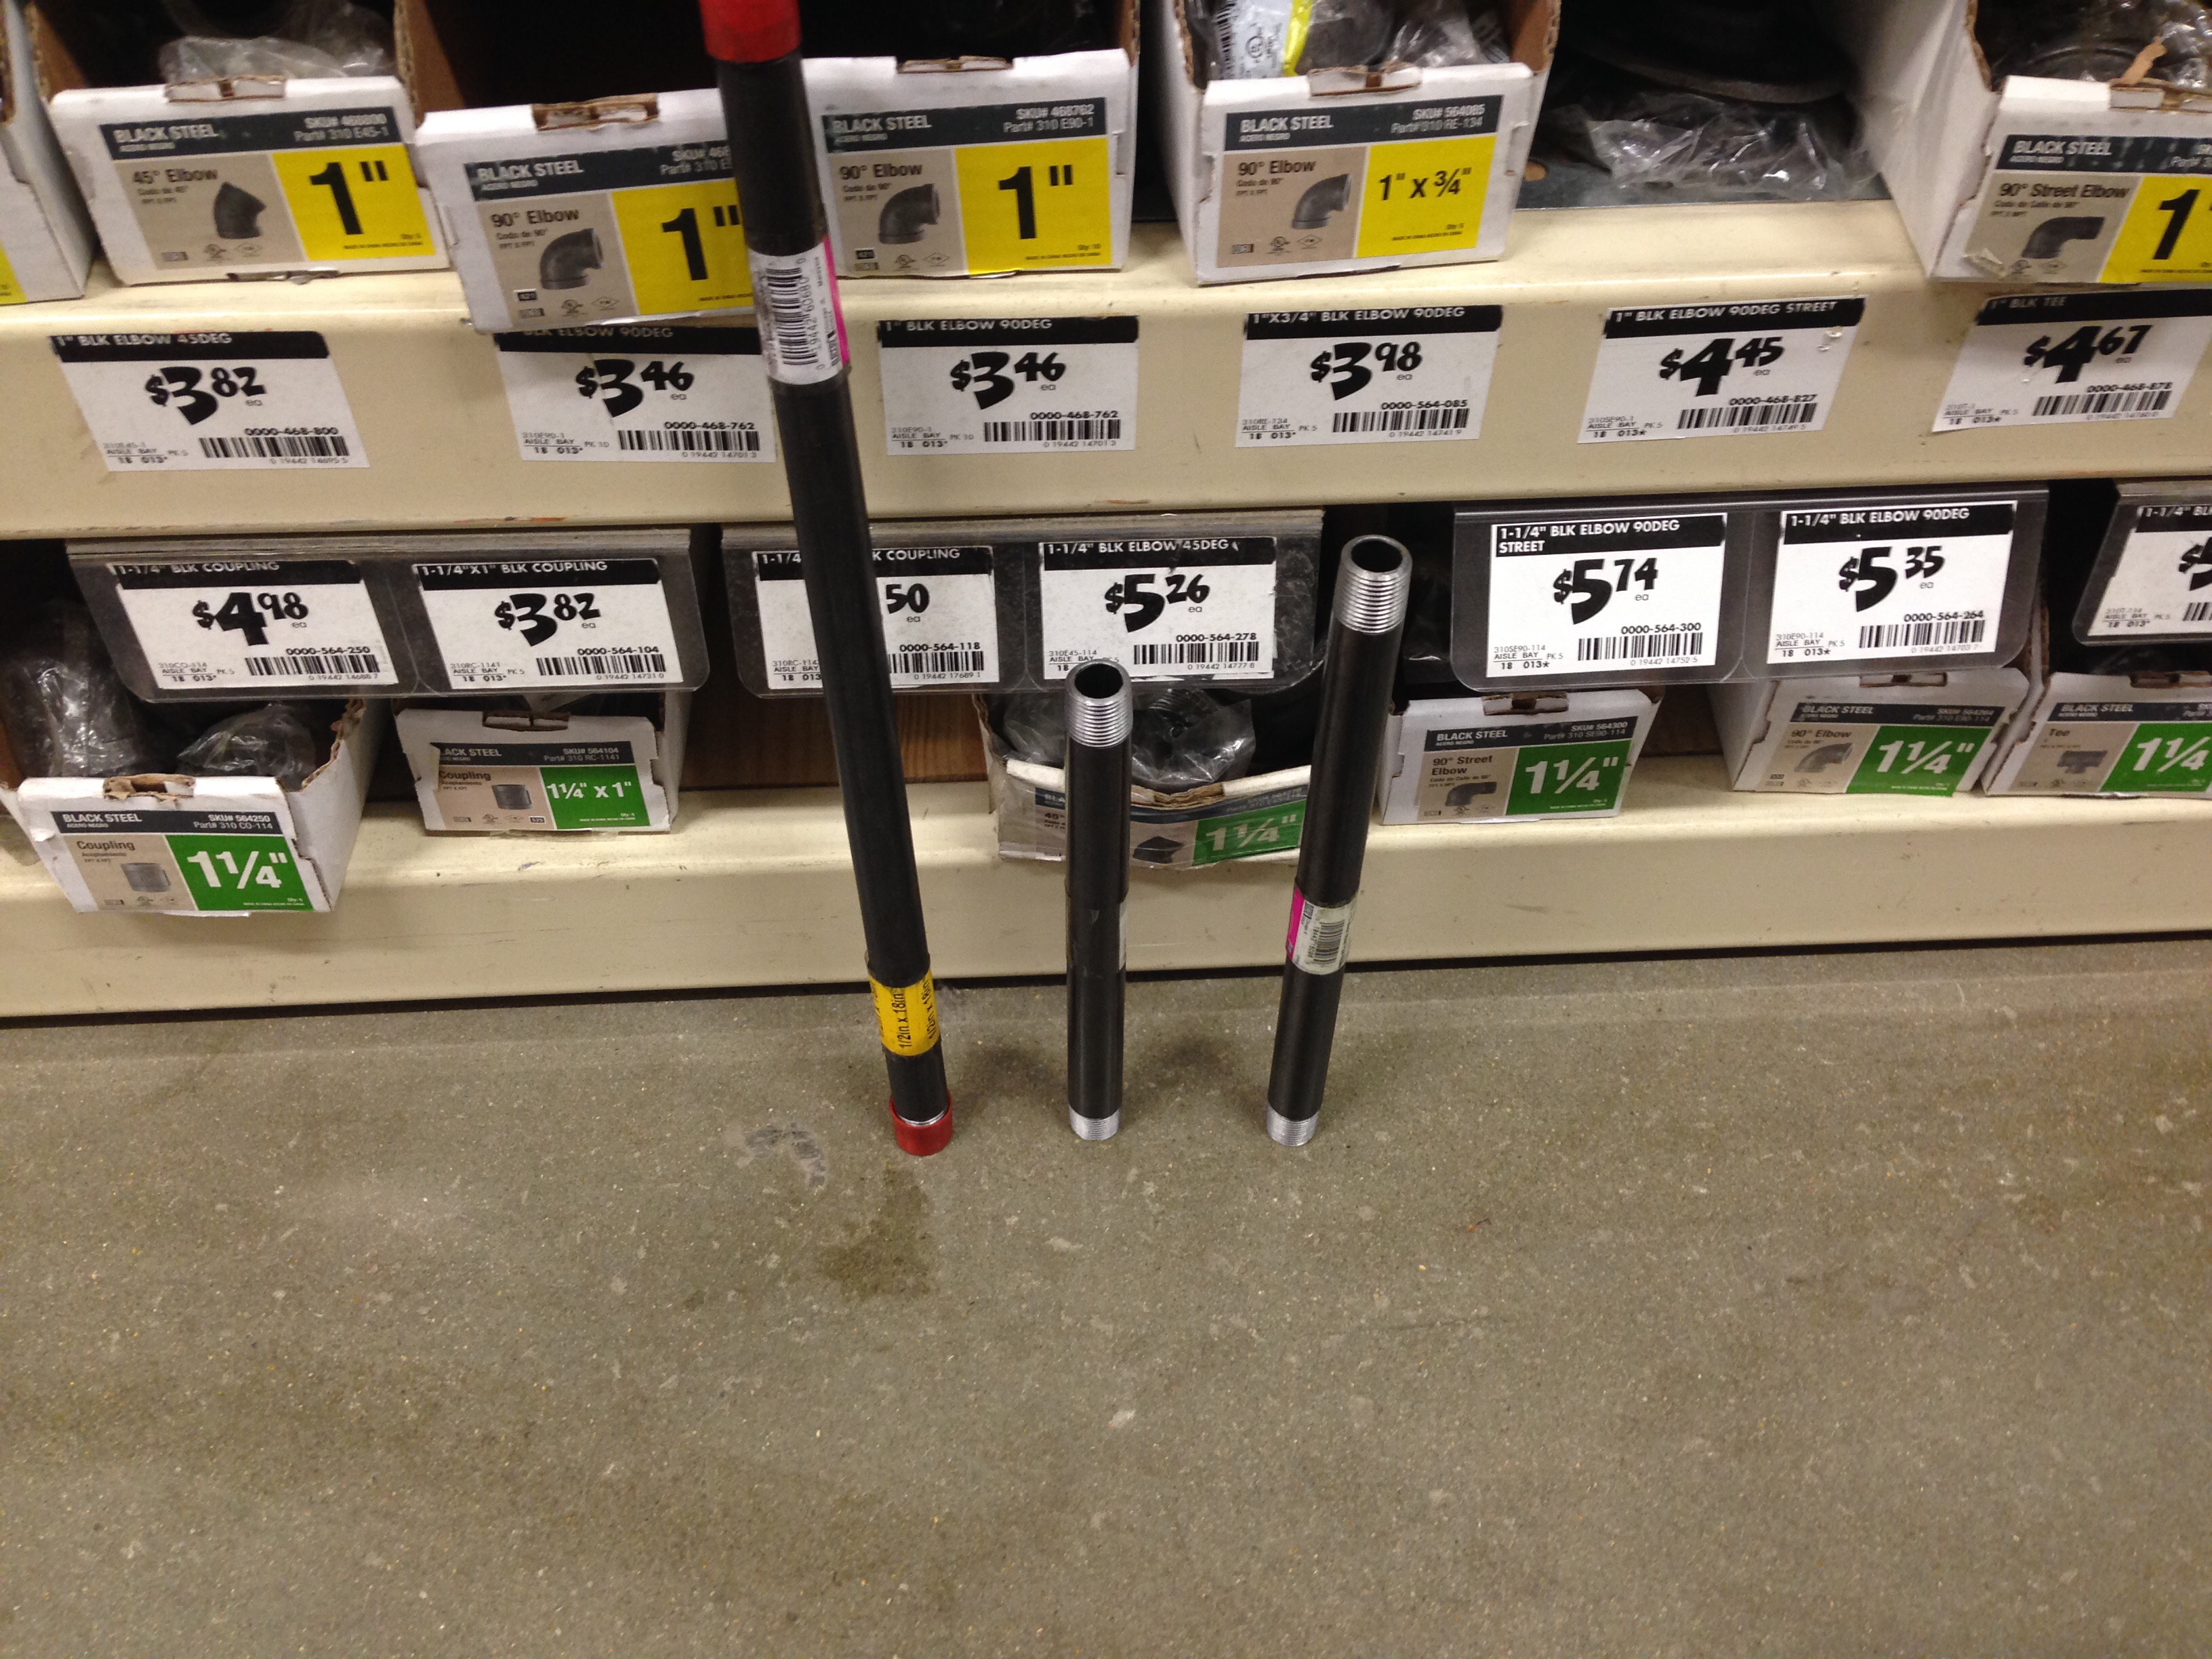
Saturday morning found be back in the Home Depot to fix my too tall bench. Below is a comparison between a 24″, a 10″ and a 12″pipe nipple.
After way too much time squinting at each one, I decided to go with the 10″ nipples and add four pipe tees (in case I want to add a bottom platform under the bench after all).
Also, note the difference in pipe threading length between the two in the below picture.

When these are screwed into the flanges as legs, this will result in an imbalanced, teetering bench. So I was sure to check the thread length on each nipple between heading to check-out.
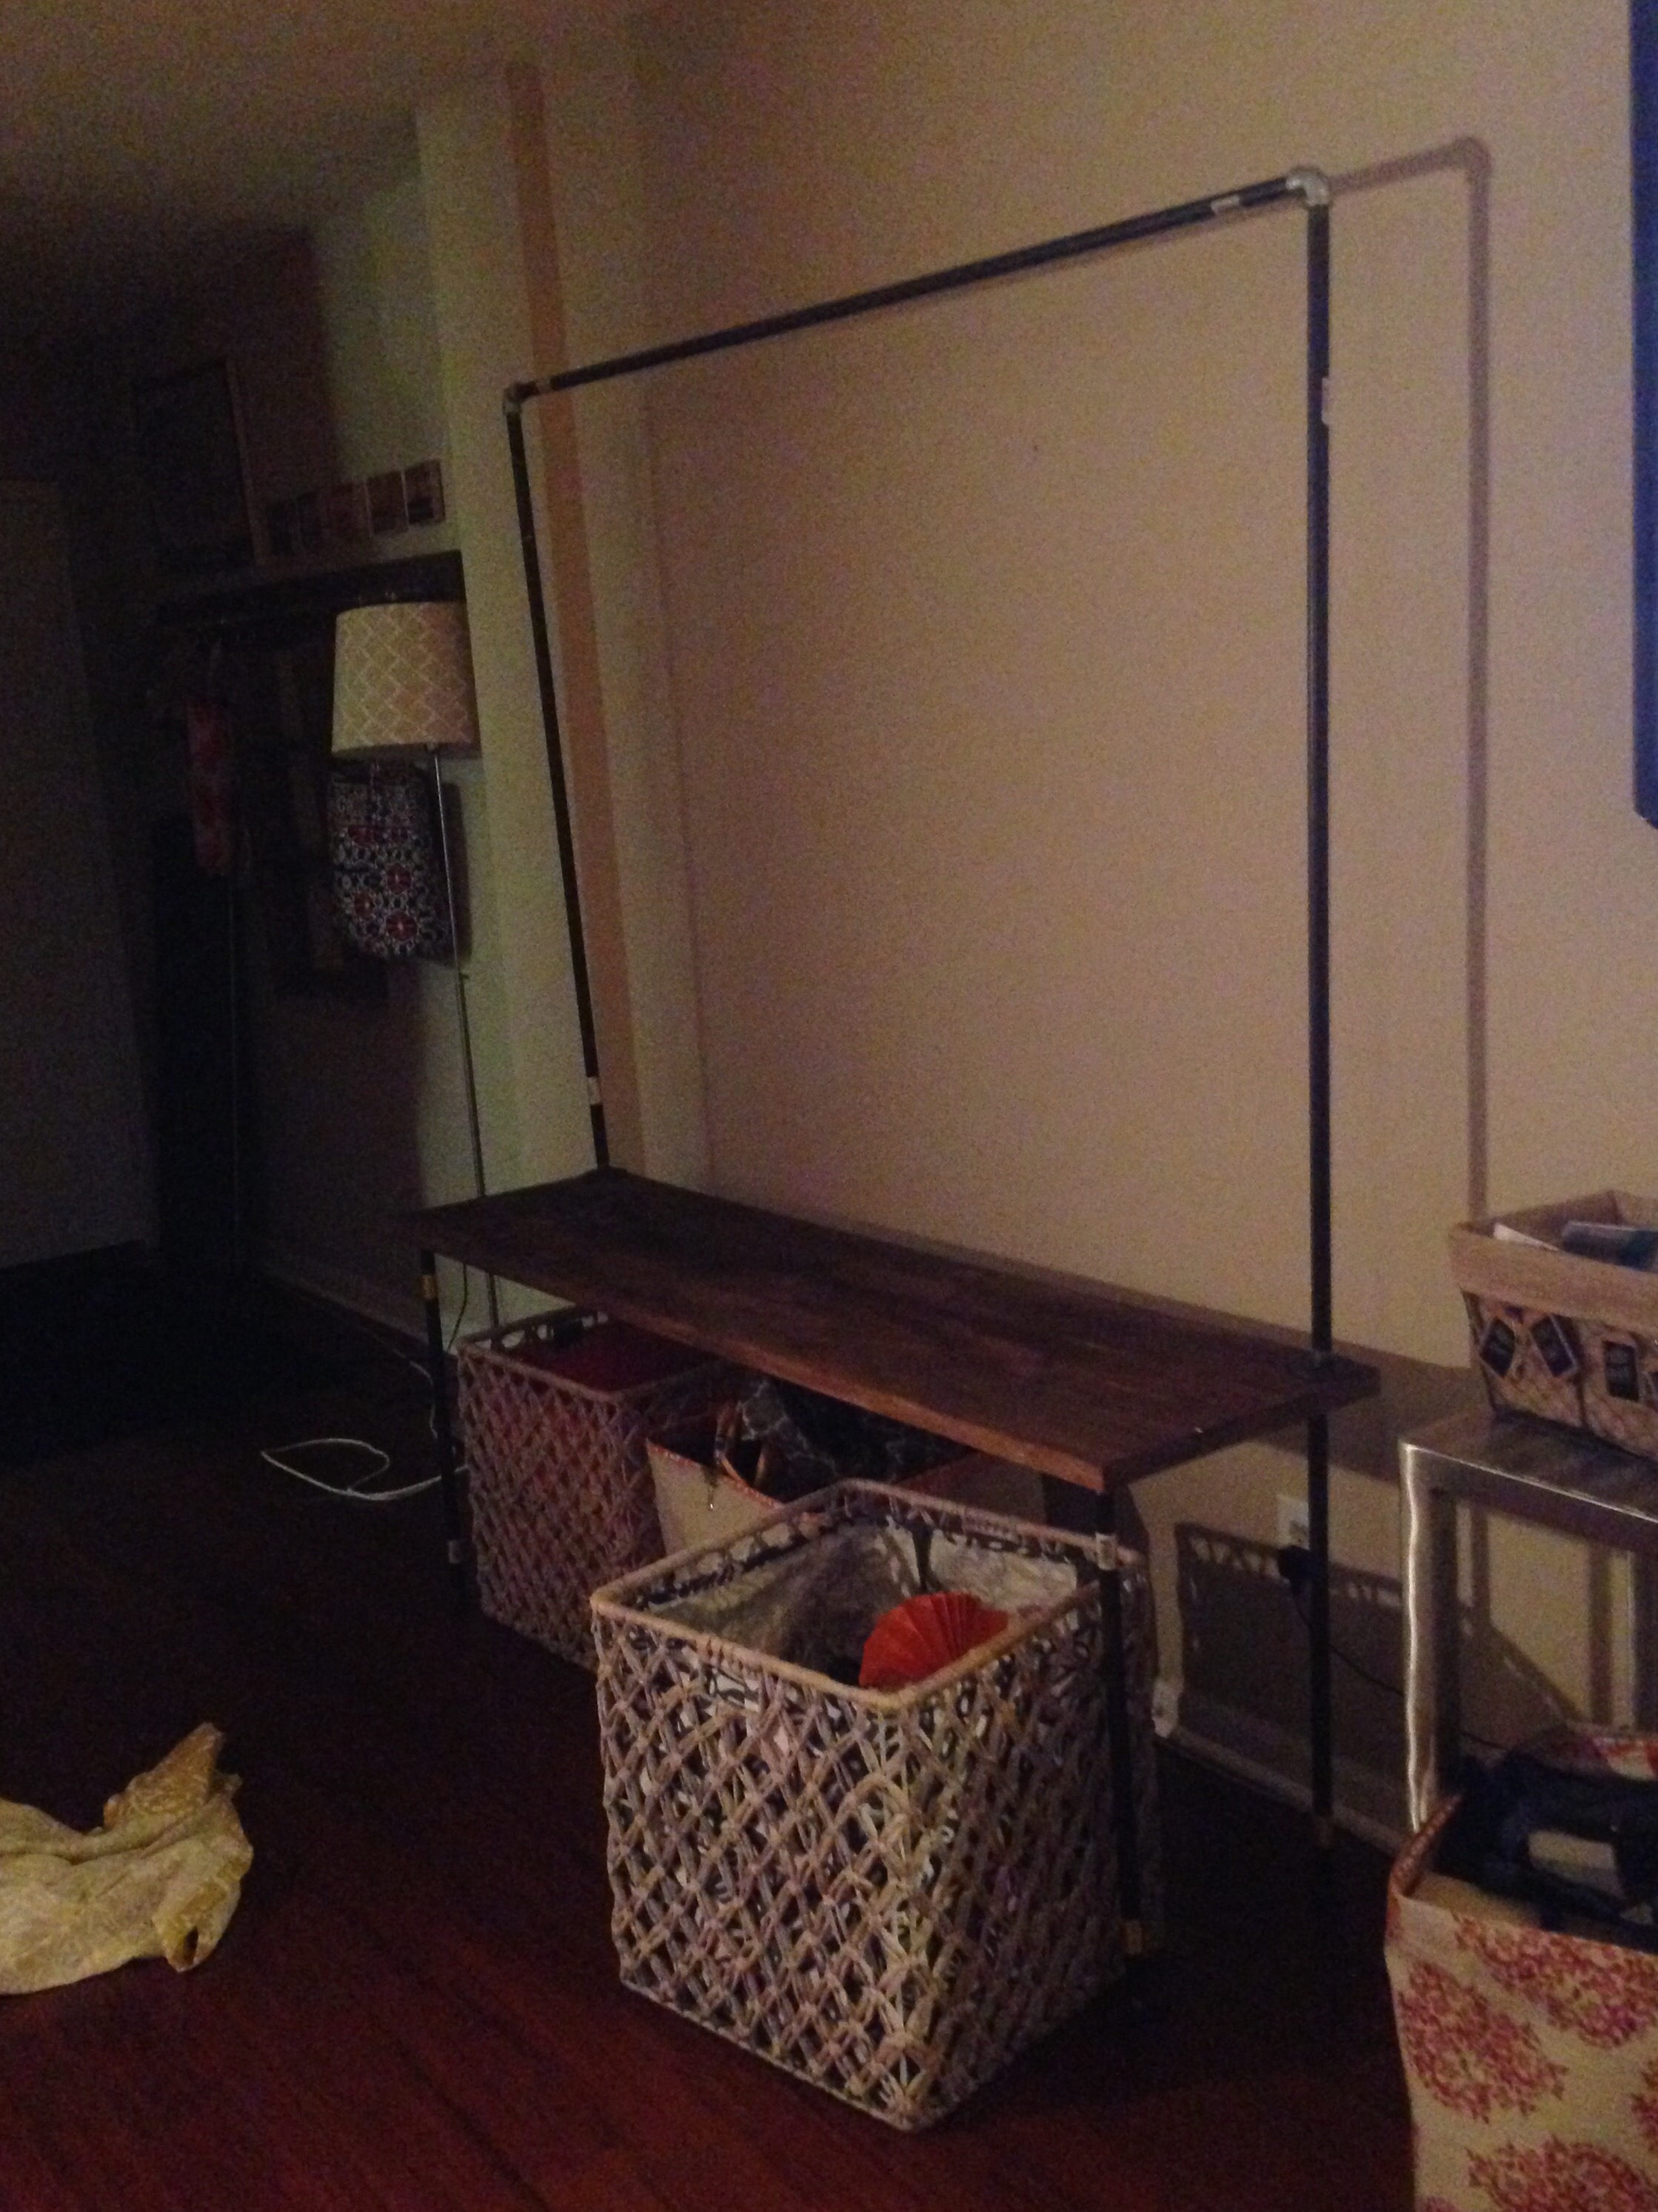
The height of the bench is much better (using the 10″ pipe nipples, combined with the tees). Now it’s time to add the casters.
I tried these caster sockets form Ace Hardware to hold the caster wheel spoke. However it was way too big for a snug fit.
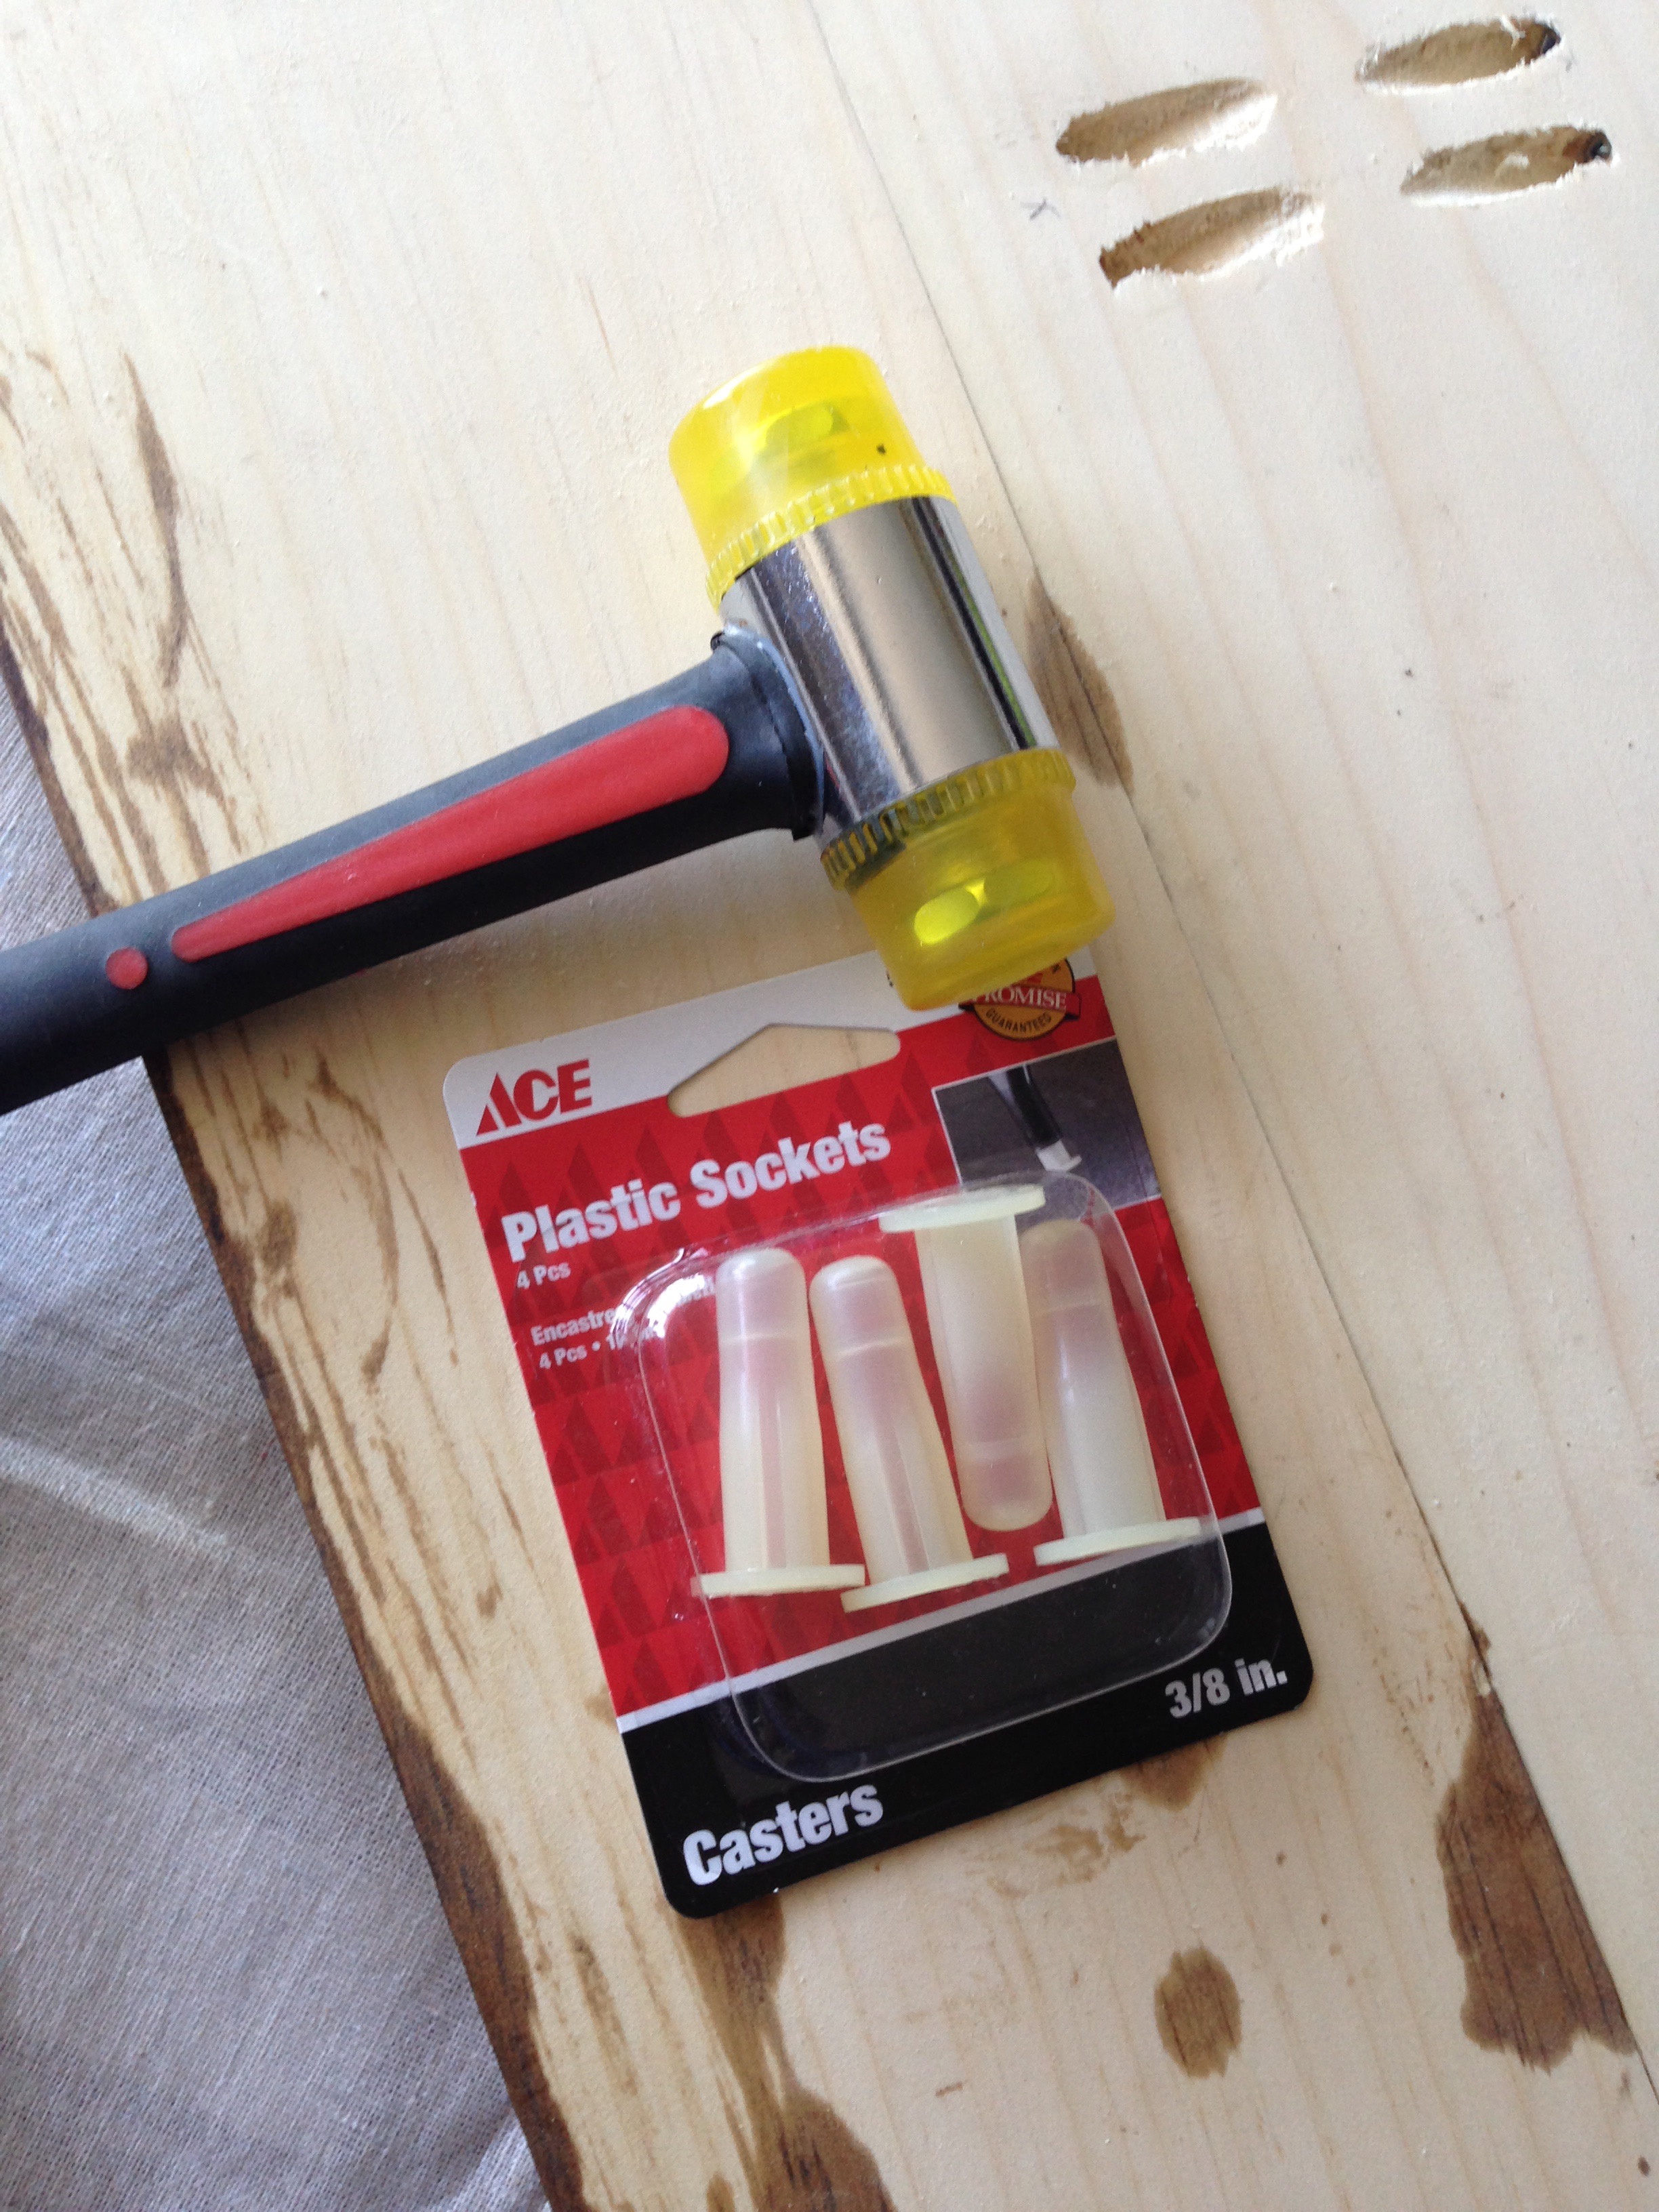
I added the socket to the bottom of each leg anyway, then make yet another trip to the hardware store for epoxy to hard glue the caster into the socket.

I added the epoxy to the caster sockets, inserted the spoke of each caster and then left them overnight to dry.
Day 4: Sunday – Completion of the mobile pipe hall tree.
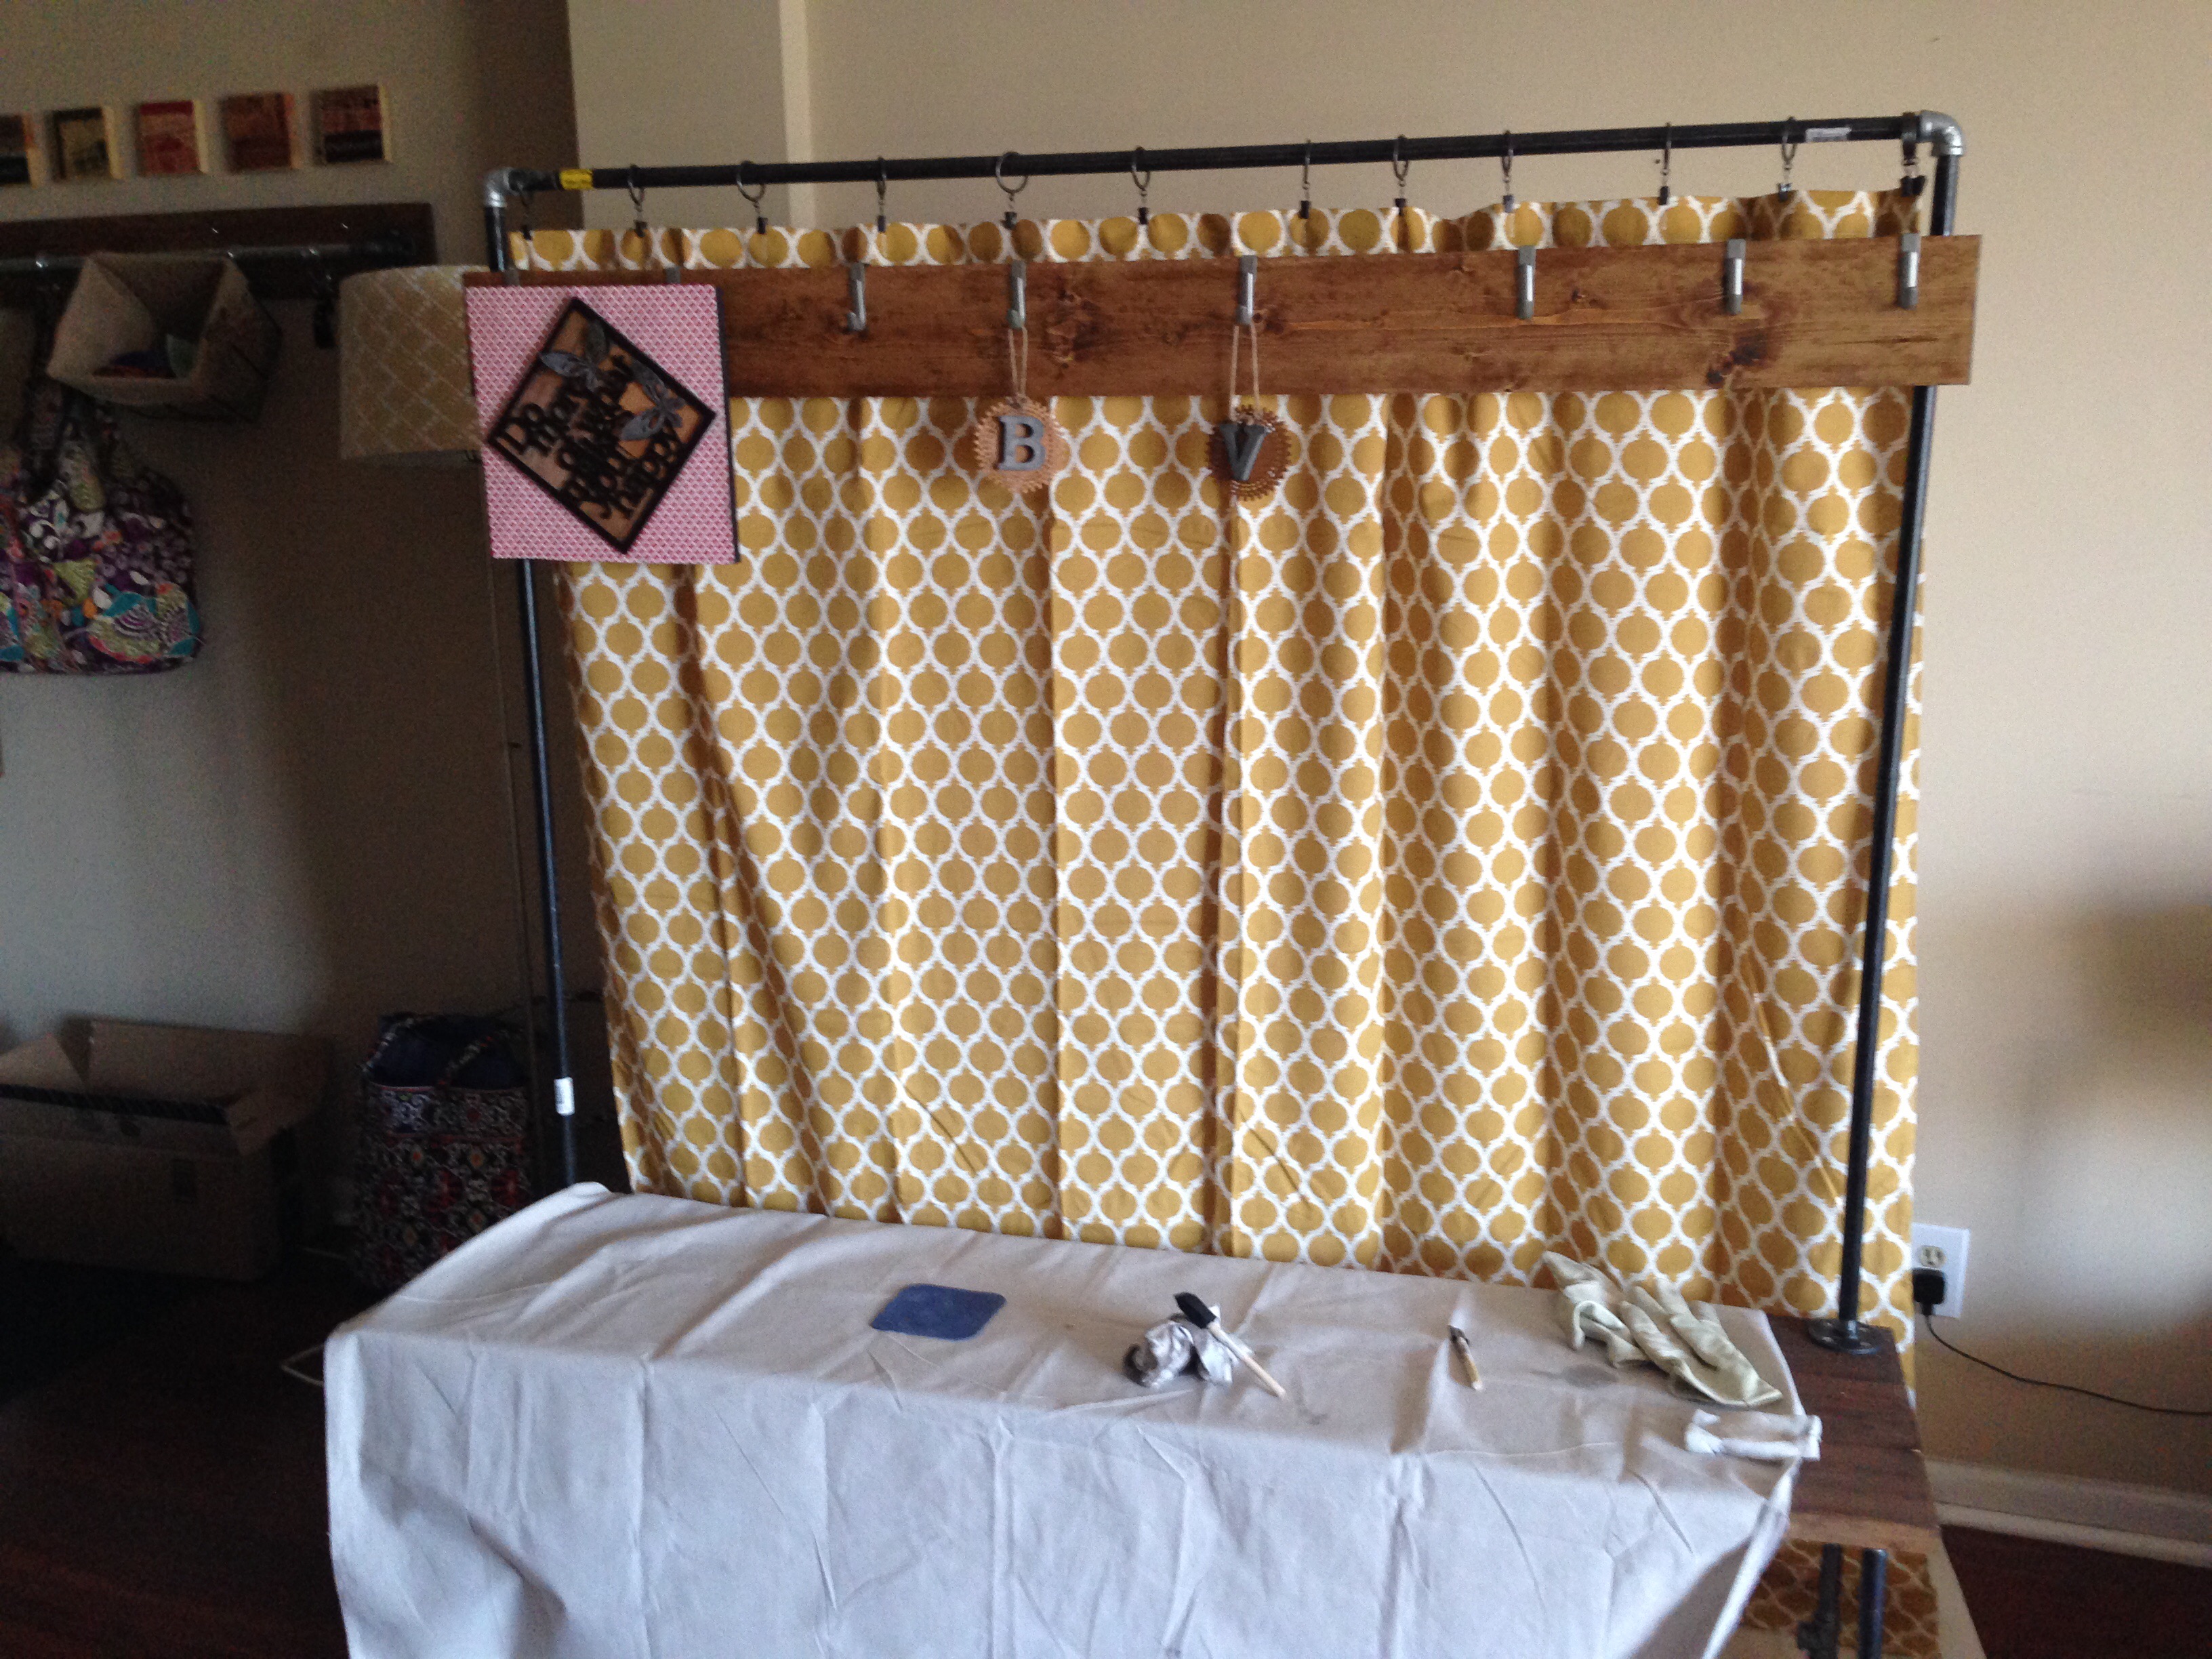
With the bench on wheels ready to go, I turned my attention to decorating the pipe stand with hanging fabric.
To get a visual on how it will look, I used Spectrum over-cabinet door hooks to hang a curtain from the pipe stand rod.
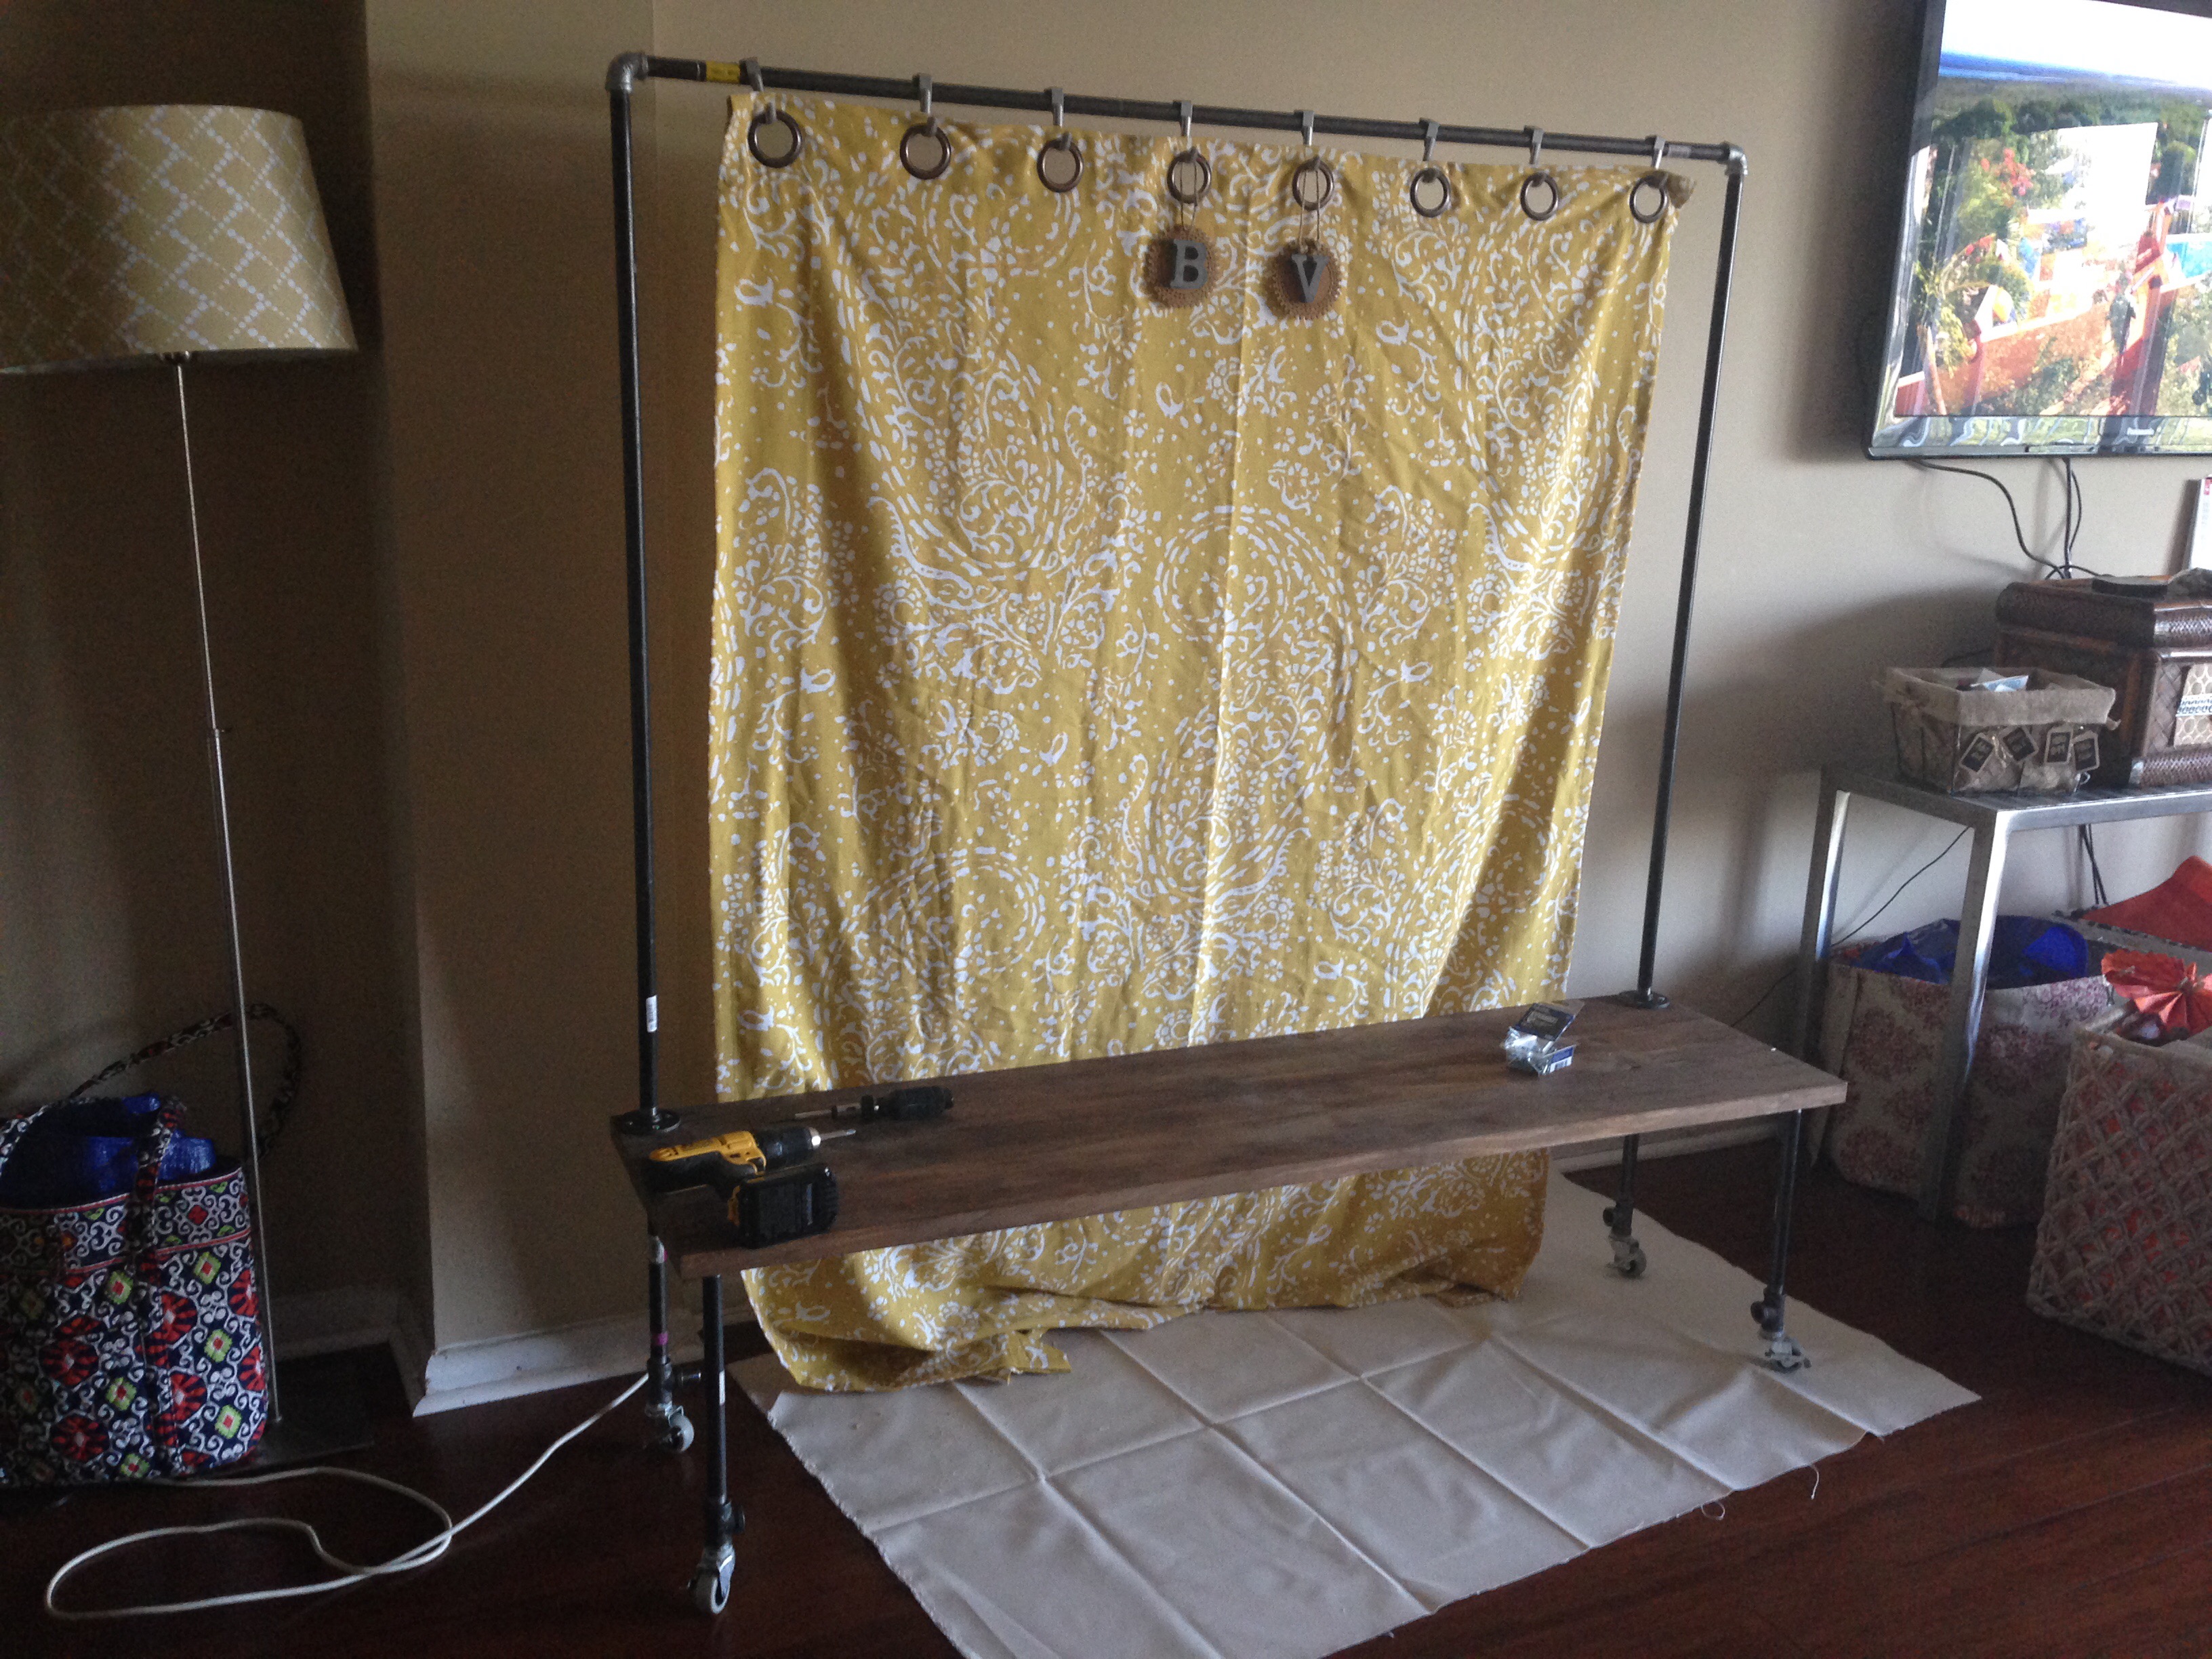
Looks great so far, but these hooks will eventually be transferred to the 1 x 4 board will be added to the front of the stand.
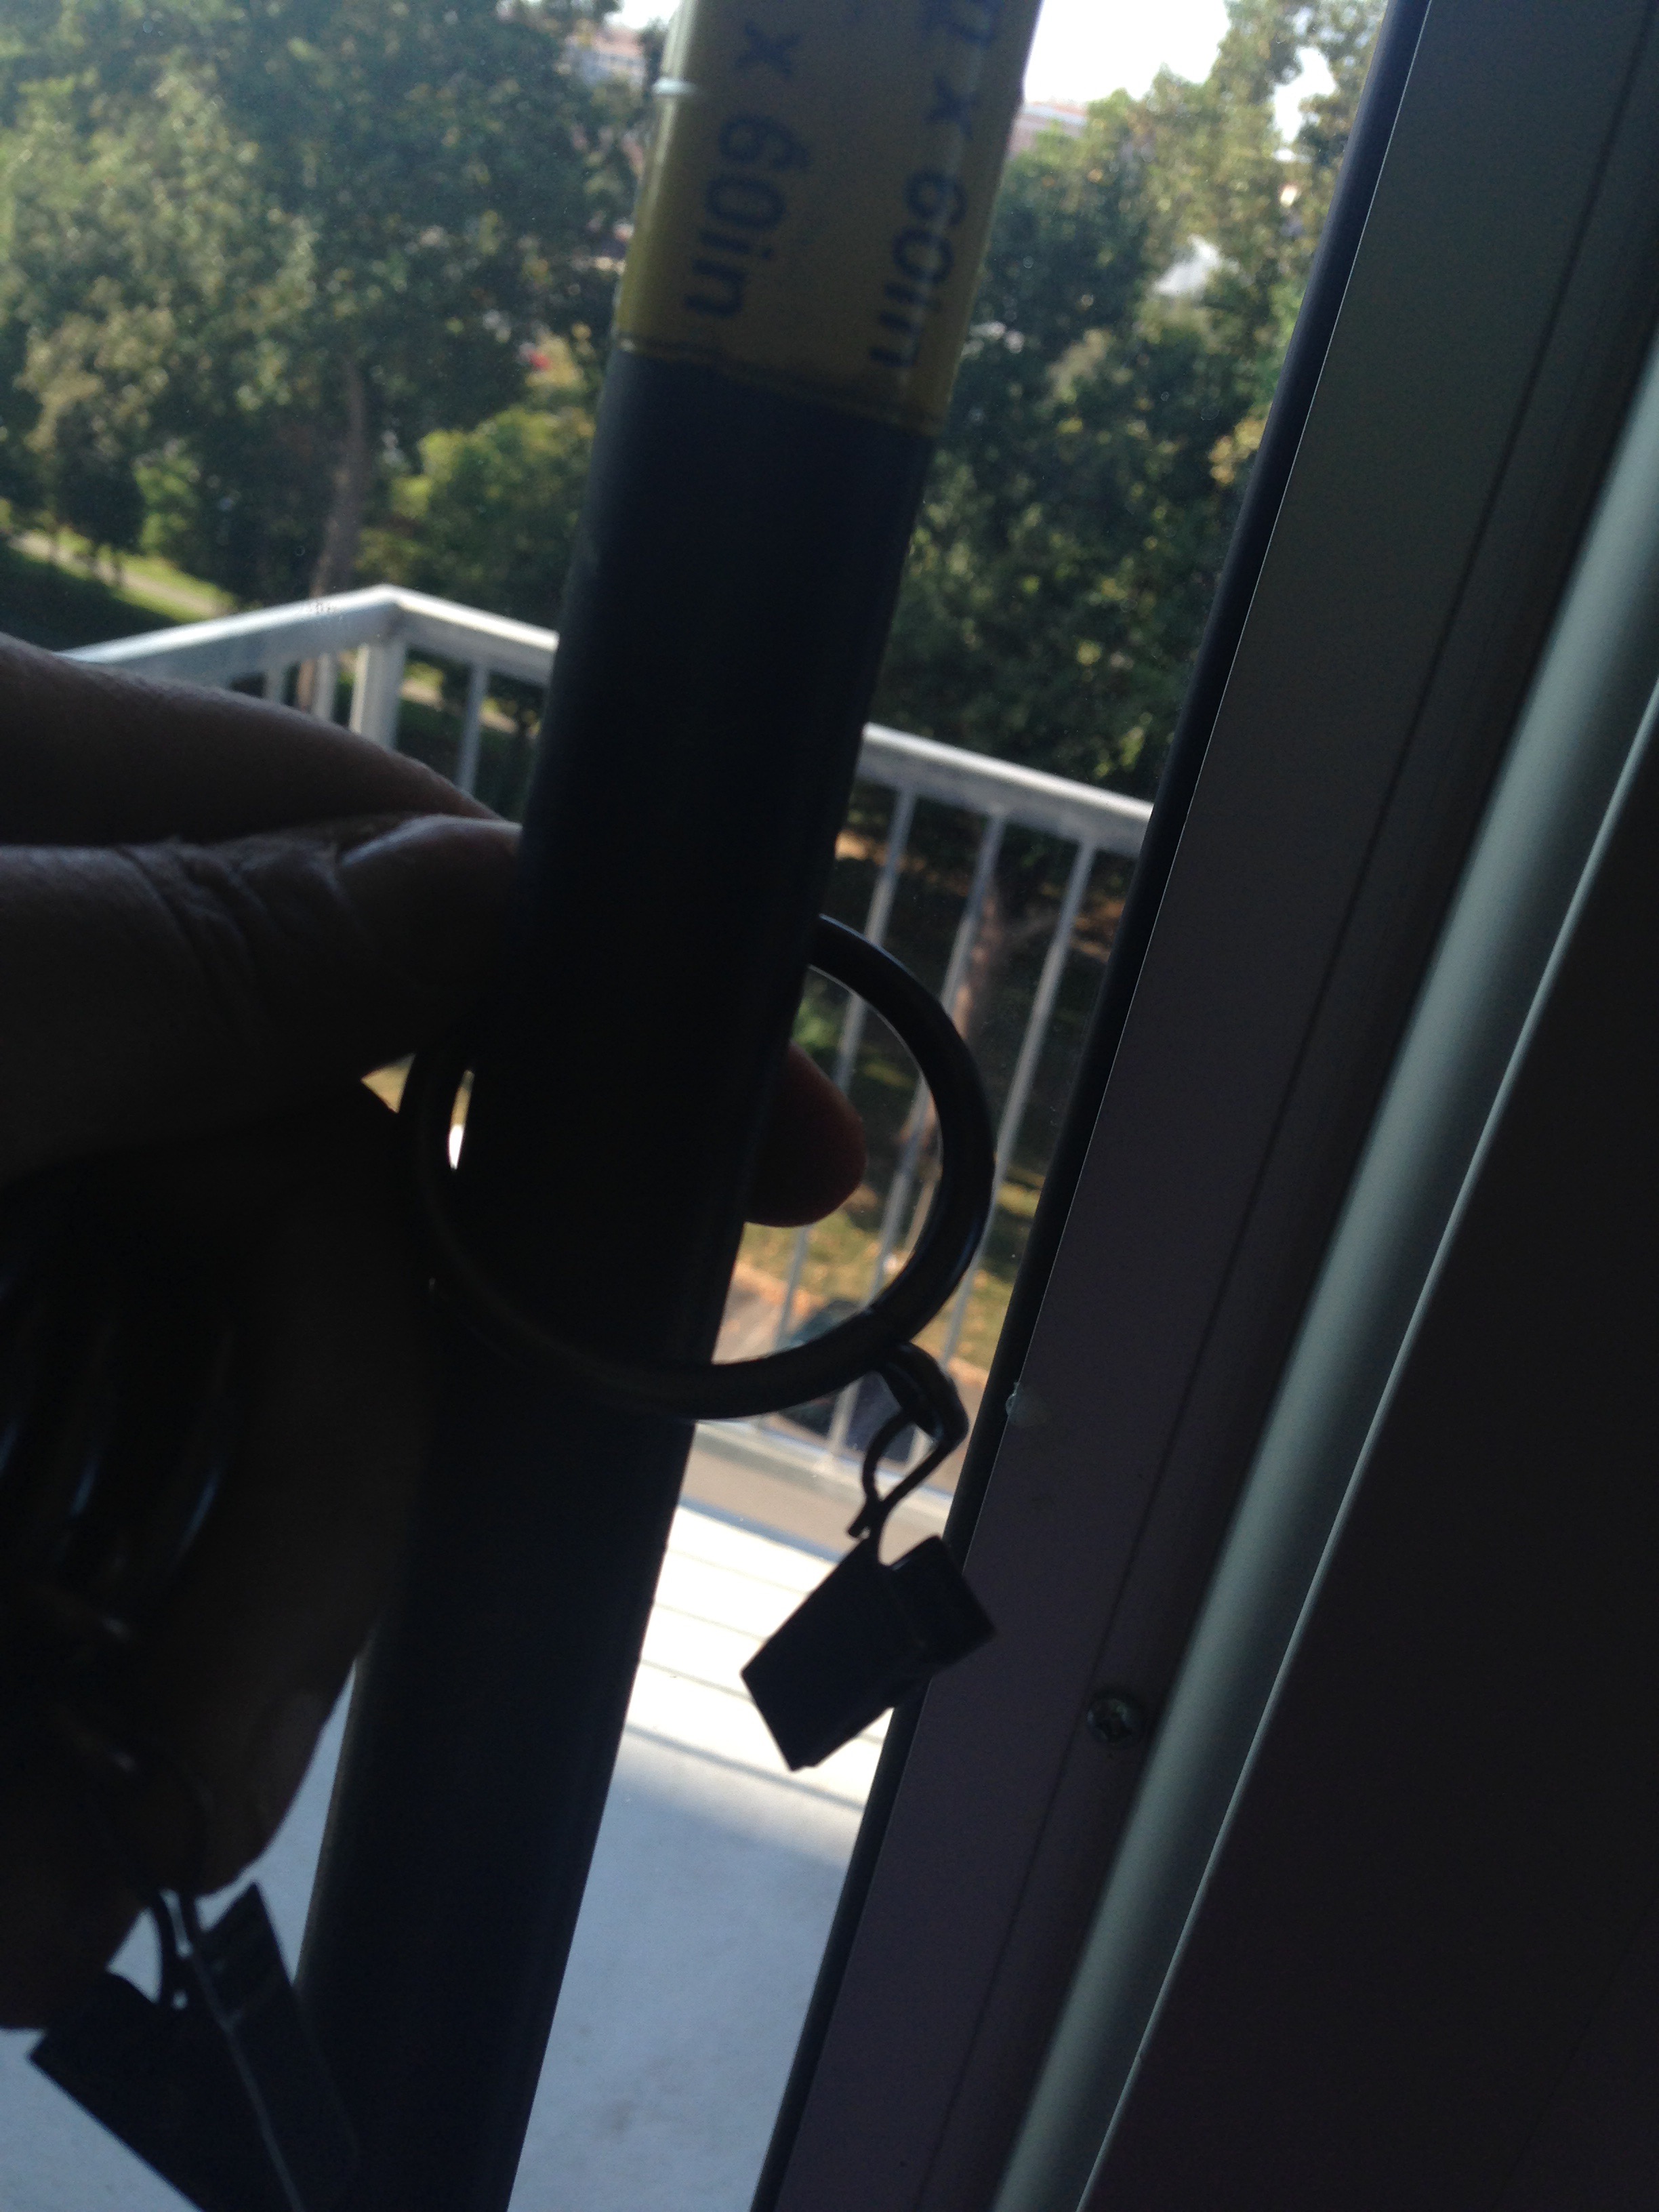
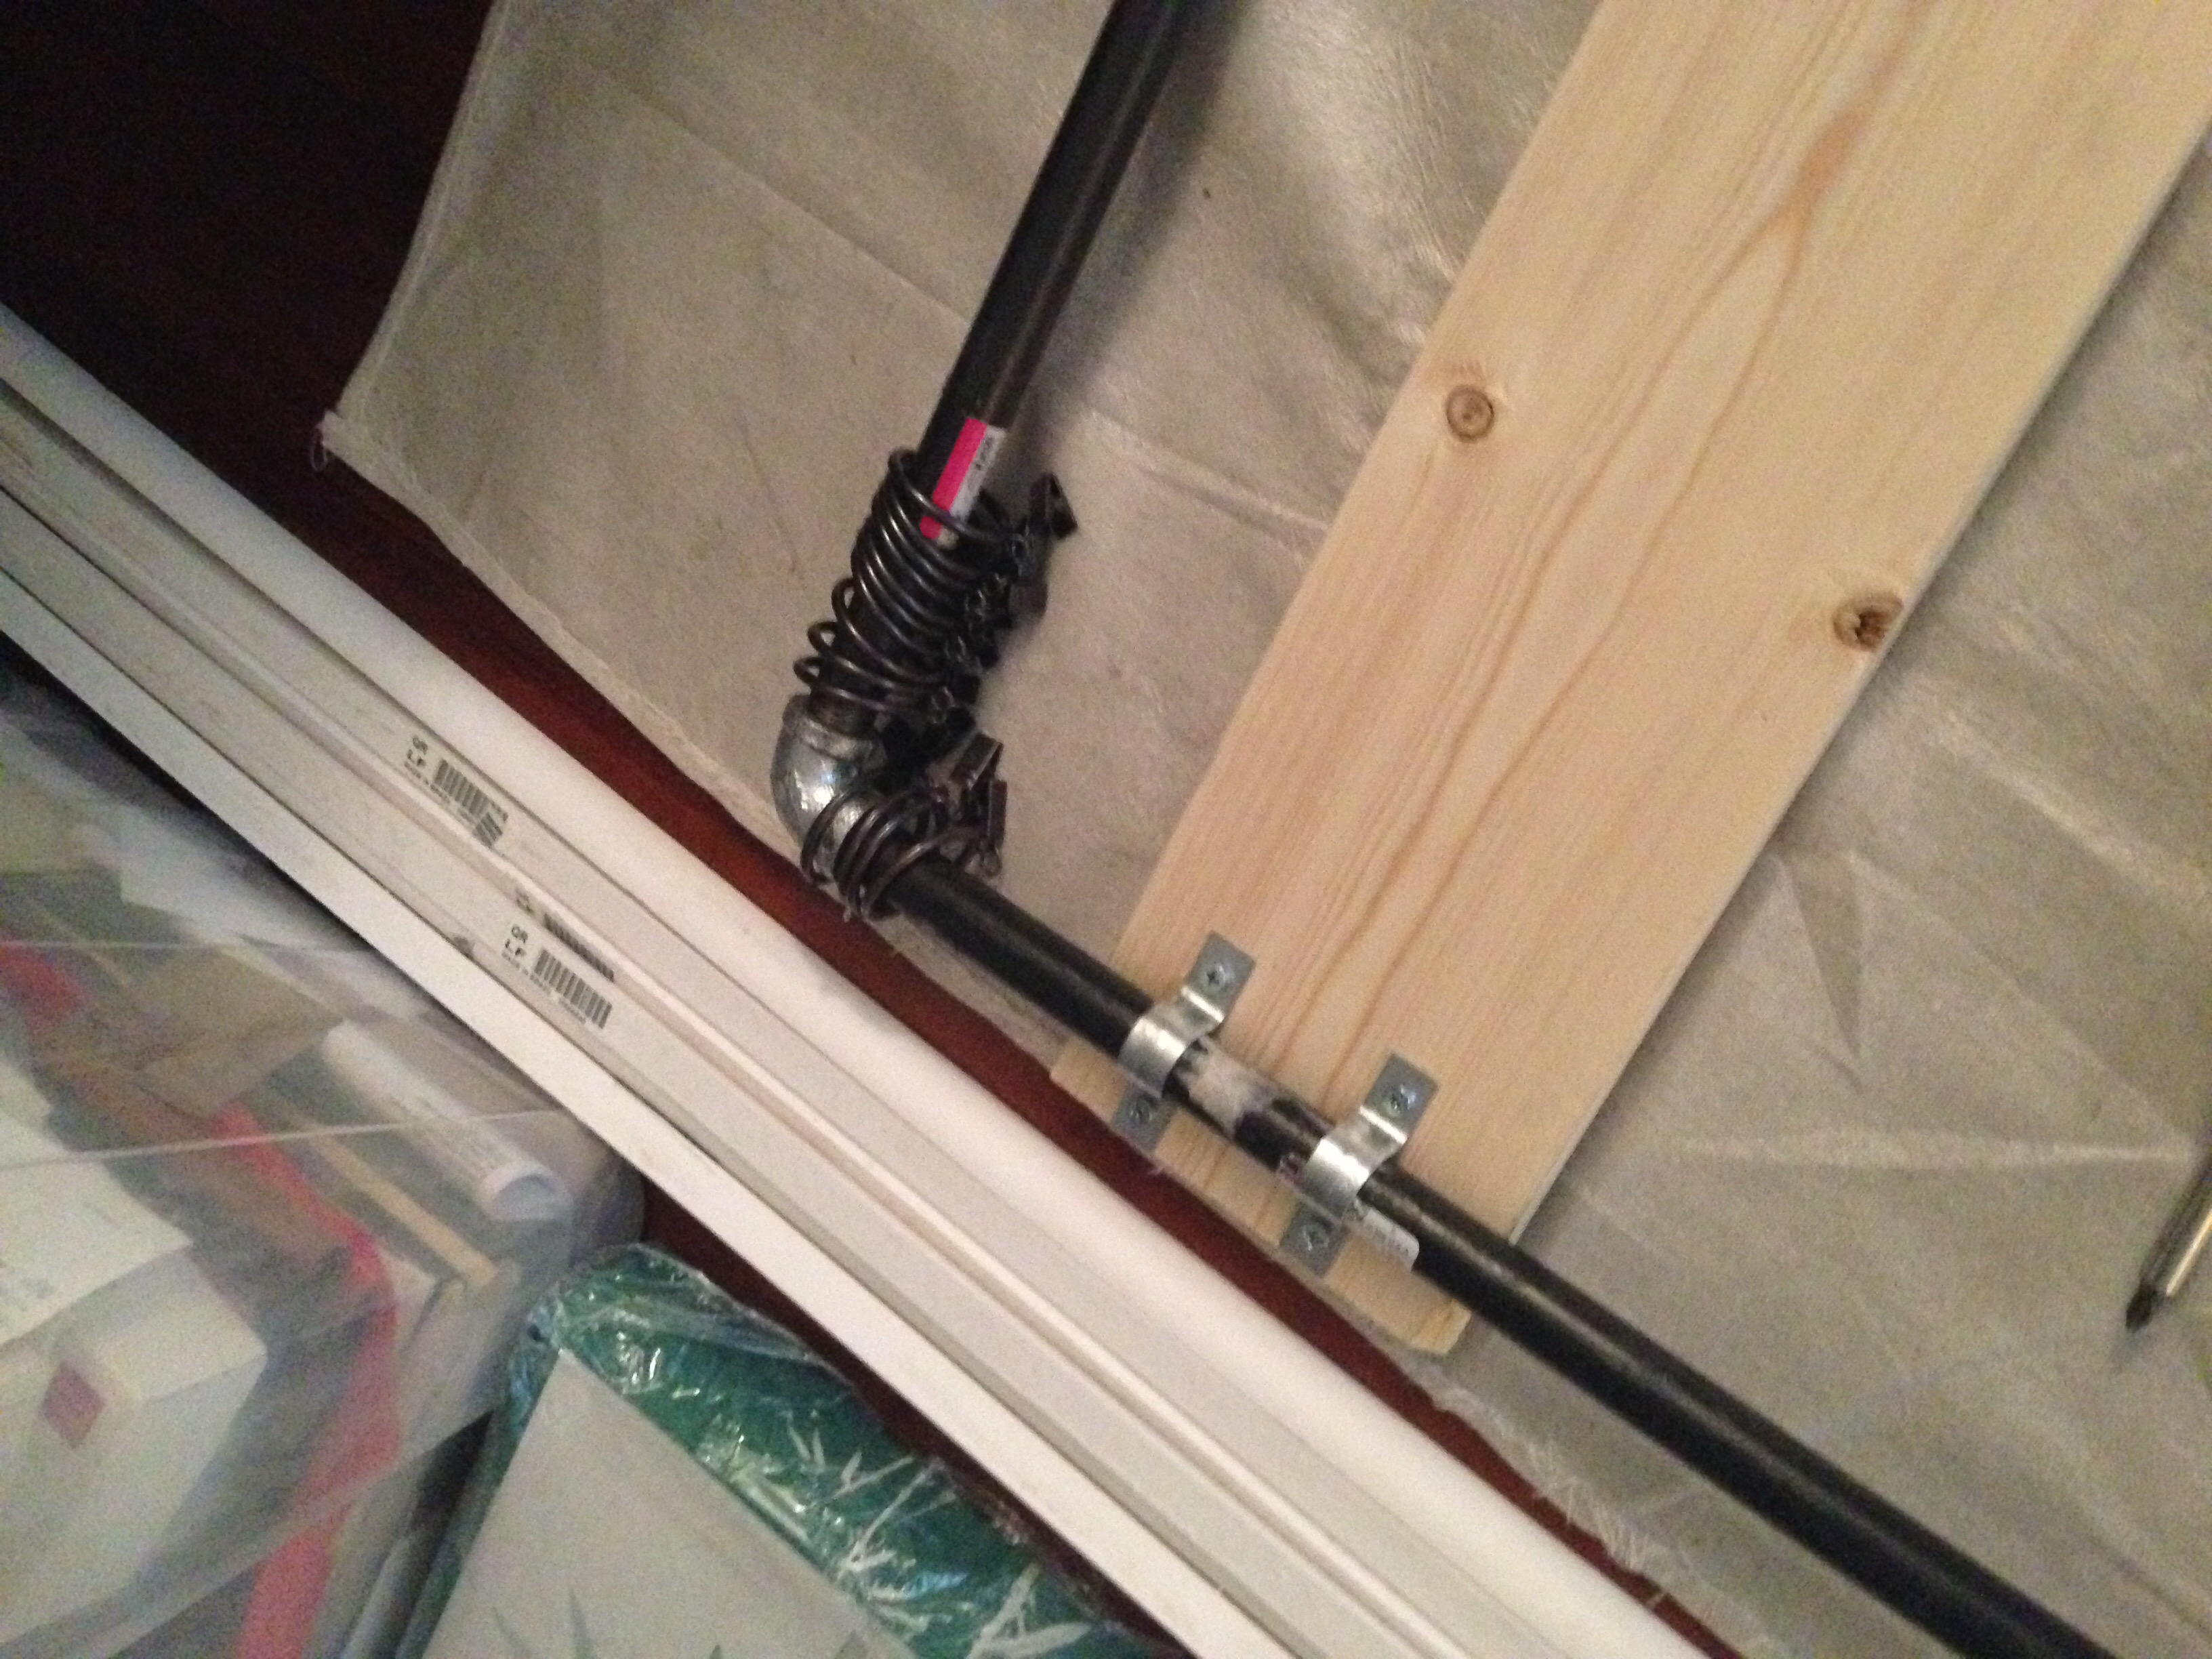
For hanging curtains from the pipe stand rod, I added curtain rings directly to the rod.
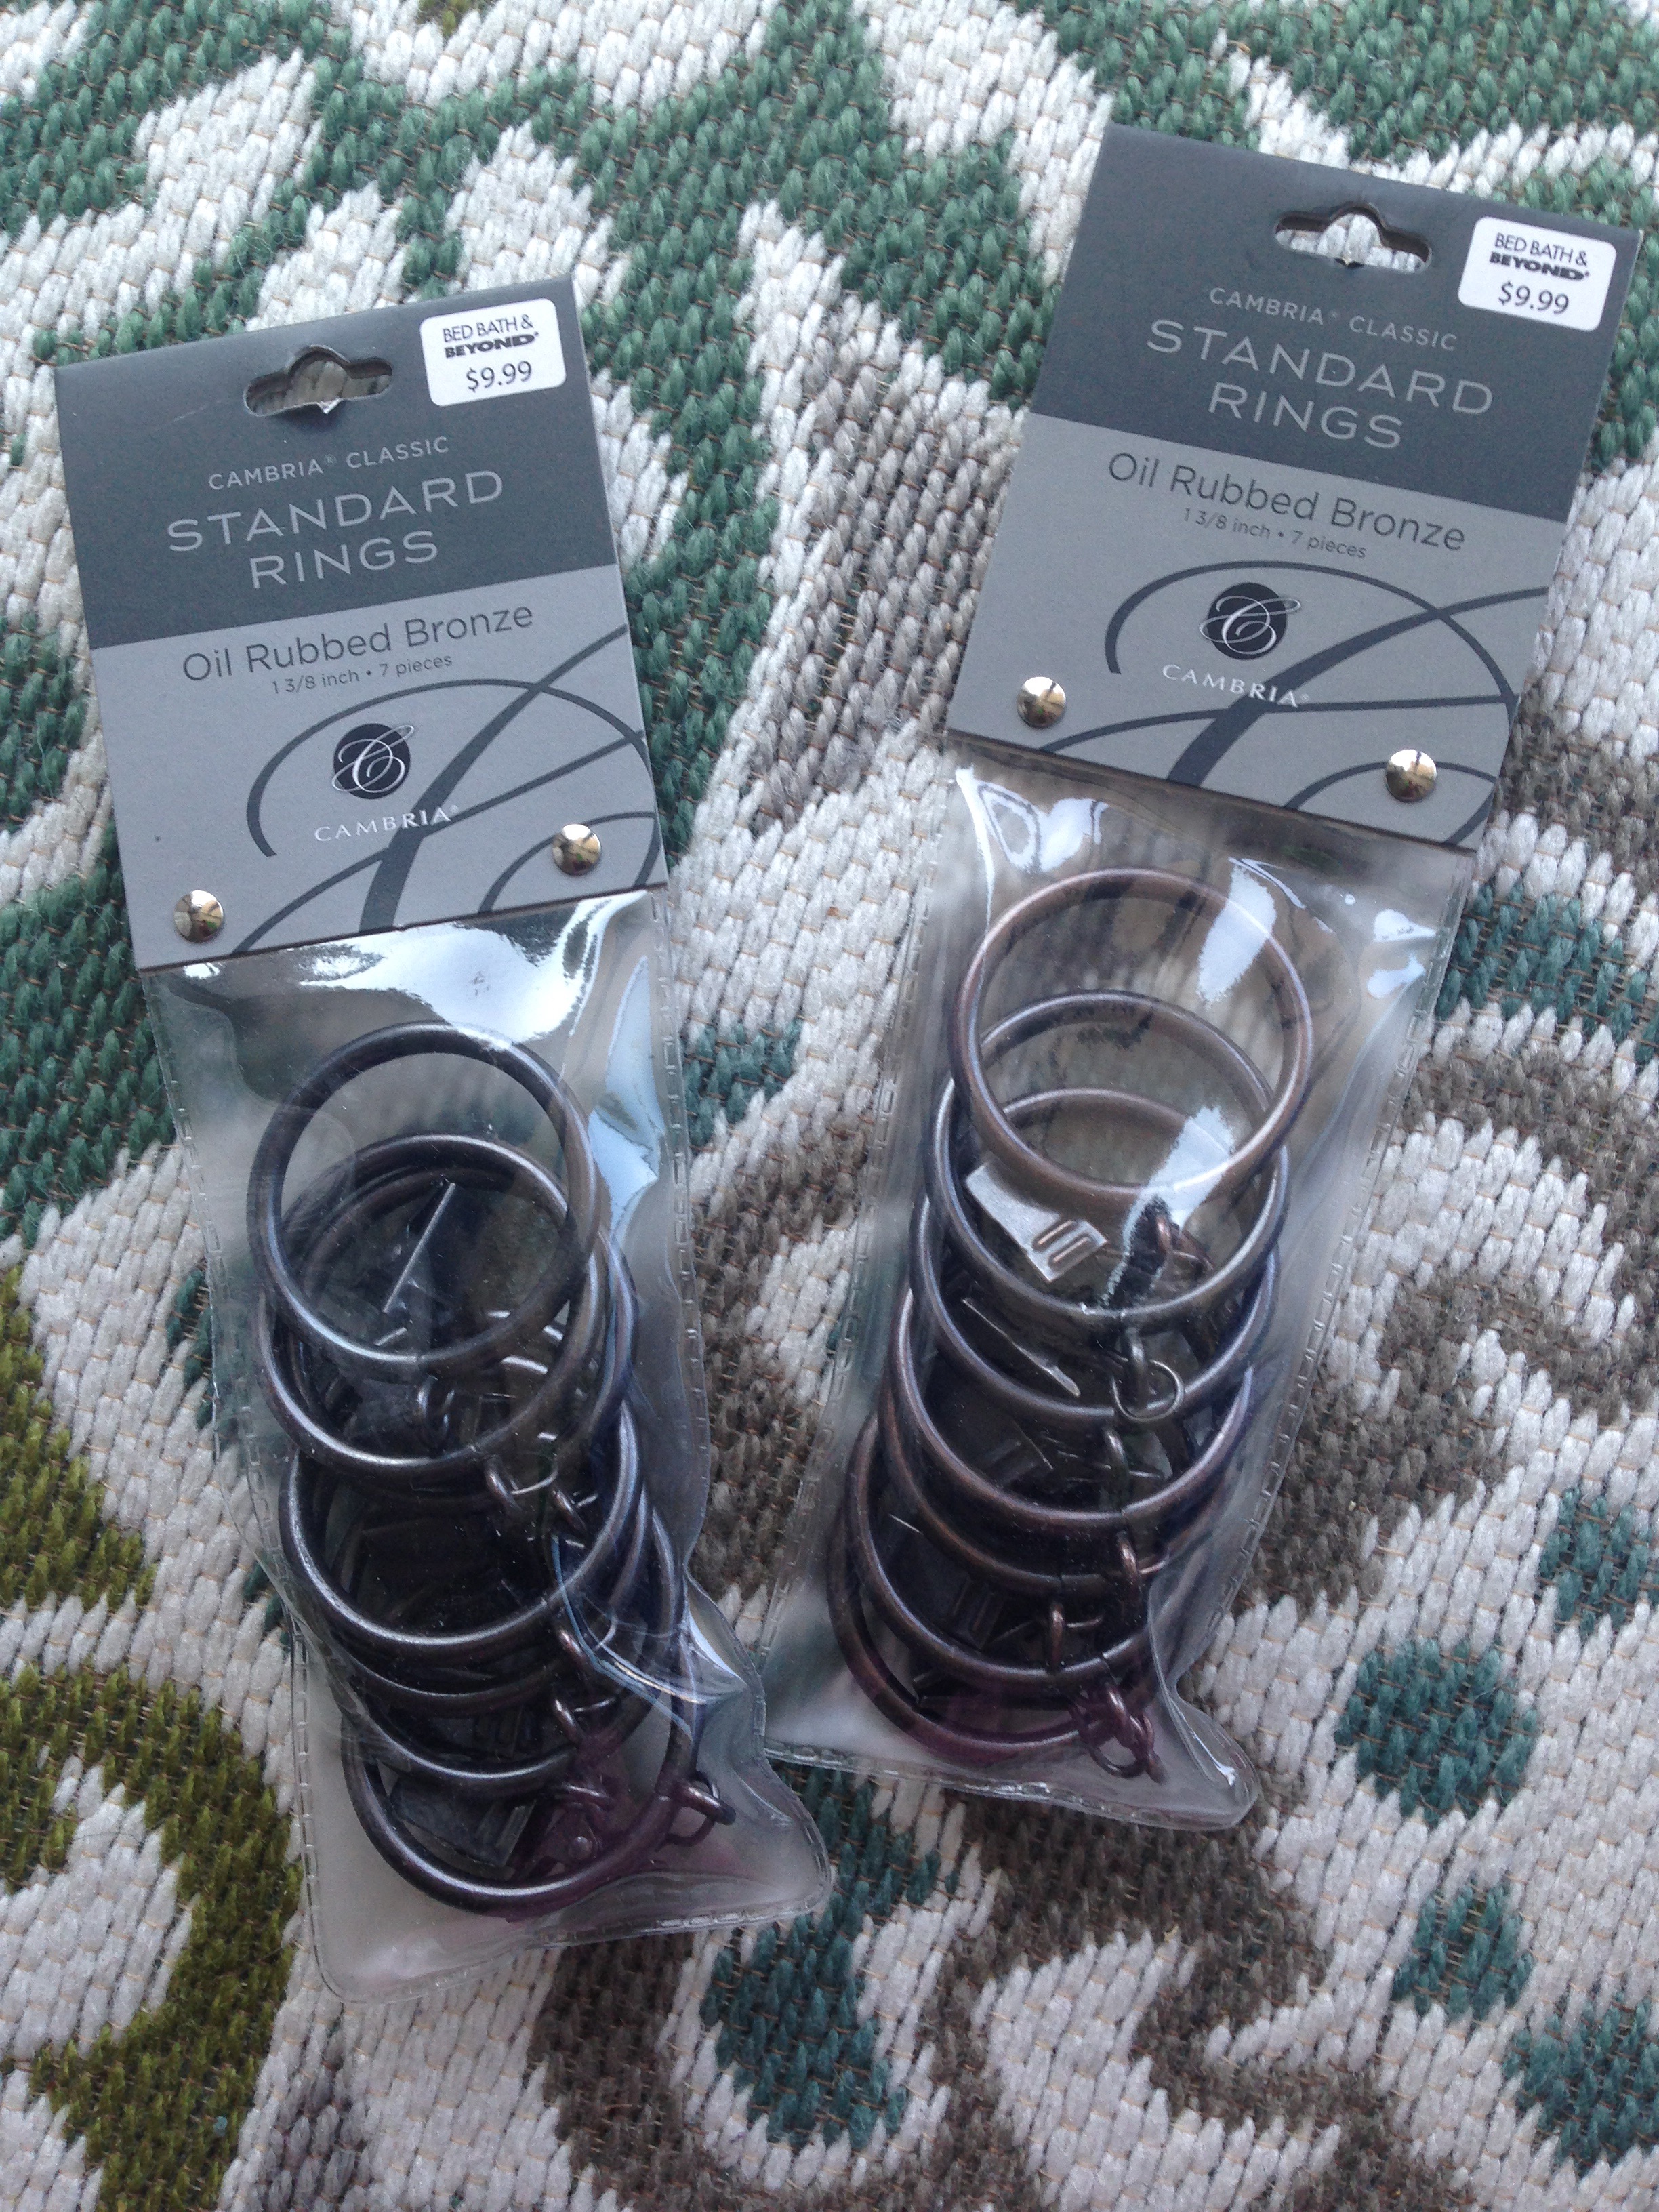
This required that I remove the rod from one side of the pipe stand (by unscrewing one of the vertical pipes from an elbow, then unscrewing the elbow from the center rod. I slipped on the curtain rings, and then put the stand back together.
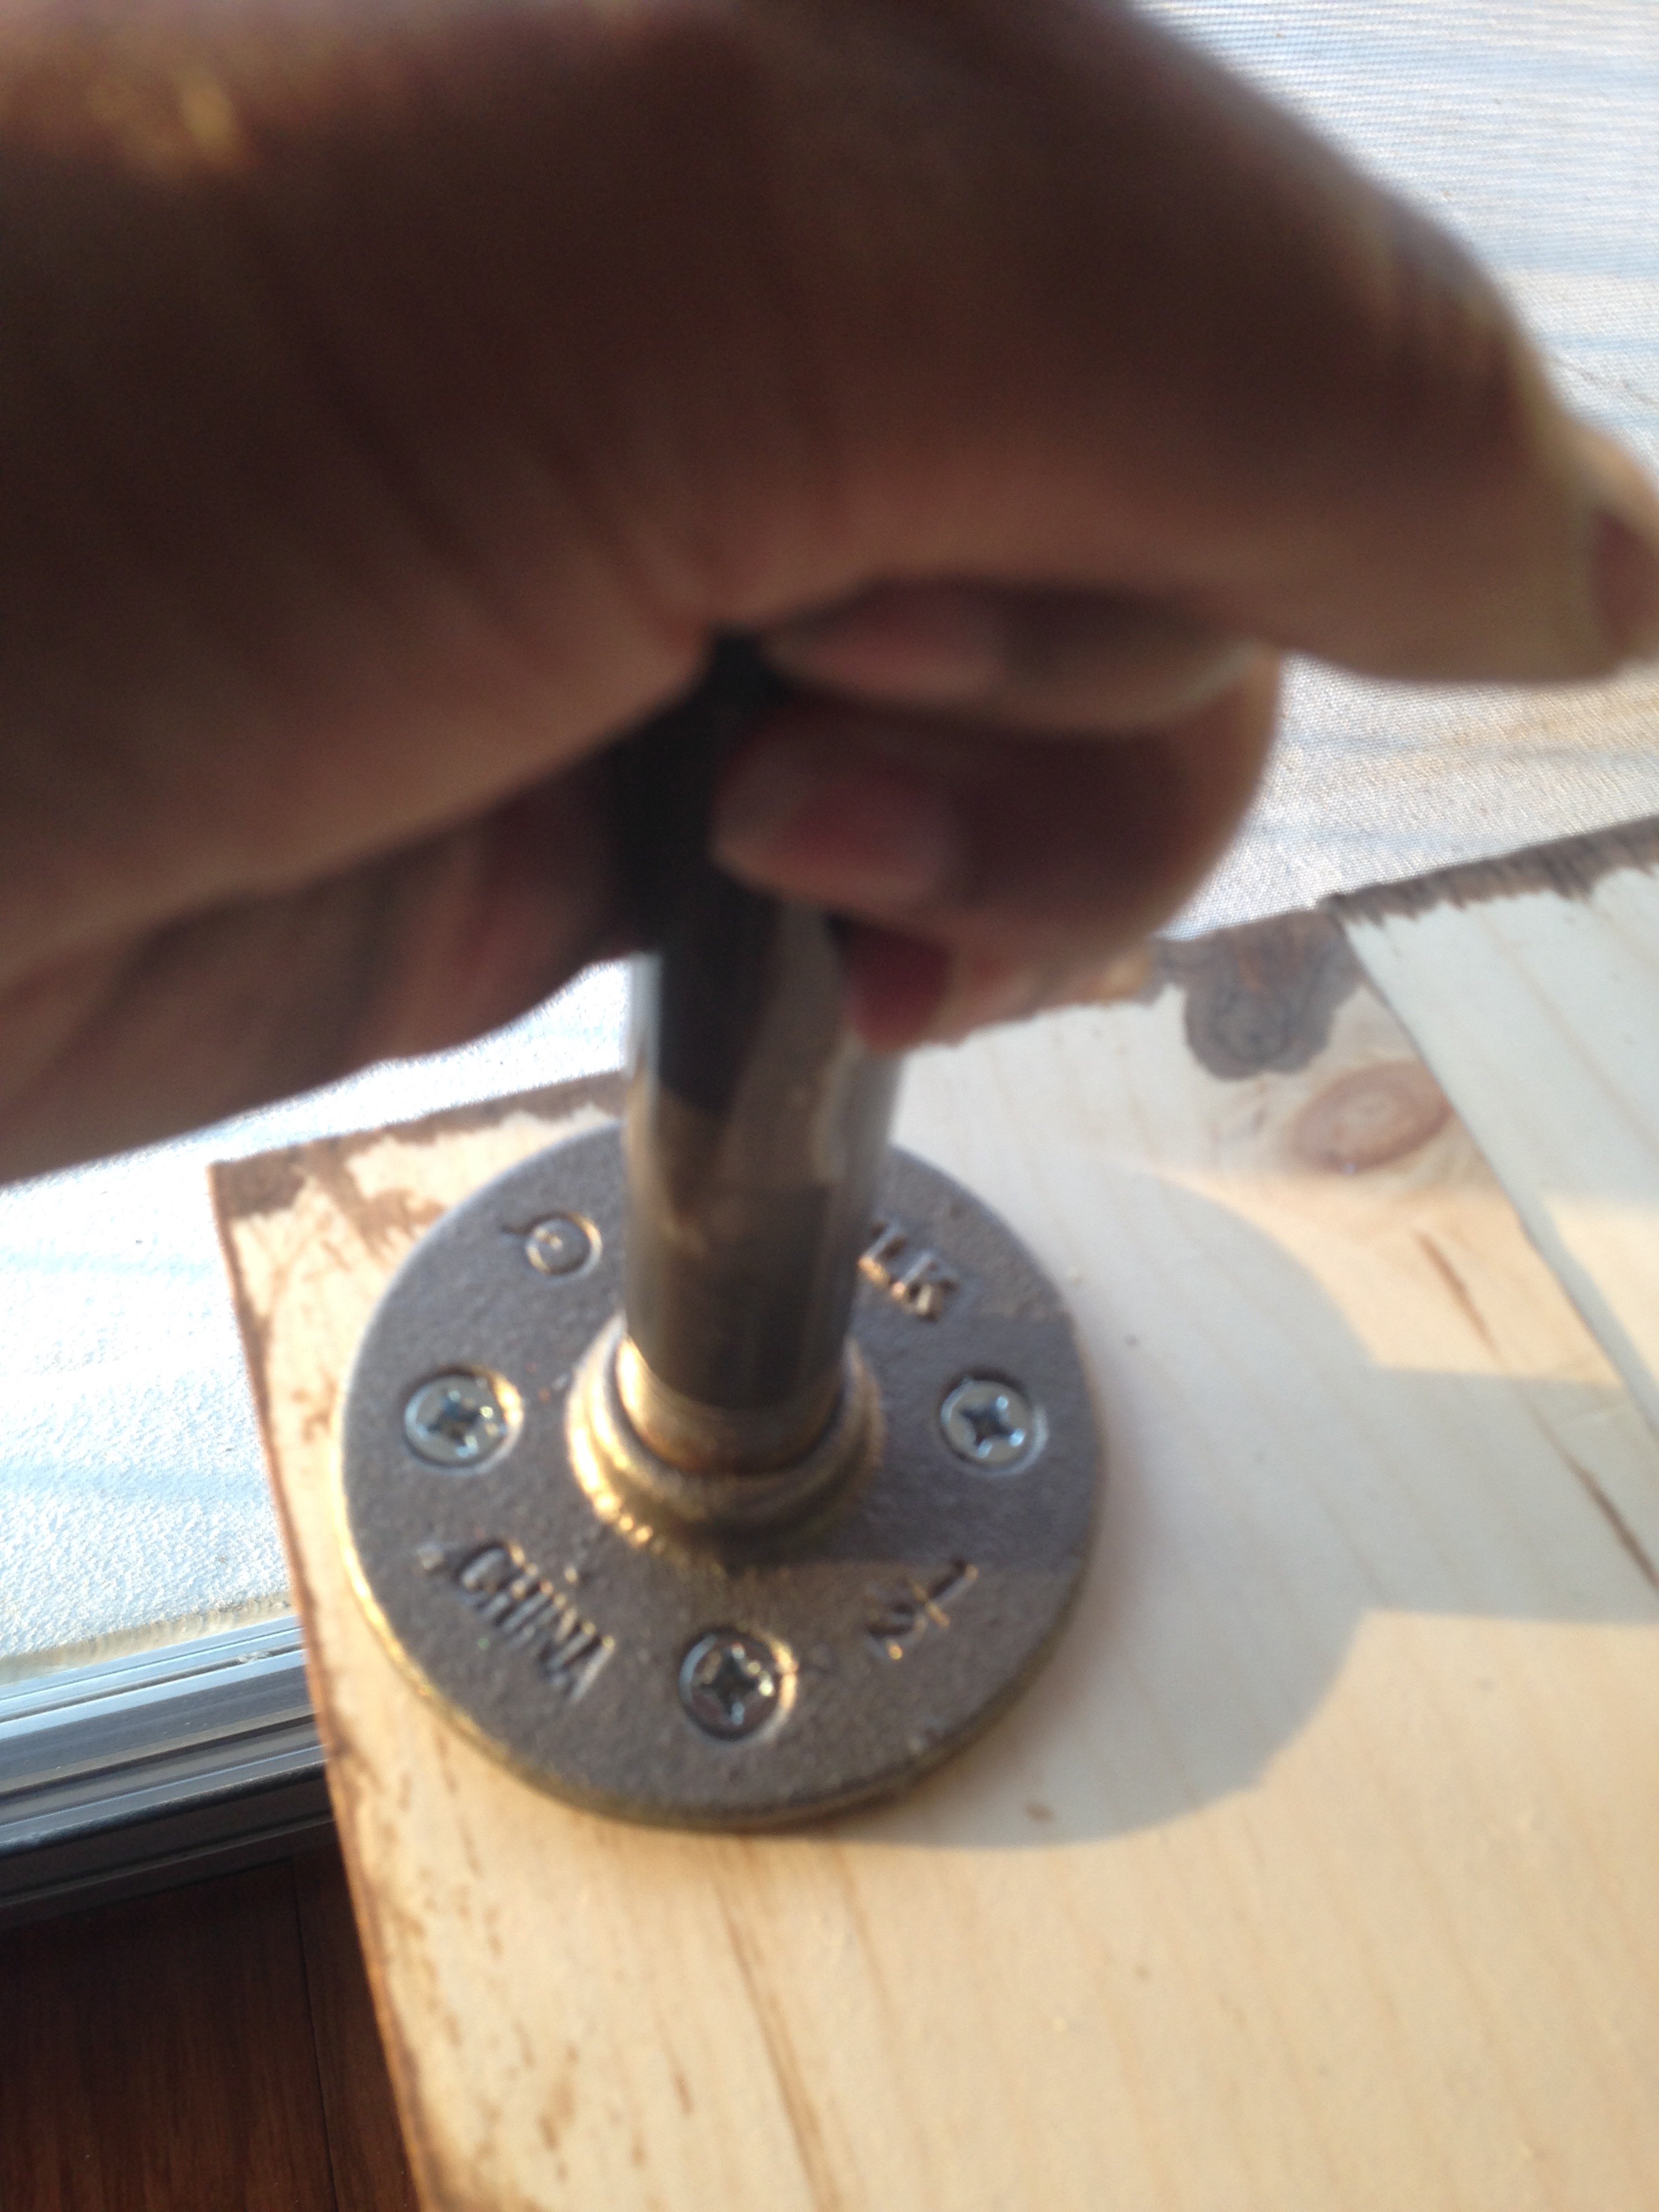
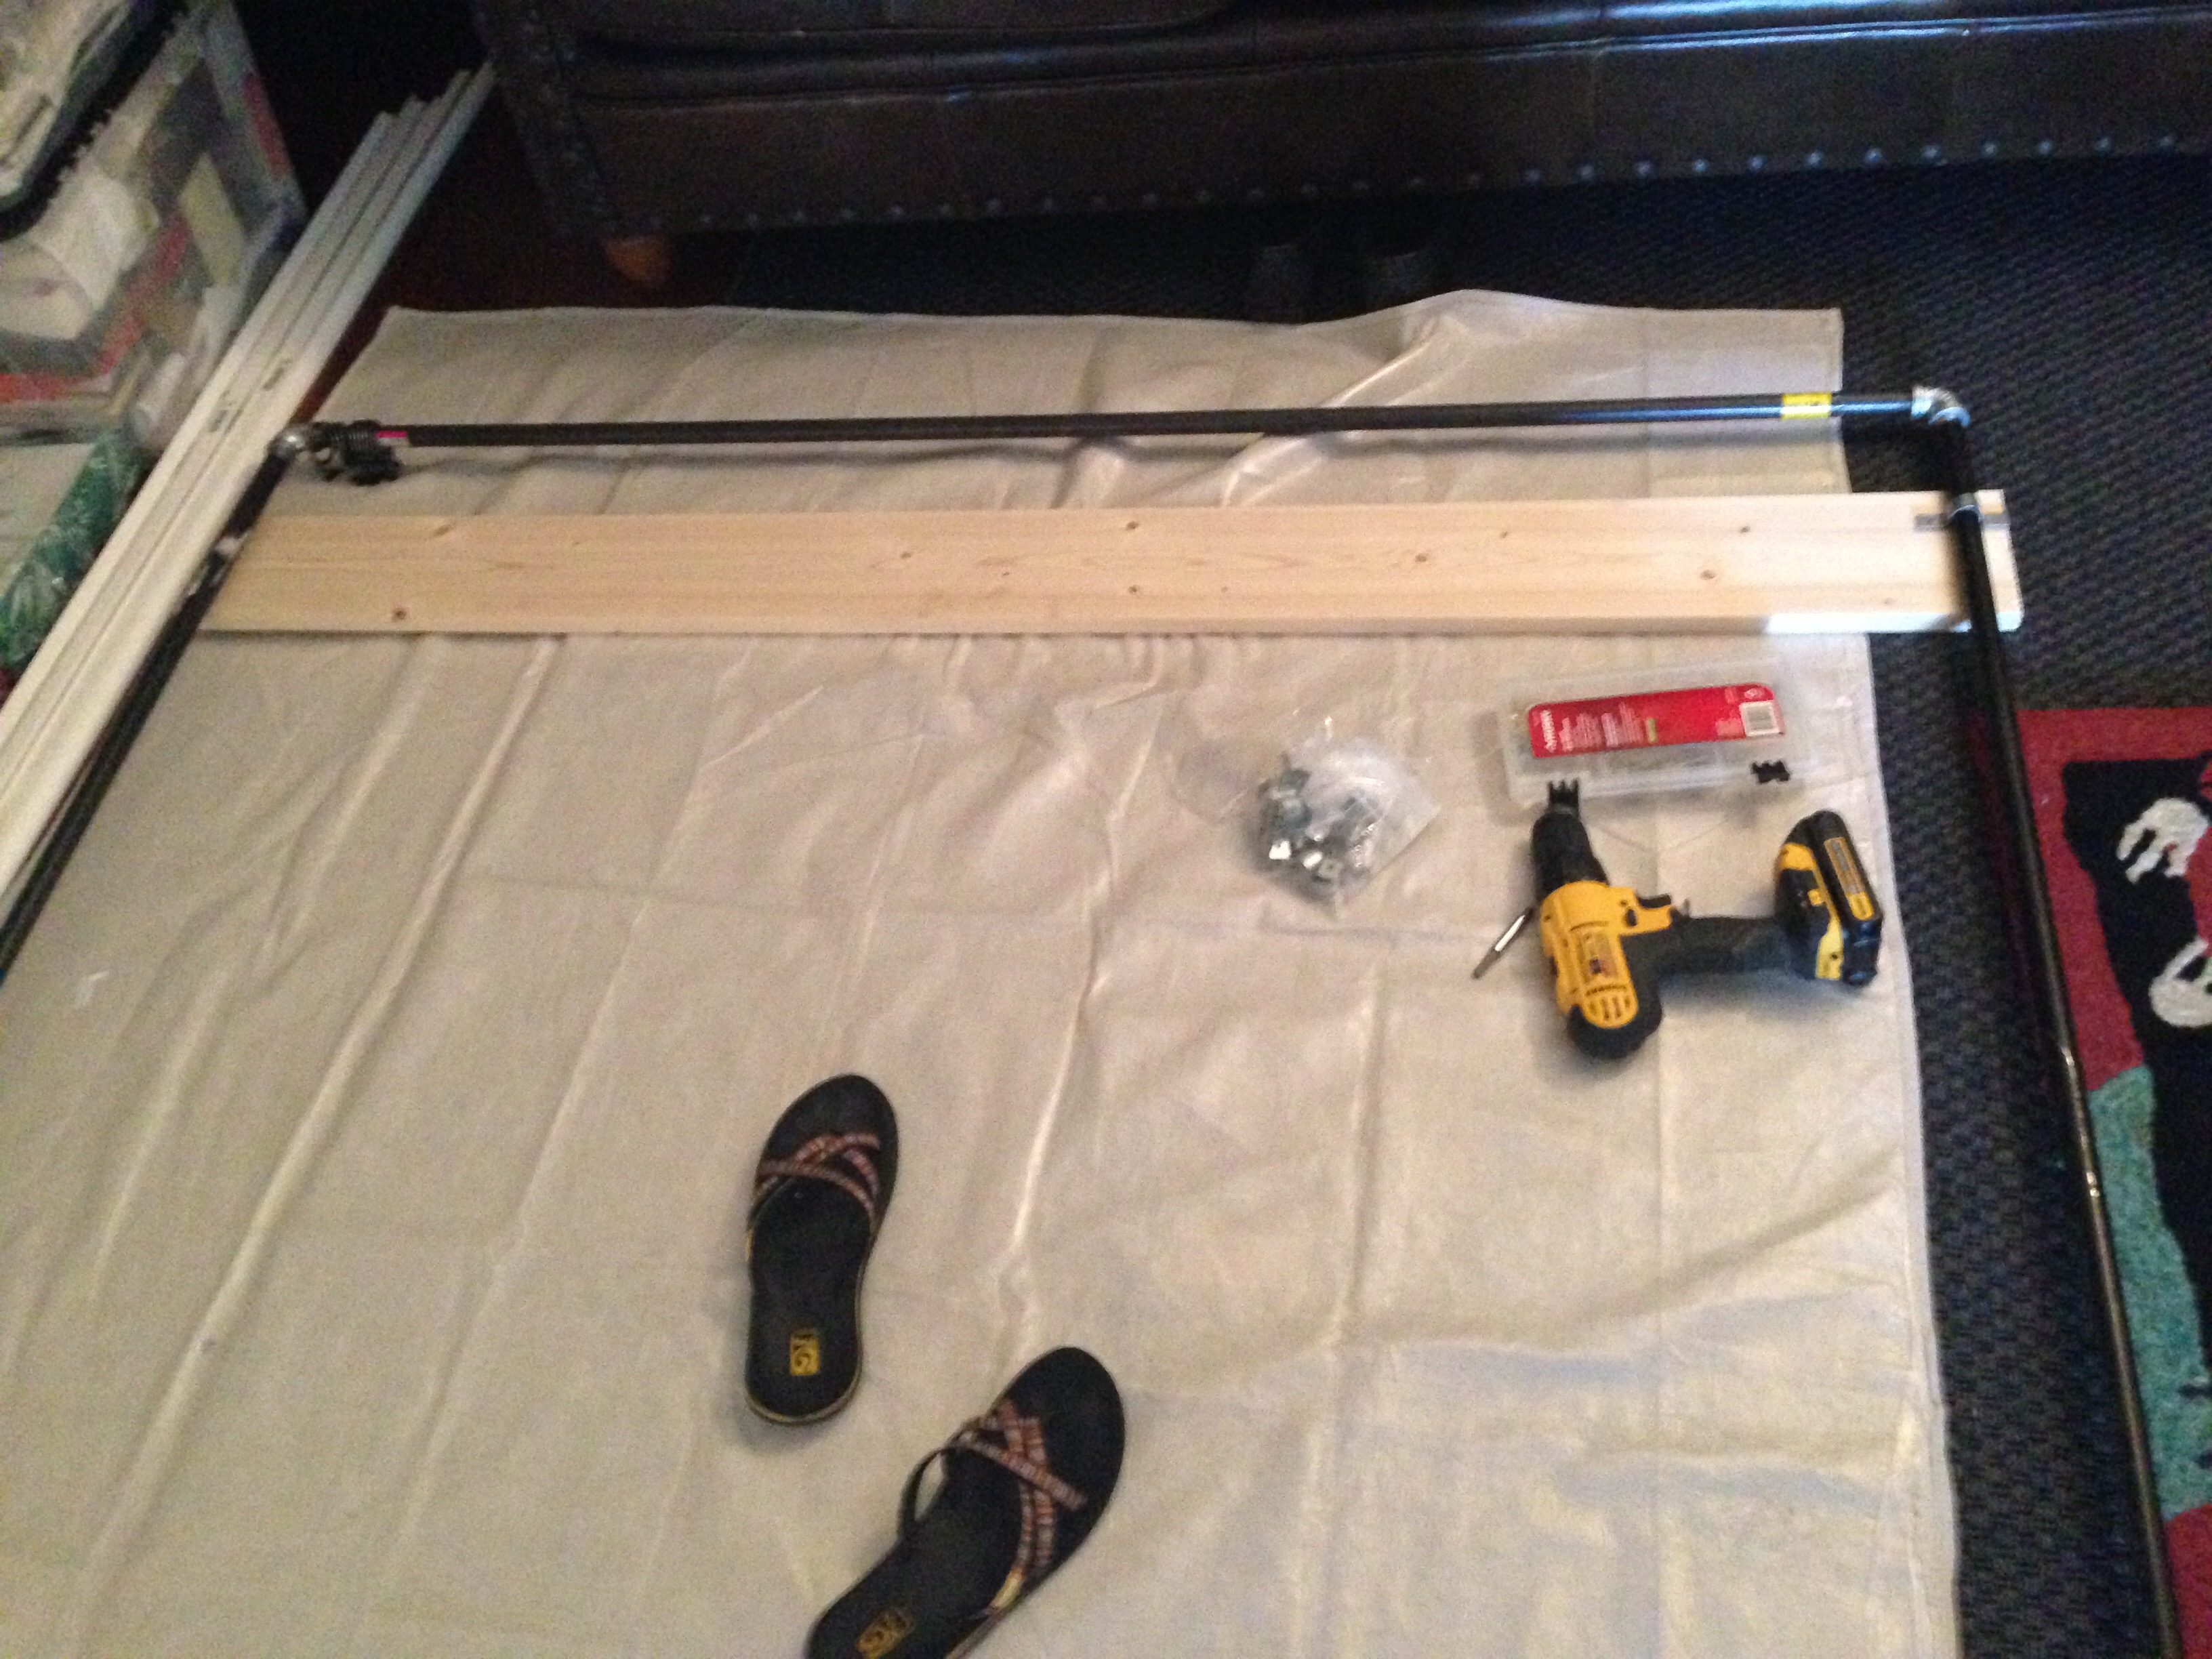
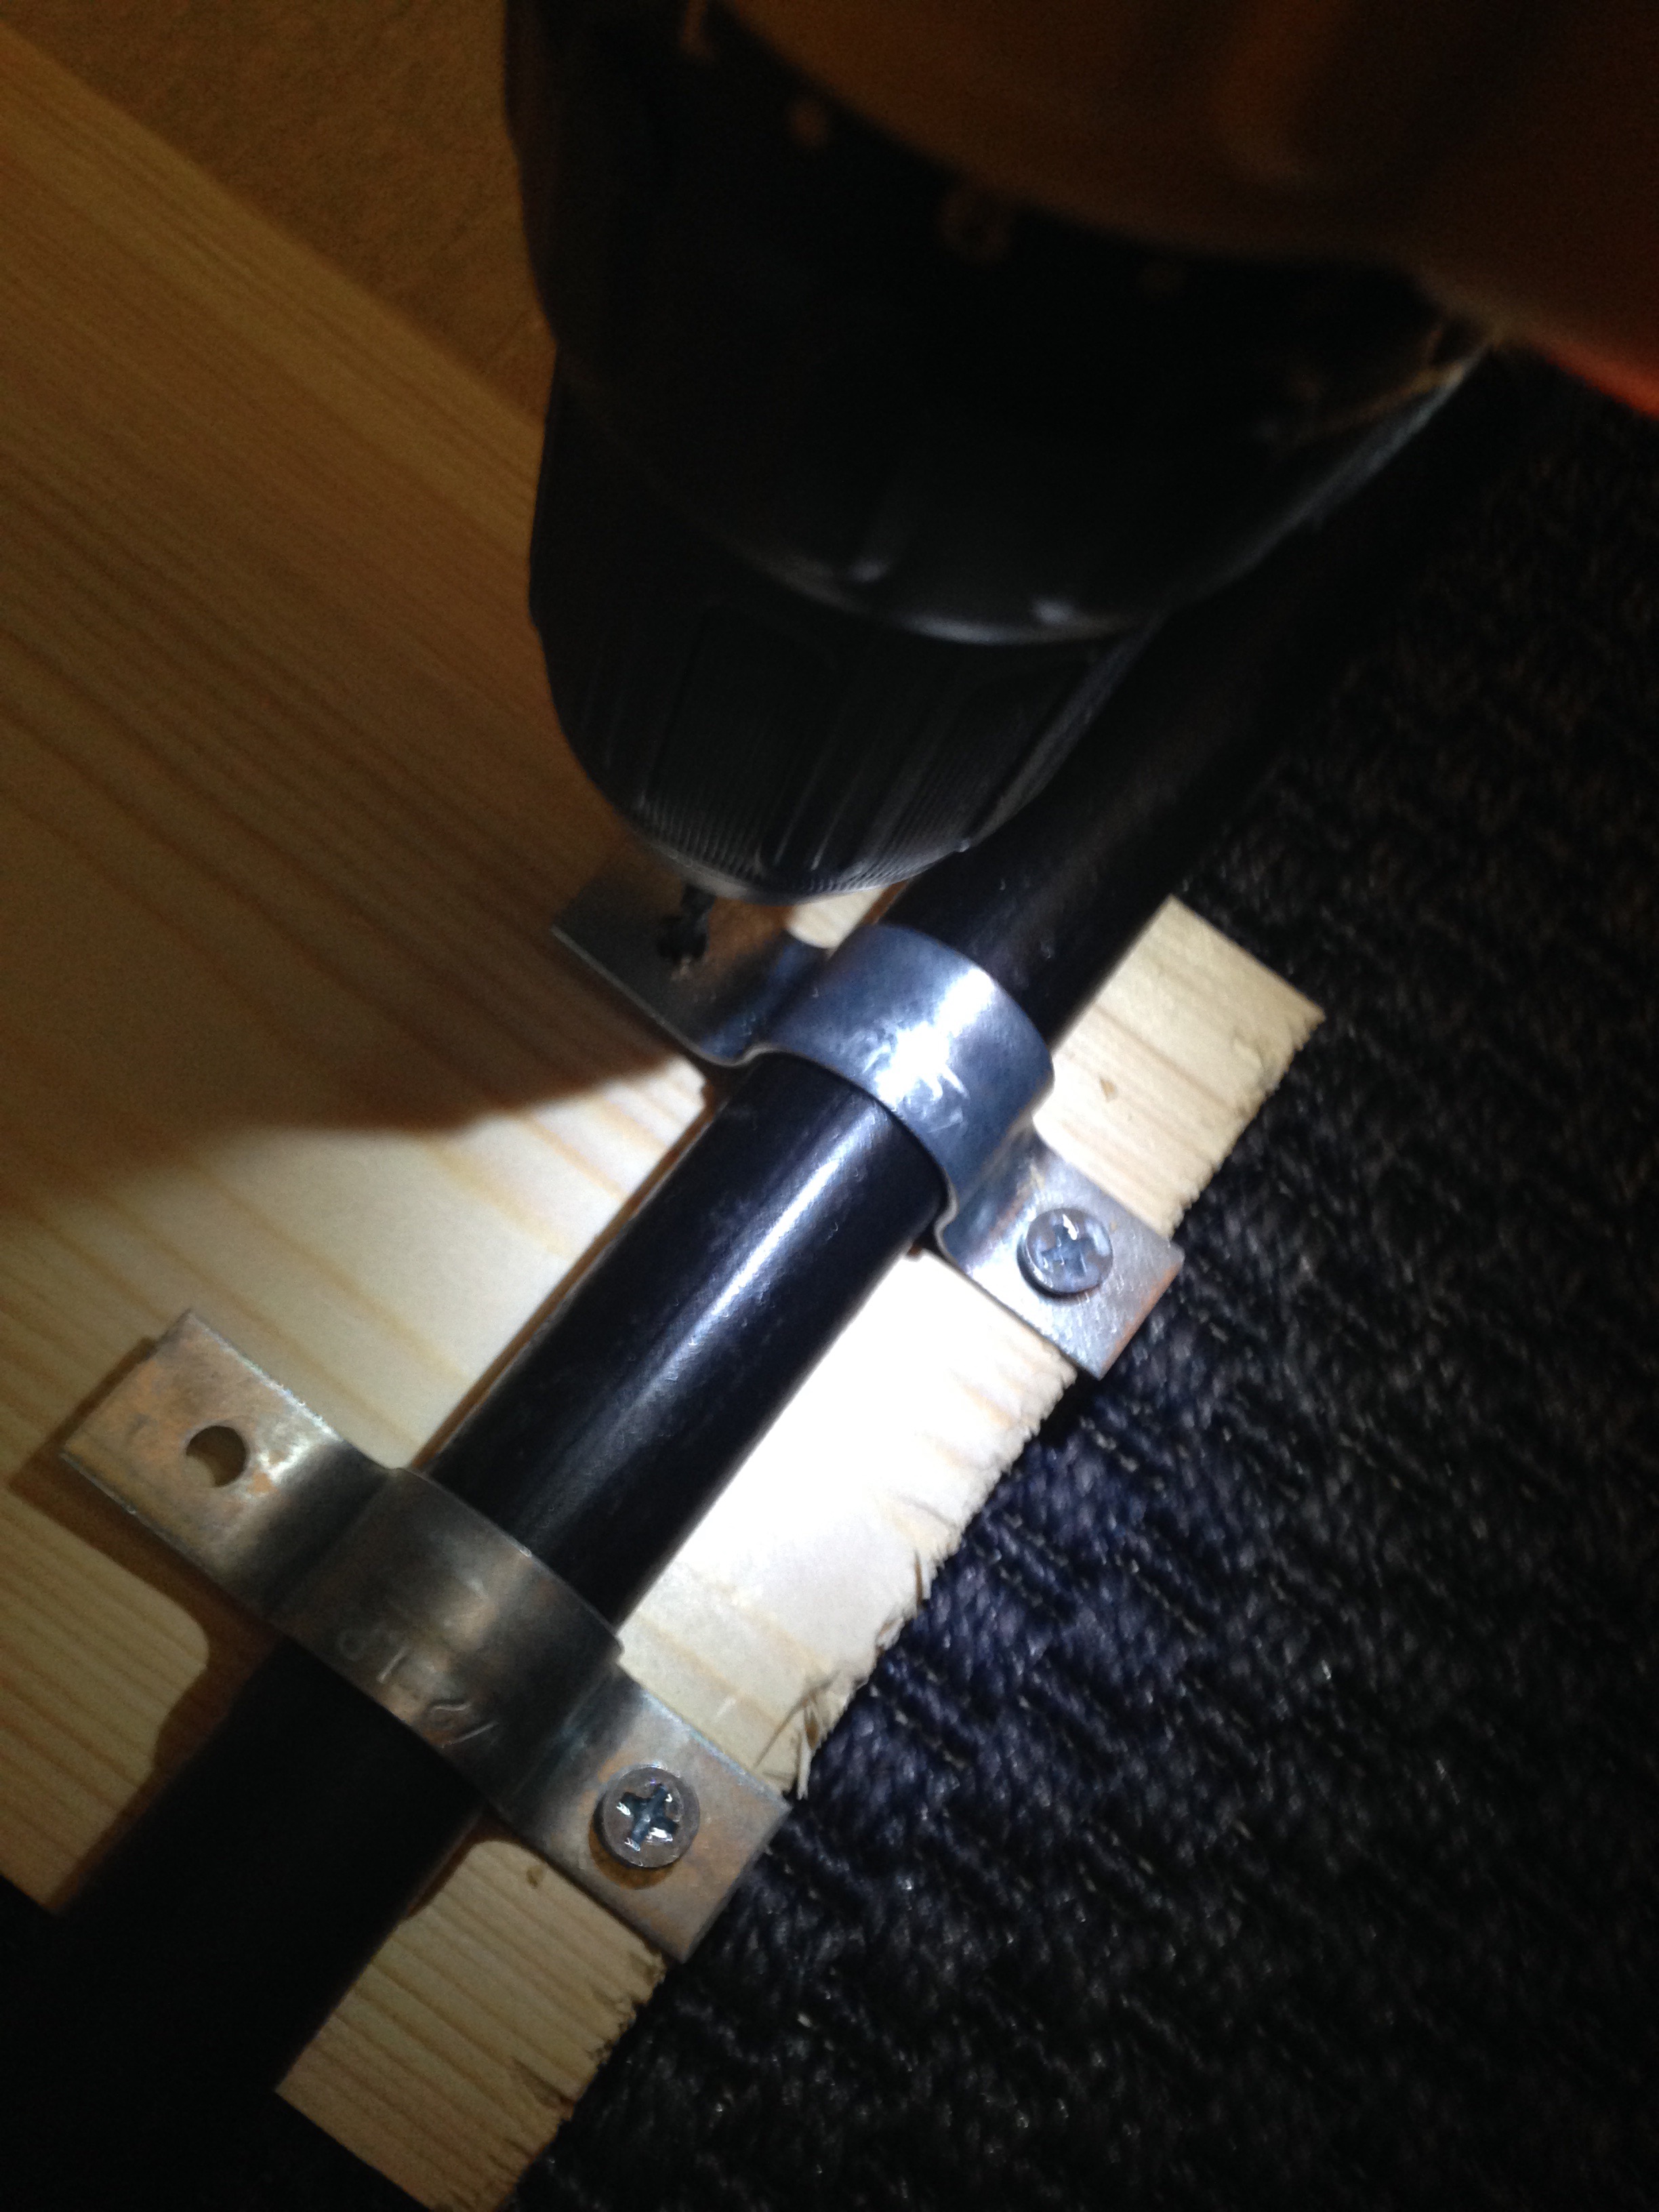
I then screwed the 64″ 1 x 4 board to the top of the pipe wall tree using 1/2″ pipe screw clamps.
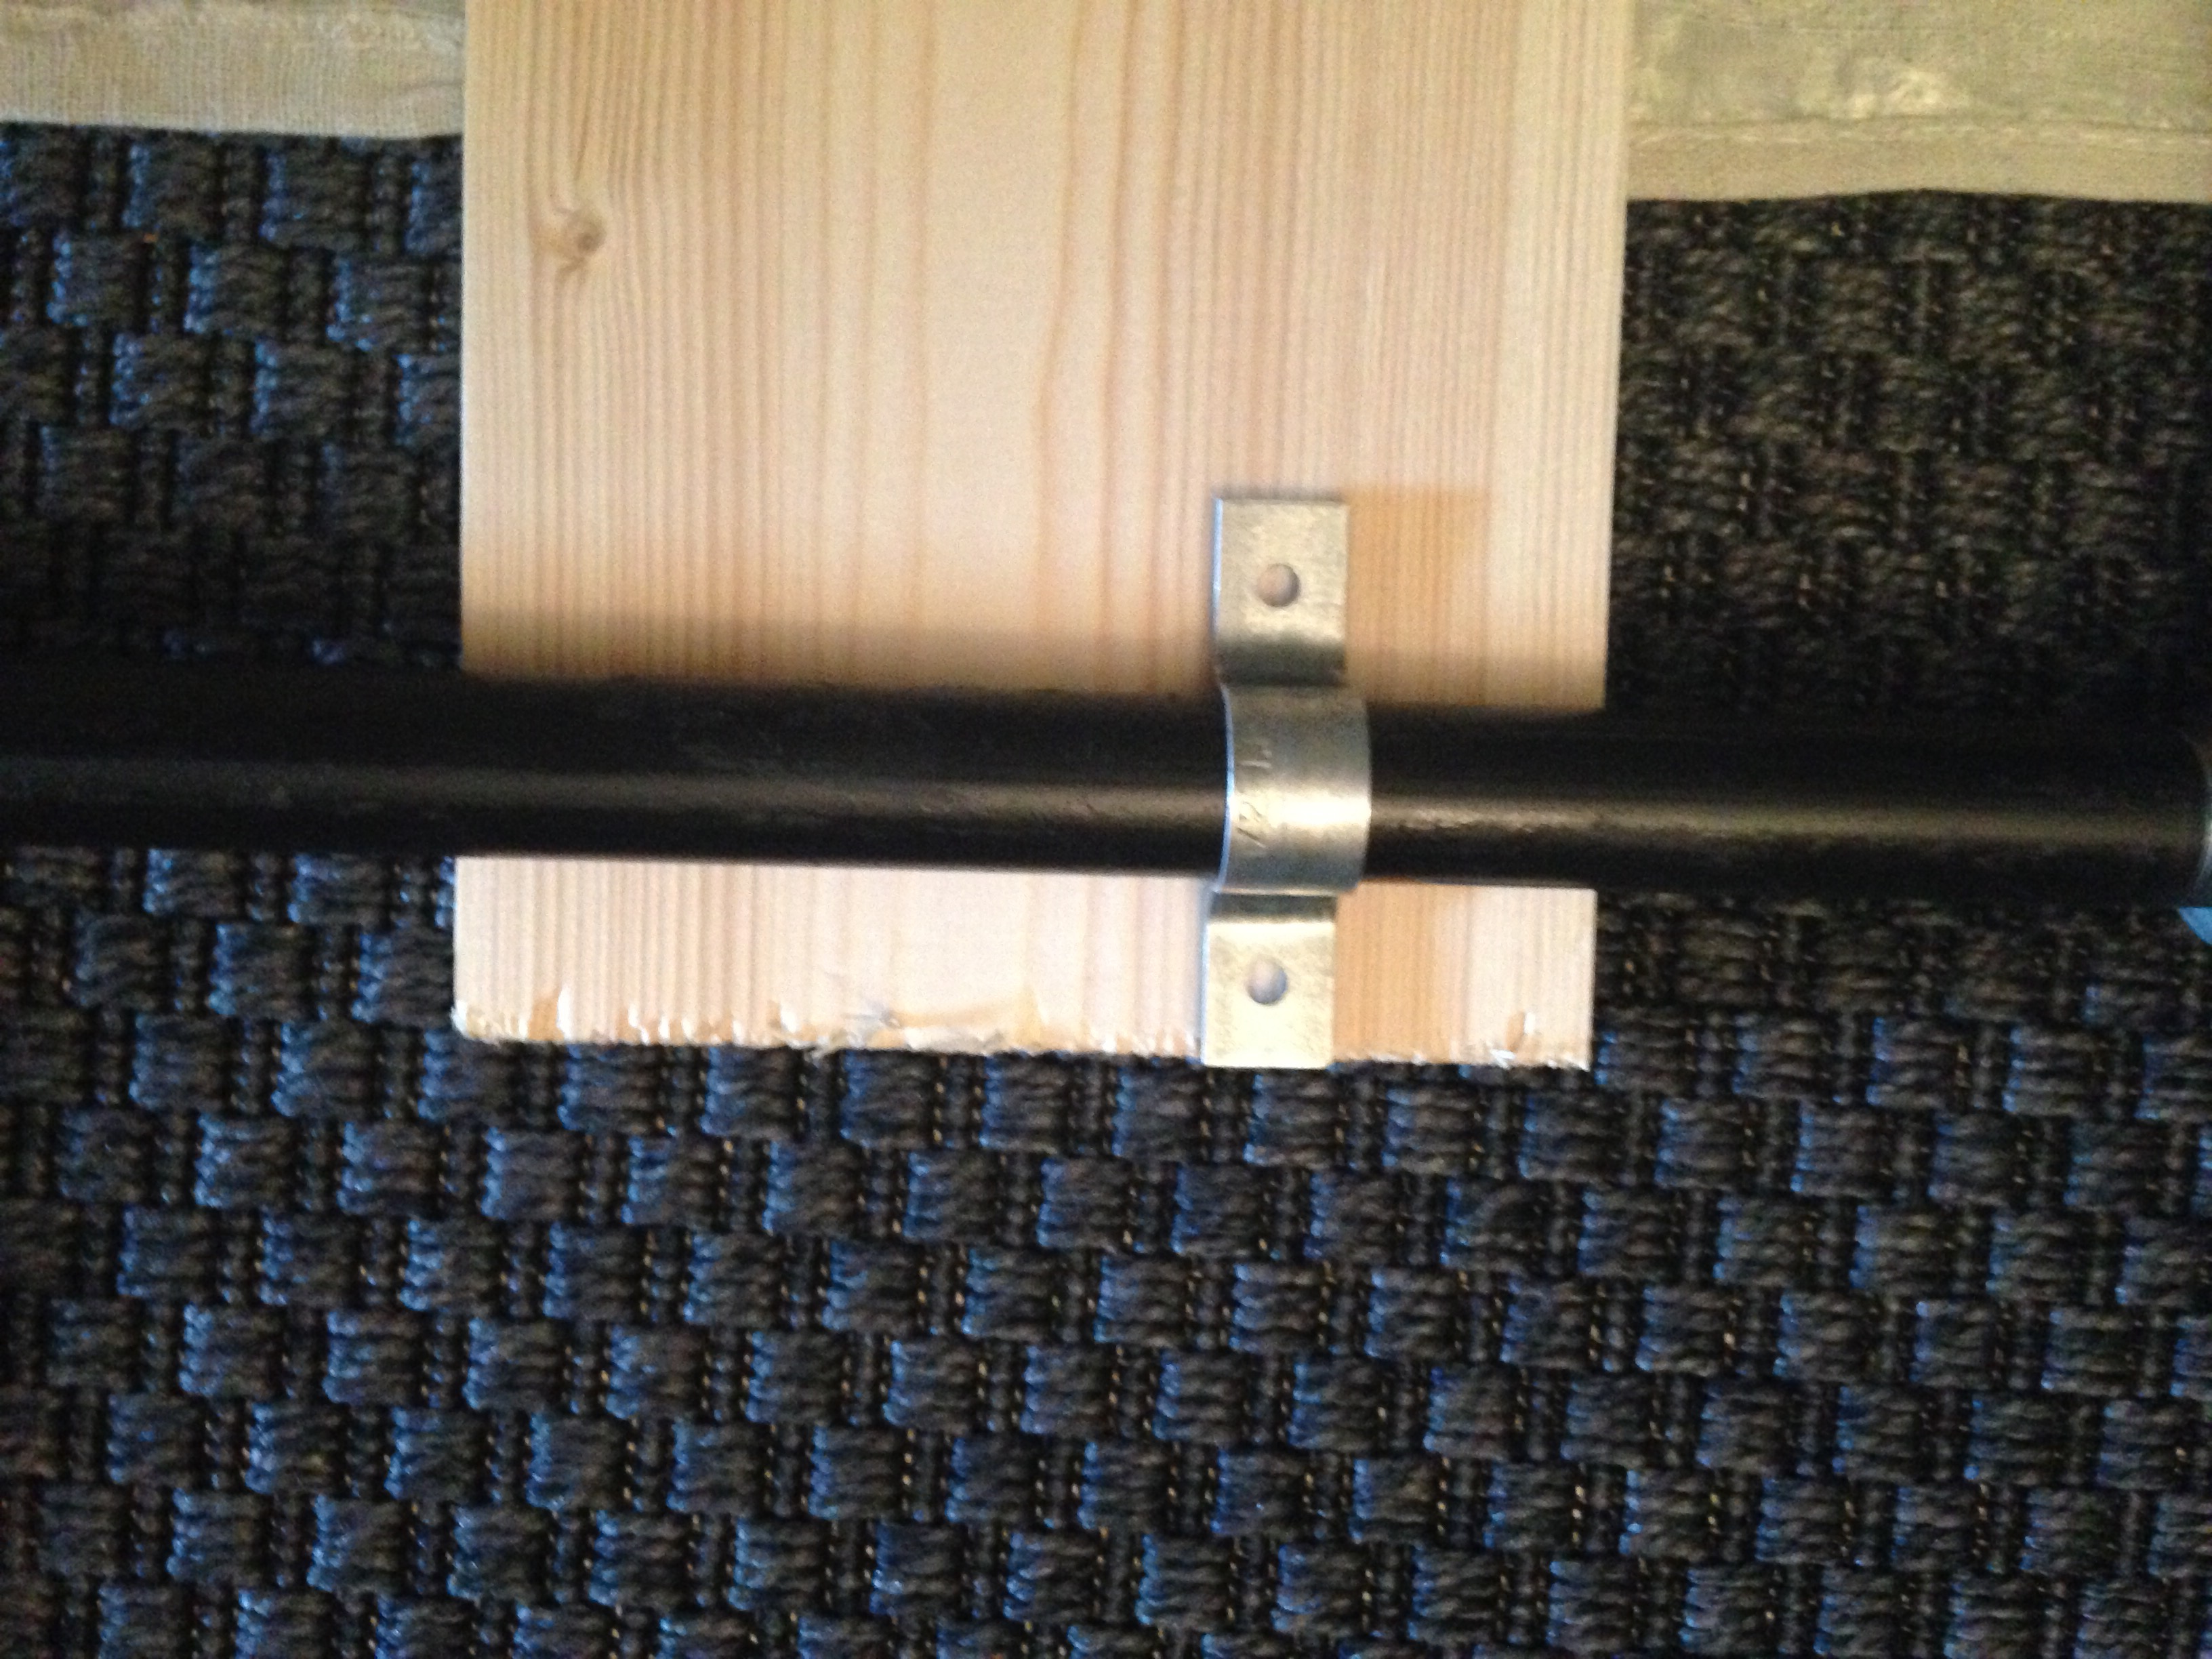
I used a piece of scrap 2 x 4 wood to measure a 4″ space between the center rod and the board.
Once positioned, I attached the board to the vertical pipes using the clamp and two #10 size wood screws (3/4″ length).
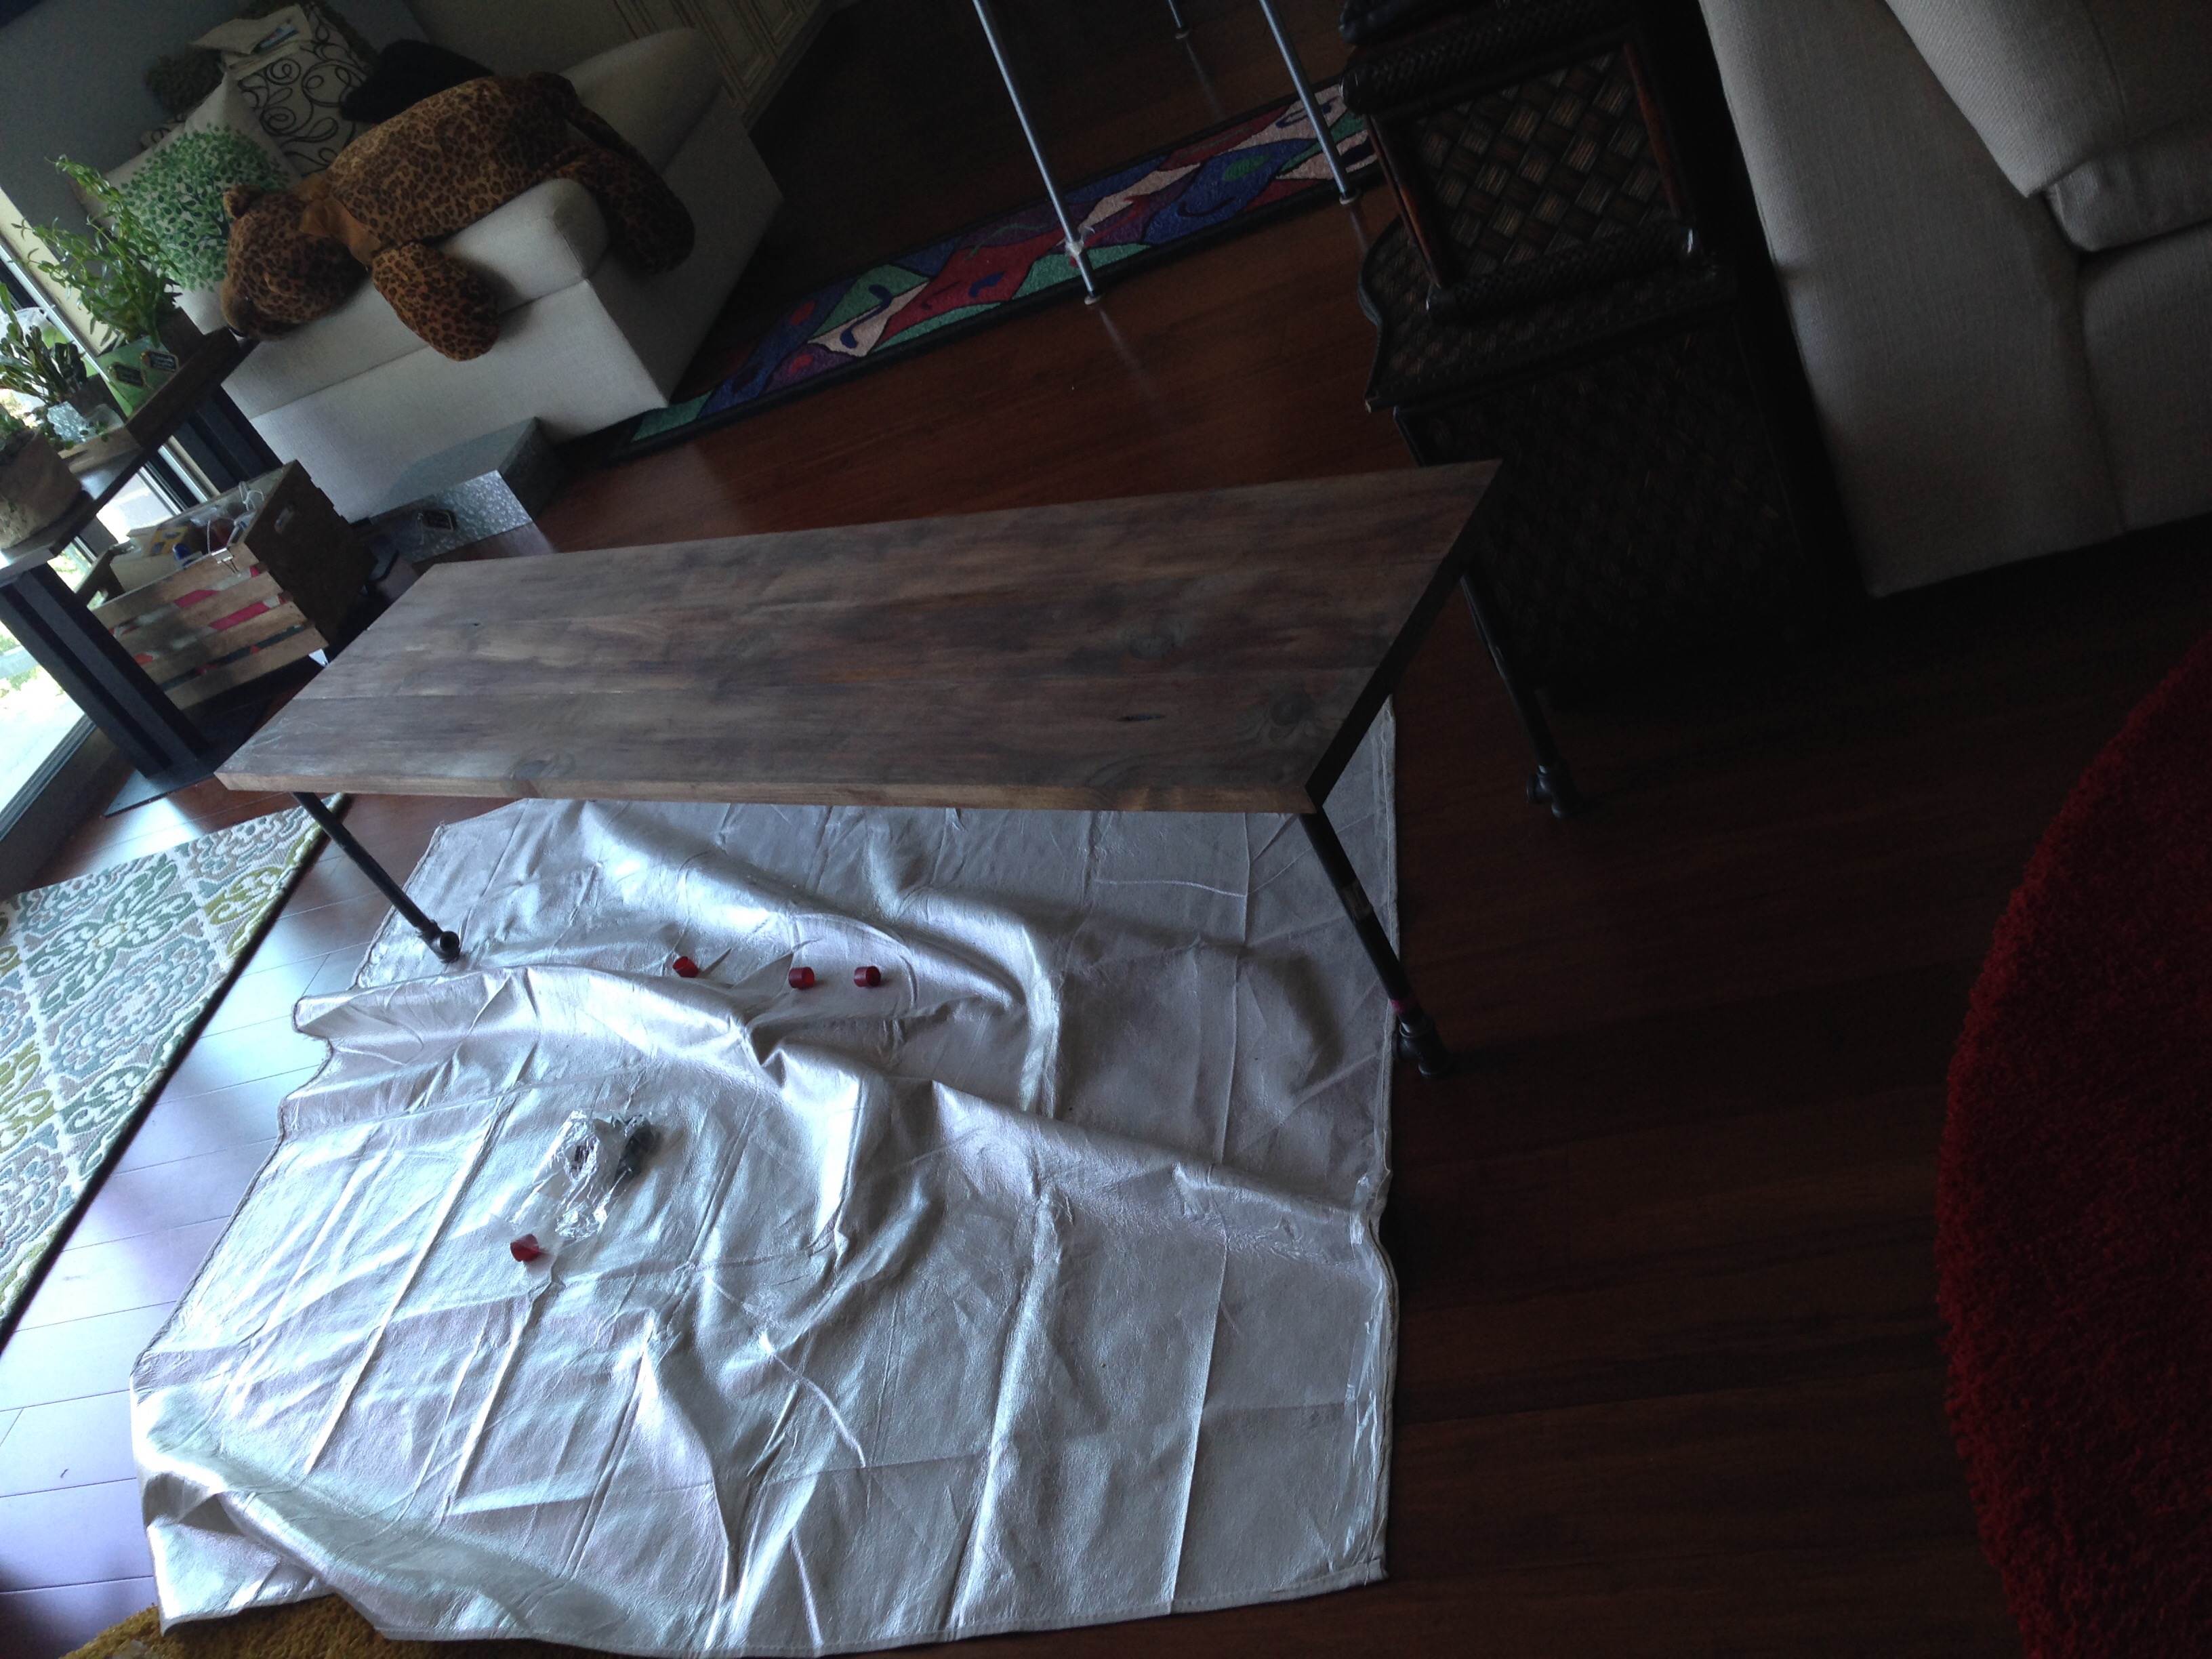
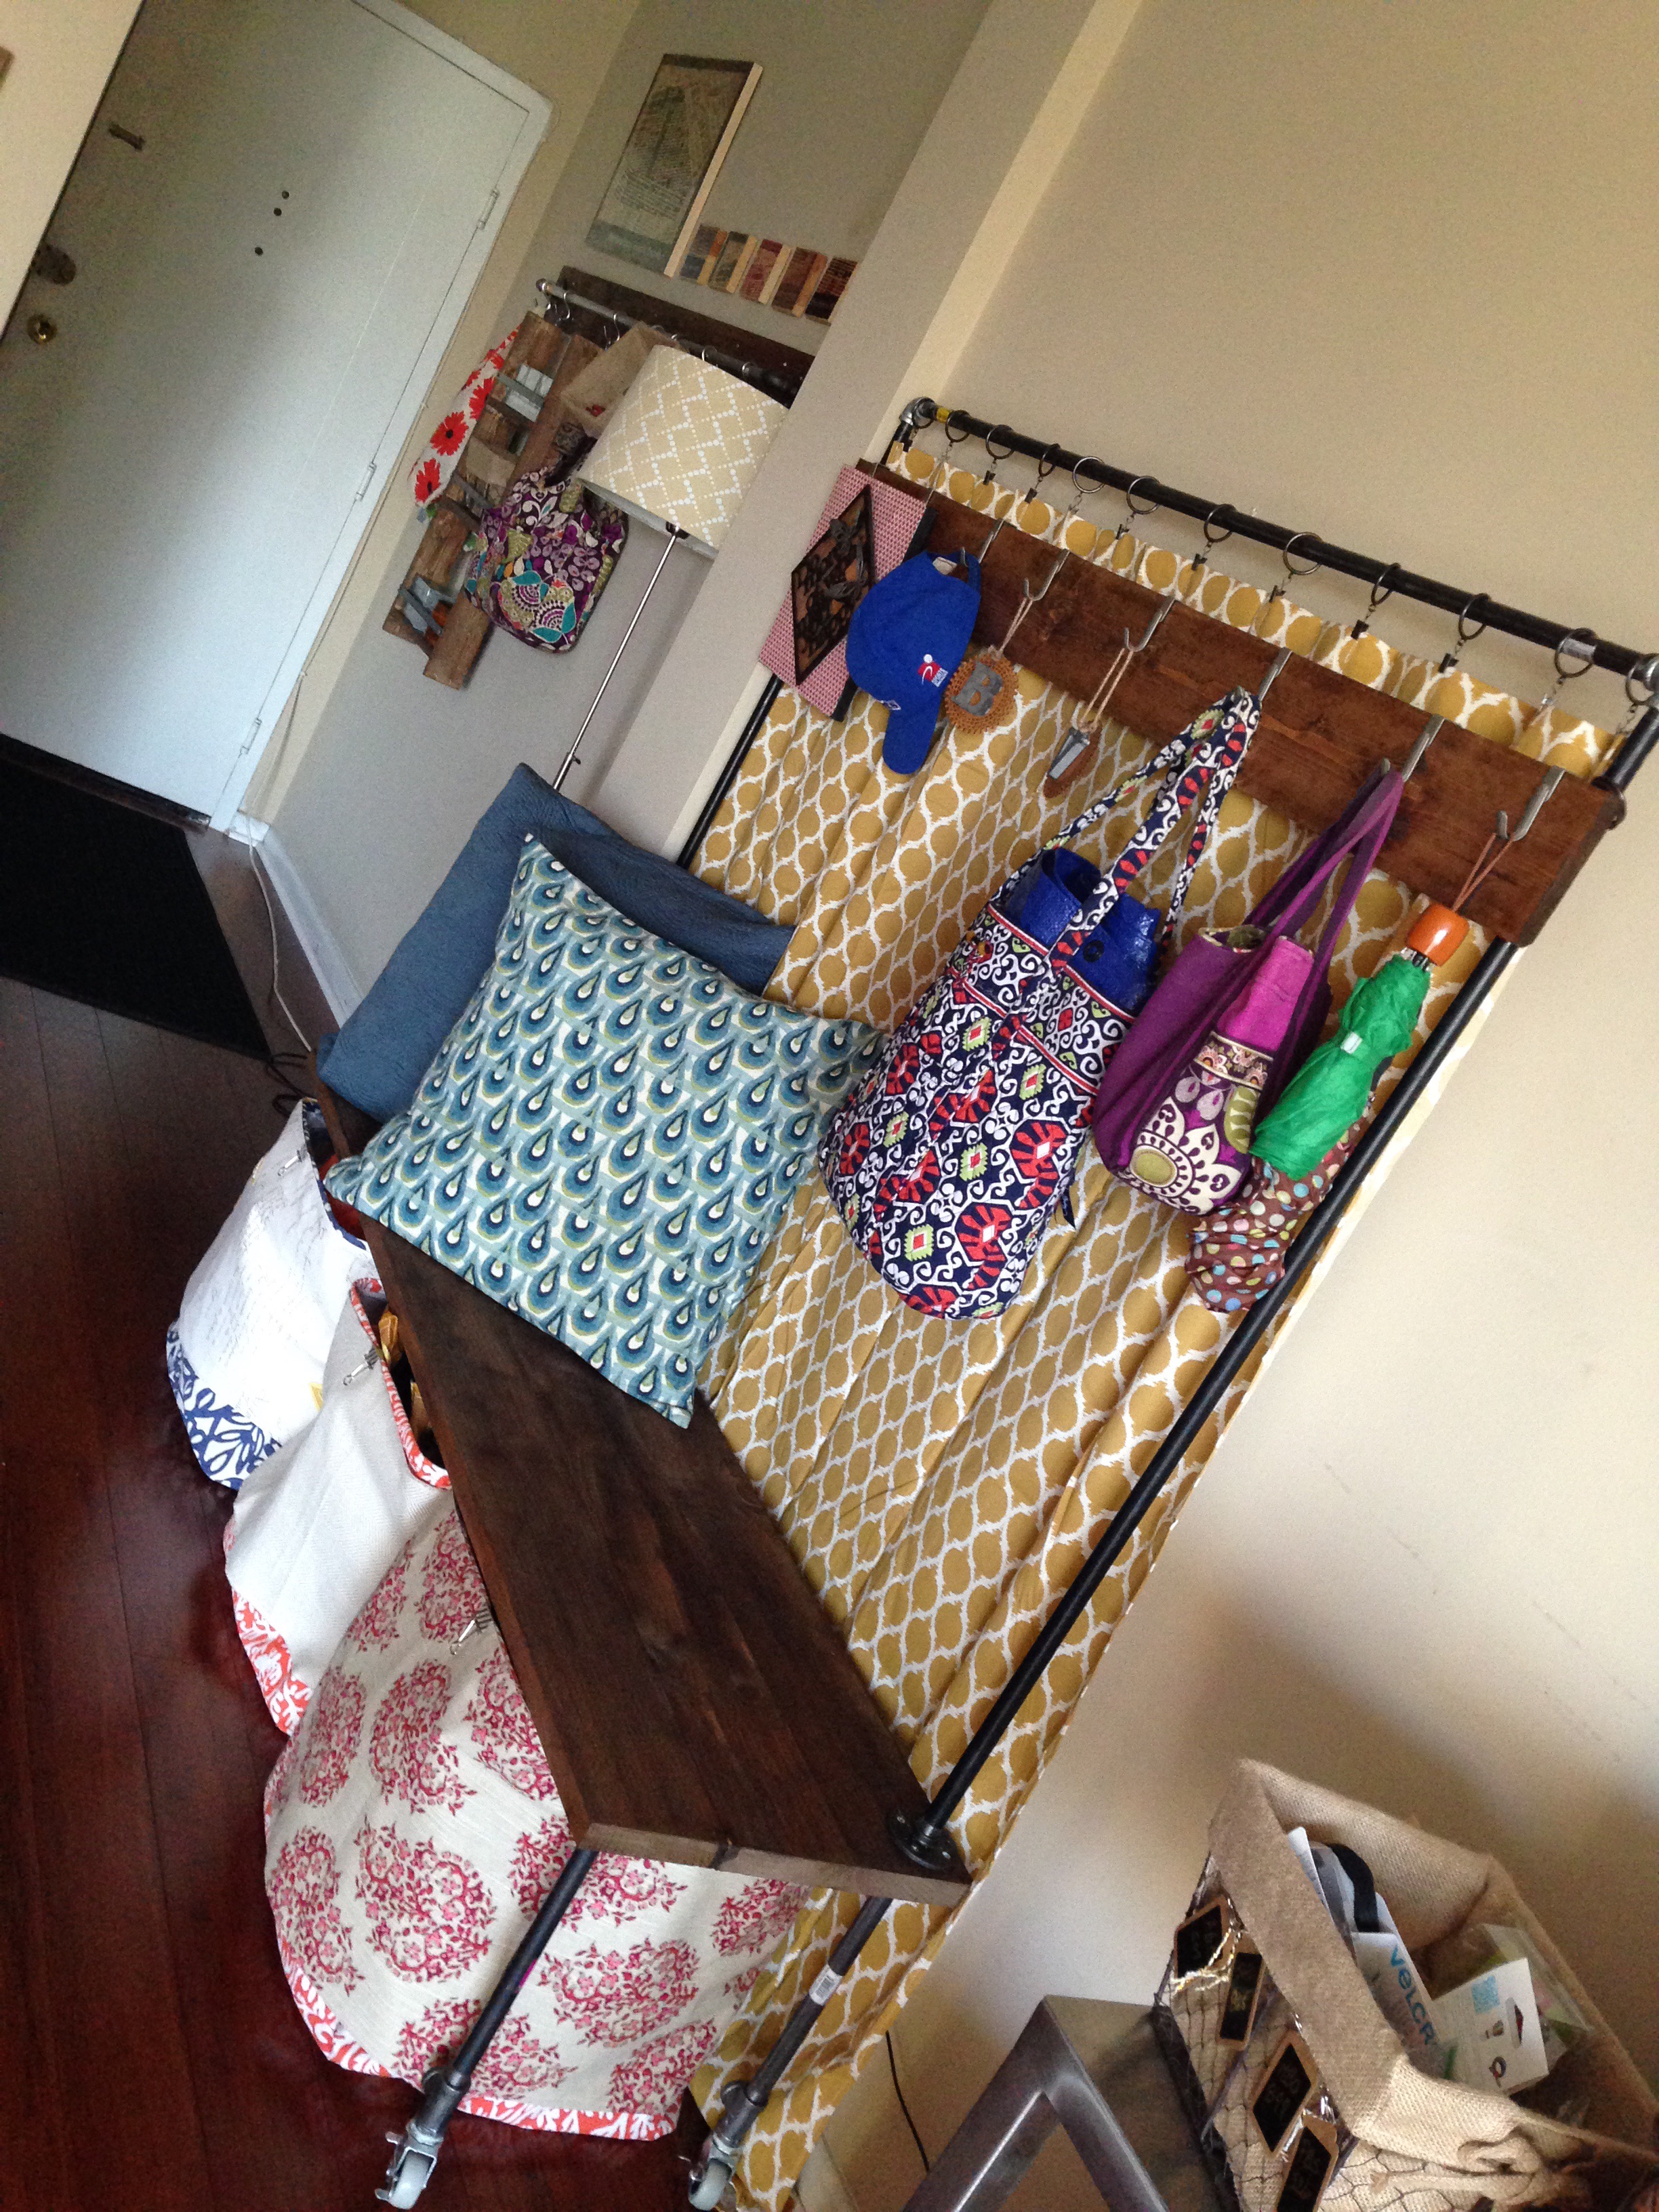
After screwing the vertical pipe flanges to the back of the bench, I had the skeleton of my mobile pipe hall tree.
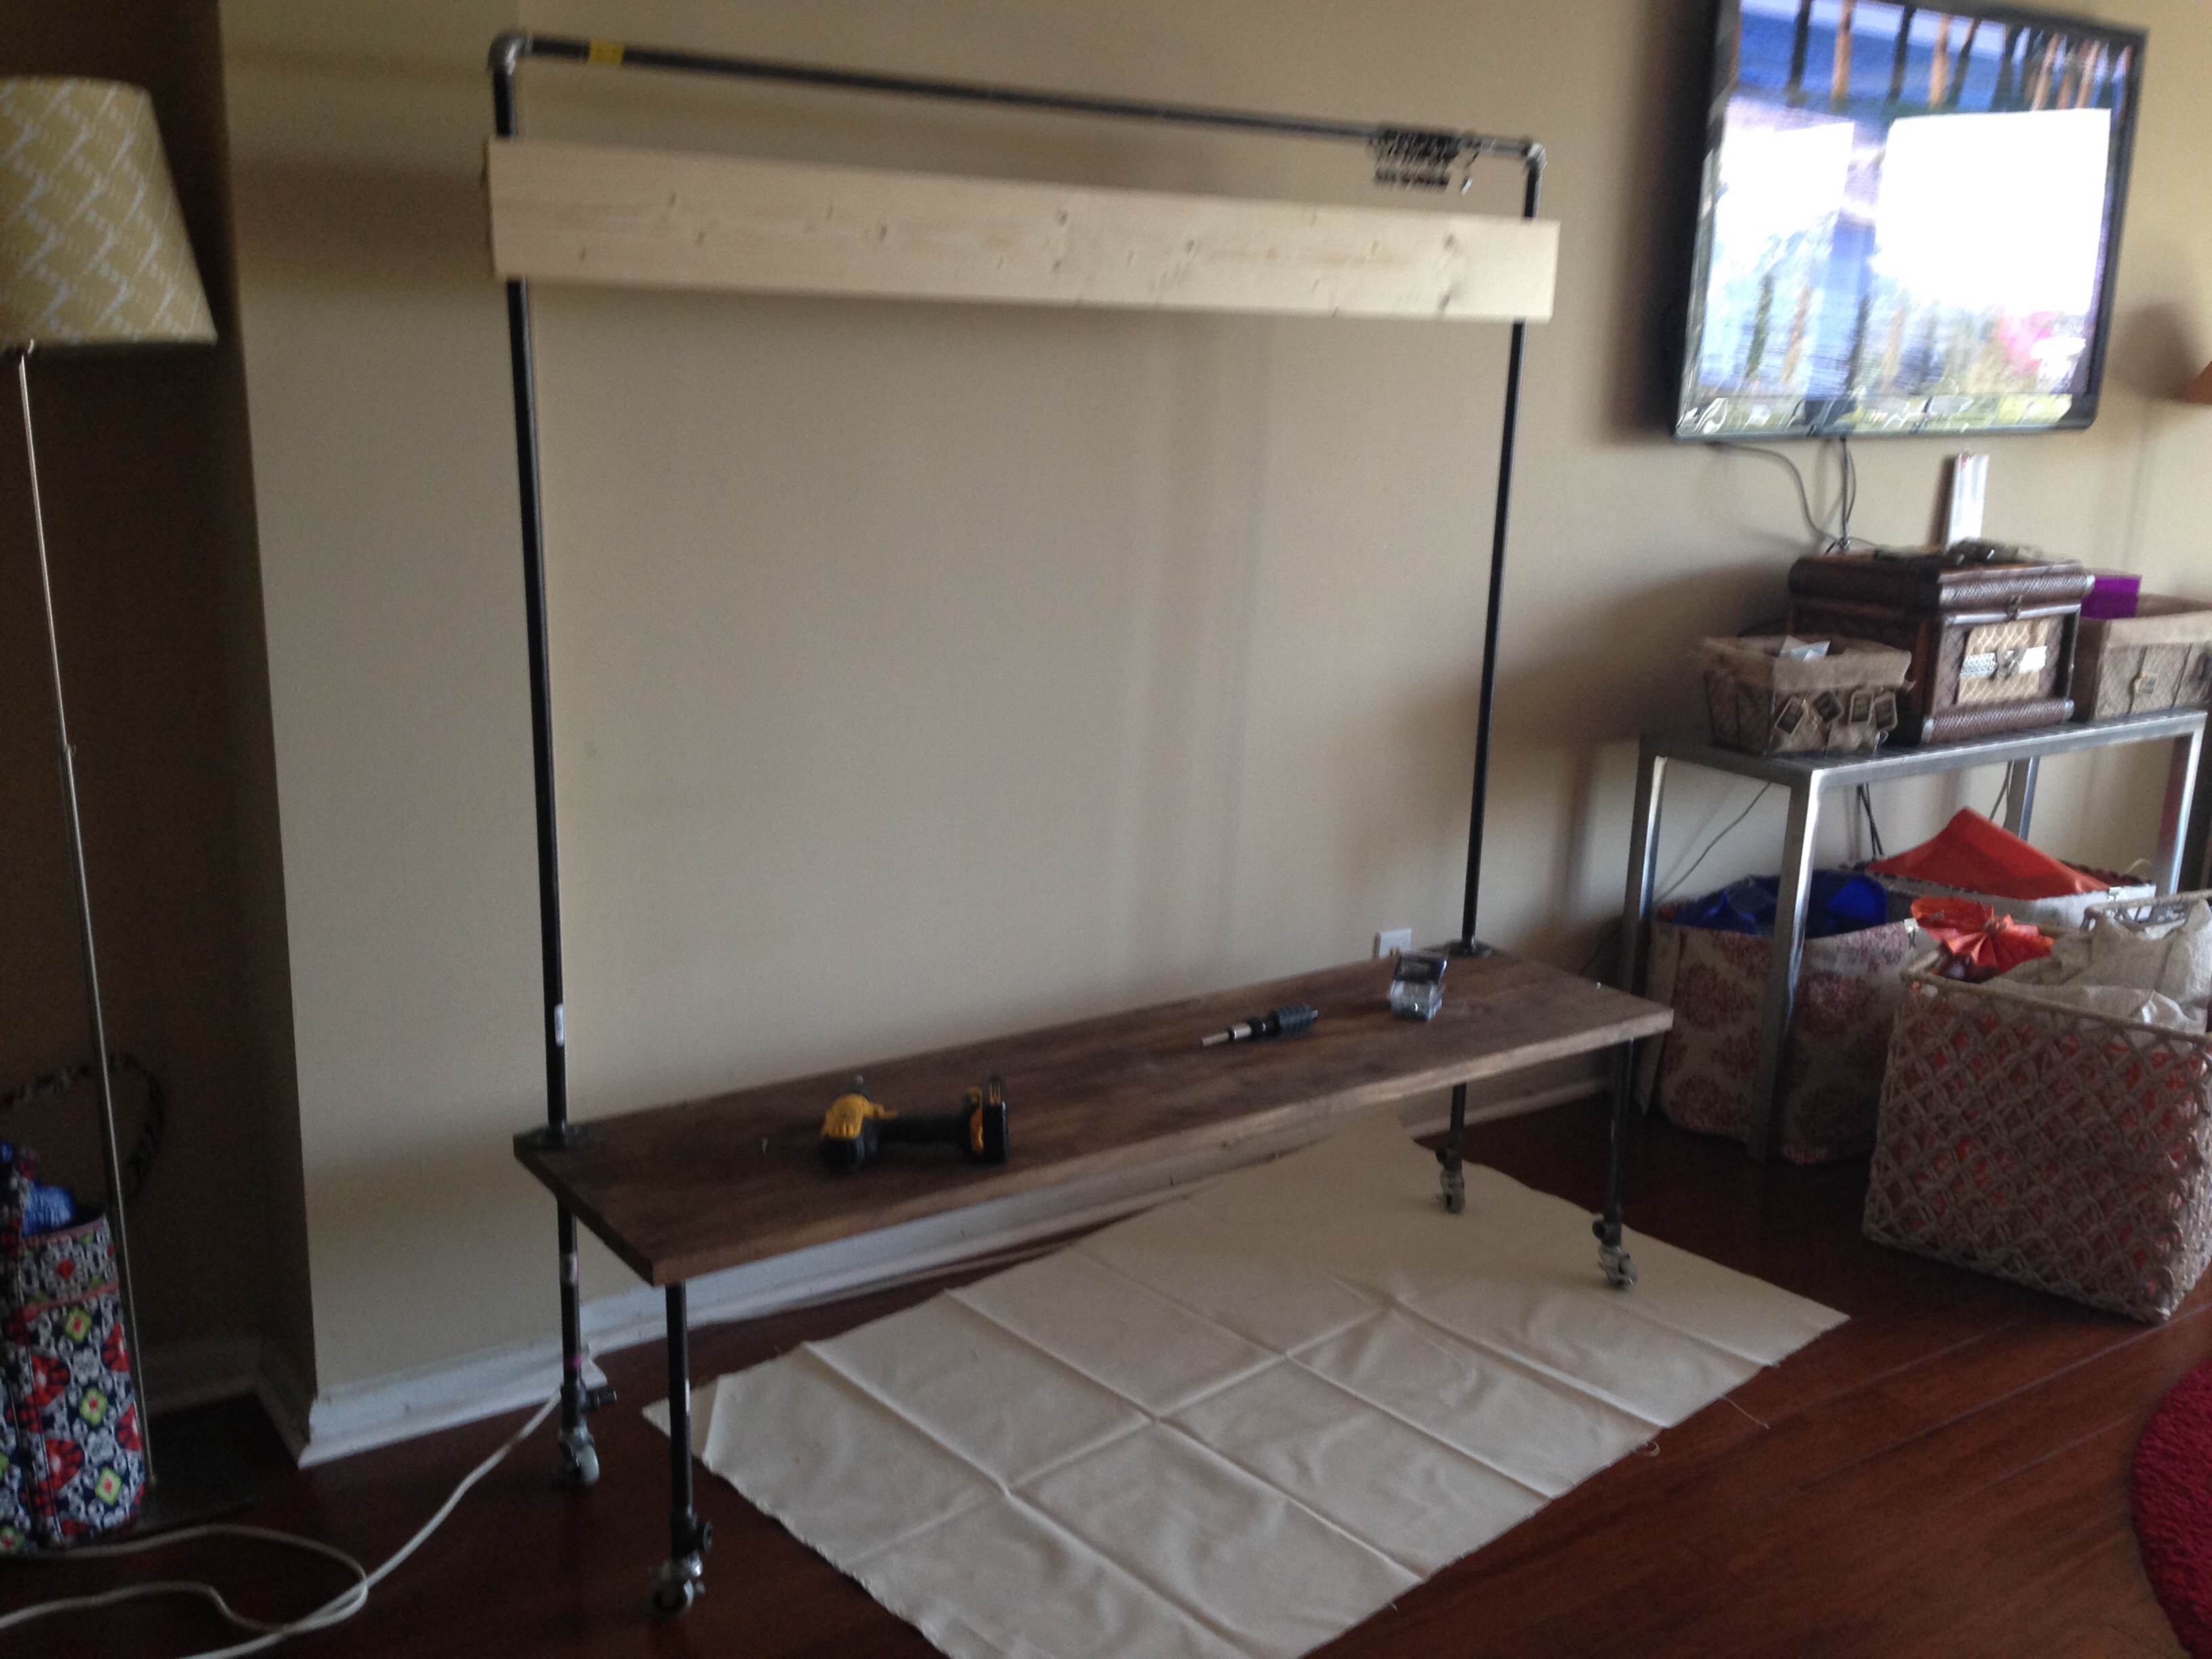
Now time for the final push – finishing and decorating the top of the hall tree.
After sanding the front board with 180 grit sand paper…
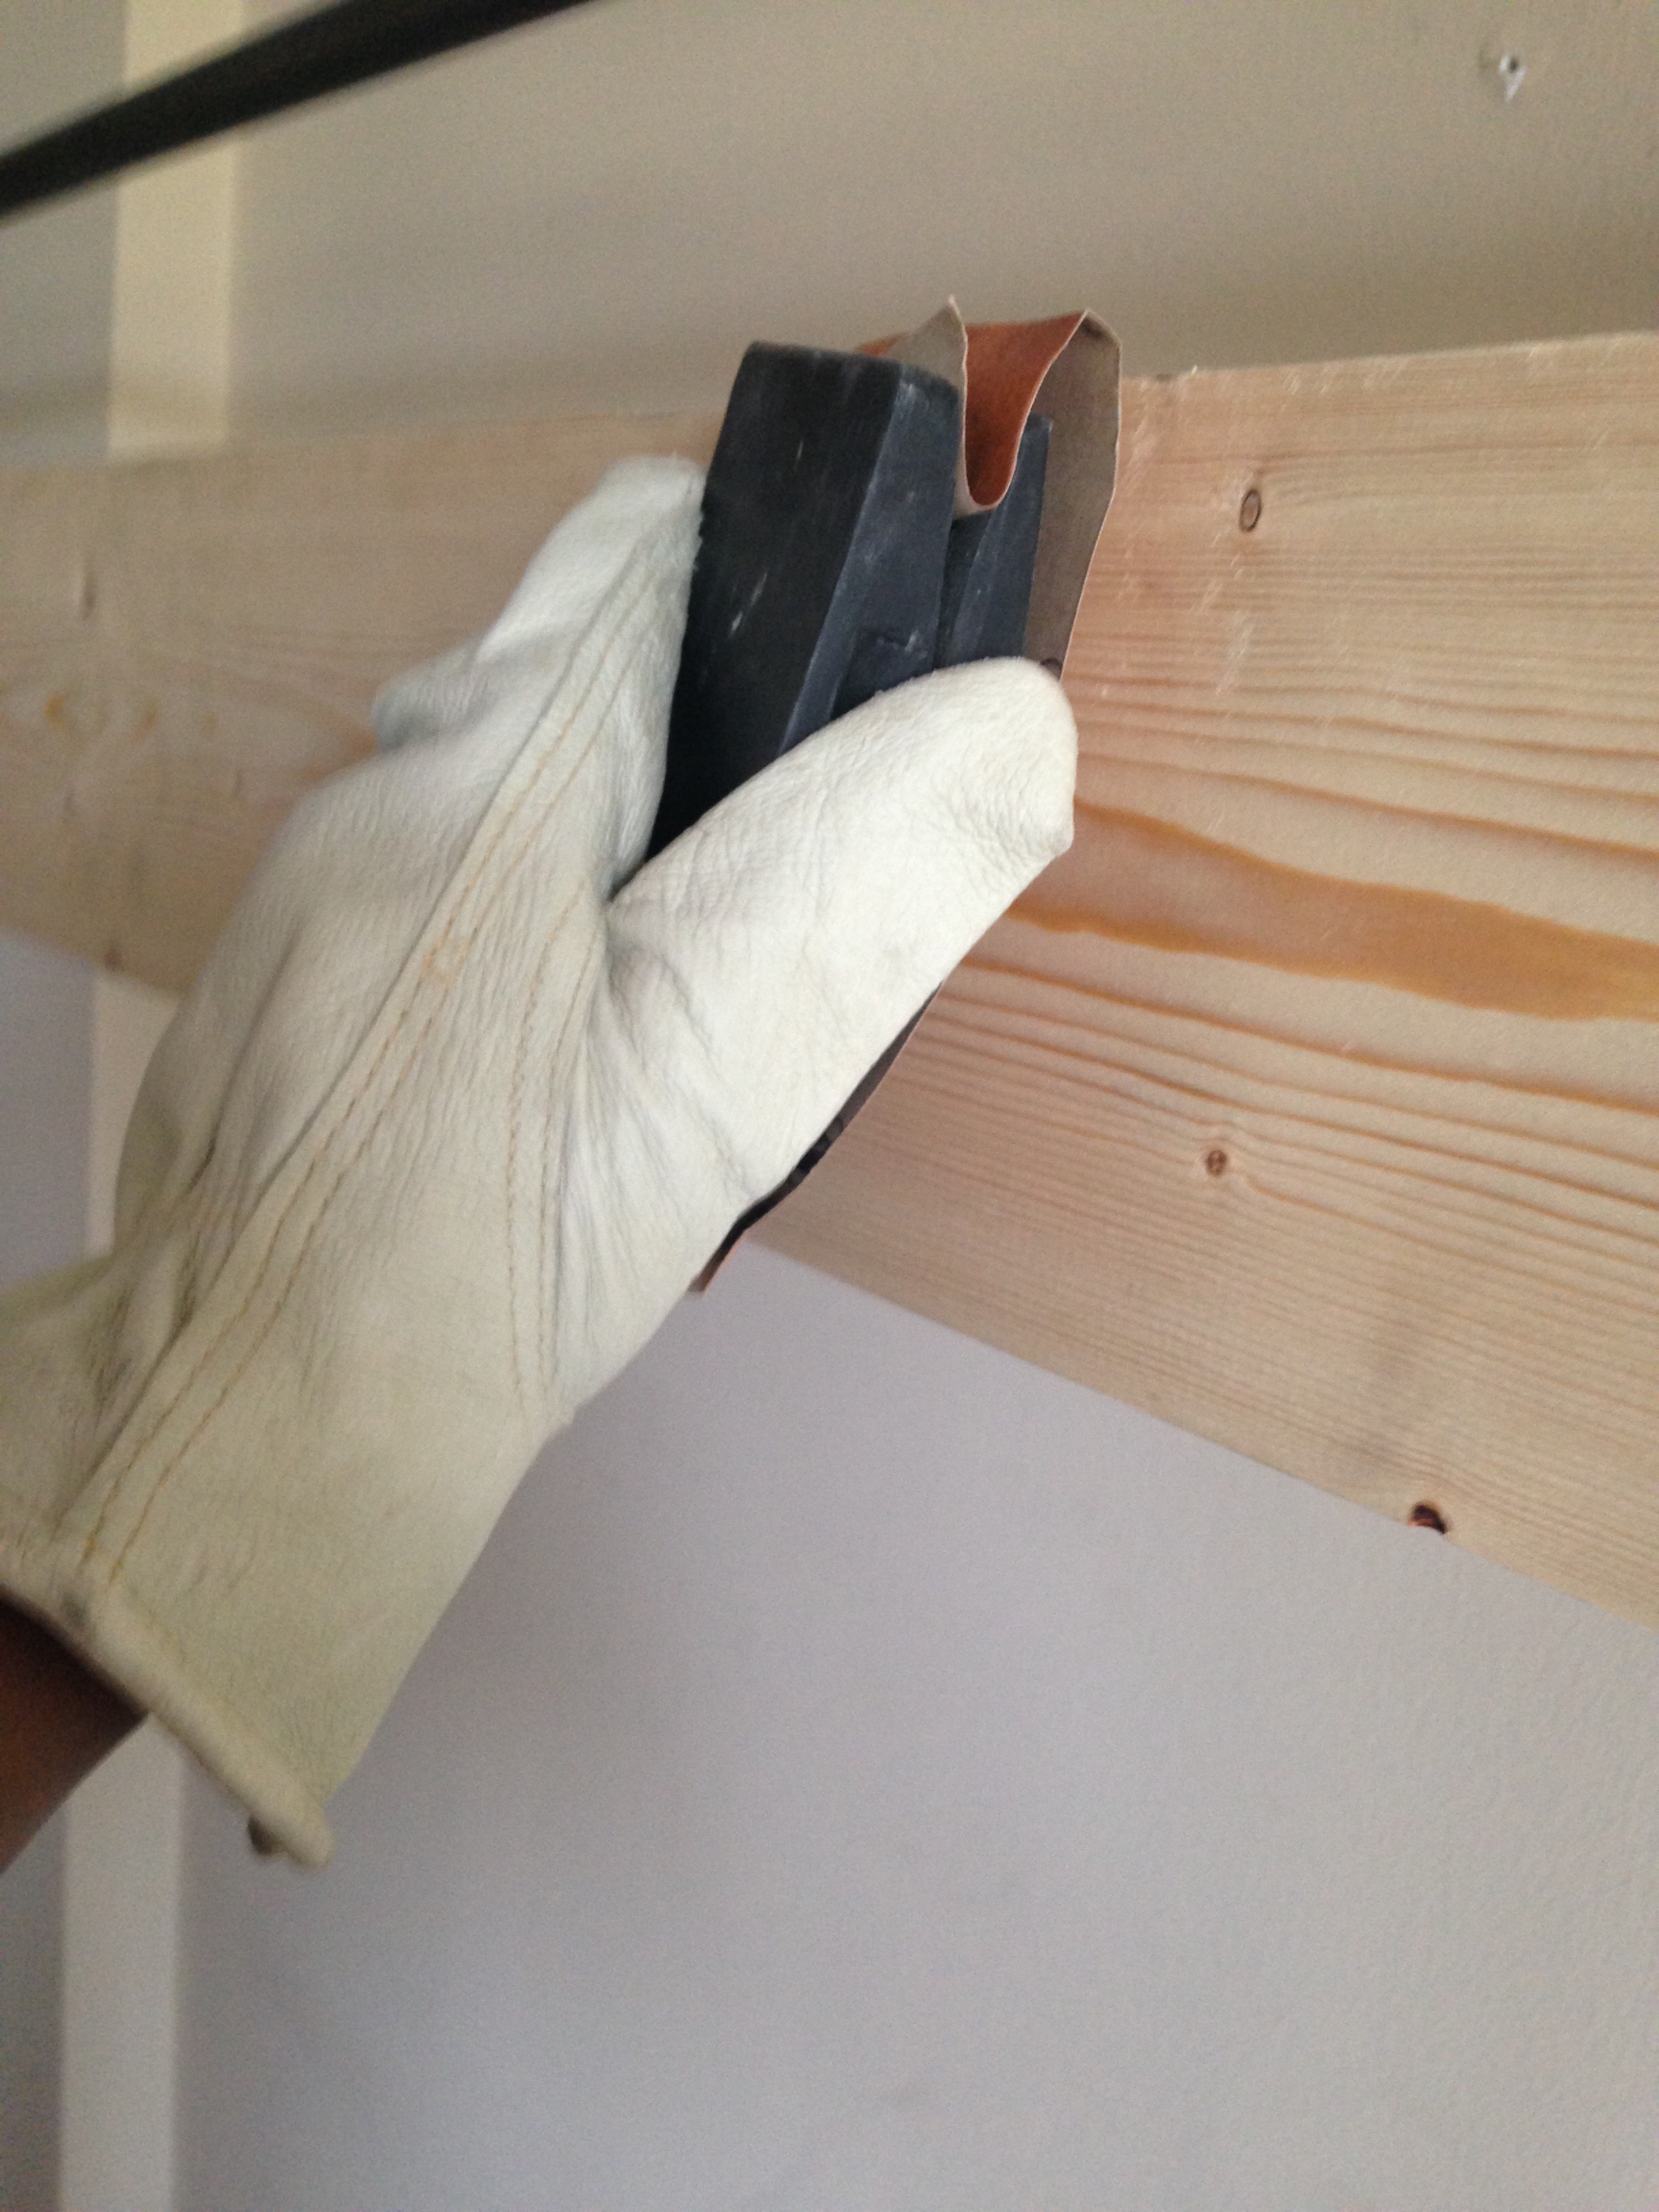
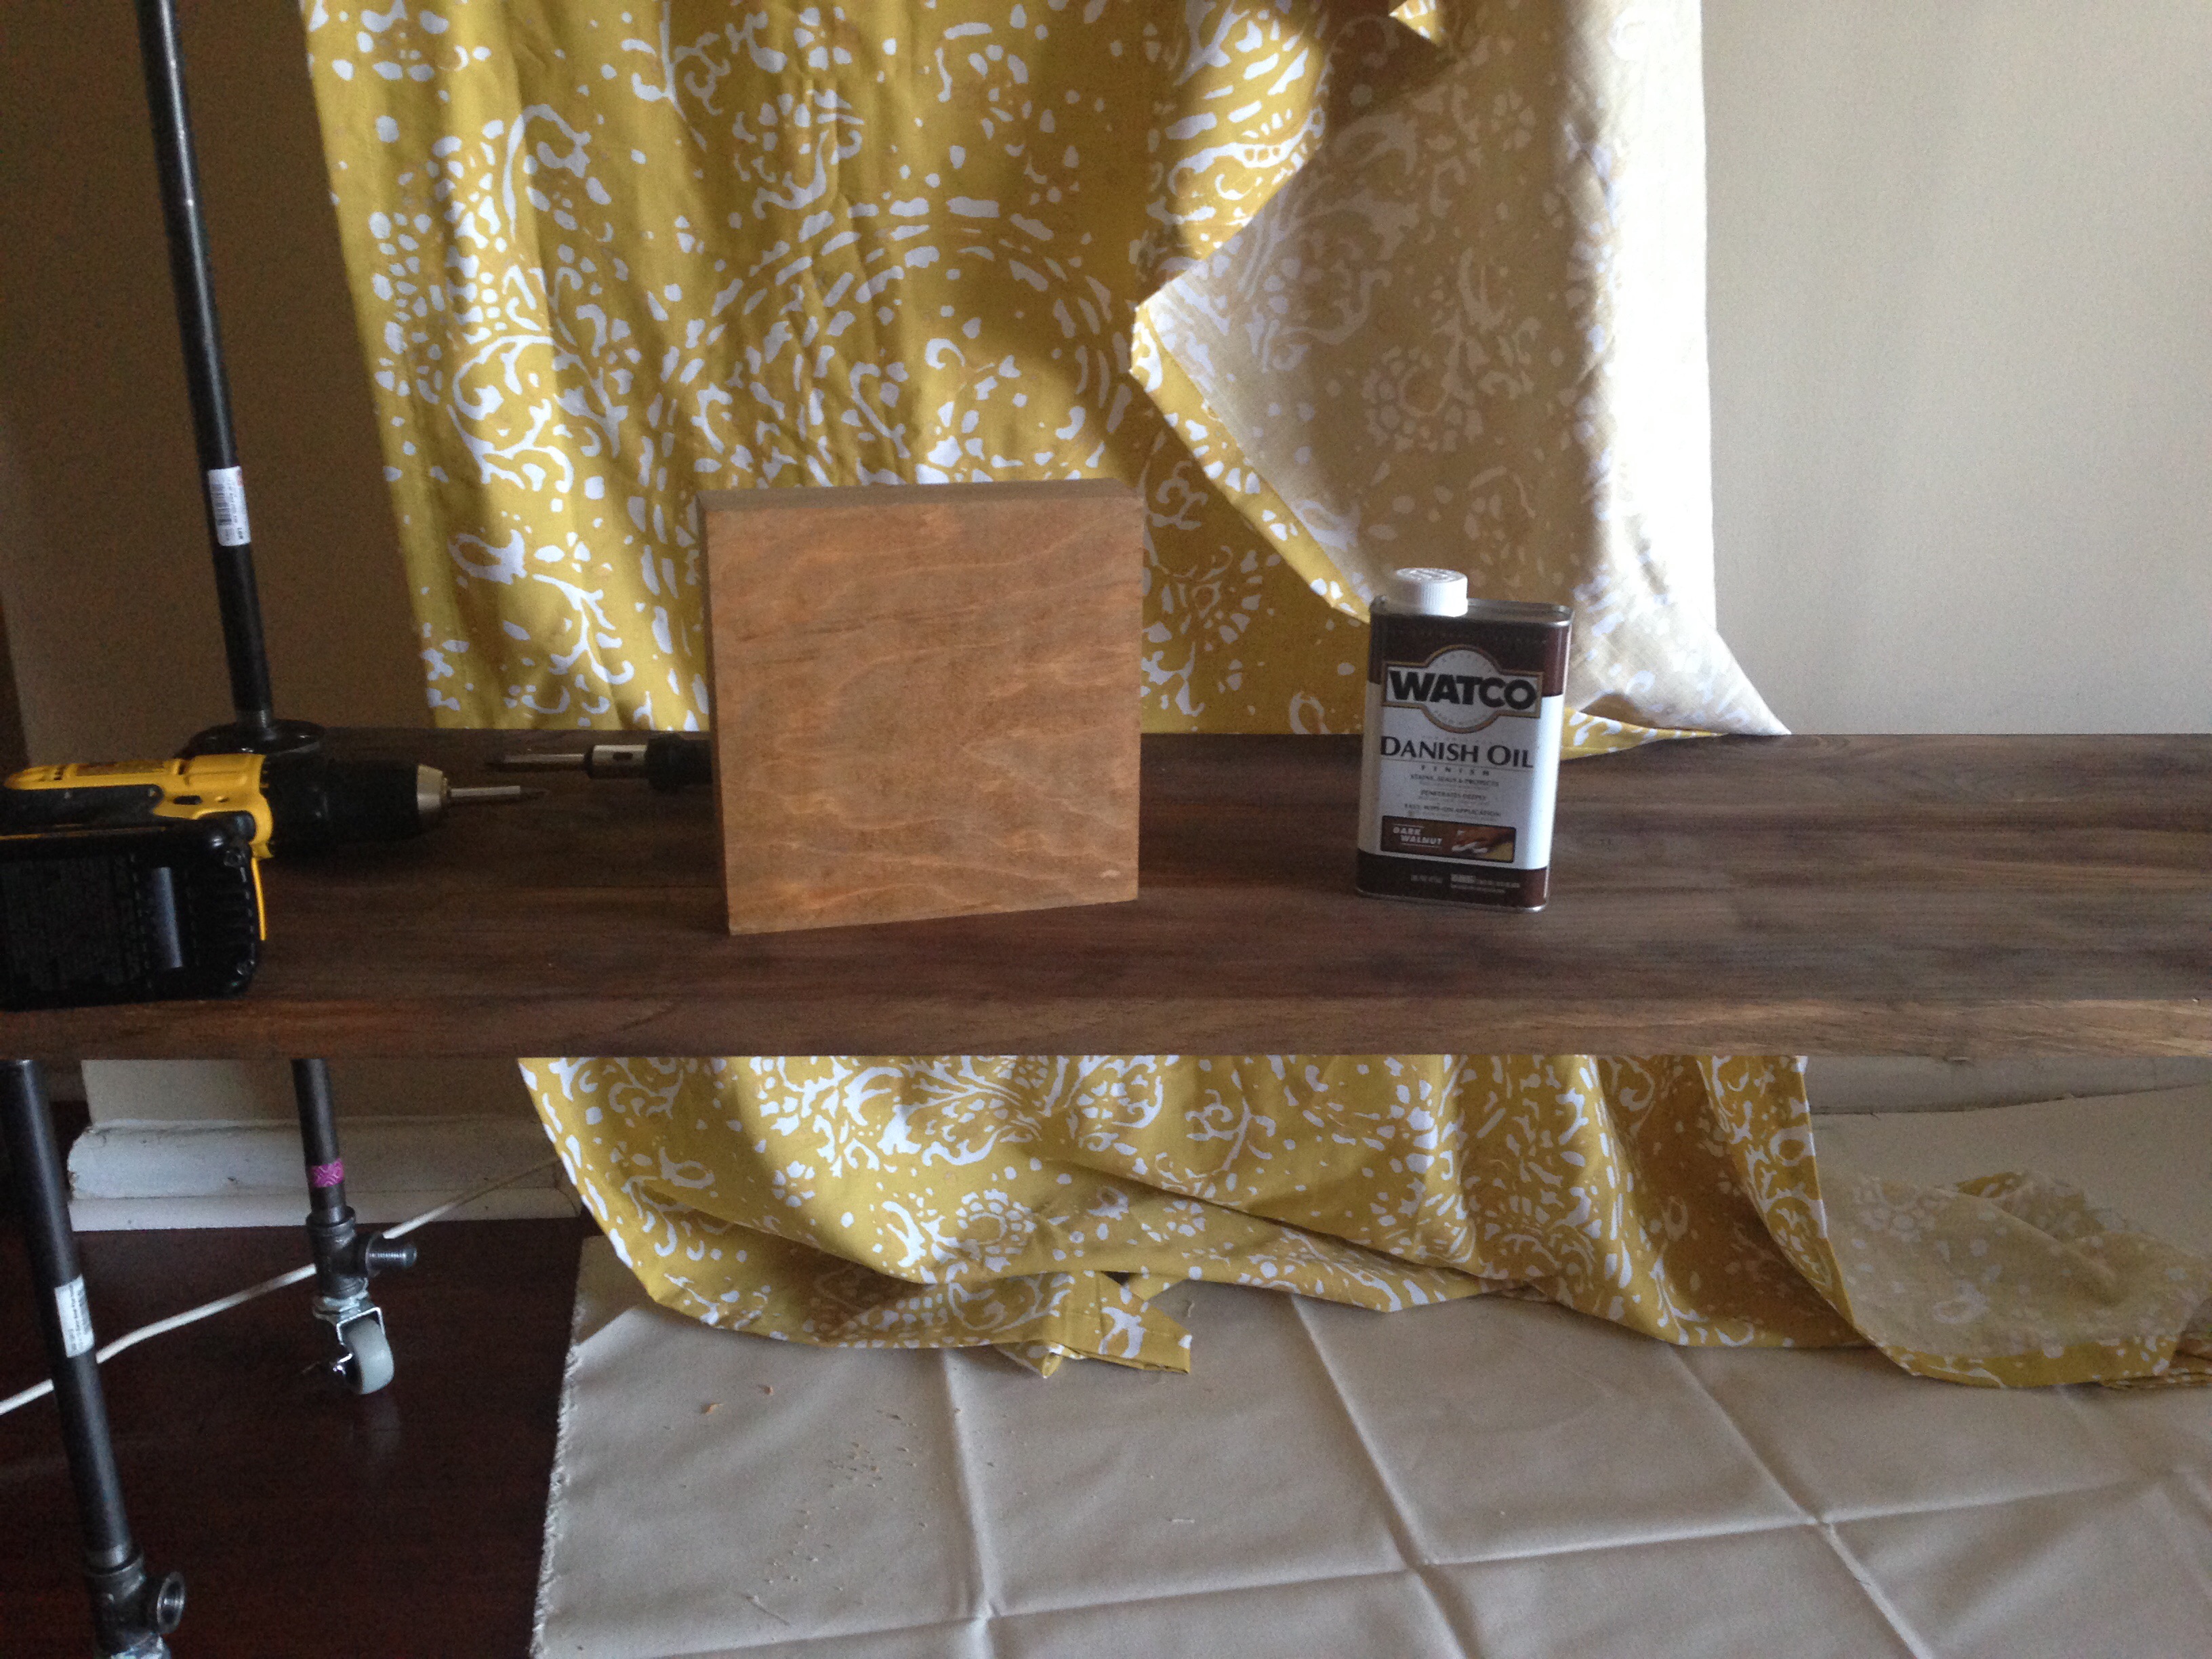
…I stain it with Danish Wood Oil (Dark walnut color).
After staining the front board using a sponge brush…
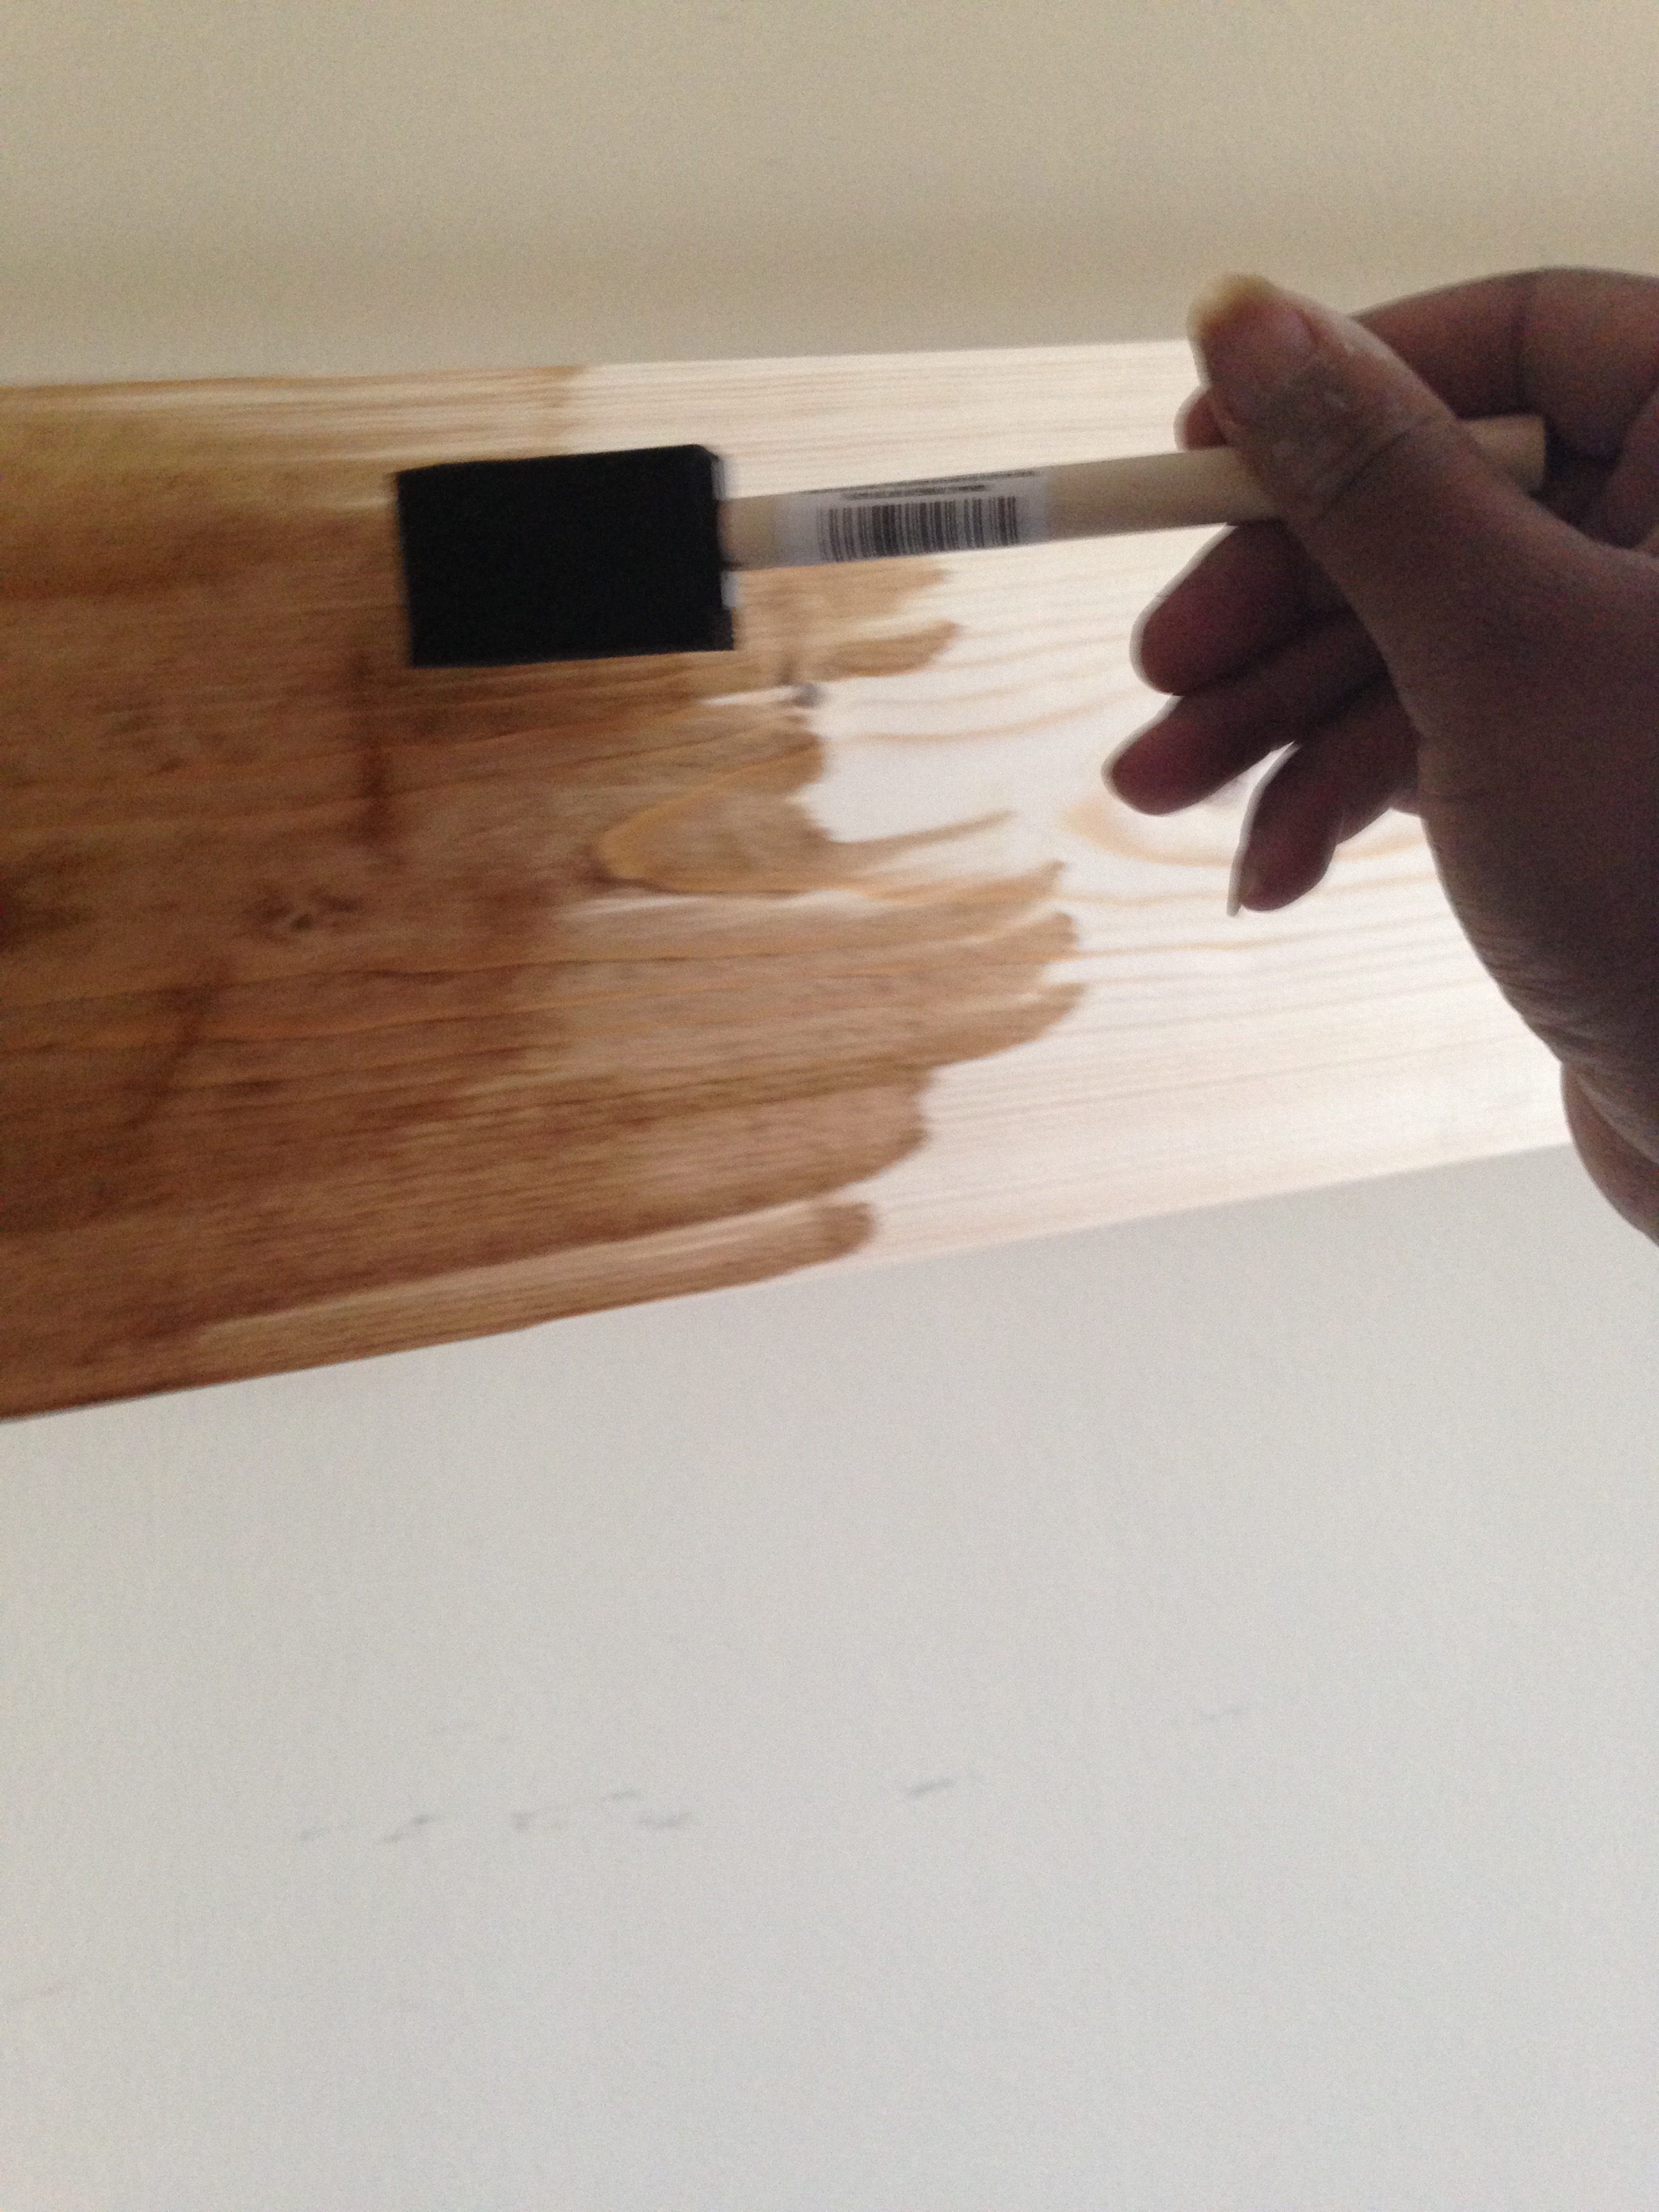
…I left the tree to dry for roughly 60 minutes.
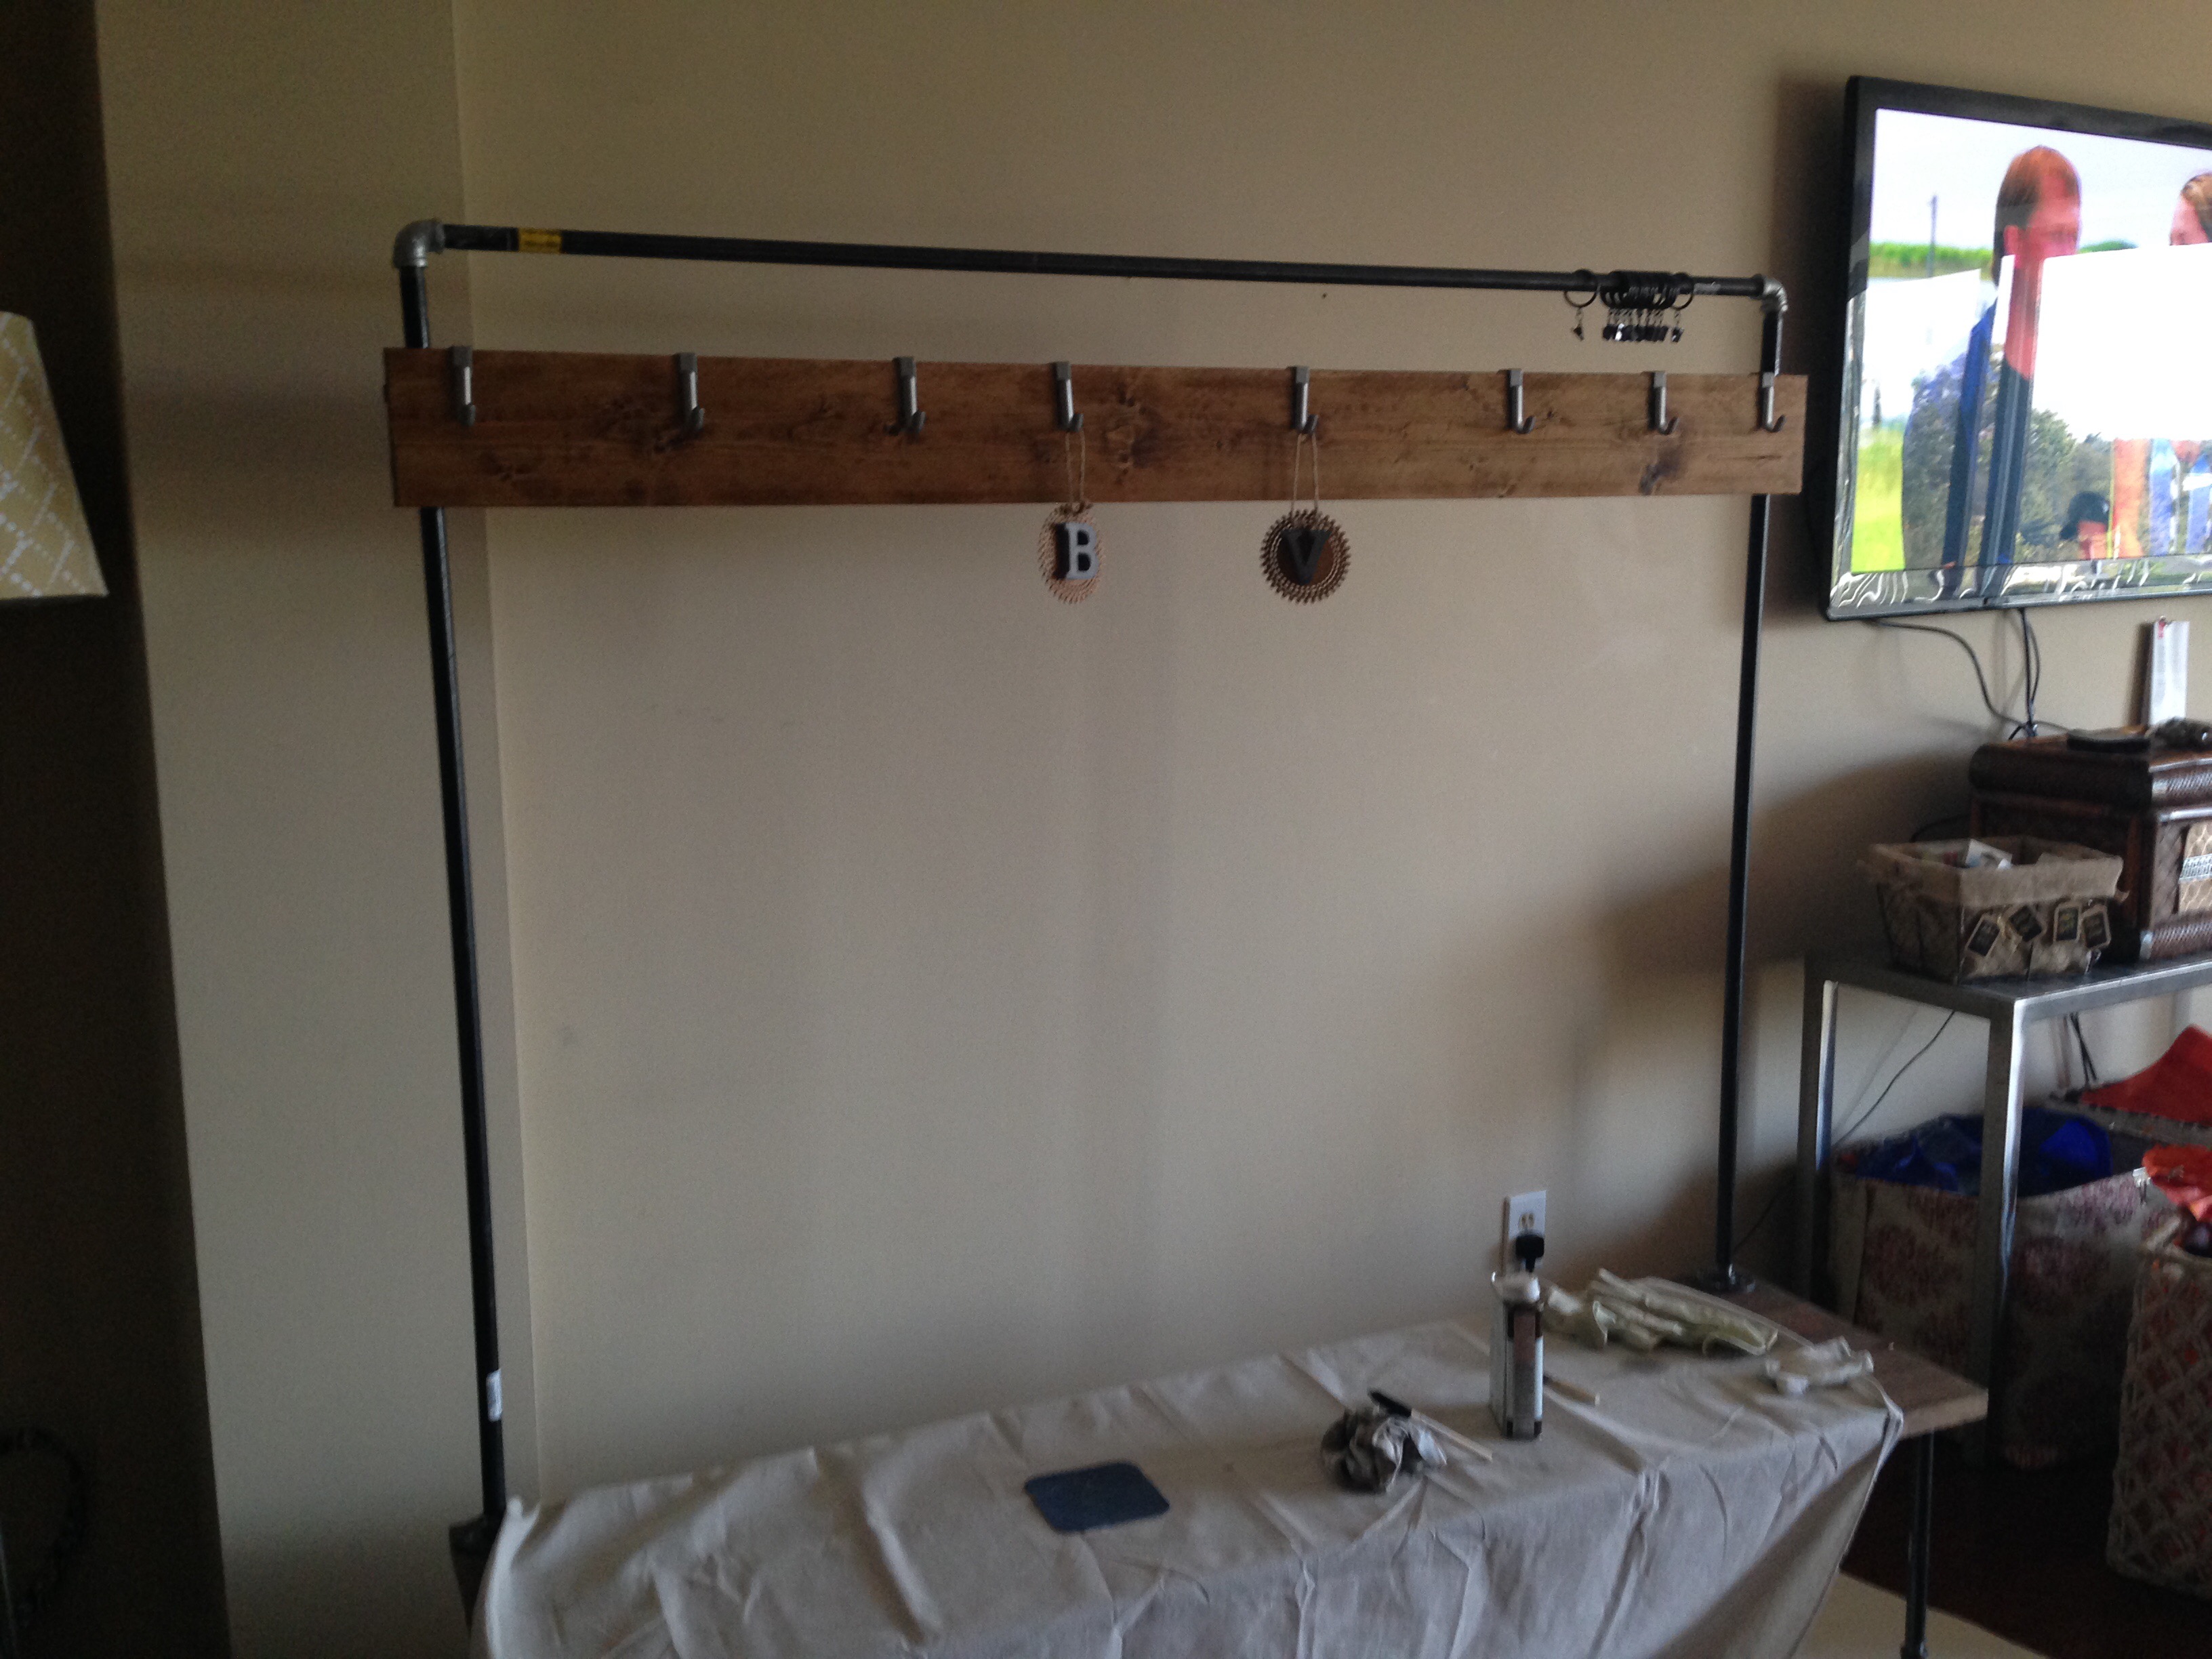
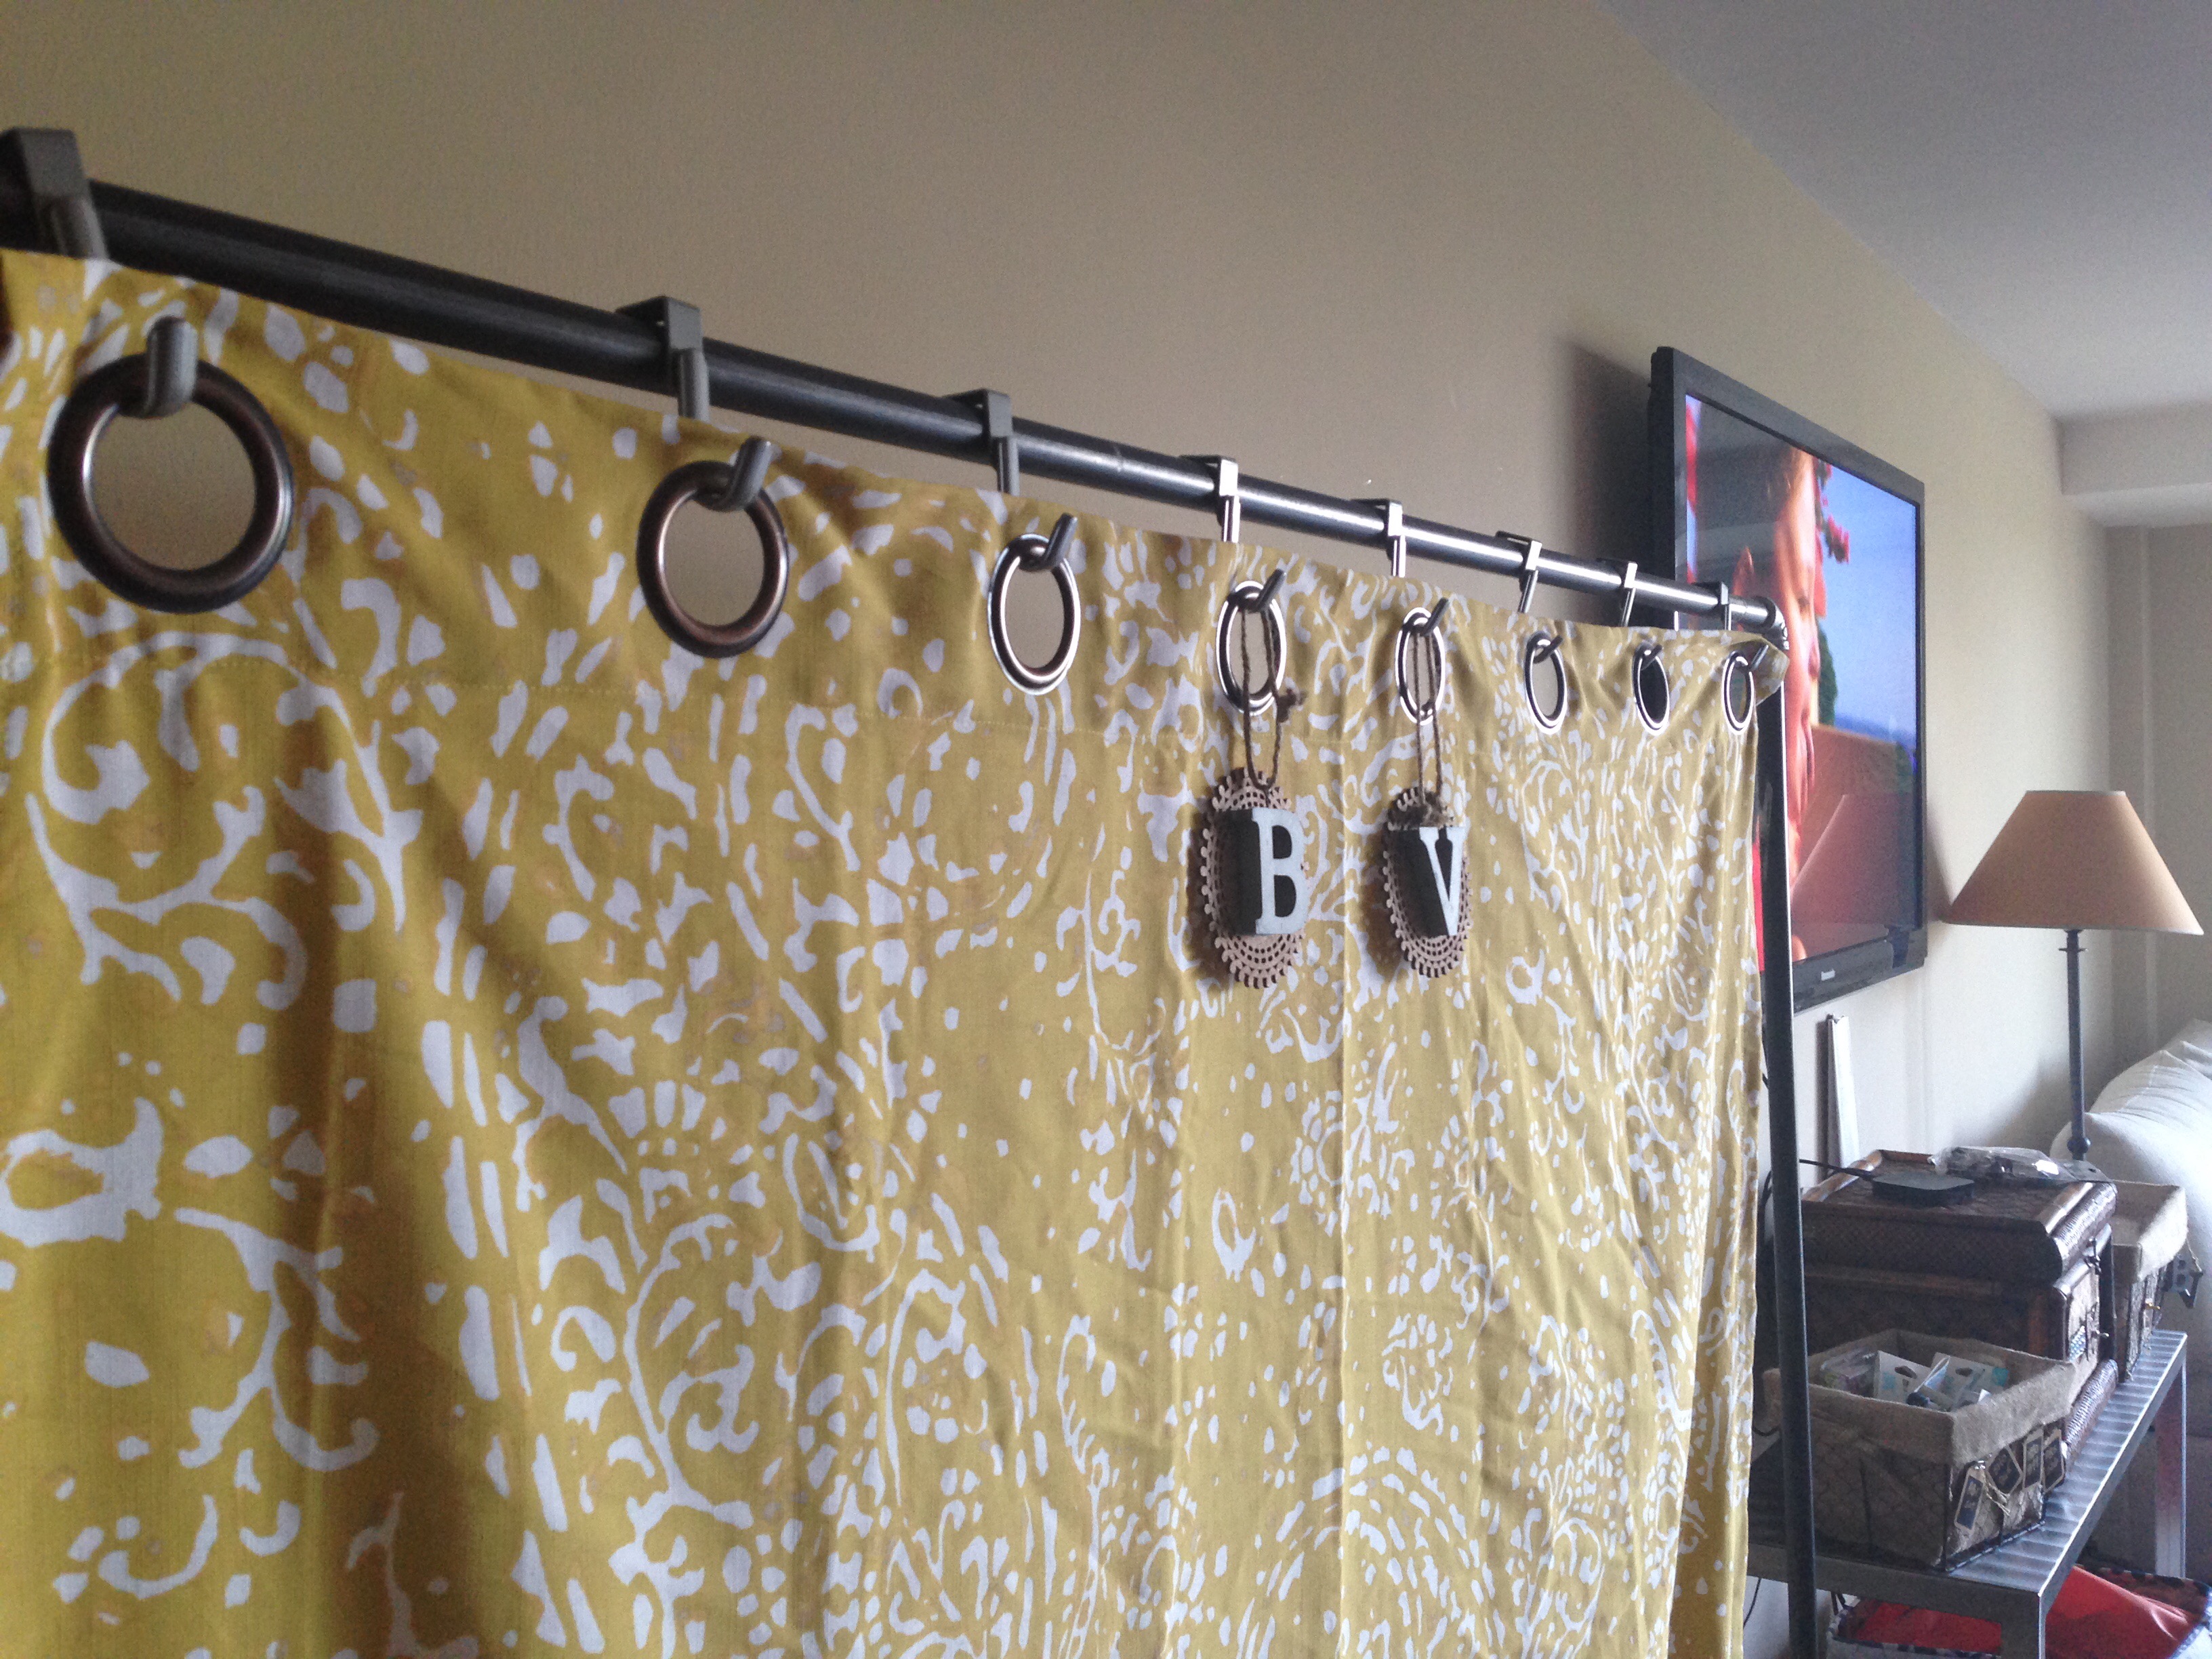
Once dried, I hung the curtain and added the Spectrum over cabinet hooks. I added my “Do What Makes You Happy” 12×12 canvas using two hooks. And, of course, I hung our B and V ornaments.
I love the look of the tree. And I’m amazing that I pulled it off. I did the entire build and pulled it all together in record time.
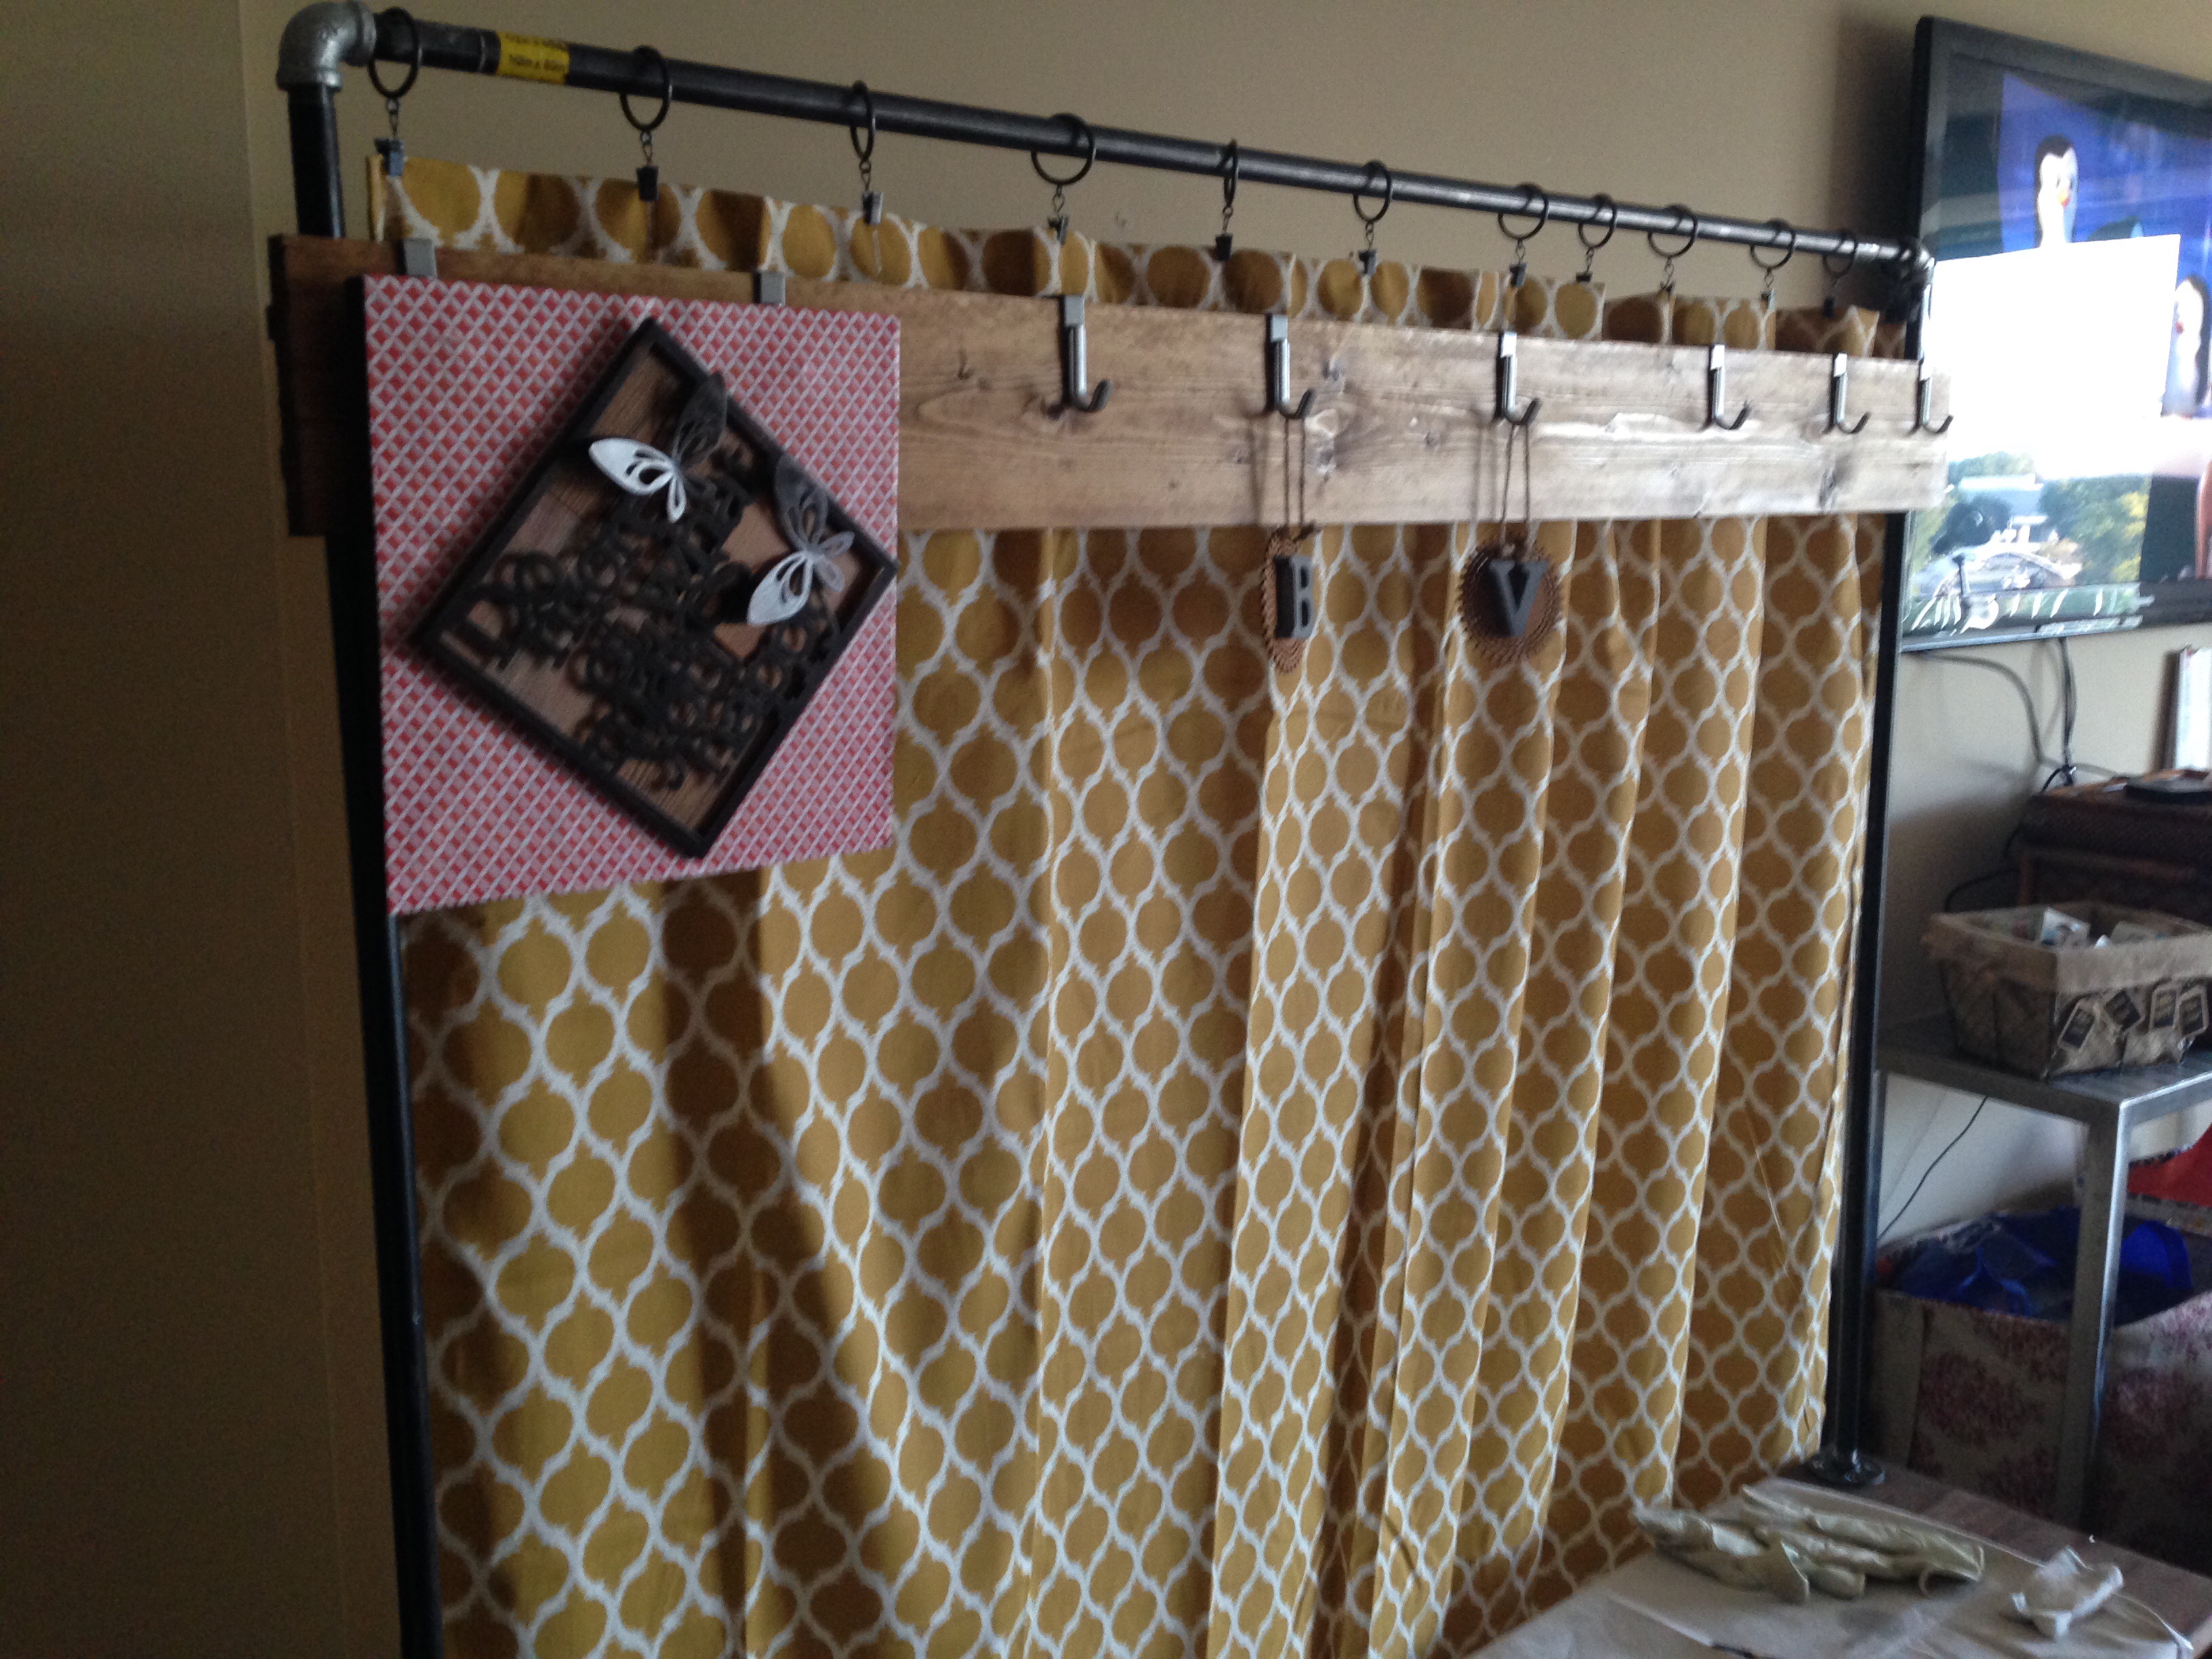
The curtain used for the hall tree is the Morocco pattern fabric shower curtain.


And for fun, I used one of my trademark binder clips to clip my crude sketch of the project to the tree. Drawing date: 8/15/15. Completion date: 8/23/15.
Now that’s how I like to do a DIY.

Hmmm…what time does Home Depot close on Sundays? V-