
Xenia’s 60th Birthday Party (My first major Vida DIY Project)
In the summer of 2010, my mother, Xenia, let me and my brother Mal know that she wanted a birthday party for the big 6-0. So, along with planning a big, early December NYC shindig from Maryland, I was charged with creating the invitations and other party favors for the event.
I headed to my local Paper Source in Bethesda and this quickly became my new favorite place. It’s a fantastic source of creative inspirations, ideas and resources (tools, material, unbelievably gorgeous papers and stationary…). Over the years since working on the Xenia party project, I would become a permanent fixture in that place (to buy up all the stamps and fancy papers I could find or to show off latest project pics to the friendly (and gracious) Paper Source staff.
The invitations for the party was all designed using PowerPoint. Because I was also in charge of the photo slideshow of Xenia’s life (to be played for the guests during the party), I had a ton of pictures from age 2 to age 59 to use for the project. More and more ideas kept coming until I had an entire, coordinated collection of Xenia party favors that included media, paper goods, decorations, and even edibles (yes, edibles!).
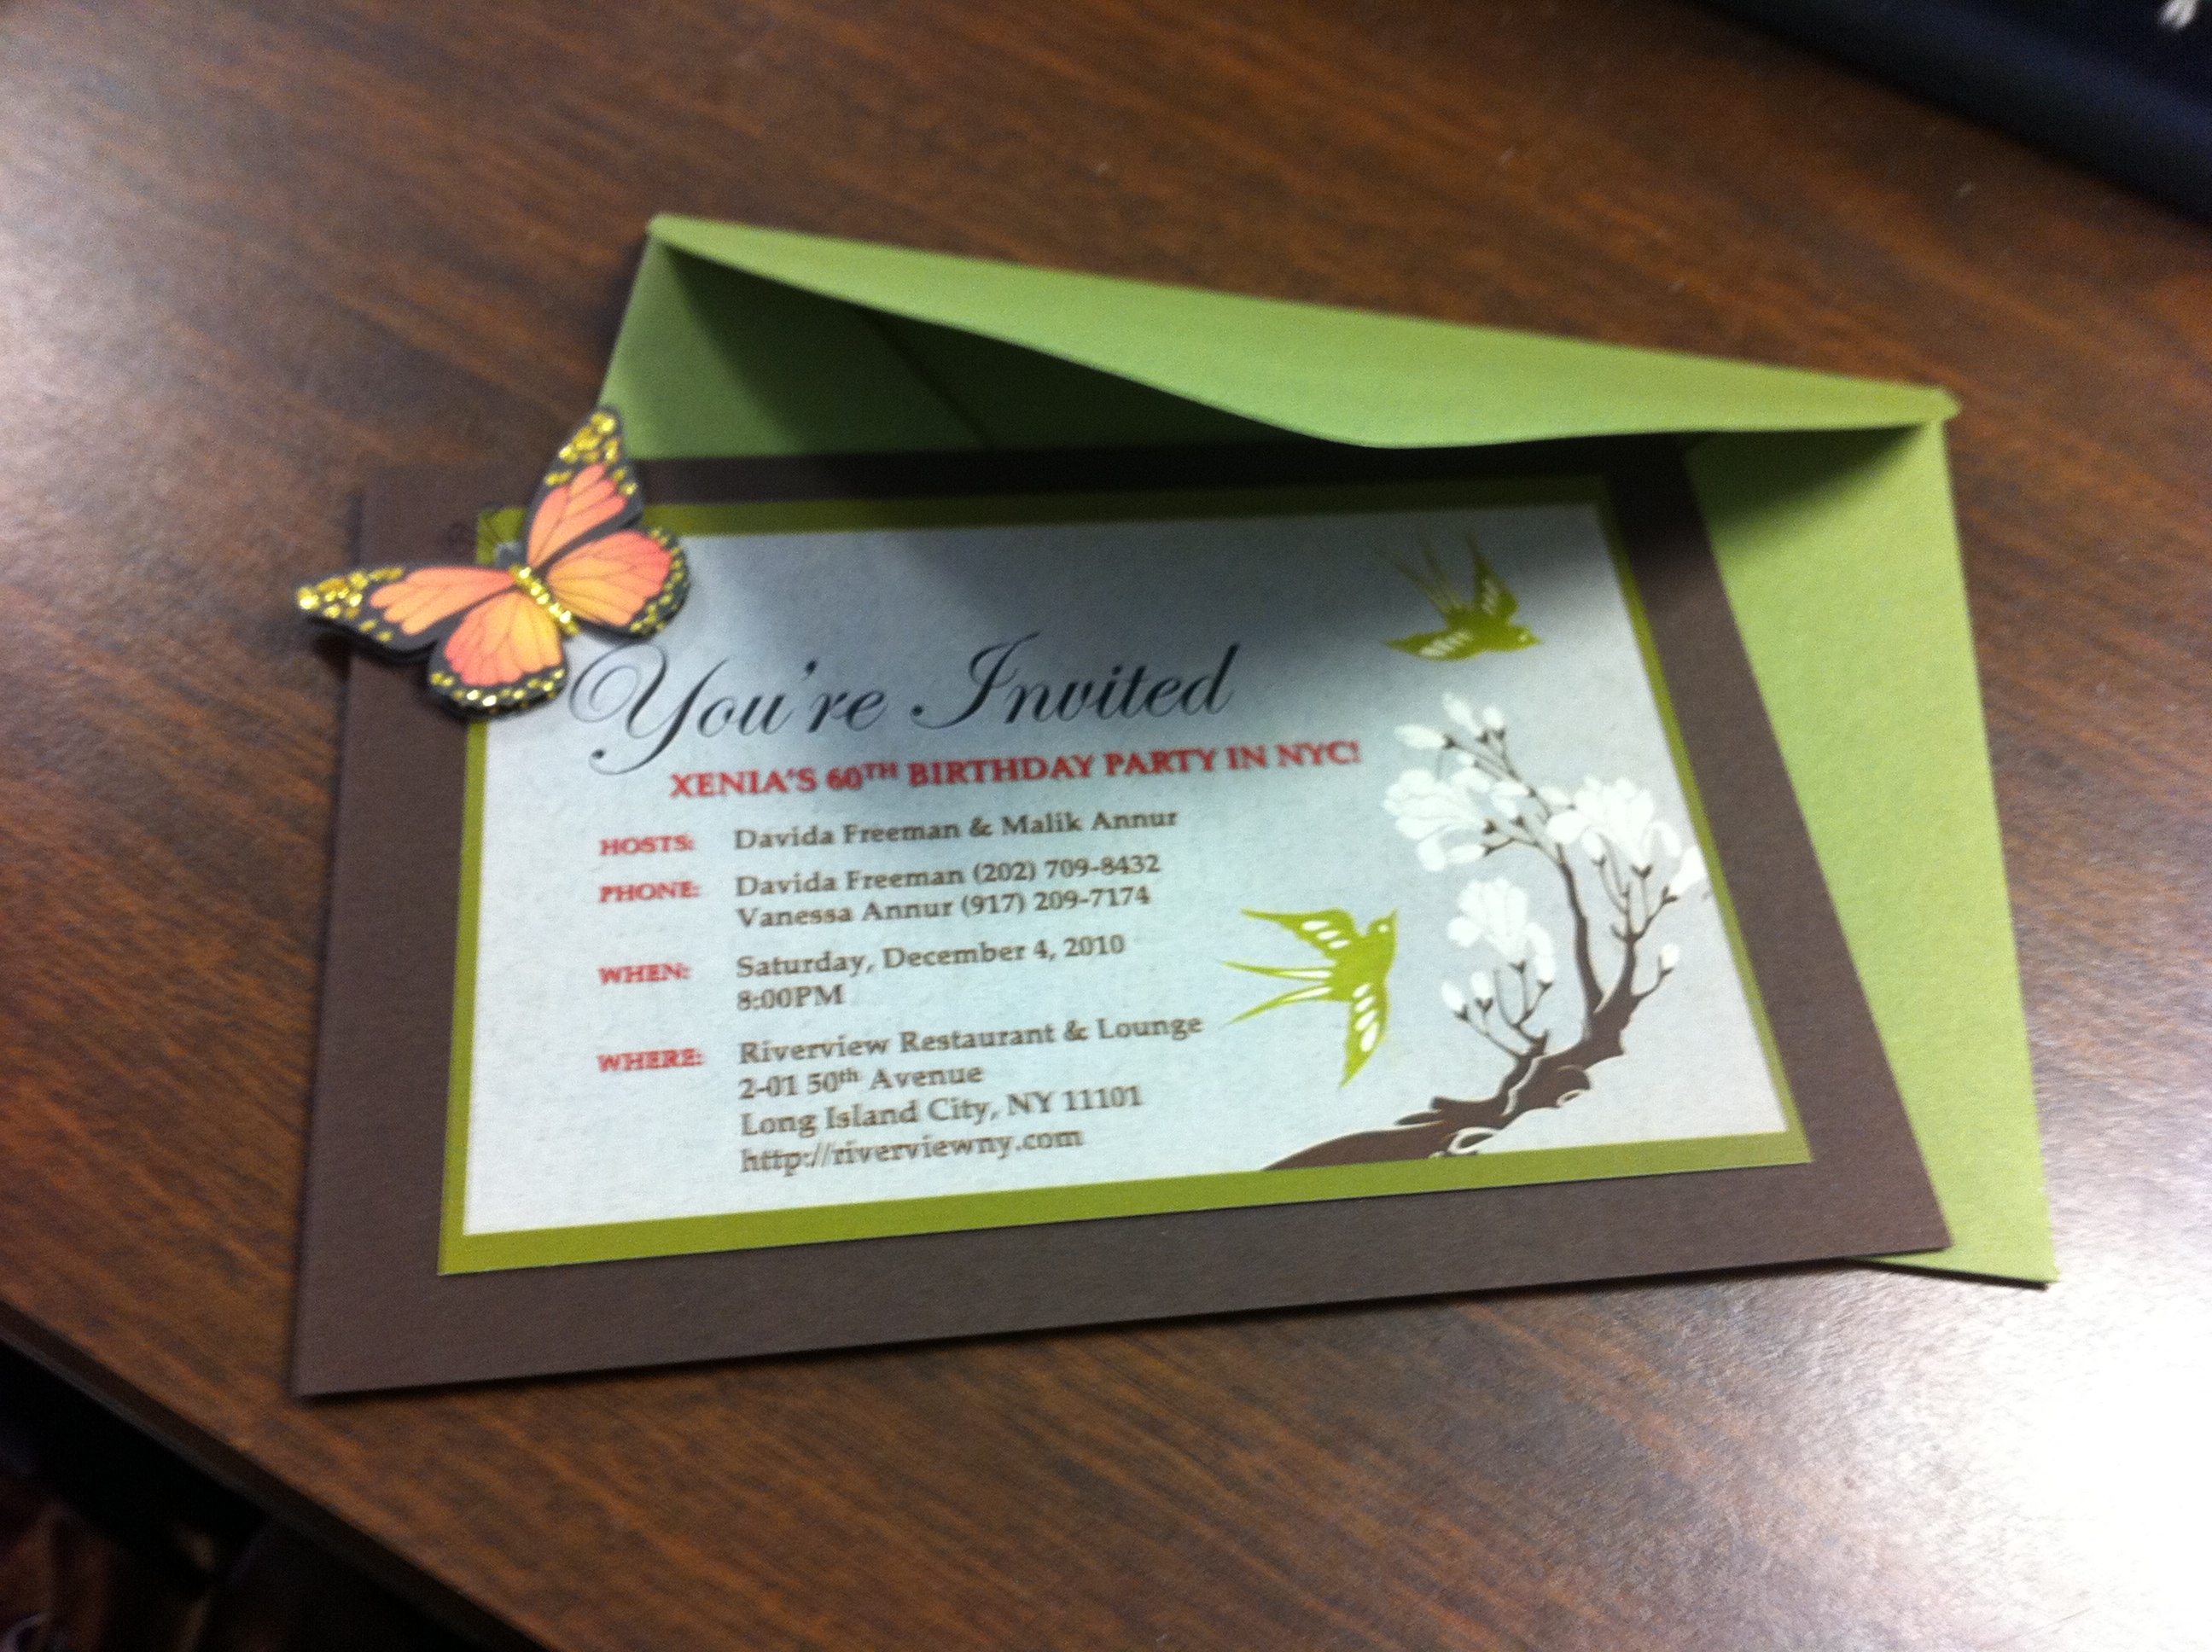
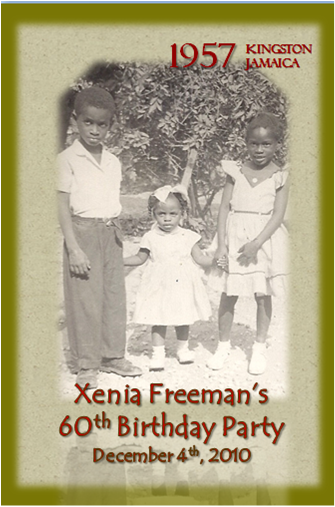
The Invitation


- Two-sided 5×7 brown flat cards from PaperSource.
- Two PowerPoint slide templates featuring Xenia’s high school graduation picture (on one side of the card) and details of the party on the other side of the card.
- A slide background created from a screenshot of a template from an online invitation website (and saved as an jpeg image).
- A thick olive green border (a rectangle, no fill) on one slide and a bottom accent line (and accent picture background box) to the other.
- Text overlay using complementary colors (dark red, brown and white in bold with shadow text effects). Wish I remembered the font I used…sorry!
- Double-sided tape to affix printed slides to each side of the brown flat cards. Important to print on high-quality matte photo paper.
- Martha Stewart butterfly stickers. The best card embellishment in the world. Every paper crafter must have these on hand at all times.
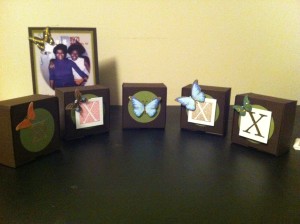
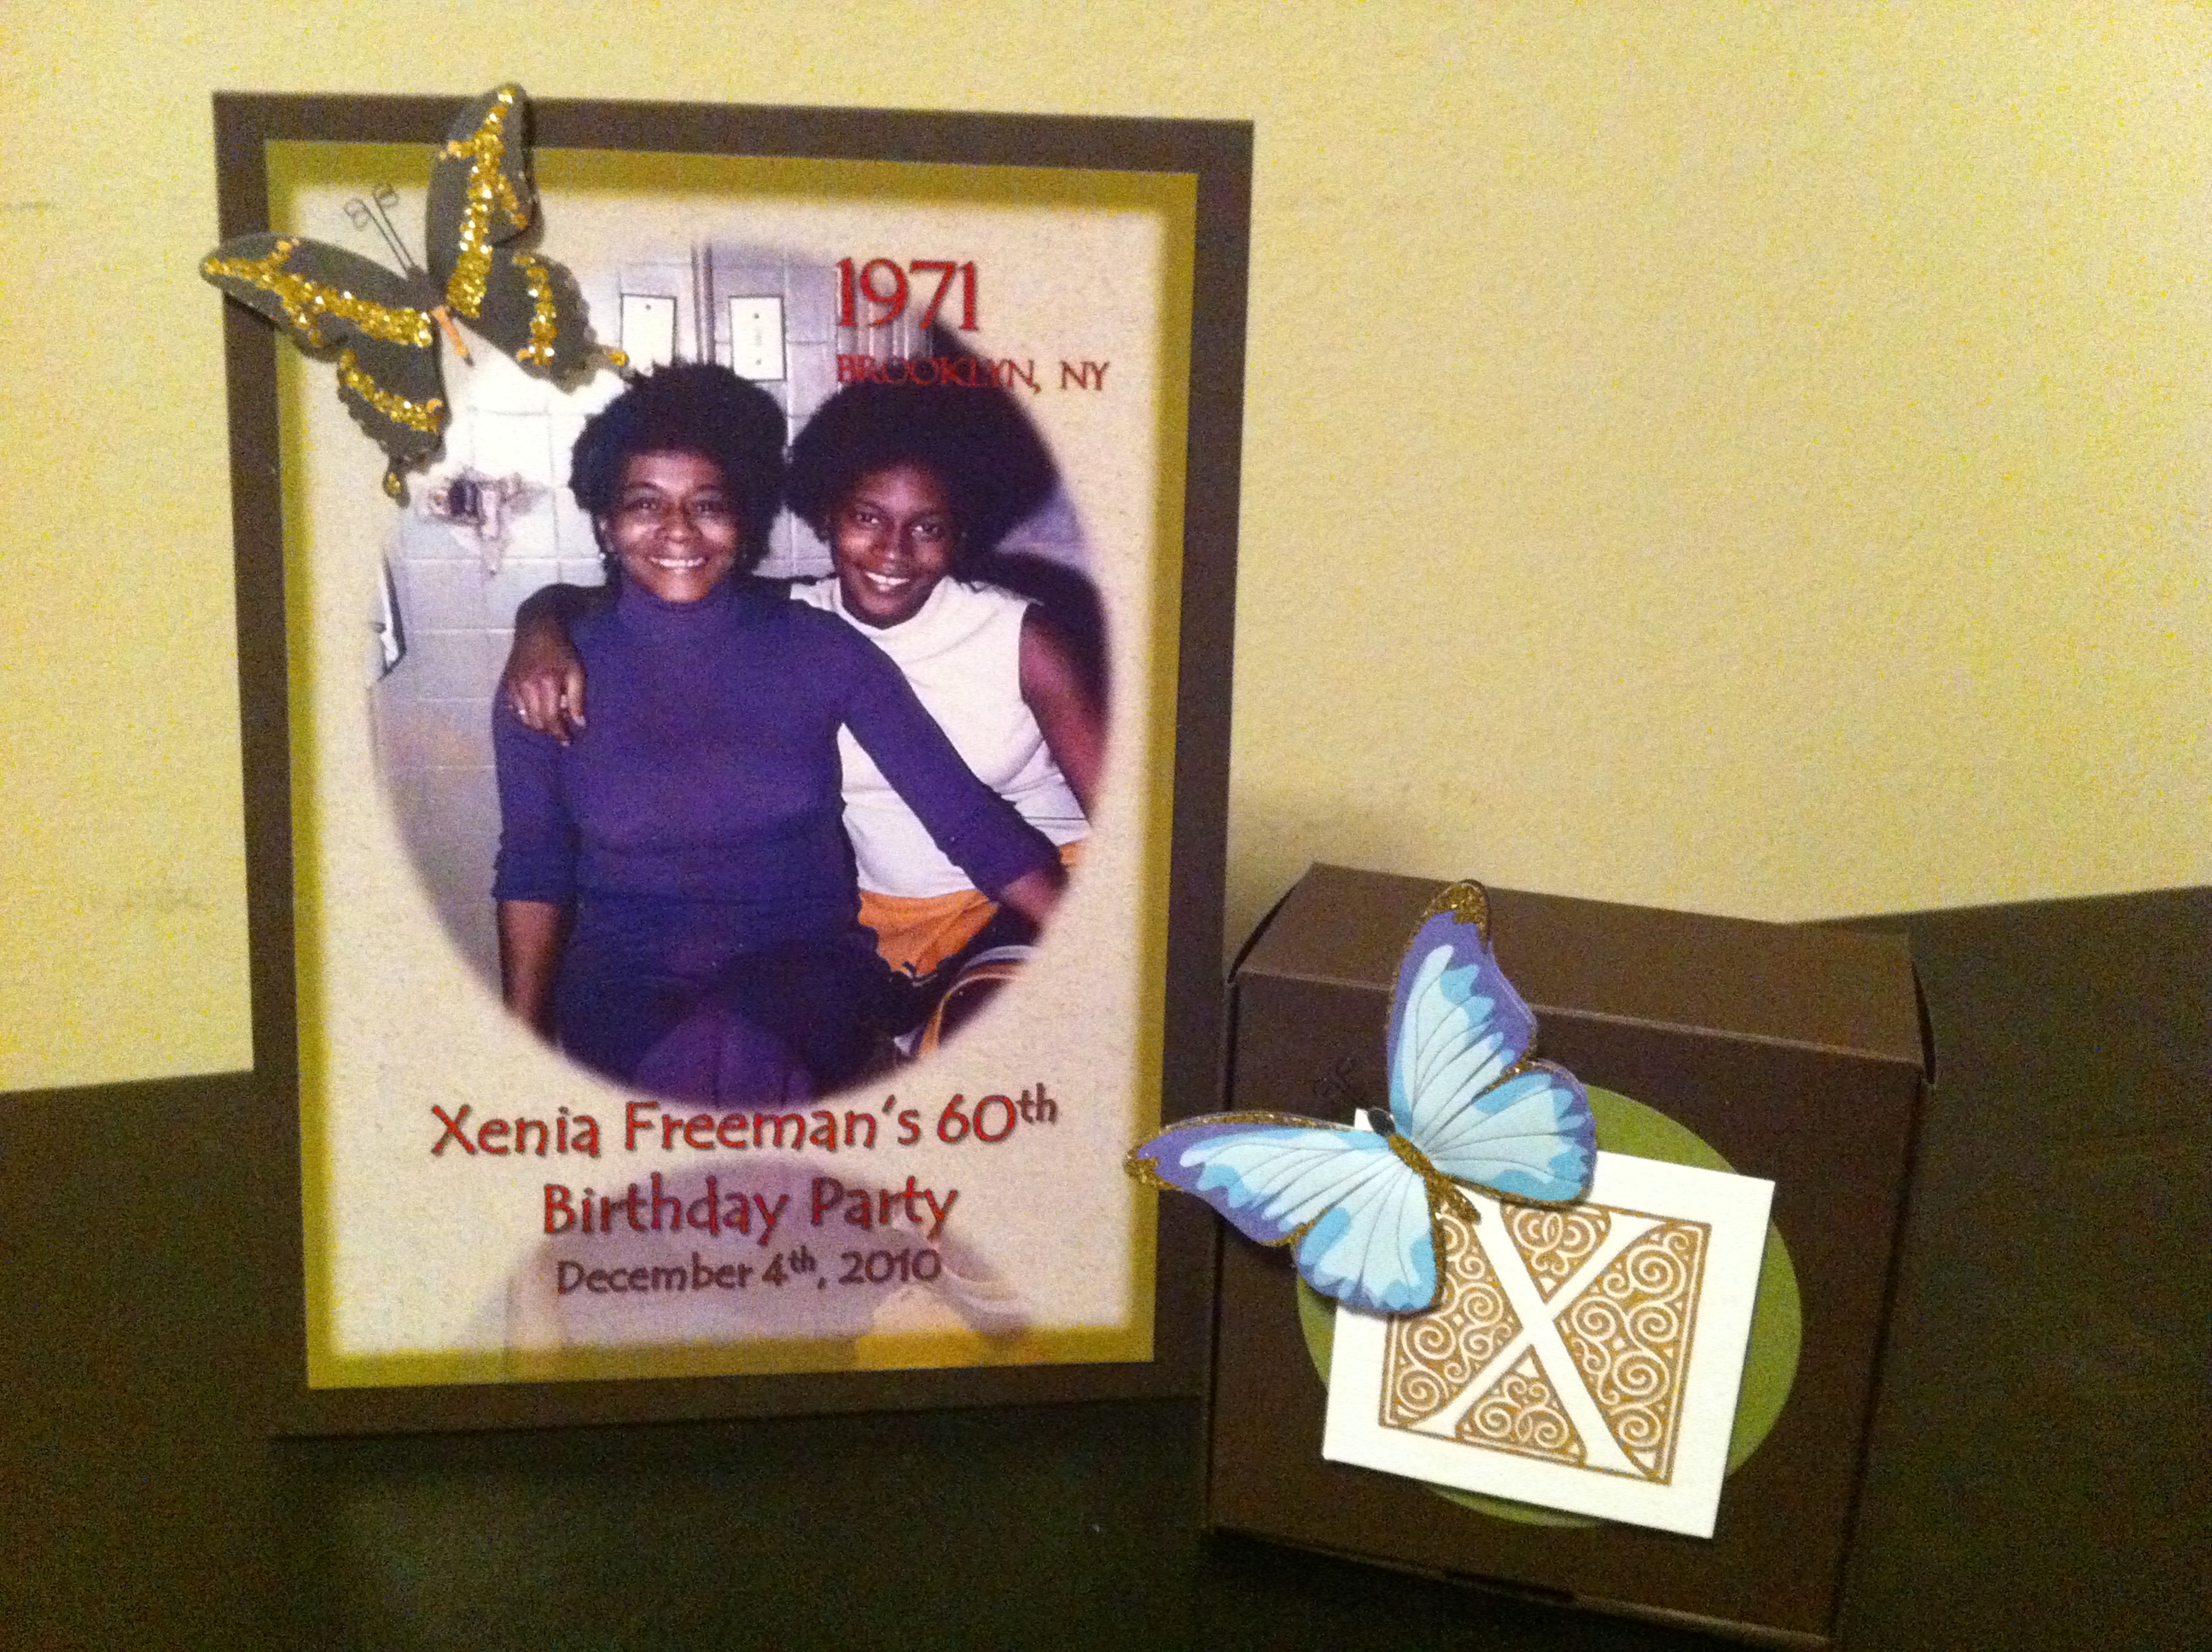
Table Tents
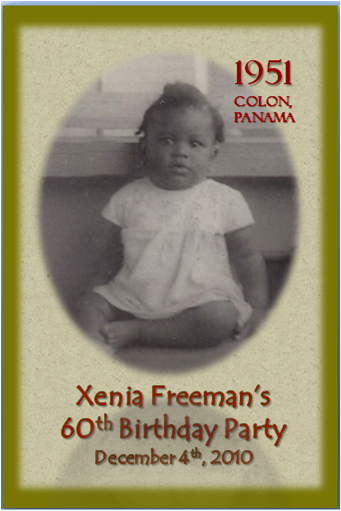
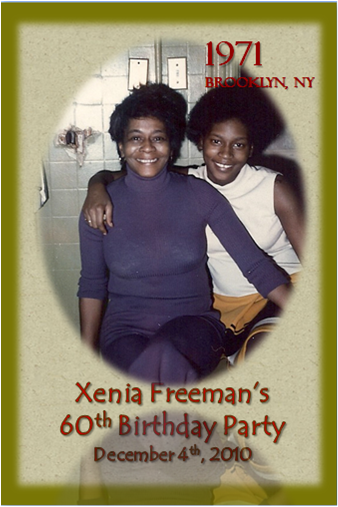
These were fun. 🙂 I had this idea of including pictures of Xenia at various stages of her life (and adding the year and place from which the picture was taken) on table tent cards. This was a nice way of inviting guests to enjoy a glimpse of her life while seated for dinner.
The picture of Xenia with the date and location was featured on one side of the table tent and the table tent number was displayed on the other.
- Two-sided 6 x 8 brown table tent cards from the PaperSource (Note: They no longer make table tents in brown or any other signature stationary color. Now there is only white or a box-brown color available as table tents.)
- 5 x 7 PowerPoint slides – one for each chosen picture of Xenia with same background and border color scheme as the invitations.
- Pictures add to slides with oval cropped borders and the vertical transparent reflection effect.
- The year and place in dark red font on the upper left of image.
- The party title and date centered below the image.
- Big white numbers (from 1 thru 9, one of each table) in a dark red oval on the table number side.
- Double-sided tape or Glue Dots to affix a picture slide on one side of the tent card and a number slide on the other.
- More Martha Stewart butterfly stickers for tent card embellishments.

Guest Favor Boxes
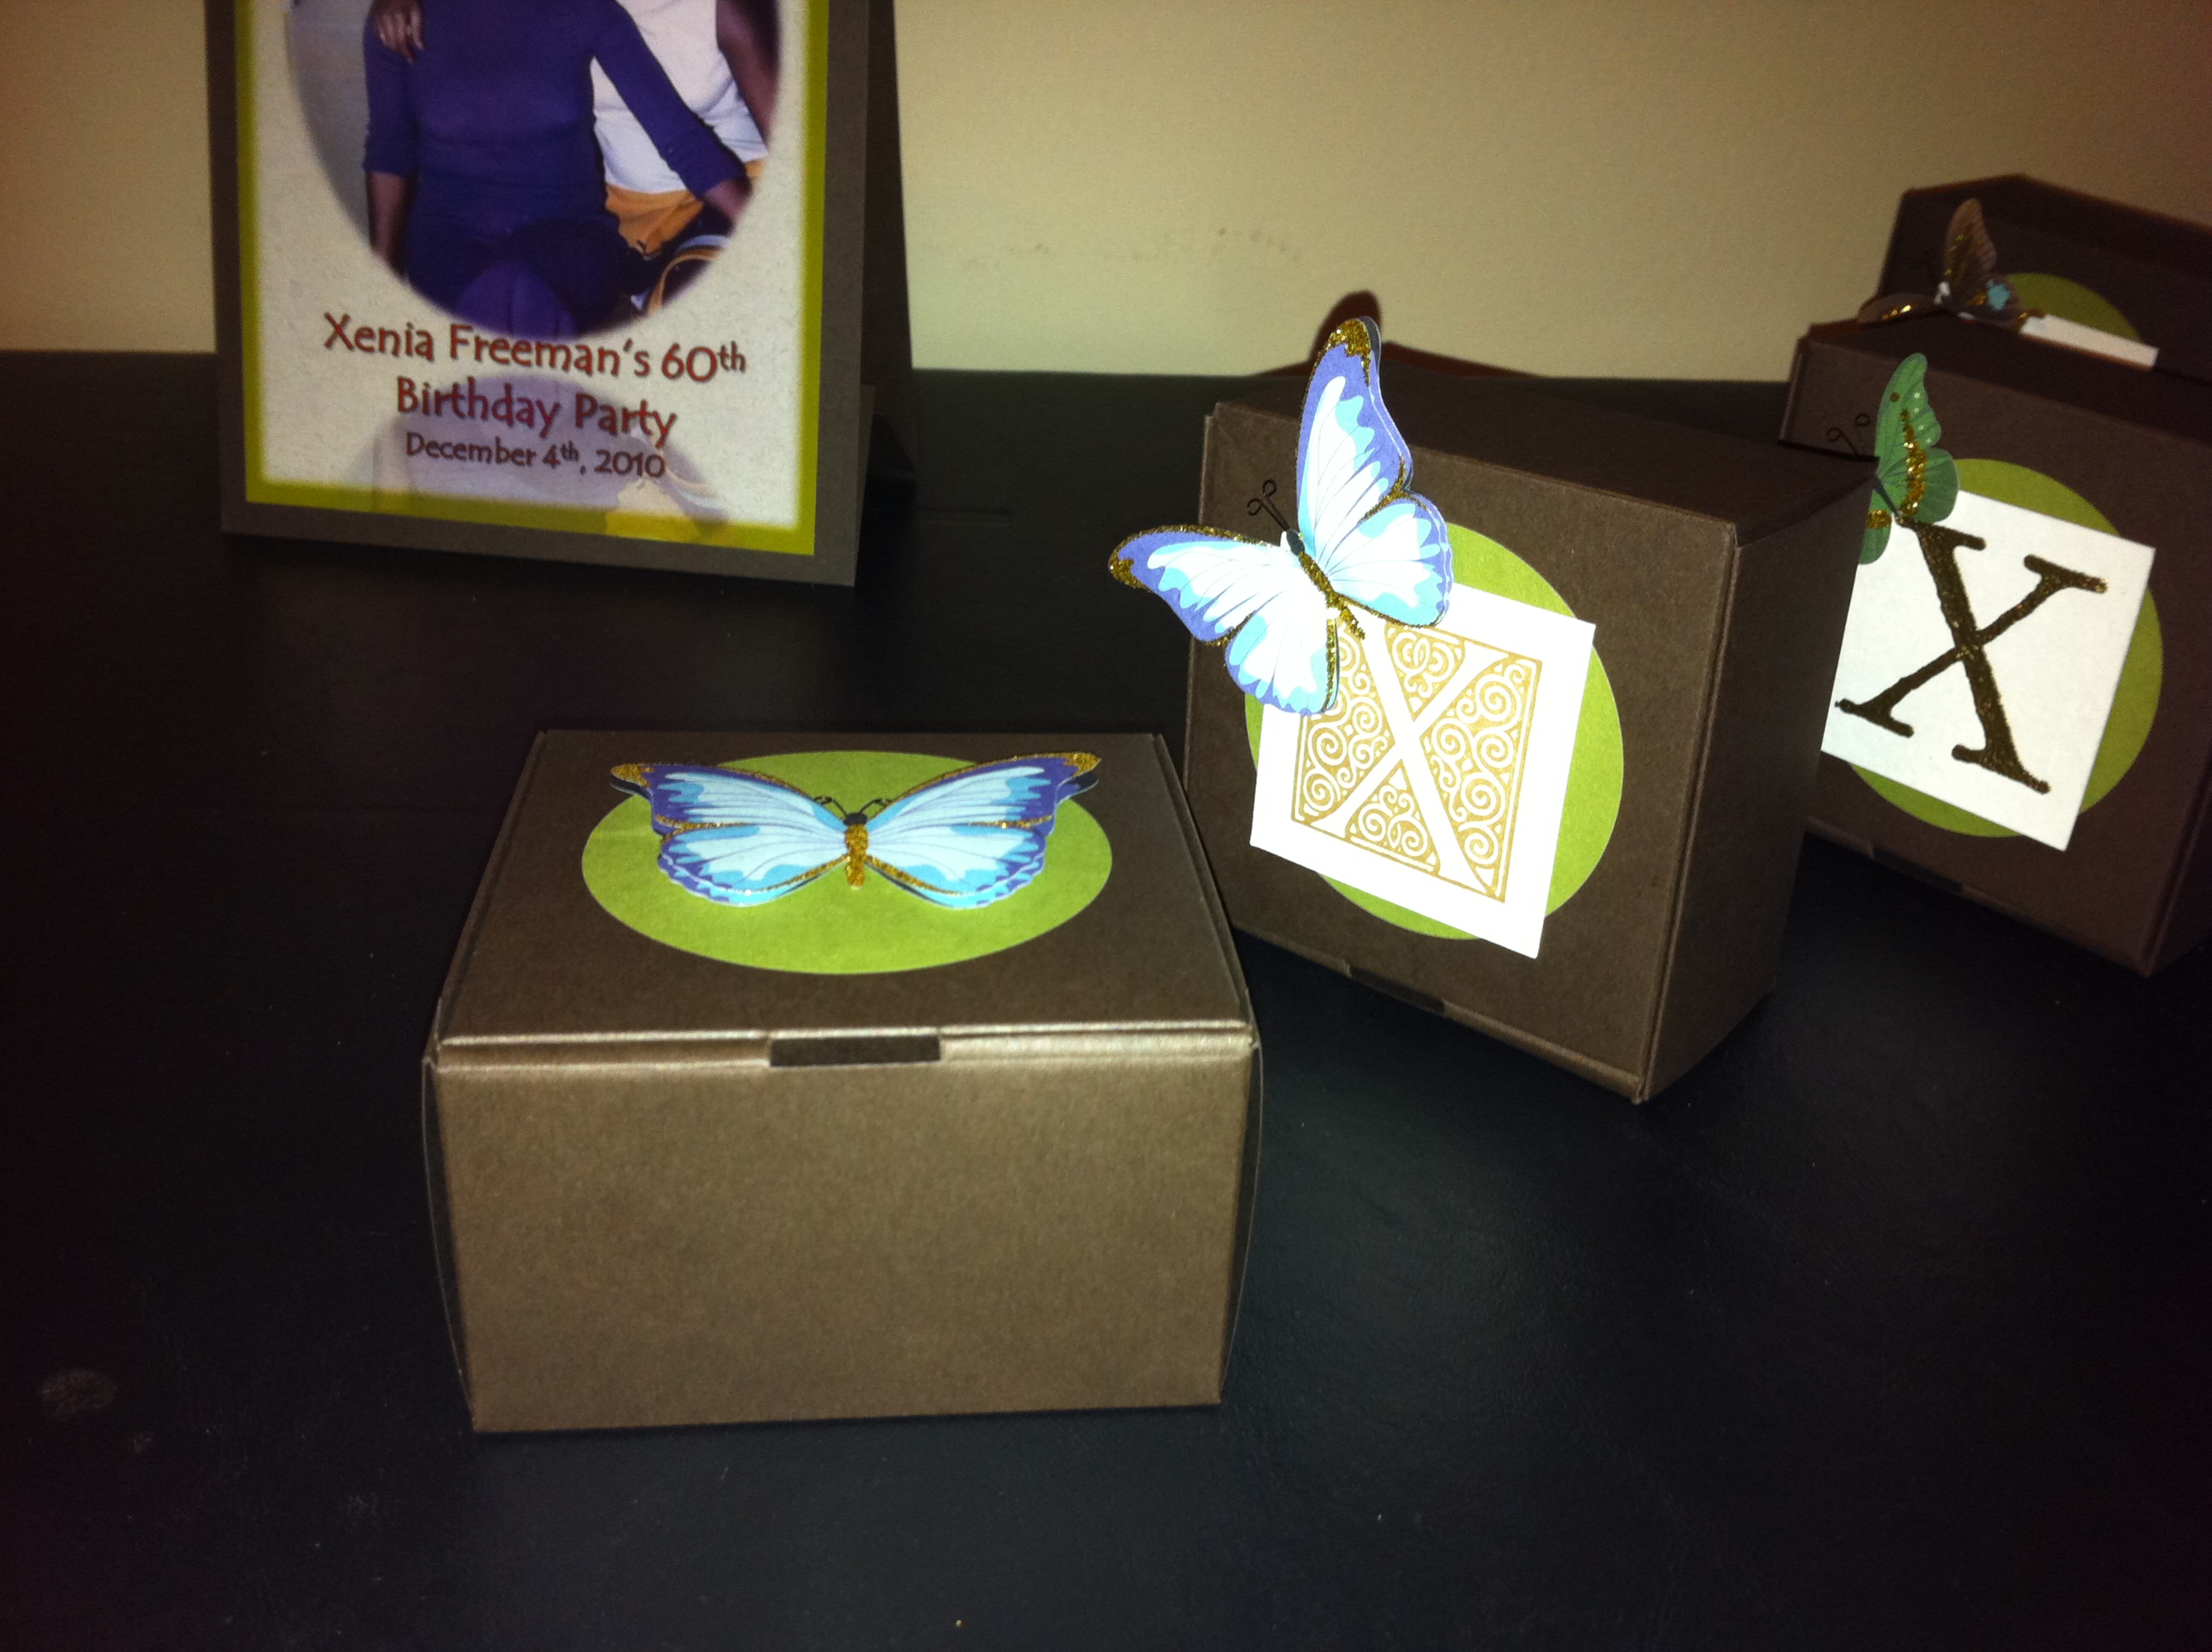
Another simple, but brilliant idea inspired by Paper Source – matching little paper gift boxes in the same color as the the flat and tent cards. This was an easy DIY (and took no time to do) because the solution (and materials) were all supplied by the Paper Source. The ensemble was complete with coordinating olive green circle stickers (and topped off with either a Martha Stewart butterfly sticker or a monogrammed X card (with butterfly sticker).
So what went in the box?
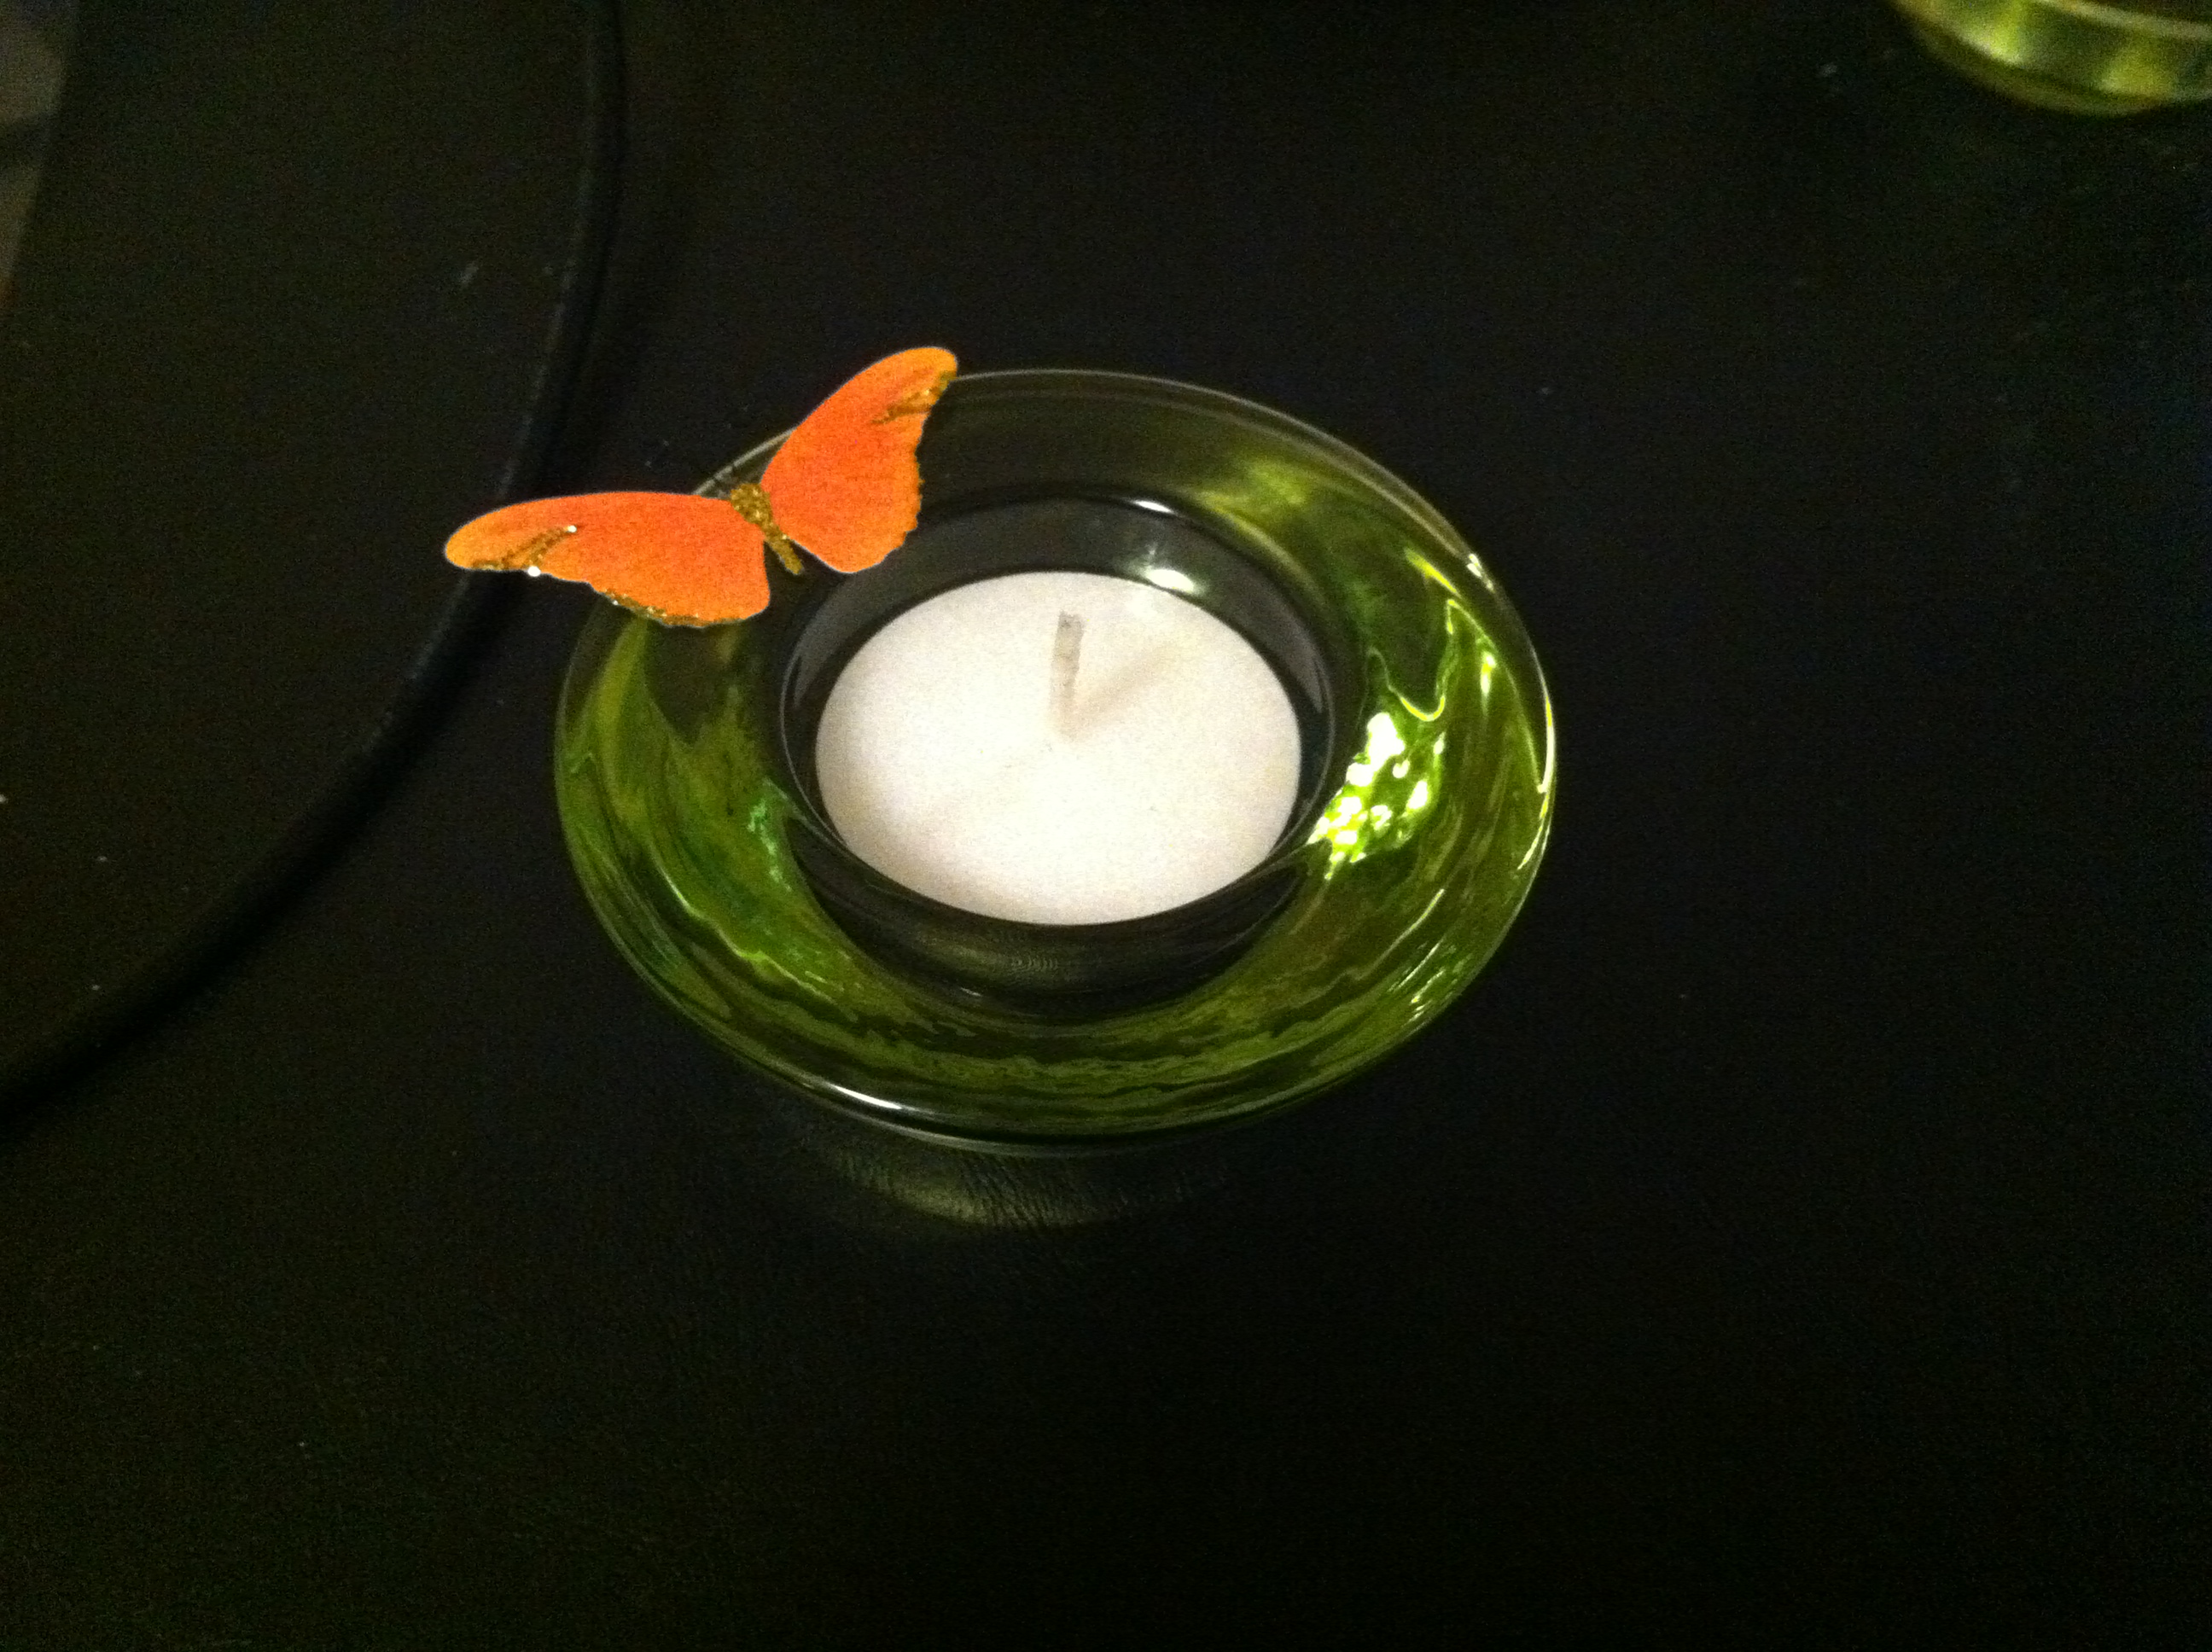
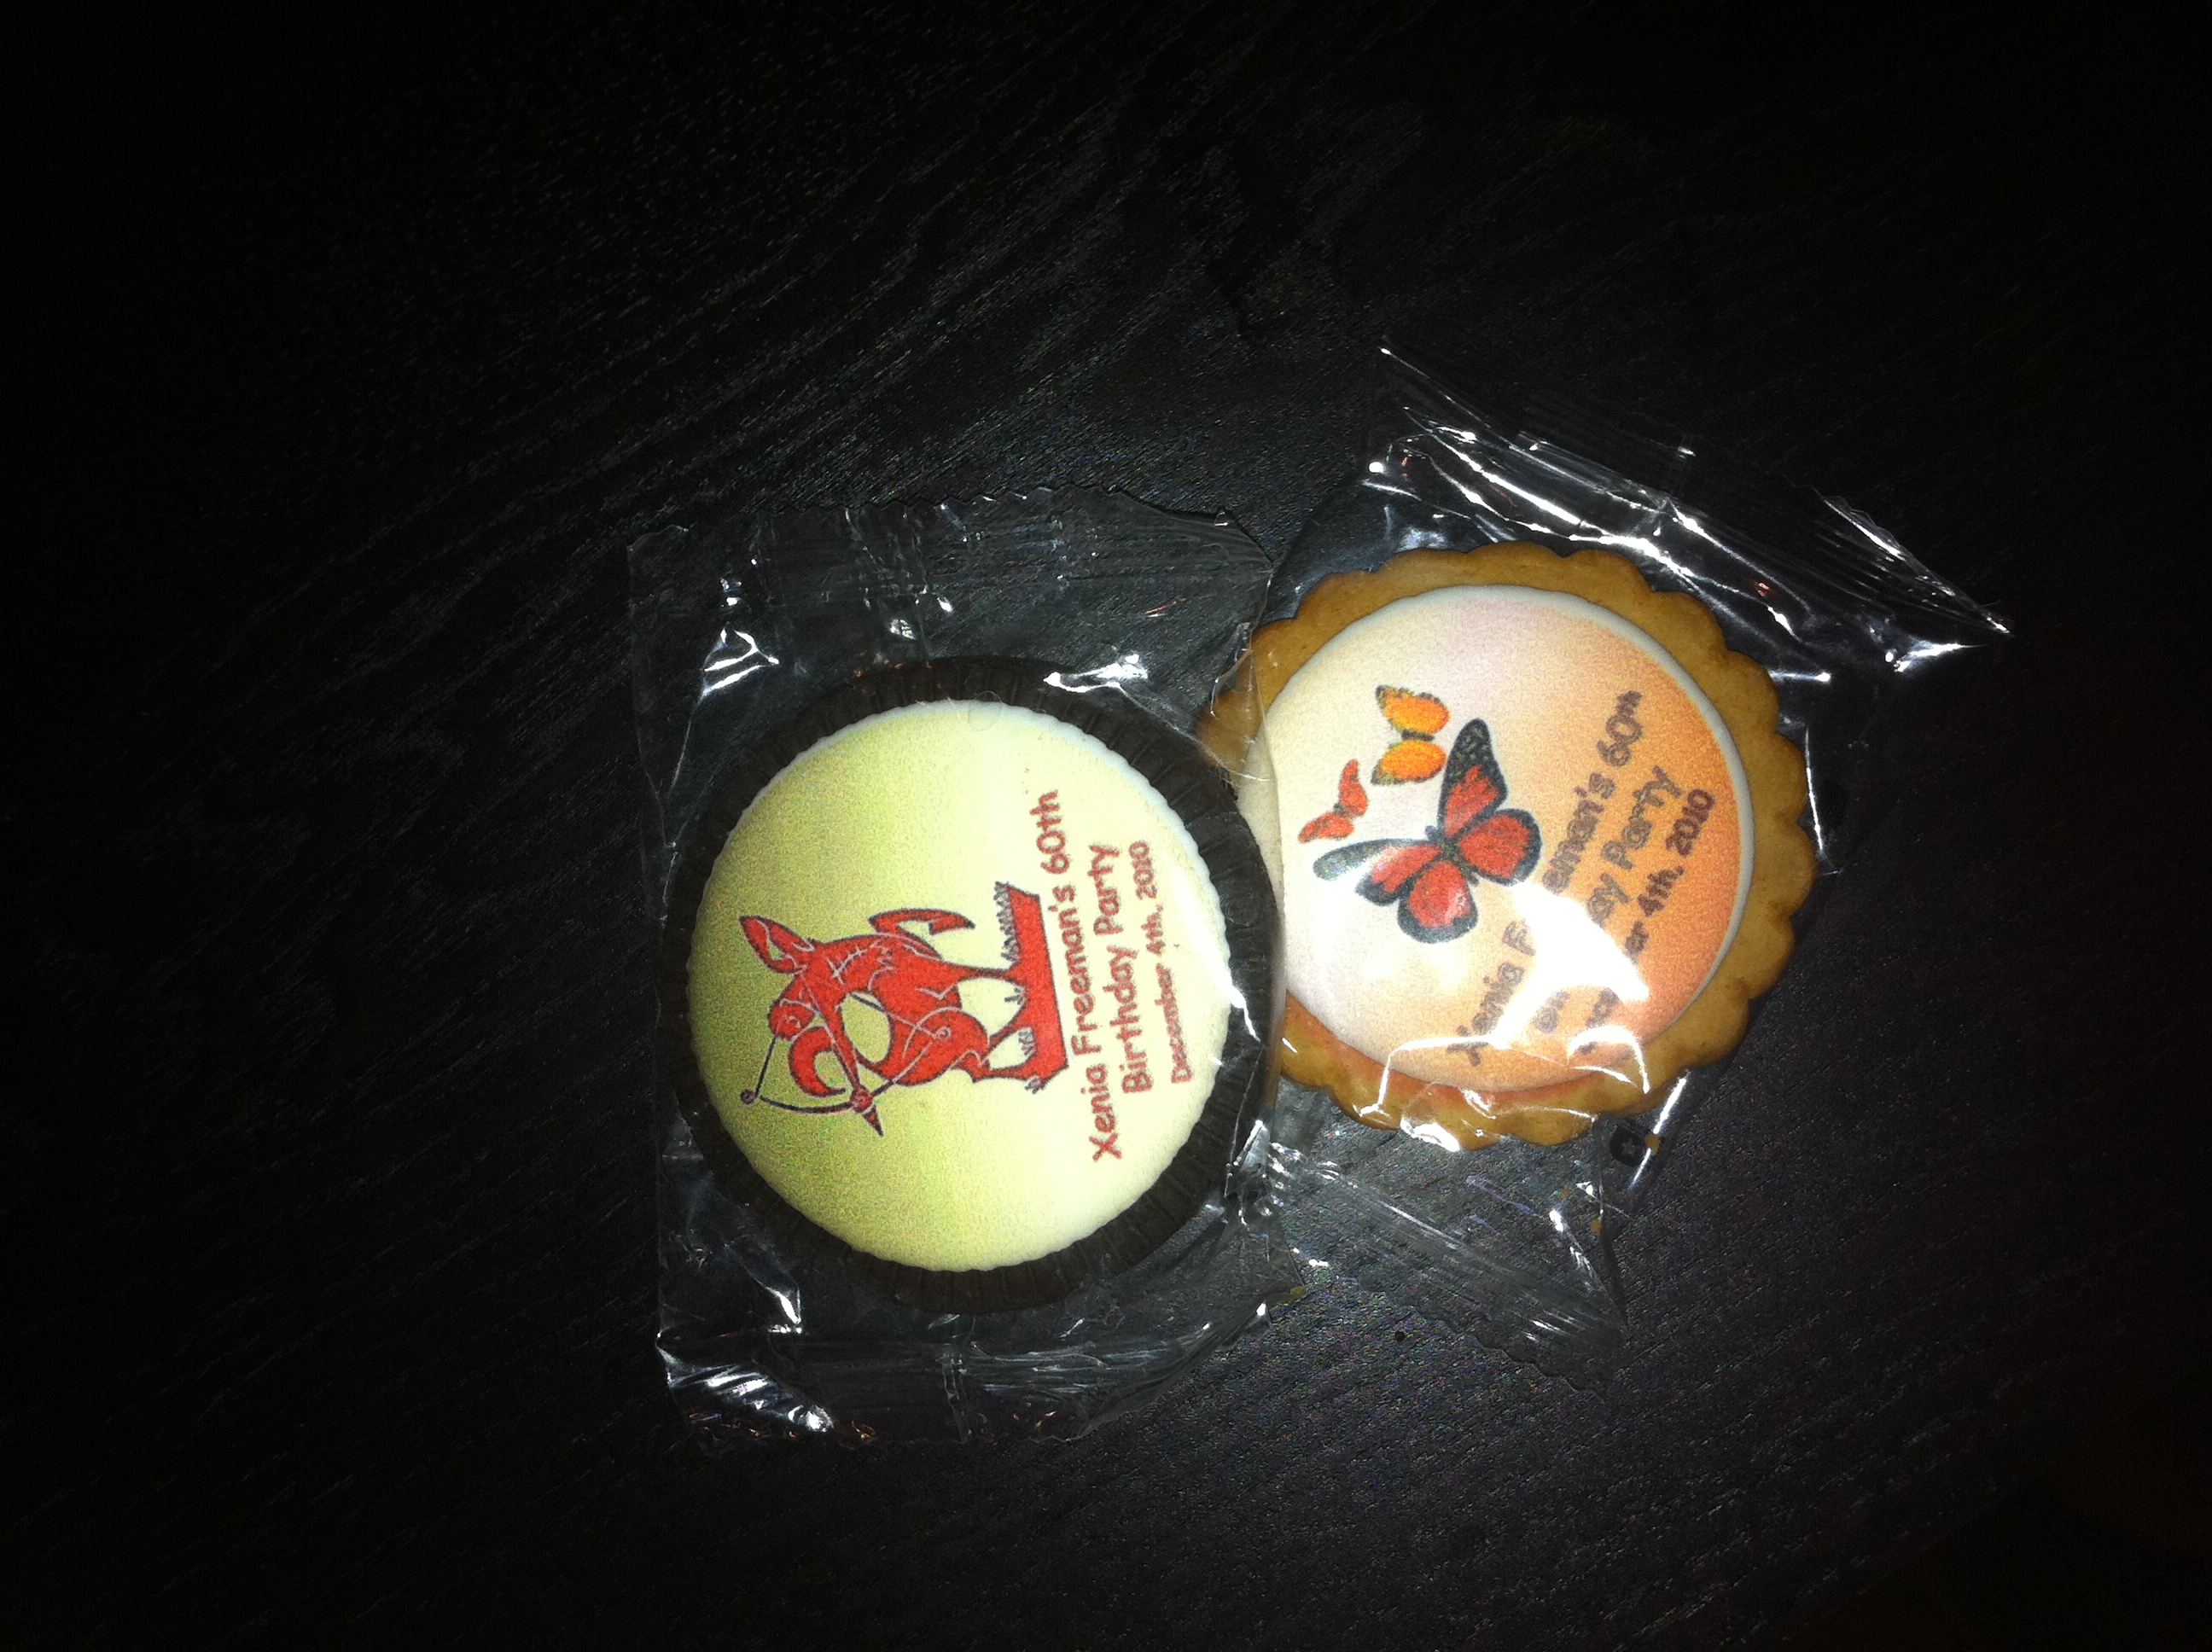
- Tiny glass tealight candle holder (99 cents each from the A.C. Moore craft store). A butterfly sticker added just the right touch.
- A cookie with a custom printed design (by yours truly) using two themes for the party – the Sagittarius symbol in honor of Xenia’s zodiac sign and, you guessed it, butterflies.
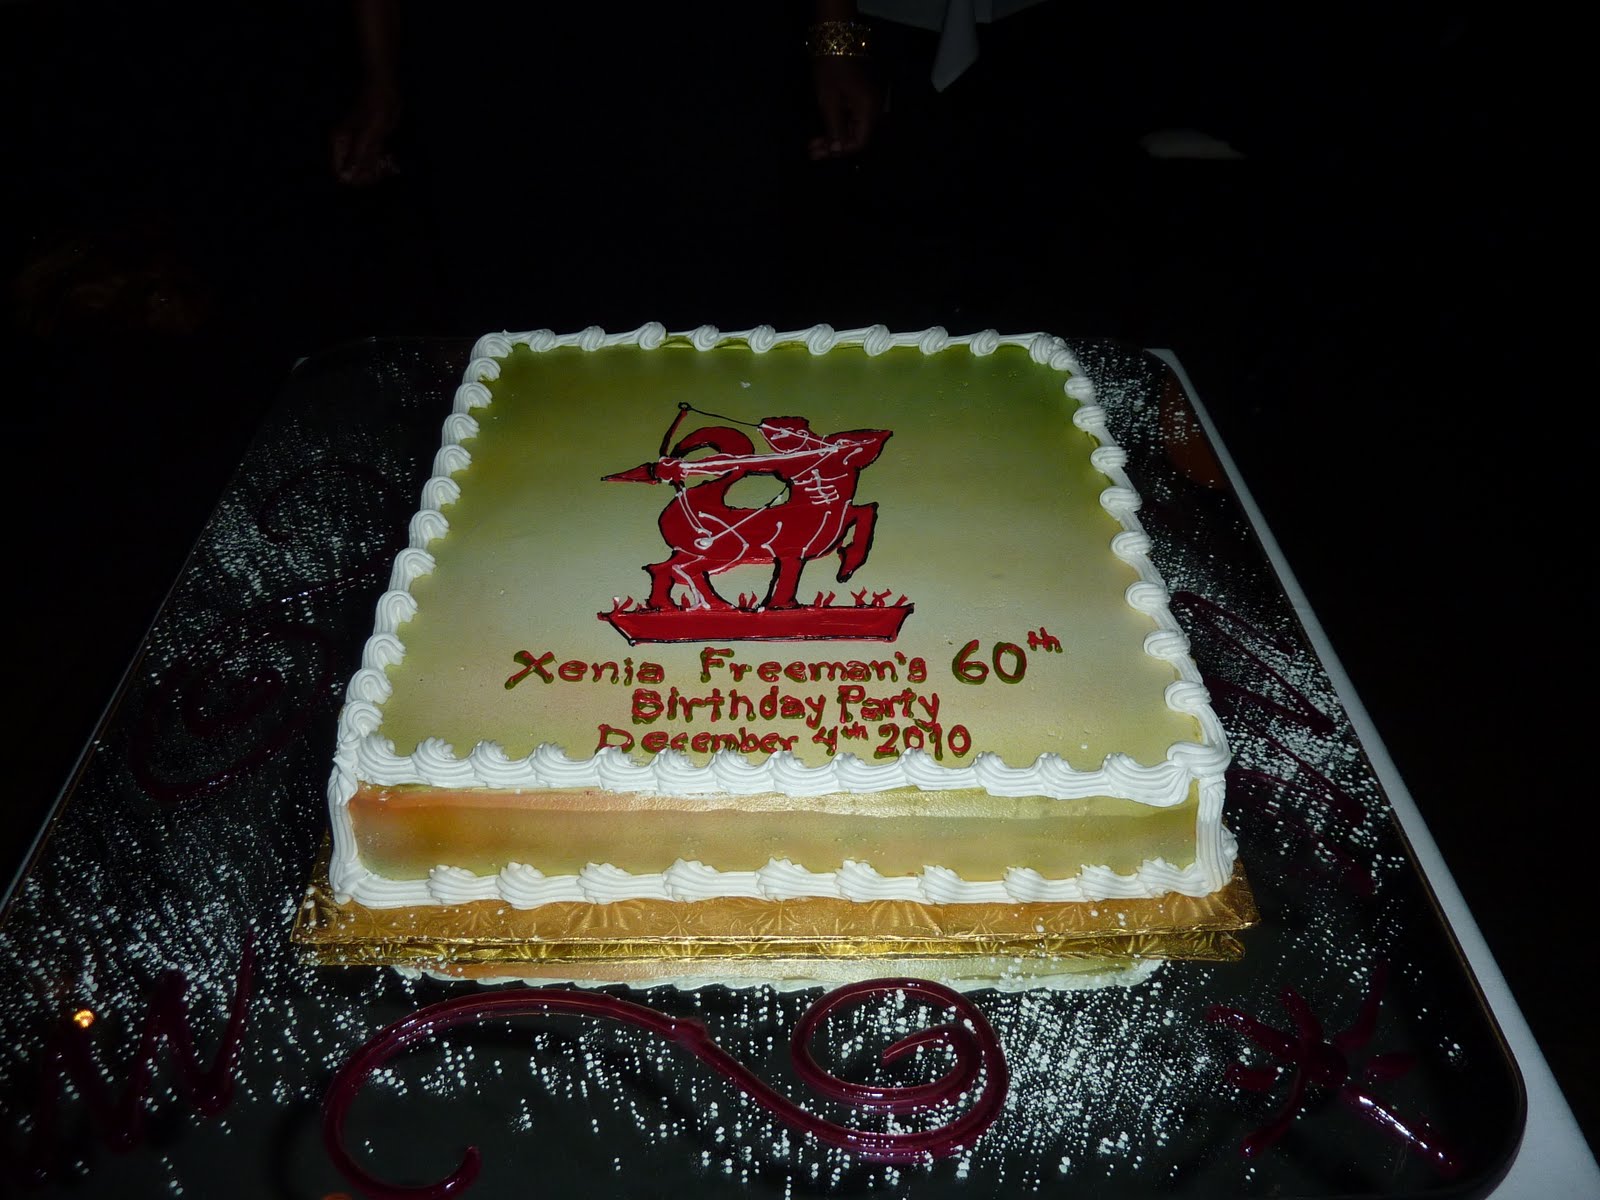
Birthday Cake
Did I mentioned I created a design for the cake? A friend of the family took charge of taking my design (in the form of a digital image created using PowerPoint) to a bakery in New Jersey. The result was spectacular – a gorgeous confectionery delight that perfectly matched the custom theme and decor of the event.
So invitations, table tents, favors, treats (and post-party thank you cards) all keeping with the same design and theme for Xenia’s birthday bash. And the slideshow came out pretty good too. First major Vida DIY project in the books. But, years later, I now know Vida DIY work is never done. This was just the beginning for several more creative projects to come.
Here’s a picture of the very happy birthday girl.

I felt so much joy putting this all together for my mama! Until the next big birthday bash (coming up in a few short months). Much love always. V-