Bedford-Styvesant Wood Map: A little something for Malik
You may also like:
My brother Malik (whom I call “Mal” for short) has this beautiful, three-level, loft style condo on Quincy Street in Bedford Stuyvesant, Brooklyn. I cannot even describe to you the pride I felt during my first visit there – on his roof-top, looking over the aerial view of the Brooklyn neighborhood where he and I were born and have spent the early part of our childhood. Returning to Bedford Stuyvesant (and investing in his community as a homeowner and as a local business investor) was a dream he worked hard to come true.
So, back in Bethesda, I’m touring an art gallery to find something big and beautiful to grace the sea of white walls that Mal then had in his new Brooklyn home. After seeing the hefty price tags of those “one-of-a-kind” art pieces, I quickly came up with a new (and more personal) idea for Mal’s space – a project where I pay tribute to his love and devotion for our childhood neighborhood.
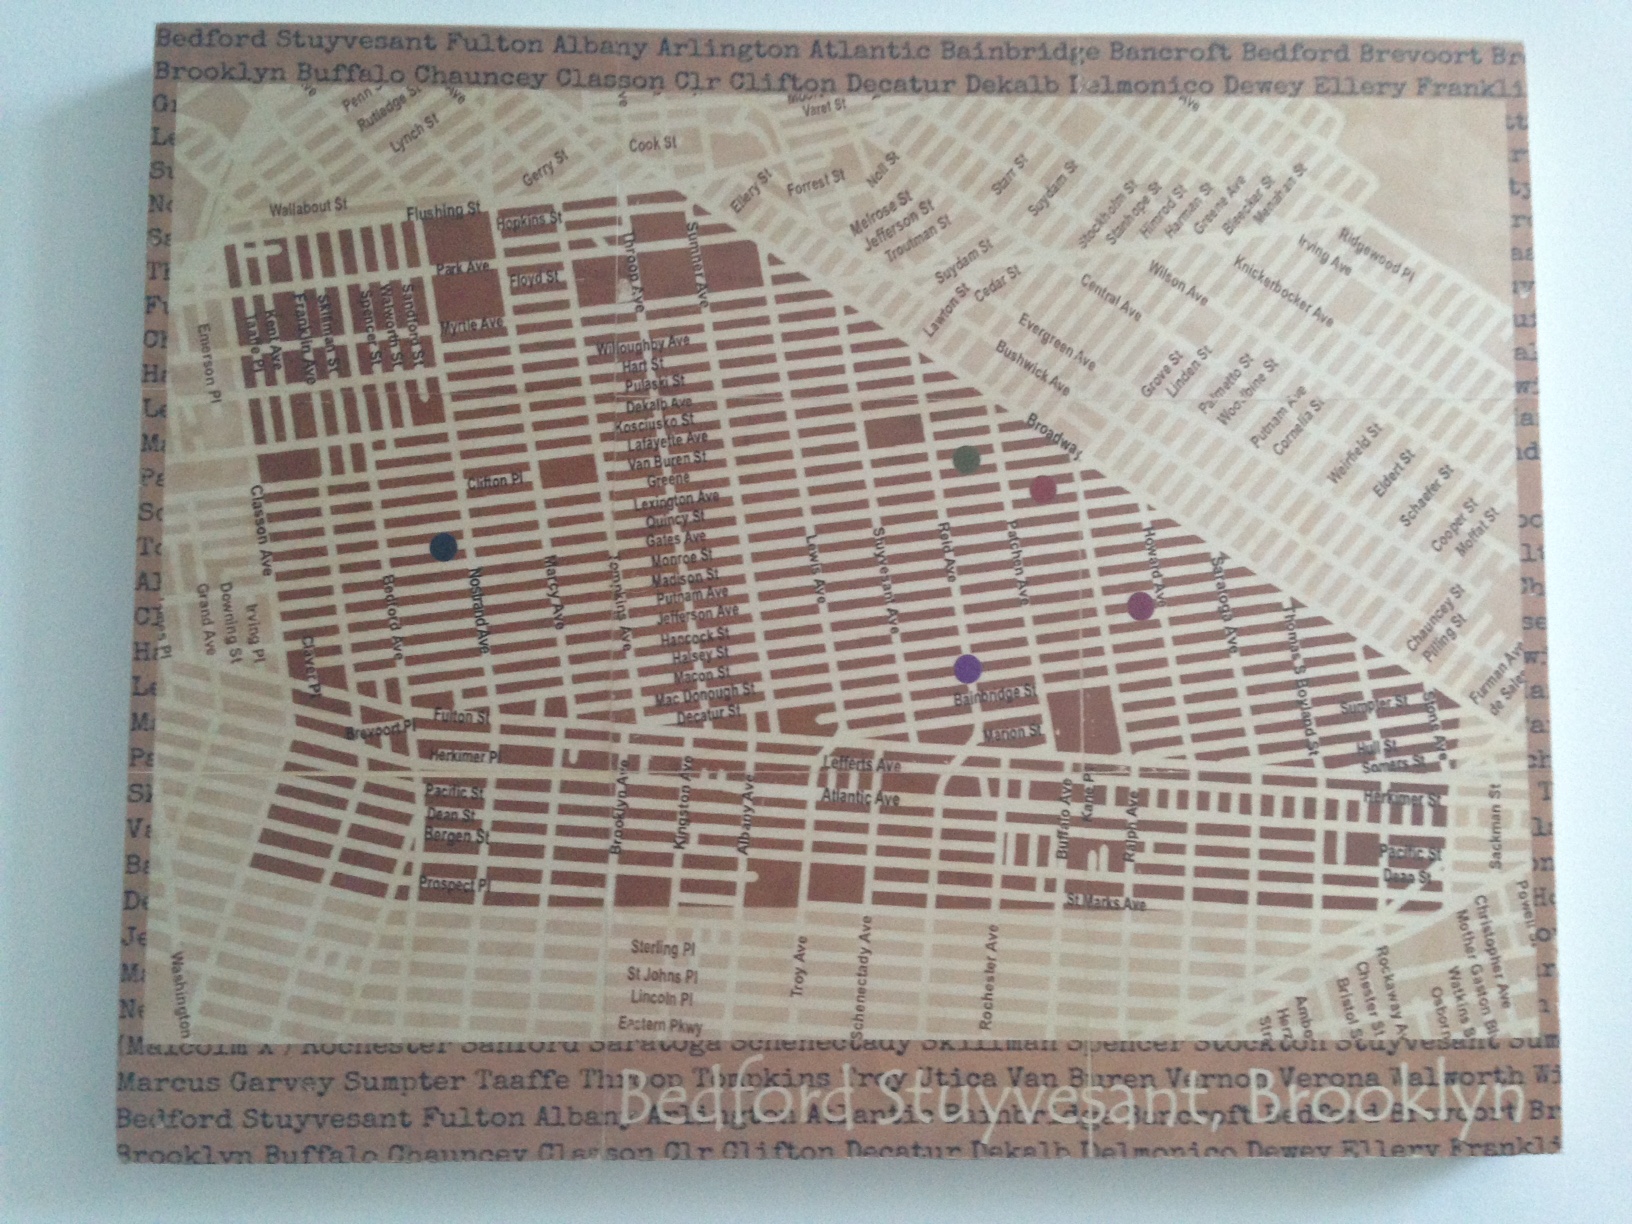
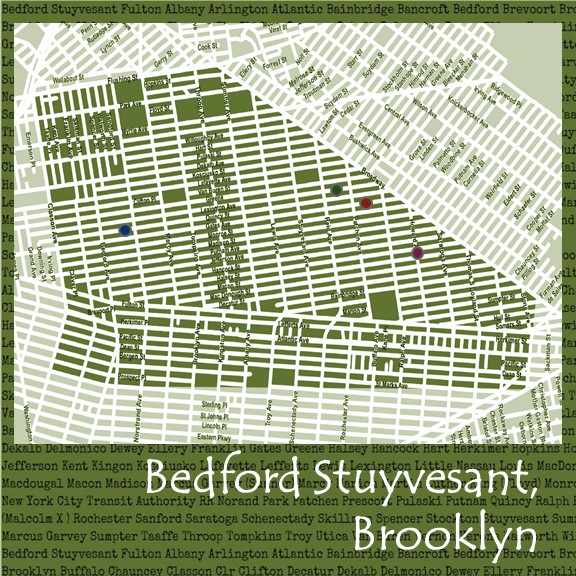
I found a great map of Bedford Stuyvesant map from the Brooklyn Social Laundry Club that served as both creative inspiration and a template. Thank you Silvia Lorenzo for the map! I updated the map template using Google Presentation and added circle “map pins” for places of interests that is meaningful to Mal – our childhood home, Grandma’s house, his three-story, two-family home on Lexington, his new place on Quincy and his business investments on Malcolm X Boulevard.
My original plan was to reverse the image of the map, make a big 24 x 30 print, and then gloss gel medium to transfer the image to a large wood panel canvas. But my first experimental attempts at wood transfers proved to be disastrous (and by then I was on a serious Christmas/New Years Day gift-giving deadline).
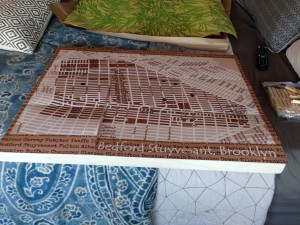
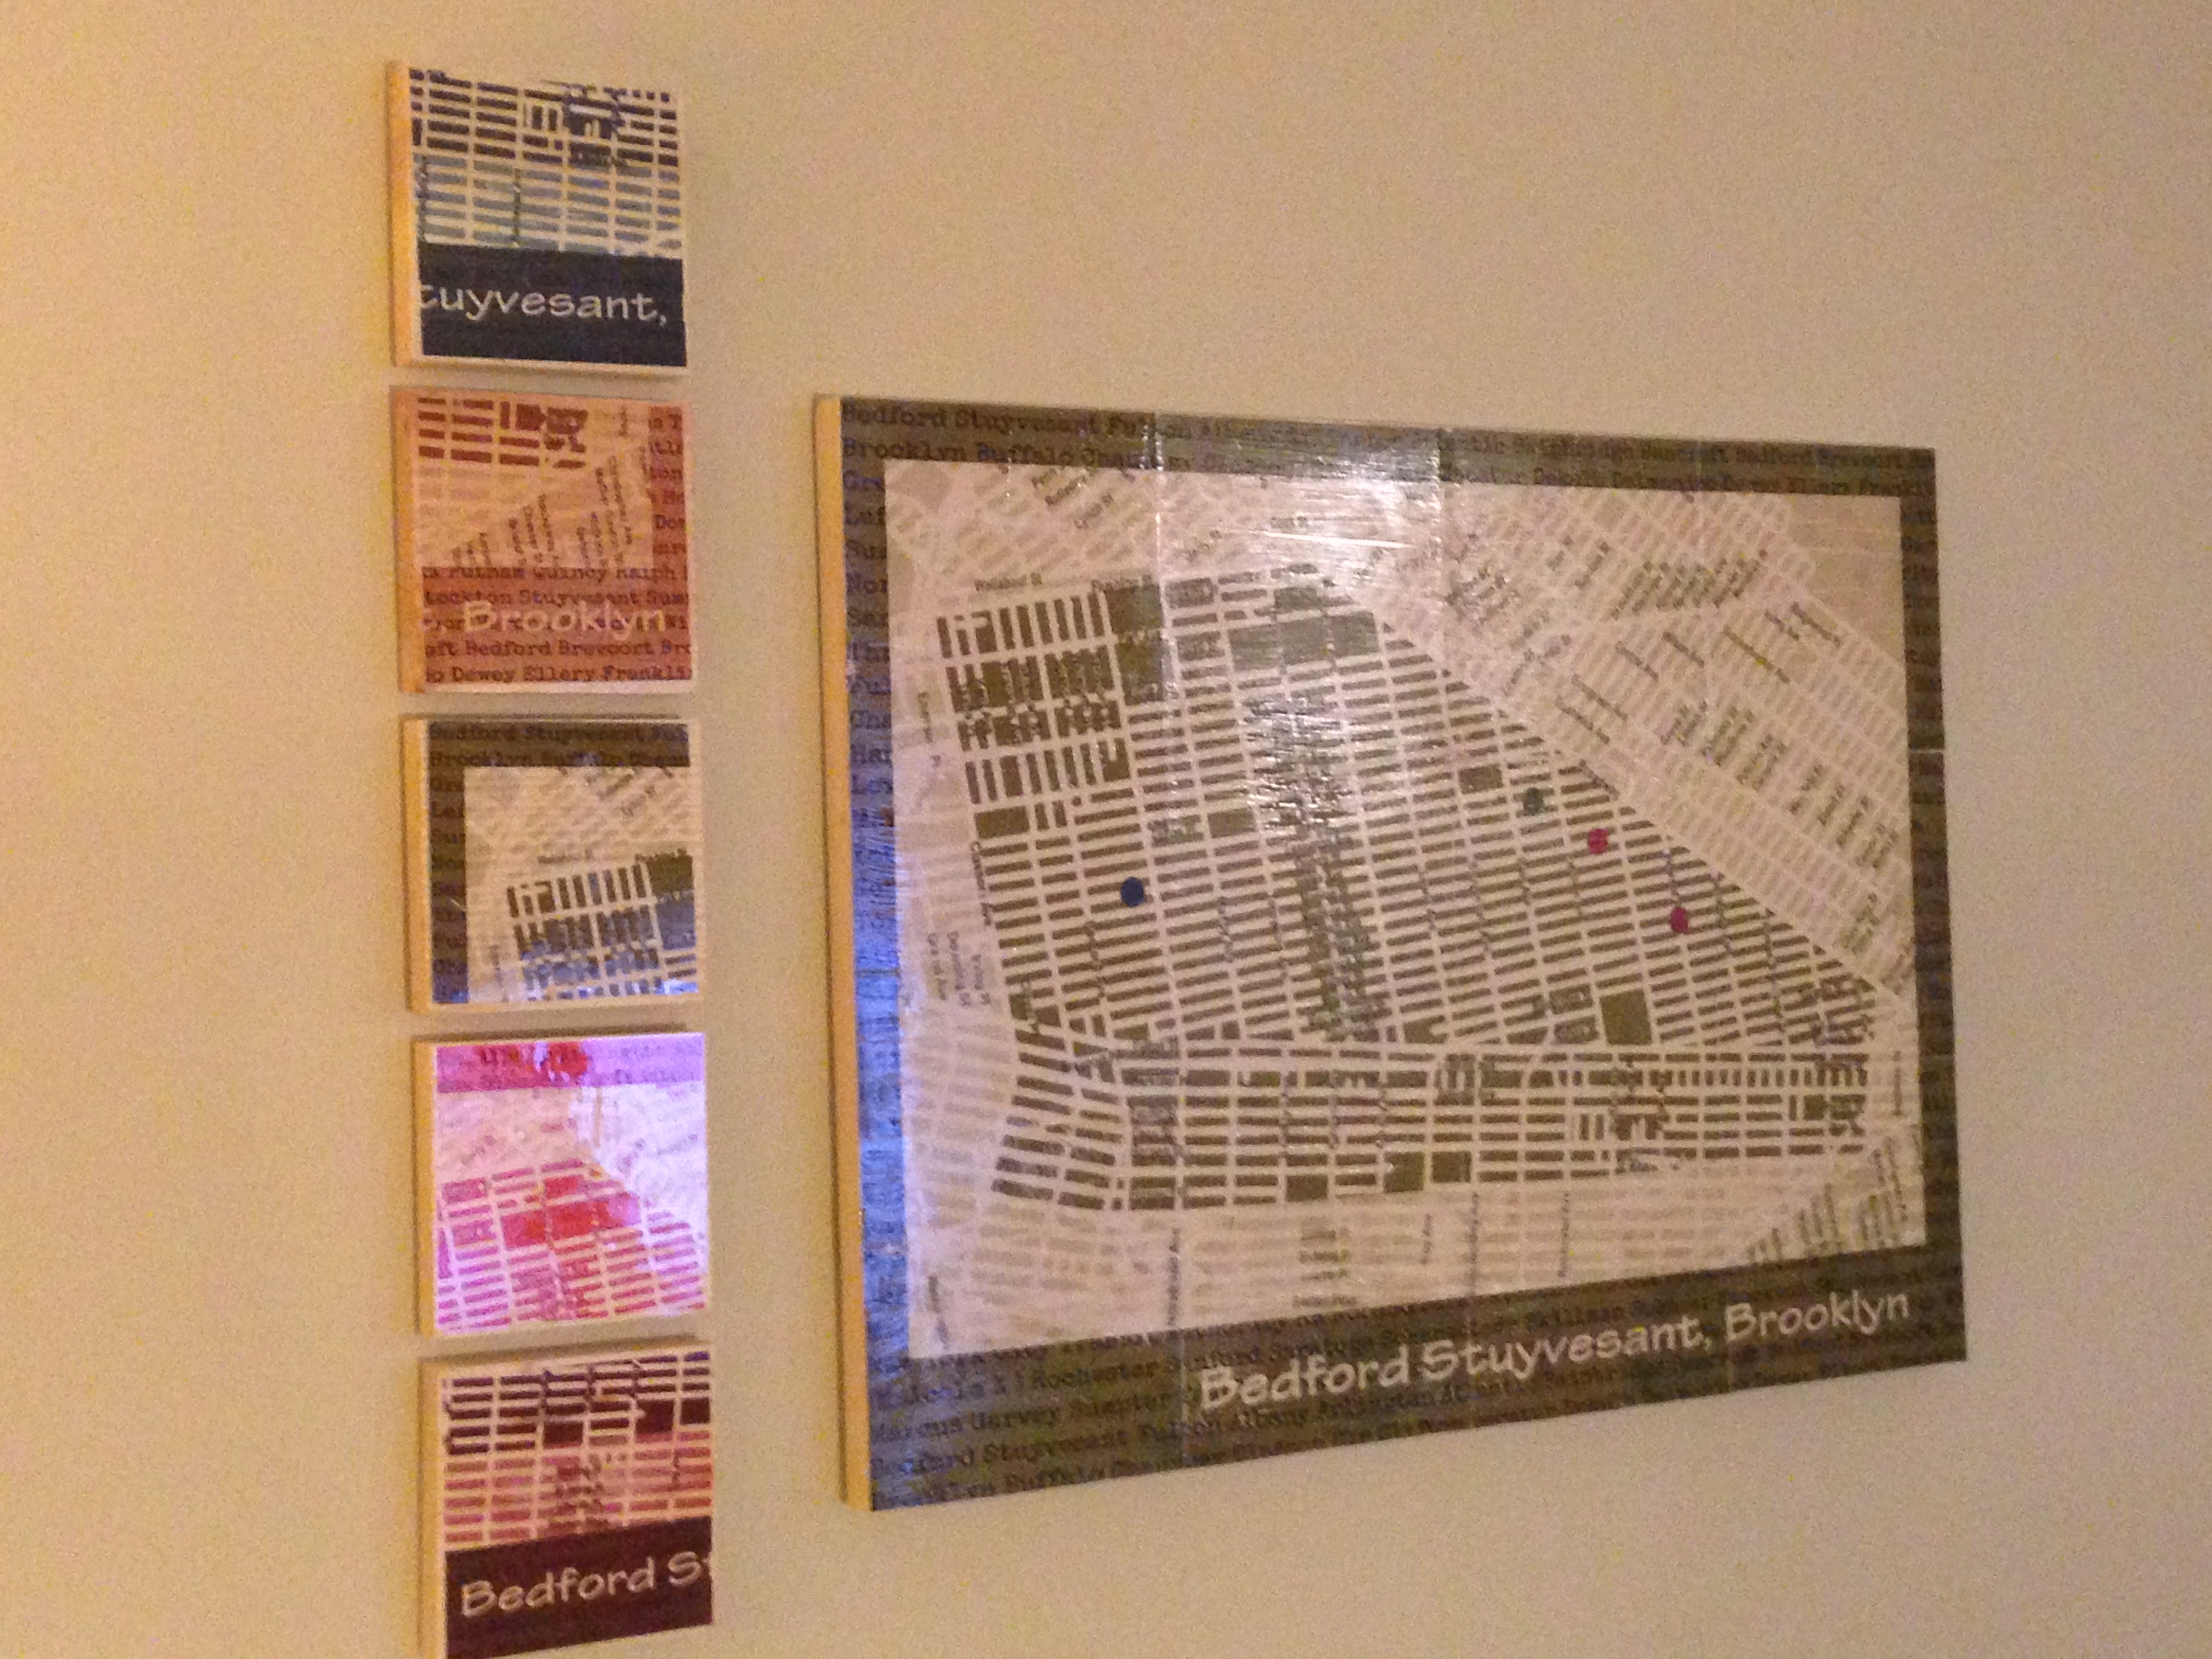
I tried different ink wood transfer tests using the gel medium and ink-jet on label paper techniques. Here is a mock-up on a smaller 8×8 wood panel.
But I had my heart set on going “BIG” for Mal’s map (so that it can enjoy a prominent place on his huge white walls. So I got creative and I turned my project into a printed map puzzle using clear transparent adhesive film.
Here’s how I did it:
- Created a background for the map that displays each street name in Bedford Stuyvesant in a repeating pattern using Google Docs. I took a screenshot of the document, and pasted it in MS Paint to create an image file.
- Used Google Slides to design a map slide using my street names image (imported as the slide background) and the image of the Bedford Stuyvesant map (added as the foreground picture).
- Used the Recolor tool in Google Slides to change the color of both the background and map image (the green and “paper bag” brown colors were my favorites). I used the brown for the Malik gift project.
- Saved the Google Slide as 24″ x 30″ picture file (via the Download As > Jpeg option).
- Split up the Google Slide picture map into nine 8″ x 10″ pieces using imagesplitter.net.
- Printed each piece of the puzzle using 8.5 x 11 Grafix Computer Film. They have the non-adhesive and adhesive variety (I chose adhesive). I got mine from my local DC Blick Art Studios store.
- Did my bare best to carefully slice out the margins of each print out using my guillotine paper cutter.
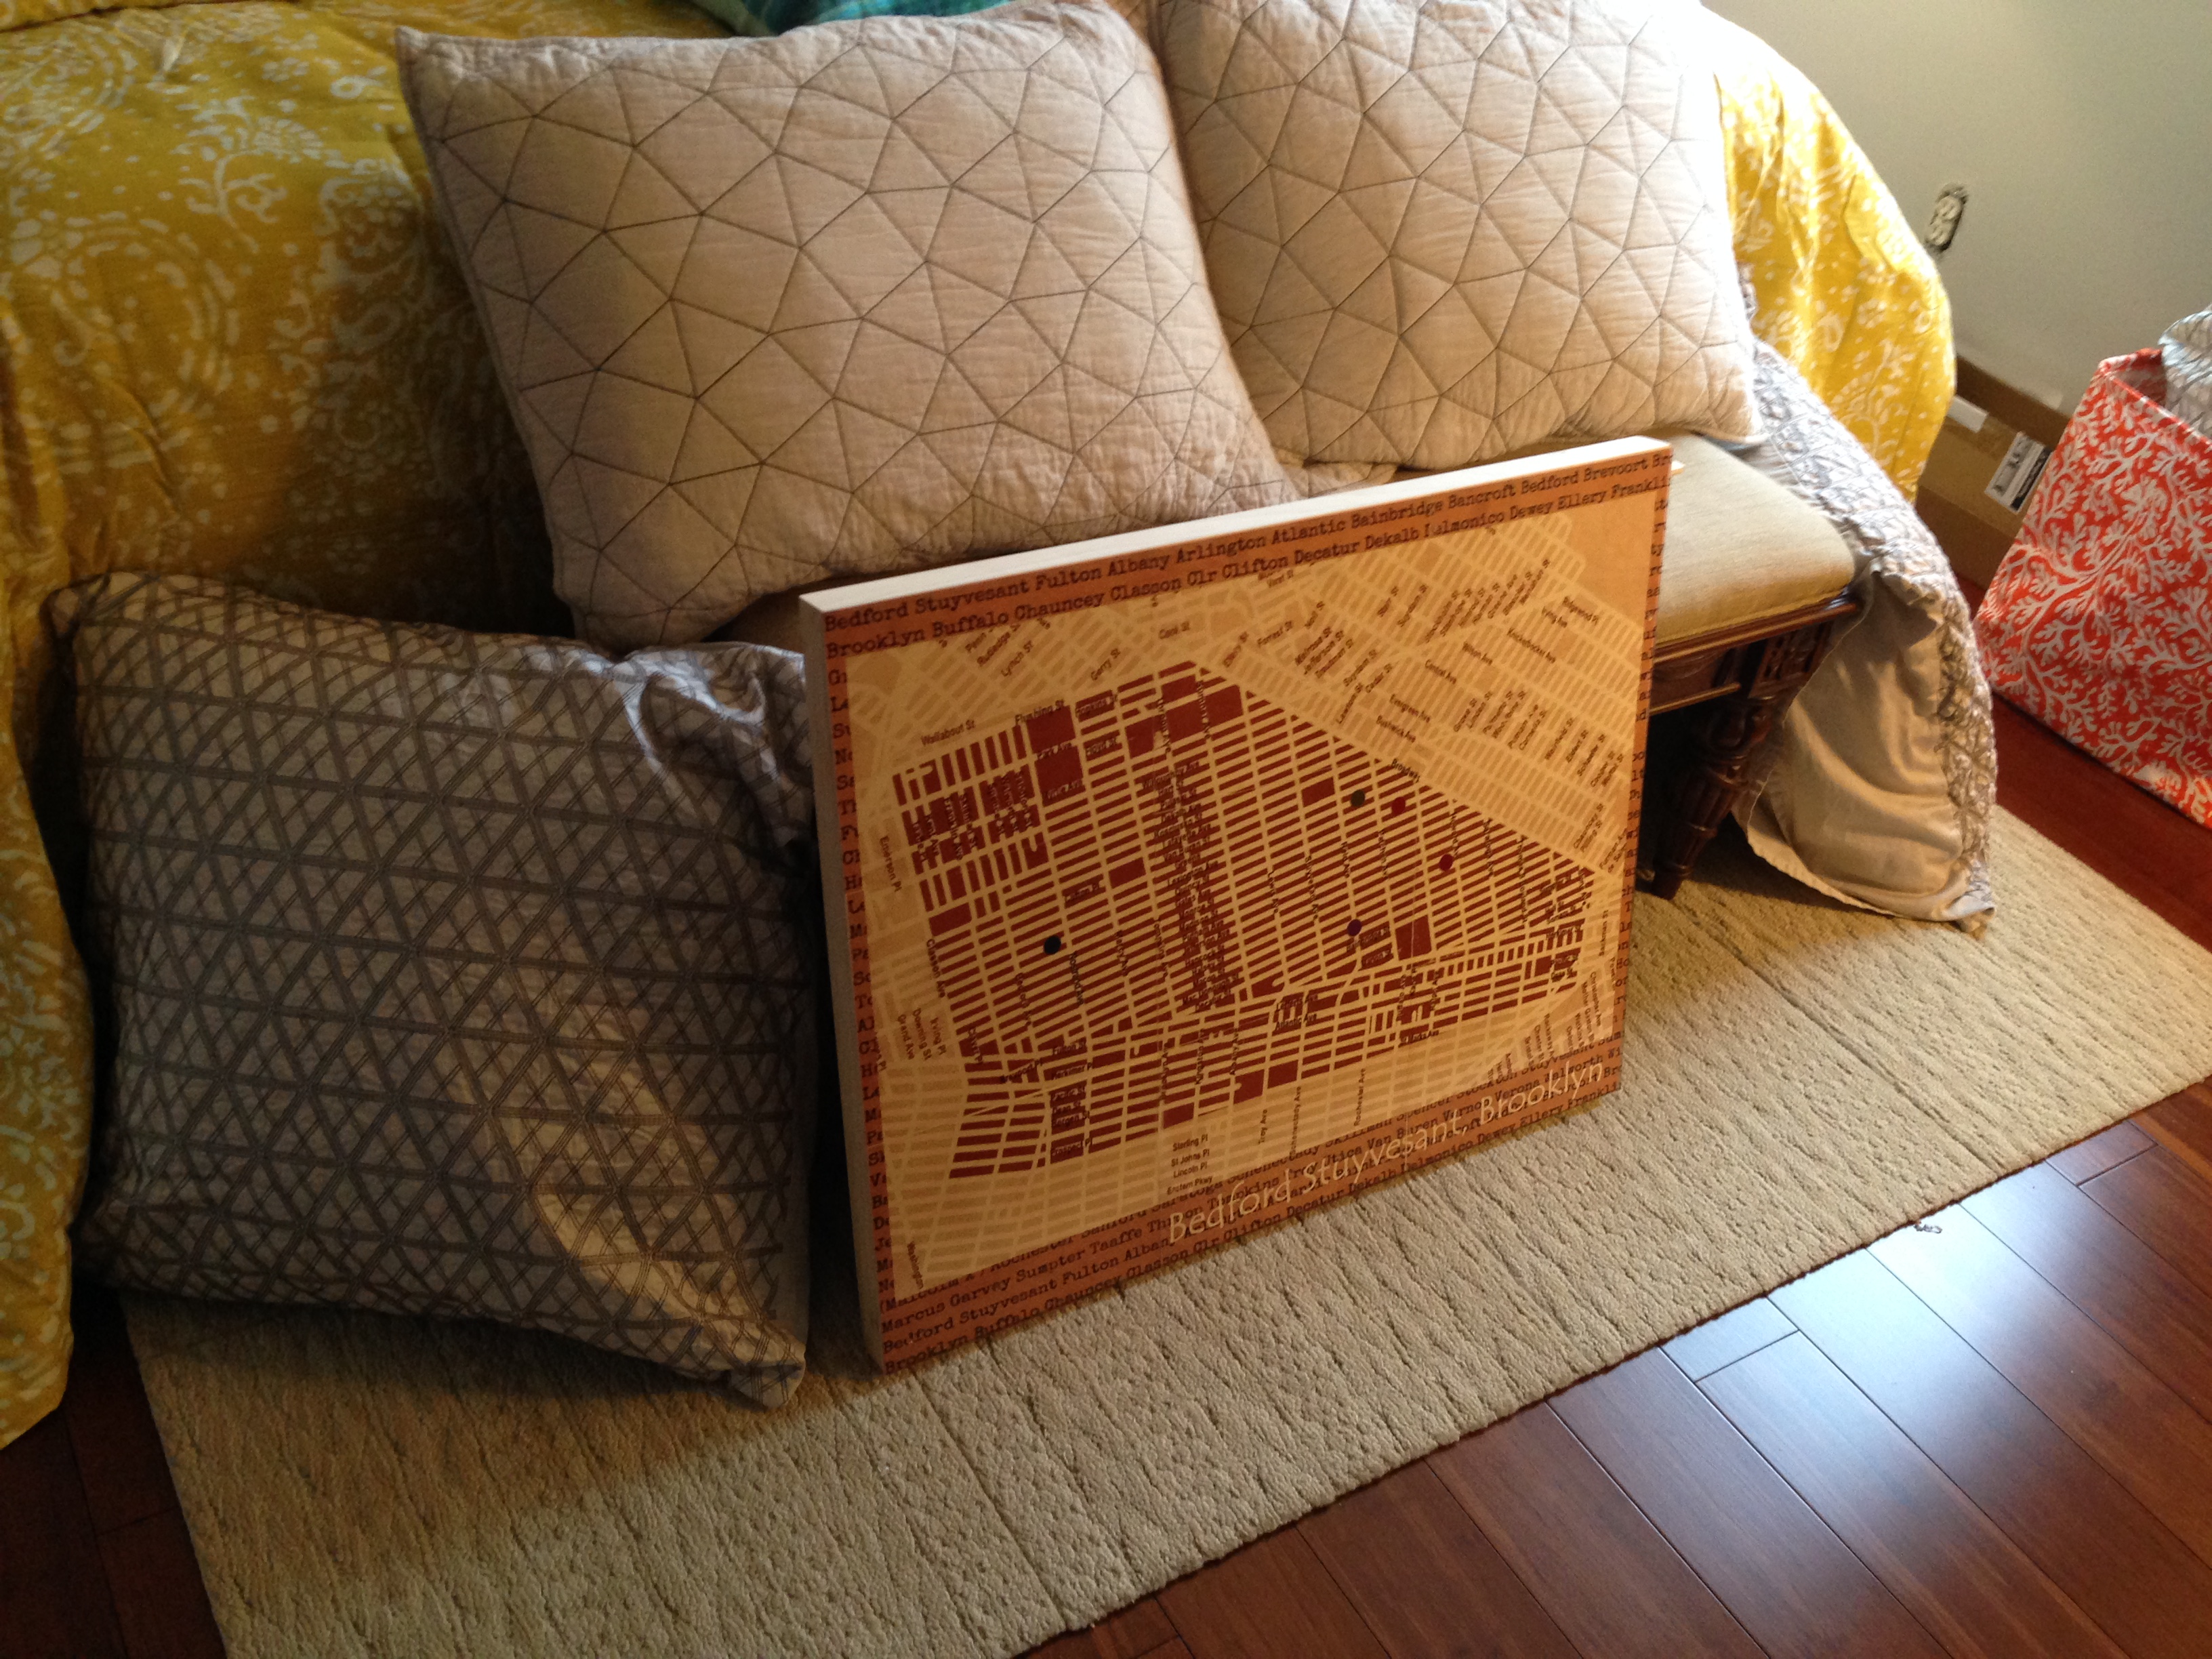
- Arrange the pieces of the puzzle (labeled numerically in the back) on the 24″ x 30″ artist wood panel (Also purchased from DC Blick.)
- Remove the backing of each cut, adhesive piece and carefully positioned it in place on the wood panel.
- Tore my hair out while attempting to match up, then redo, then match up each piece again so that it lined up perfectly. But continued to struggle with the misaligned streets (Tompkins Avenue – now woefully zigzagged) and area gaps (RIP Sterling Pl).
- After a full day of wrestling with getting the puzzle “just right”, I gave up and reminded myself that it doesn’t have to be perfect to be beautiful.
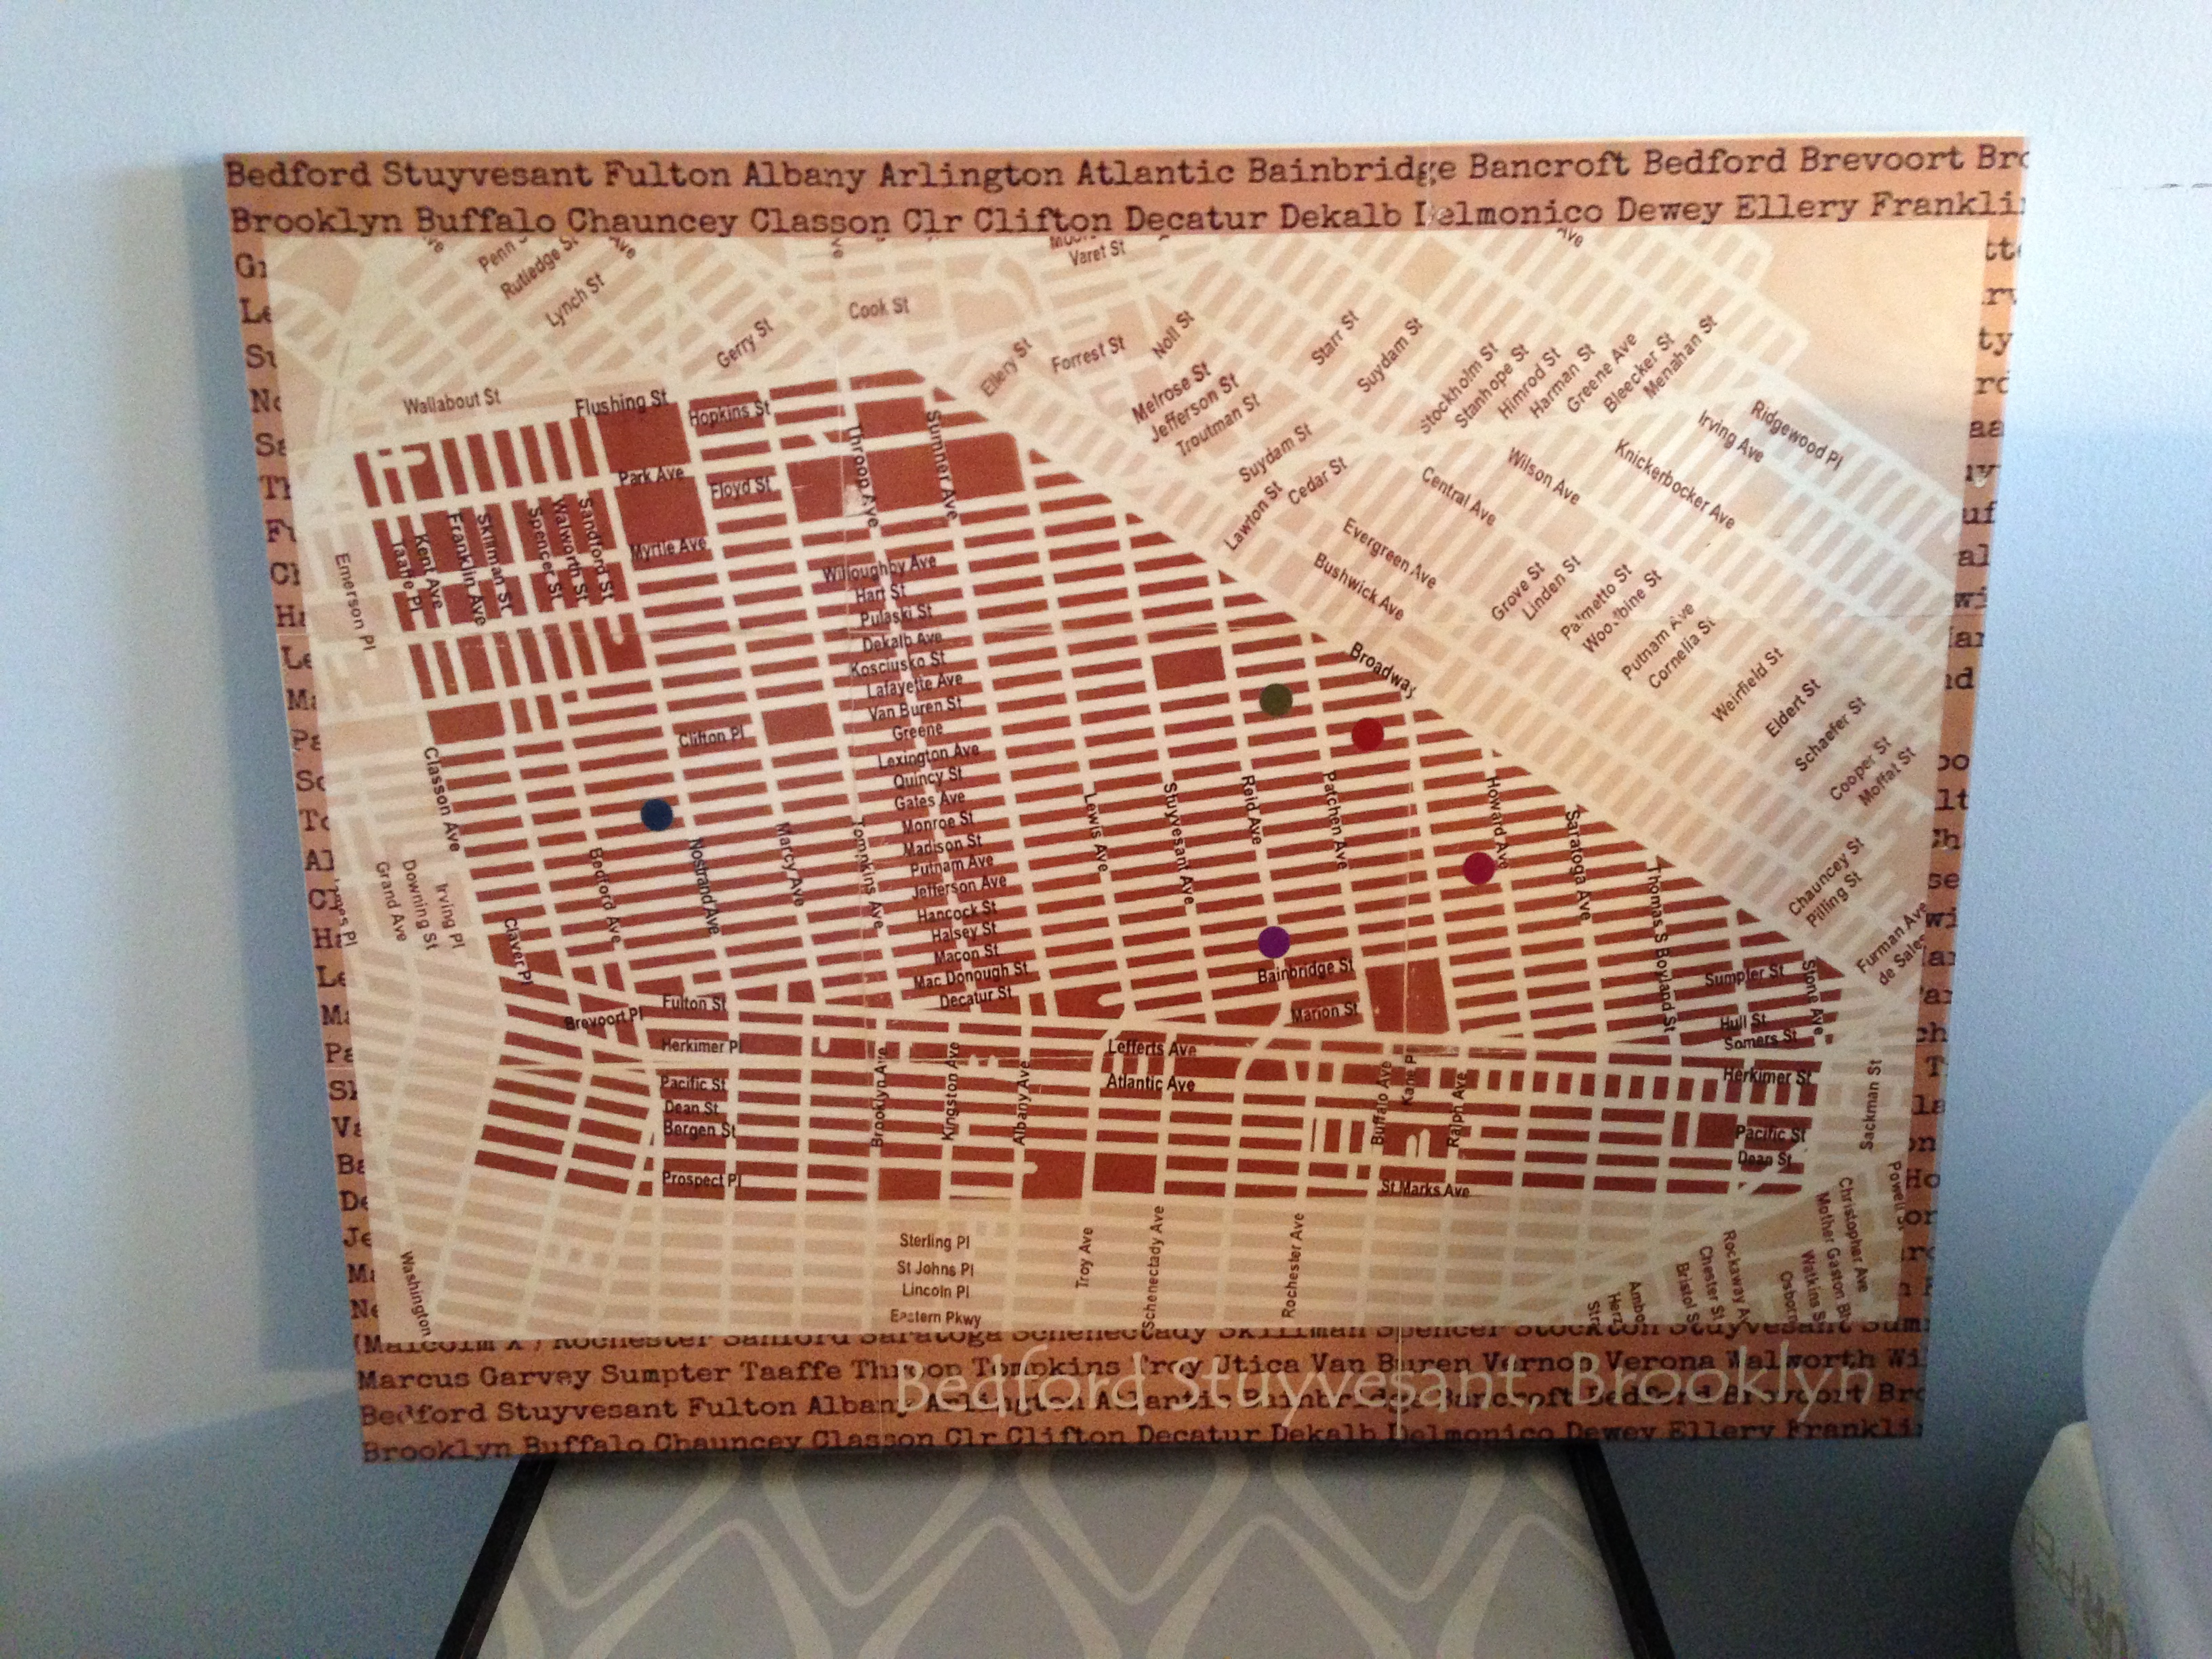
- After I admired the true “artistry” of my creation, I sealed and protected the surface by spraying the top with clear, gloss lacquer.
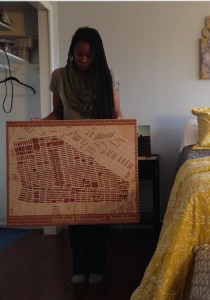
And here’s the completed project!
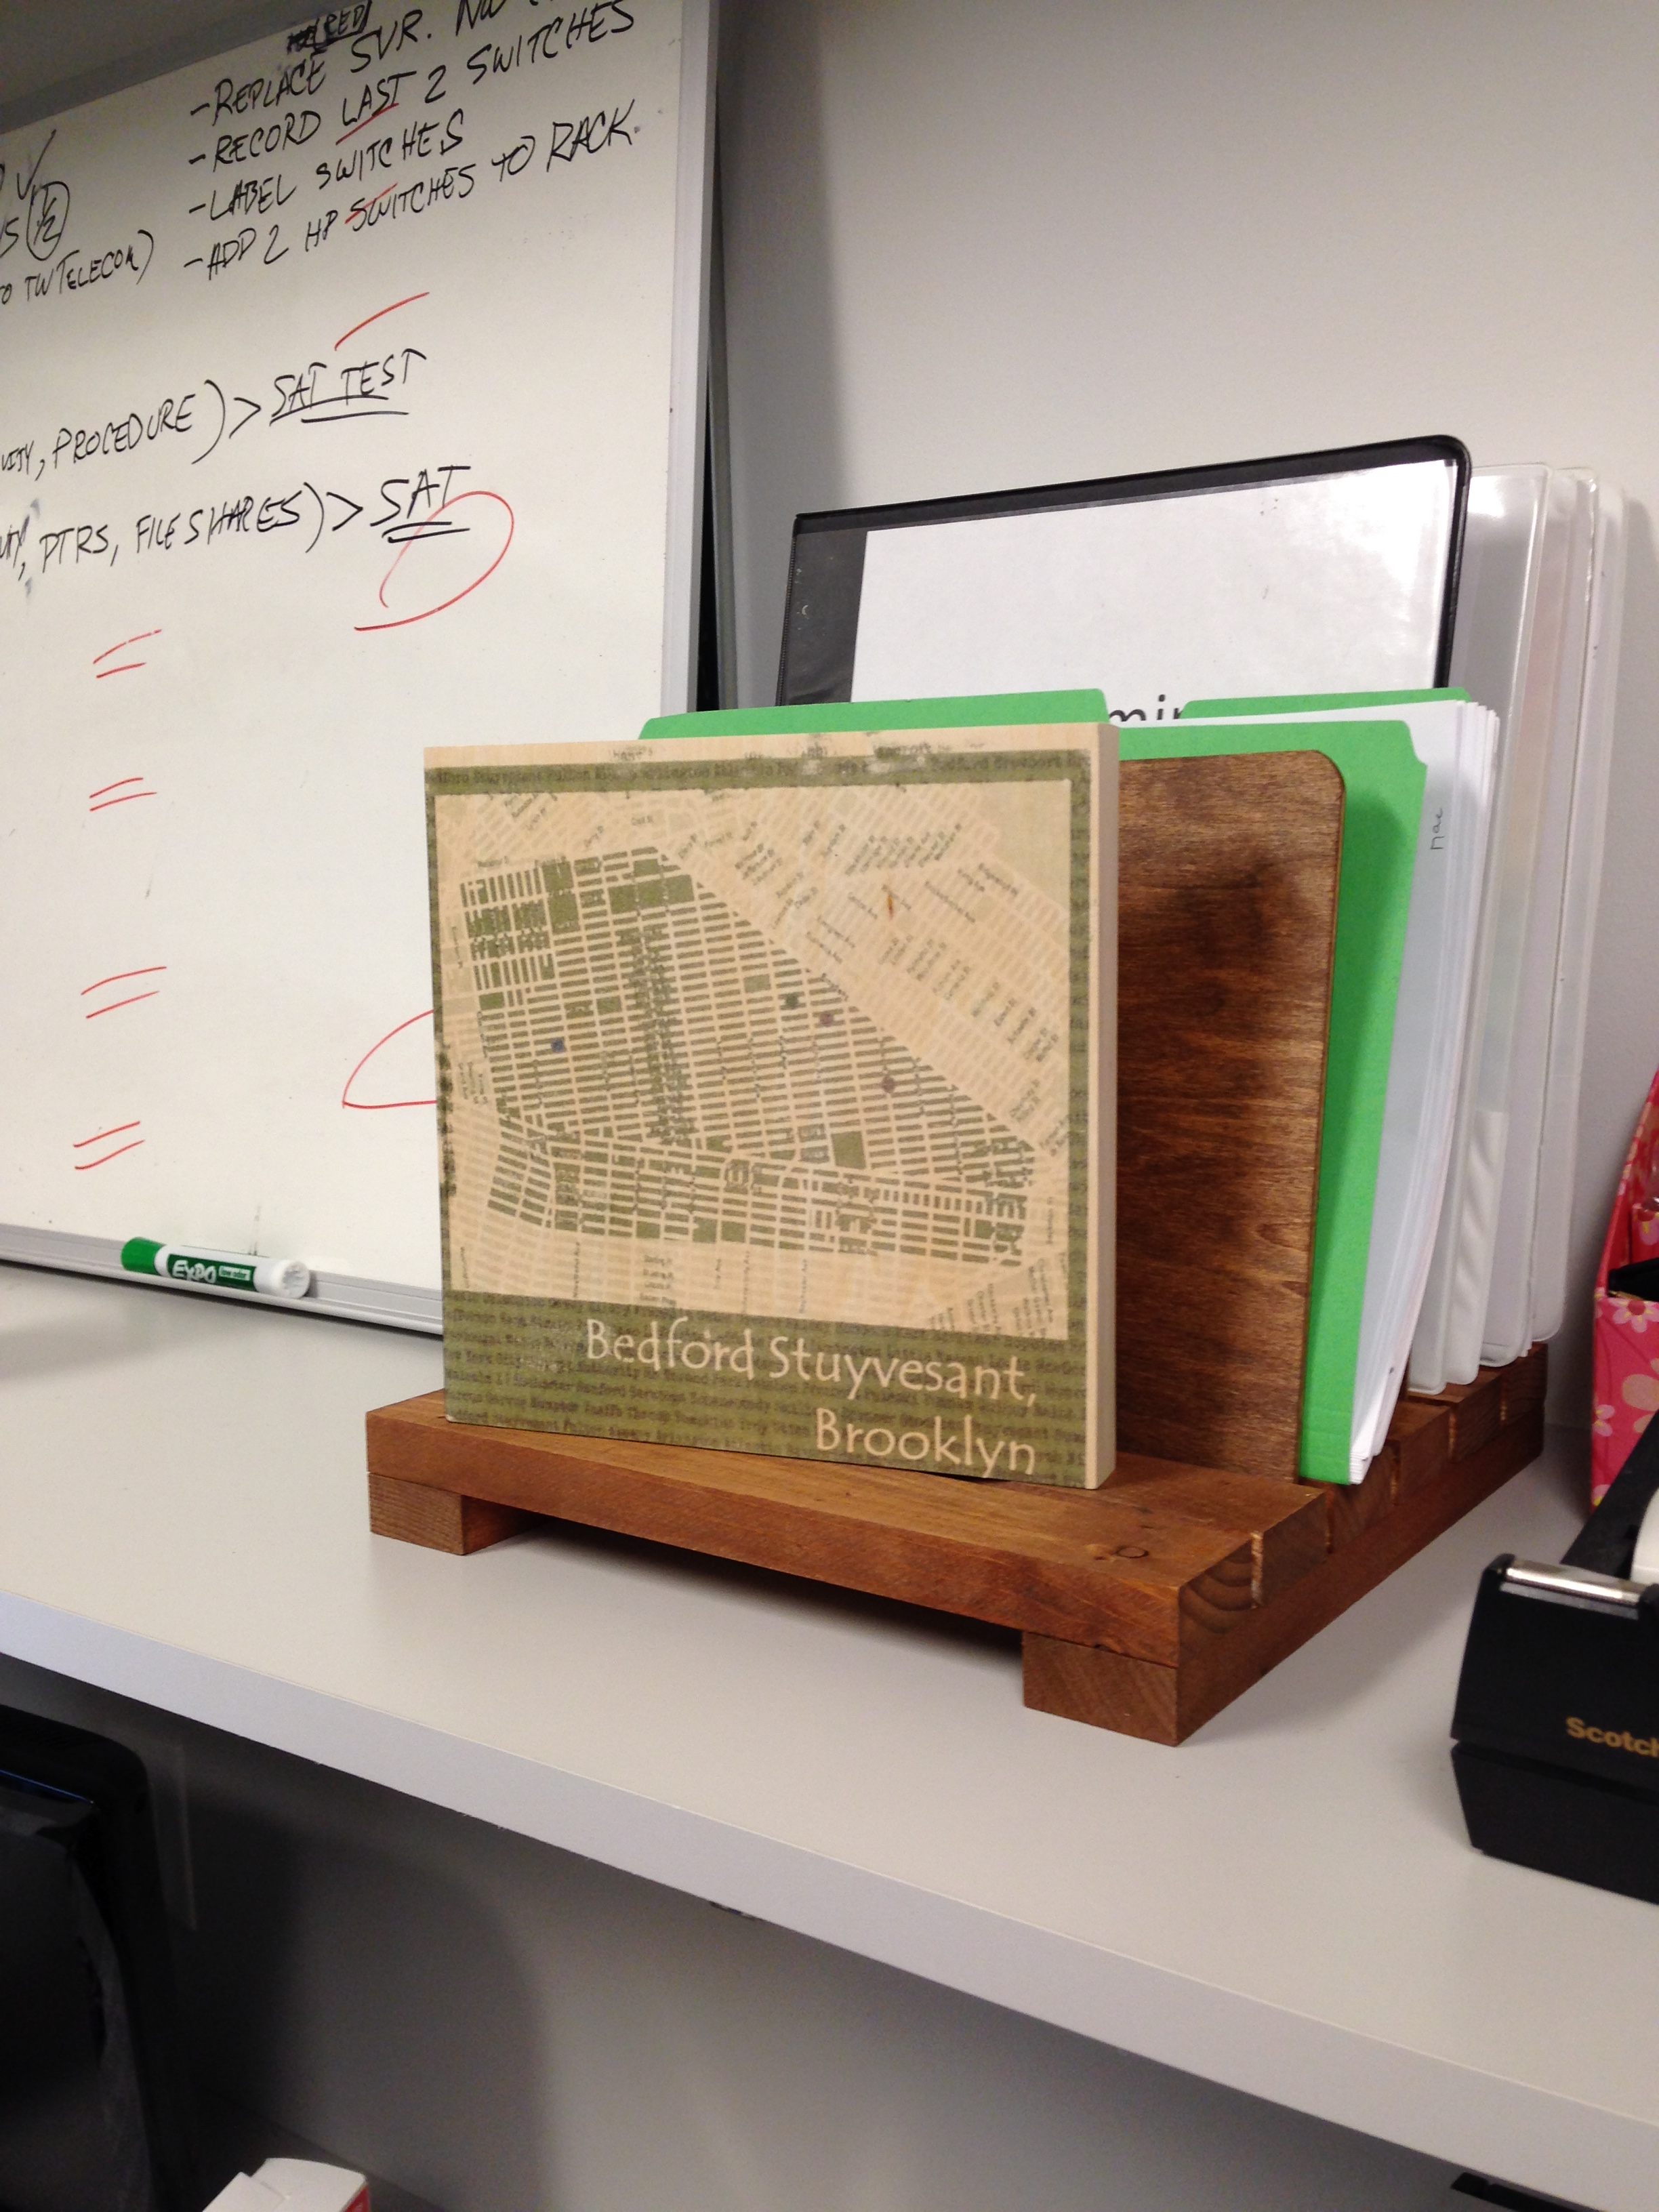
On my journey to project completion, I created a smaller, 18″ x 24
green wood panel map for our condo, but I used Mod Podge to seal and protect it. Mistake! The transparent image began to smear and break apart while applying the second coat. So, this is another “highly artistic” creation that over time I grew to love.
I also created wood block map pieces using 5″ x 5″ wood pieces (purchased at Michael’s). And this time, I knew to stick with spray lacquer and avoid the Mod Podge.

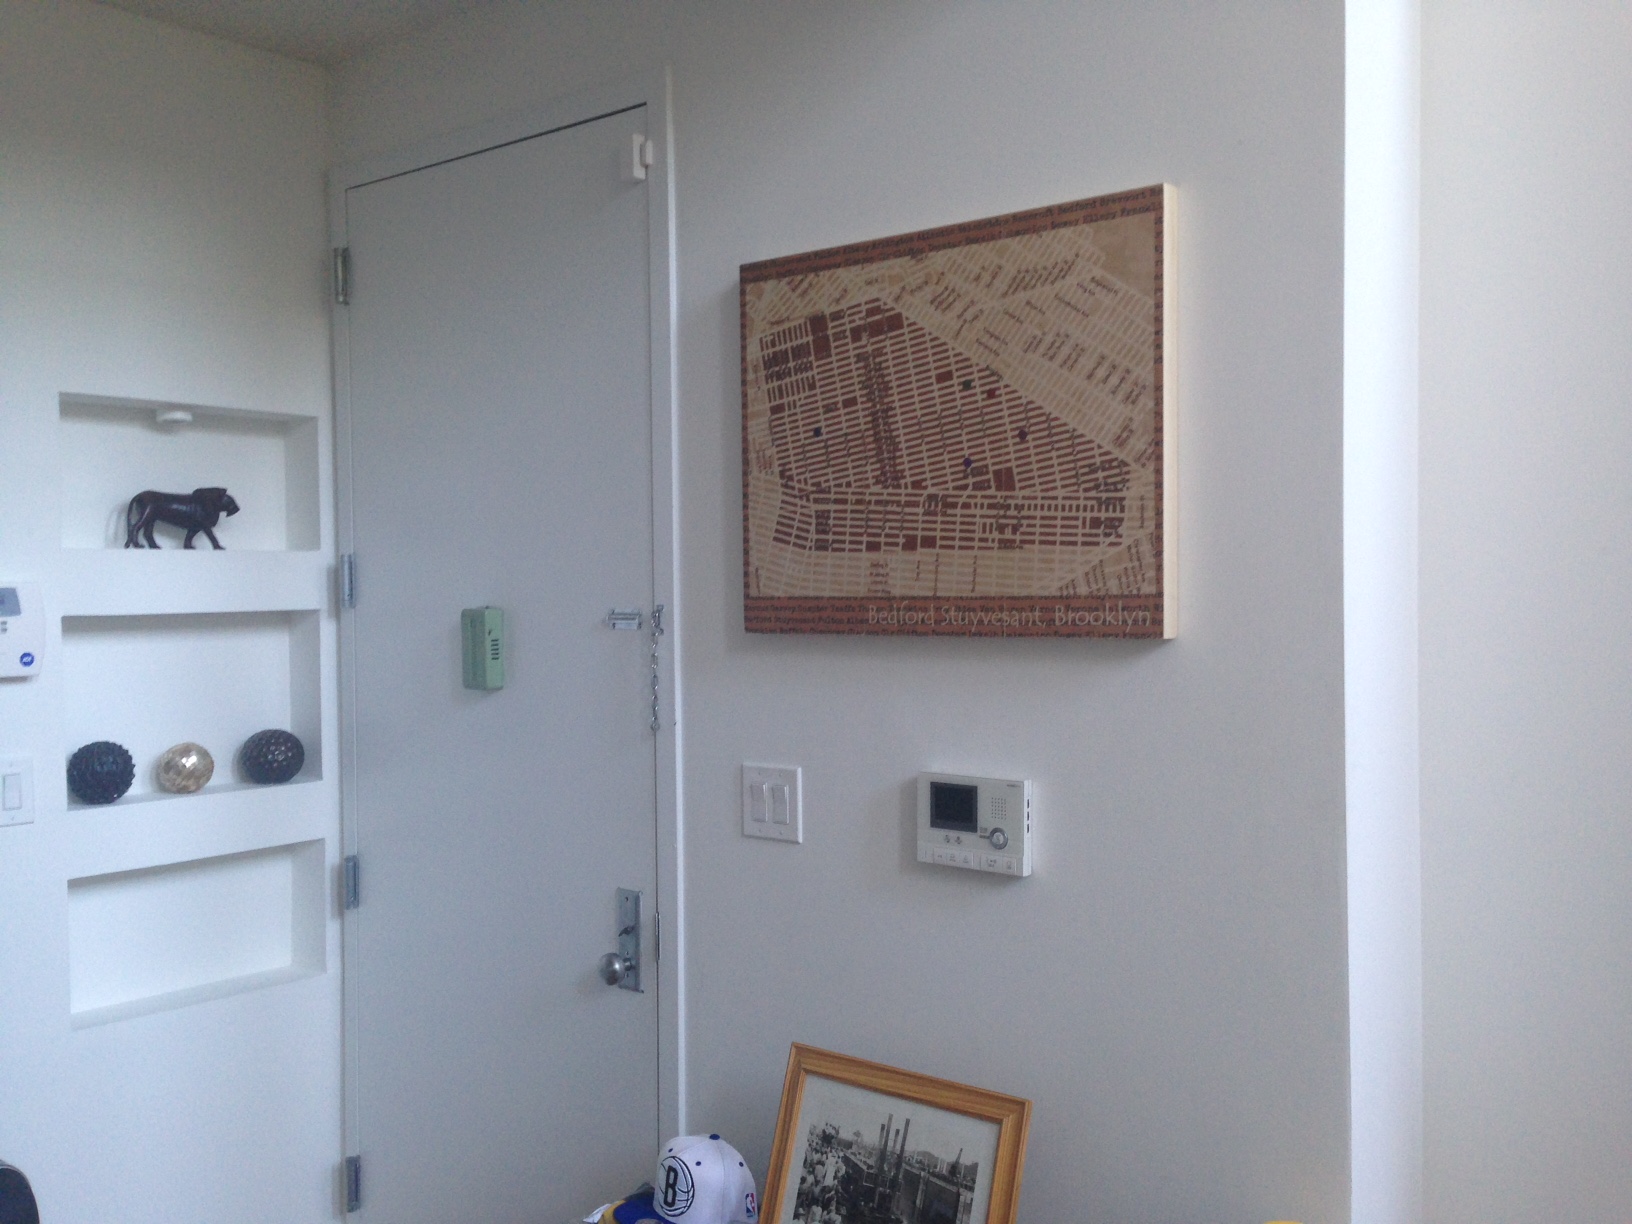
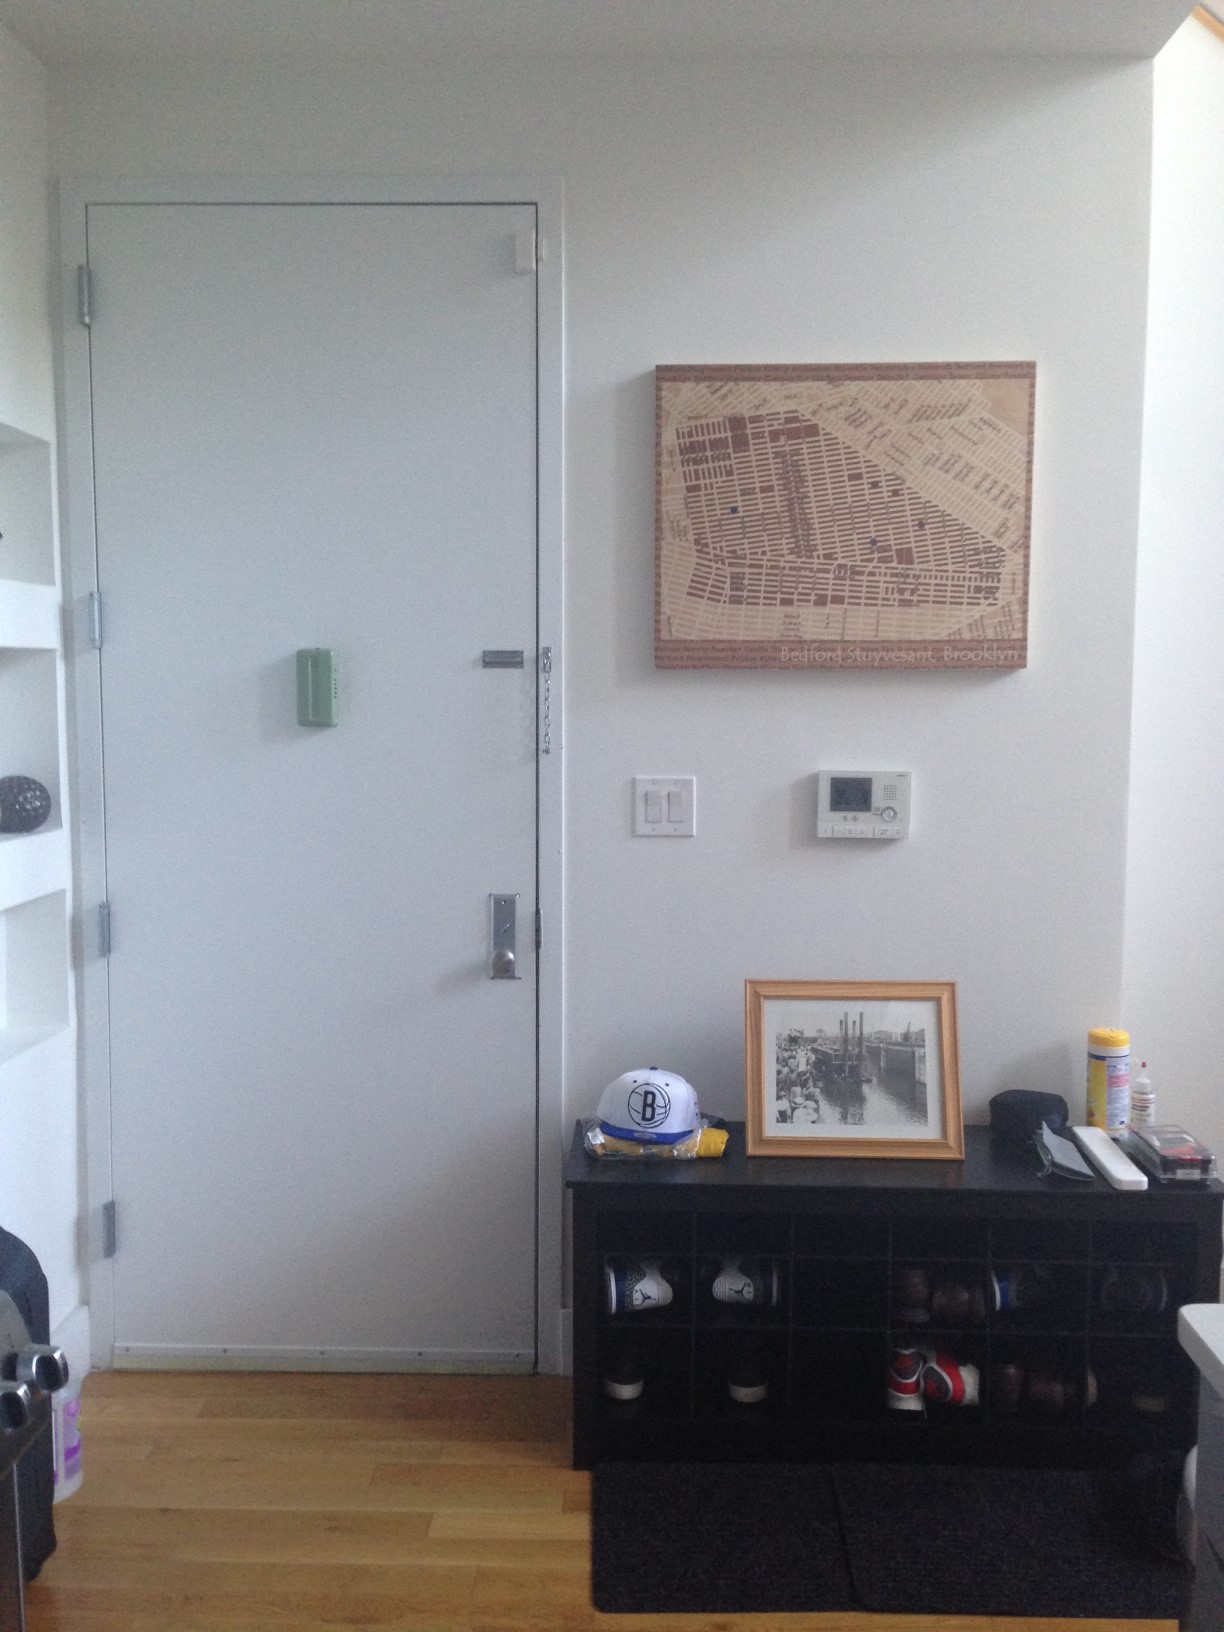
Mal was so happy and excited when I presented him with the big wood map of our favorite Brooklyn neighborhood. I can’t wait to see where he hangs it in his home (and take lots of pics…I promise to post). V-
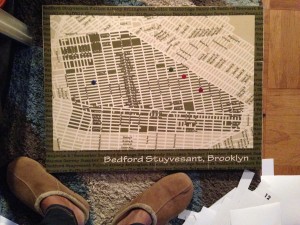
Update 9/6/15: I went to see Mal over the Labor Day weekend. Here’s a picture of the map by his front door. 🙂 V-