
A Todd Original: Mounting a beautiful photograph art piece in the den
You may also like:
- Wood Floating Display Frames in the kitchen
- Decorated Wood floating frame squares
- Tribal floating wood frame (Part 2)
- Cabin crafting series #4: Tribal decorated wood floating frame (Part…
- Mod Podge Puzzle Wood Panel Floating Frame
- Paper ogee decorated wood floating frames
- Building out more floating shelves
- Building a floating shelf for the den
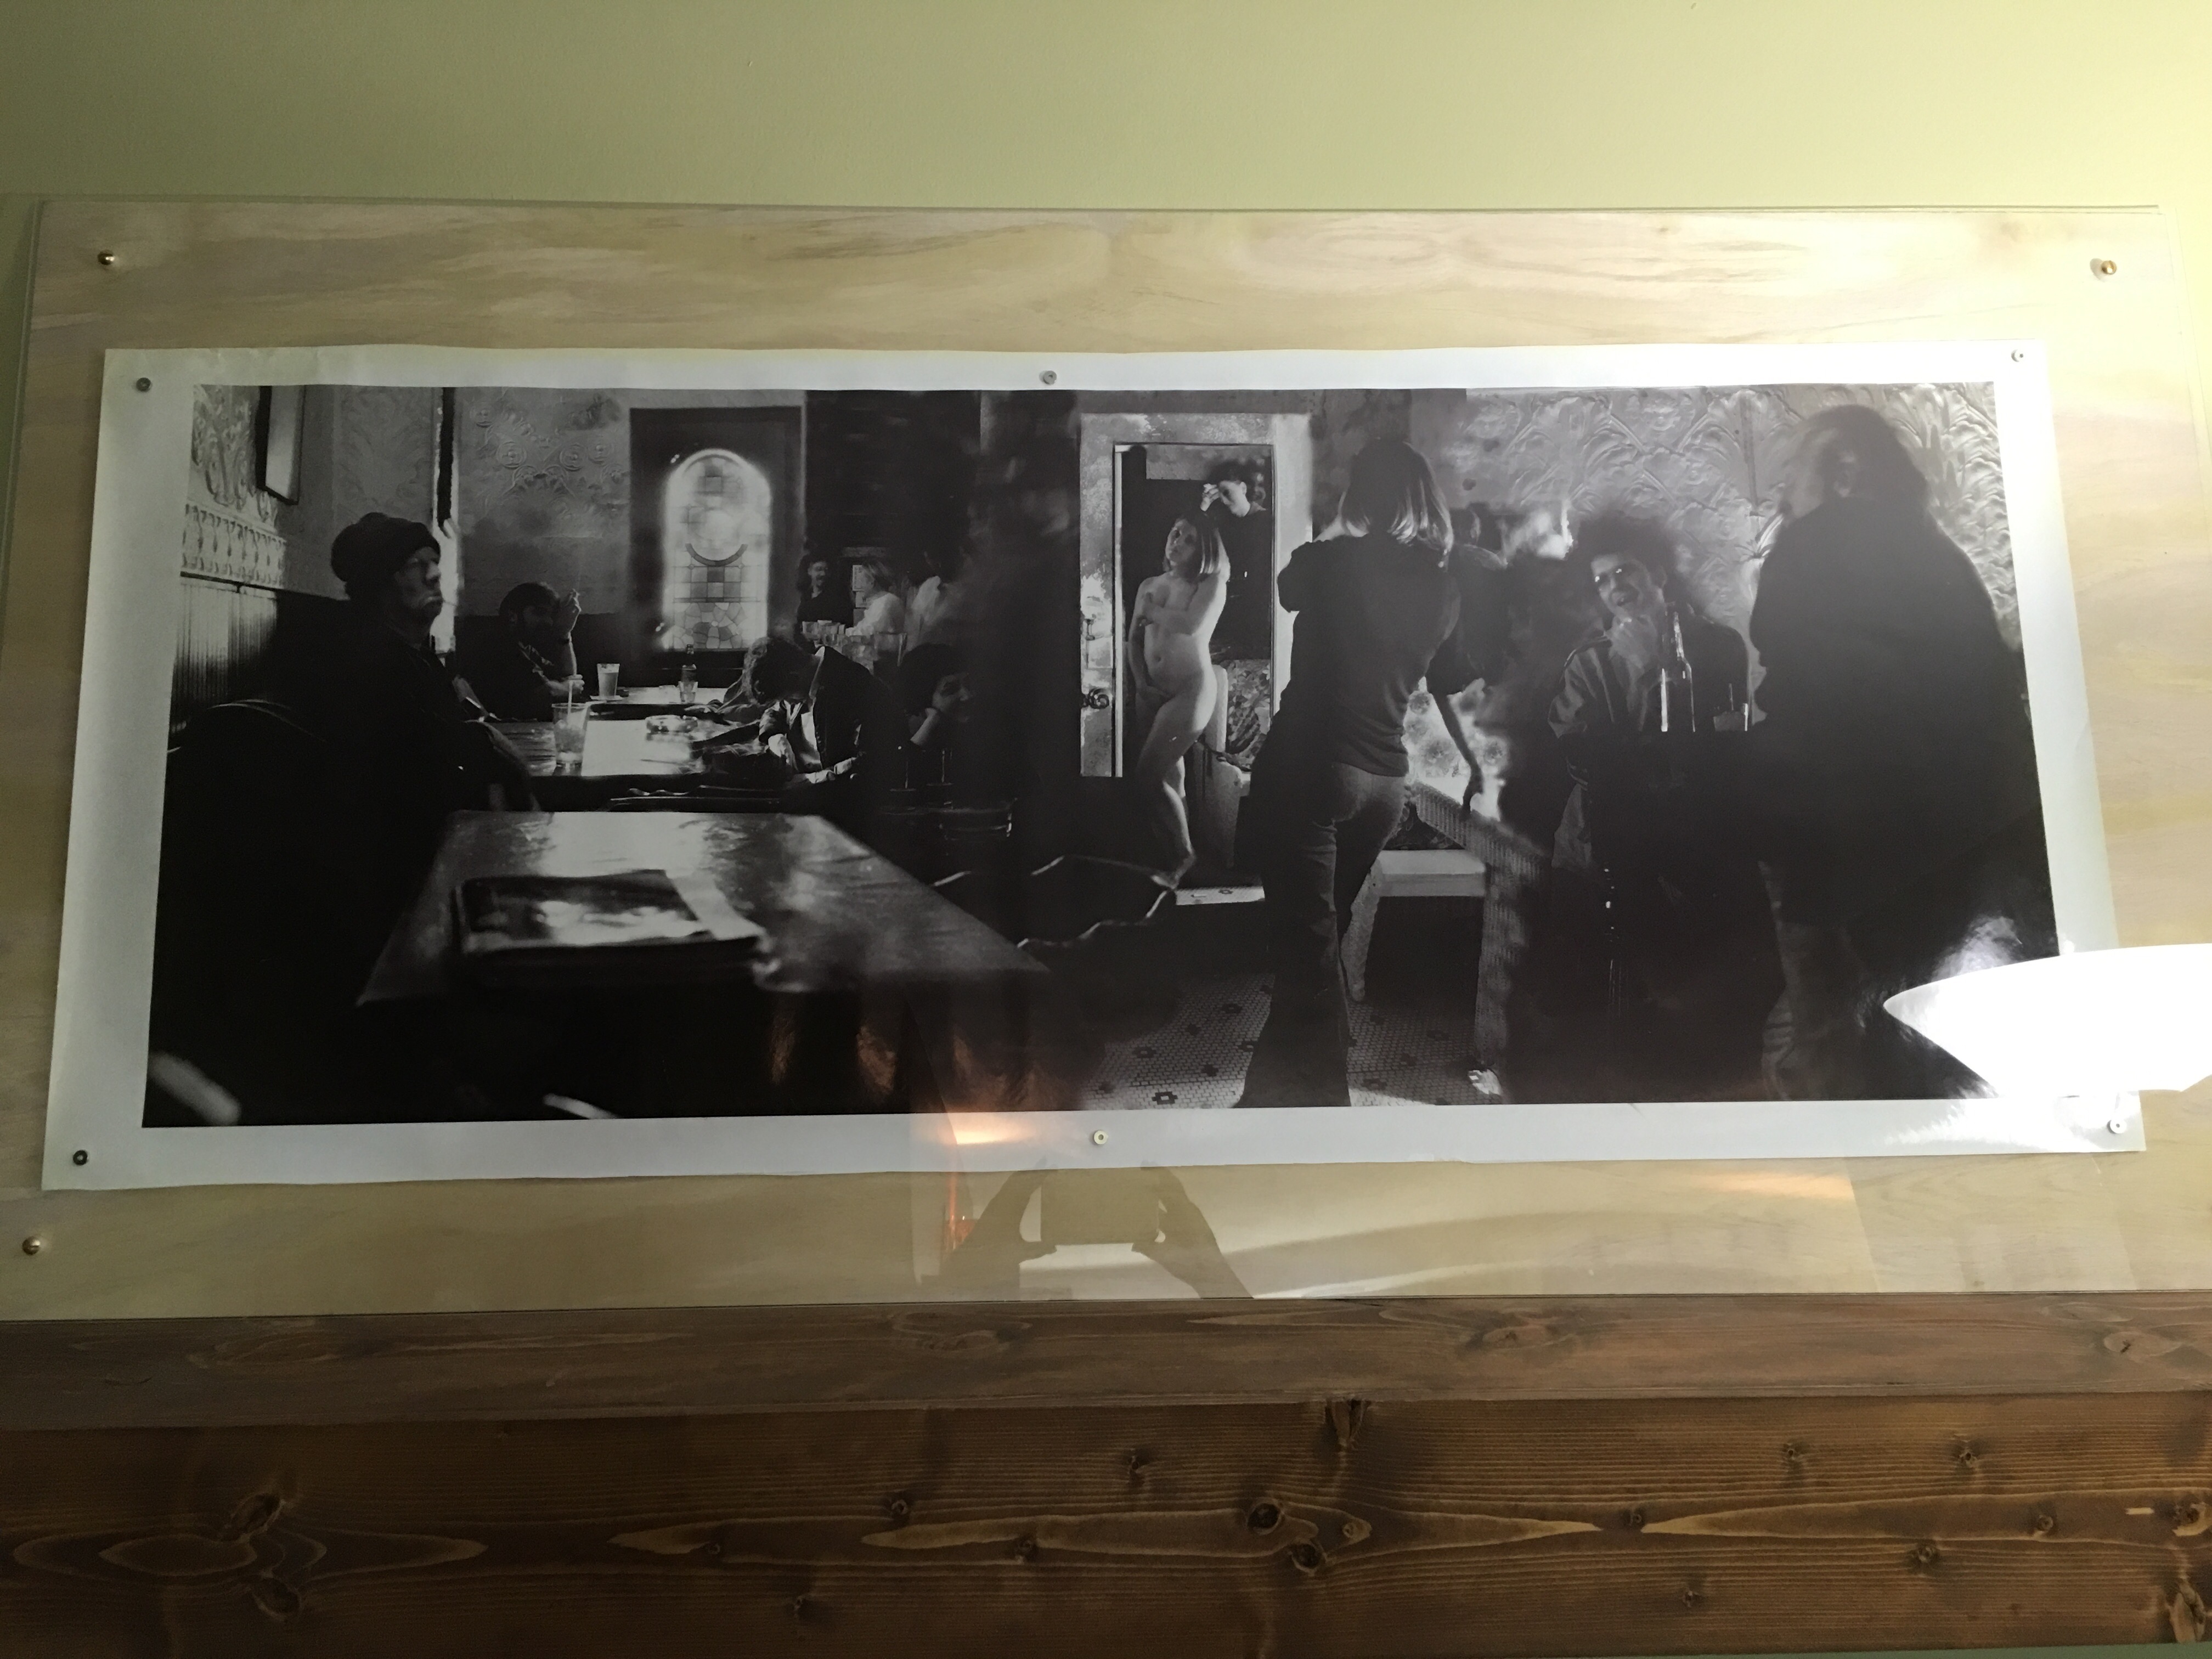
April 24, 2016: A couple of years ago when I was cleaning out the den closet, I came across what seemed to be a rolled up poster. When I unrolled it, however, I discovered a gorgeous, large format photograph instead. A photographing art piece, to be exact.
It depicted a beautiful, poignant and haunting scene of a young woman looking at herself in the mirror. She’s in the middle of a crowded bar and appears to be looking at herself in the mirror through a camera lense. She’s fully clothed in the bar, but in the mirror she is nude and is hiding herself in shame.
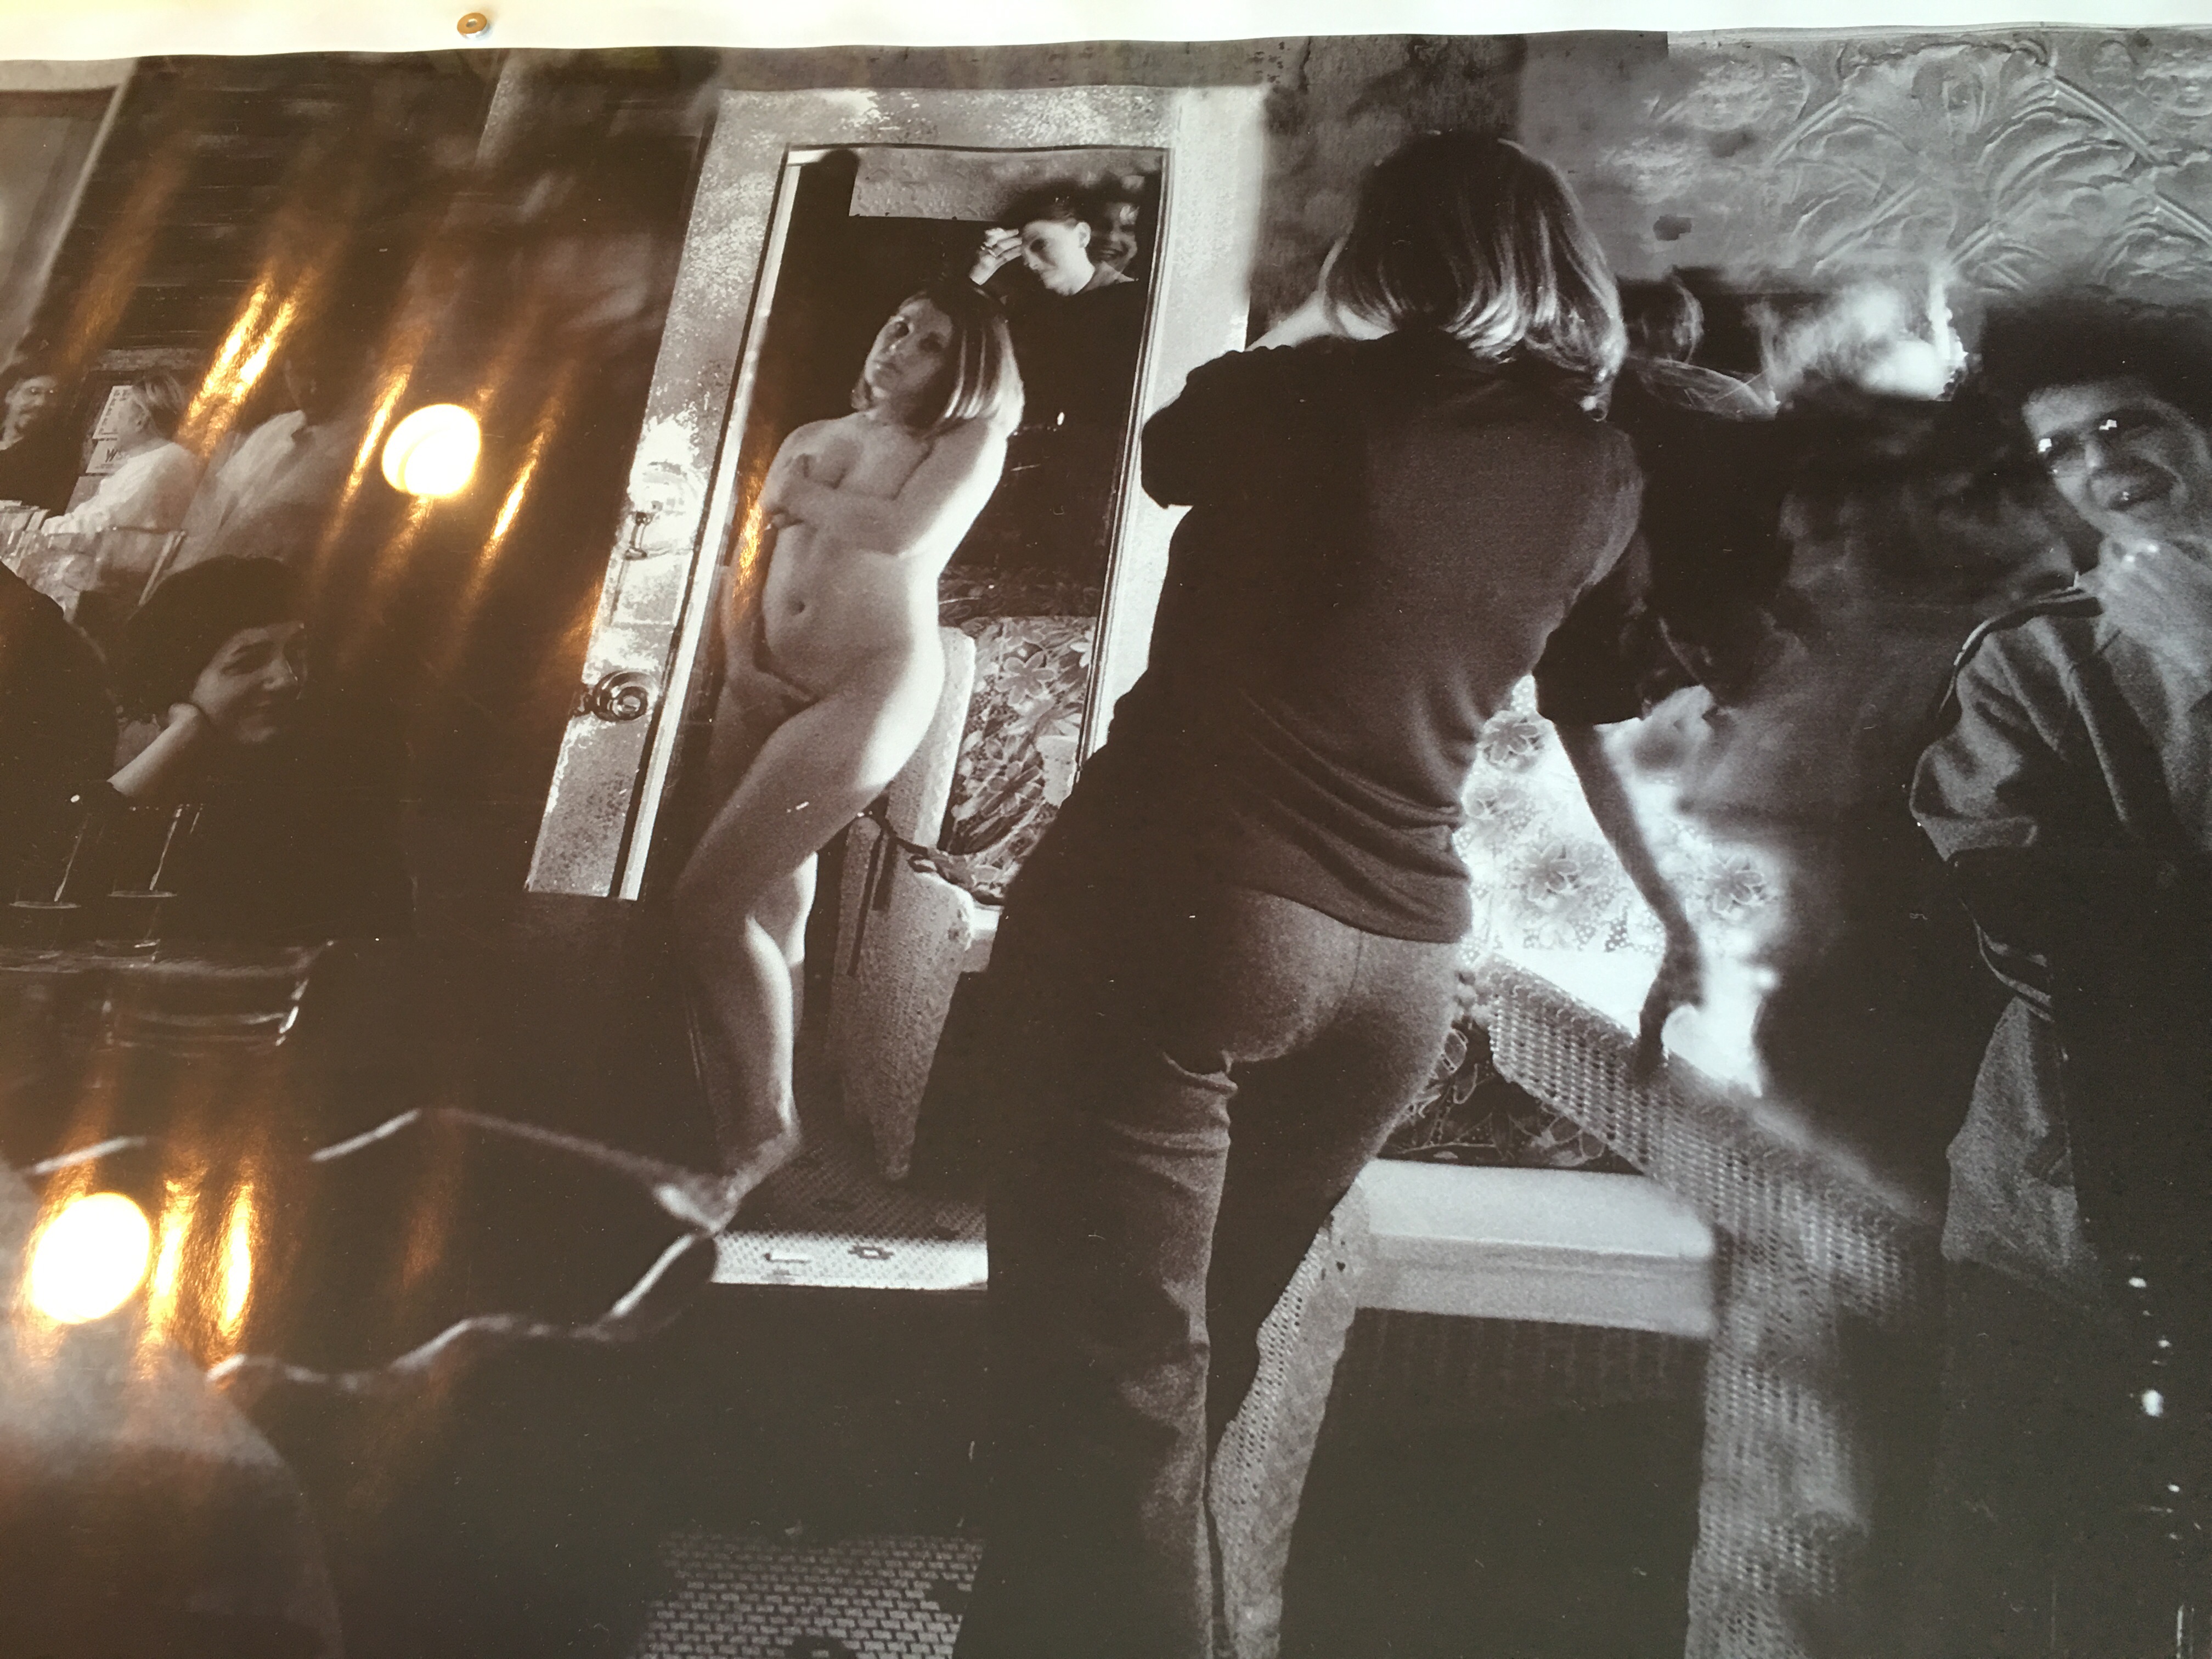
I was so hypnotized by the image it was hard to pull my eyes away. It is truly gorgeous.
I asked Bruce where the photograph came from and he told me he bought it from his buddy, Todd at an art show years ago. Todd photographed and created the piece. Bruce liked it so much that he bought it and brought it home.
And in the den closet it stayed from then on.
I asked Bruce if he was ok with my eventually hanging the piece on the wall. He replied that he would be thrilled…he loves the photograph. But the issue is that it’s so big. It would require a massively huge custom mount.
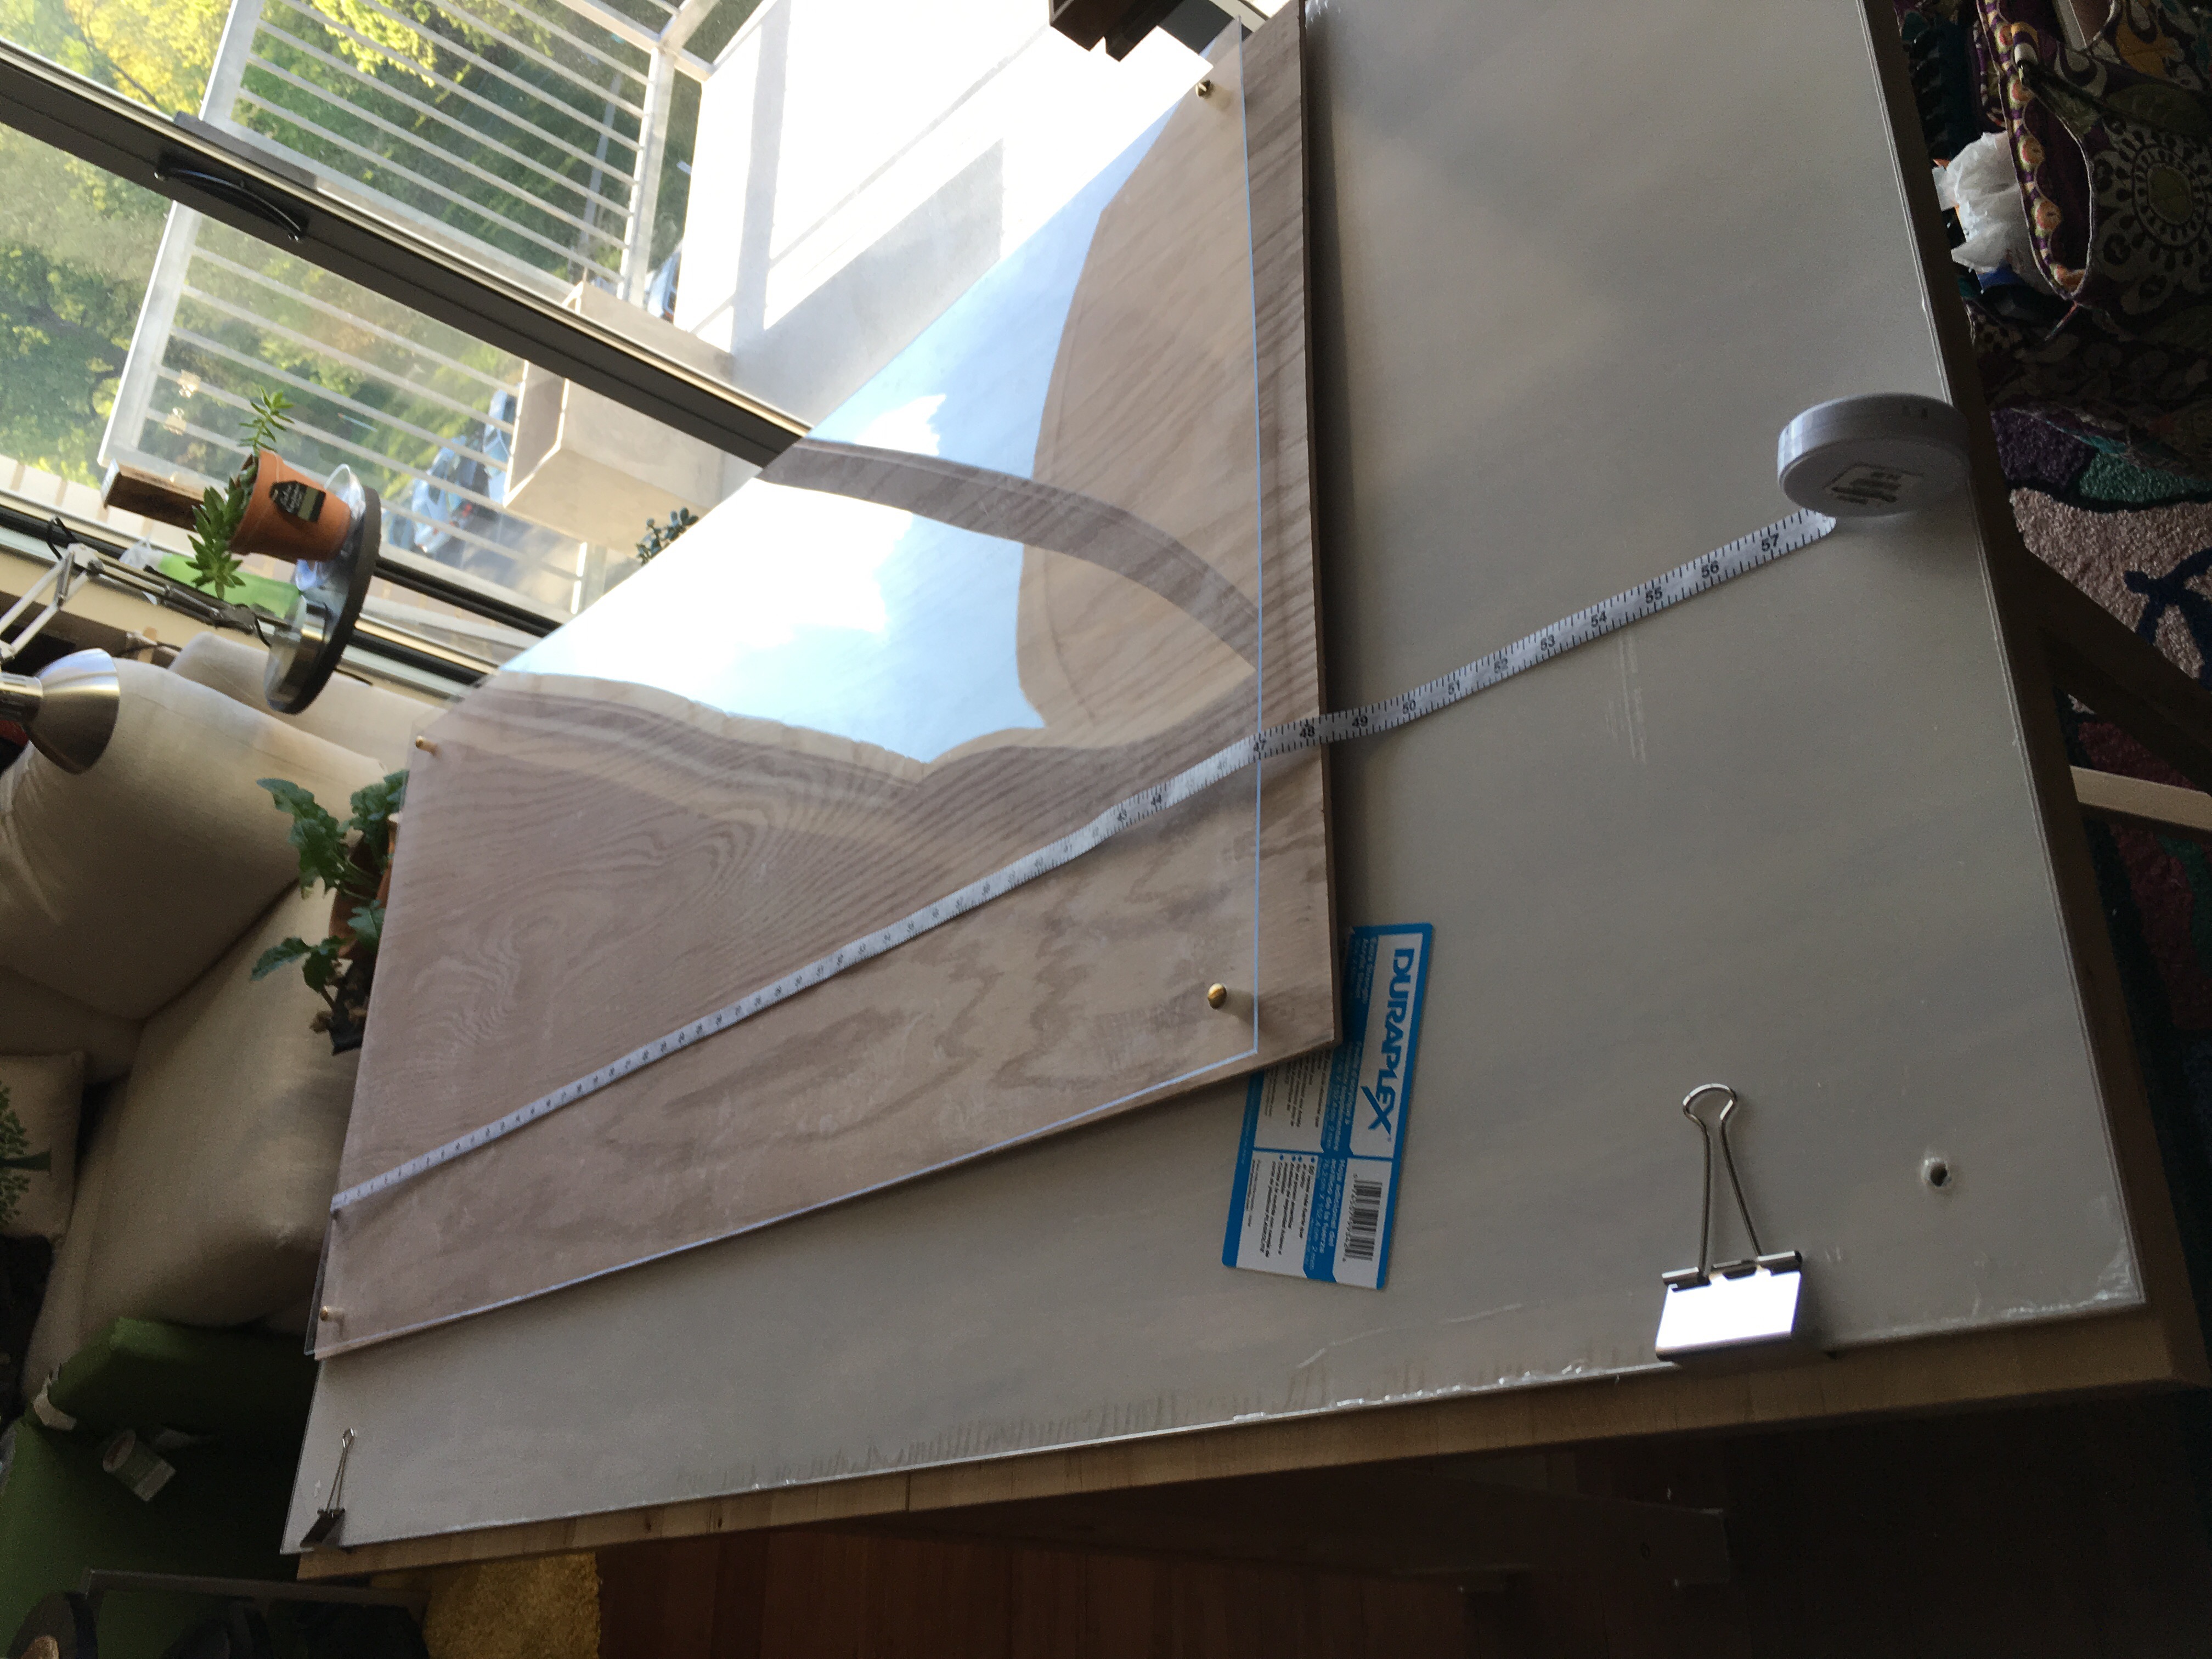
Working together, we unrolled and measured the photograph. 22 x 54″. Not including the border. Wow!
I filed away the idea of doing a DIY floating acrylic mount as I rolled the photograph up and tucked it back in the closet.
Tackling the mount in February:
After figuring out how to DIY an acrylic wood frame (thanks to Lowes) and getting a number of smaller mounts under my belt, I felt ready to tackle Todd’s photograph.
I head out to Lowes on February 18th and went in search of 30 x 60 acrylic and plywood. I knew I wanted the plywood to be thin – 1/4″ thick rather than 1/2″ thick like my paper ogee decorated floating frame wood panels. For a mount this big, 1/2 plywood would be way too heavy for me to handle alone.
I verbally conveyed the size I wanted to the helpful Lowes associates and they helped me cut the acrylic and plywood I needed.
After a quick stop at my friend Tim’s to use his drill press to create the holes at each corner, I proudly brought it back and showed Bruce my plan for mounting the photograph.
Bruce told me right away that the huge cut of plywood I just hauled is not big enough.
In disbelief, I rolled out the photograph and measured.
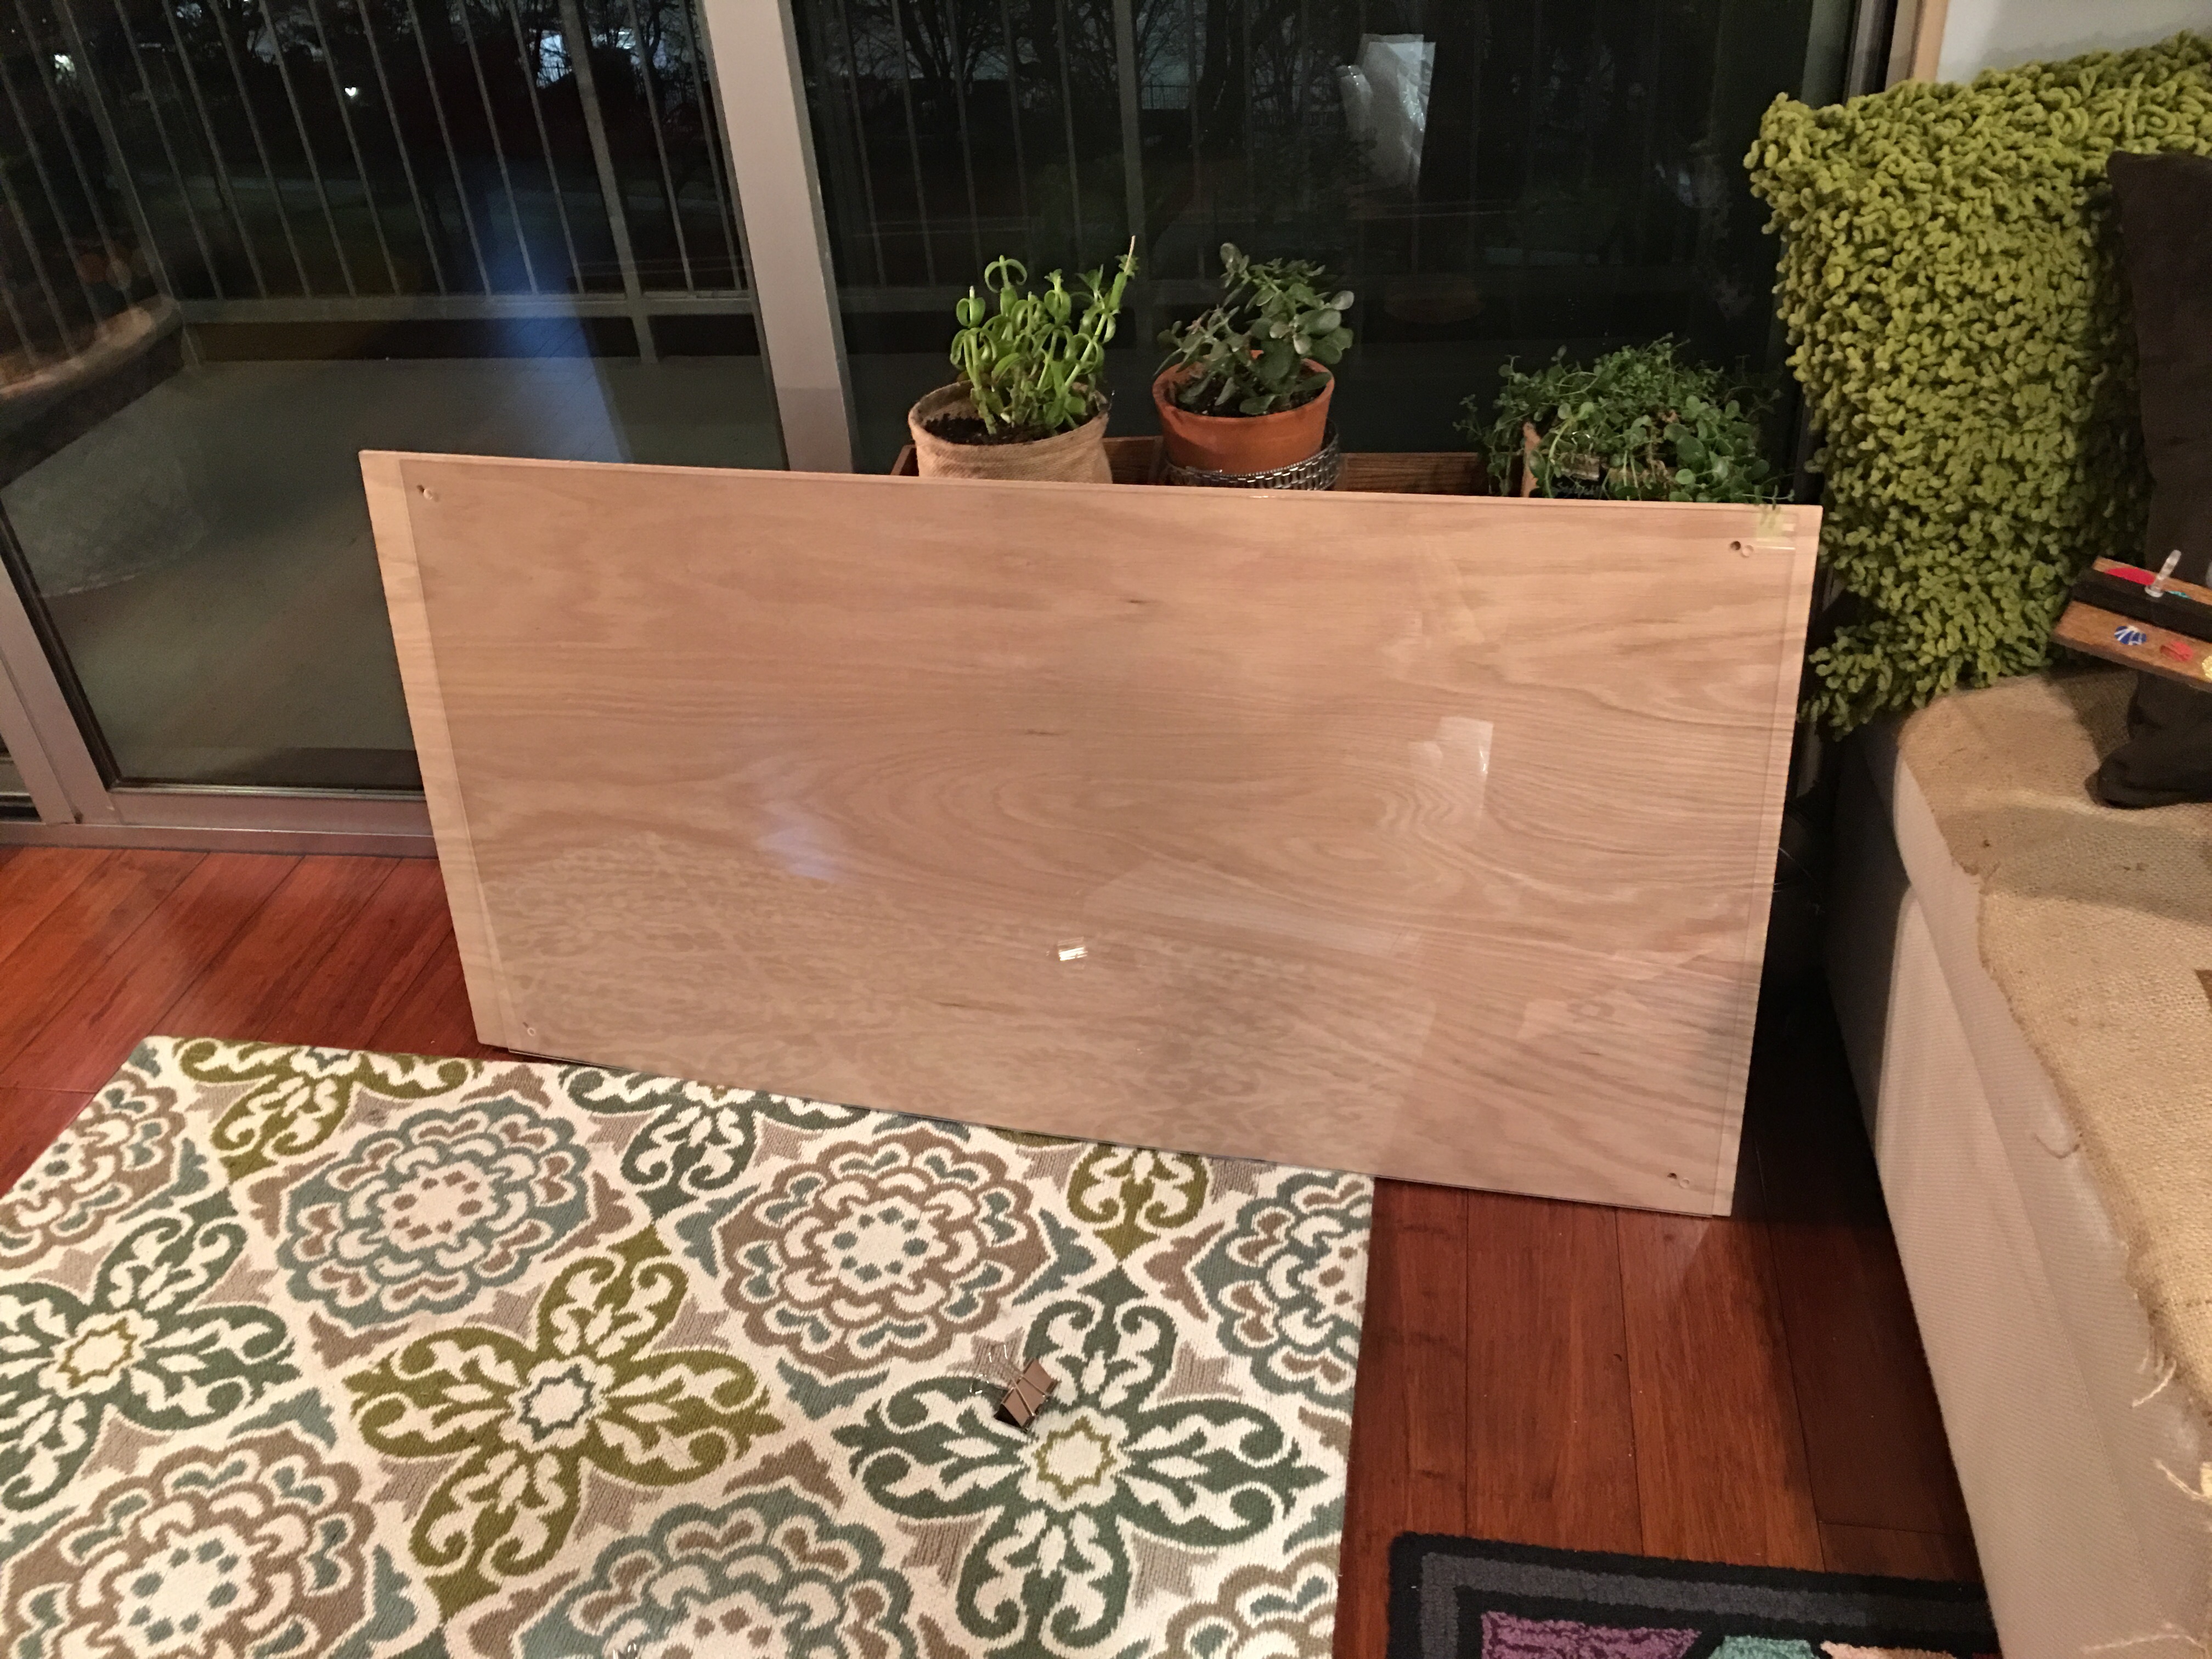
Groan…I managed to bring home a 24 x 48 inch piece of plywood (with a slightly smaller piece of acrylic.
Well, that will definitely NOT work. Cutting the size of the photograph down is definitely NOT an option.
As for the plywood and acrylic, since I had them cut it, I own it. I assembled it as a floating frame piece using spacers, nuts and bolts and propped it in the bedroom under the window. I’ve been brainstorming a different project for this piece ever since.
Getting it right in April:
While shopping in Lowes yesterday for other projects, it occurred to me that this weekend would be an ideal one for finally getting the photograph mount done.
And this time, I played it smart. I had my tape measure in hand before selecting and cutting pieces.
Here’s the 30 x 60 inch acrylic that I selected from Duraplex.

Since I want to use the full 30 x 60 size to frame out the photograph, no cutting of acrylic required. (A good thing too since the associates kindly advised me that they have no cutters left for the glass cutter – so no acrylic cuts today. Made a mental note to get the hang of cutting my own acrylic once and for all and tossed a Plaskolite scorer on my hand truck as well.)
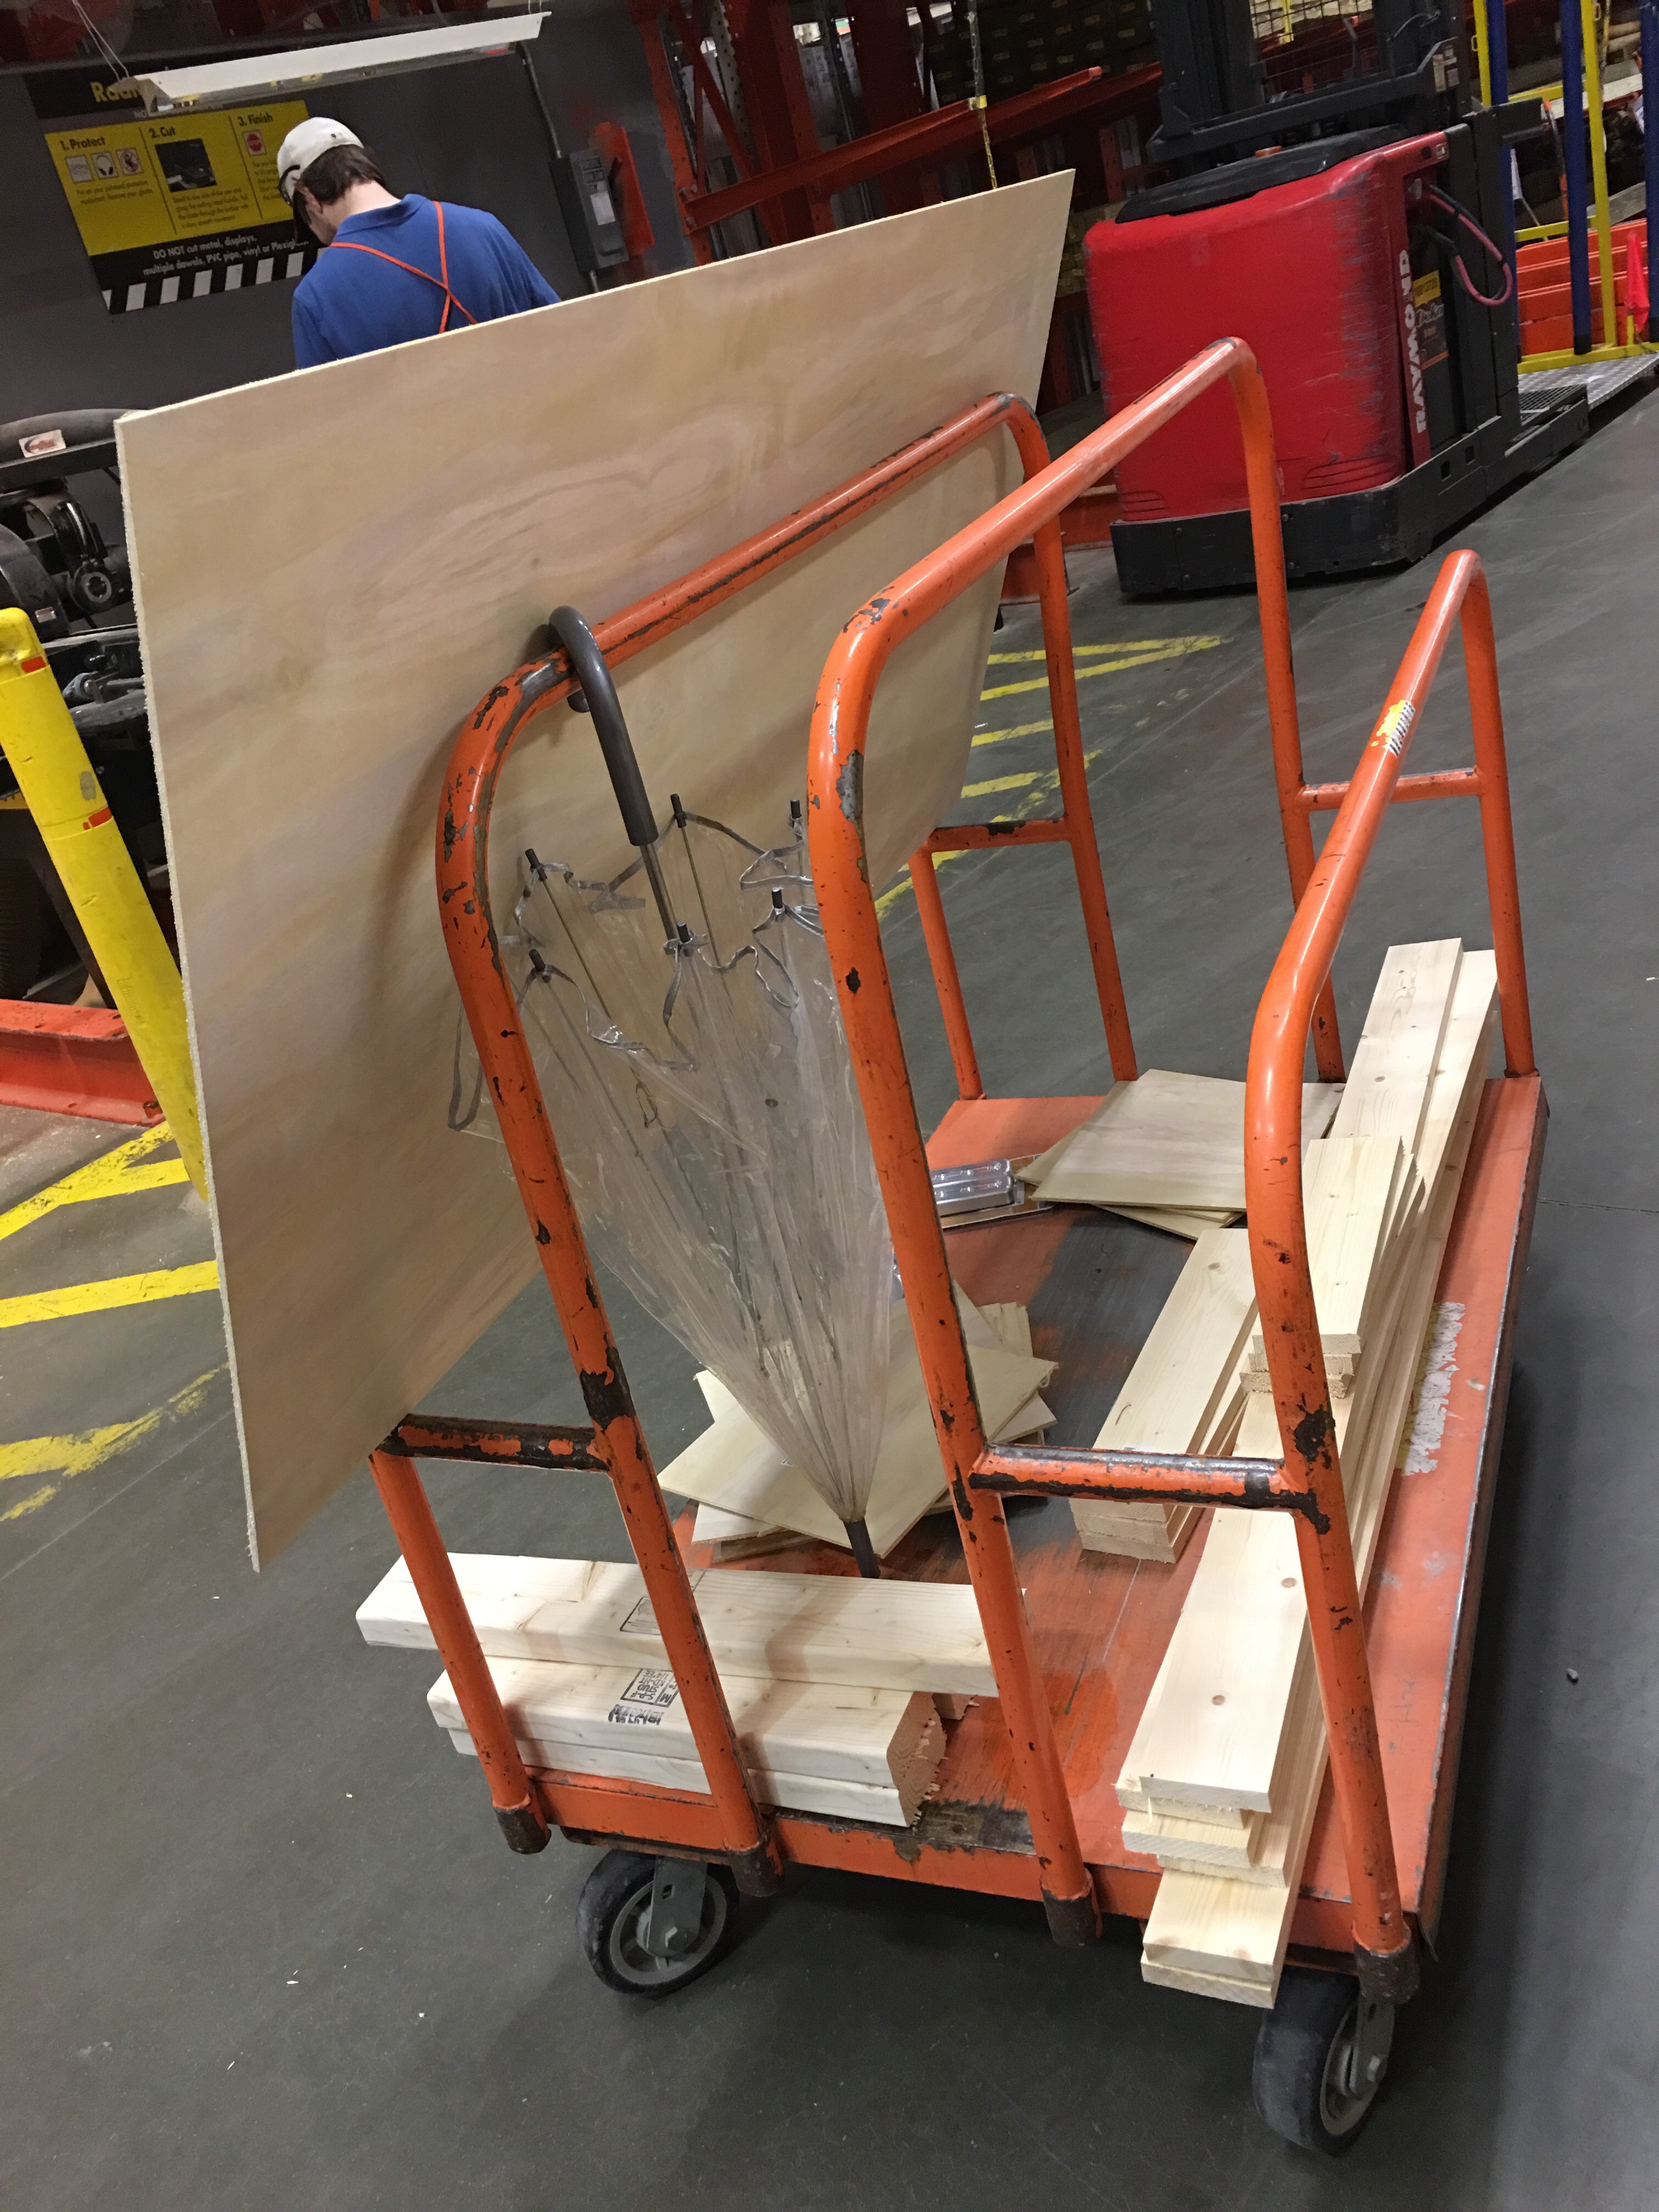
Fed up with the continued lack of service at this Lowes location (don’t even get me started), I head over to my neighborhood Home Depot in Bethesda to pick up the plywood (shown below with wood and materials for my other projects). I had the very helpful associate cut it the 8 x 4 feet birch plywood sheet down to 30 x 60 inches.
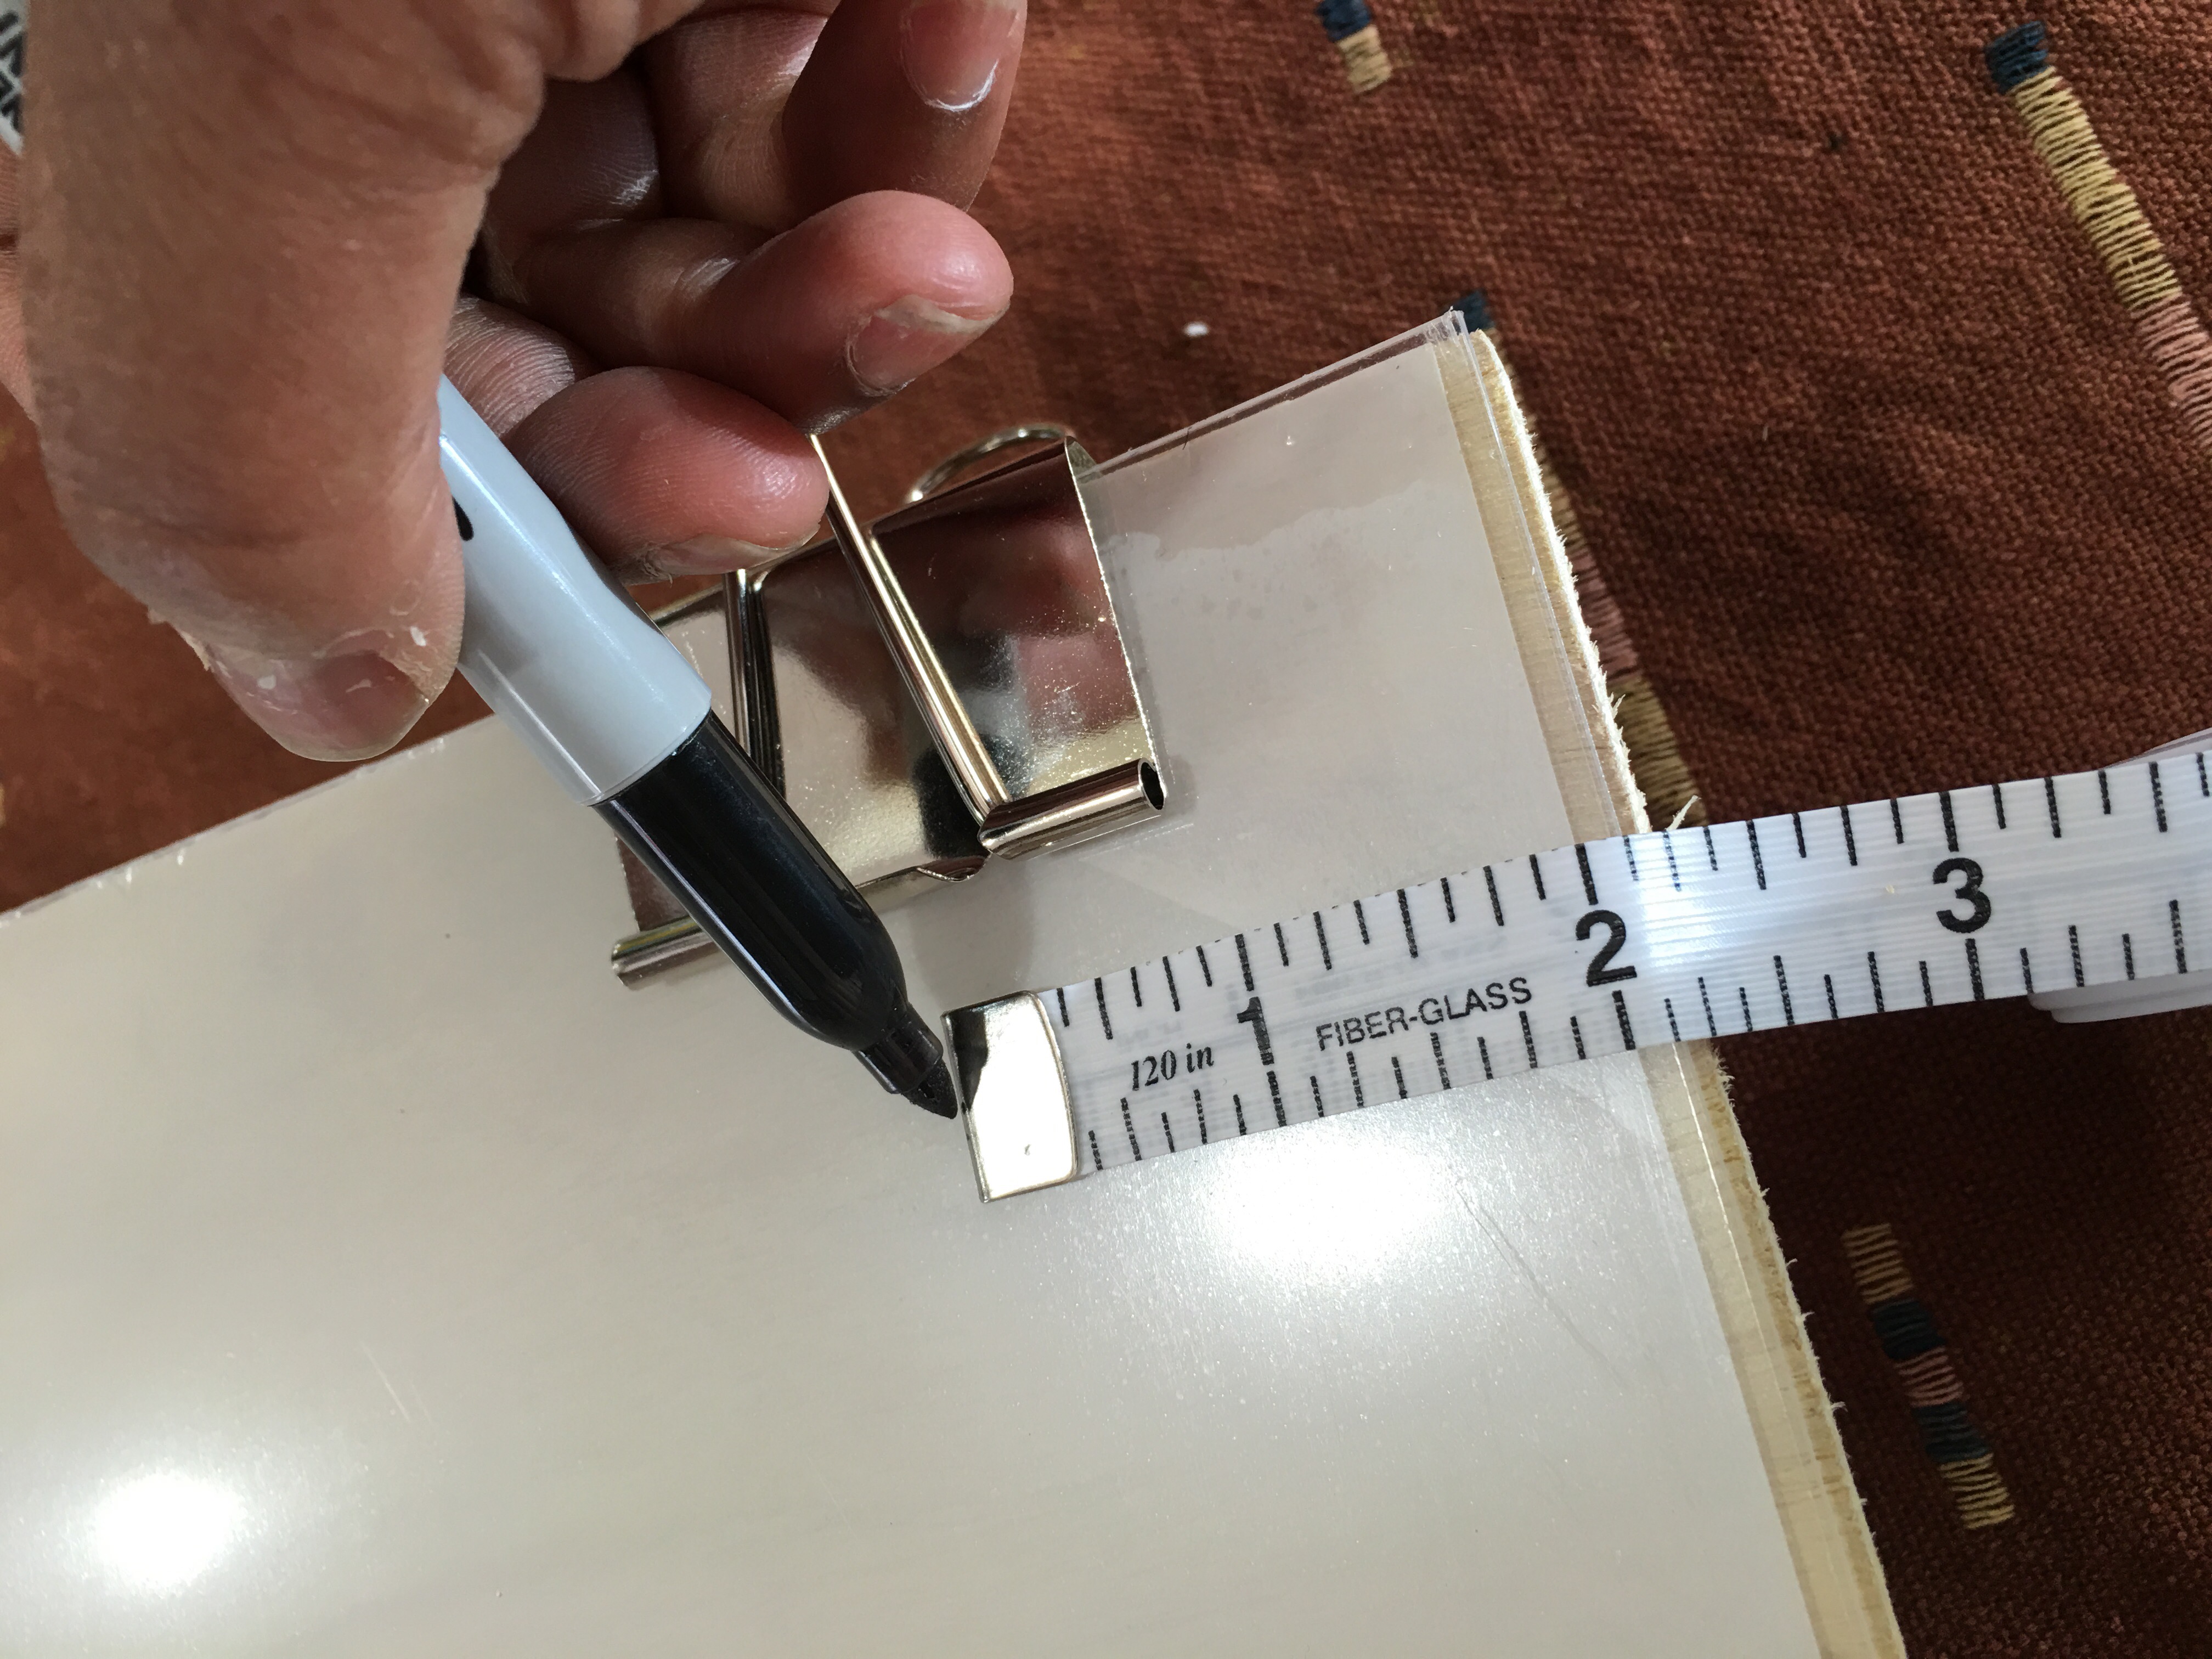
Back at Tim’s, I use his drill press to drill four holes at each corner of the plywood and acrylic.

After measuring and marking each corner 2″ from the top and side of the edge…
…I positioned each corner under the drill press…

…and used it to drill clean holes through the acrylic and plywood.
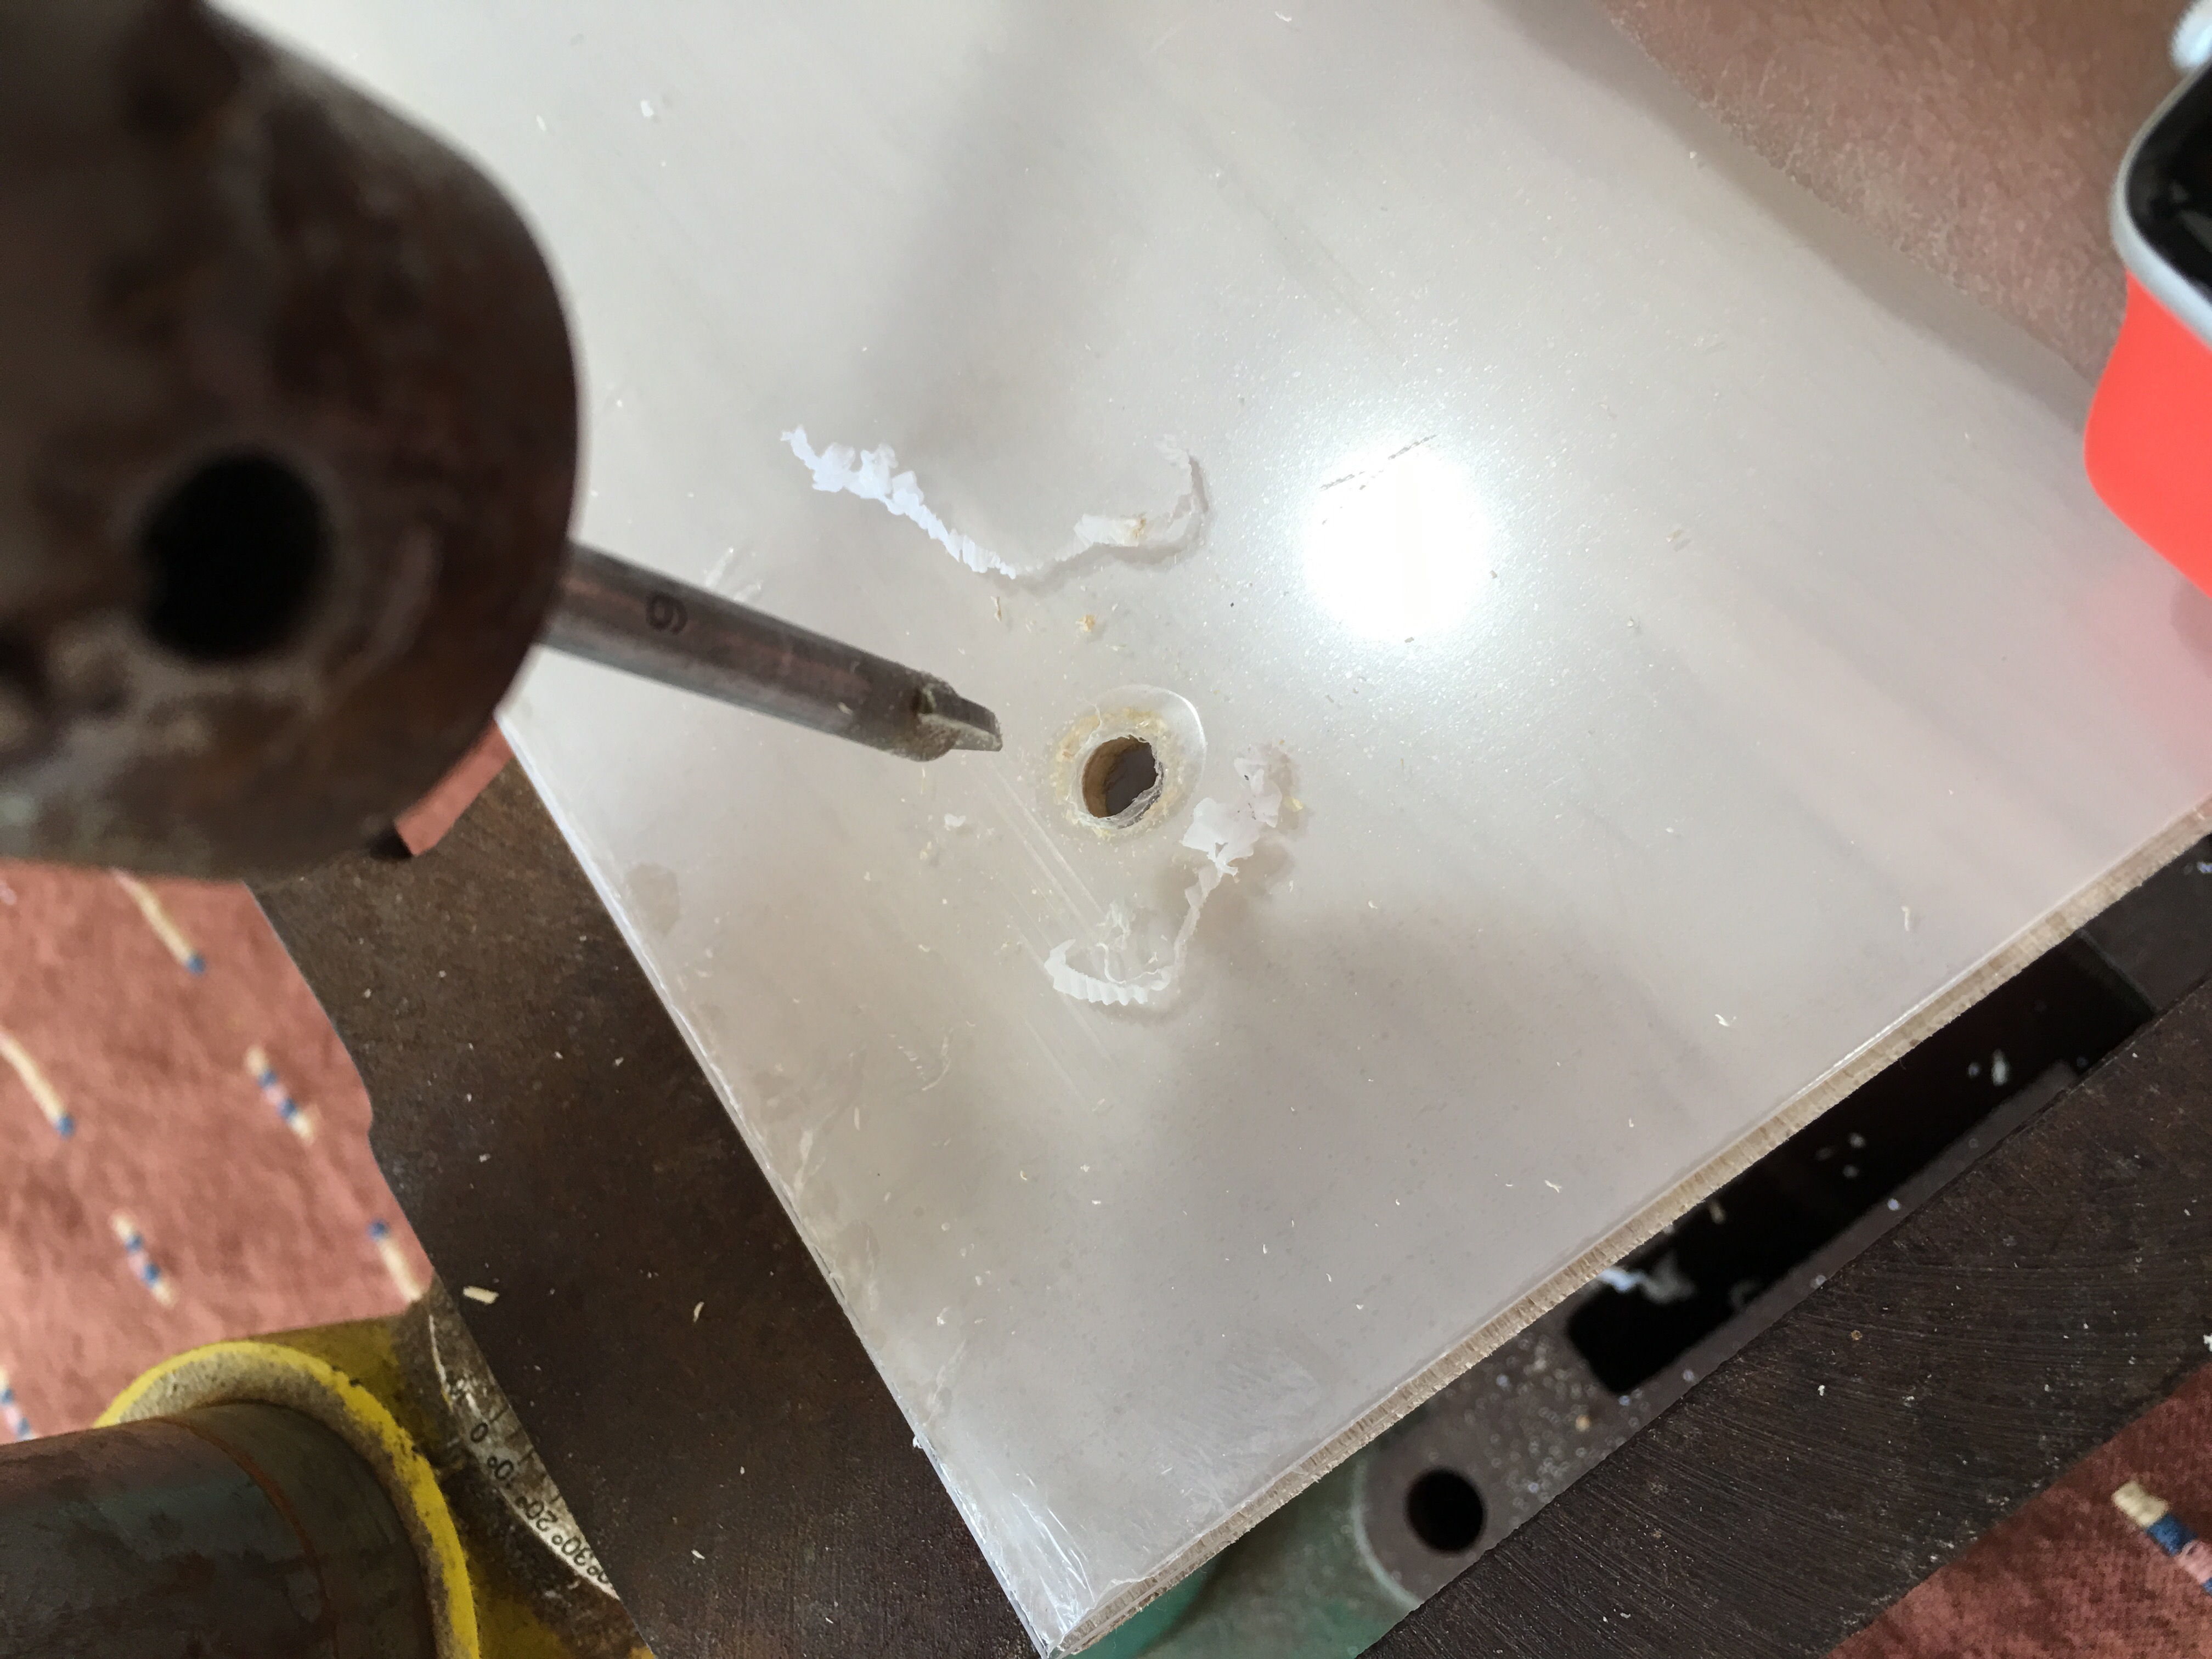
I used a 5/16 glass and tile drill bit to get the job done.
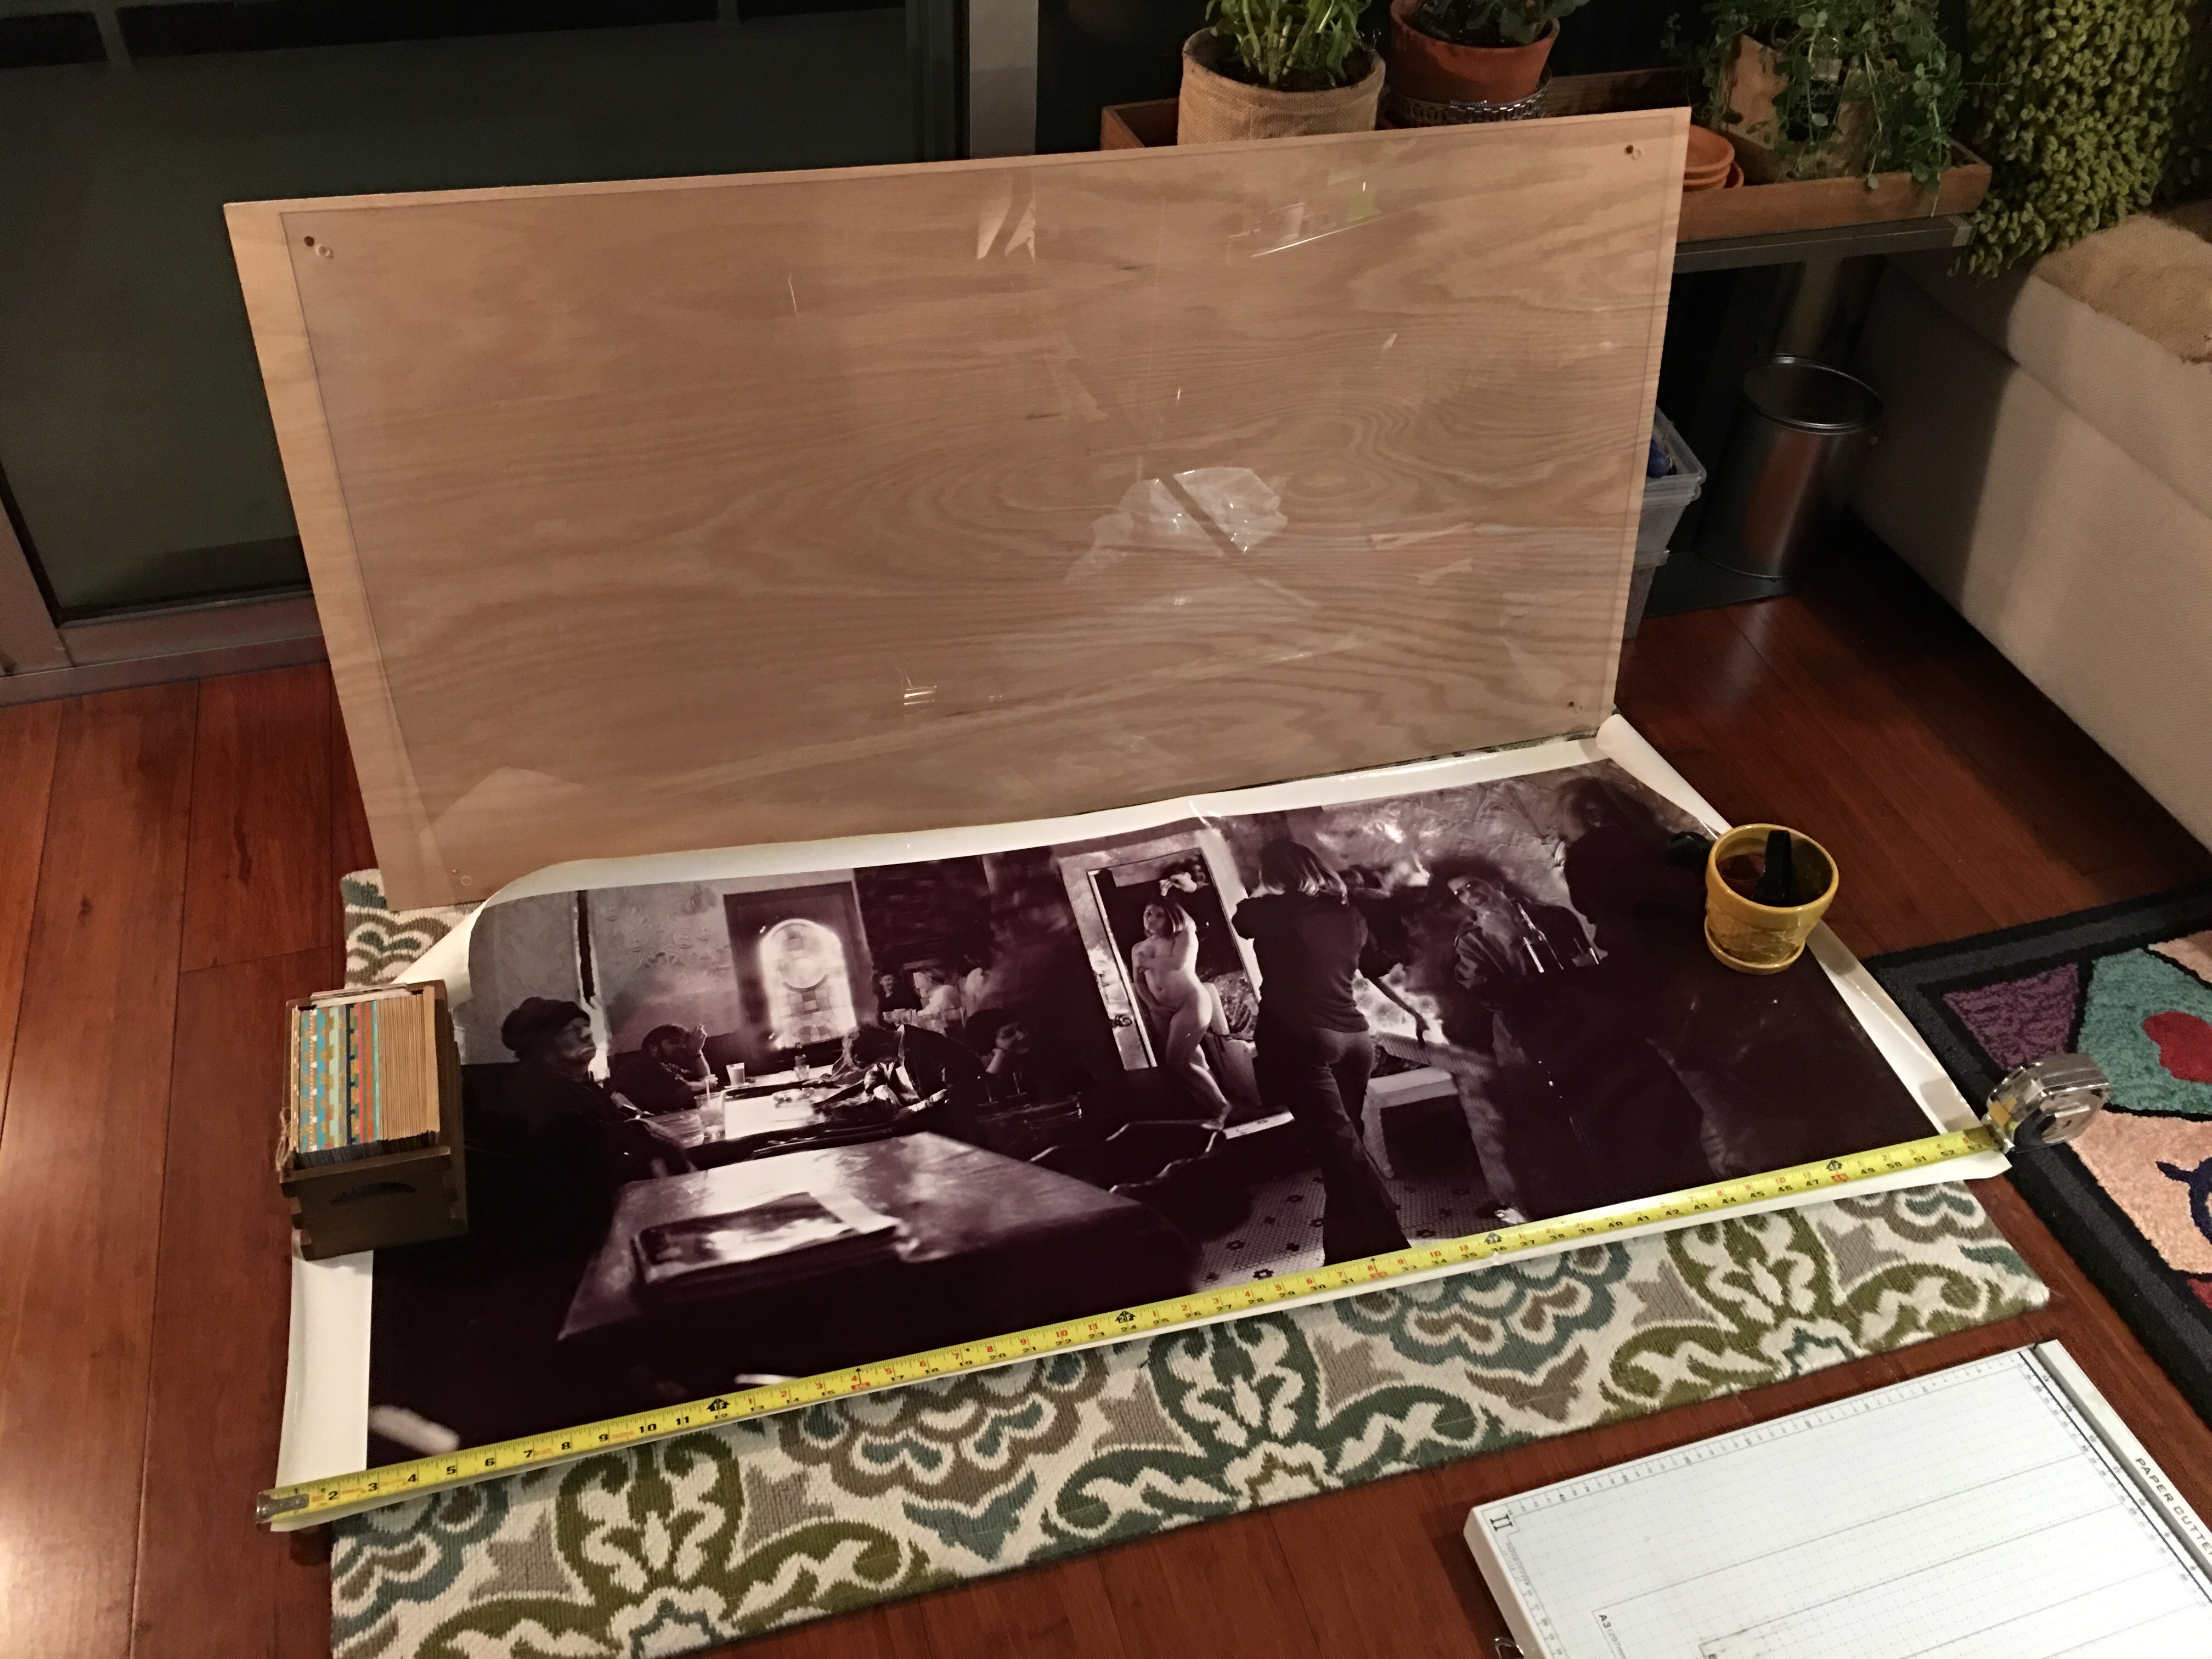
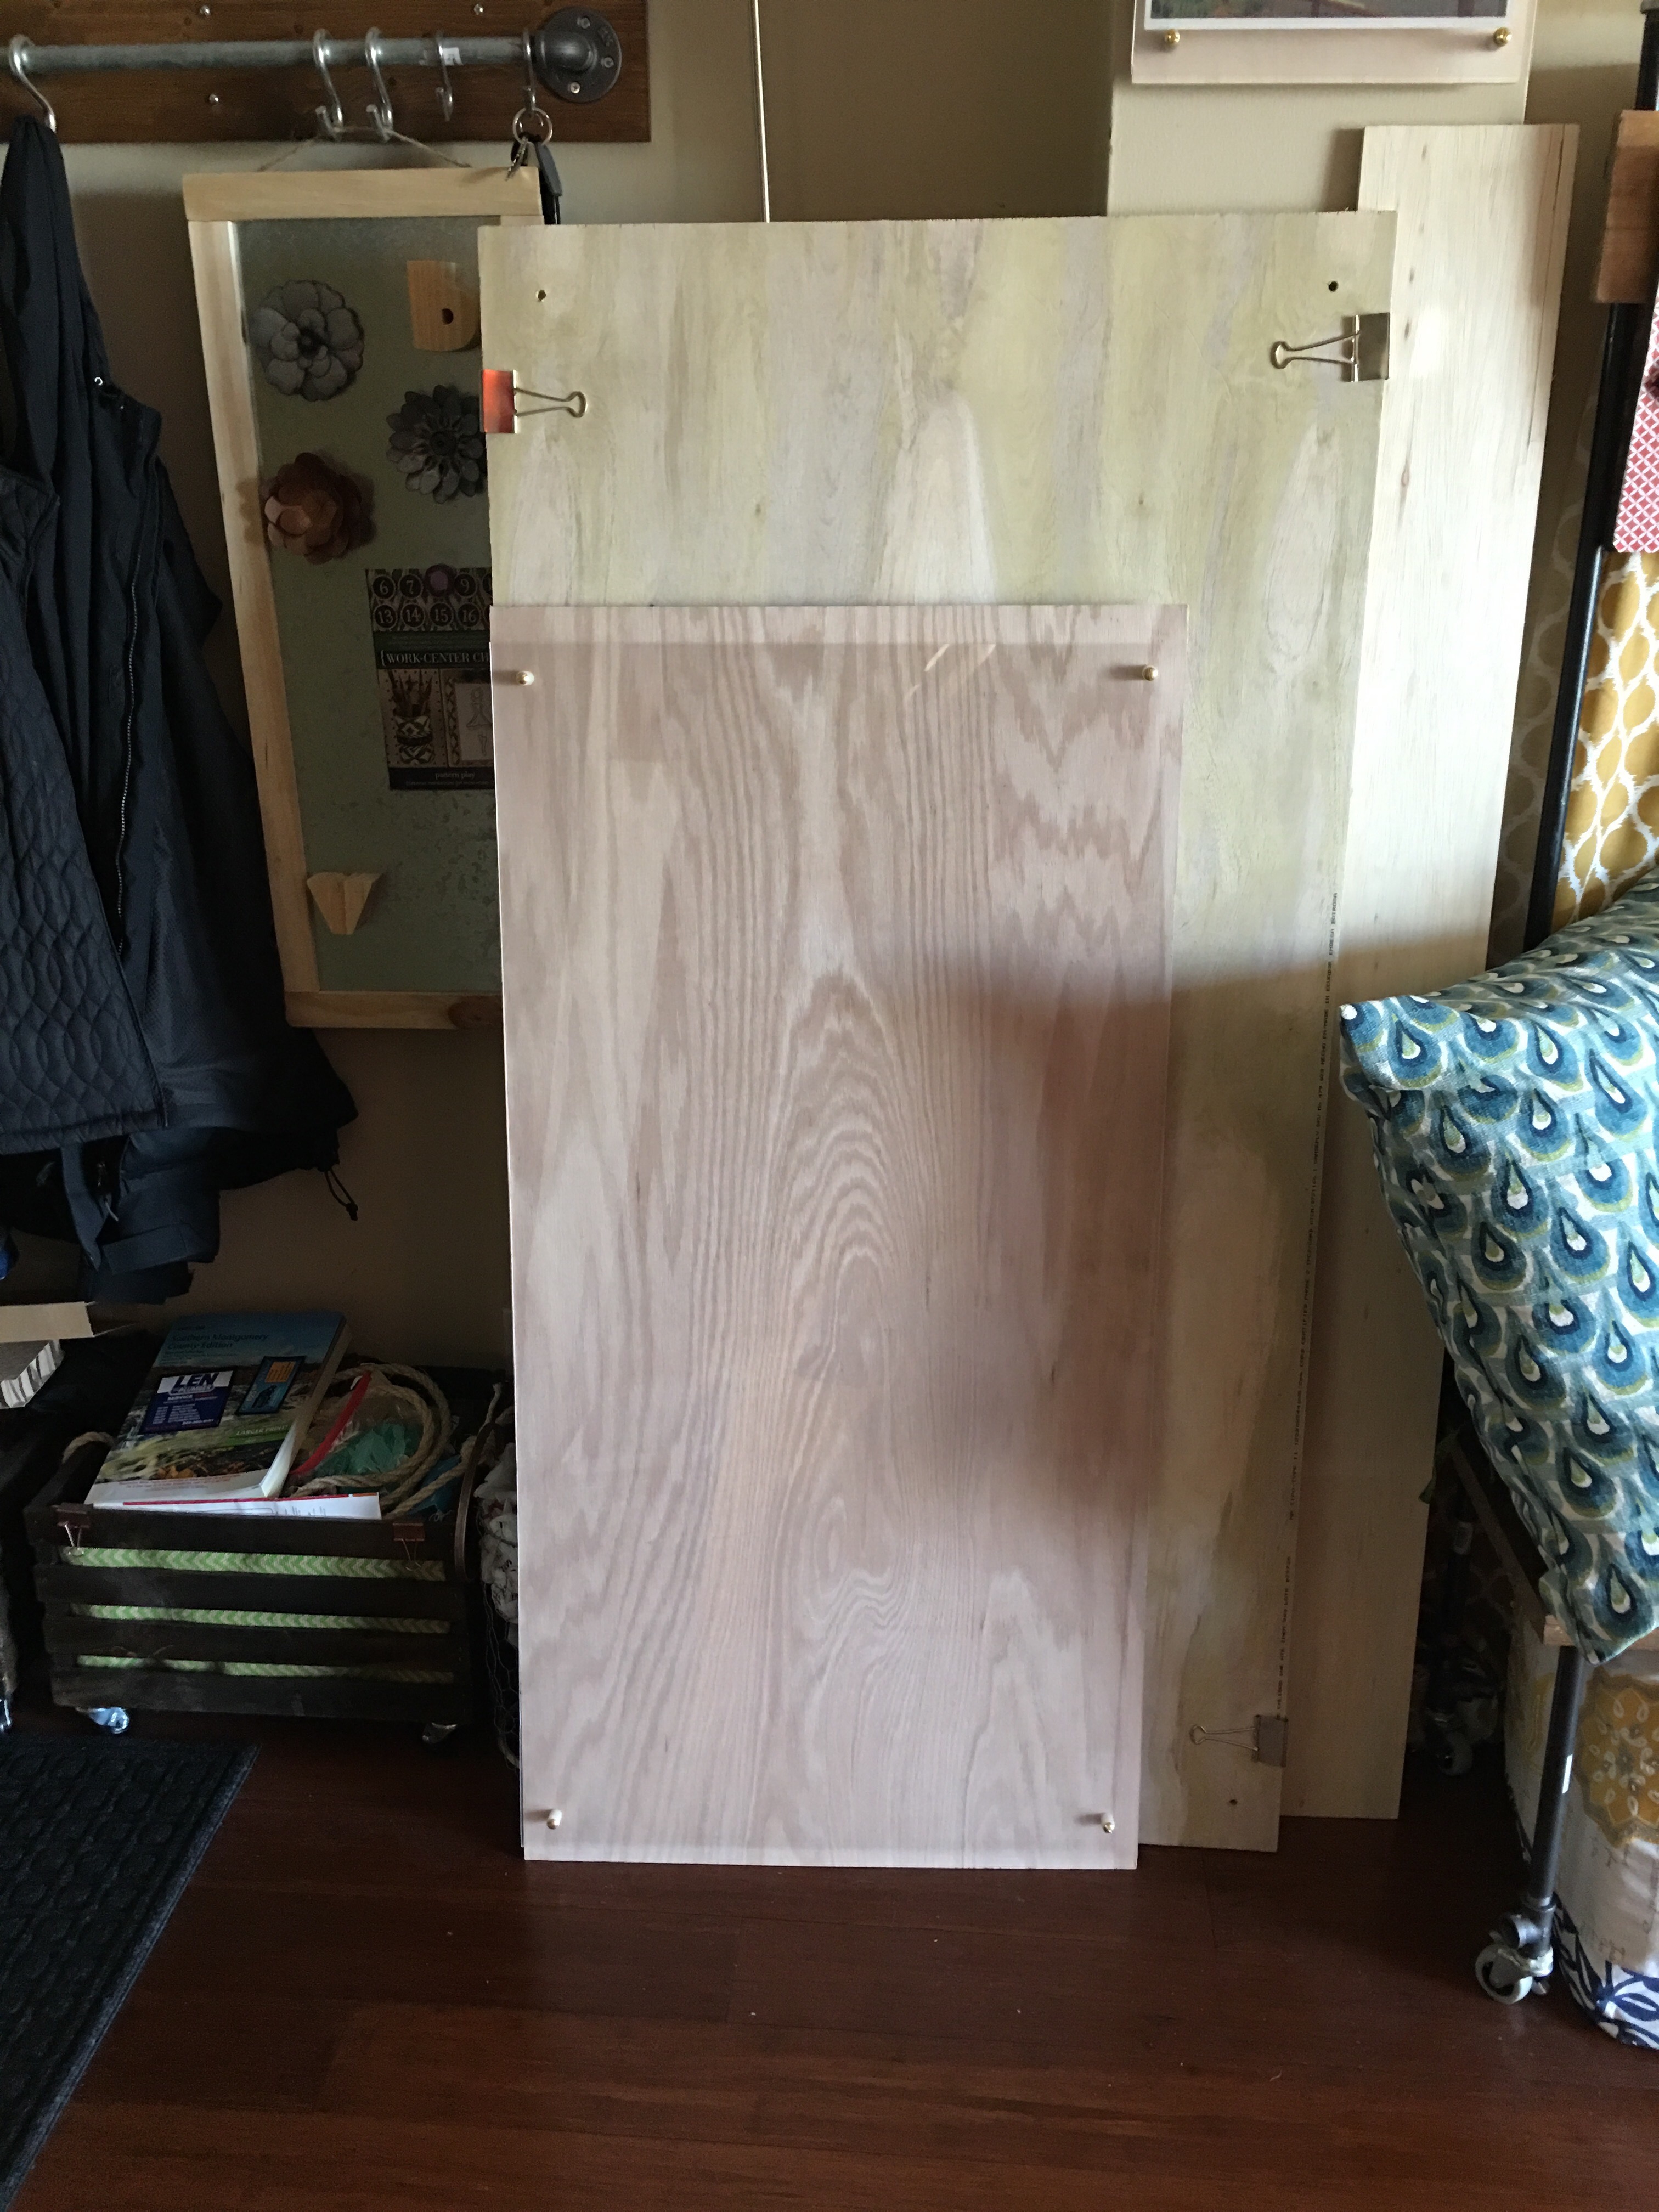
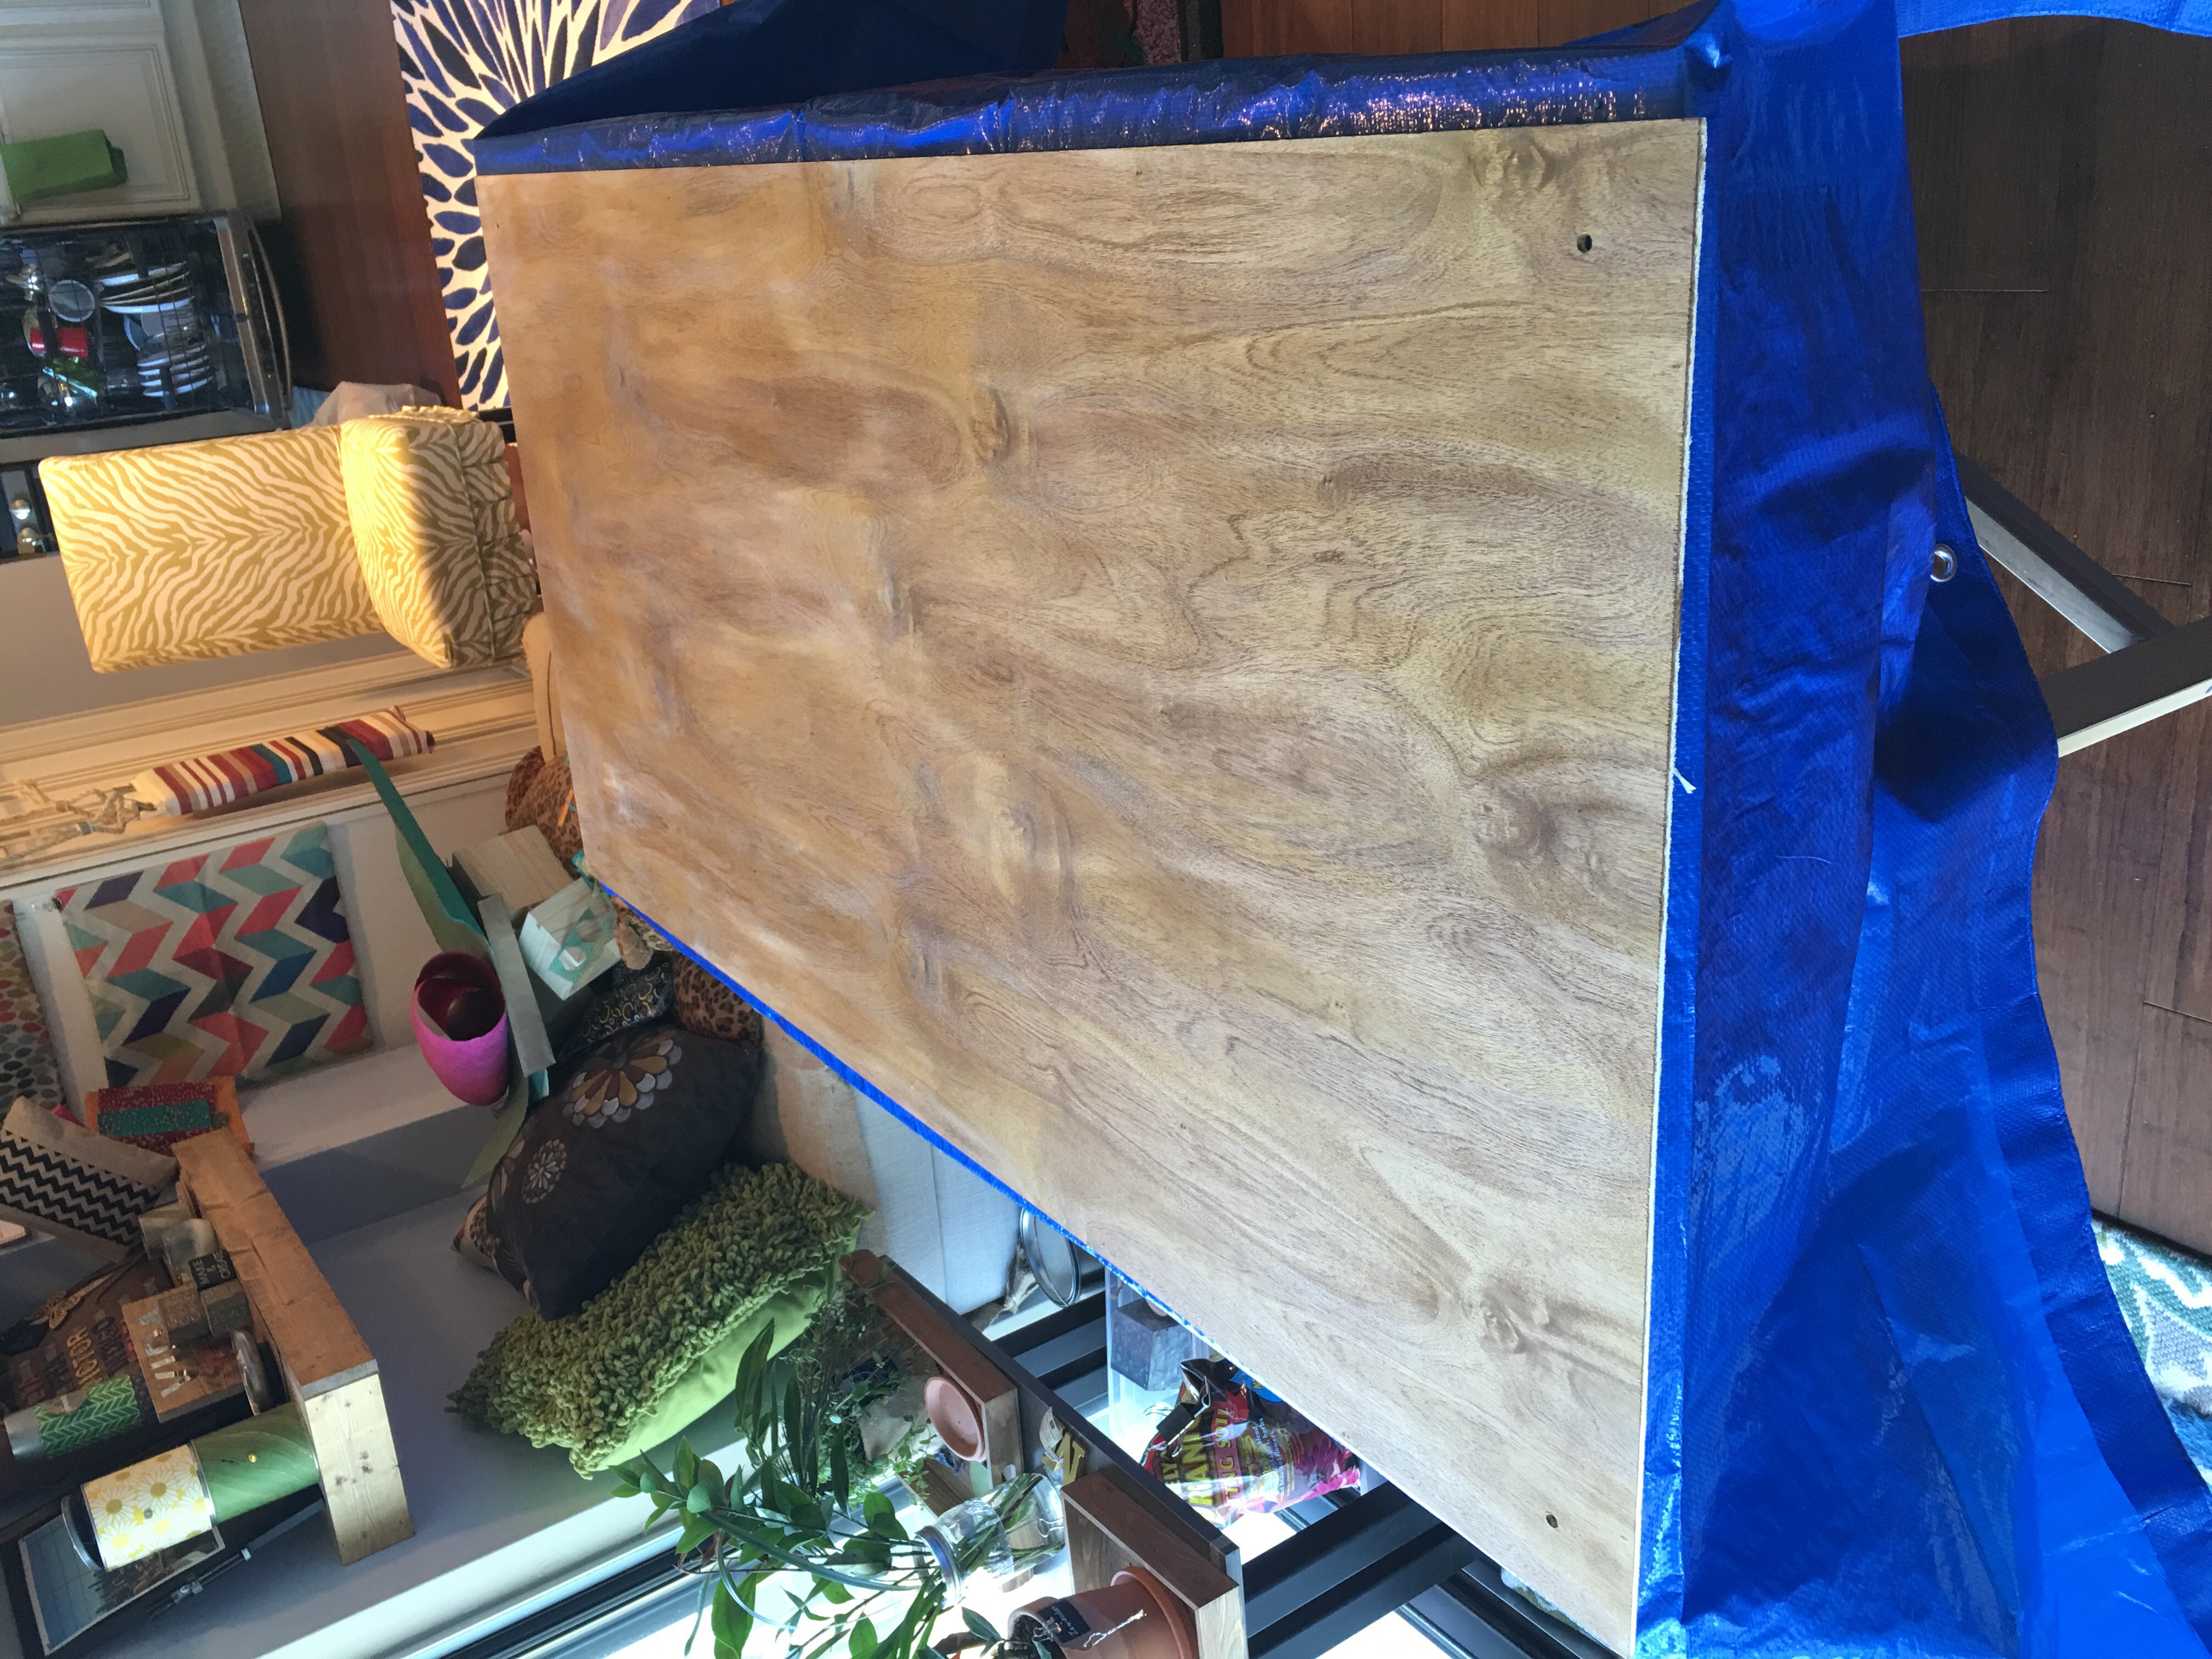
This time, when I hauled the plywood home, I could plainly see that the other piece I brought home in February is way too small for the job. The picture below shows the massive difference between the two.
I pull out my new crafting table to assemble the new plywood and acrylic pieces. This mount is so big that it takes up the entire surface of the table fully extended.

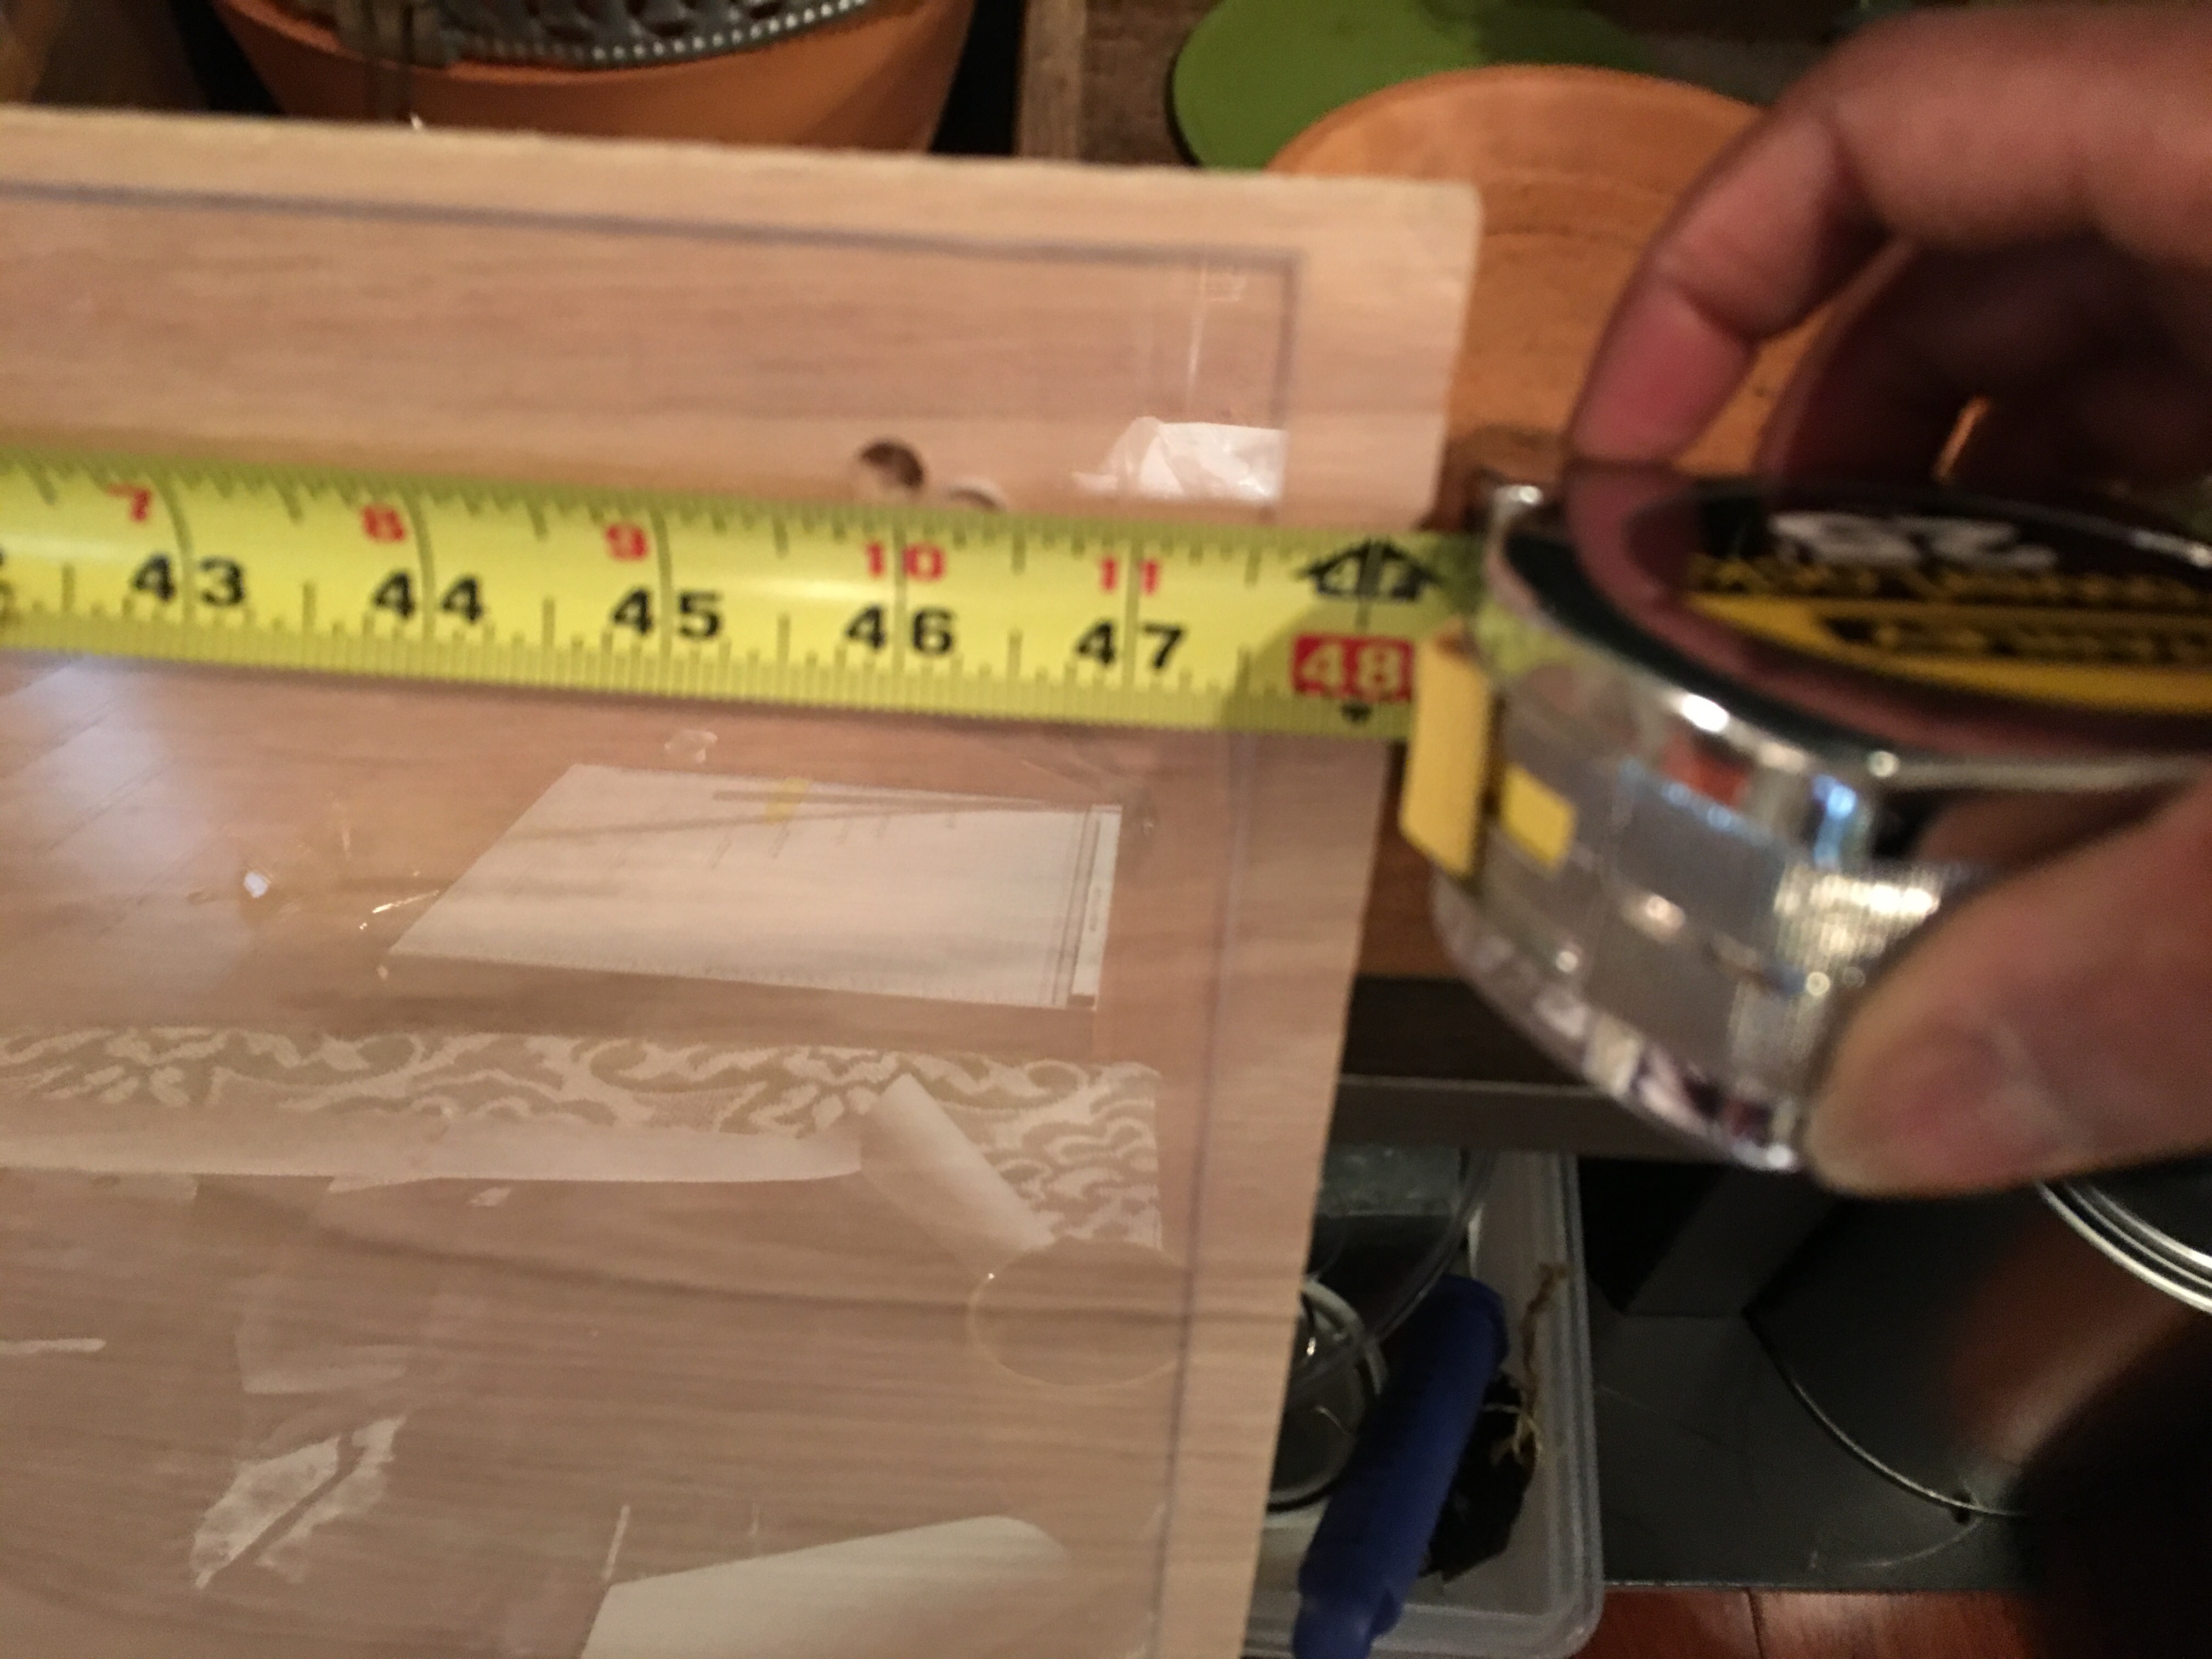
Double-checking measurements. Confirmed I’m now working with a 30″…

…and a 60″ piece.
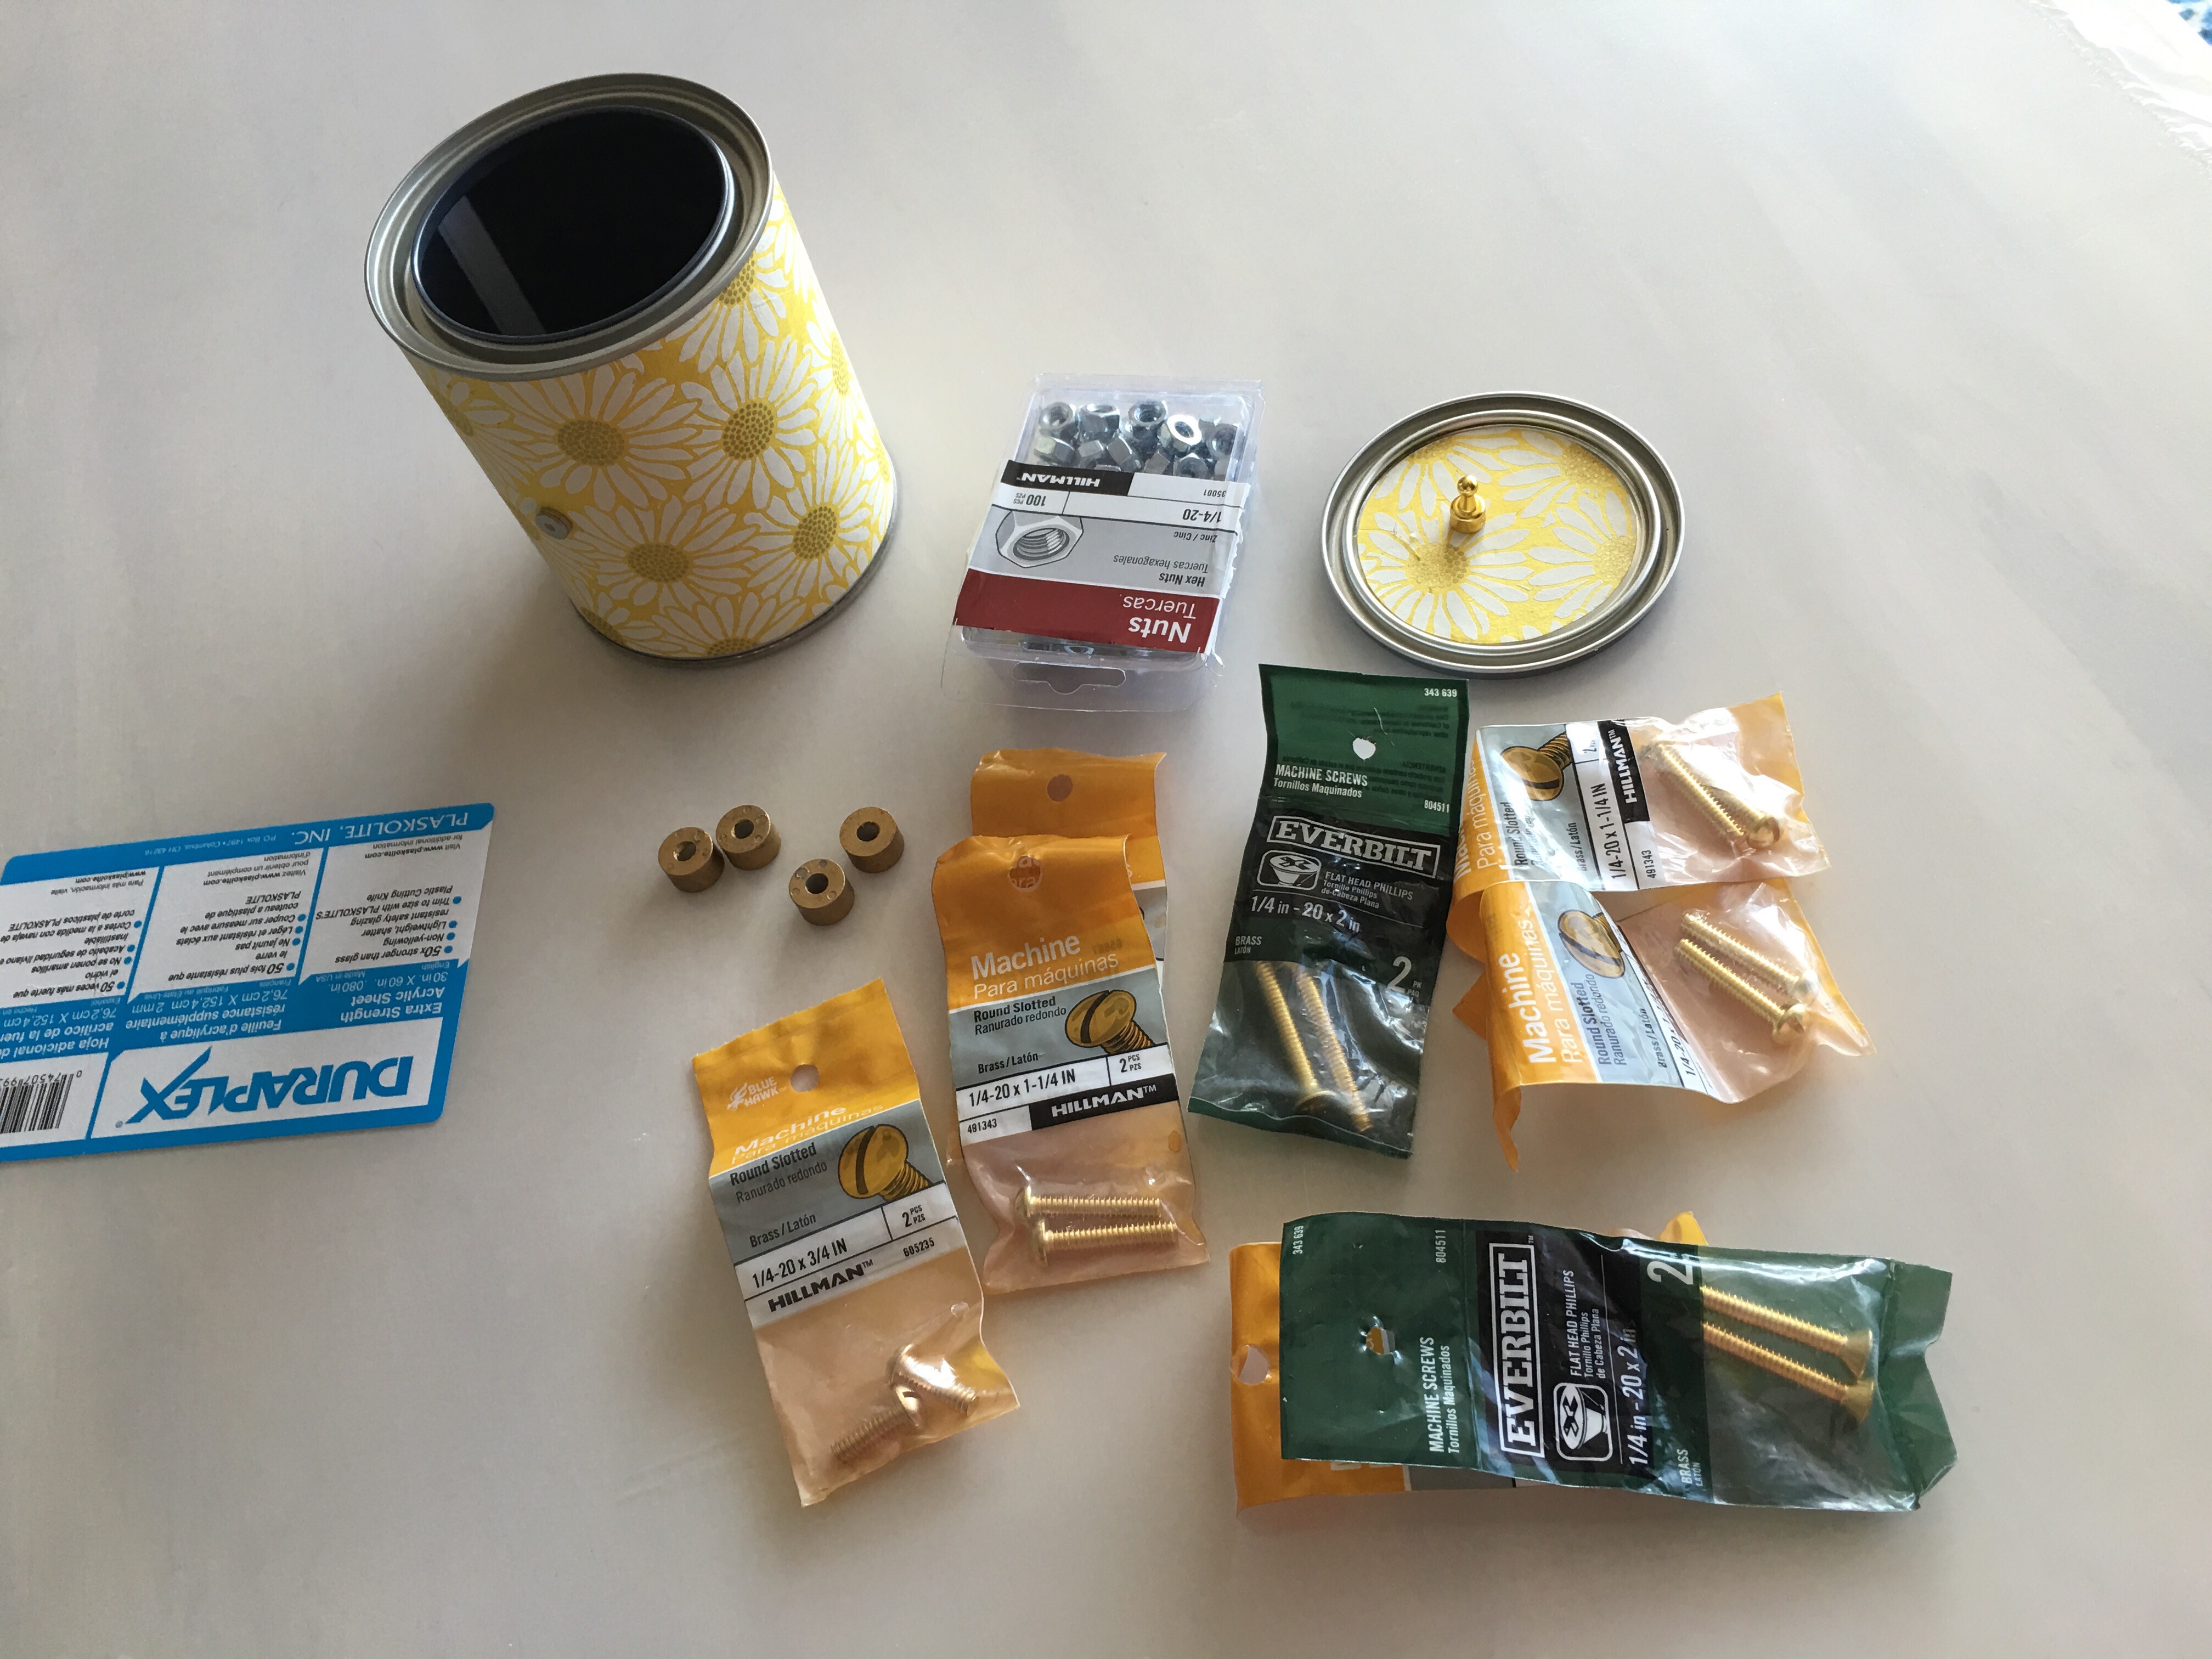
I then pulled out my floating frame mounting hardware can and got a set of four 1/4″ spacers, four 3/4″ #20 brass machine screws and four #20 size nuts. Details on using this hardware to create the floating frame is outline in my “Decorated Wood floating frame squares” post.
Before adding the spacers, nuts and bolts to create the floating frame, I peel away the protective plastic. Beautiful!
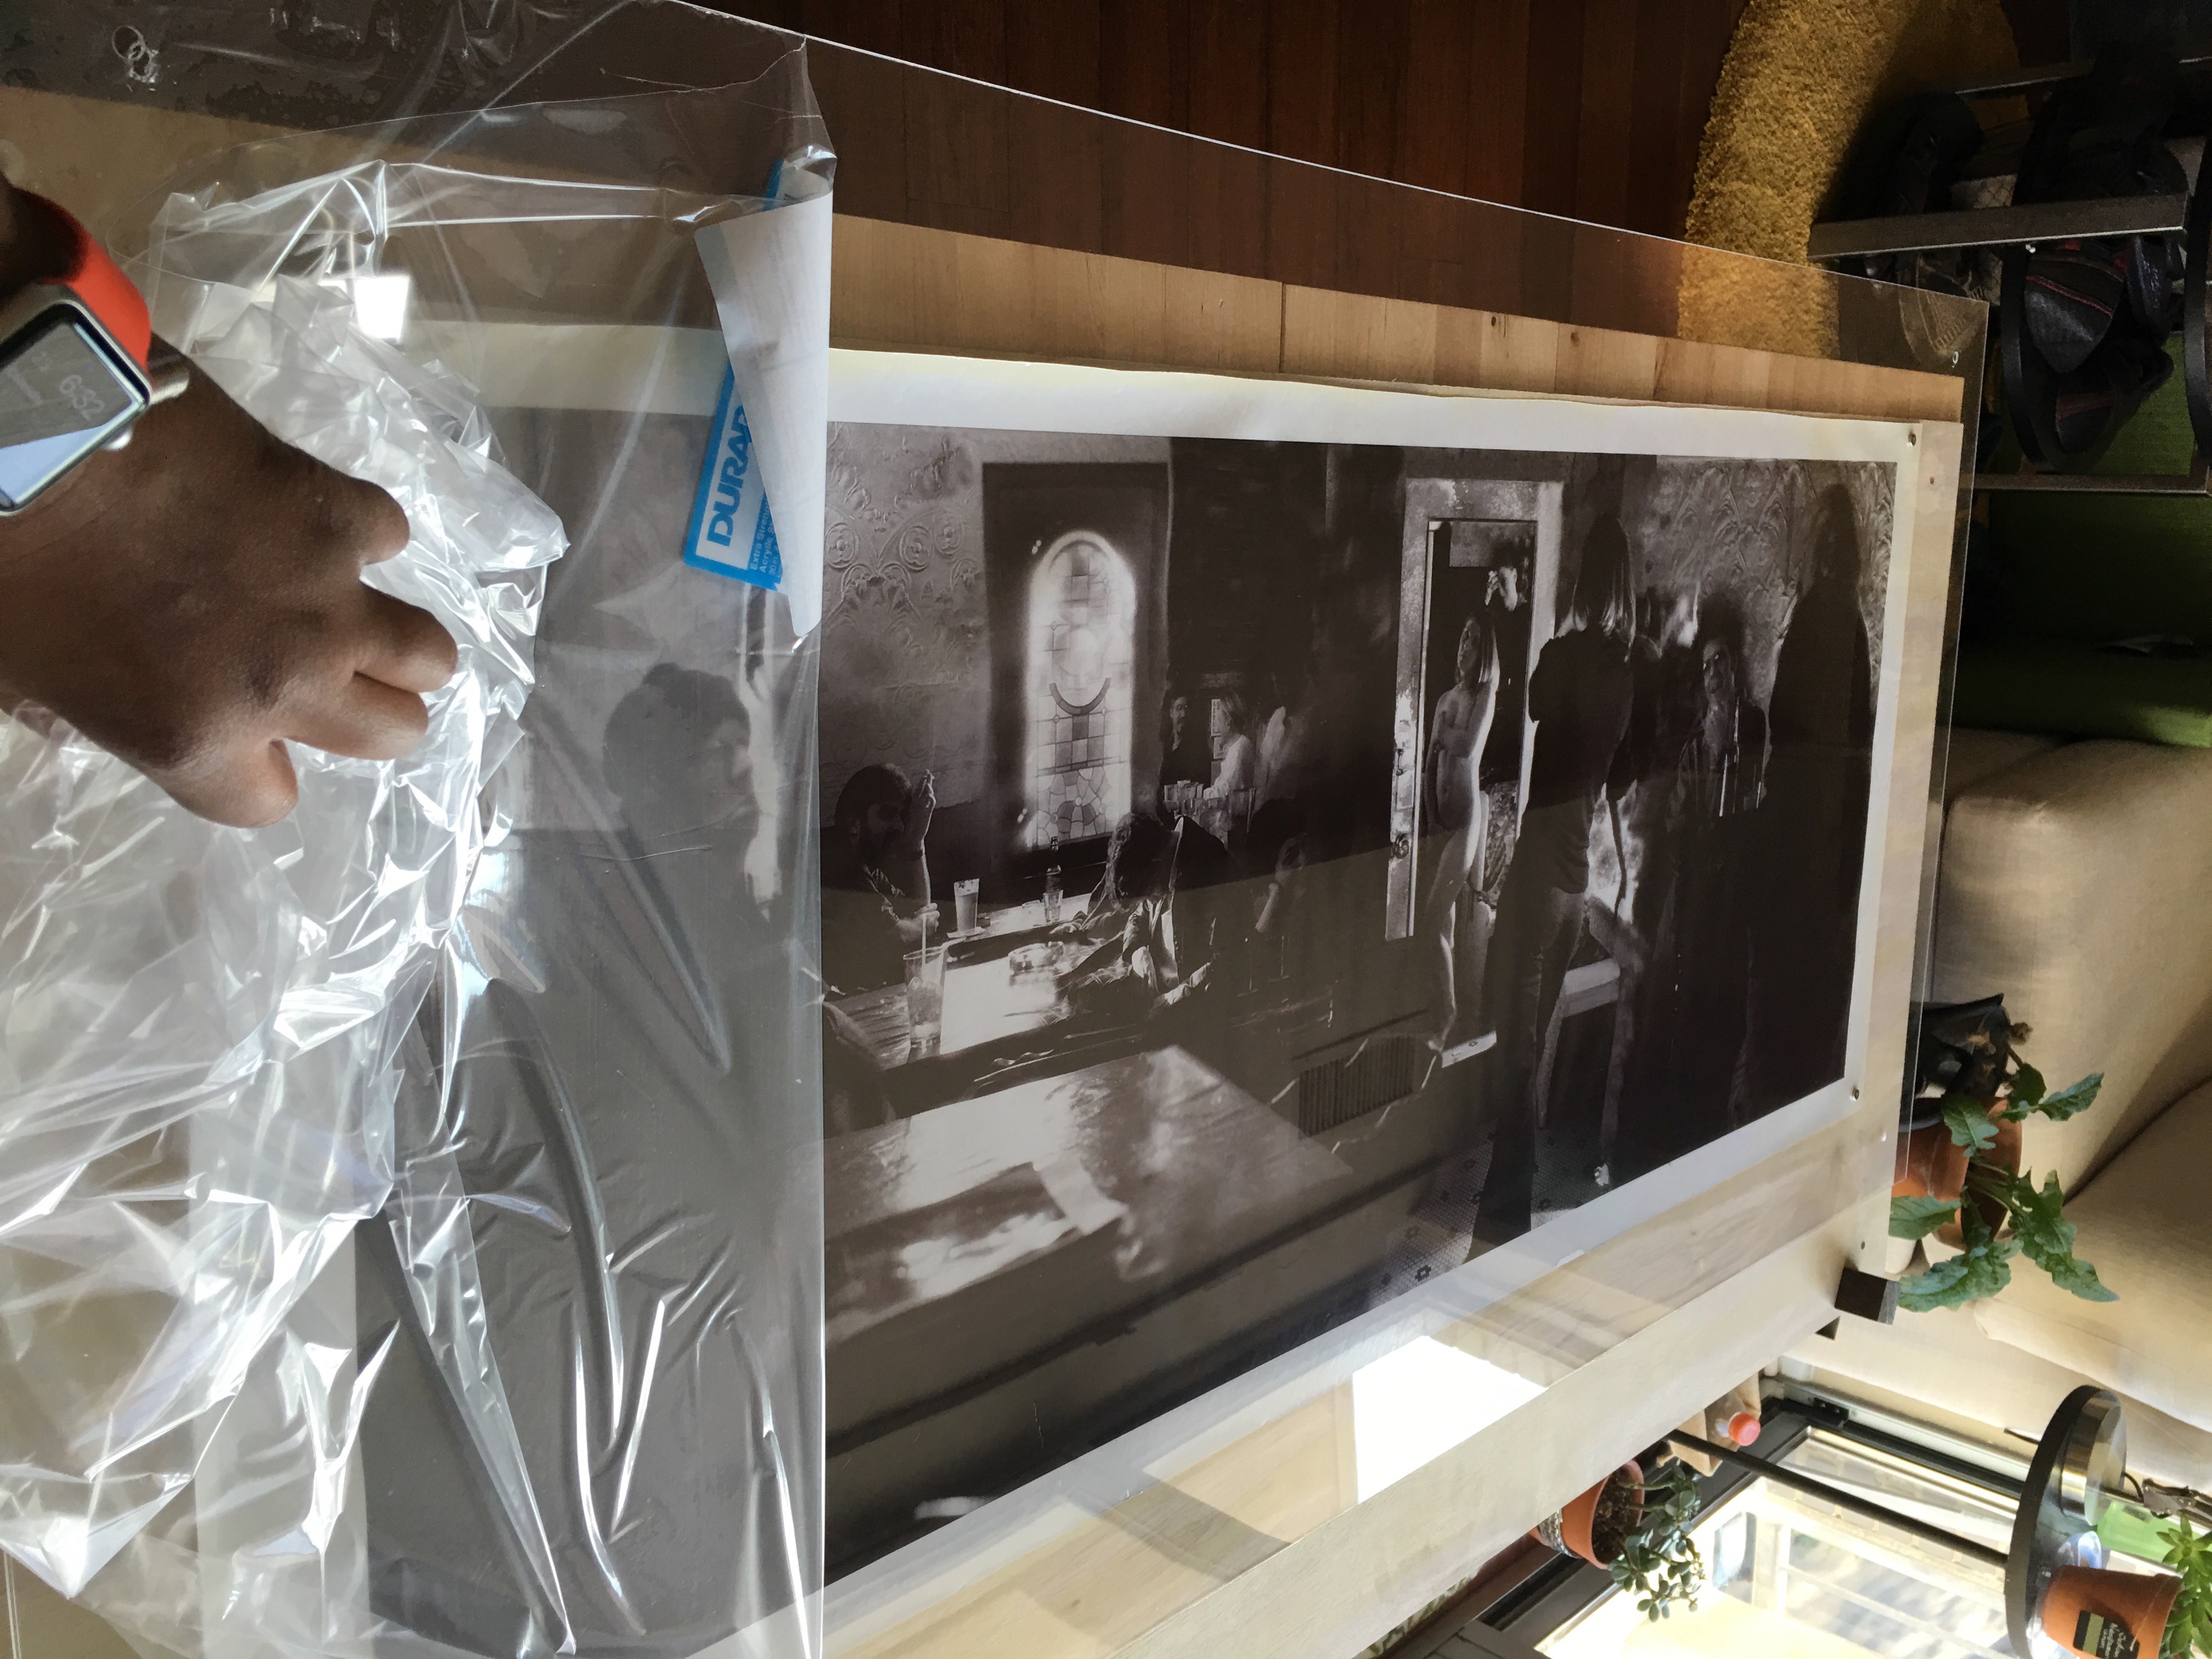
The photographic artwork is attached to the acrylic with magnets. I use two mini magnets on both sides to adhere the picture to the acrylic pane.
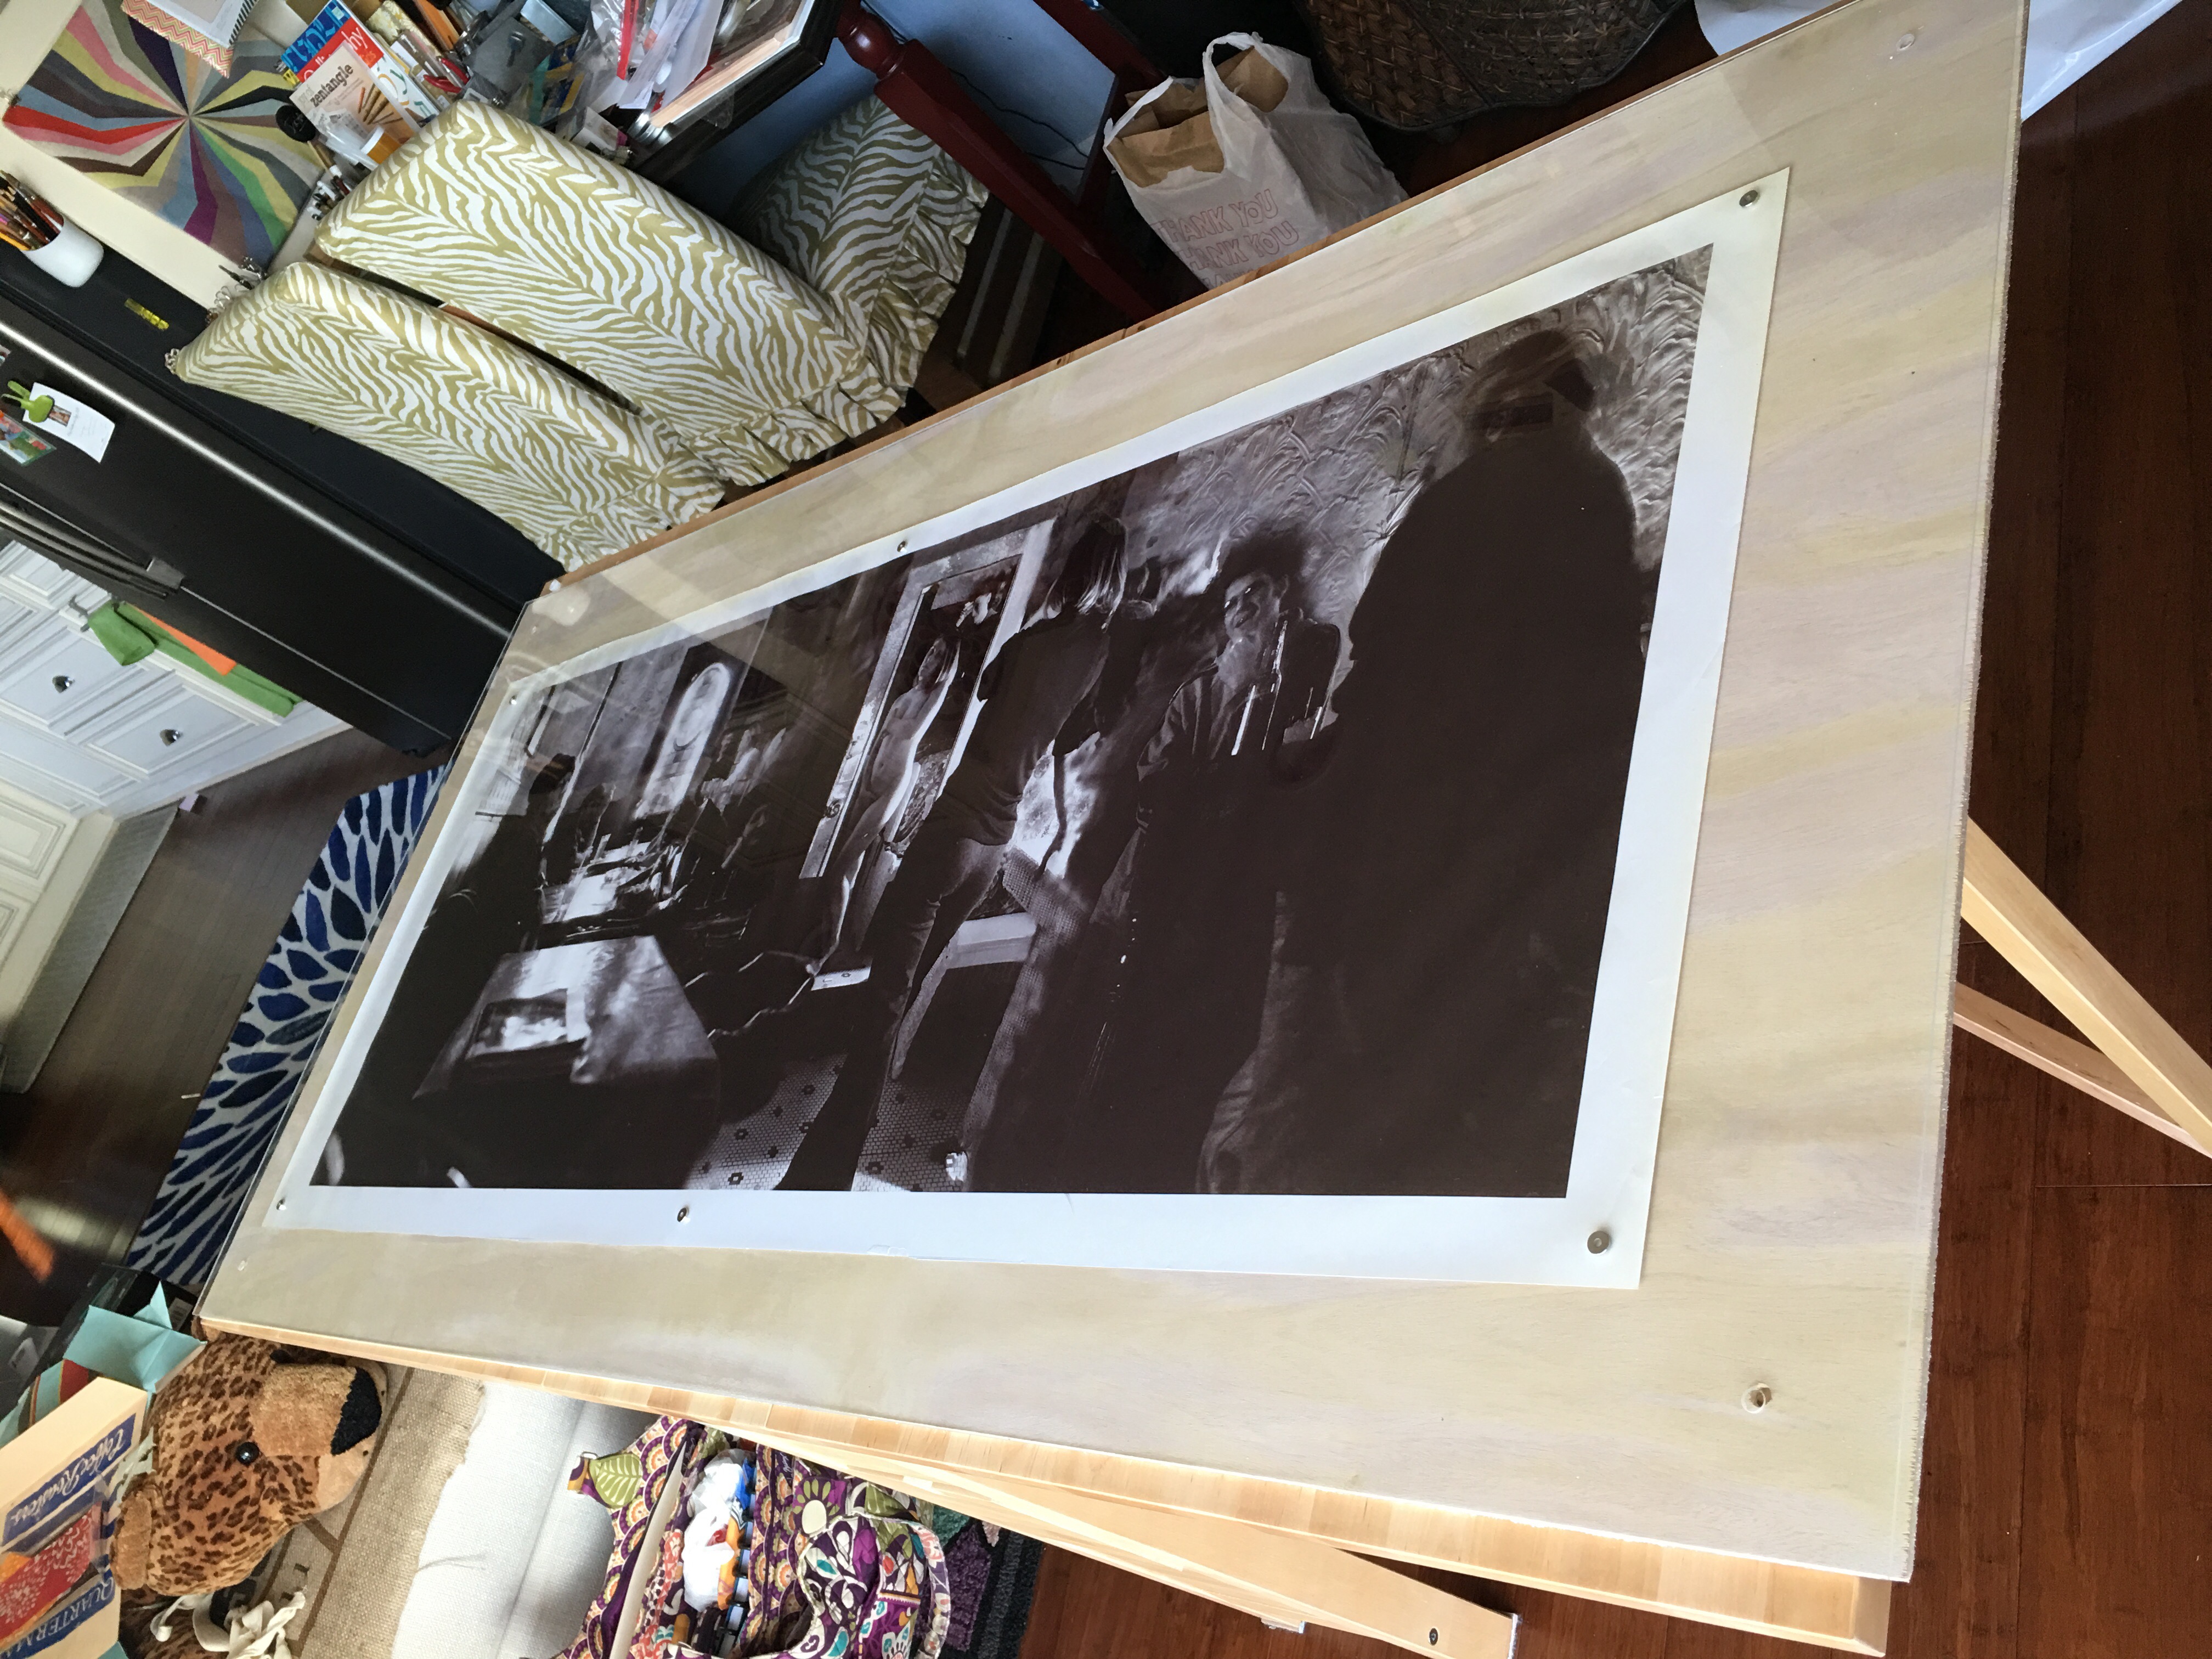
After assembling the frame, I love the way it looks and I immediately want to mount it. So I remove all the items from the den’s floating shelf…
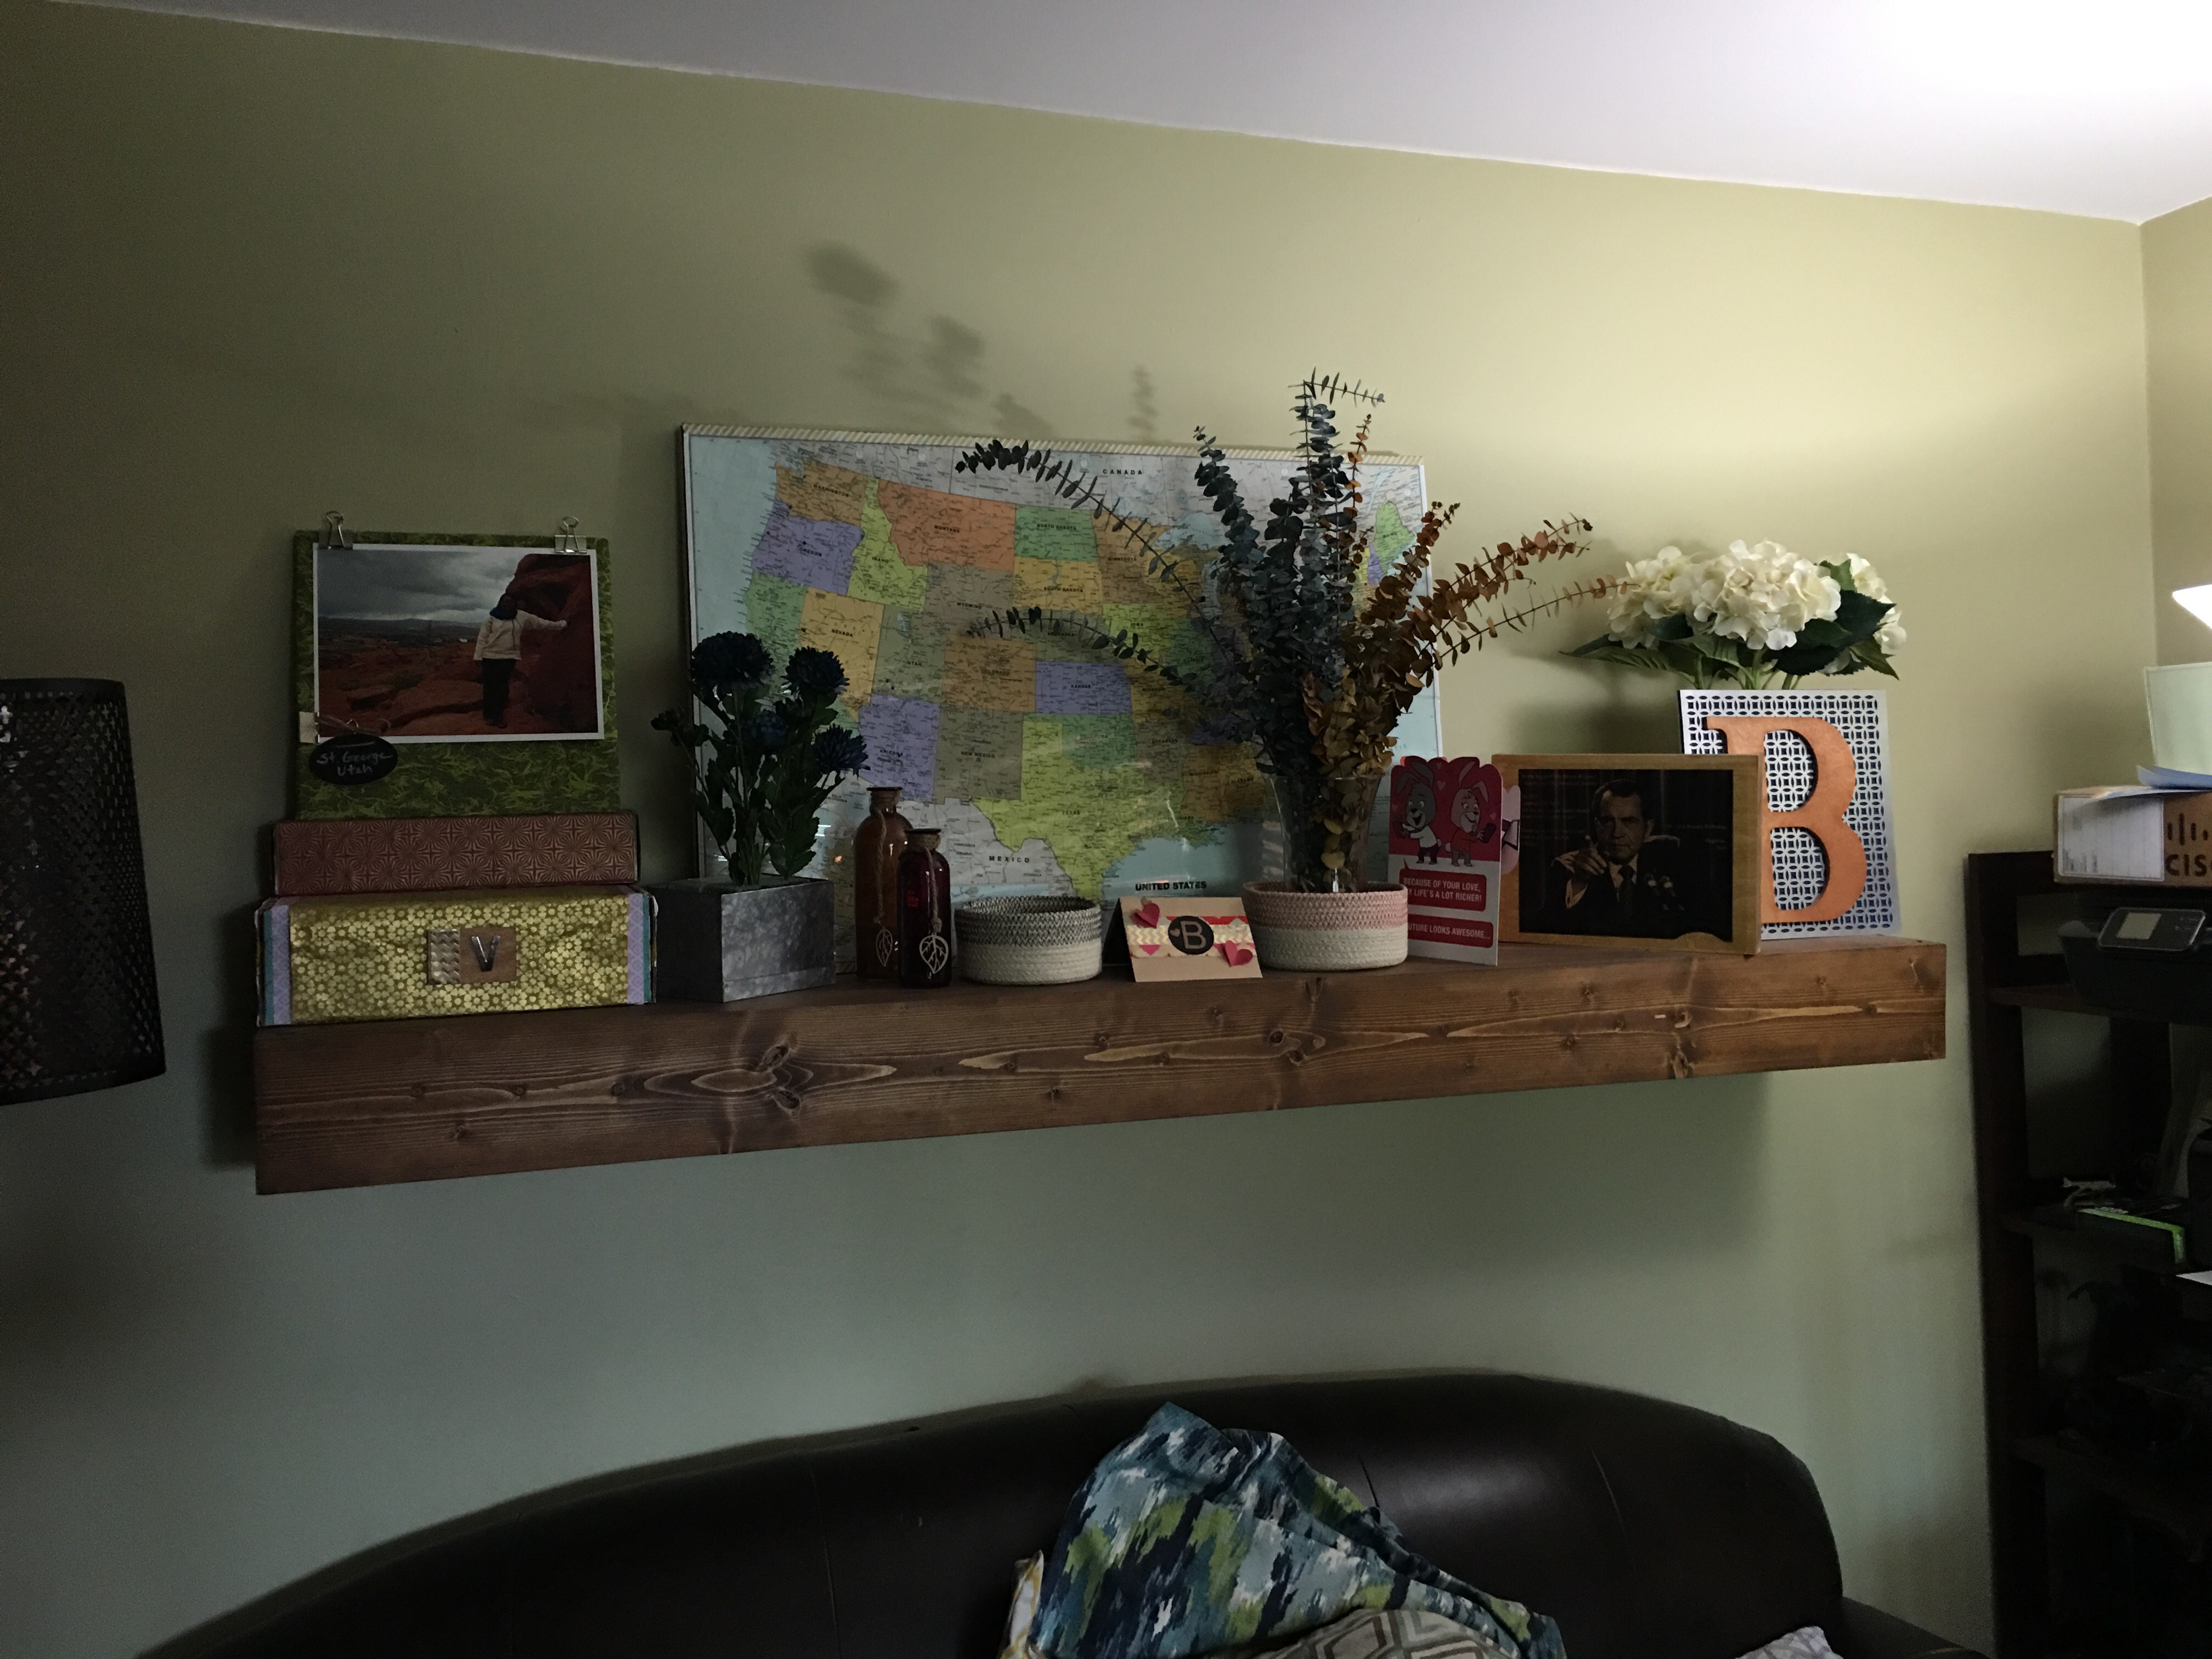

…and replace them with the frame.

It looks fantastic. I absolutely love having this beautiful image in the den as the focal point of the space.
I place the items back on the shelf around the frame and survey my handiwork with pride.

Bruce loves the way it looks in the den too. But I did ask him “Should I decorate the wood?” And he replied, “You don’t really need to.”
Happy with that, I call it a night and make plans to work on my next project the following day.
Going that extra mile with the mount!
After much tossing and turning on Sunday morning, I’m up early, standing in the den, staring at our beautiful new mounted photograph.
And I know deep down that I’m not done with this project. Not by a long shot.
I need to do that beautiful image some justice. I need to beautify the plywood that is the background for the image.
I need to VidaDIY the wood.
So I take it down and remove the acrylic frame.

I place the frame back up on the shelf without the wood backing. Ha! I knew I would not be satisfied with acrylic only mounts. Glad to have that gut feeling of mine confirmed. Time to work the wood.

First I stain the plywood with Danish Oil (Dark Walnut). I used this stain because it dries faster than the Minwax (my usual “Go To”). And I was still under the delusional belief that I would get multiple projects done today after finally completing this mount.

After staining the wood…
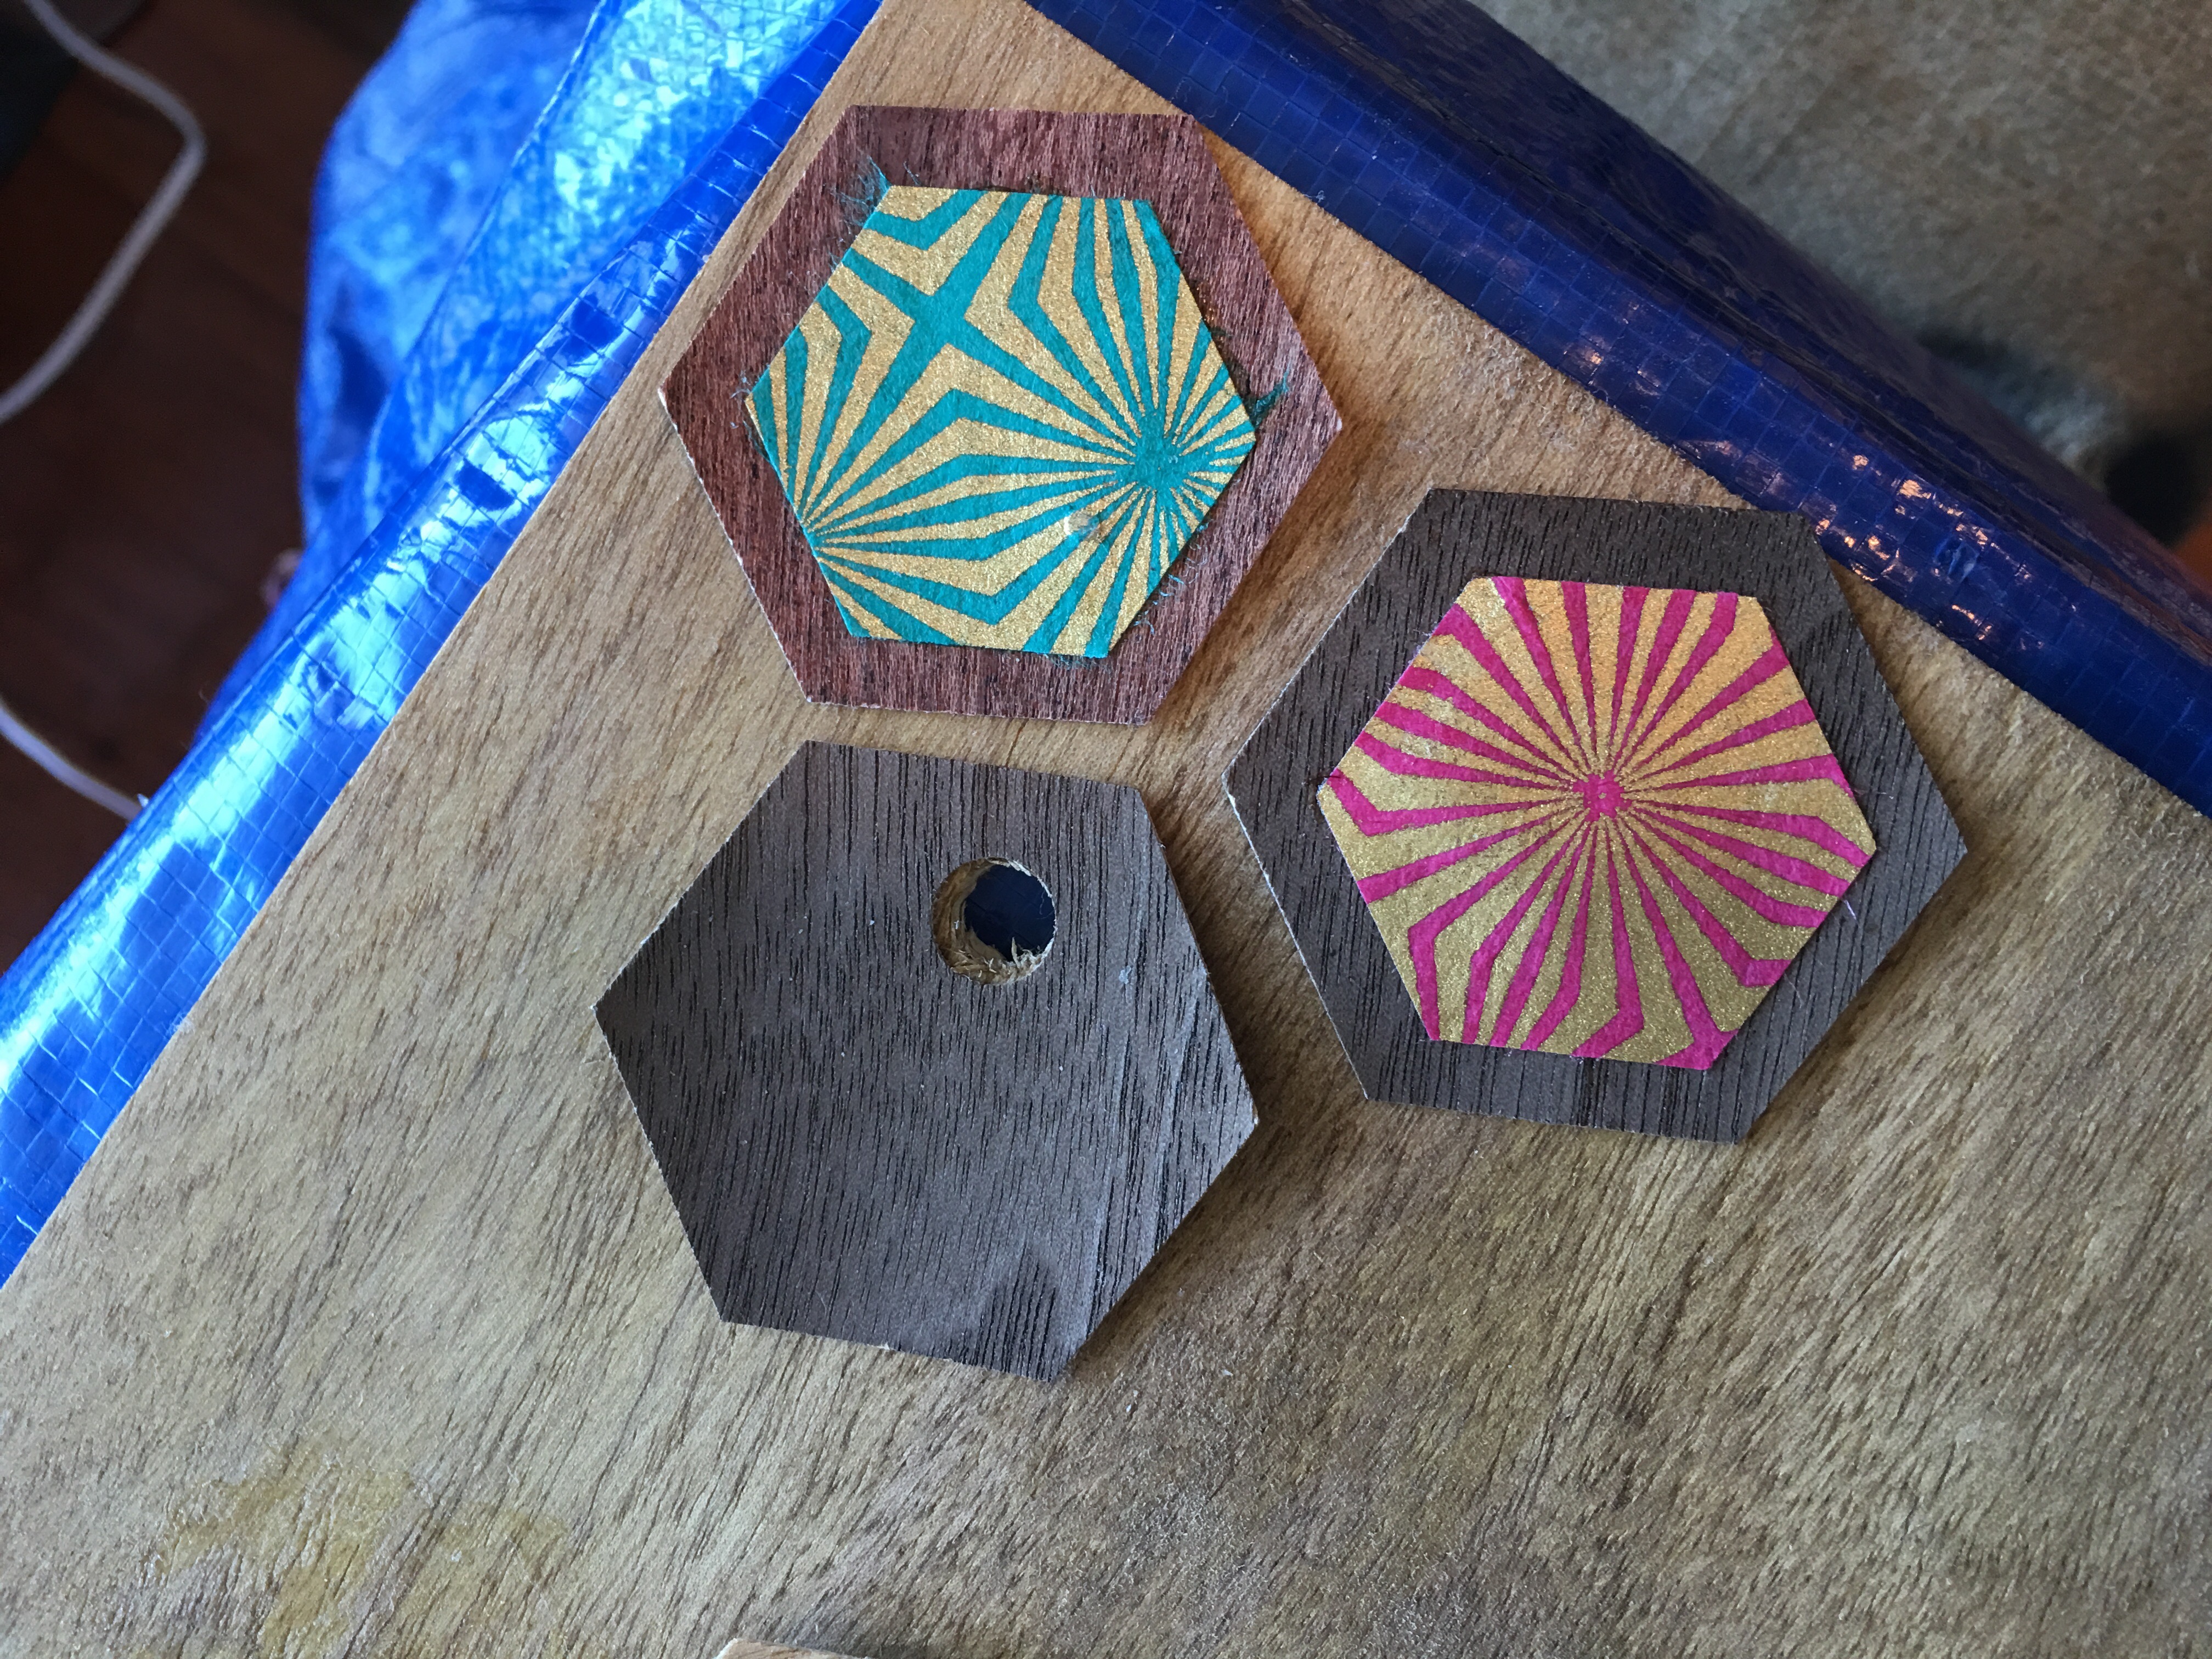
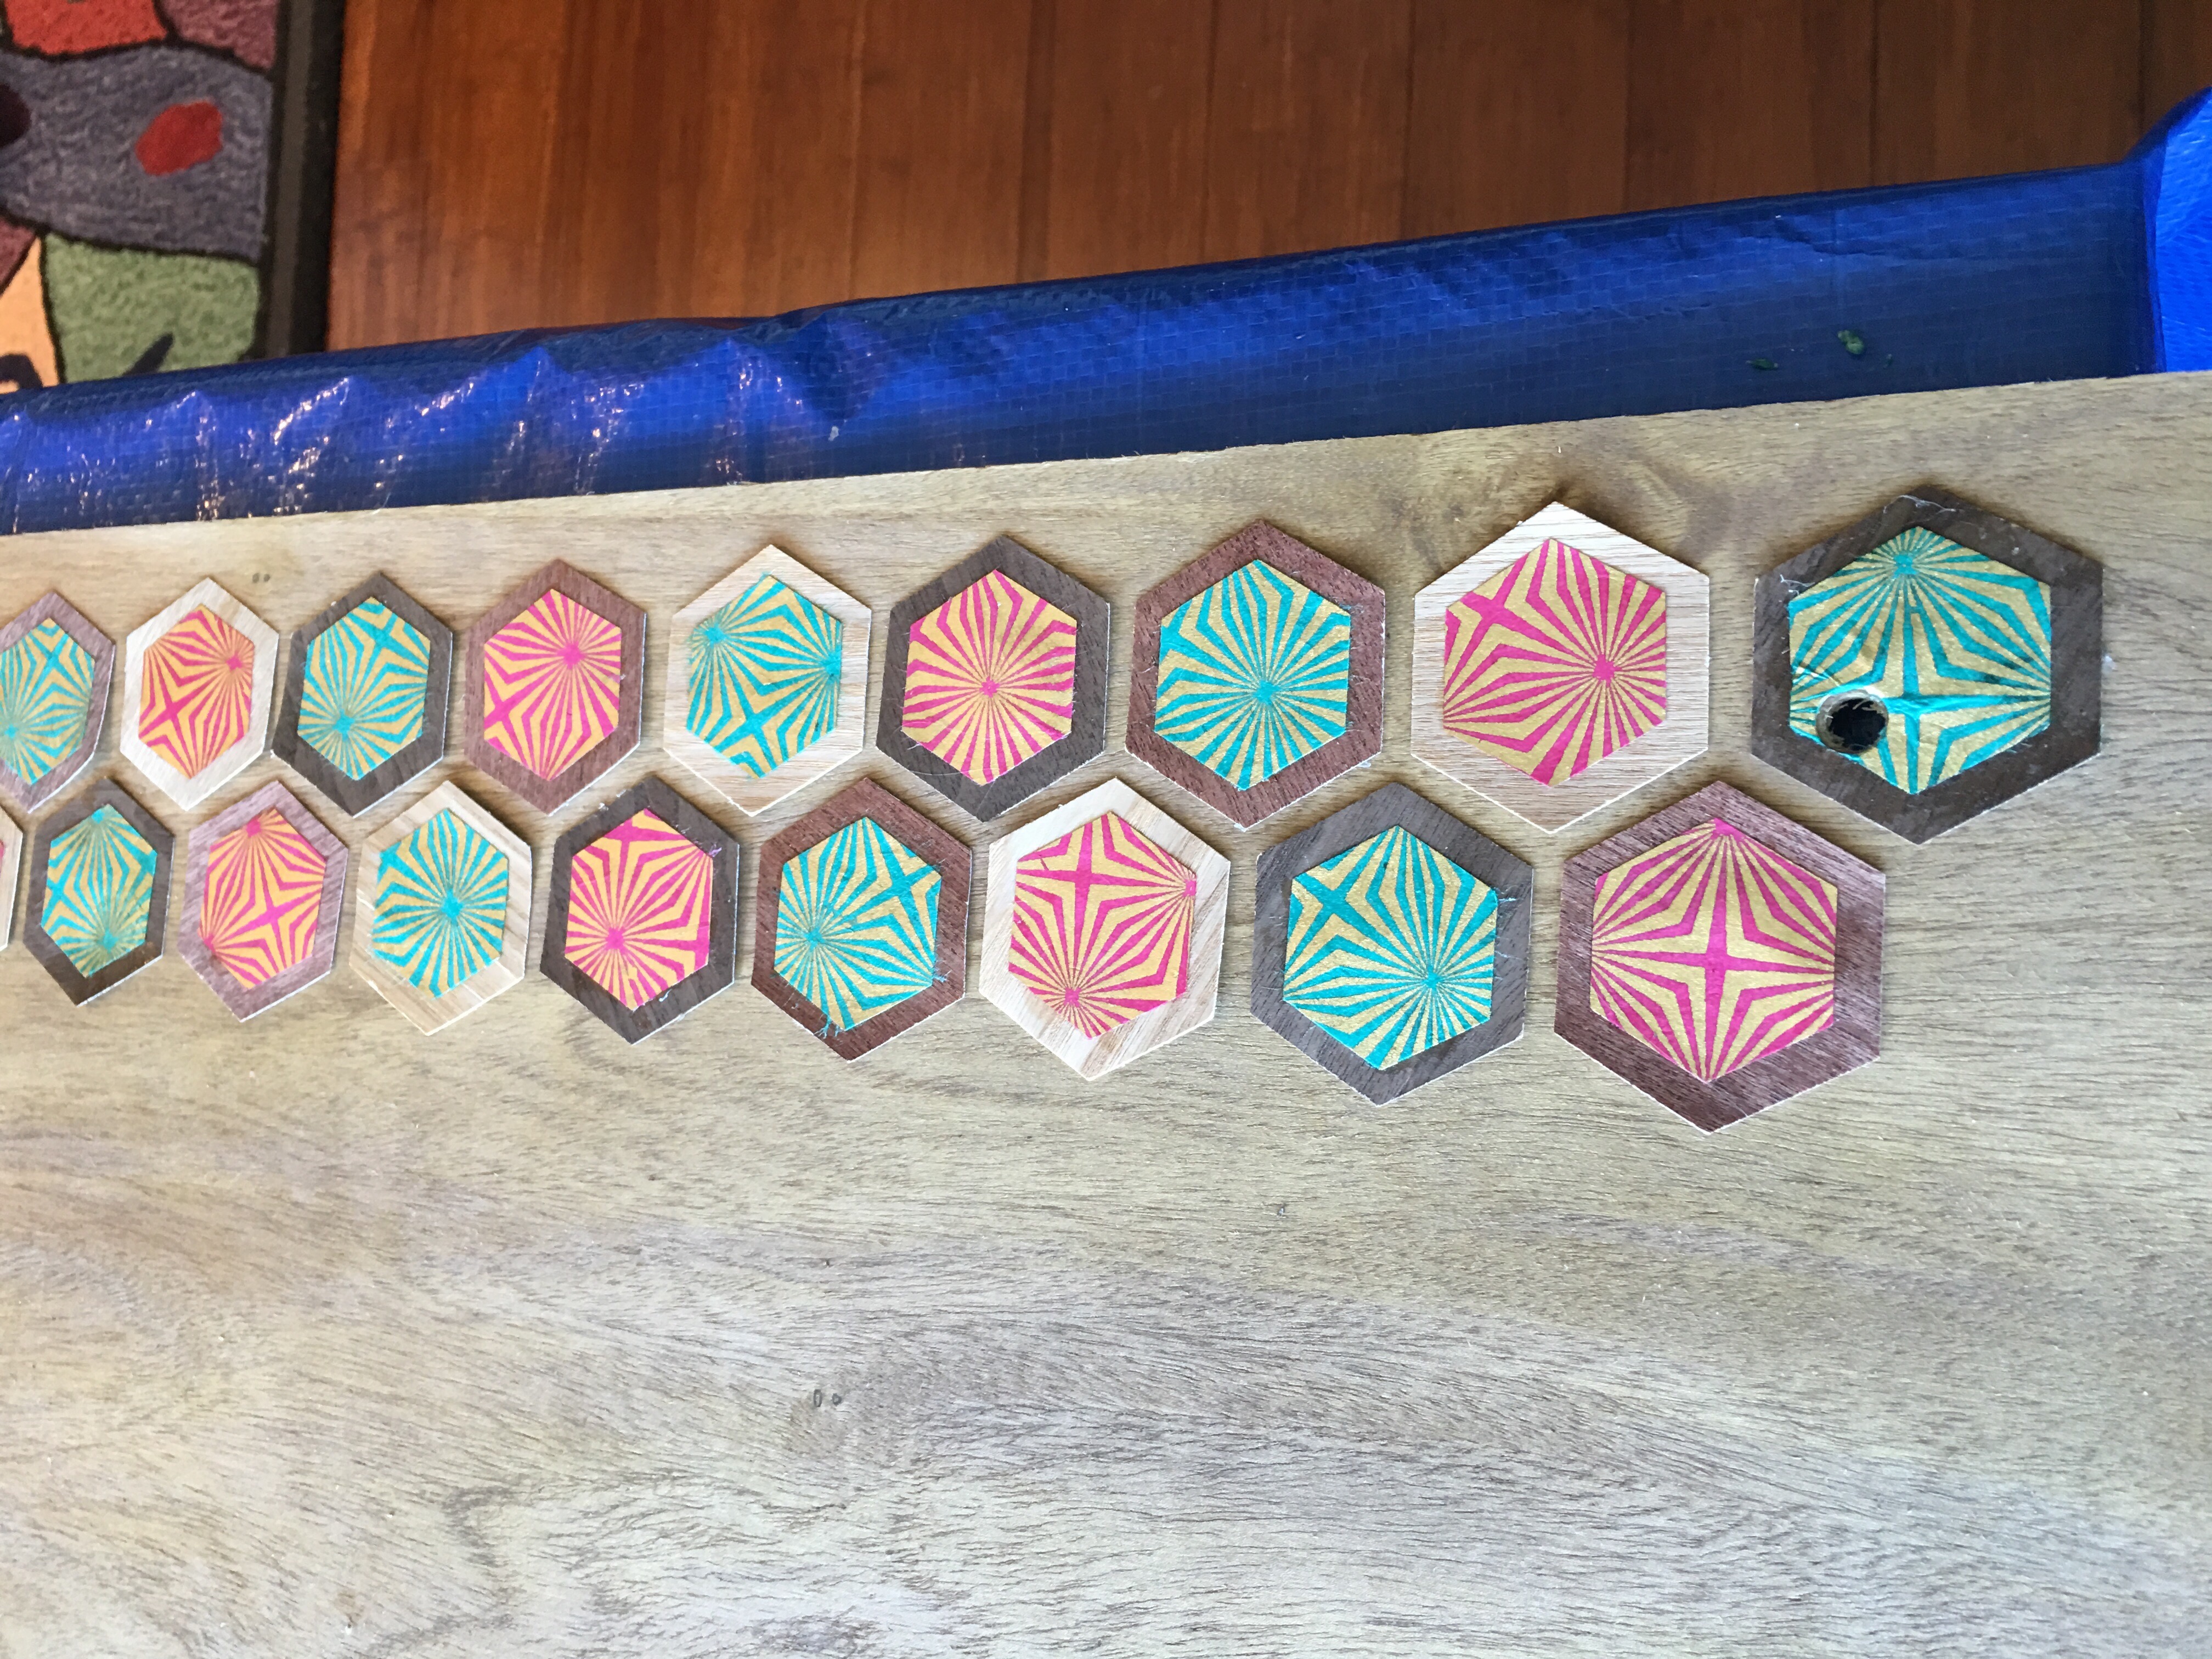
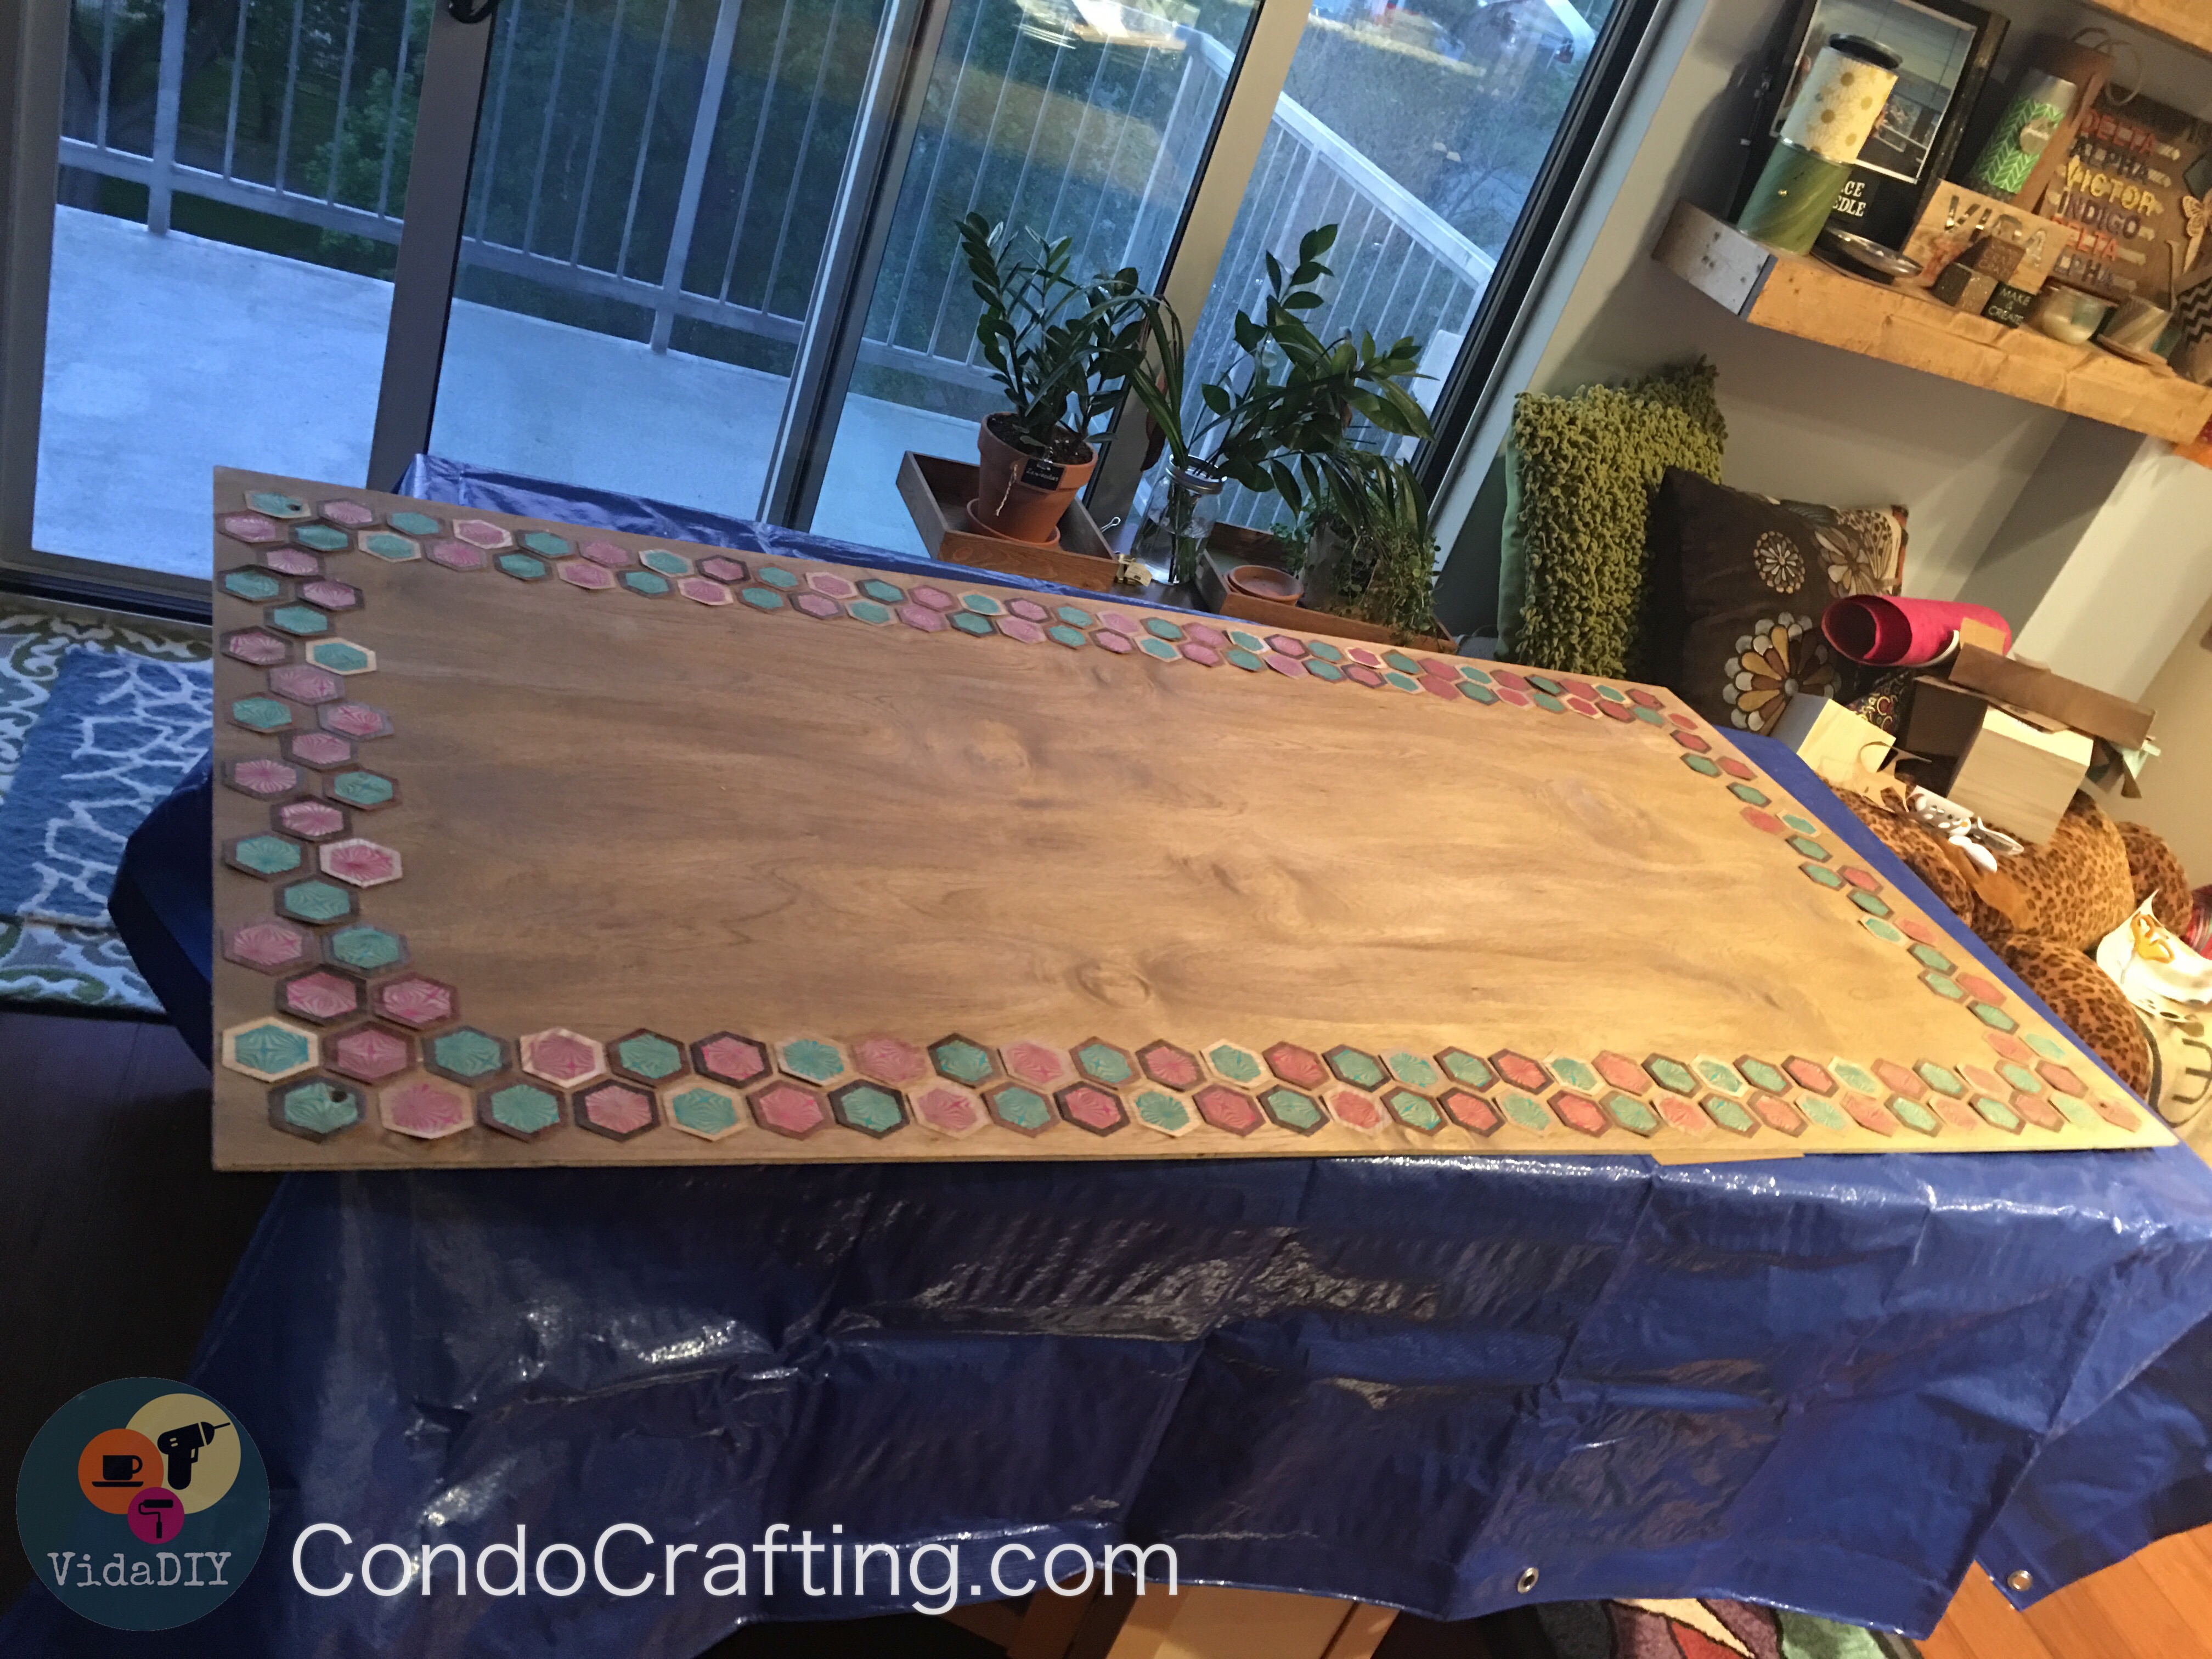
…I use my large hexagon paper punch tool to punch out wood veneer shapes.
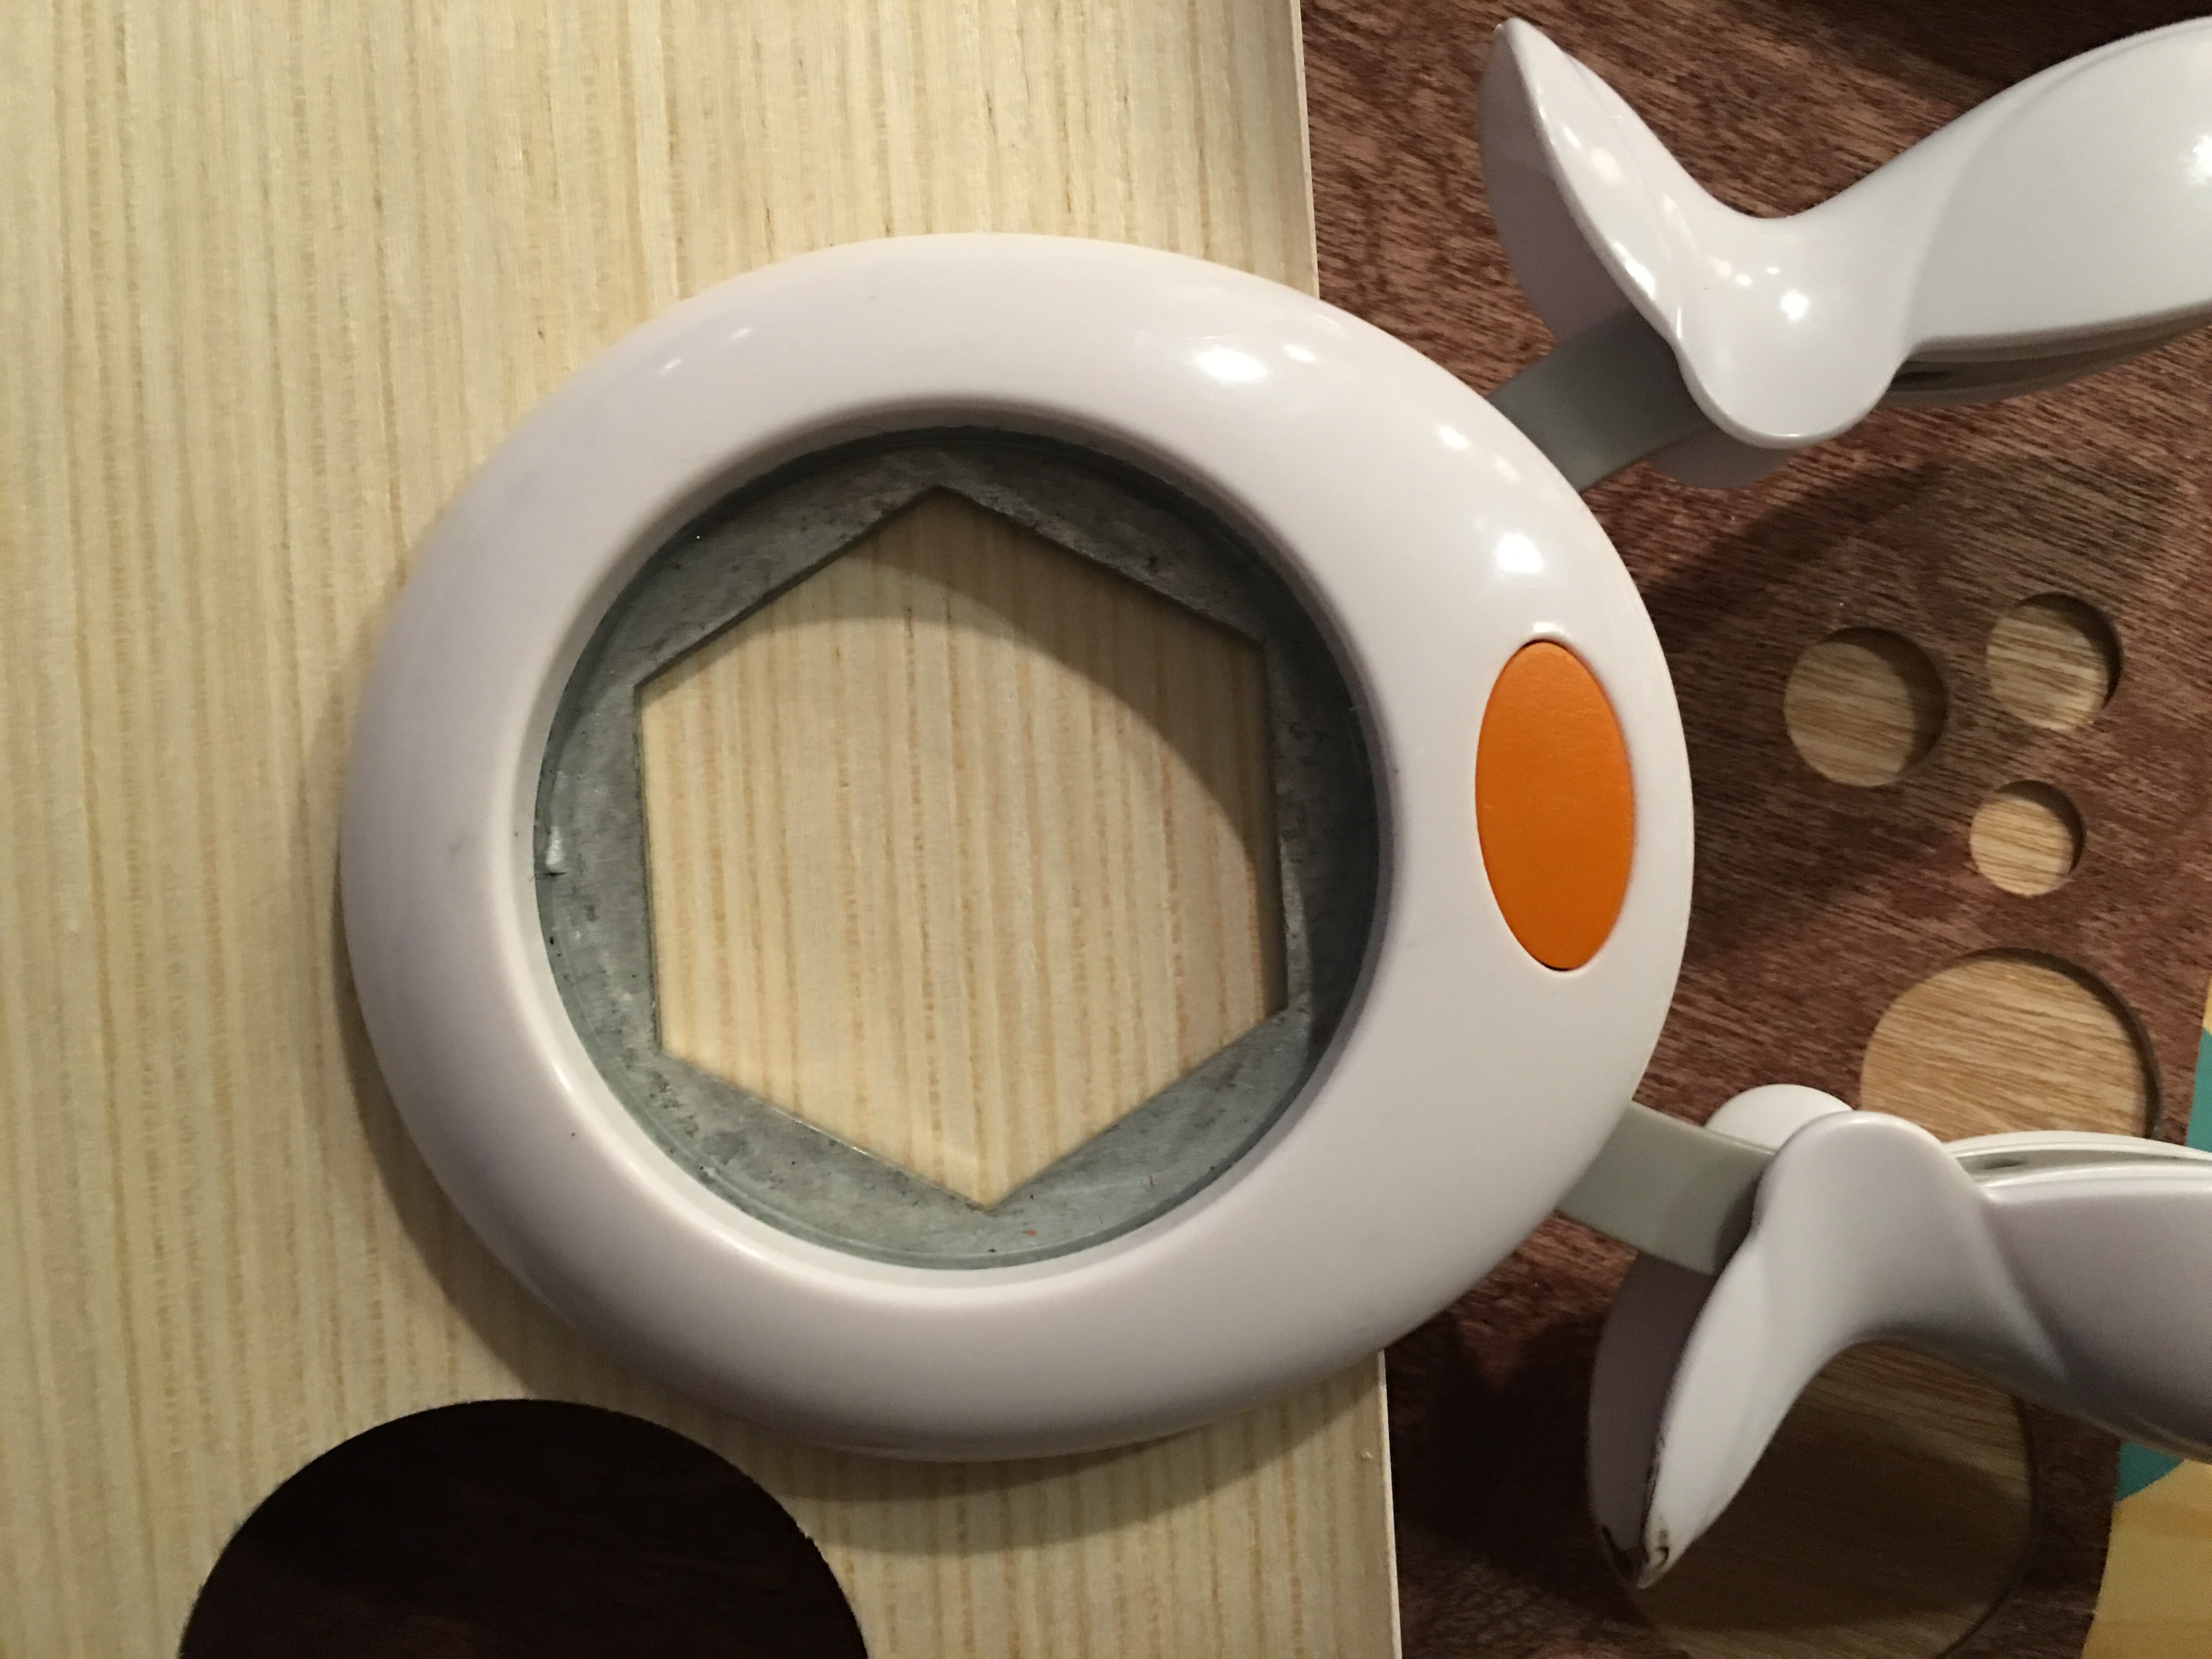
I use the Target Handmade Modern Self-Adhesive wood veneer to make the large hexagon shapes.

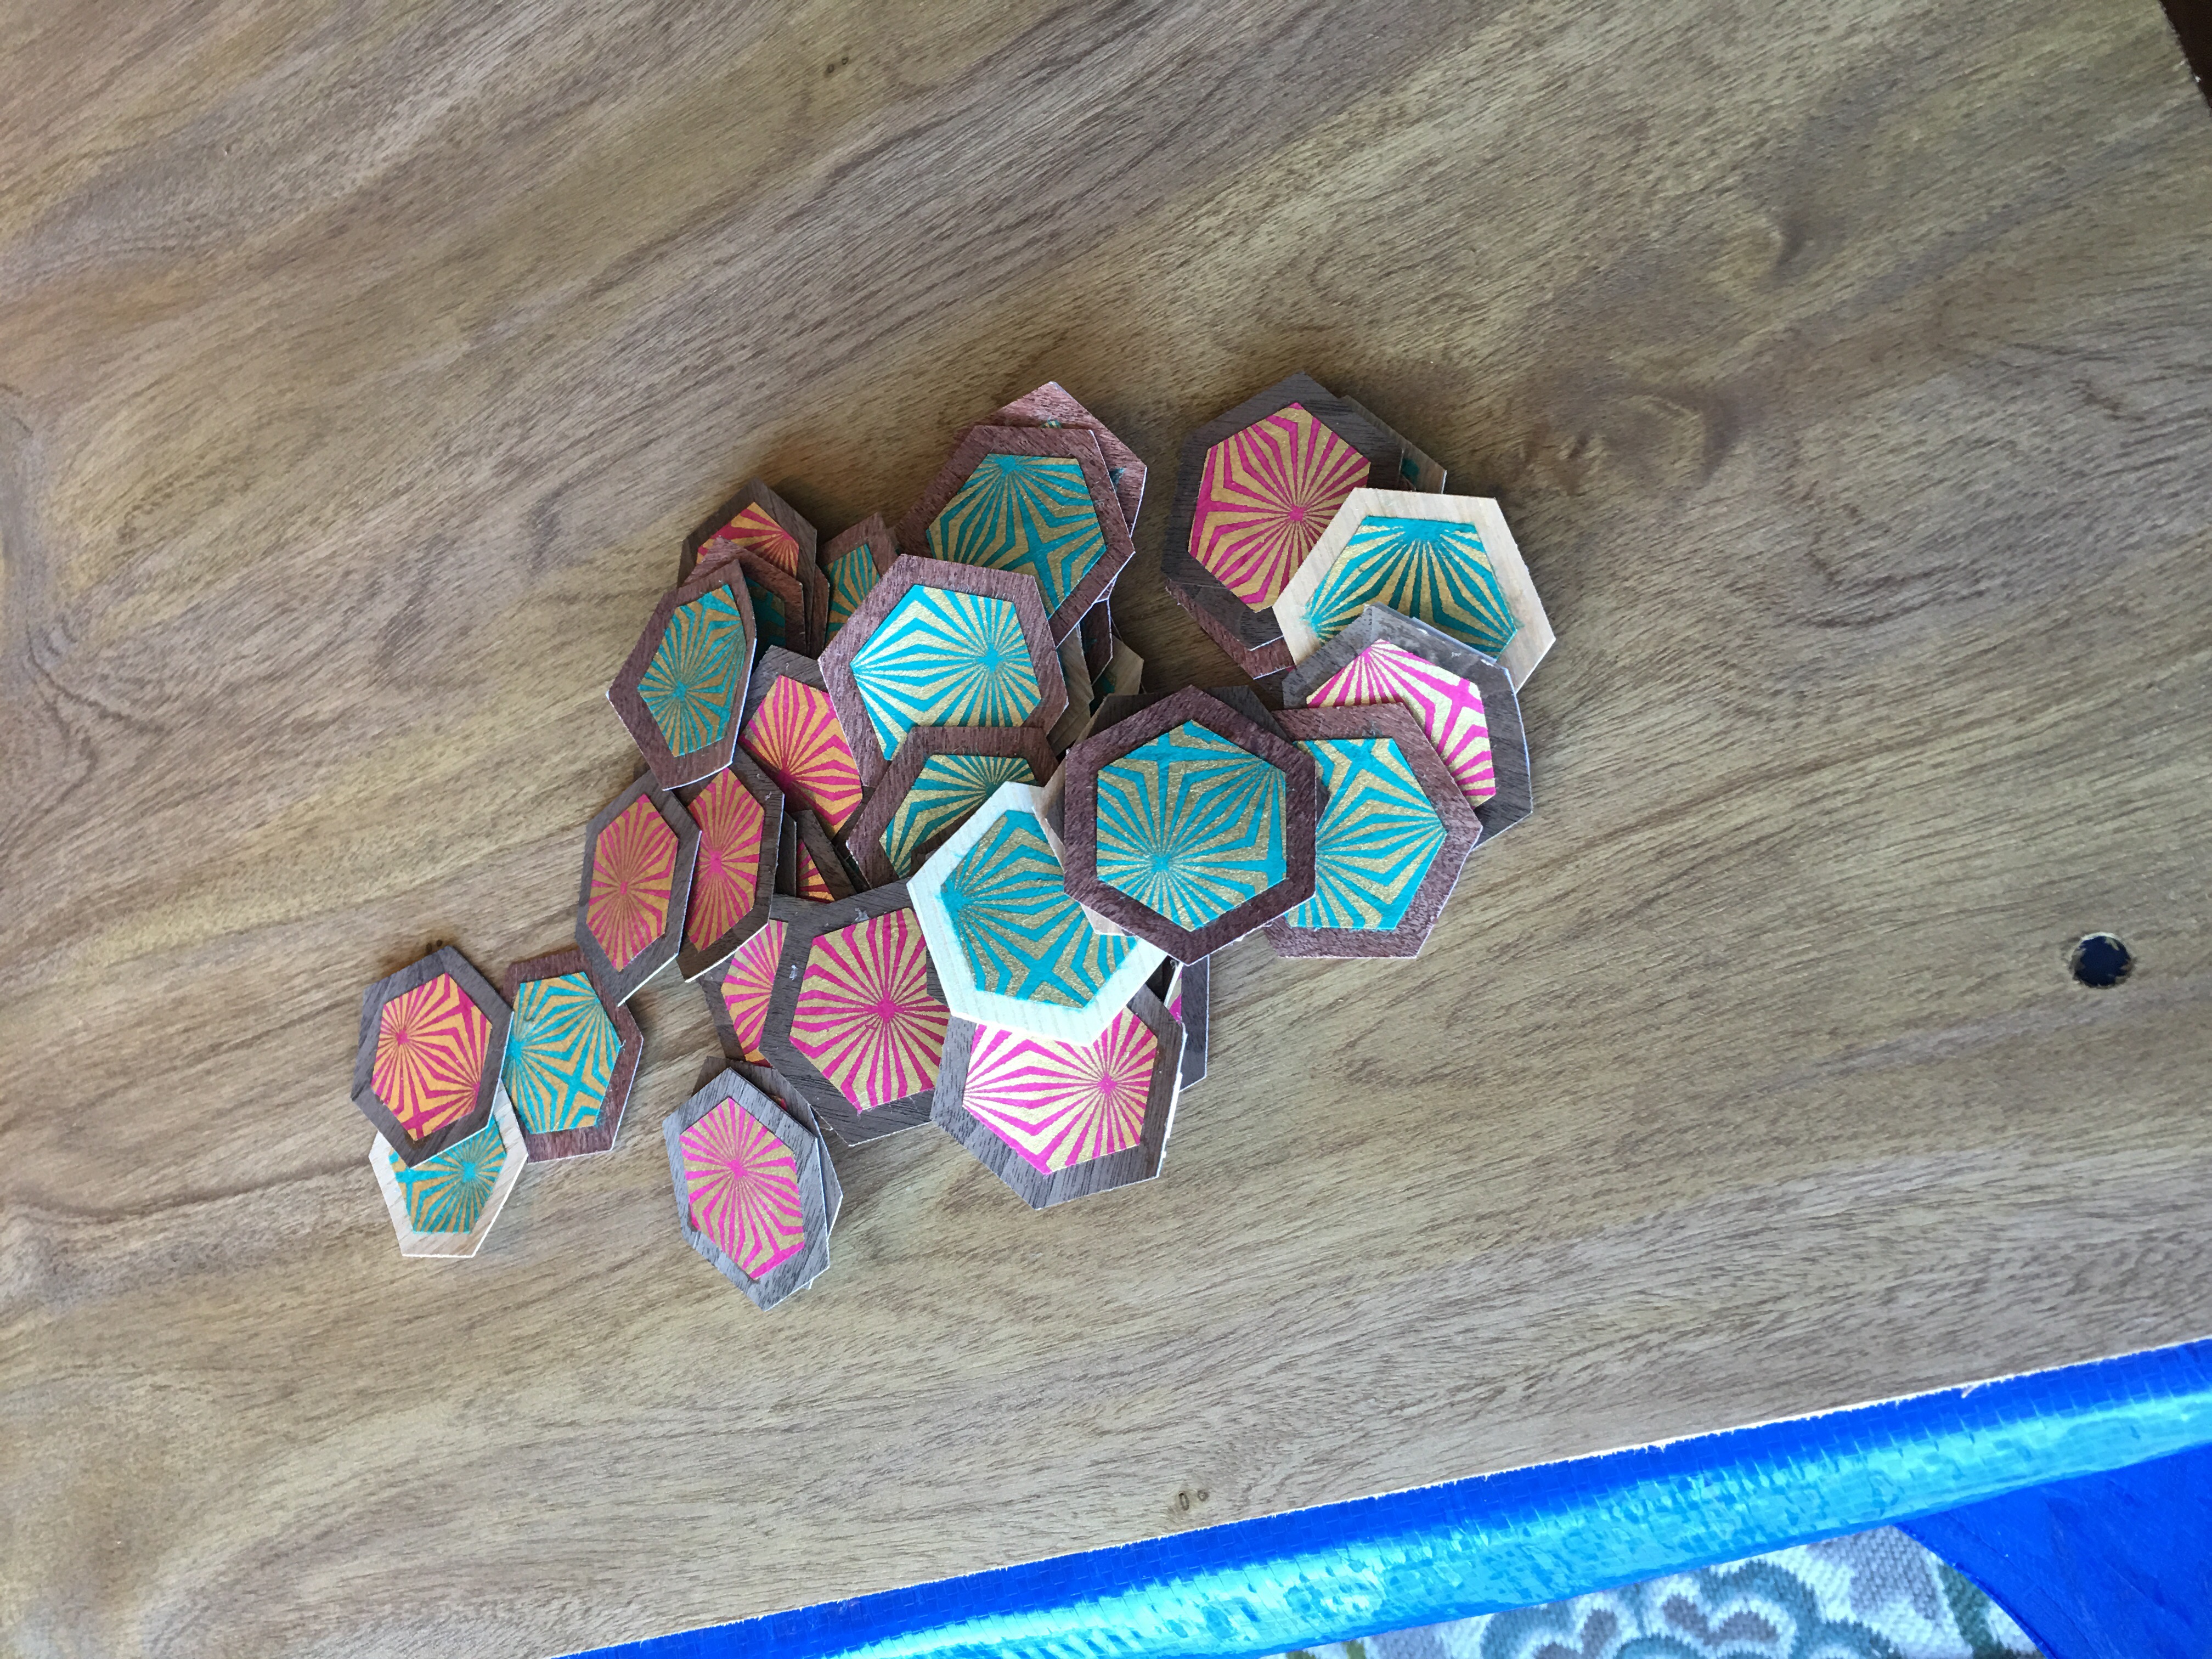
I then use the medium hexagon punch tool to create shapes out of my favorite decorated baltik fine paper – Starburst gold on turquoise and magenta.

Using Mod Podge, I apply the smaller decorated hexagon shapes to the larger, wood veneer ones.
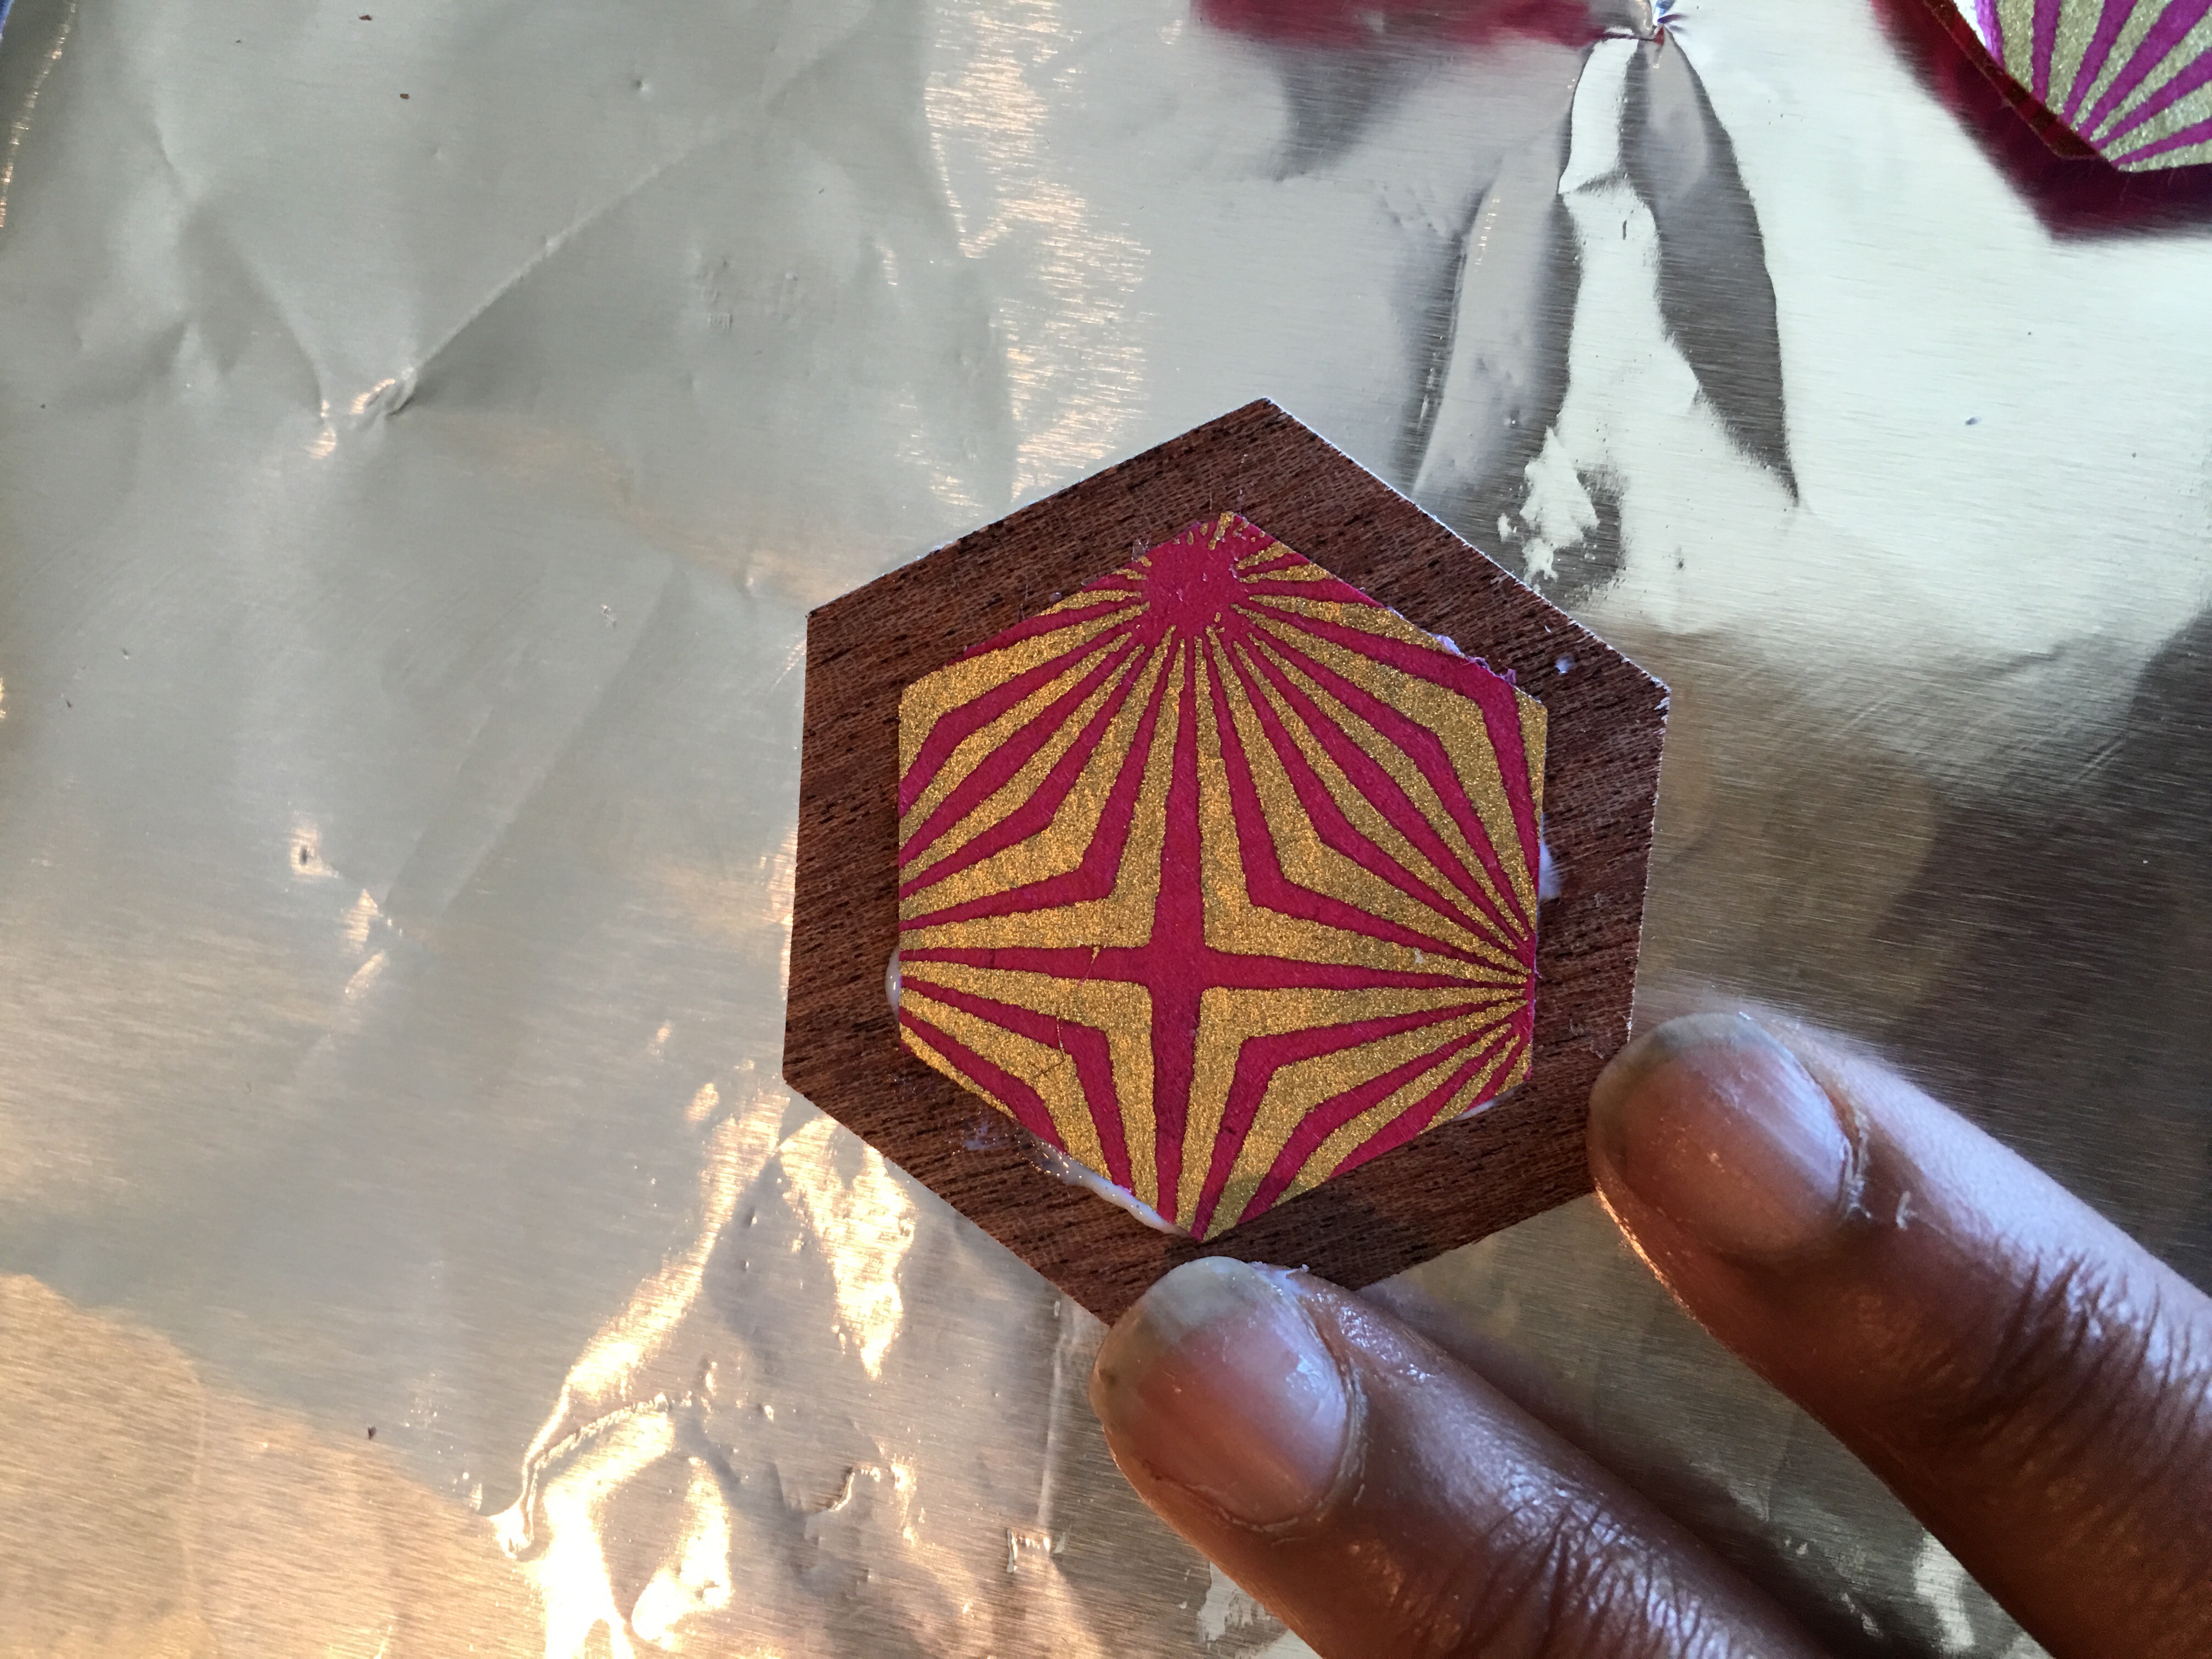
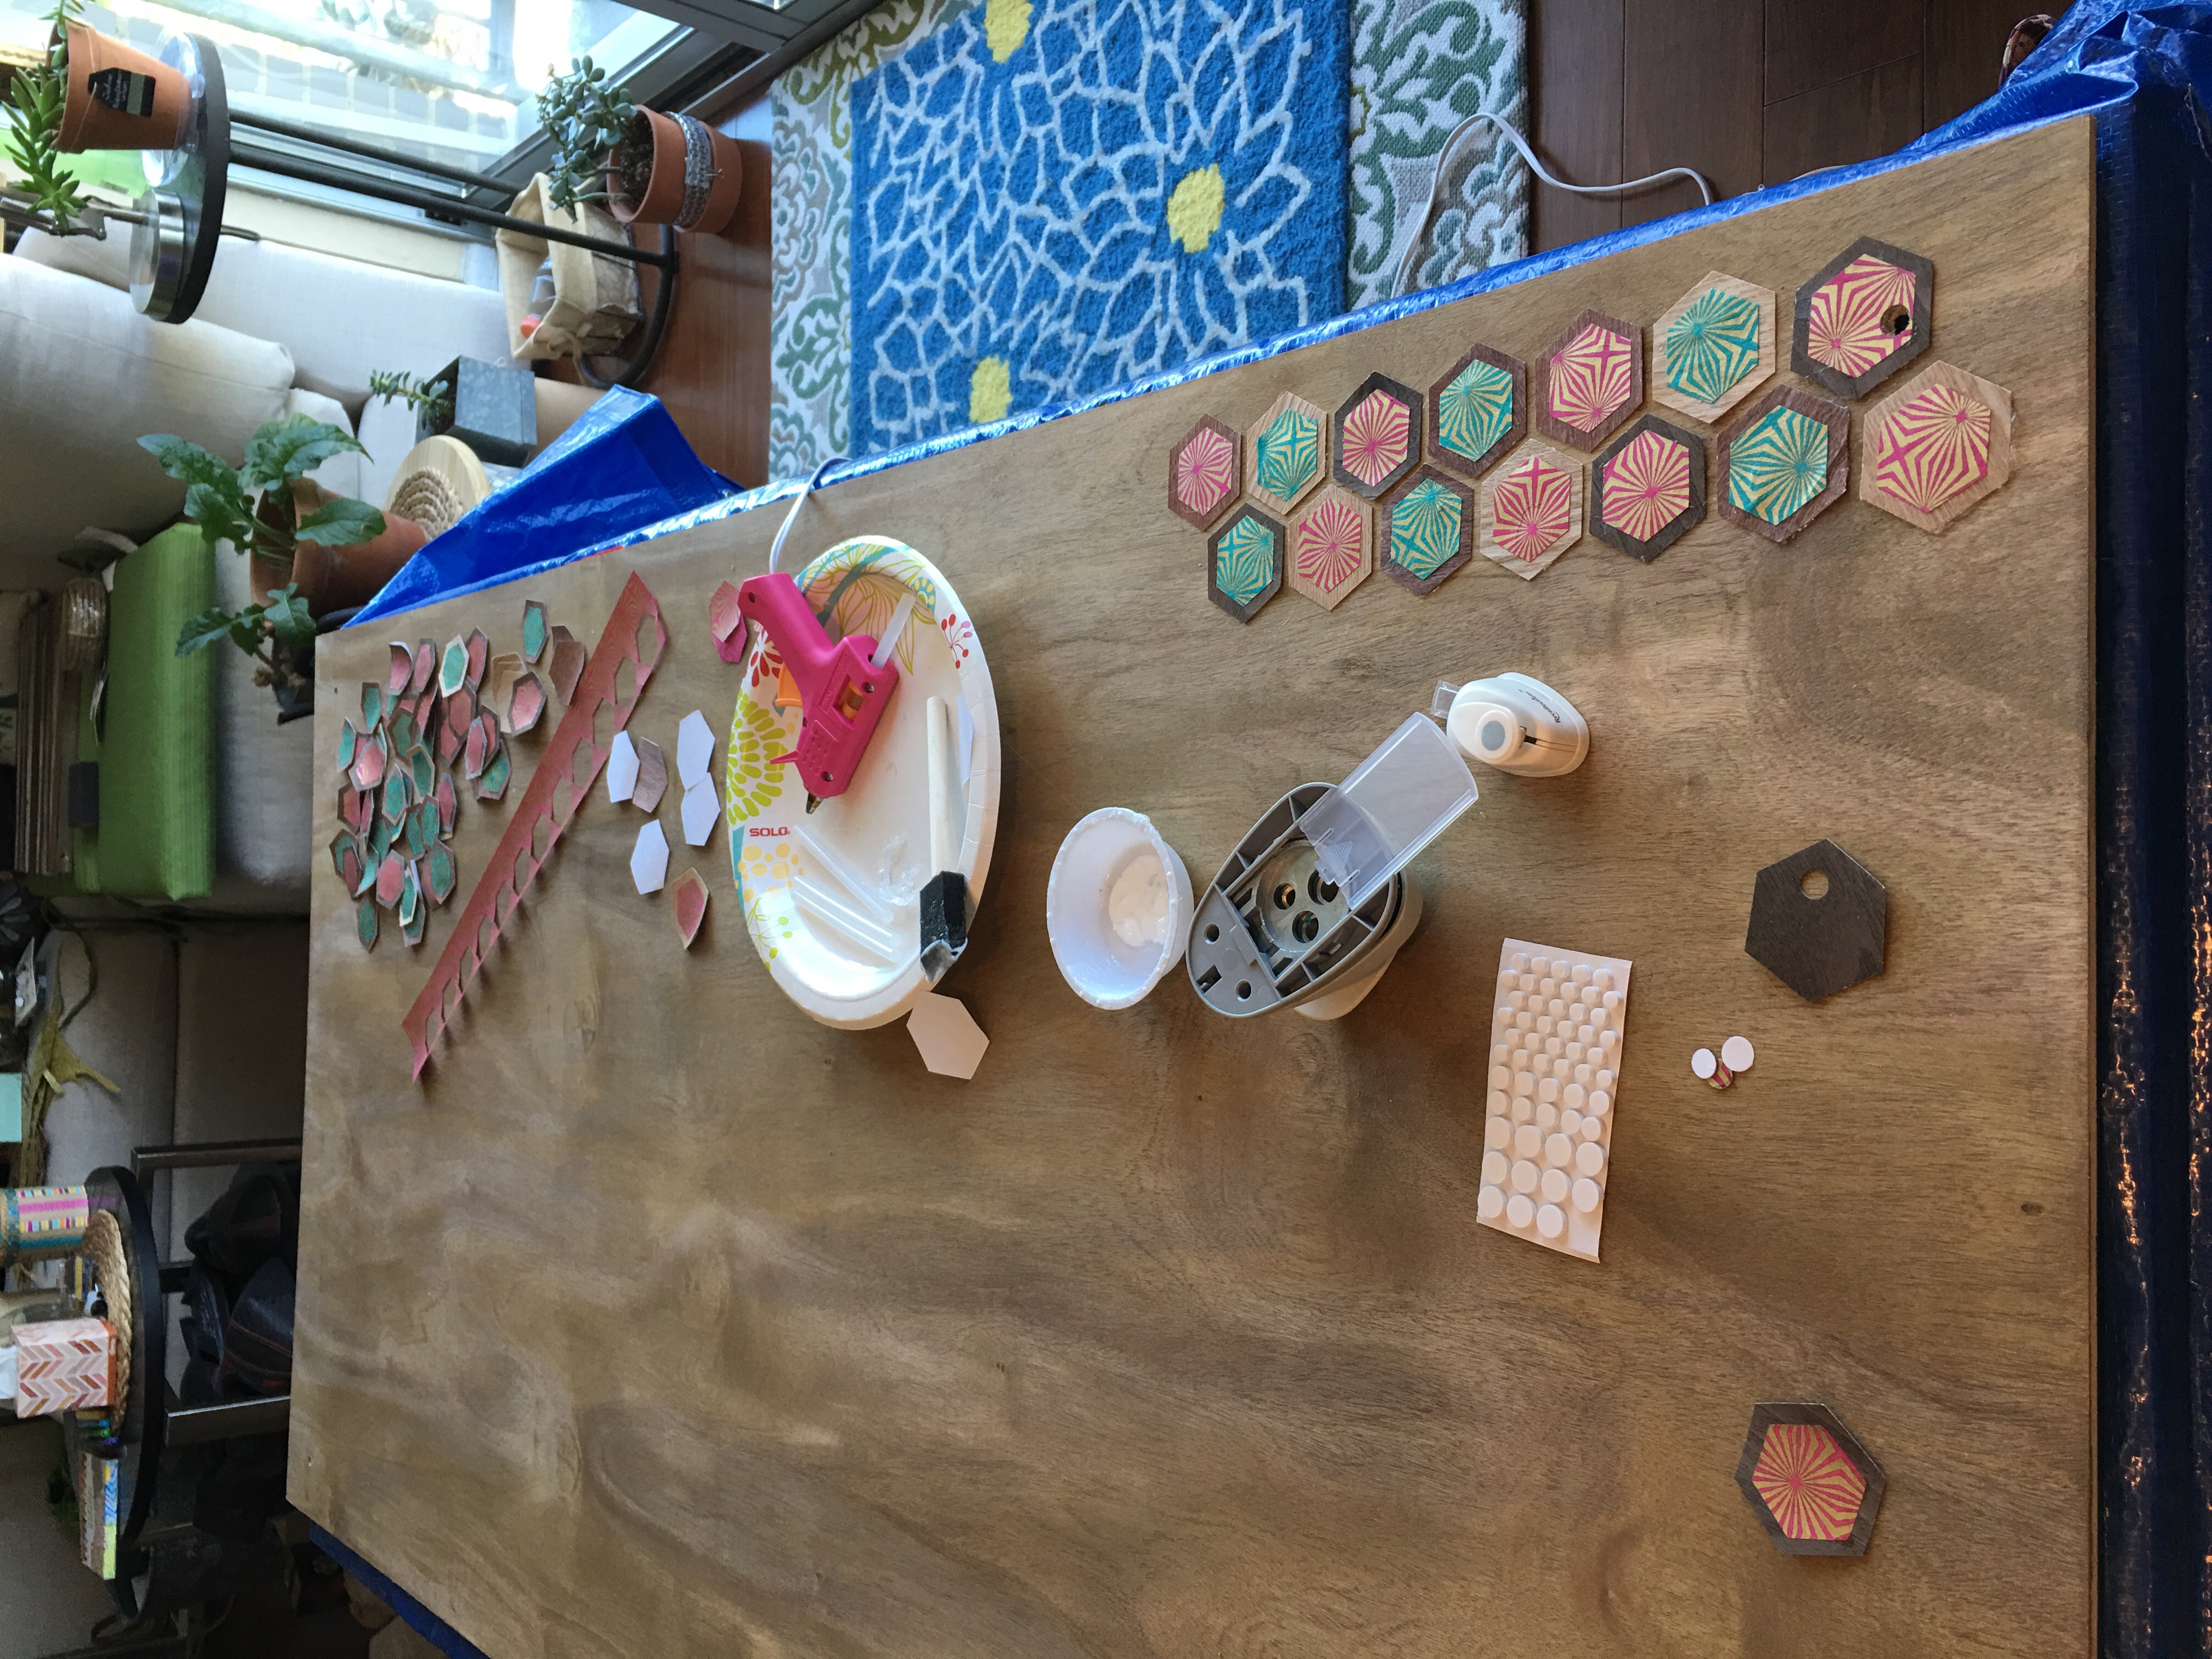
Once I had a large pile of decorated hexagon shapes assembled…
…I peeled off the backing on the wood veneer adhesive…

…and began placing them on the plywood.
I first attempted to add the wood veneer to the plywood using more Mod Podge. But this material would not easily stick to the wood surface.

Time to pull out the hot glue gun.

The hot glue gun is always my go to adhesive in a pinch. Wood glue typically works best for wood projects. But I wanted something fast. And because I’m not adhering heavy objects (I’m using lightweight veneer card stock), hot glue will work just fine.
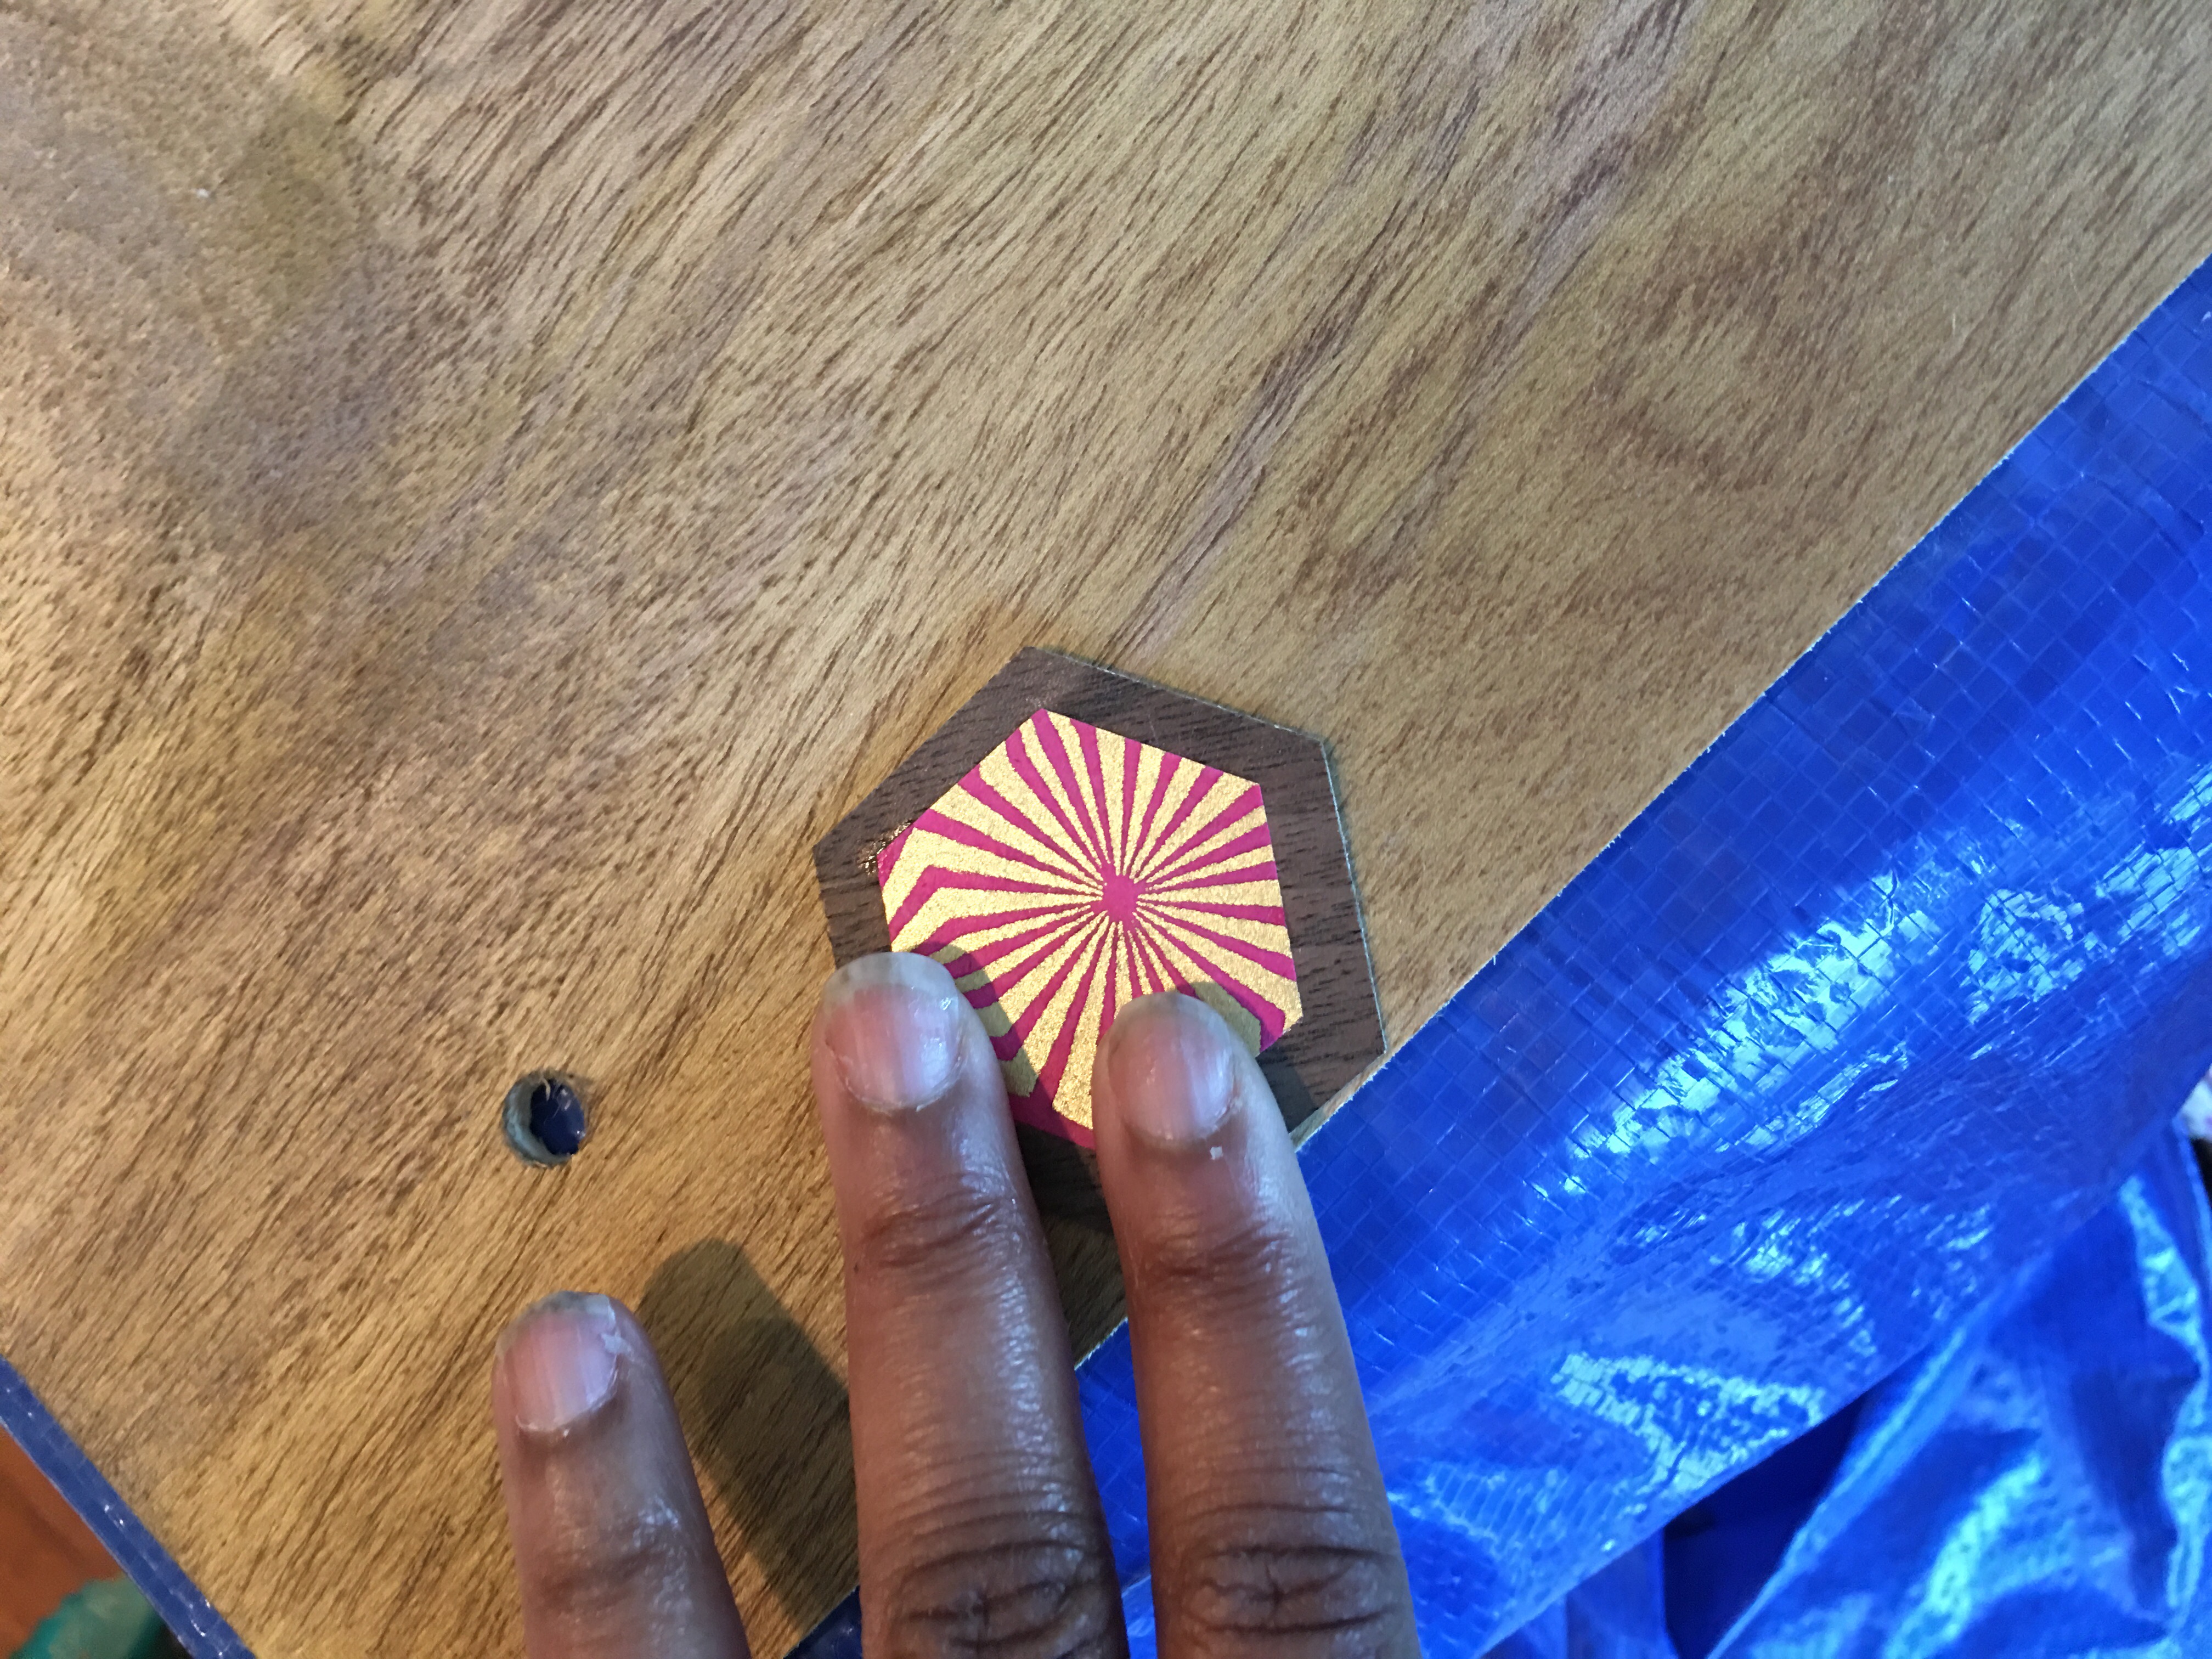
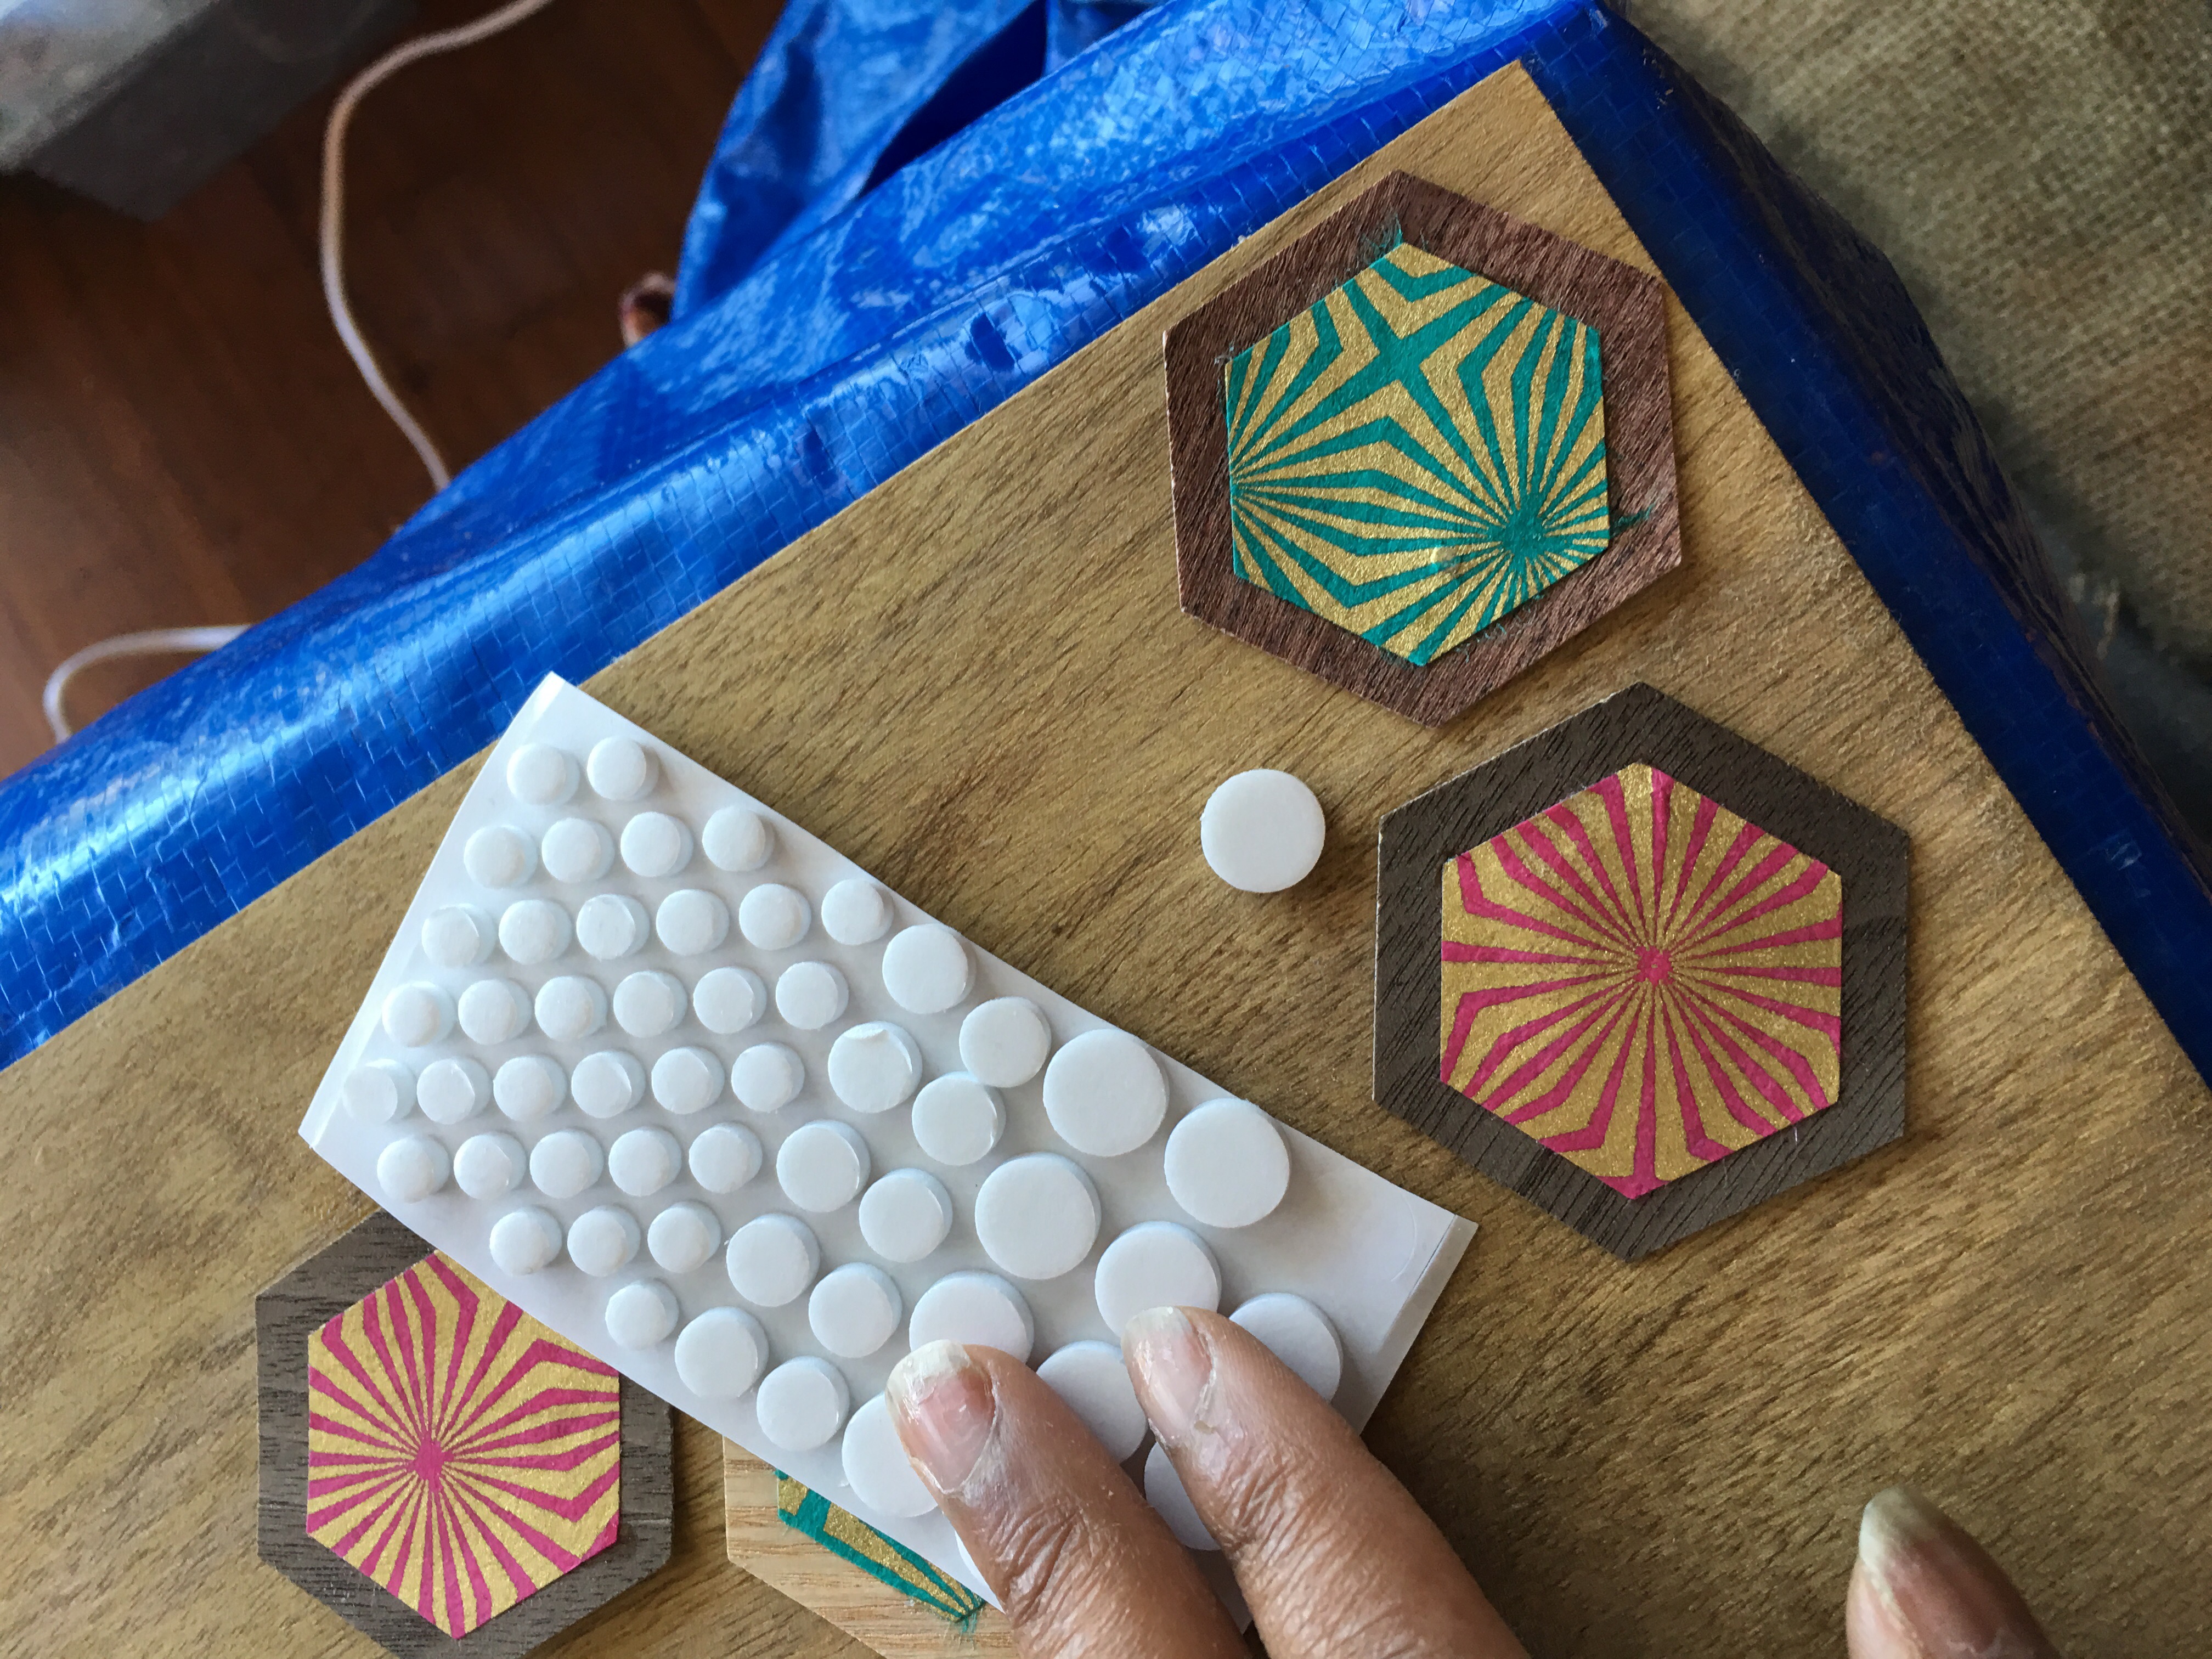
To cut holes into the shapes that cover my drilled holes for attaching the acrylic, I use foam dot stickers. I place a foam dot on the hole in the plywood and then position the hexagon shape in its designated place within the pattern firmly on the dot.
I use a pen to draw a circle around the foam dot…

…and then after removing the dot, I use a 1/2″ circle punch tool the punch out a hole in the hexagon.

Voila! Hexagon positioned without covering the plywood hole.
I methodically glue hexagon shapes to the plywood, still hoping to be done by early afternoon. By now it’s around 10am on Sunday.
The self-adhesive wood veneer pack come in four different shades of wood. I use three for this project. I alternate each shade to make a striking, yet subtle, visual pattern on the wood.
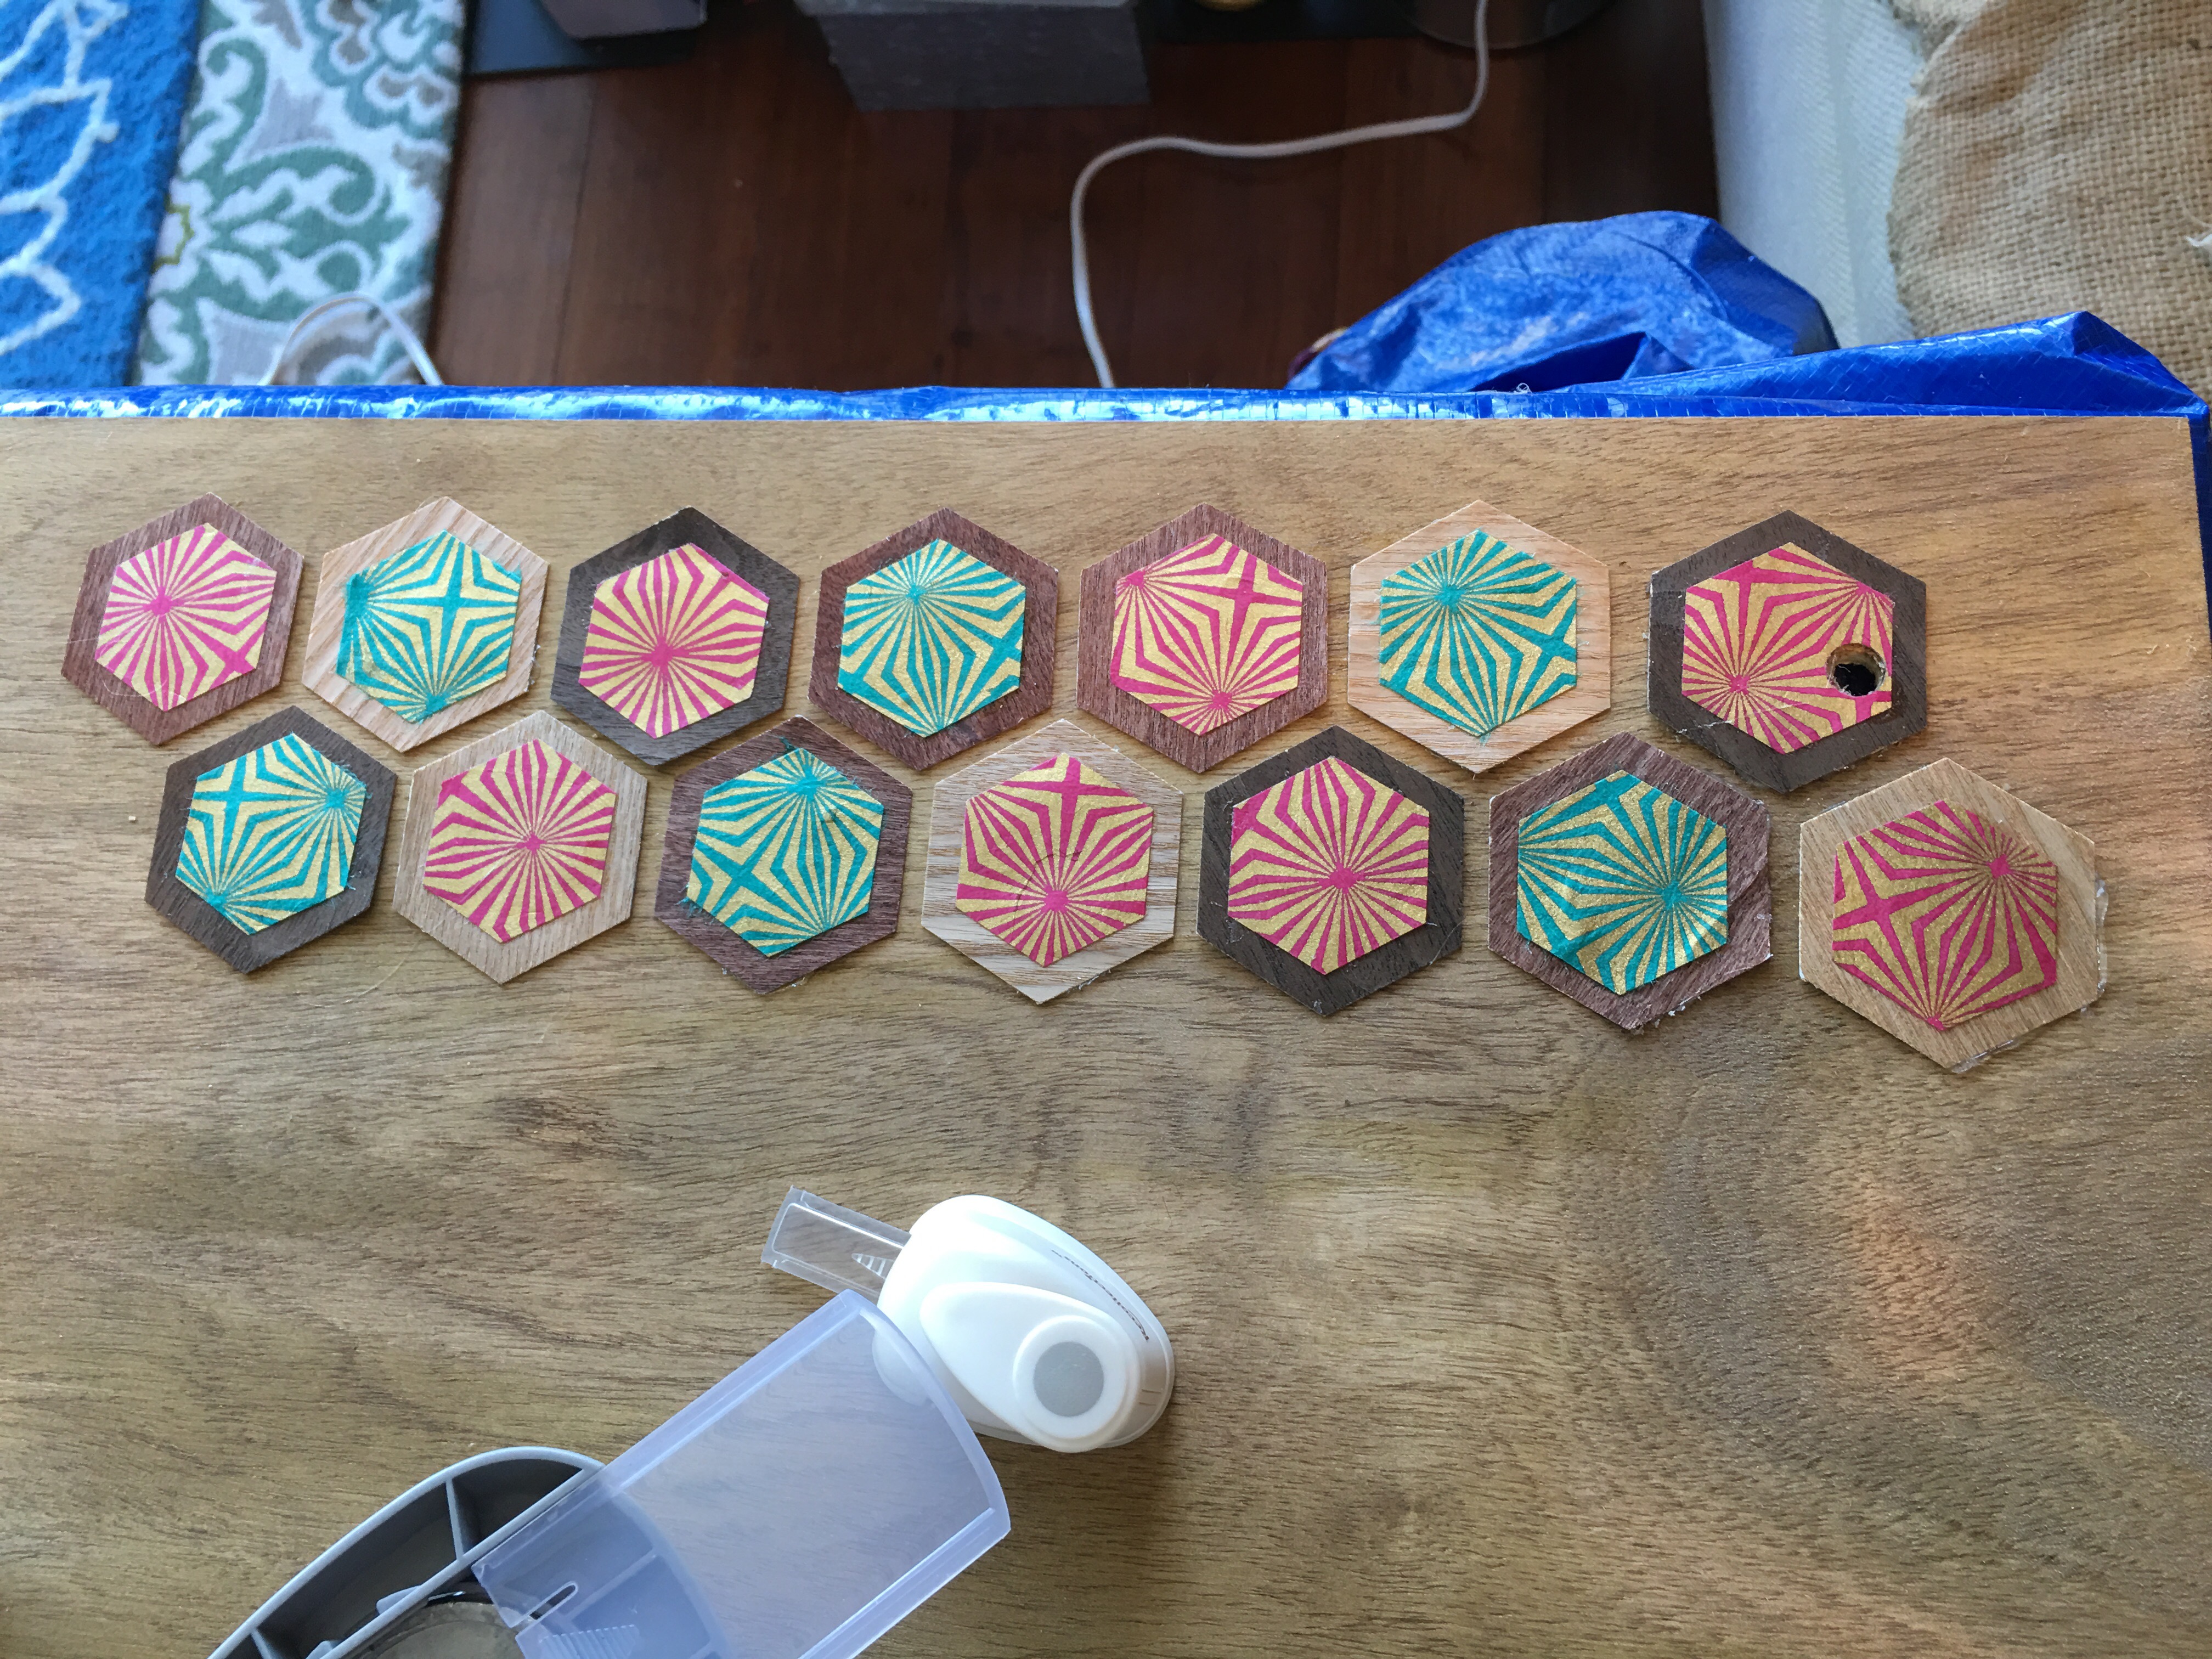
It took 63 hexagons to complete two rows of one side. Sixty-three! Yes, this piece is huge.

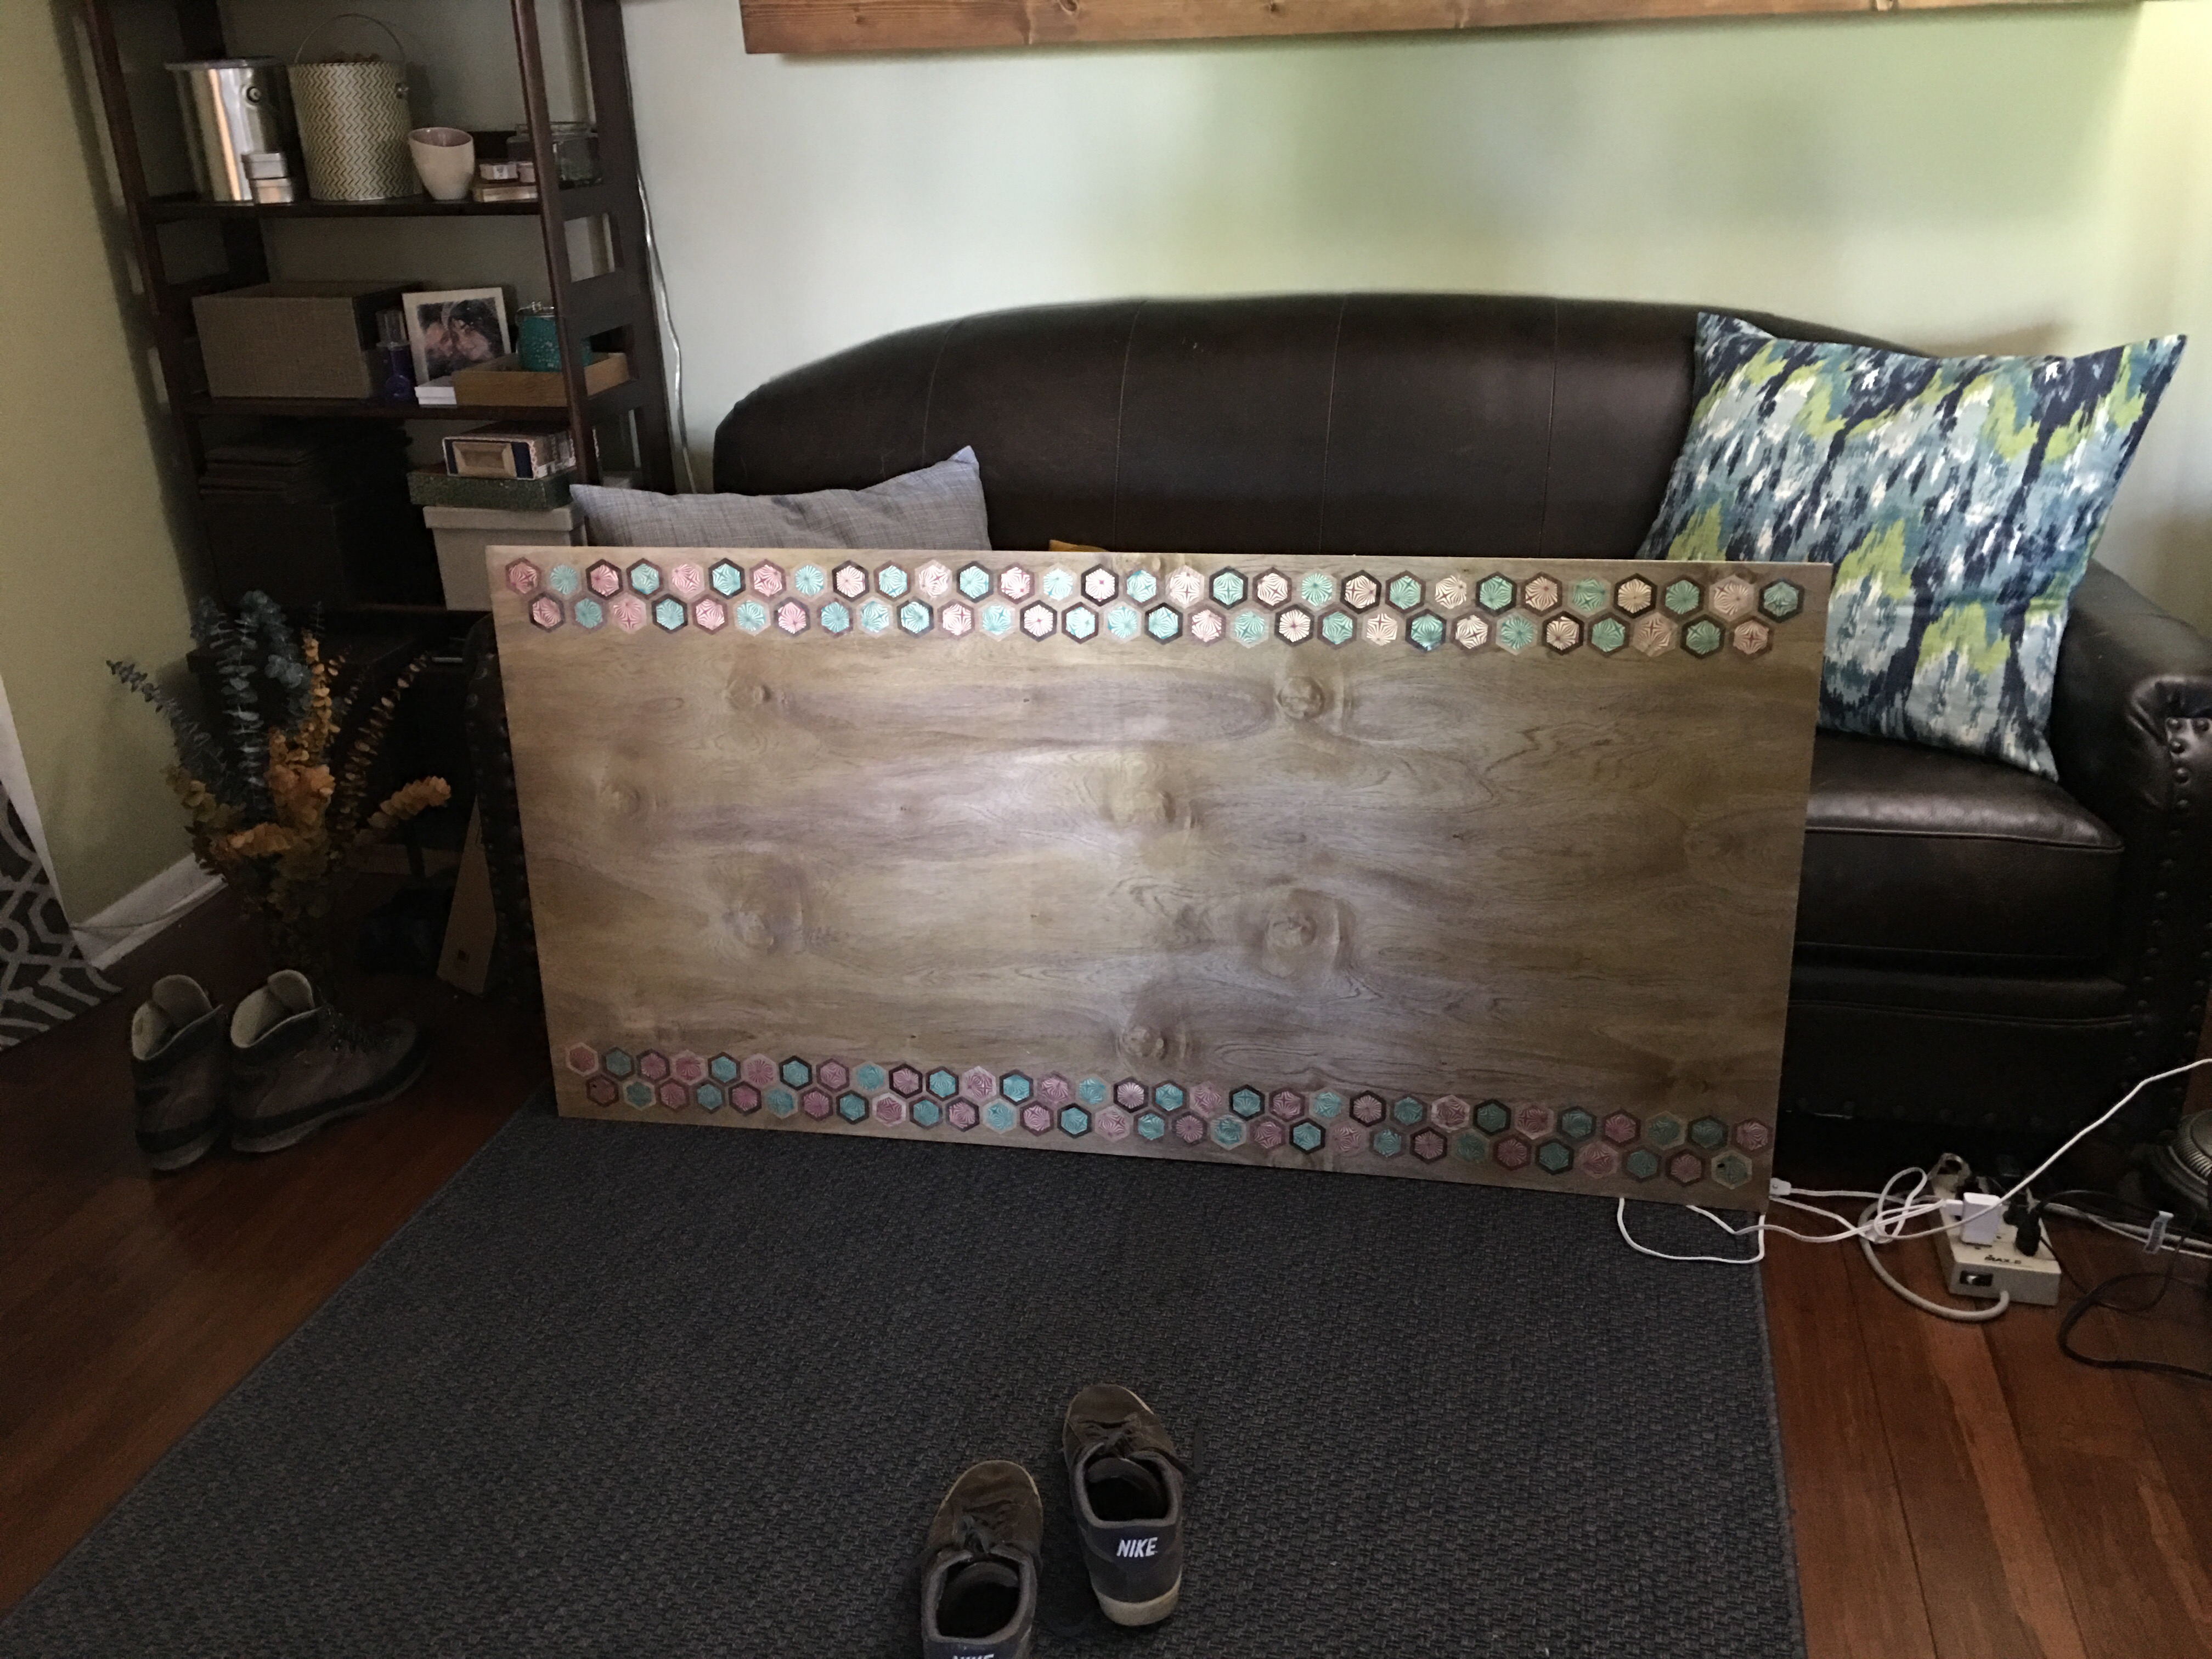
After counting my remaining hexagons and confirming that I had enough to decorate the other edge, I power through and apply the same pattern on the other side of the plywood.
I’m pleased with how the hexagons look on the plywood. I love adding vibrant colors in the form of decorated paper to wood.
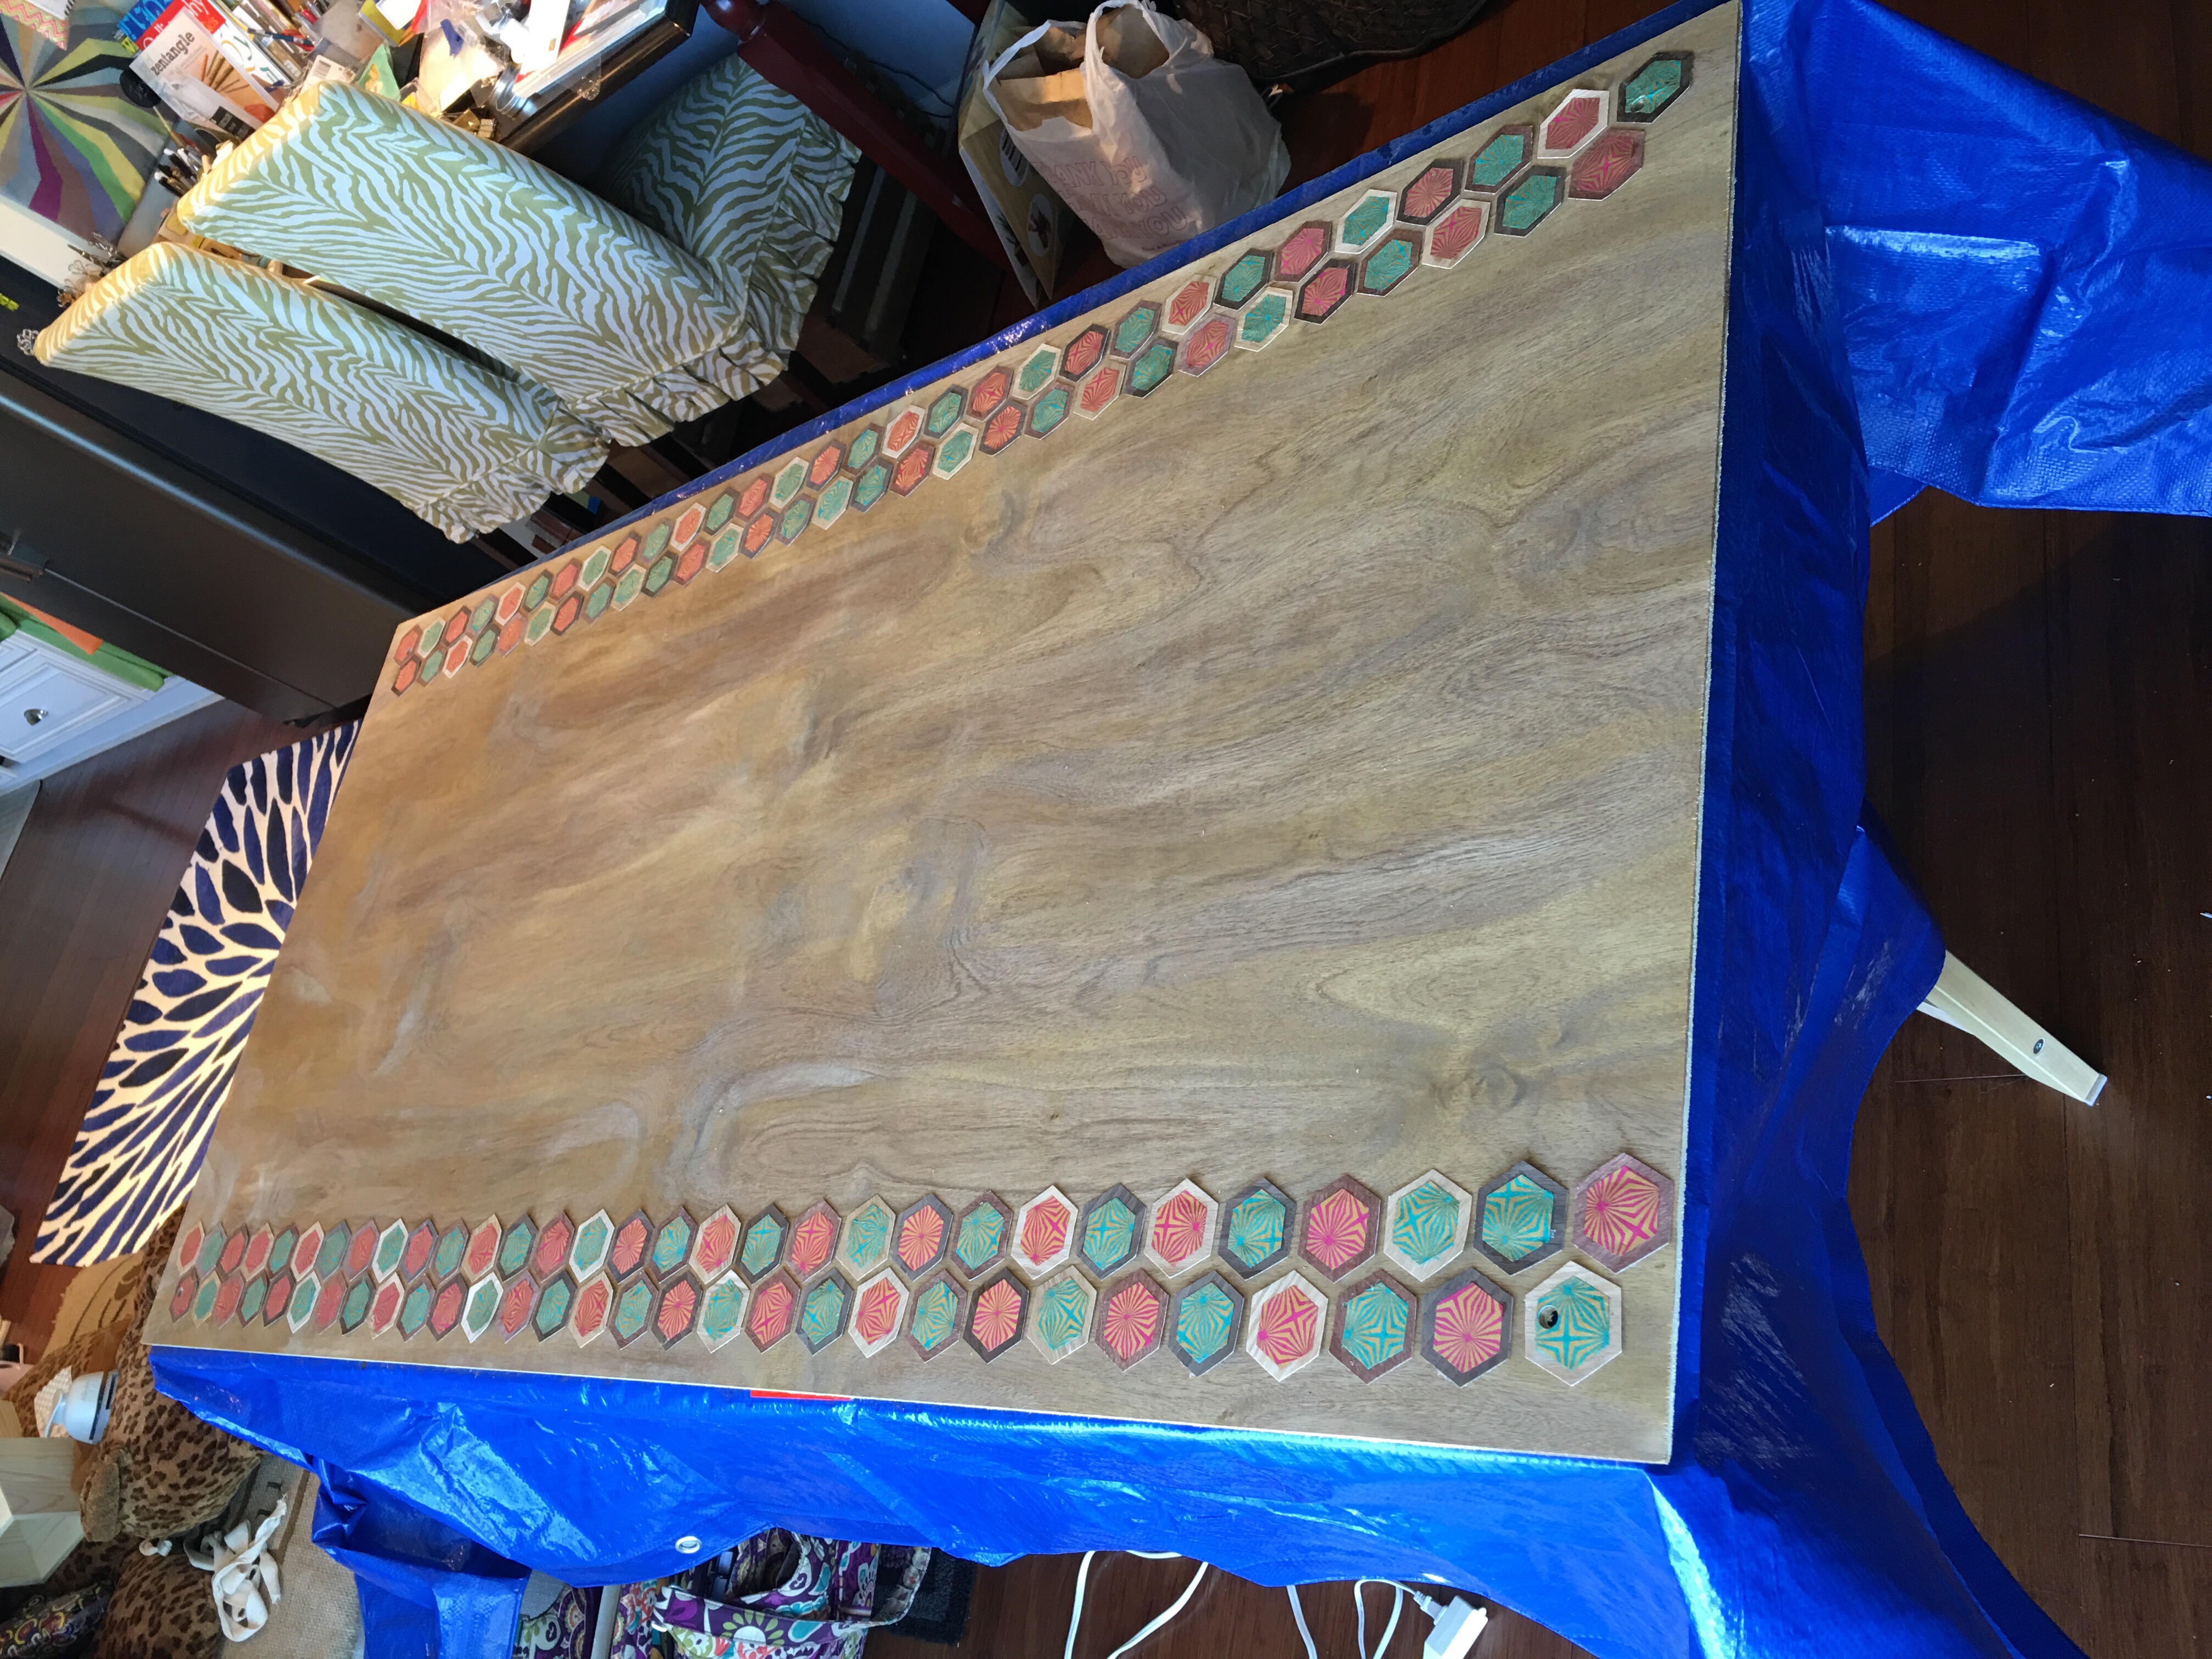
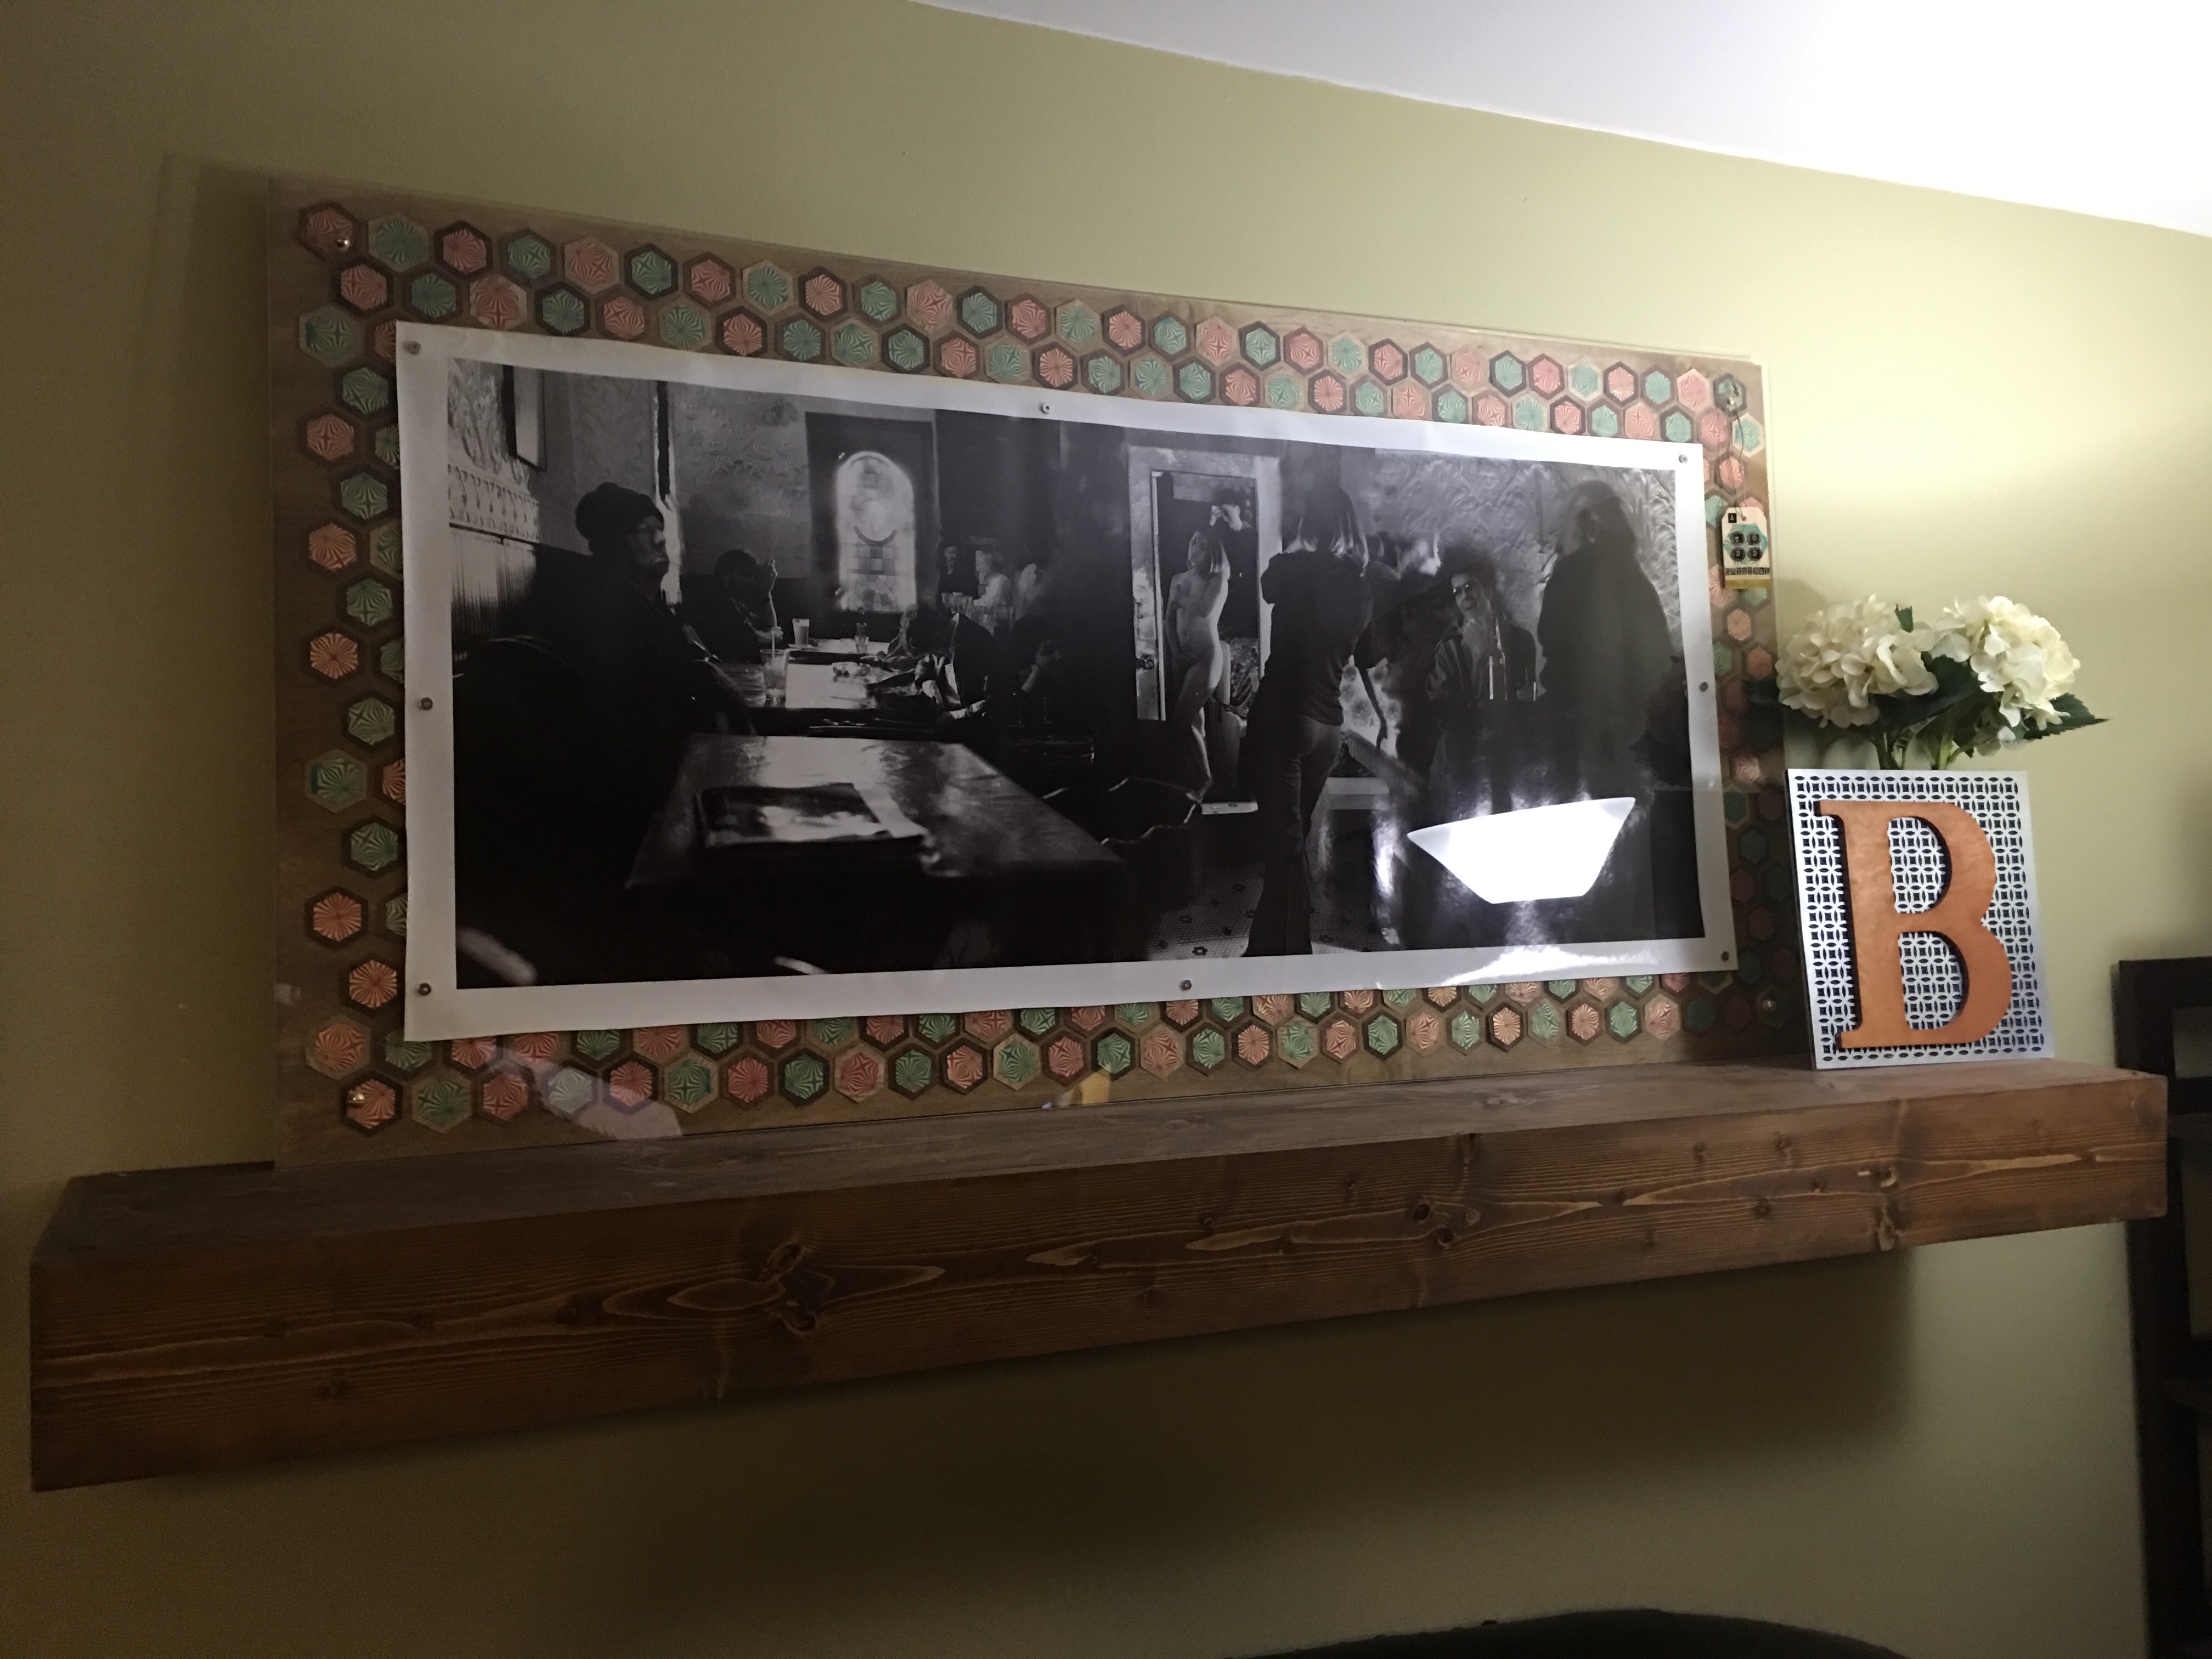
By now it’s around 1pm in the afternoon. With both sides done, I’m ready to mount the picture again.
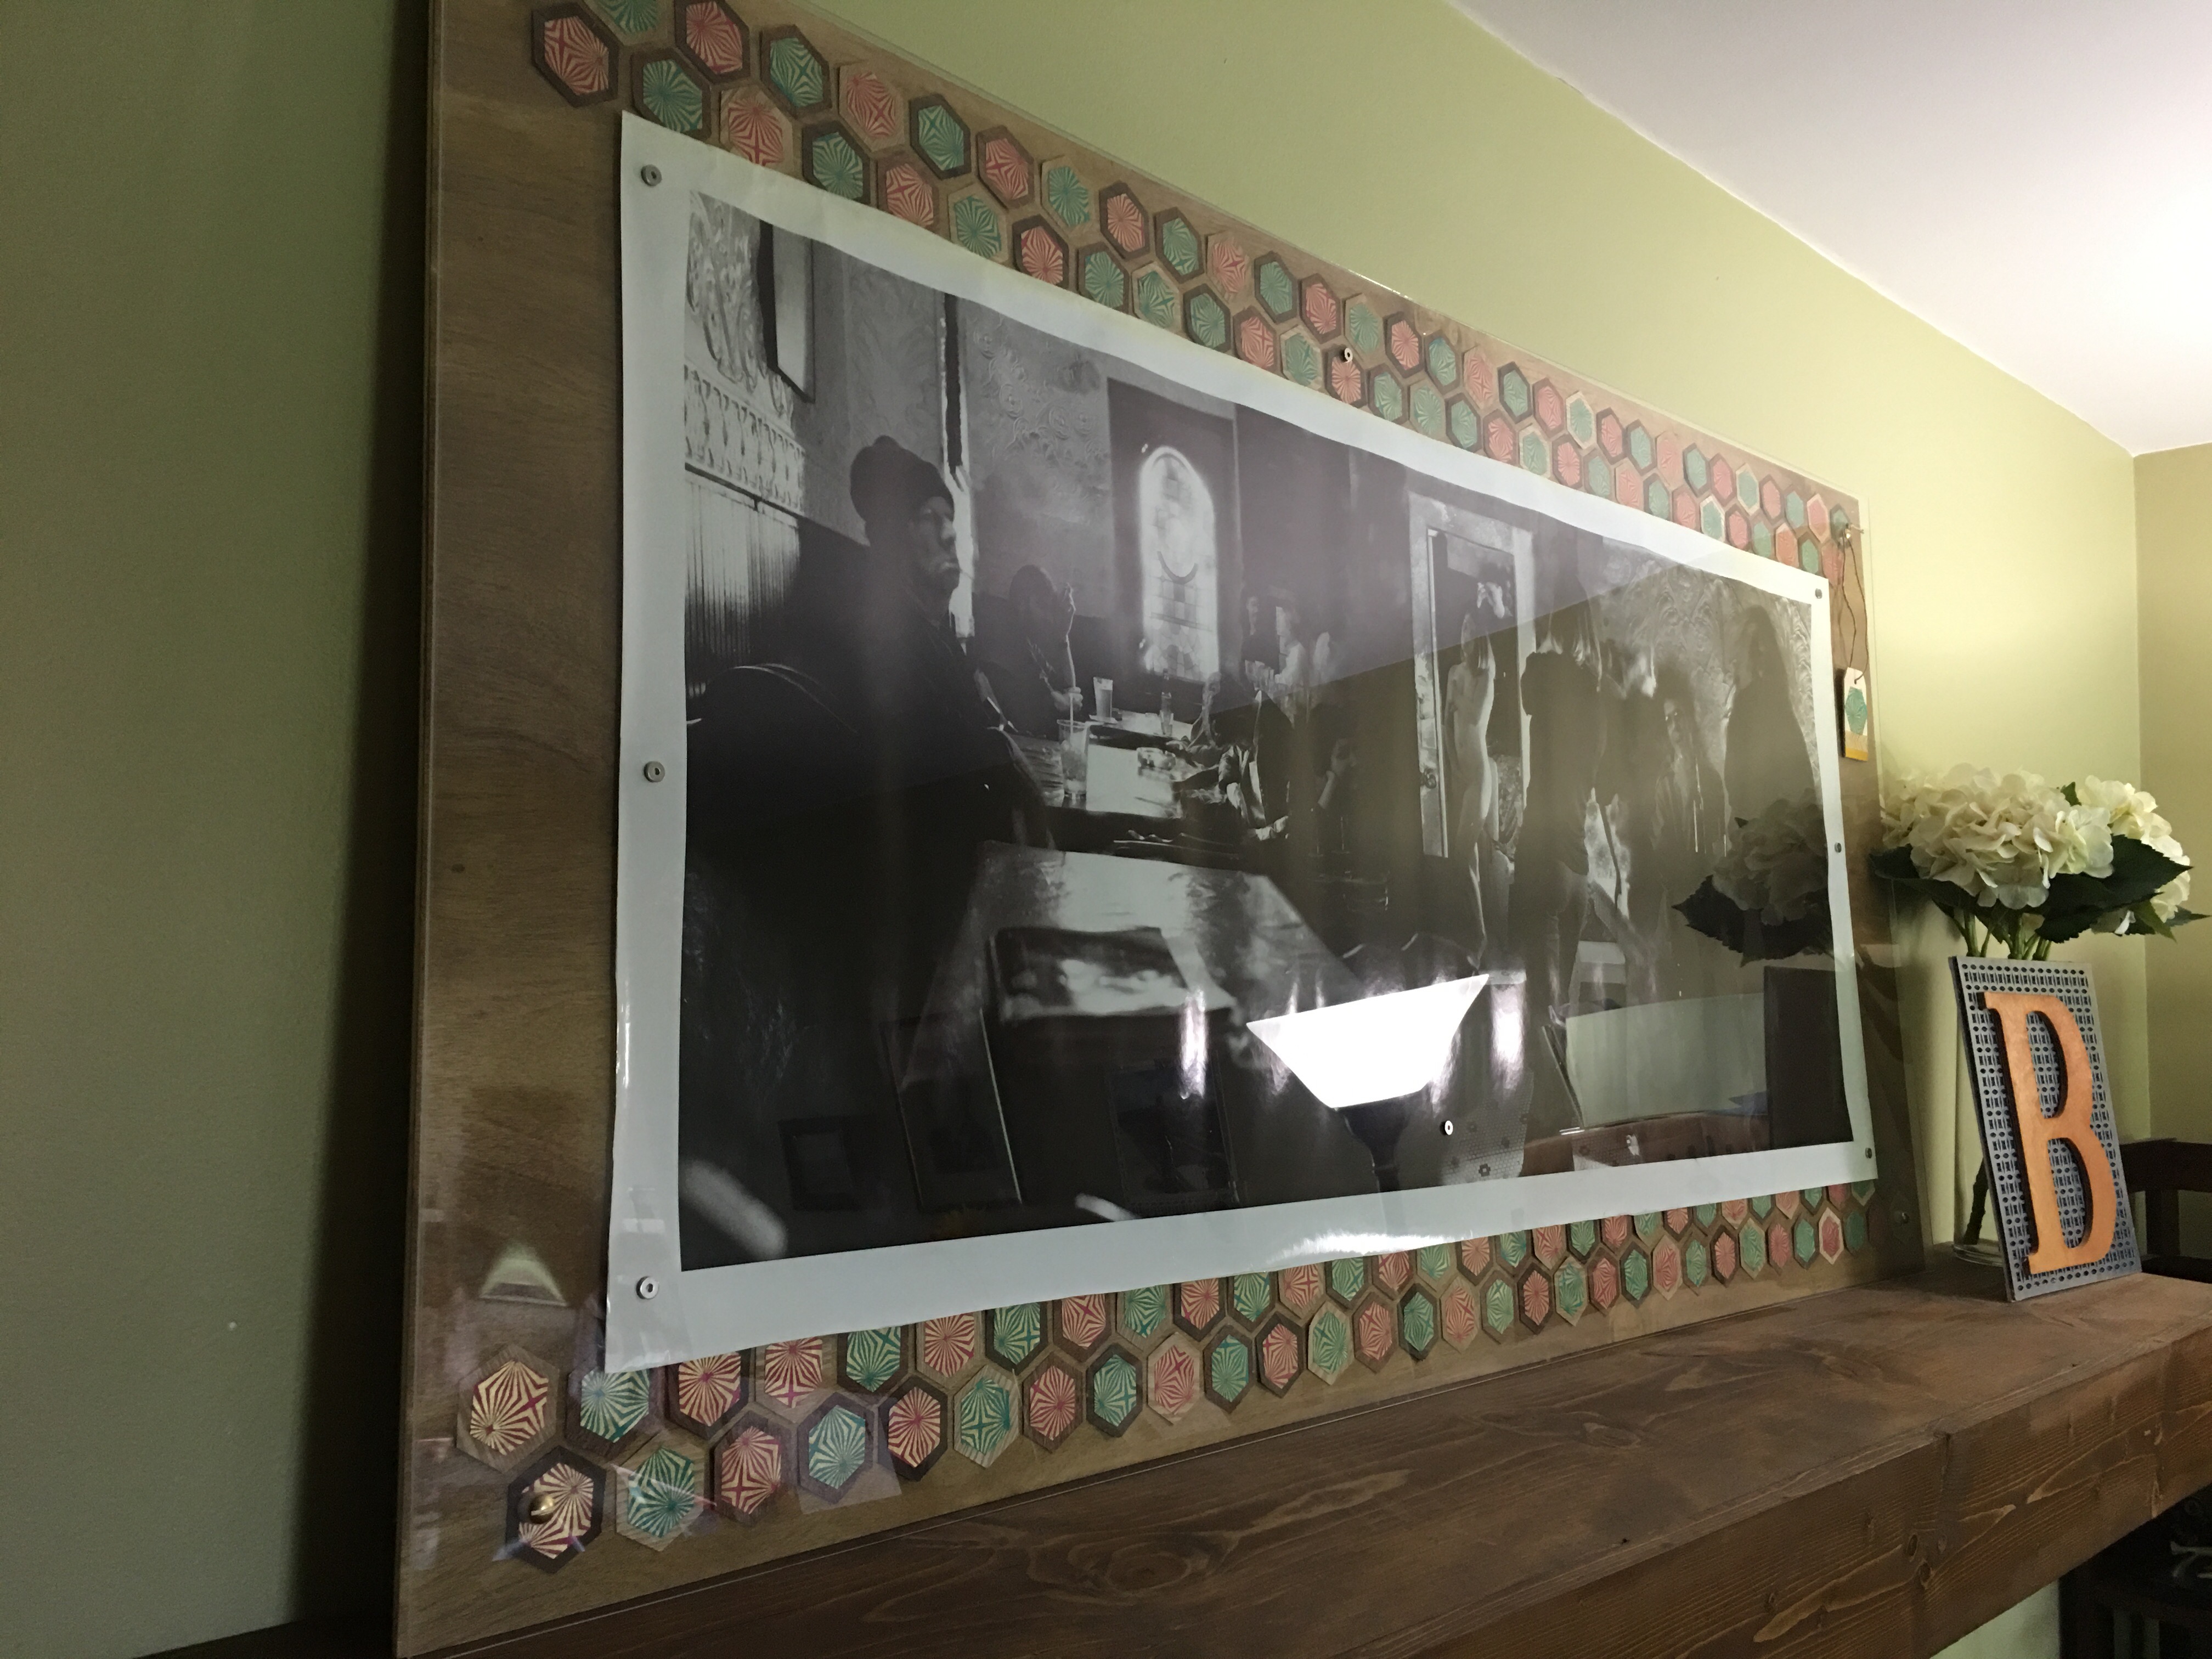
Here’s how the picture looks over the decorated wood. I even add a decorated wood tag. I want to add a “Made by Todd” label to this (to pay tribute to our talented photographer friend).

I place the mount back on the shelf. It’s better. I’m satisfied with it.
Until I wasn’t. The sides need to be done.
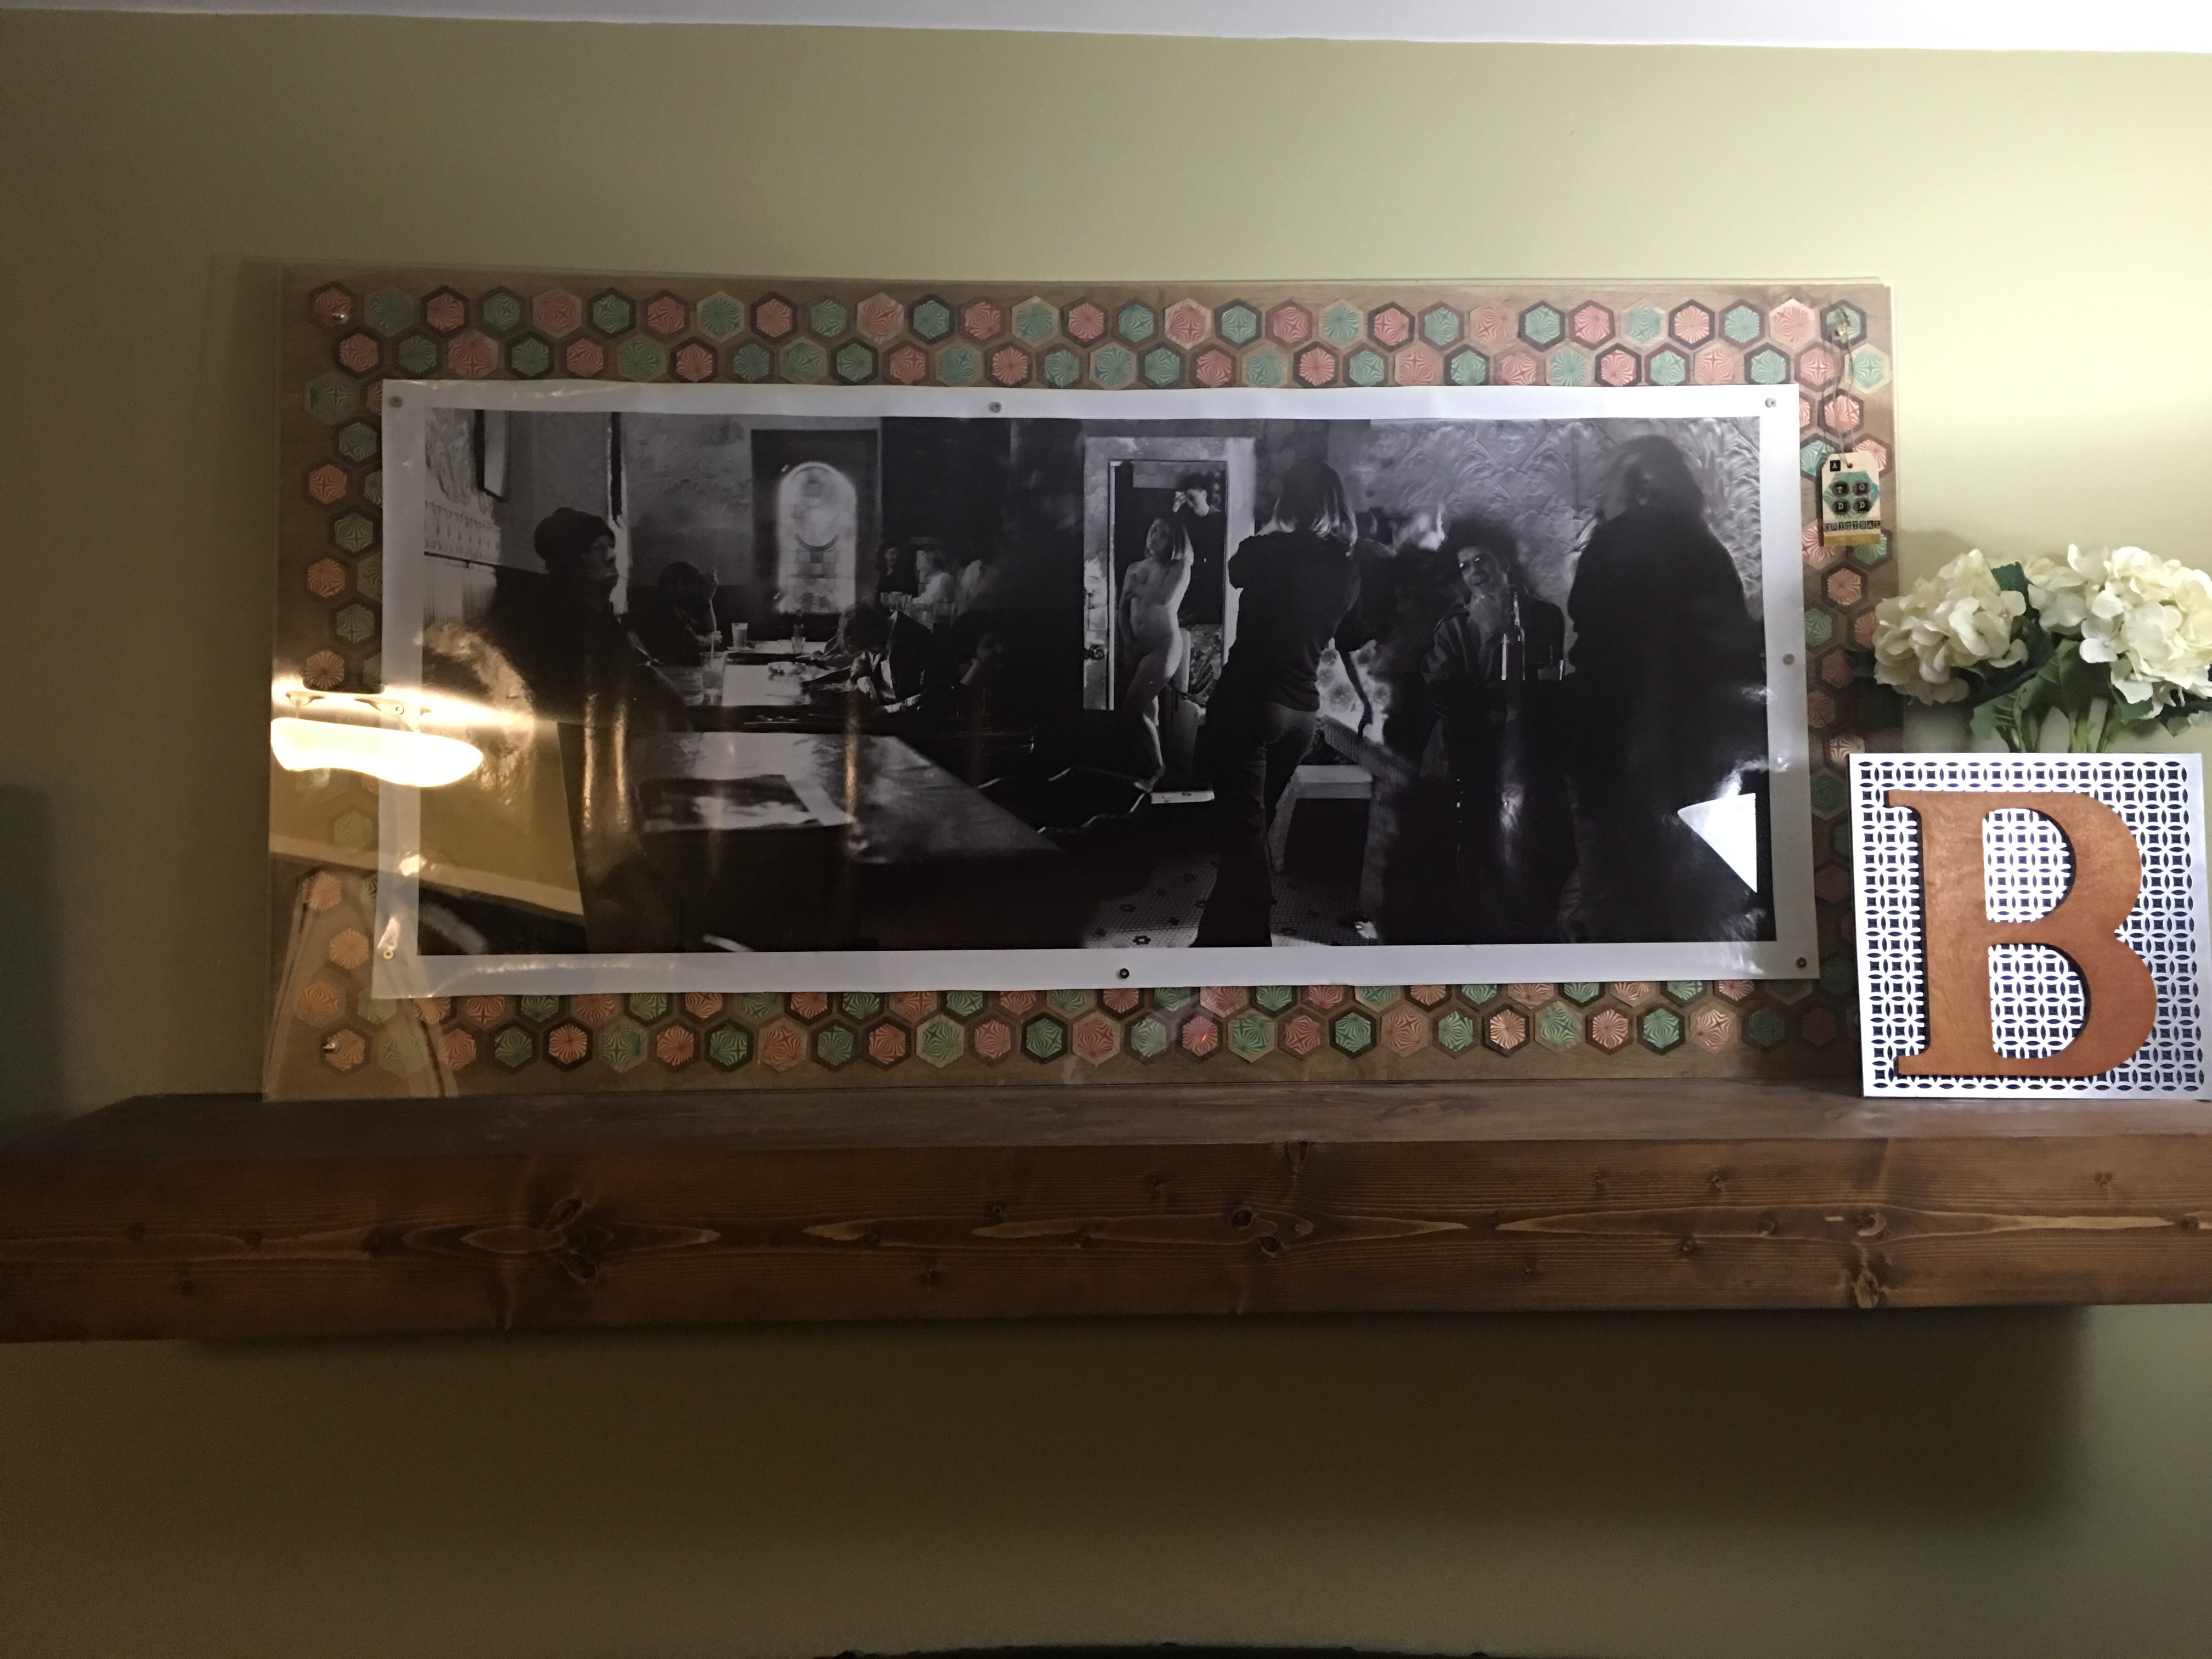
Final sprint to the finish:
It’s now early evening on Sunday. After running out to Target to get more wood veneer, I create more decorated hexagons and adhere them to the left and right side of the plywood.
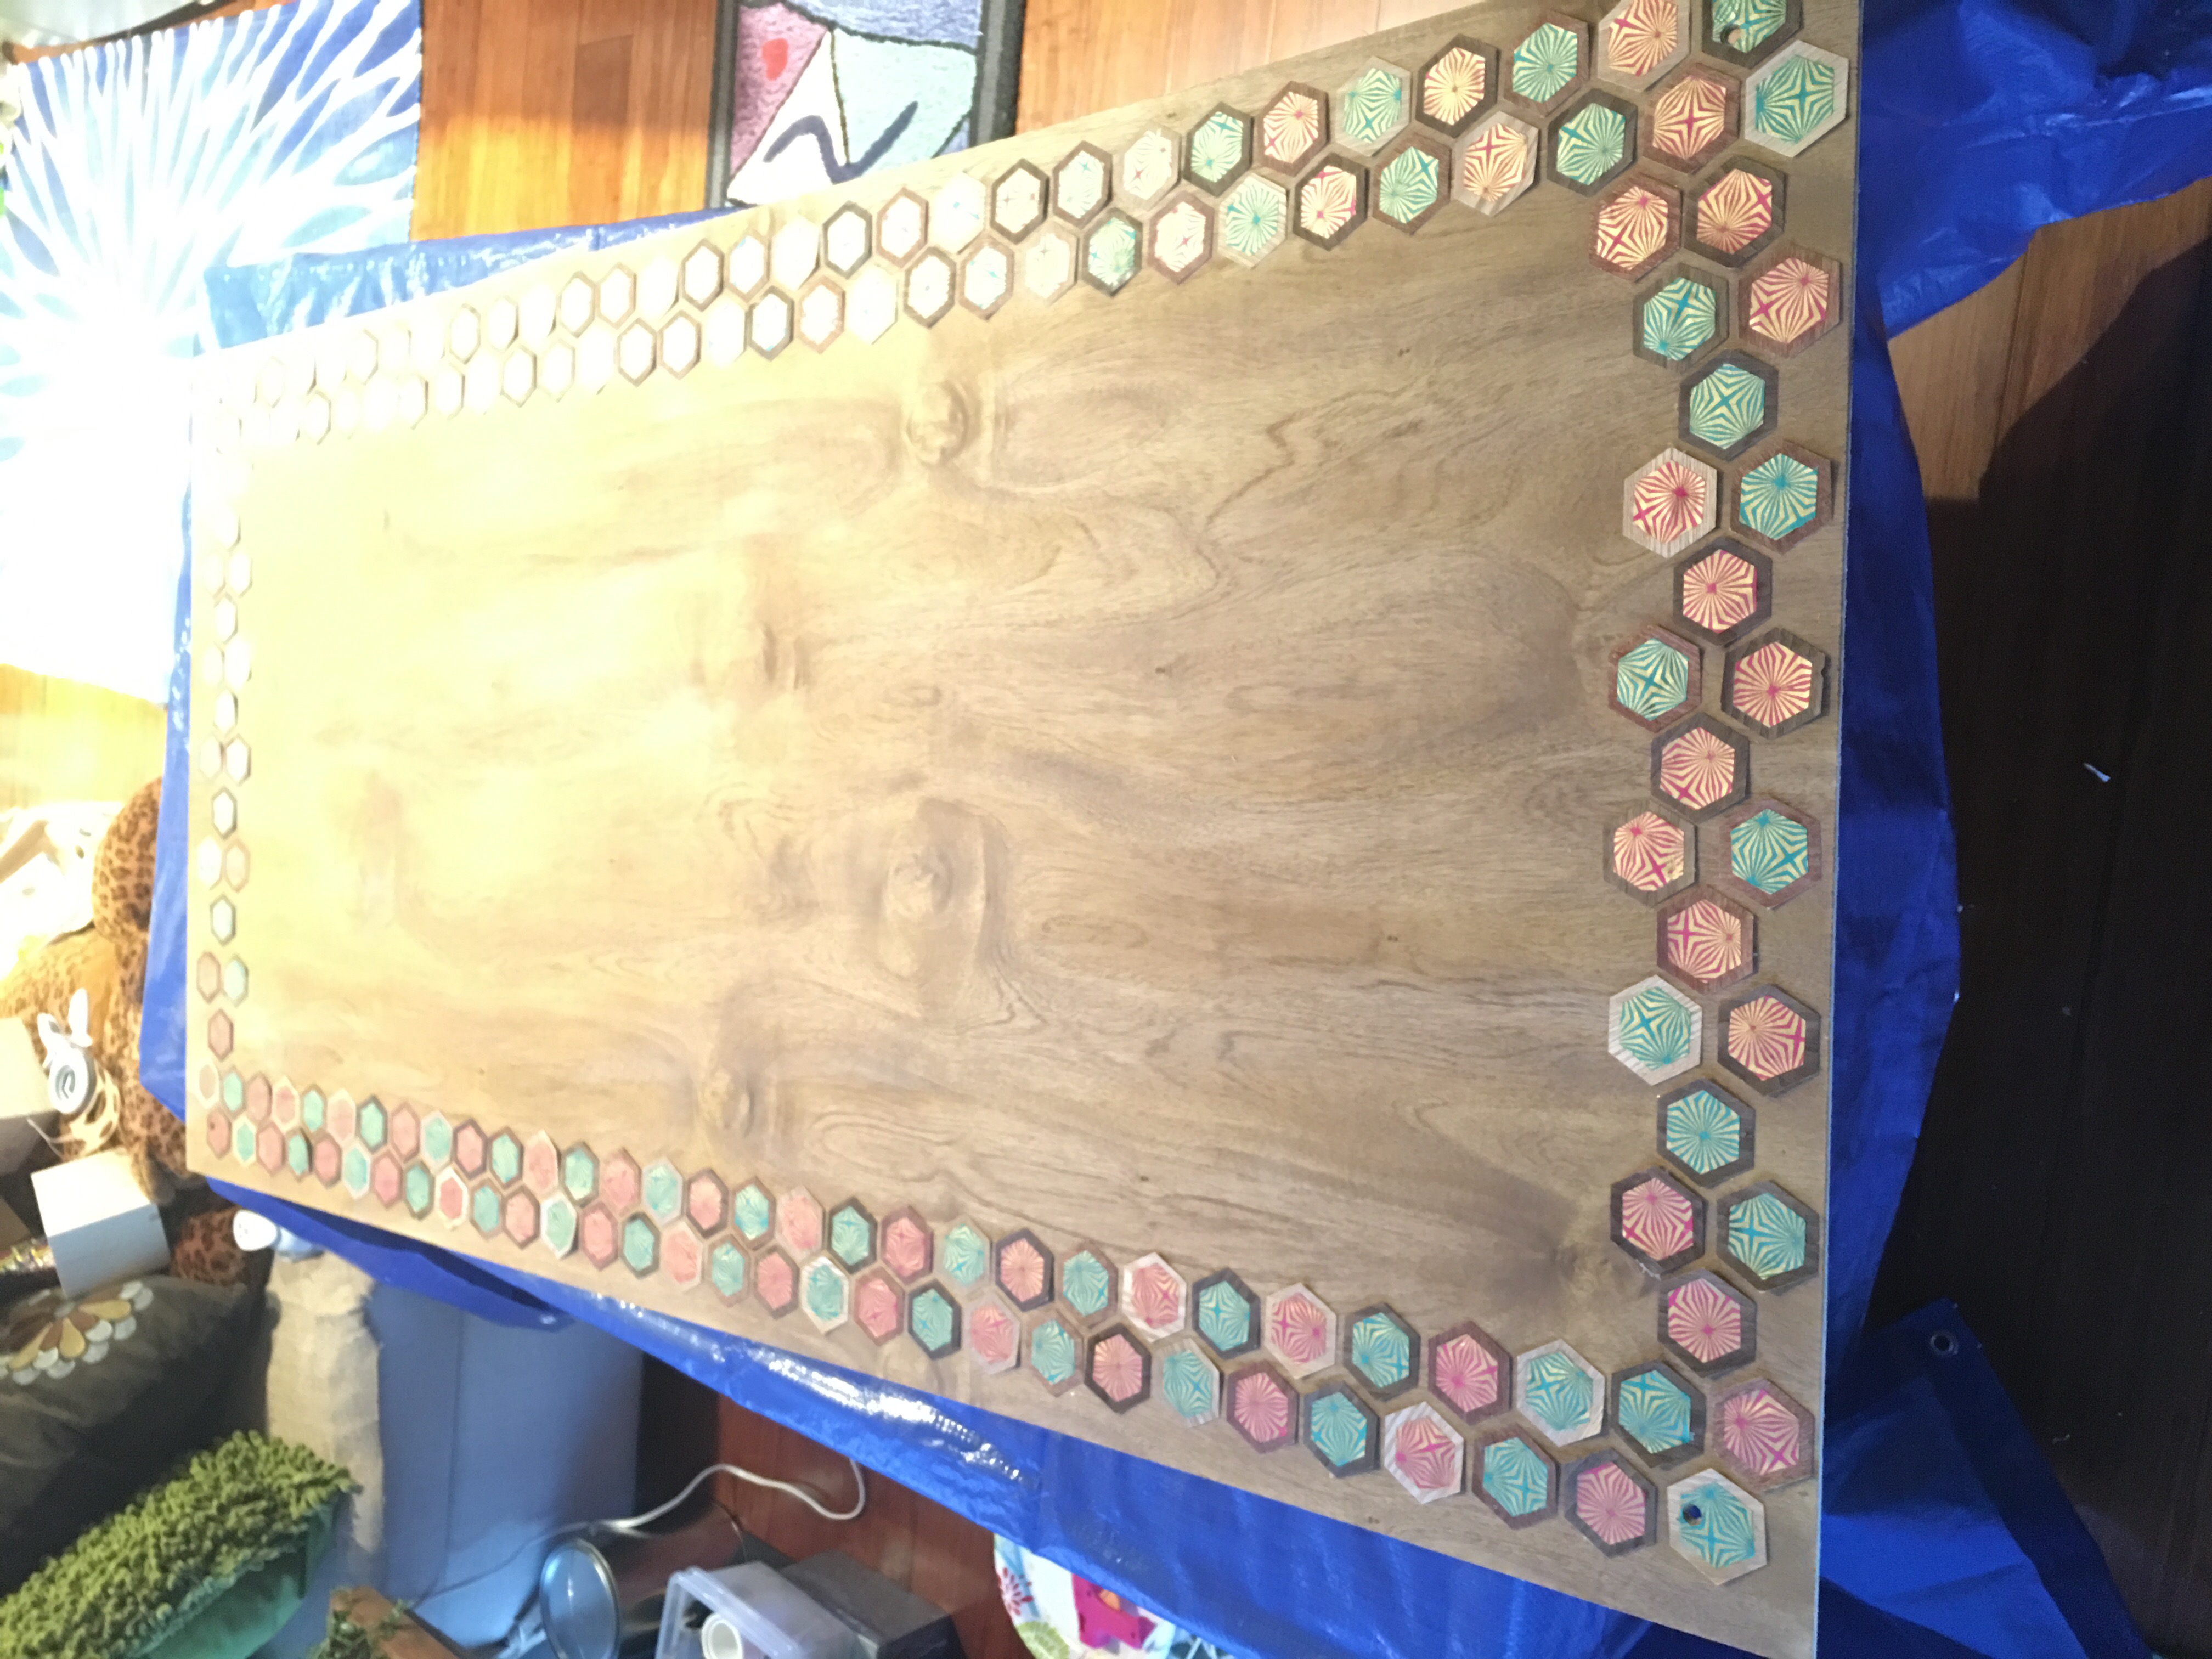
And I’m super happy with the result.
I thought for a split second, “Should I decorate the whole thing?”
I look at the massive area of unadorned wood in the middle.
“Nah!” I instead shift my focus on decorating the wood tag.
Using Pebble stickers I picked up from the Container Store…
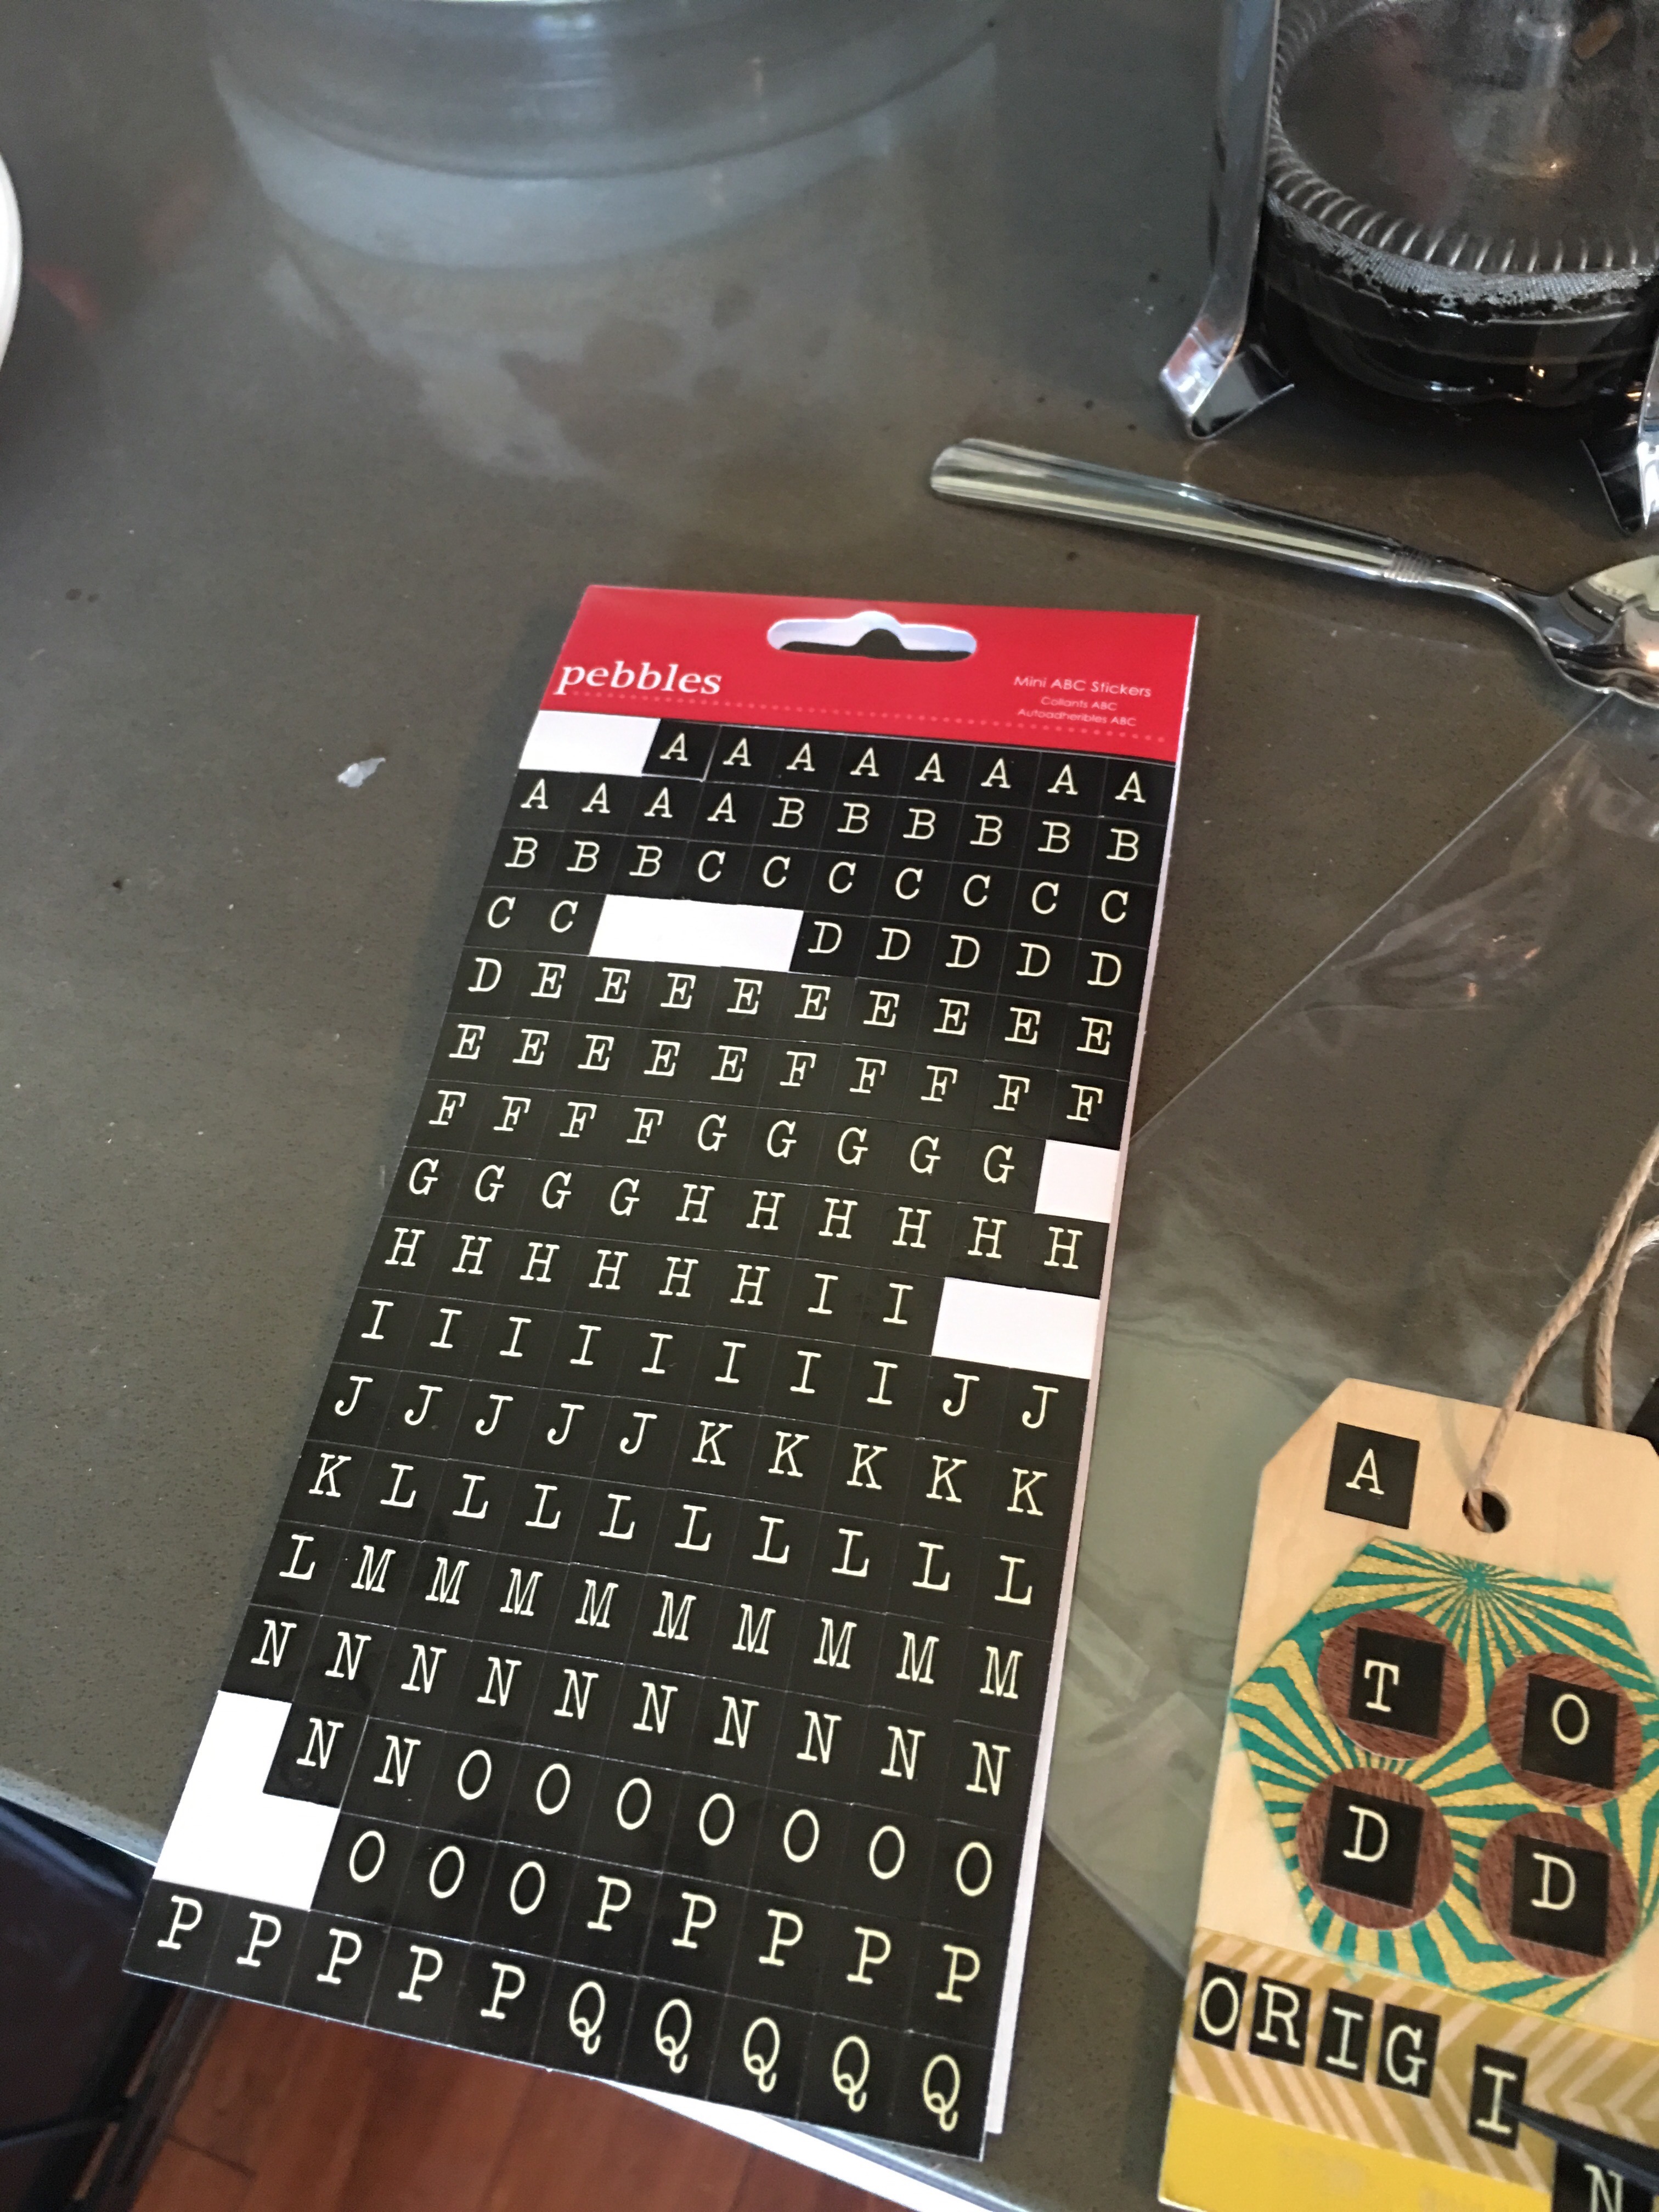
…I decorate four 1/2″ wood veneer punch outs with the letters T-O-D-D.
I then add more letters to the tag to add the label “A TODD Original.”
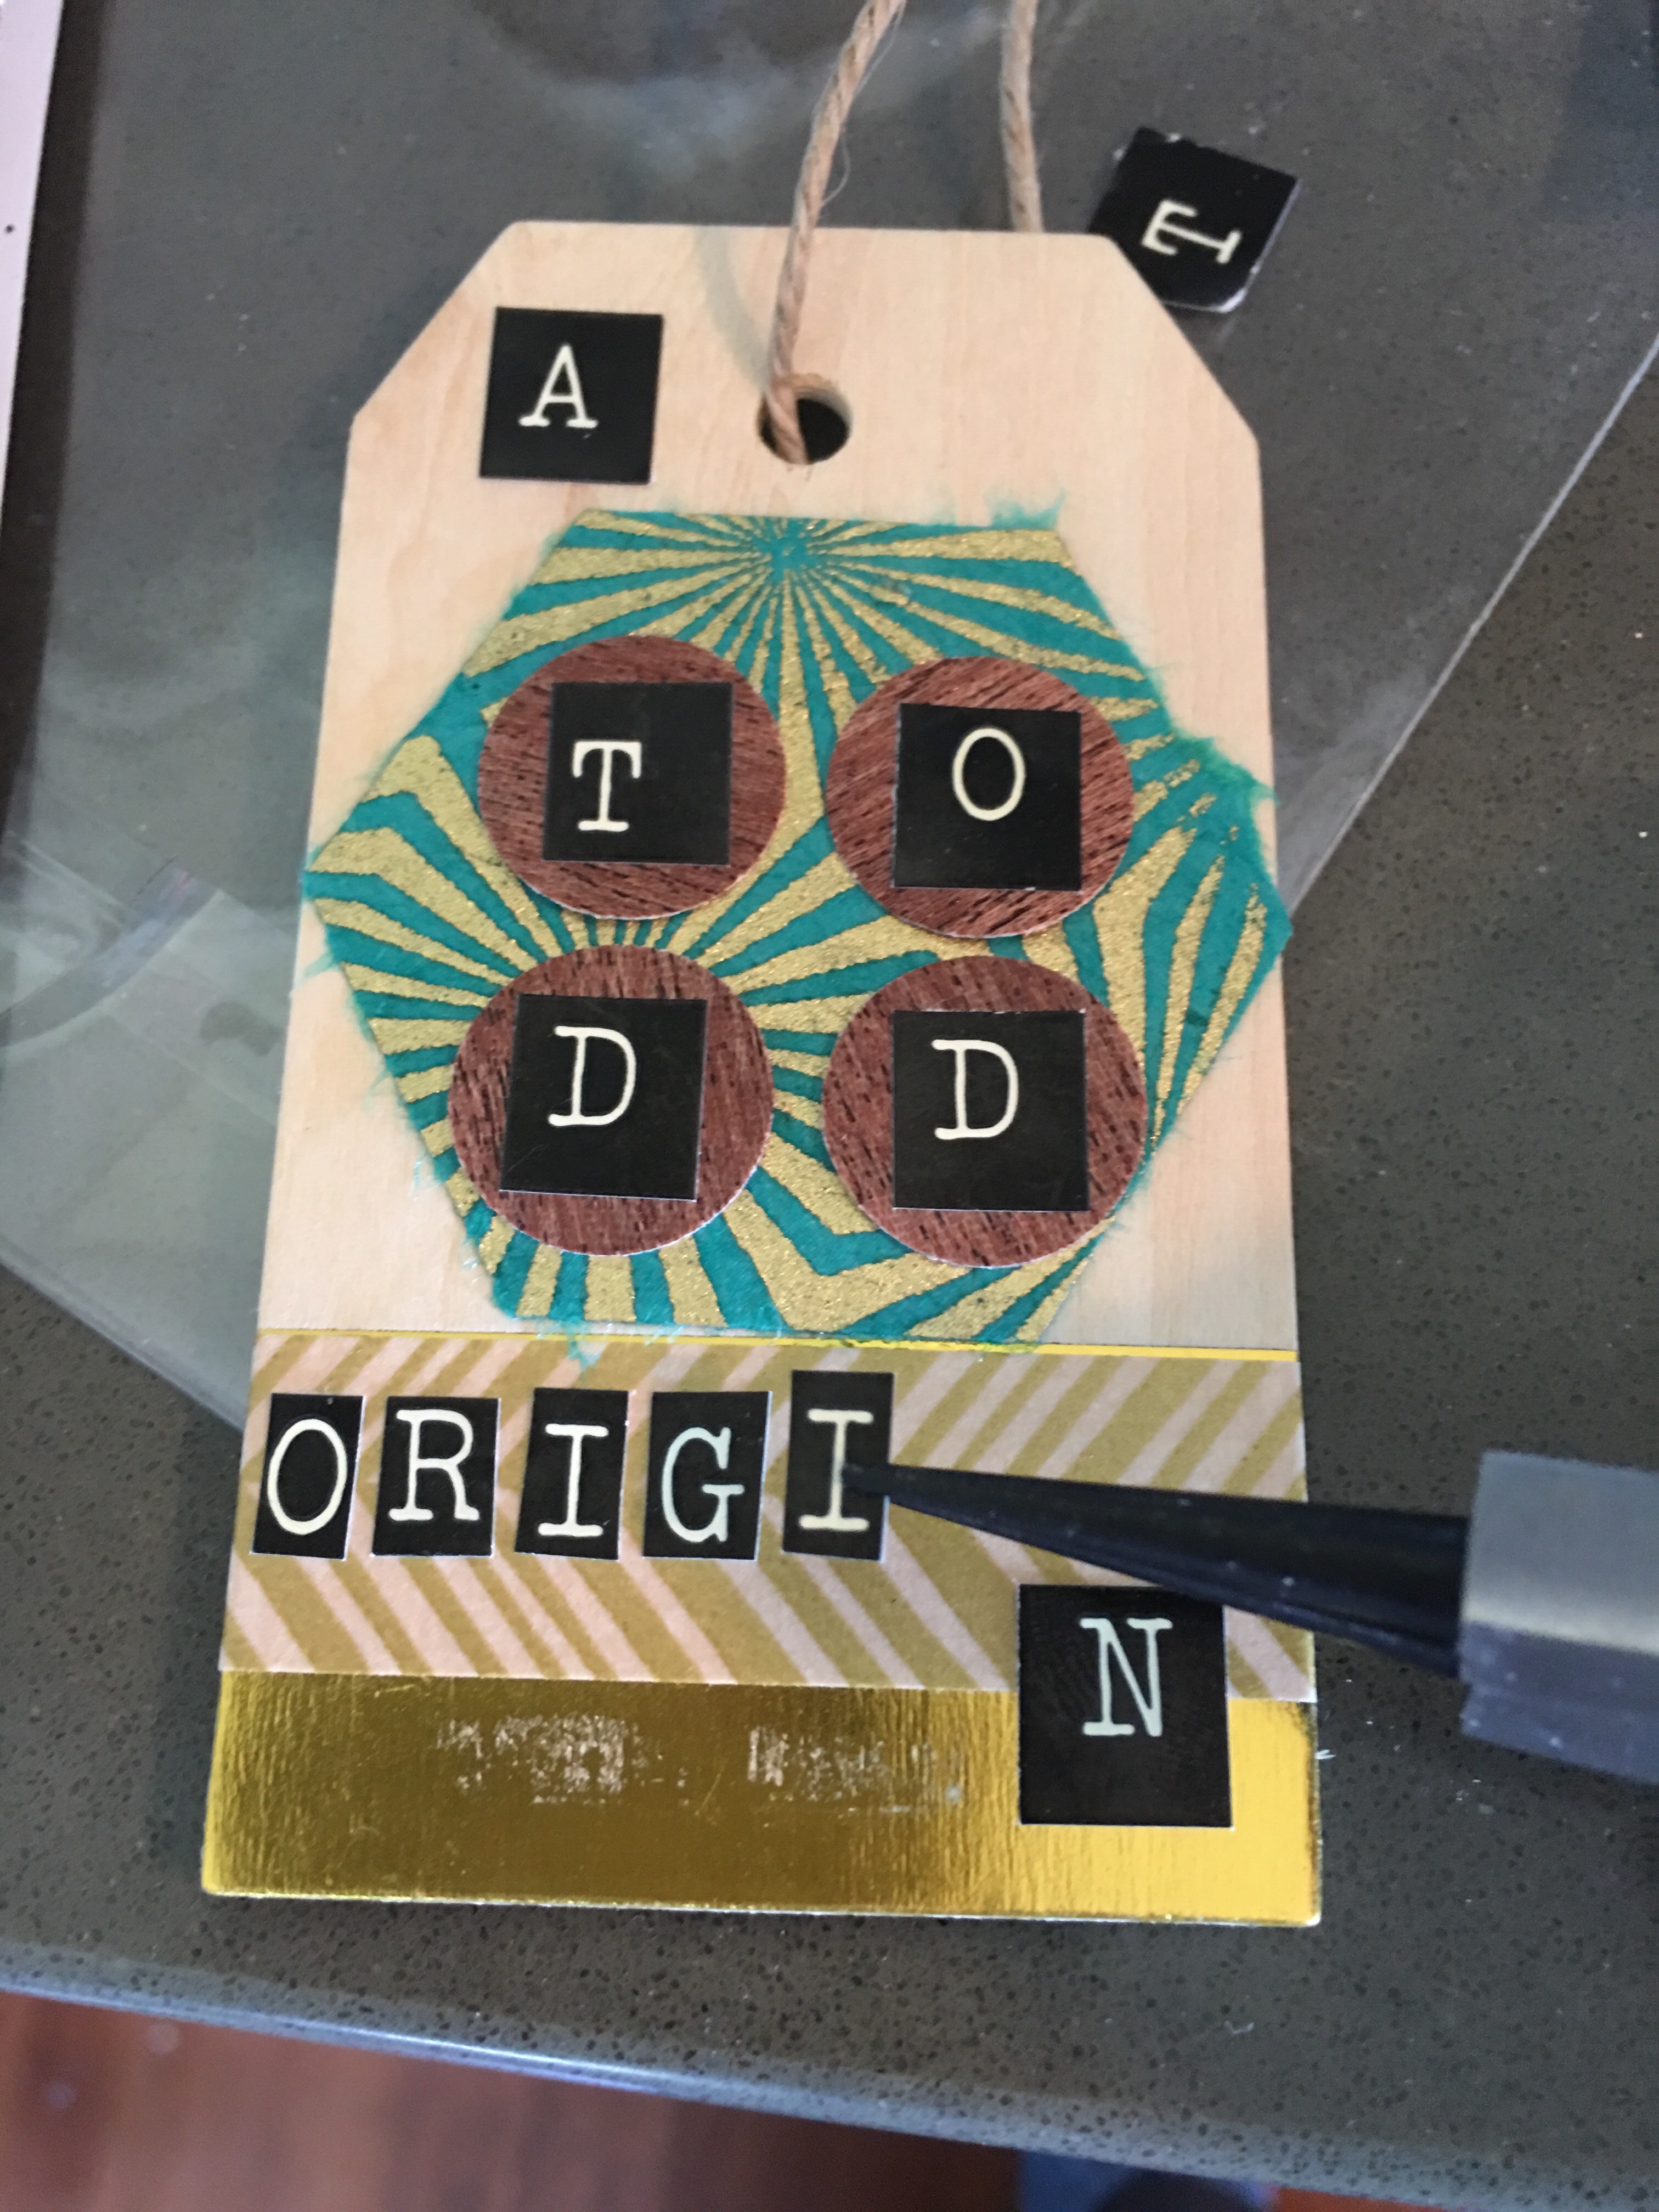
I really love the way the tag looks (and it perfectly complements the decorated wood backing for the floating frame).”
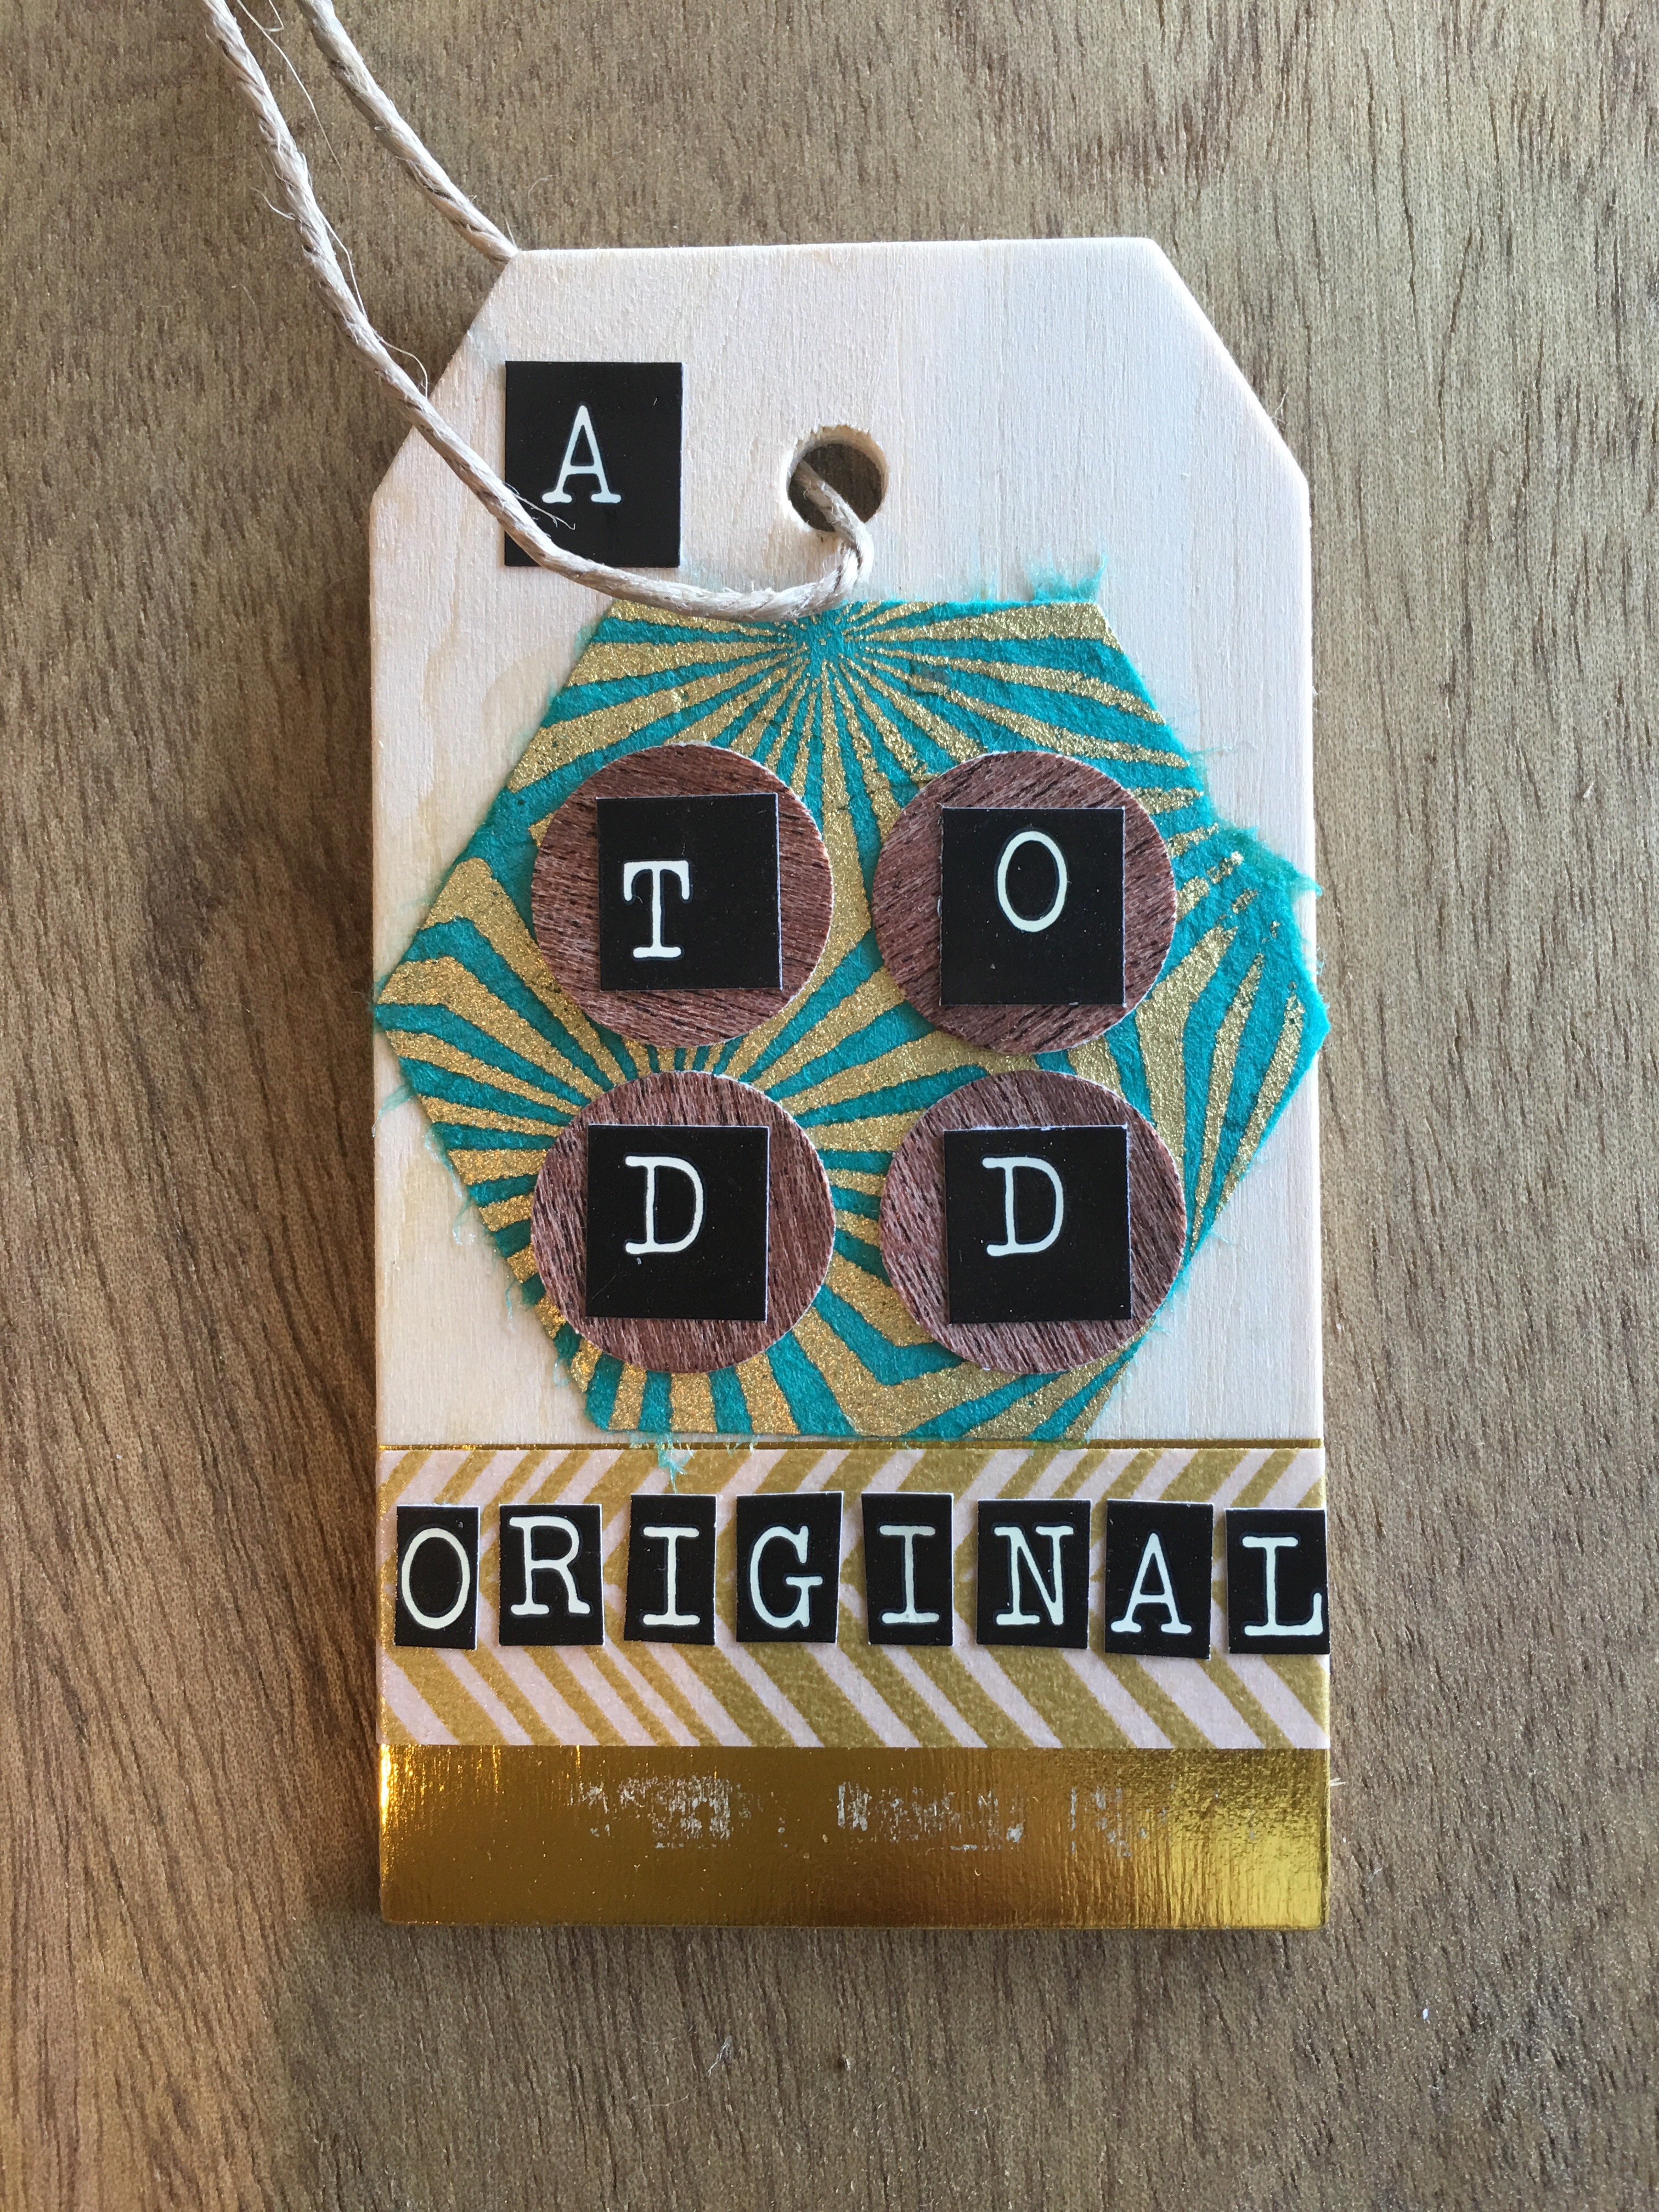
After applying Mod Pod to the decorate tag to seal in the paper, wood veneer and stickers…
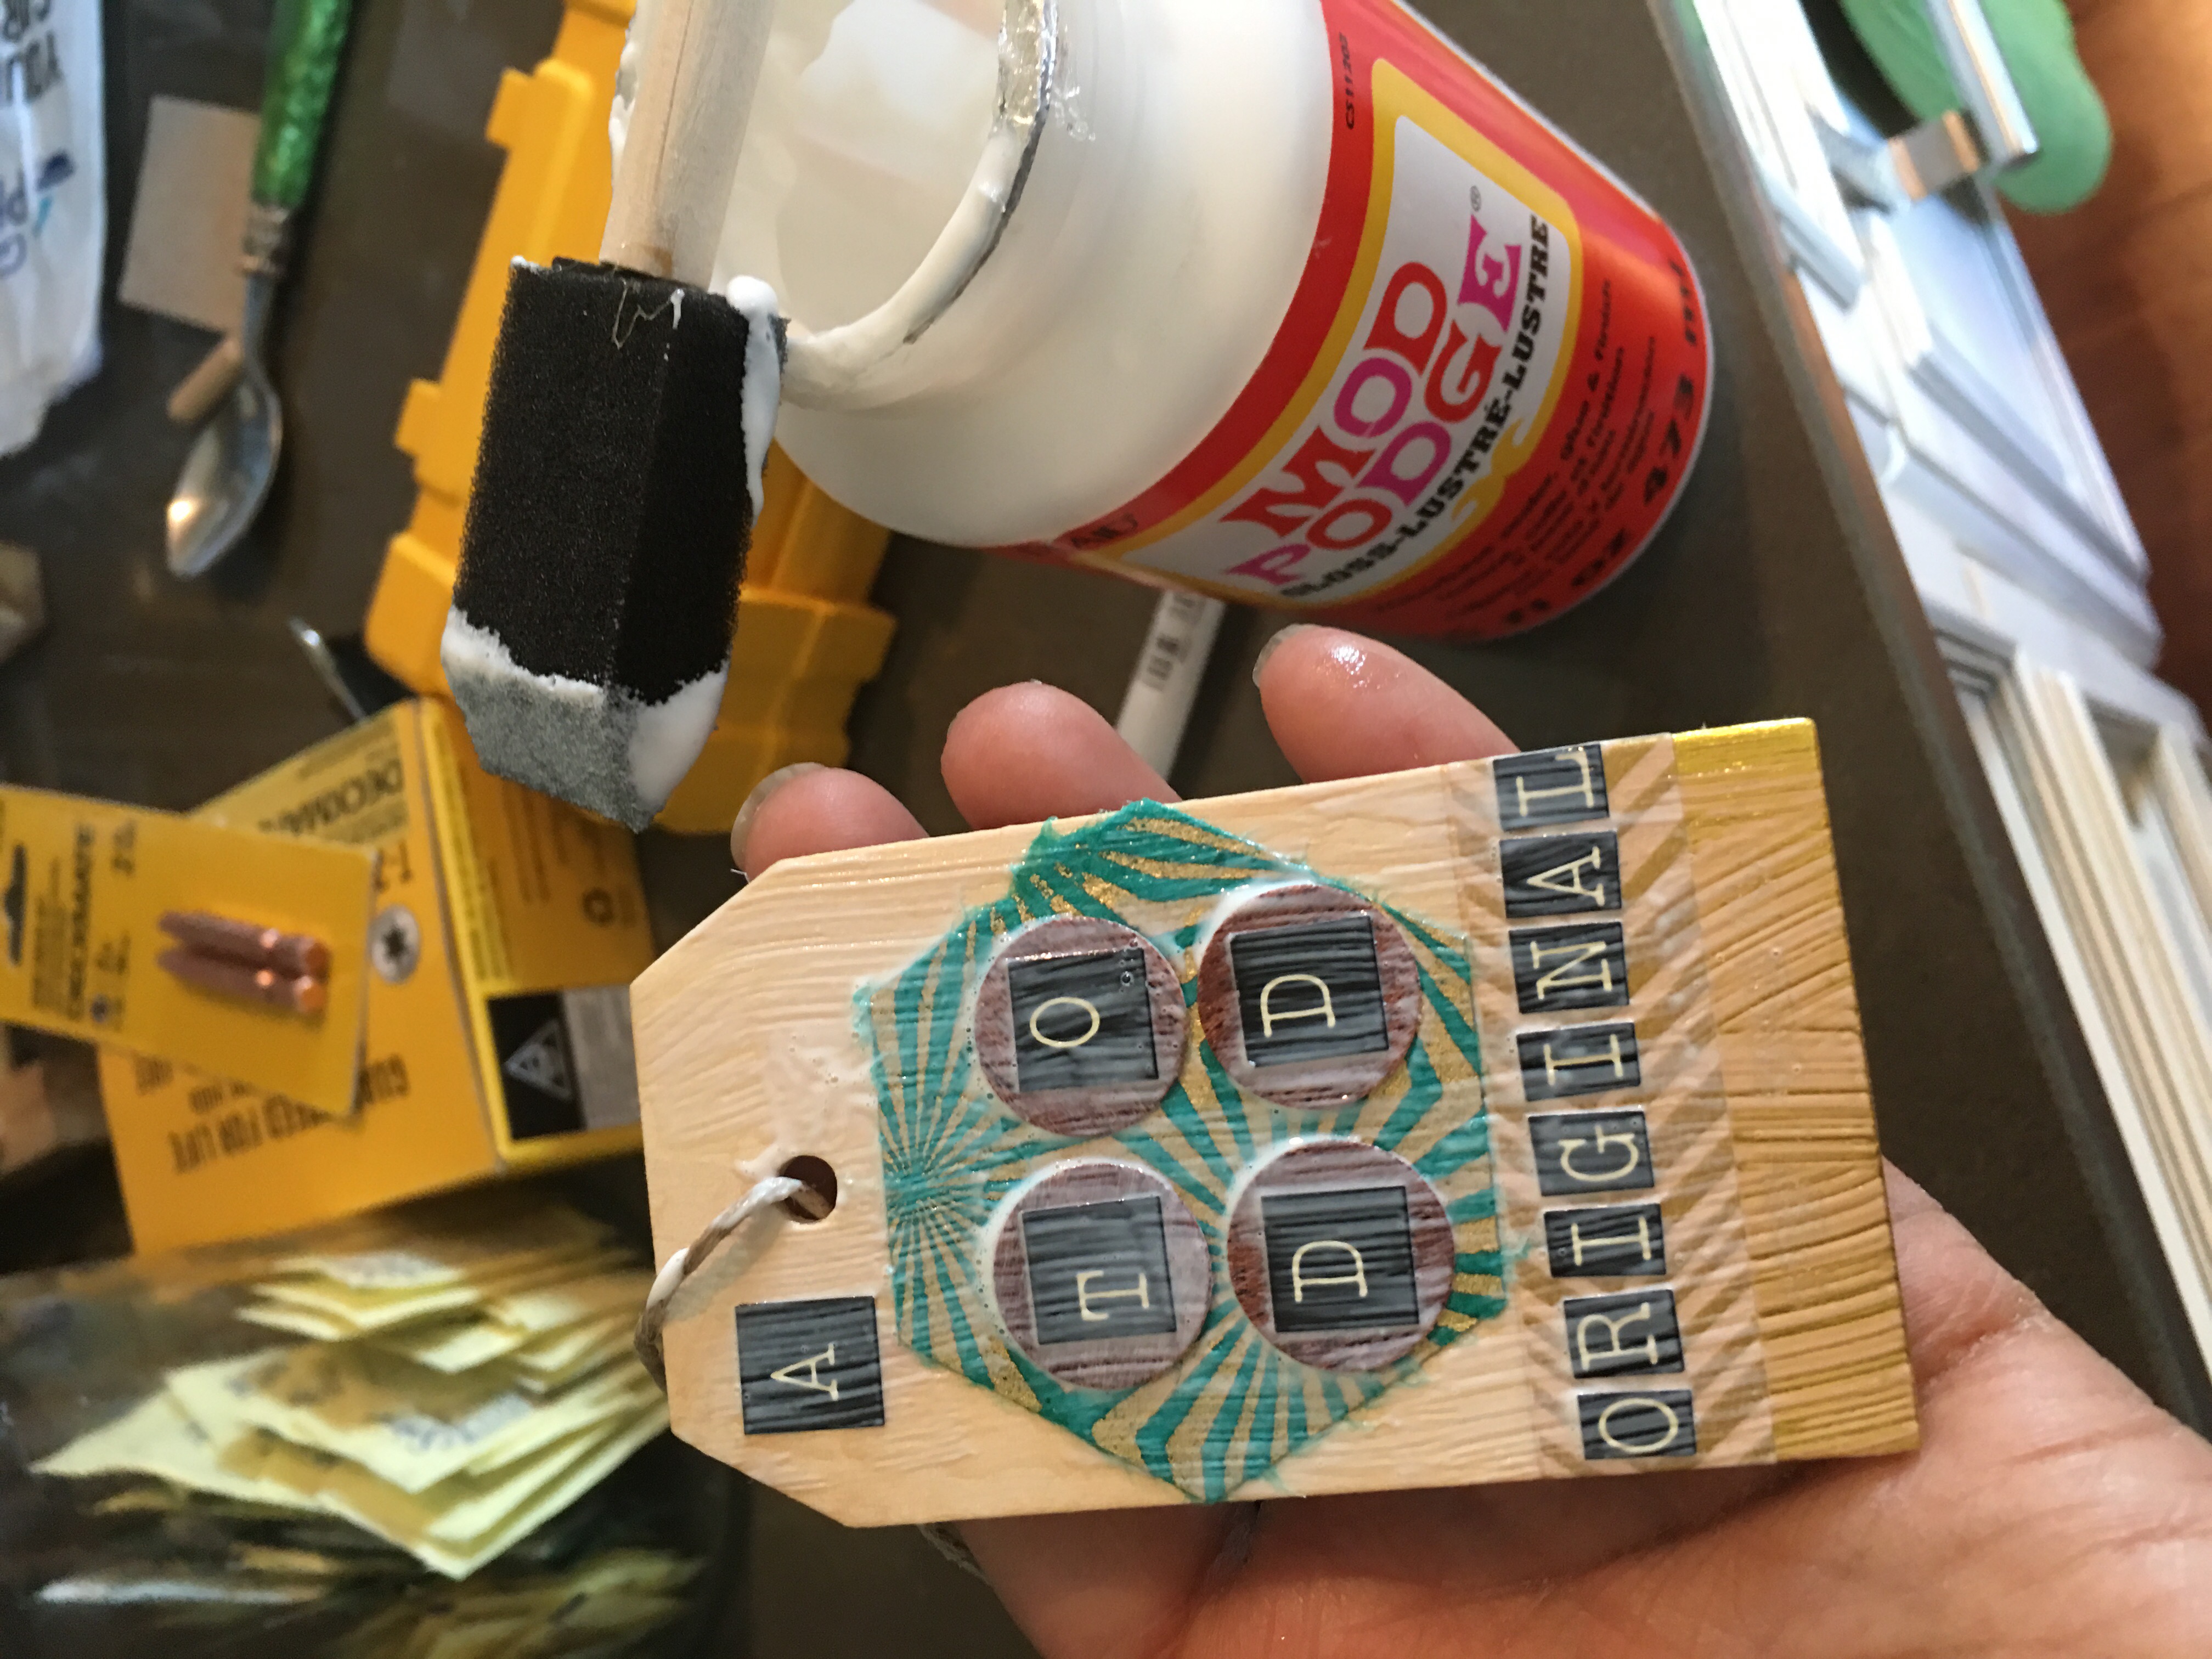
…I add the tag to the floating frame (by placing the tag’s loop around the bolt on the upper right corner of the piece.

Here’s a close-up of the brass bolt above a magenta decorated hexagon. Sexy!

And my massive mount for Todd’s photograph is finally complete!

Here it is on Sunday night on the den floating shelf.
It’s now perfect.
The perfect focal point in the den. It complements the floating shelf beautifully.

Floating shelf staged and decorated again. My work here is done.
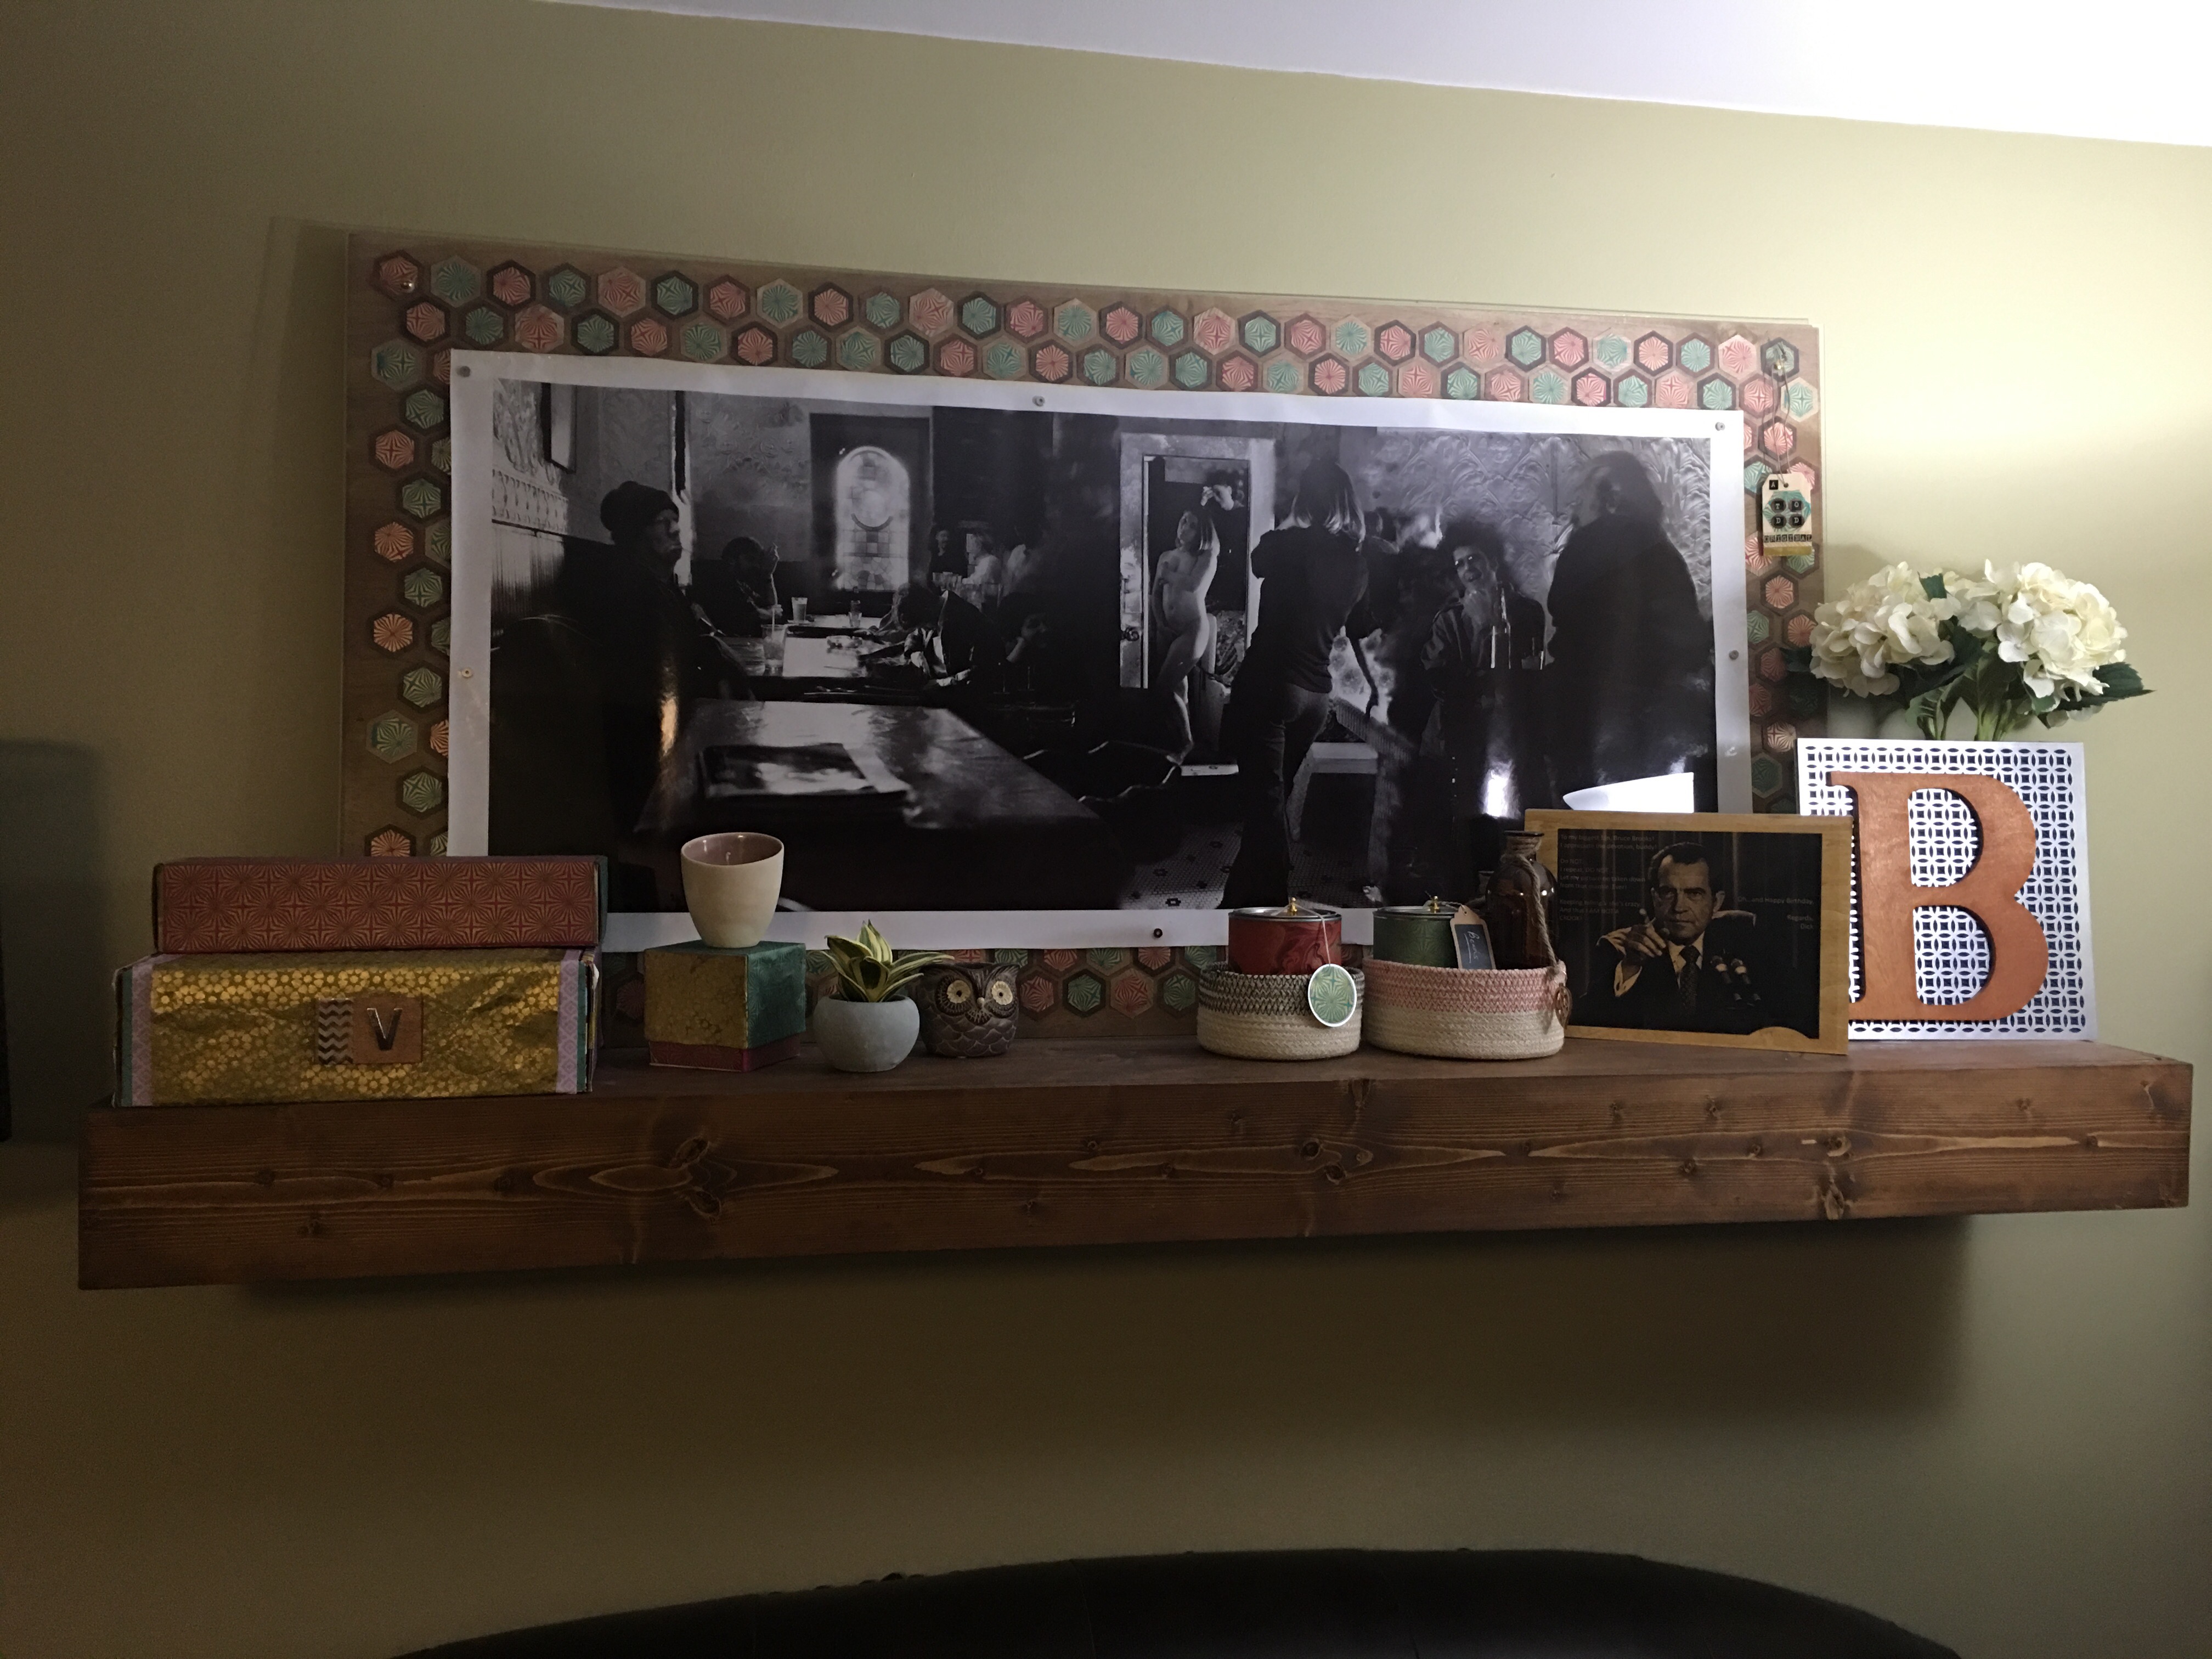
I’m extremely happy about the way this came out. It still takes my breath away whenever I glance towards the den. The picture is truly larger than life (and is beautiful on its own).
What makes me even more happy is to finally put up an image that spoke to Bruce and he truly loved as well. I’m glad that I found a way to display artwork that he enjoys (and find especially meaningful due to the artist being a close friend).
So, thank you Todd, for the very lovely piece of art that is now in our den. Nothing could have made this space more perfect. V-
You may also like:
- Wood Floating Display Frames in the kitchen
- Decorated Wood floating frame squares
- Tribal floating wood frame (Part 2)
- Cabin crafting series #4: Tribal decorated wood floating frame (Part…
- Mod Podge Puzzle Wood Panel Floating Frame
- Paper ogee decorated wood floating frames
- Building out more floating shelves
- Building a floating shelf for the den