
Need a DIY work surface table stat!
You may also like:
April 17, 2016: So Bruce and I had a conversation about my DIY projects and crafting in the kitchen. It went something like this…
Bruce: We need to get you a table with cork board on it.
Me: Yeah? Why?
Bruce: Because I don’t want you doing crafts in the kitchen counter anymore.
Me: Really? But…
Bruce: I mean it. No more DIY happens in the kitchen. You need to do your crafting elsewhere…on another table. Outside of the kitchen…
Me: Well, there’s this table I have my eye on at IKEA, but I wanted to see if I can DIY it…
Bruce: Let’s get you a table. Now.
Me: Ok. I can do that. But what about re-potting plants?
Bruce: That stays out of the kitchen too.
Me: But it’s practically produce!!! I need a sink!
Bruce: No.
Me: But babe…
So off I went to the IKEA in College Park, Maryland on Saturday to get myself a crafting table. Here’s what I’ve been eyeing.
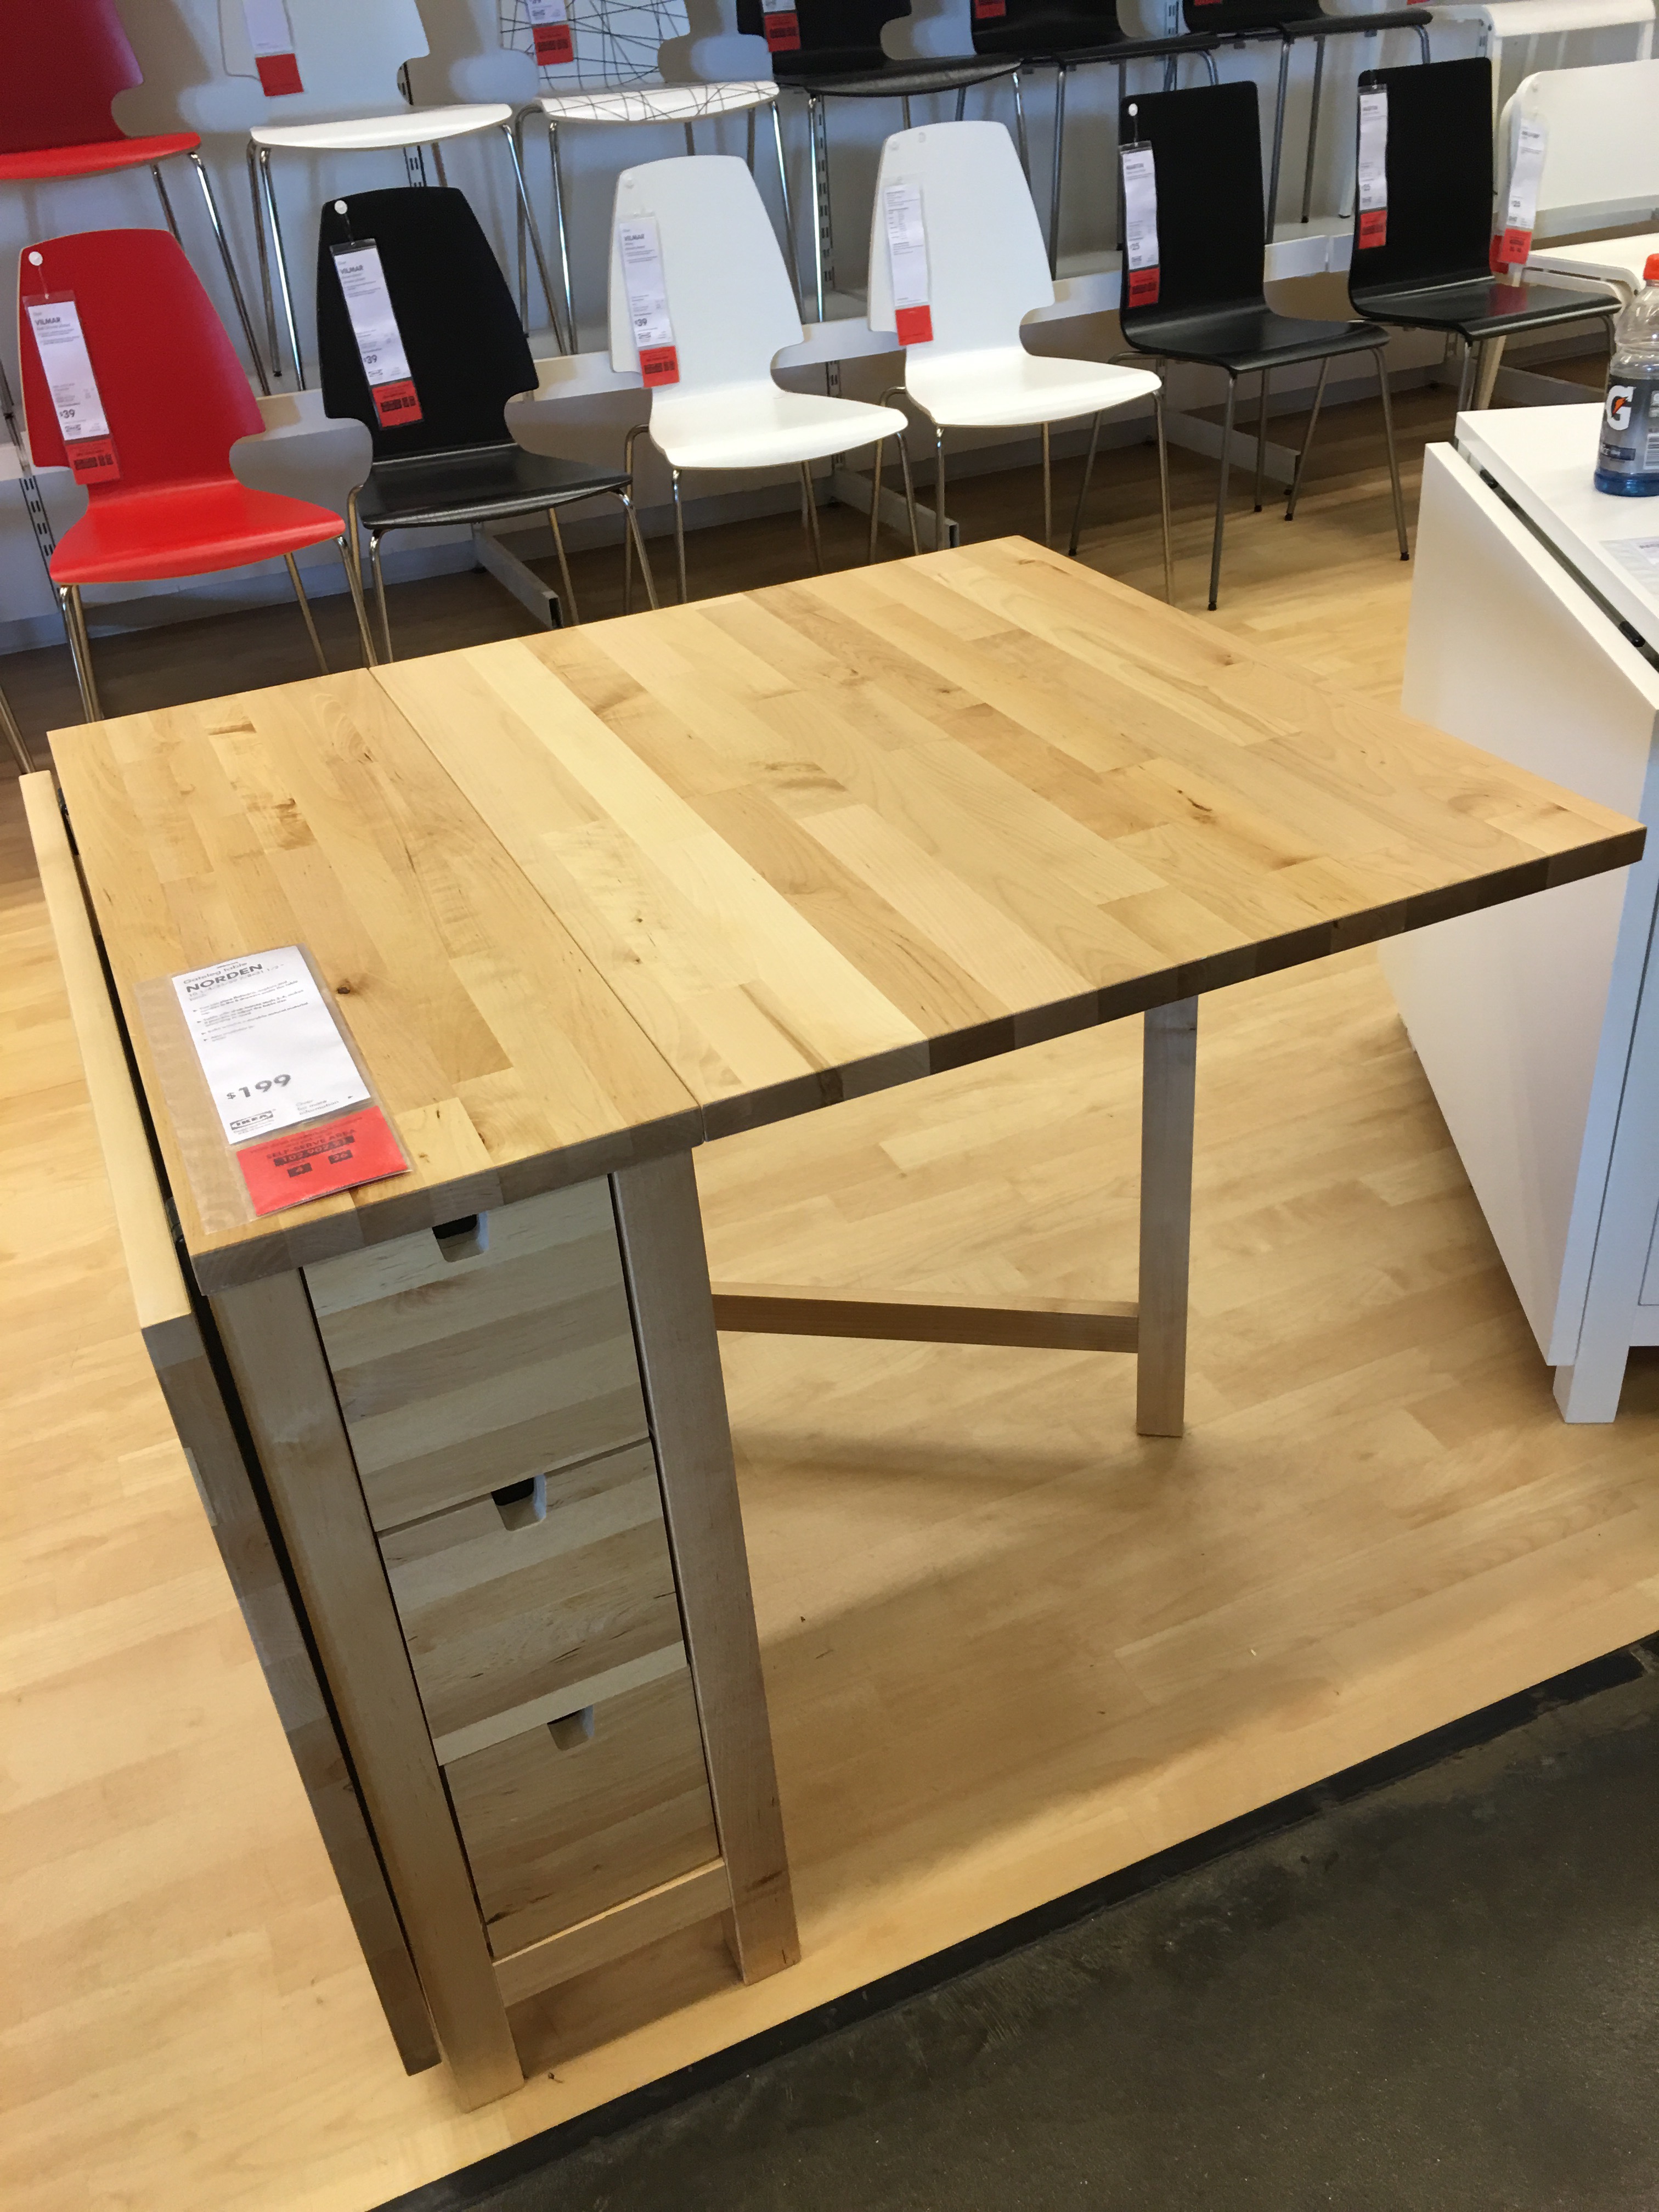
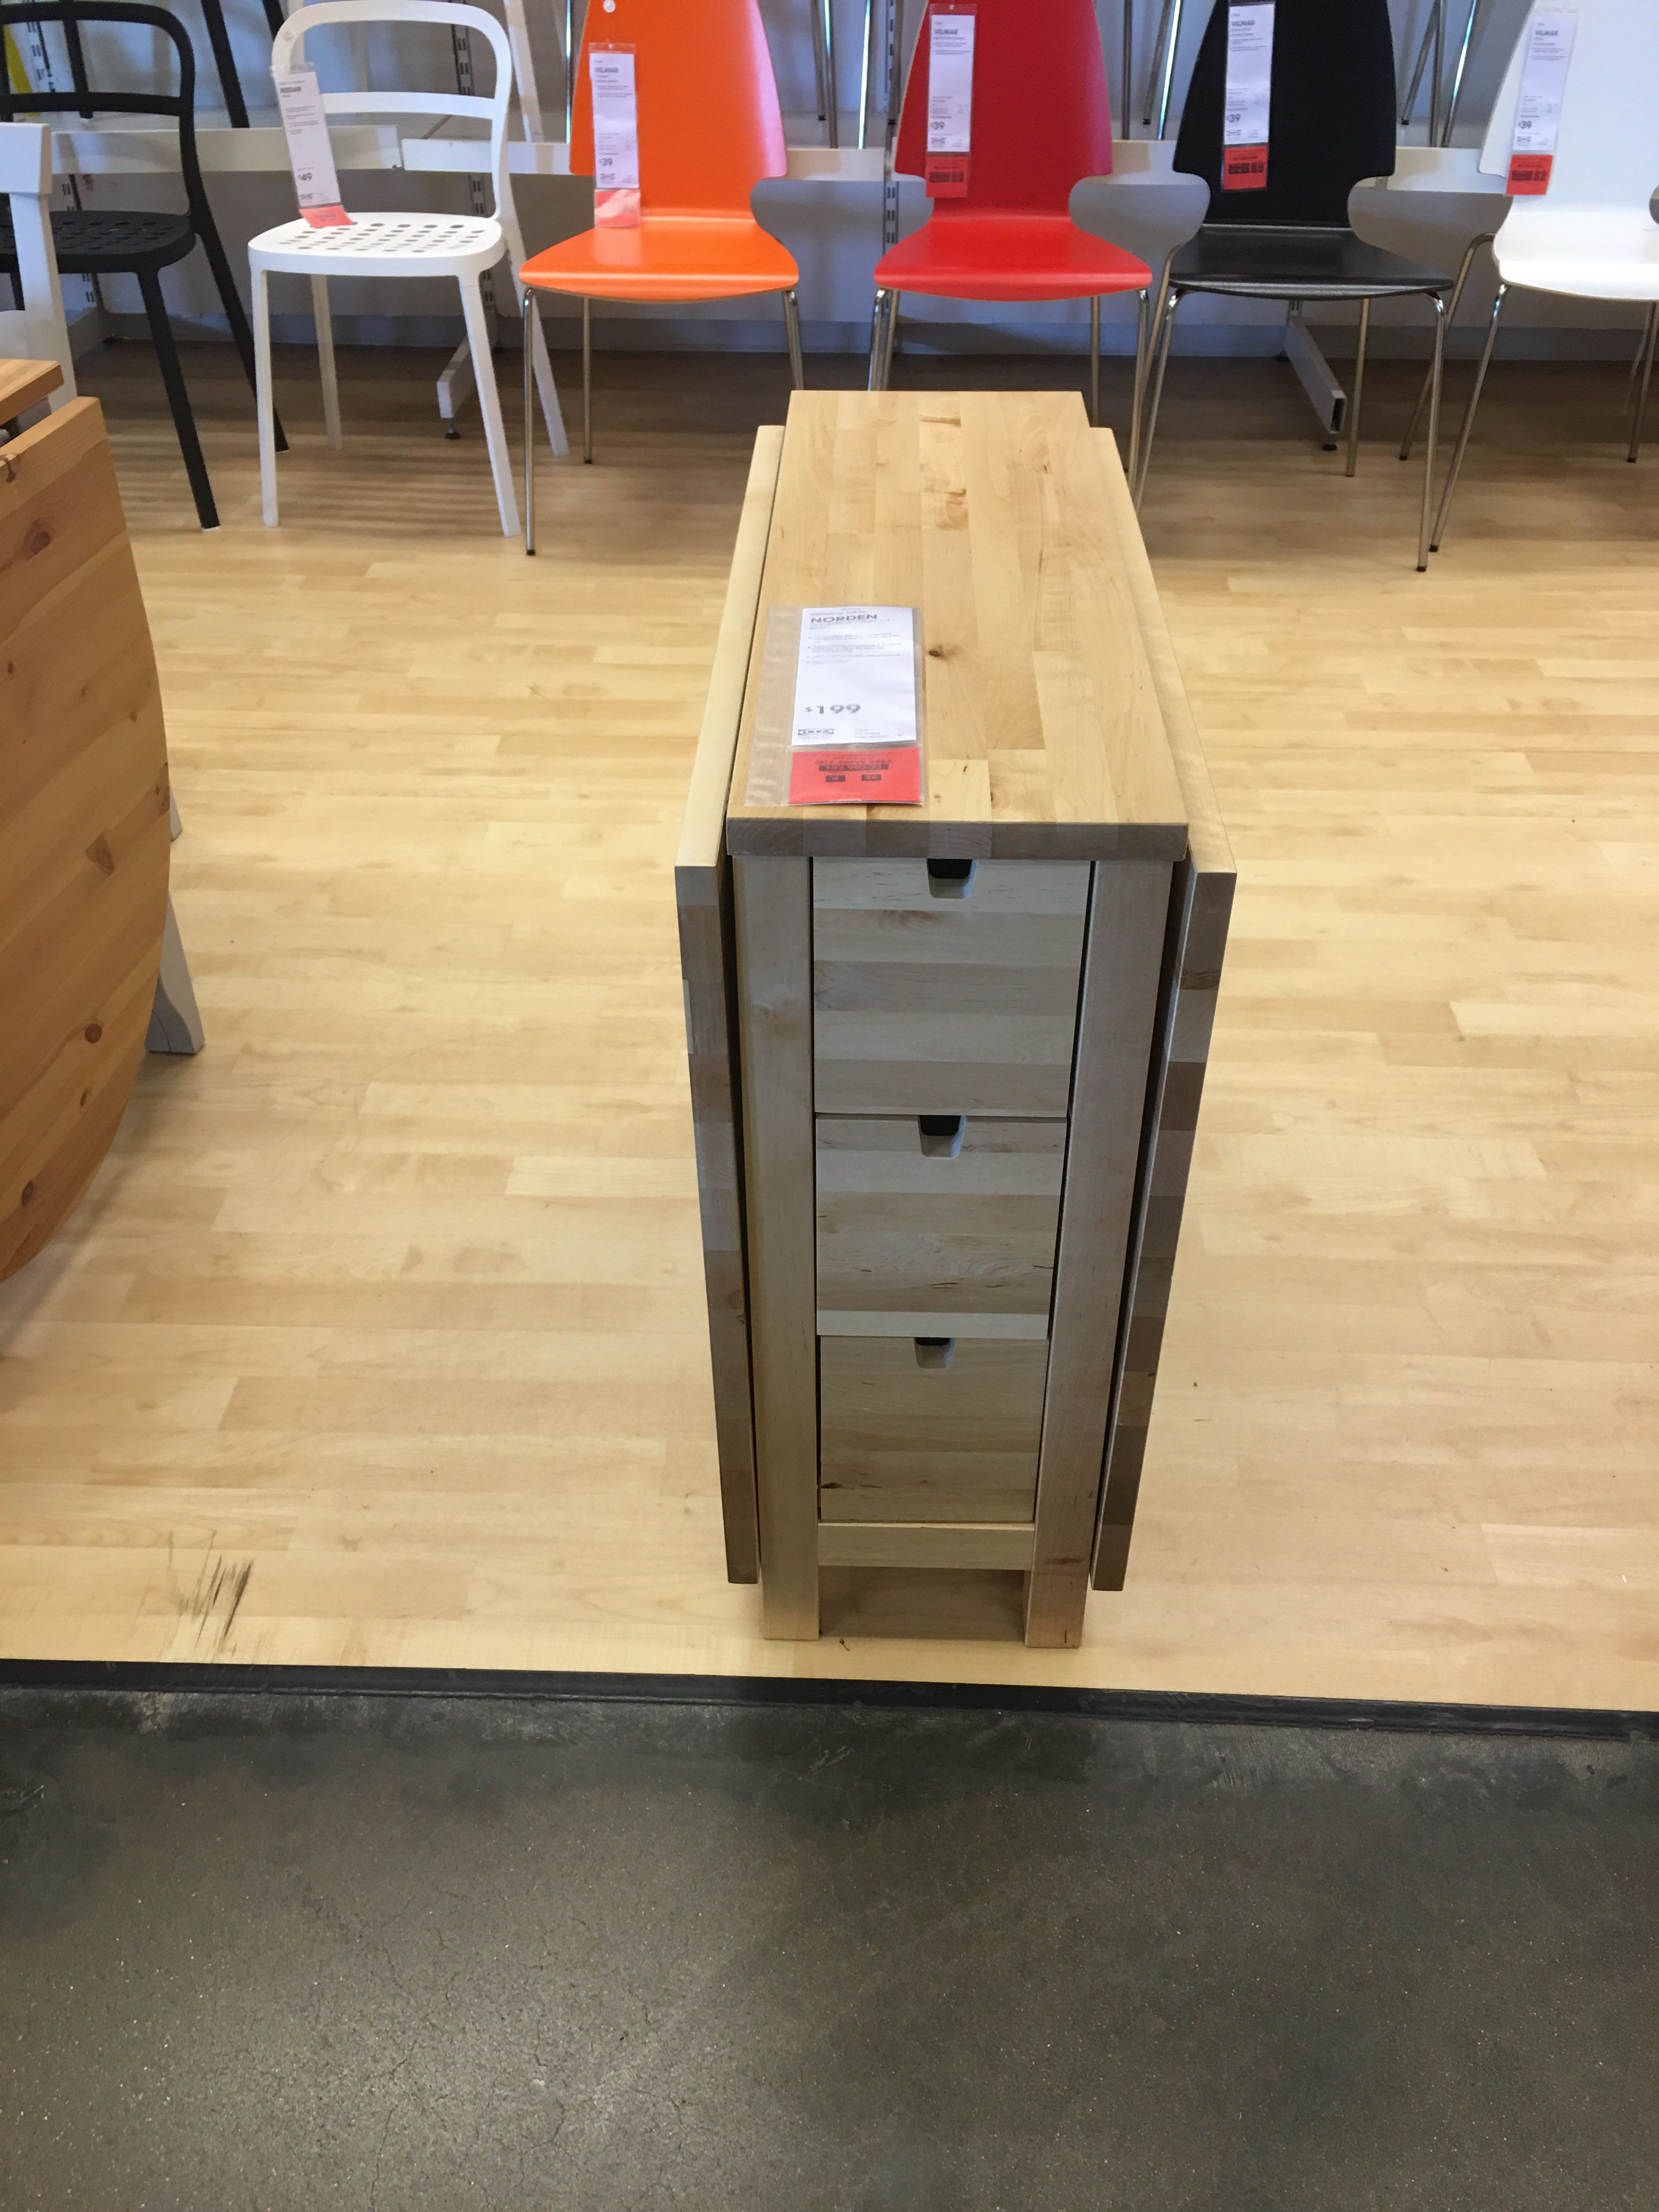
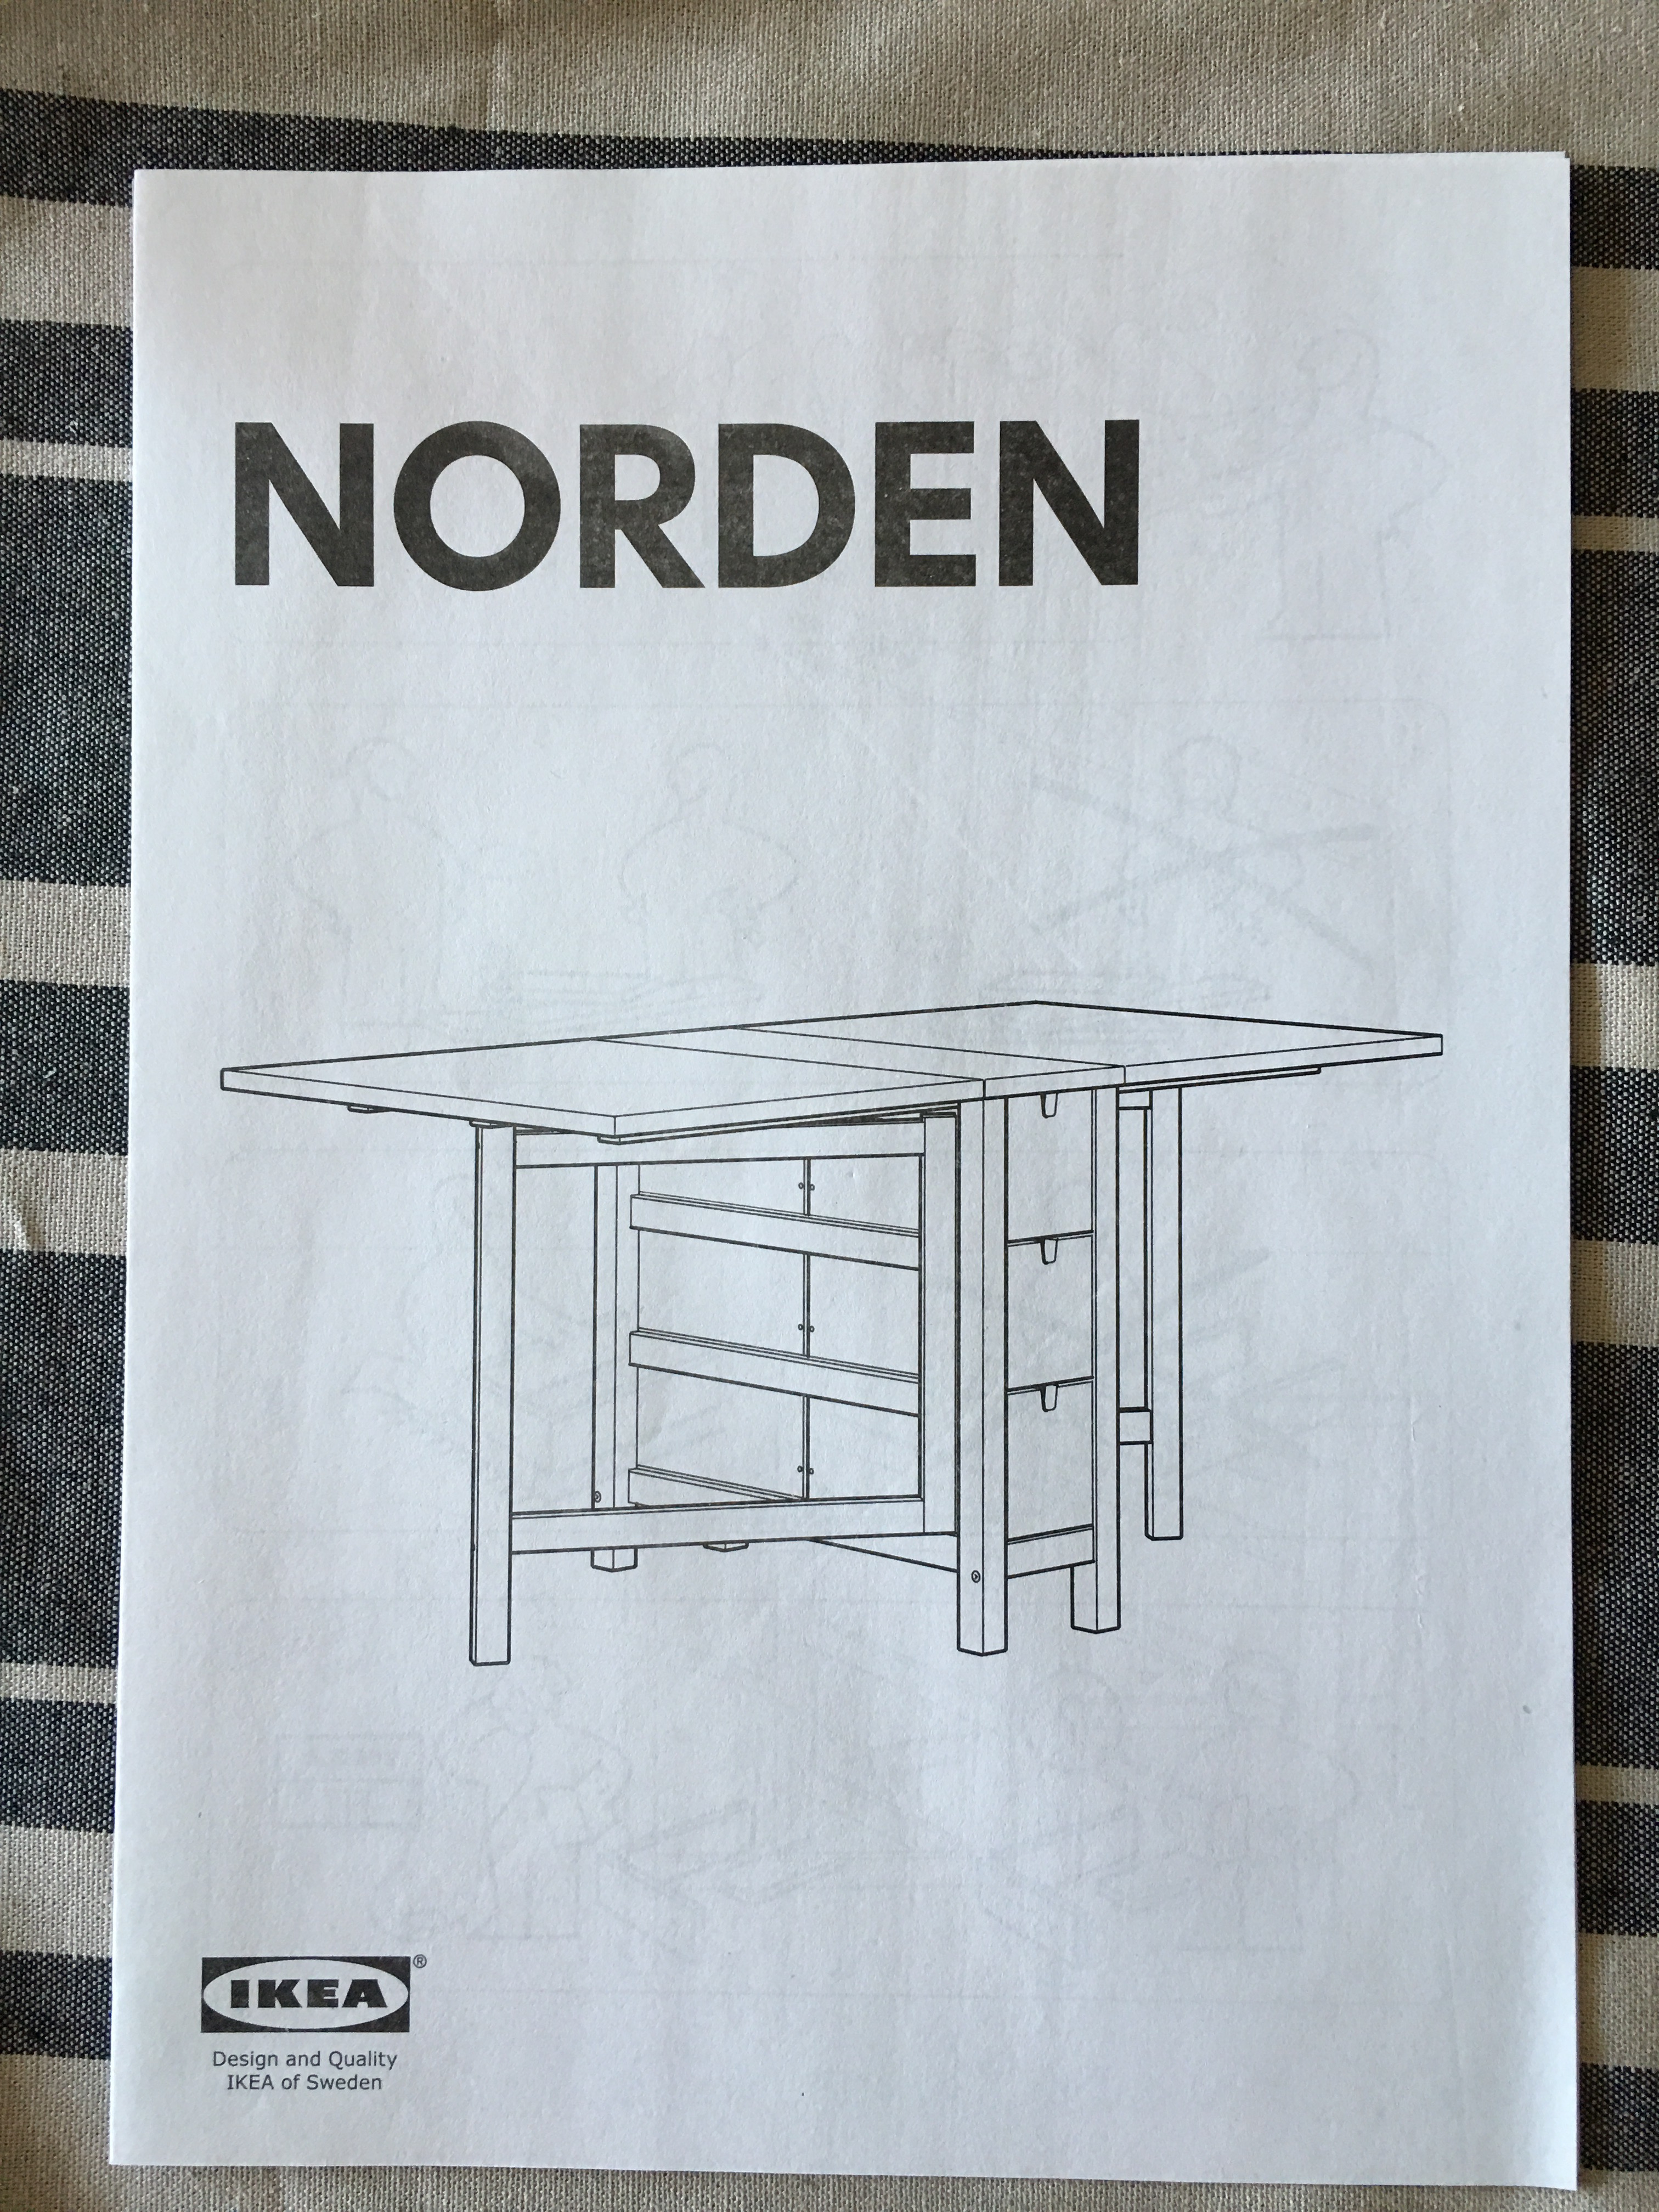
A NORDEN Gateleg convertible table. It’s a super leaf table.
See what I mean? 🙂
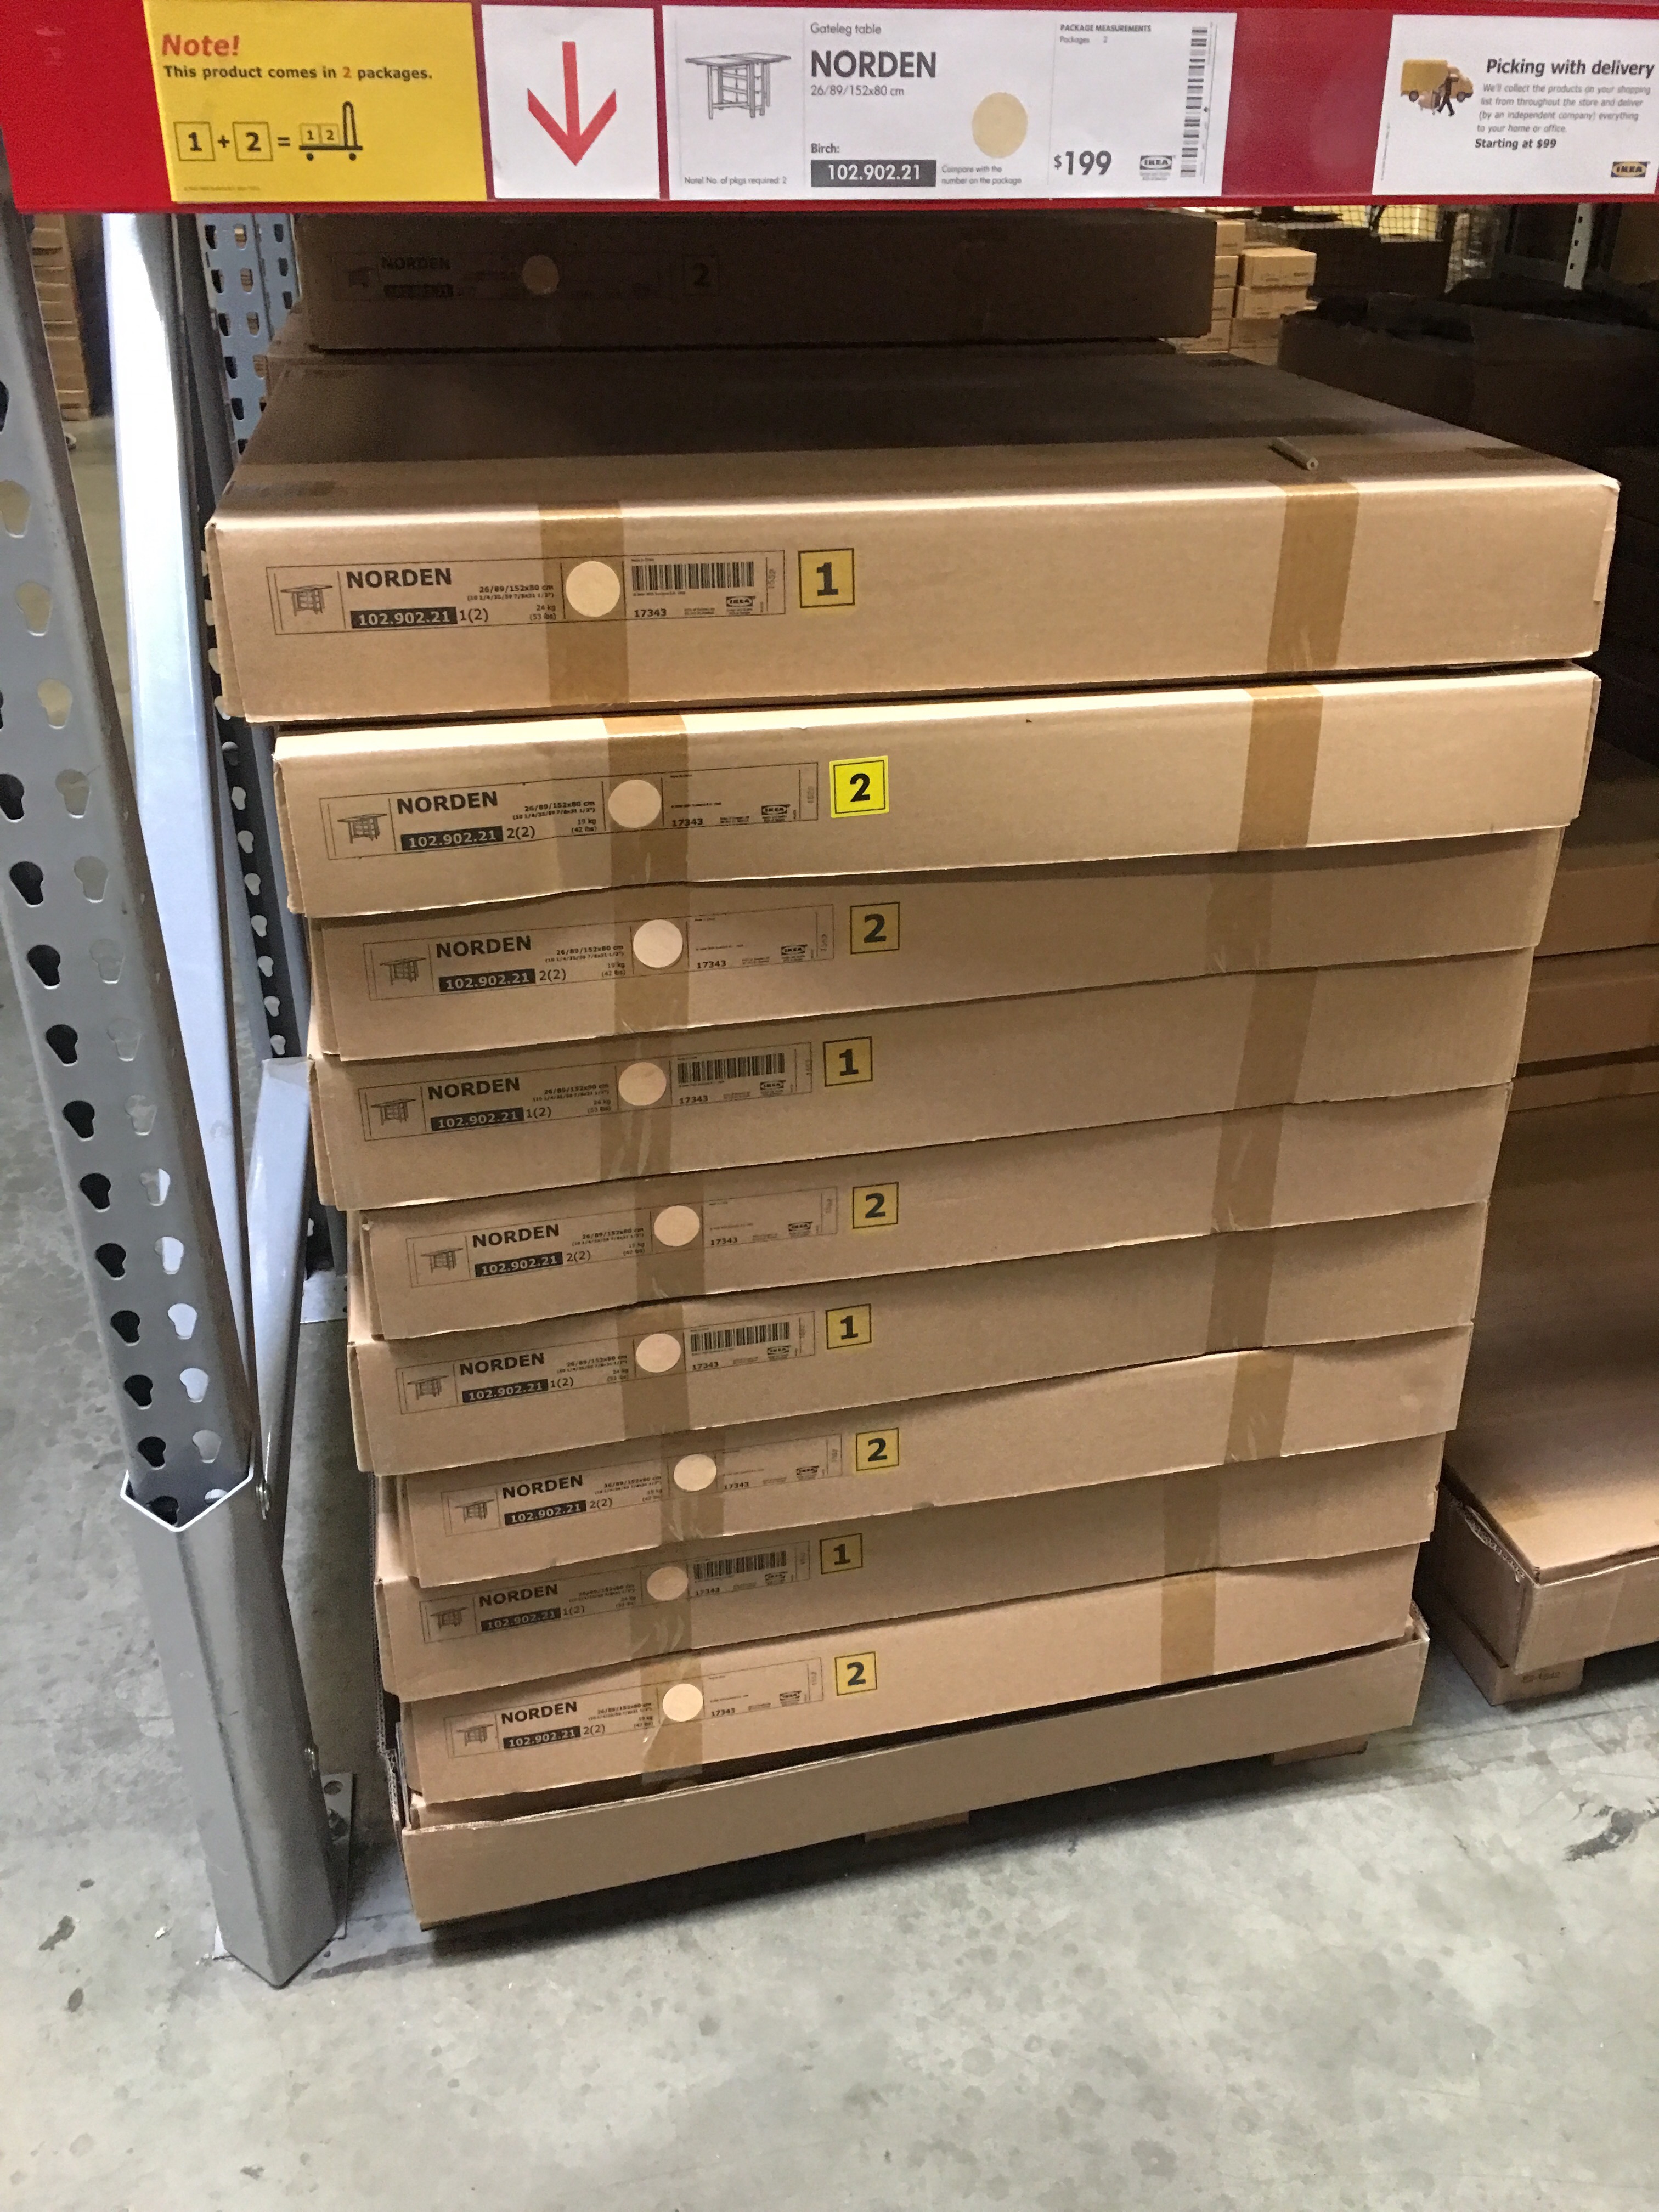
This is a table that comes packaged in two very heavy boxes. And, as you can see from the price tag, it’s quite the investment.
But my condo crafting and DIY projects are very important to me. And Bruce even more so. So it’s worth the money. I added my heavy boxes to the cart and hauled it to checkout without a moment’s hesitation.
On Sunday, I unpacked the boxes and began the assembling process.
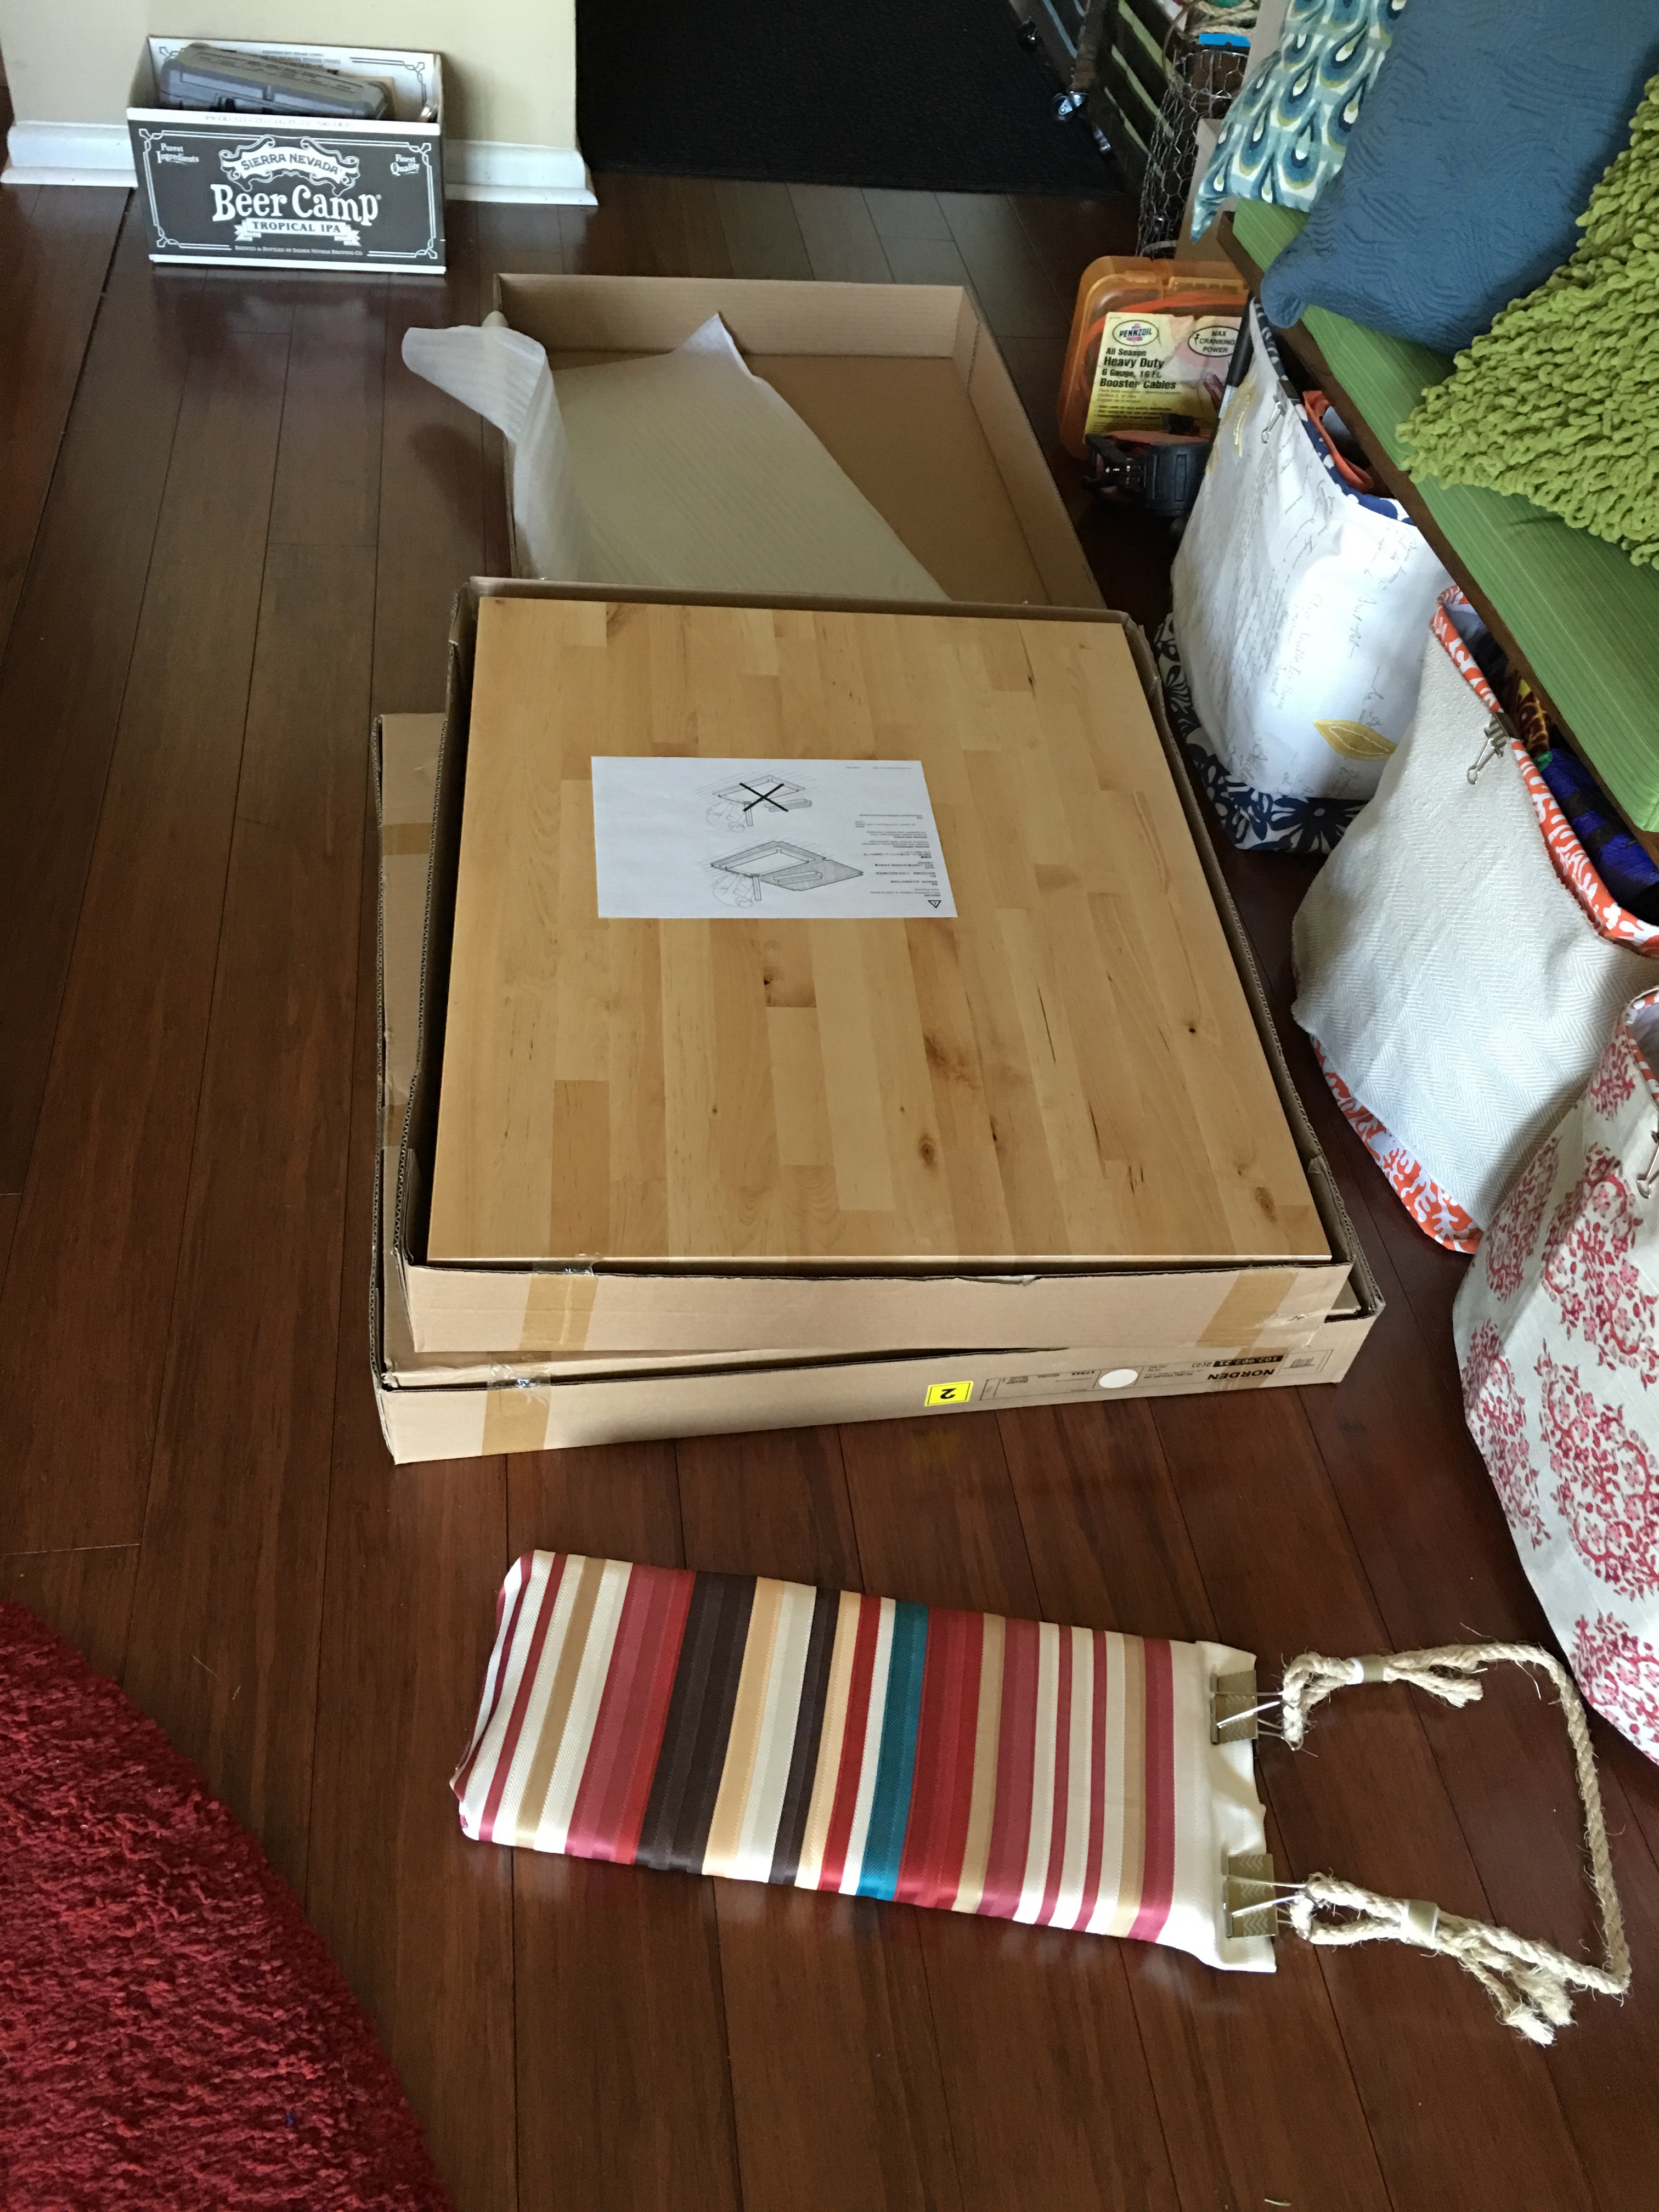
Instruction booklet.
Parts and pieces.
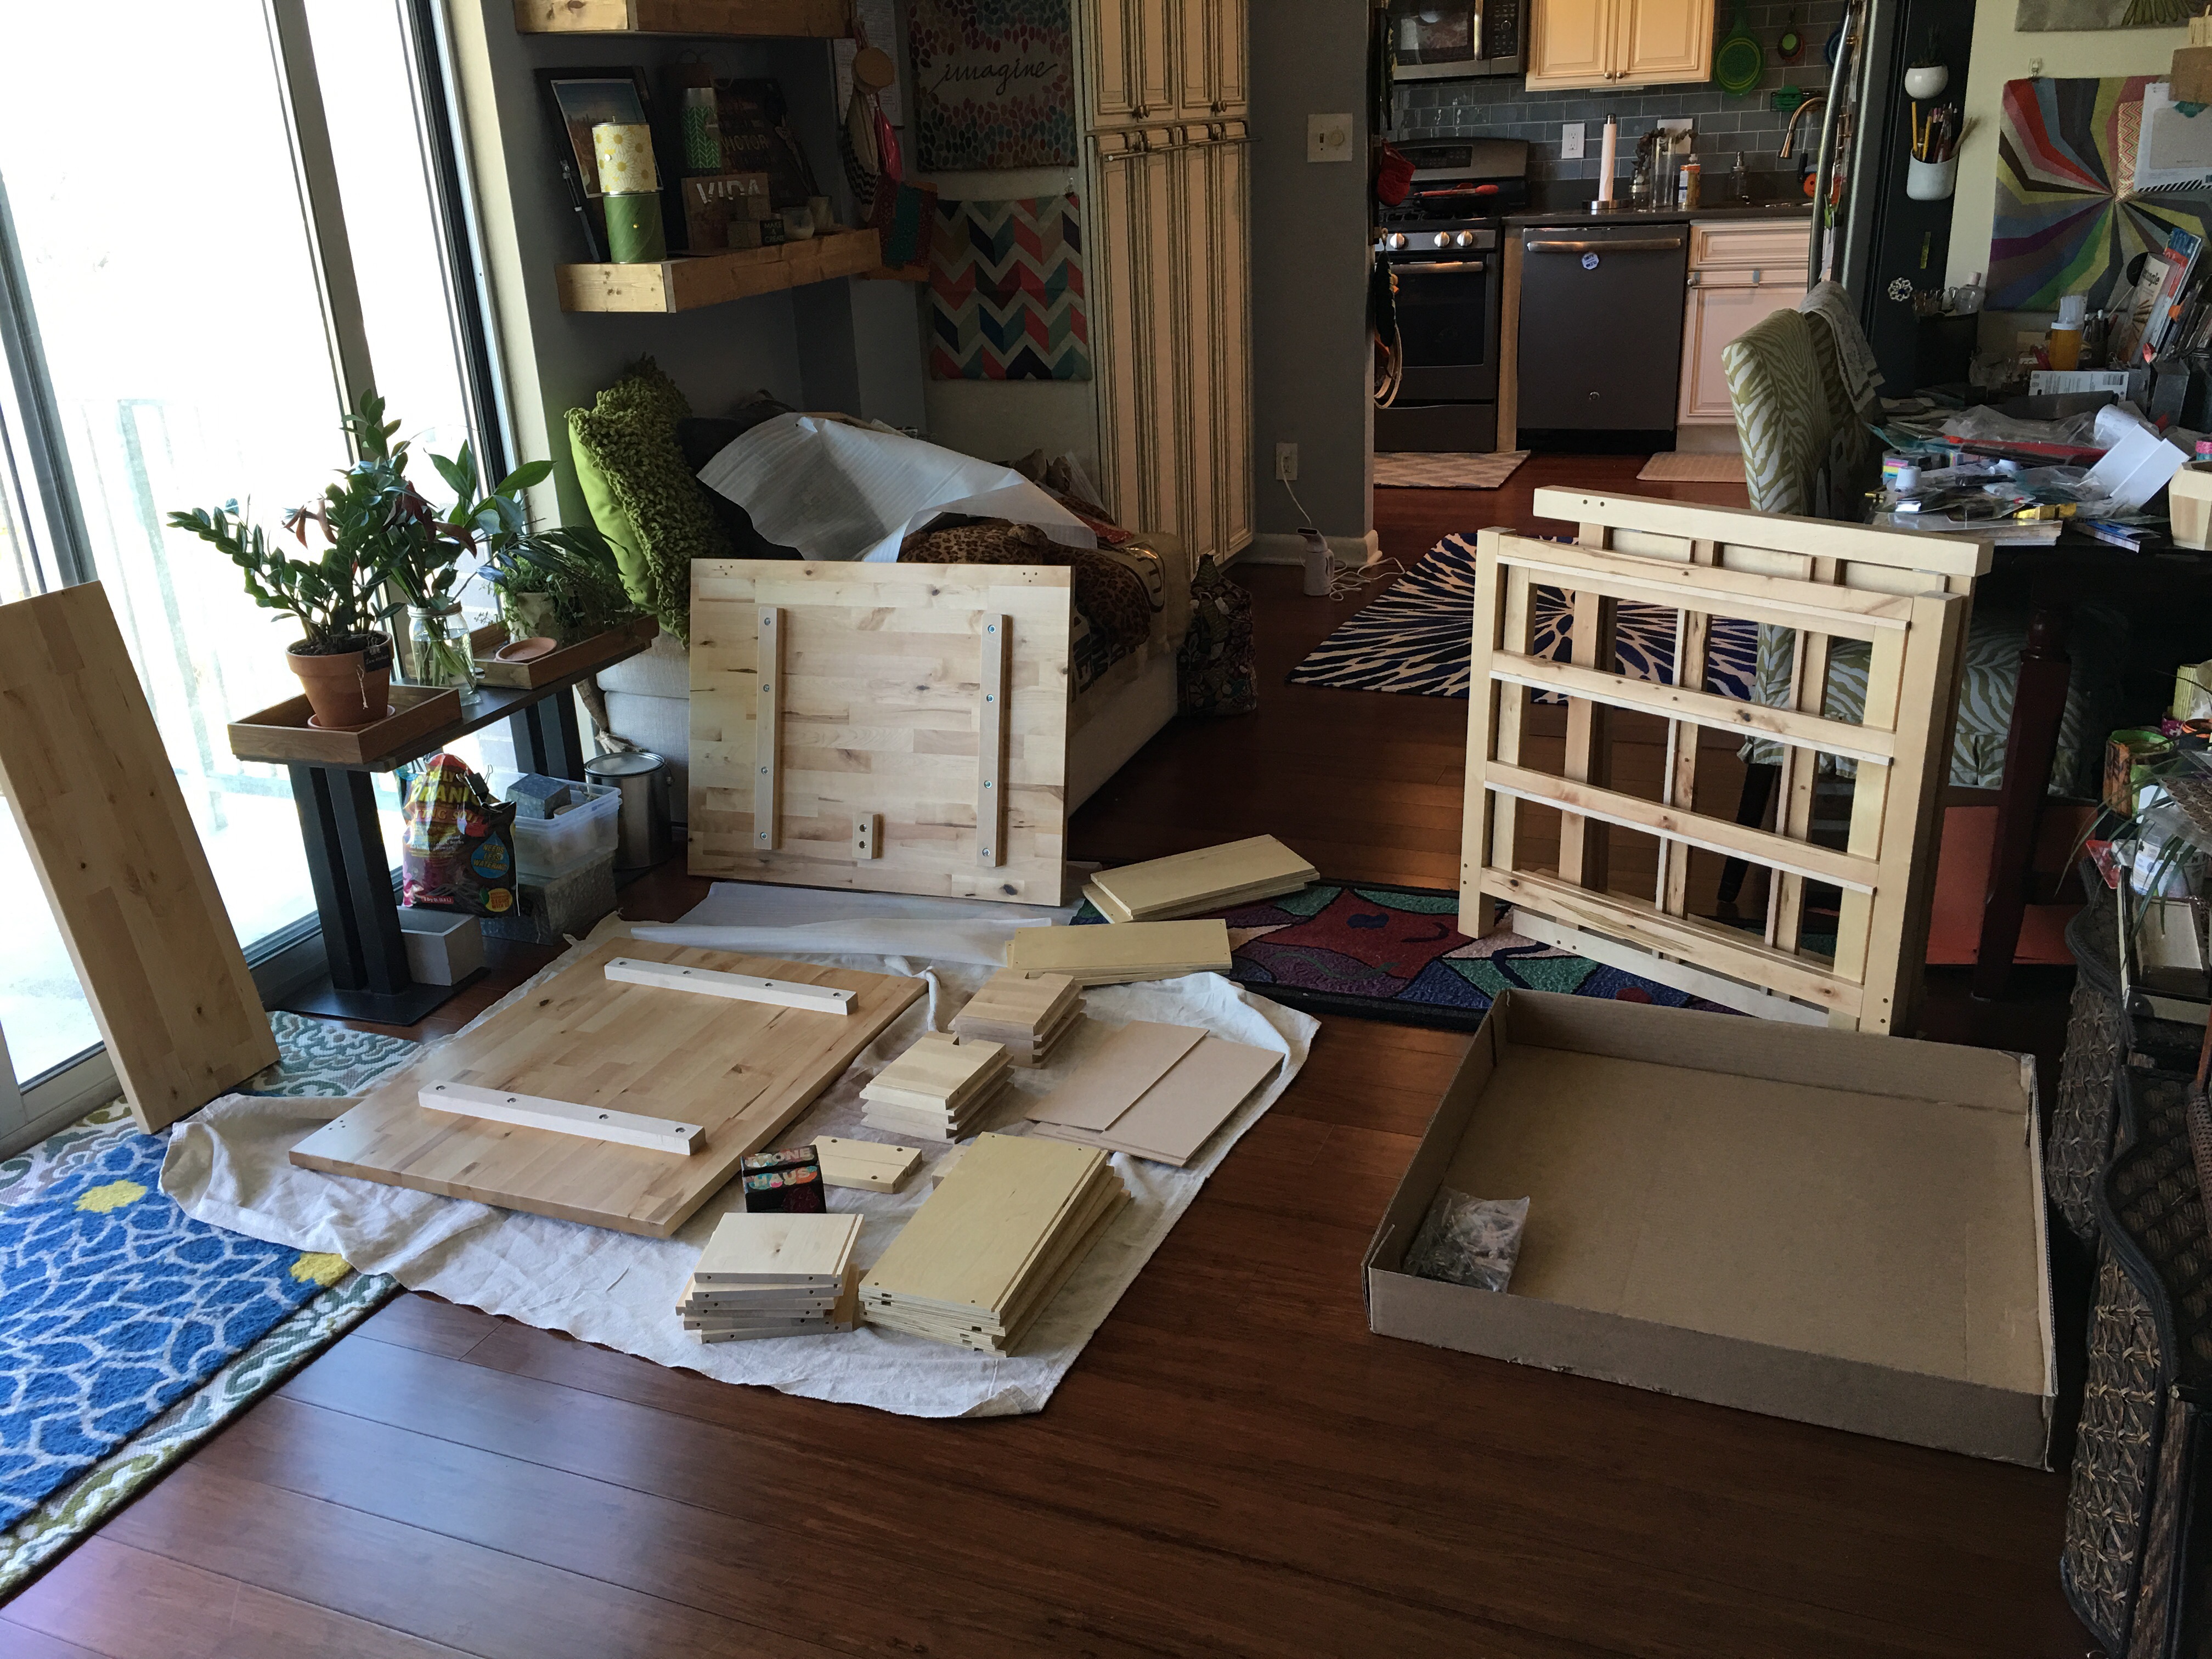
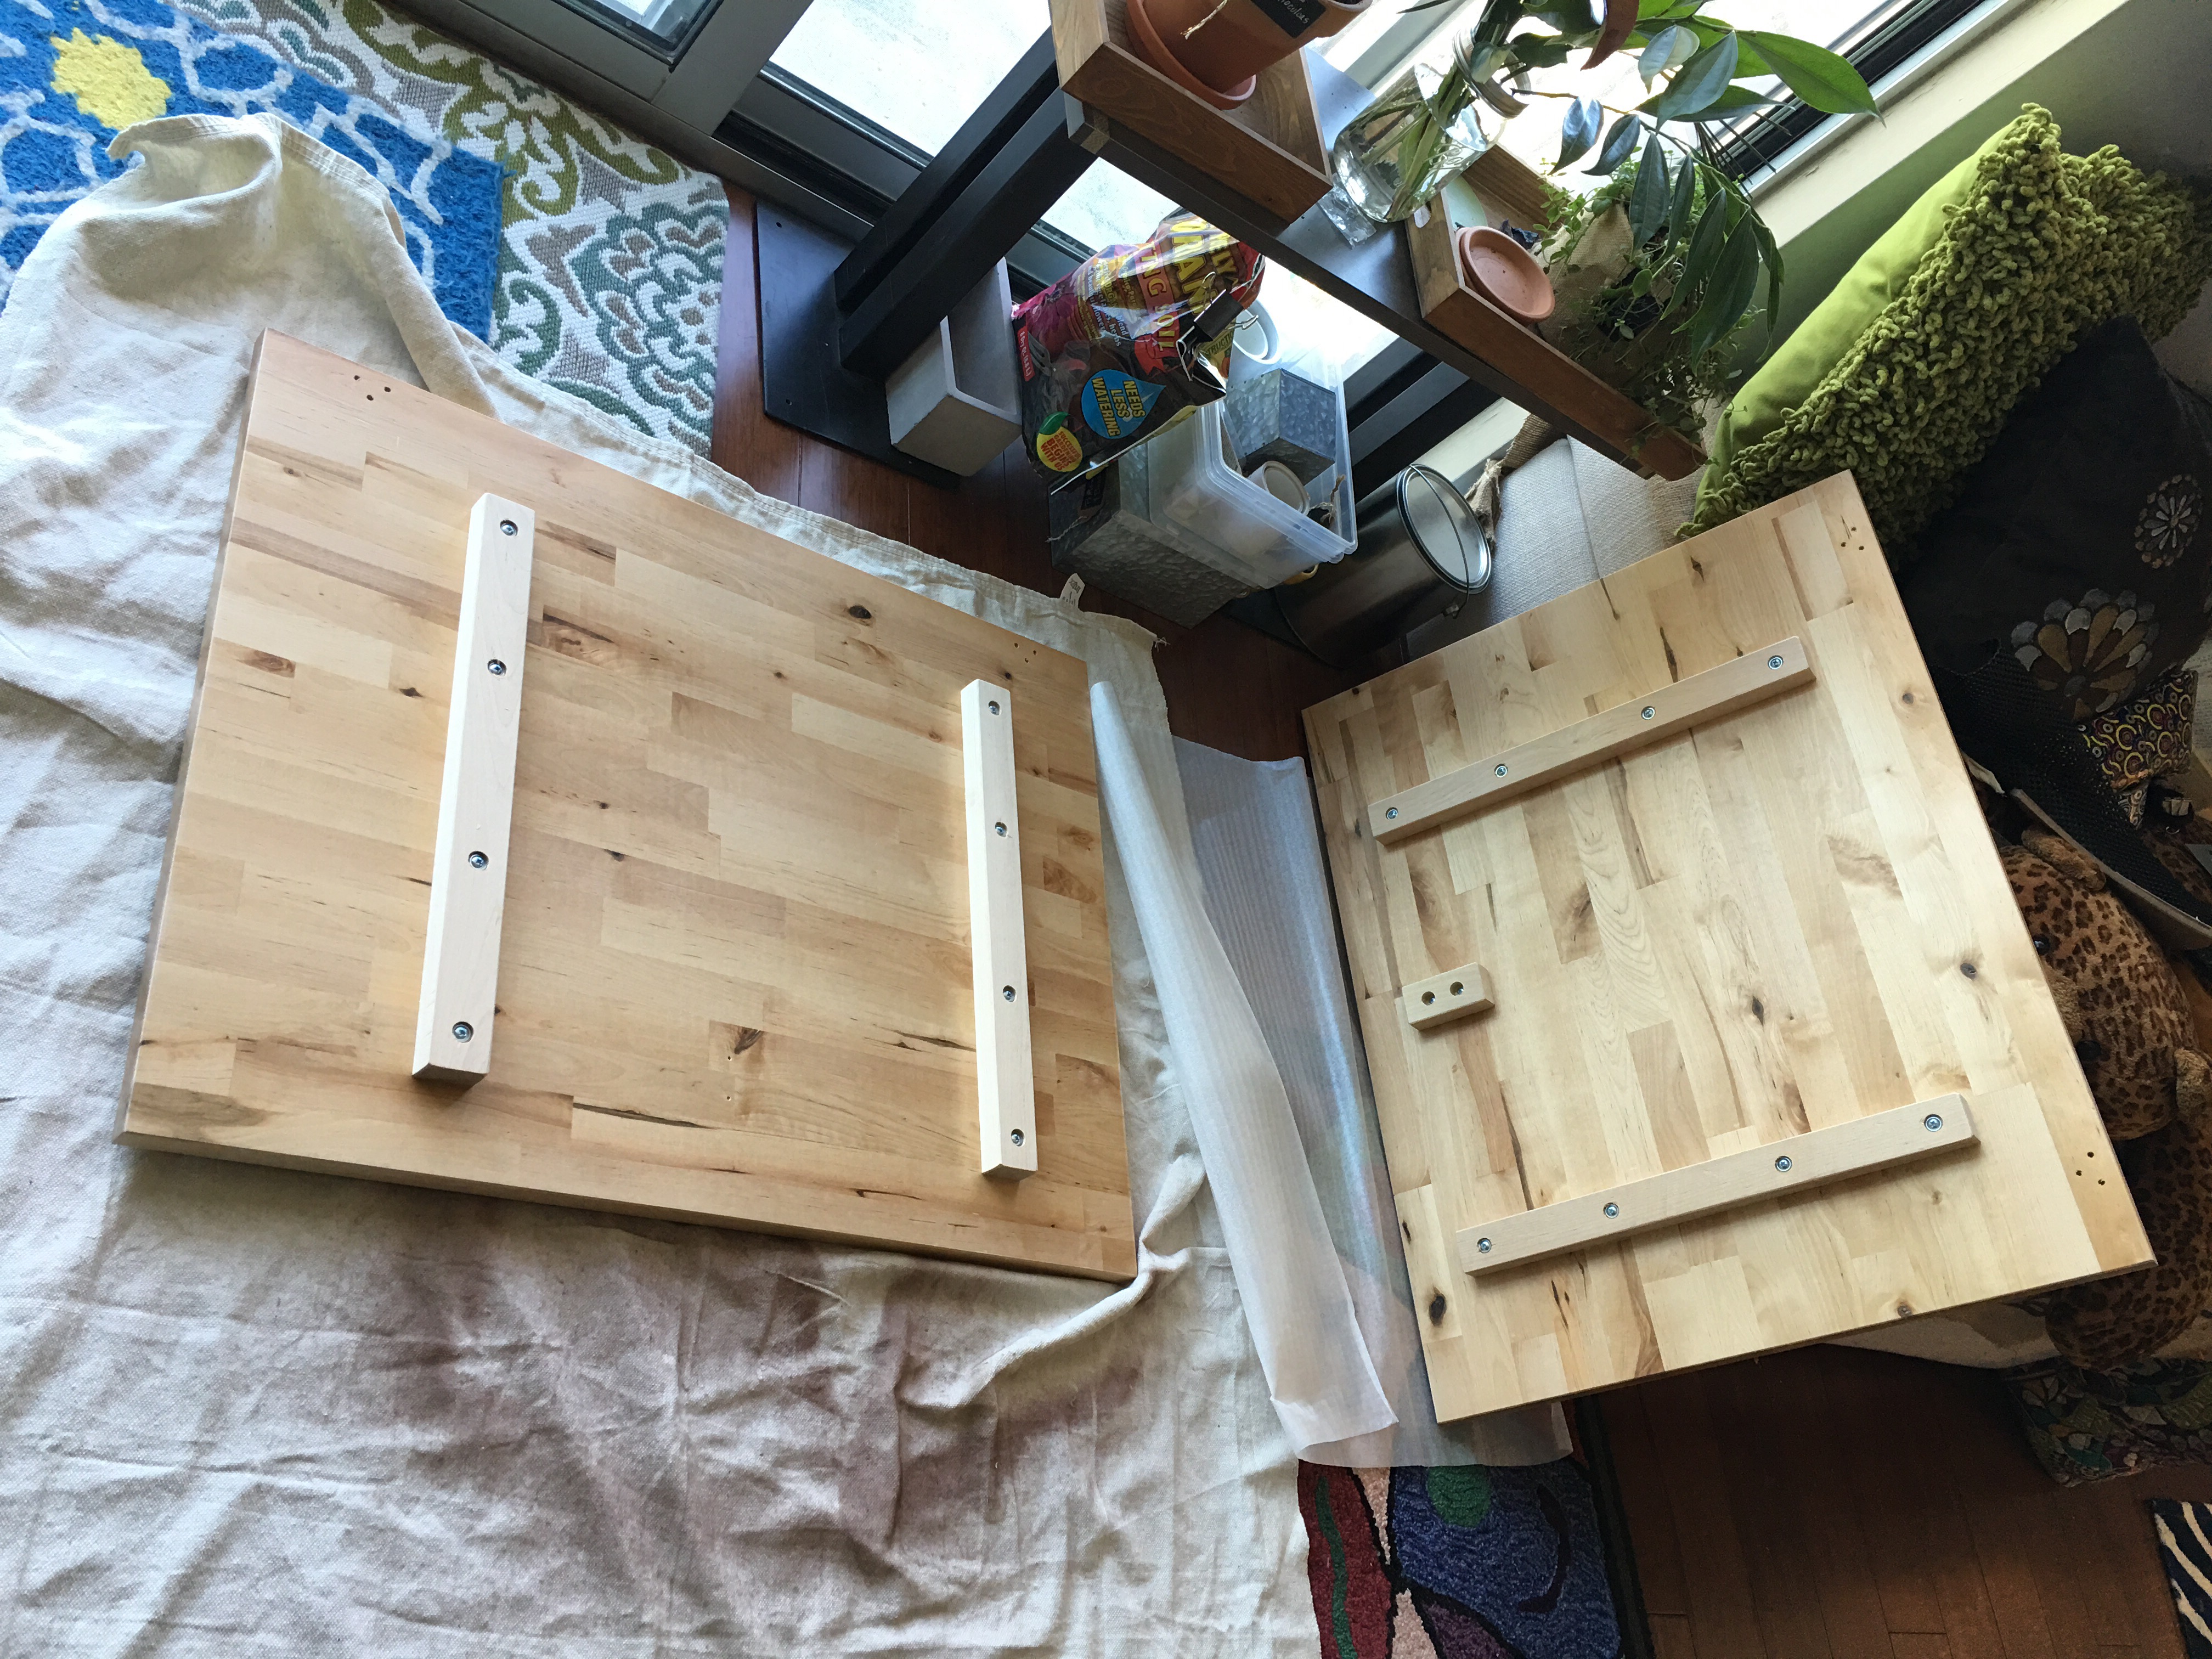
The two sides of the NORDEN “super leaf”.
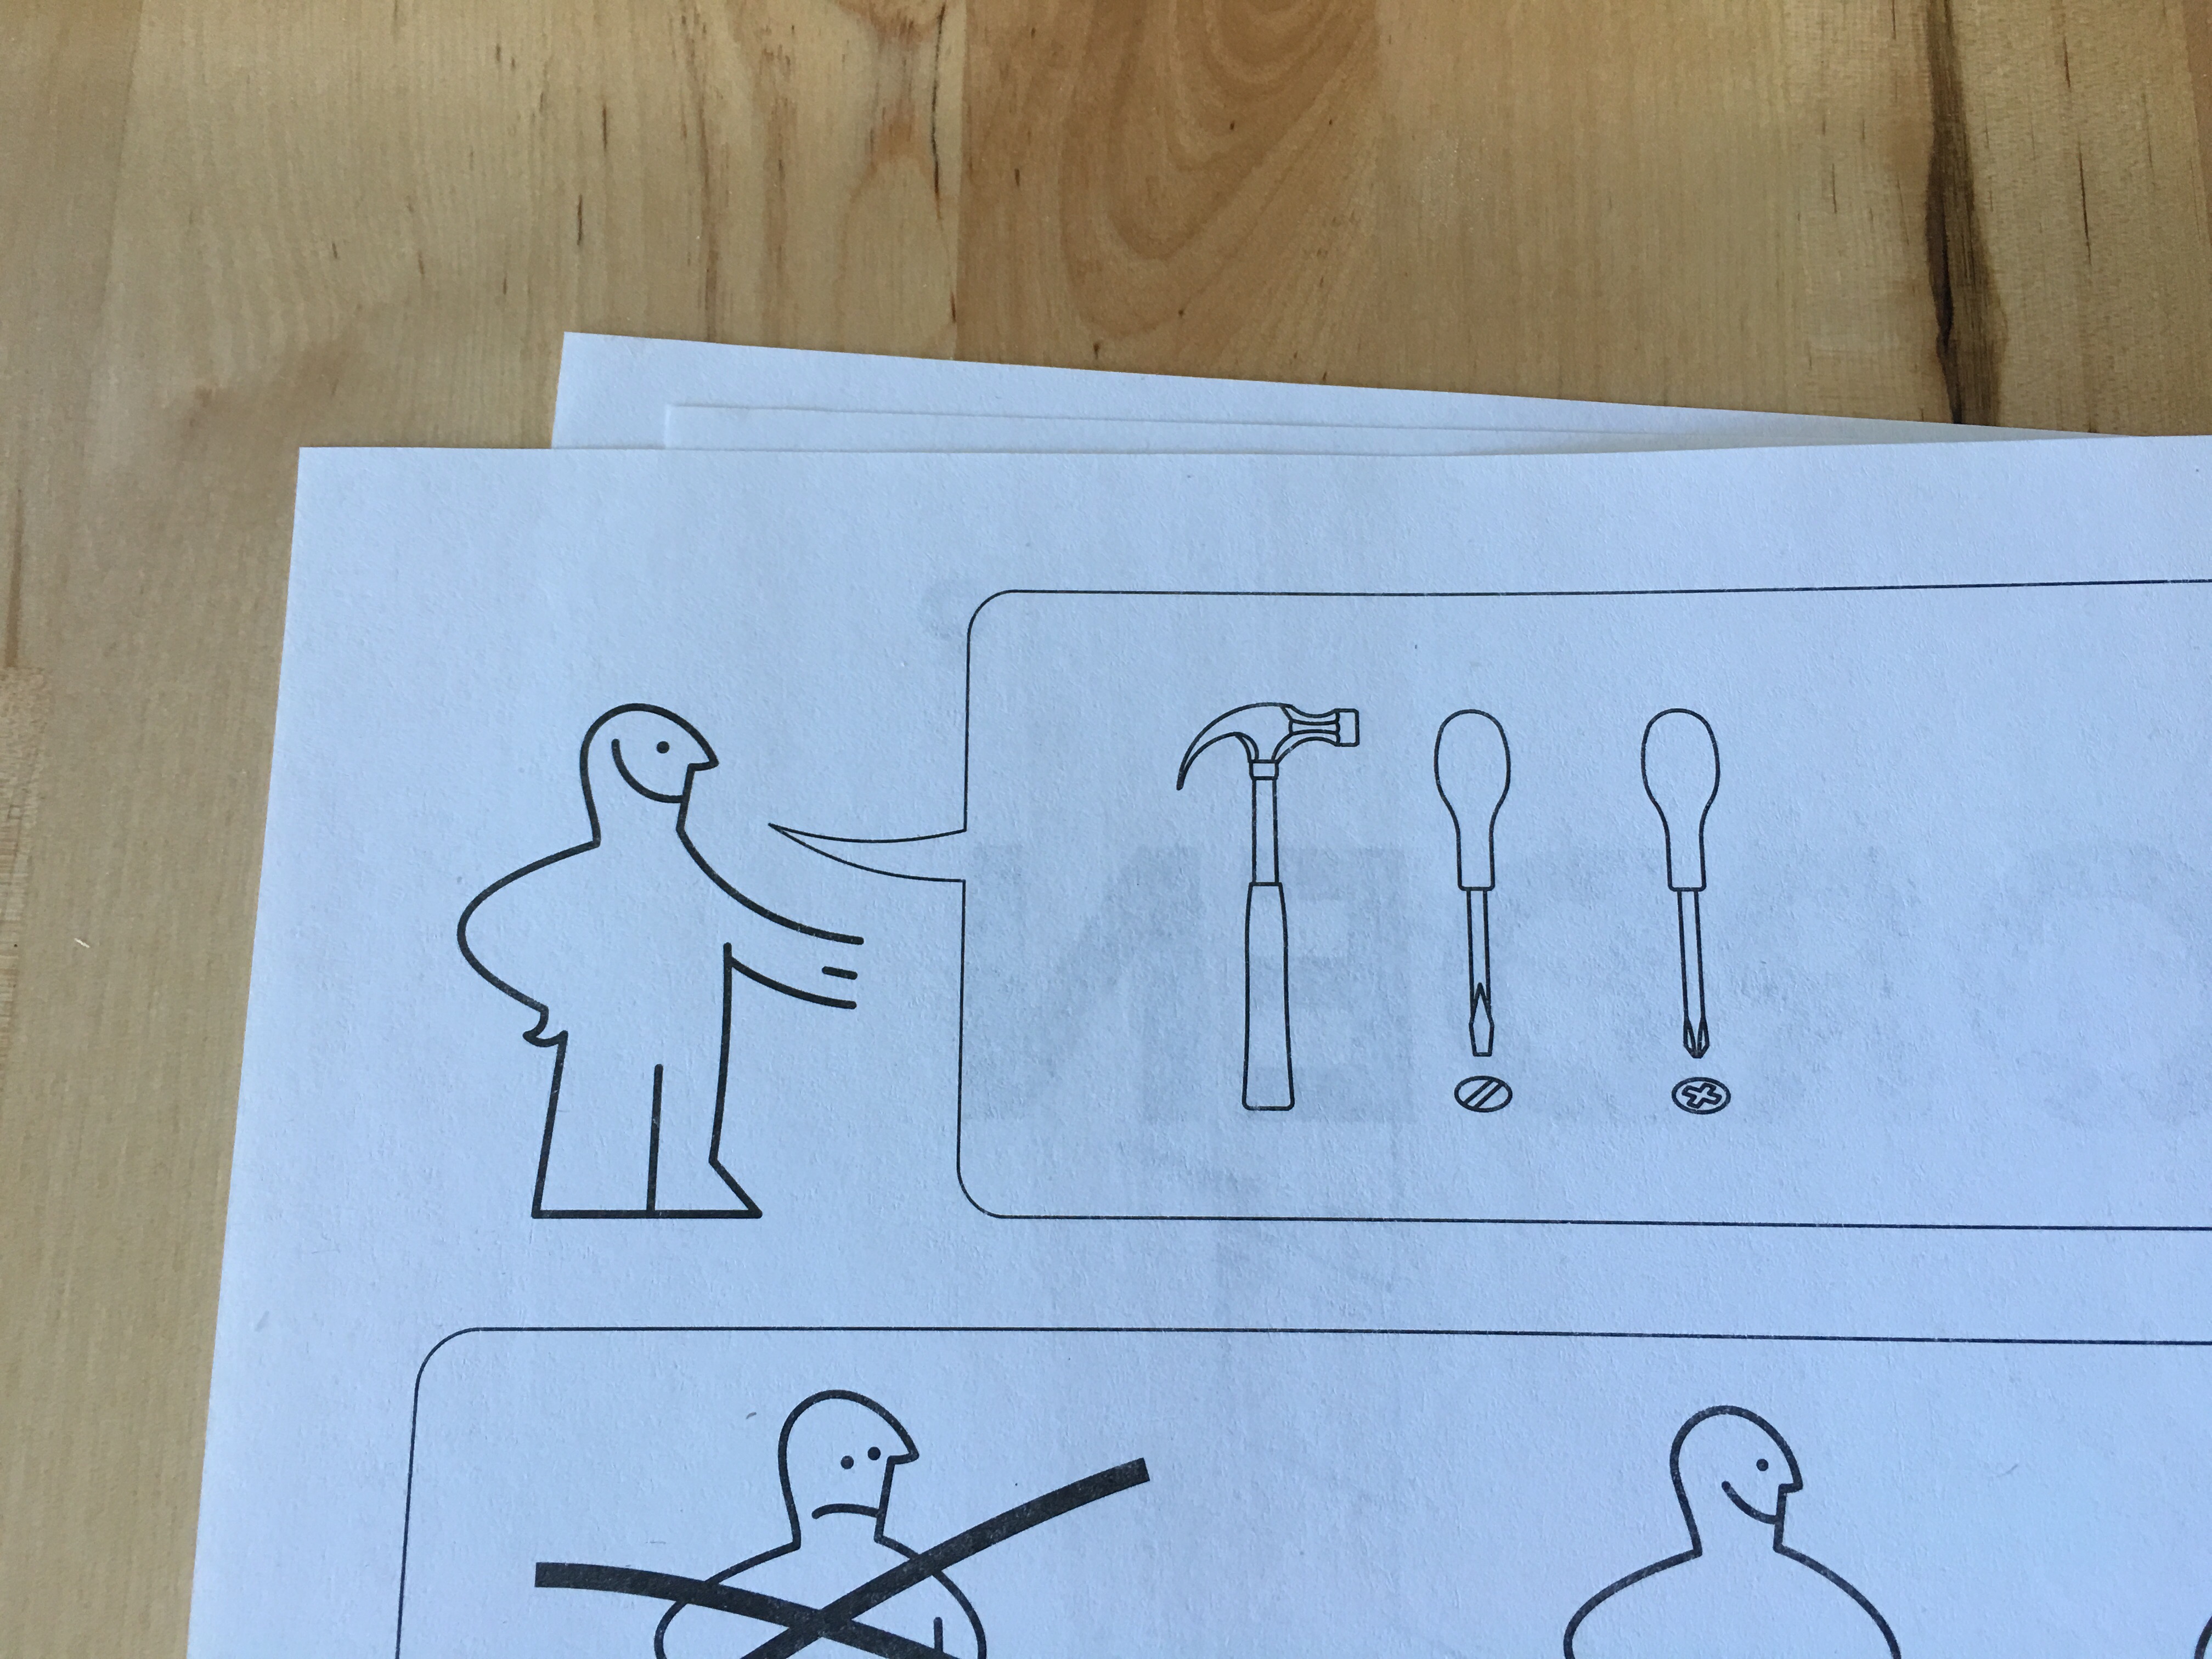
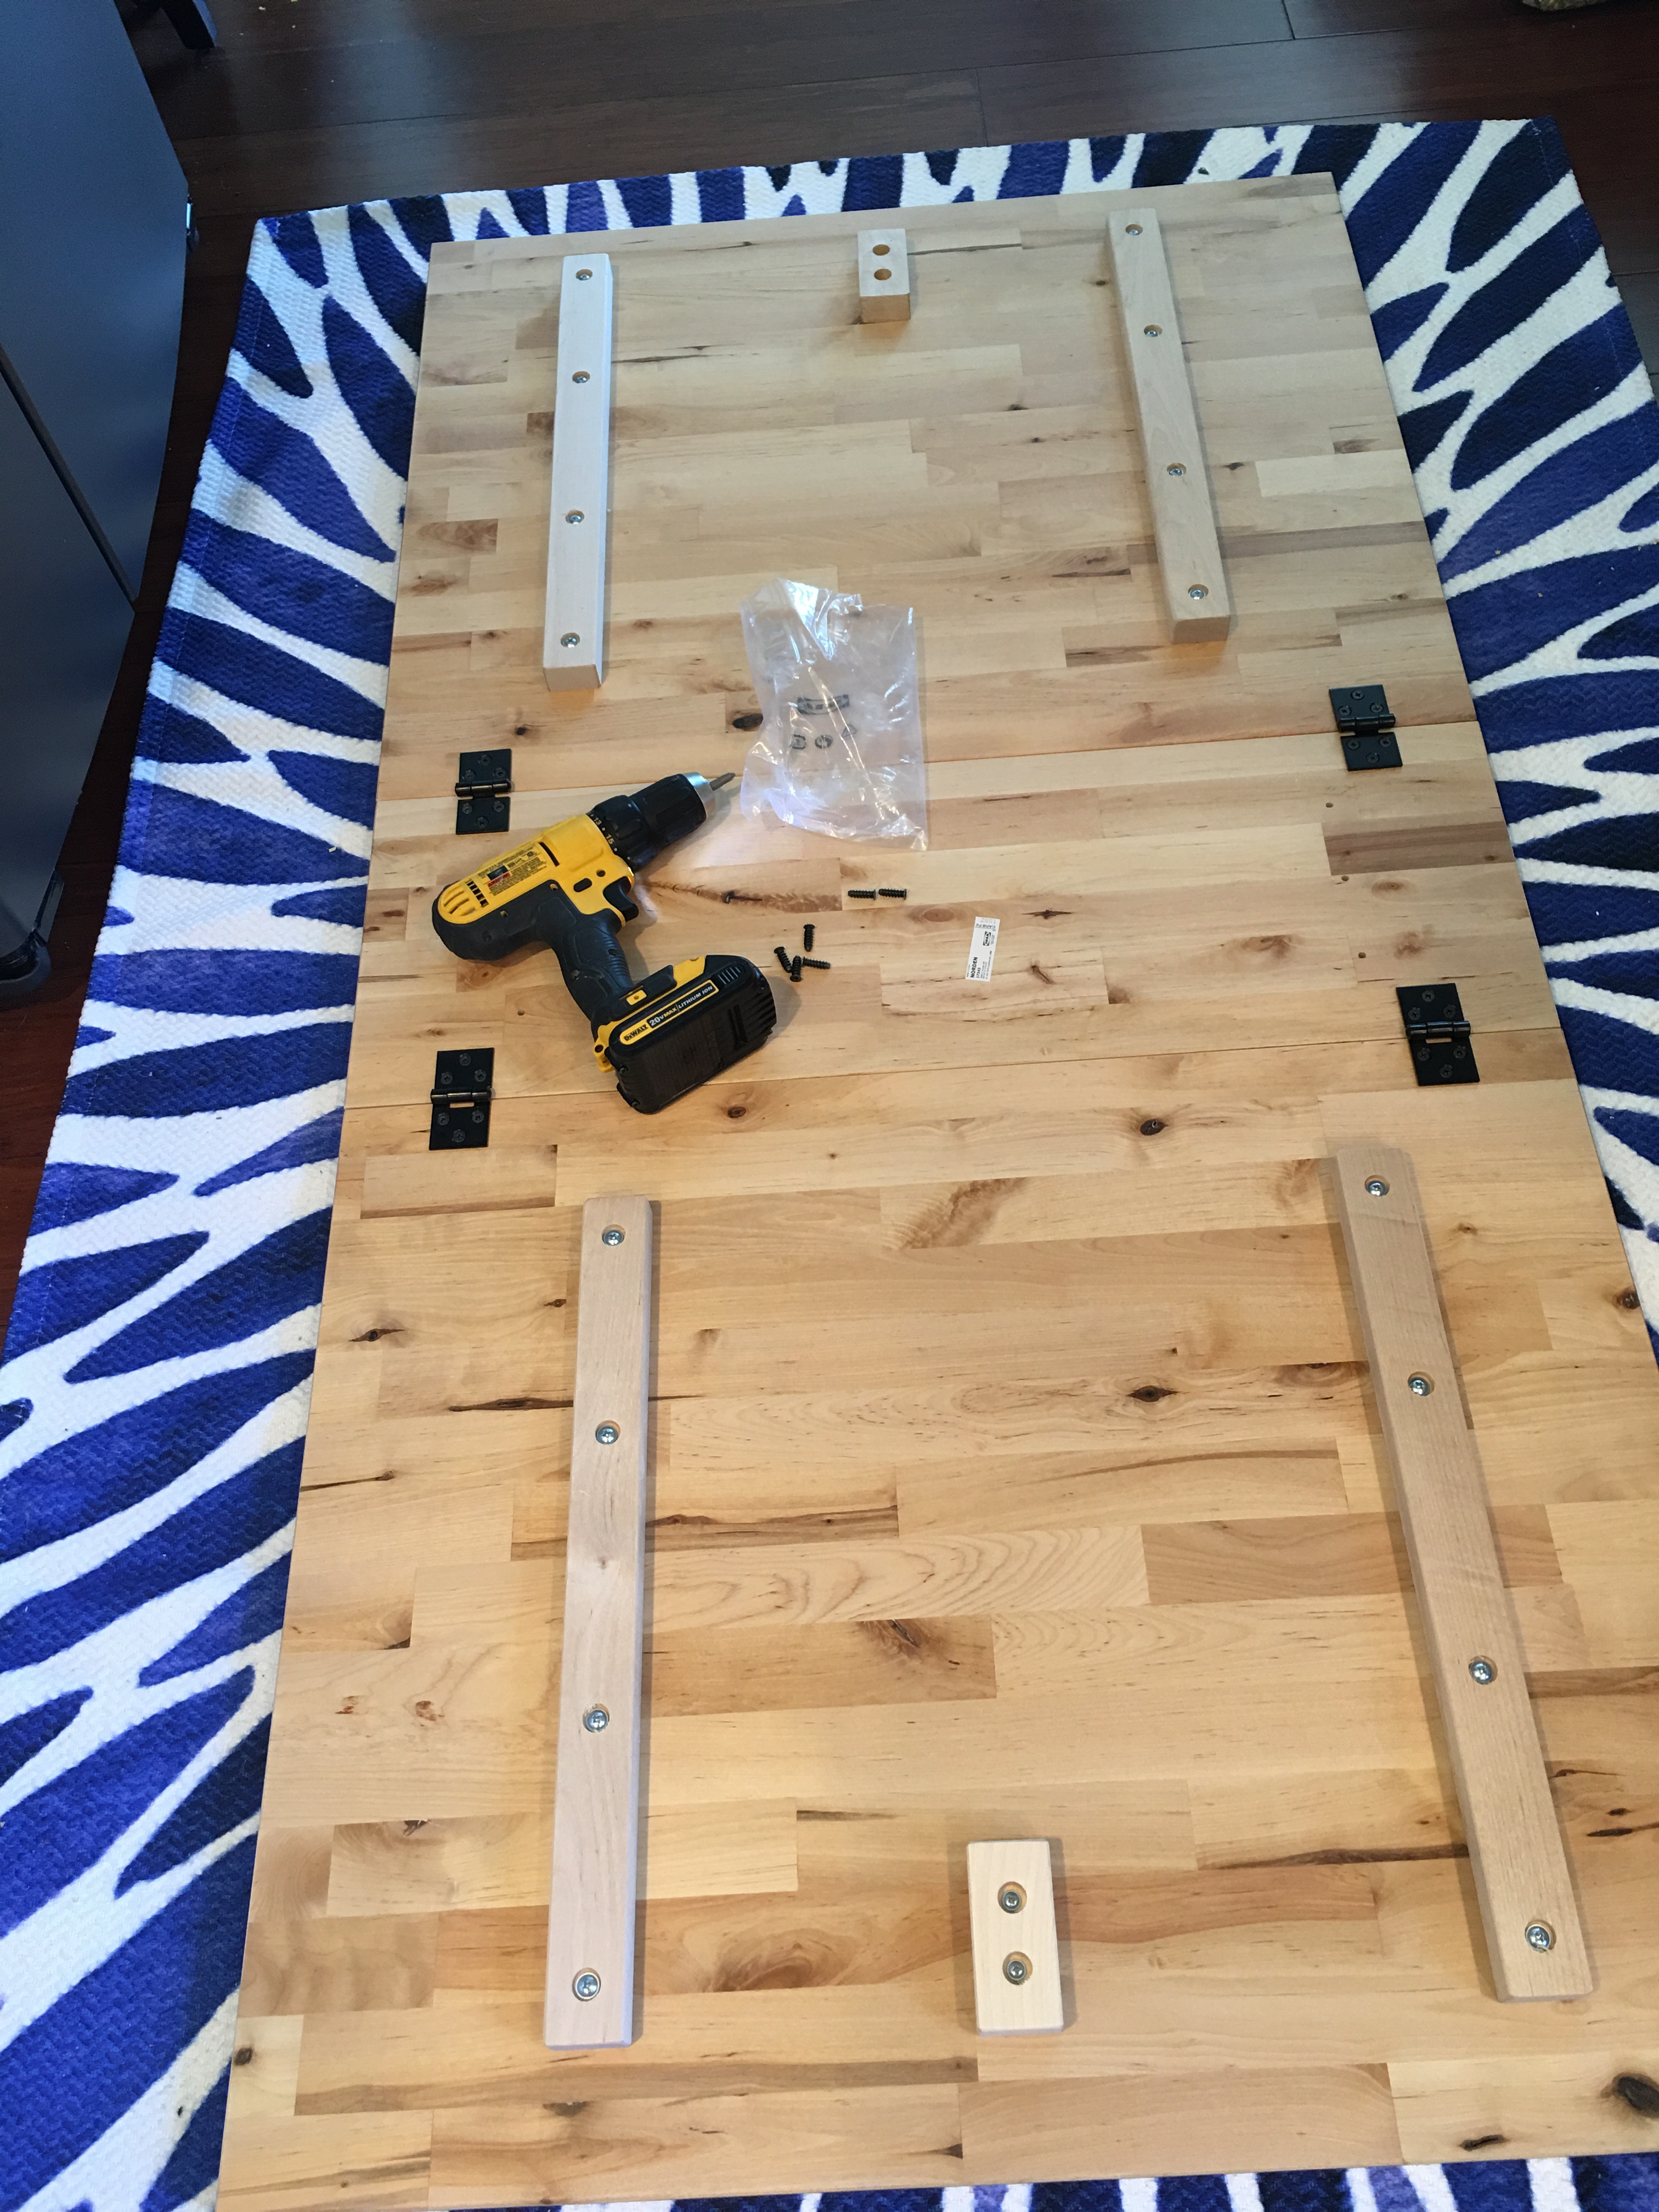
The ritual inventory of all tools, lugs and hardware. Why oh why is there never any text in an IKEA booklet? I mean, what are the names for each item anyway? I mean, I get it…it’s supposed to be international – no text in different languages needed. But it would be nice to know what each item is called in case I should choose to DIY it. Or if I loose a screw…
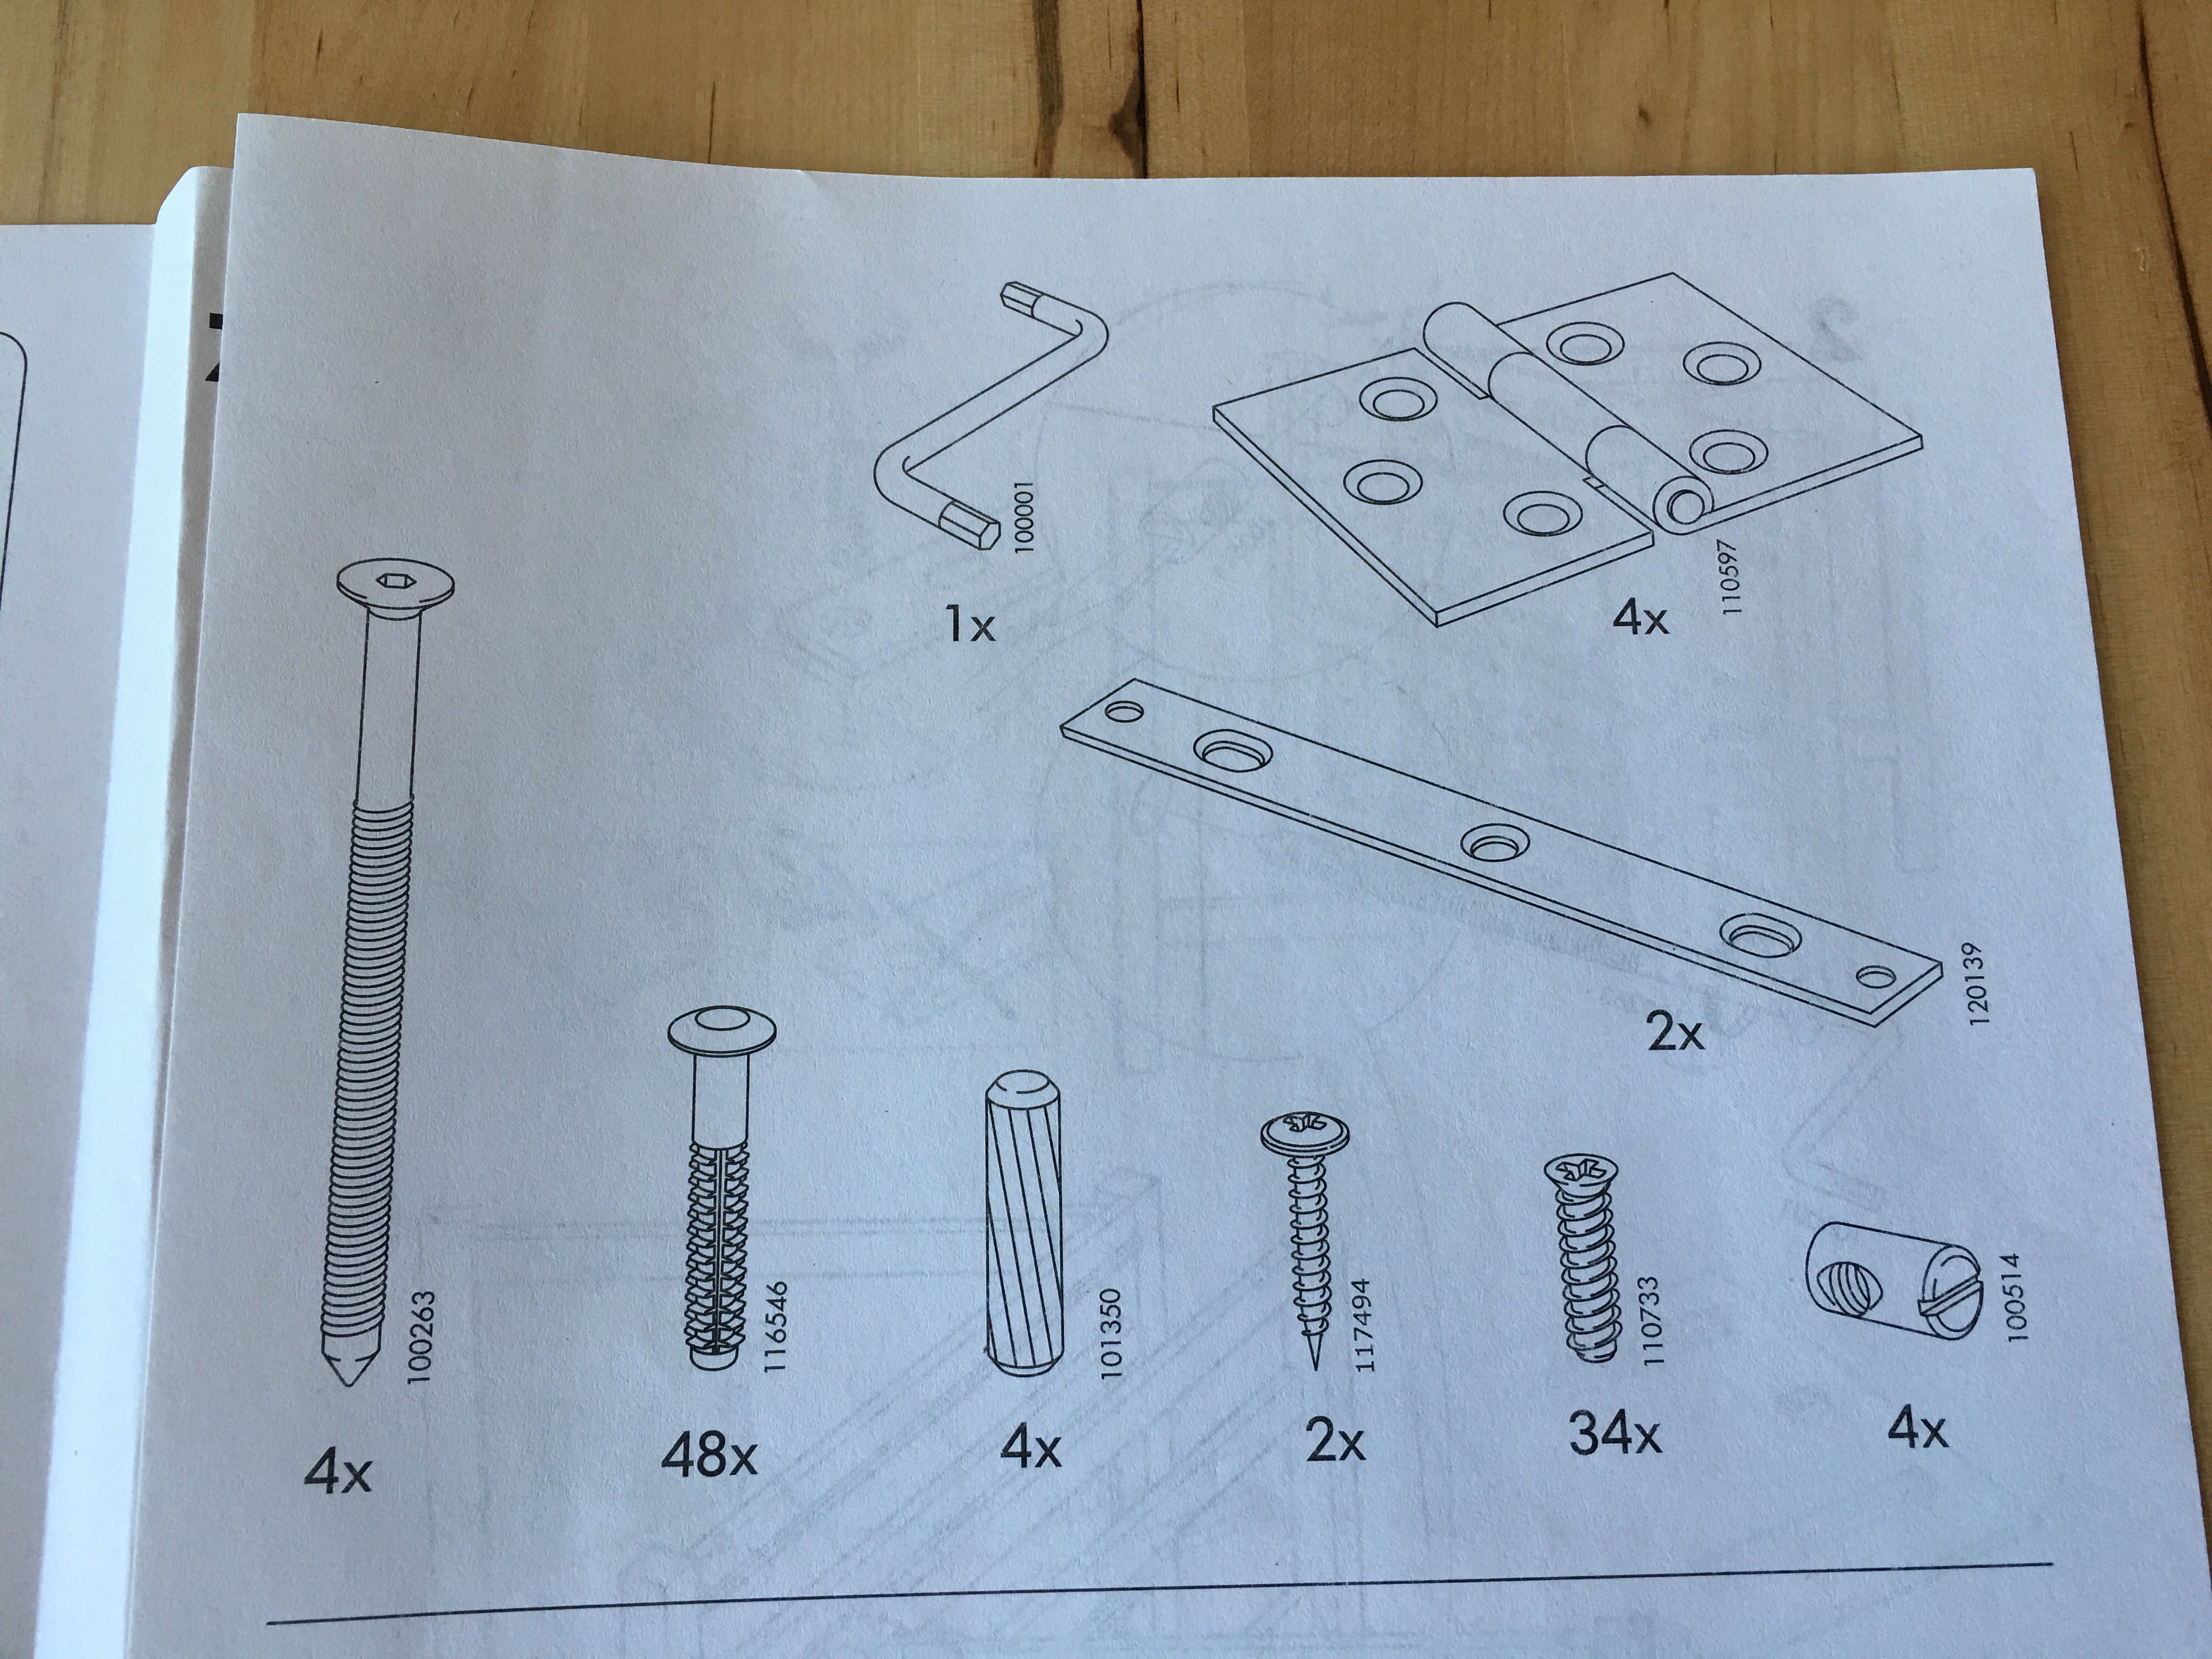
Well, anyway…here’s my bag of hardware to do the ritual inventory.

I have my hammer and power drill/screwdriver ready to go for the project.
OK, here’s the cliff notes version of the assembly steps:
- Step 1: Arrange the drawer brackets and legs so that they are facing each other.
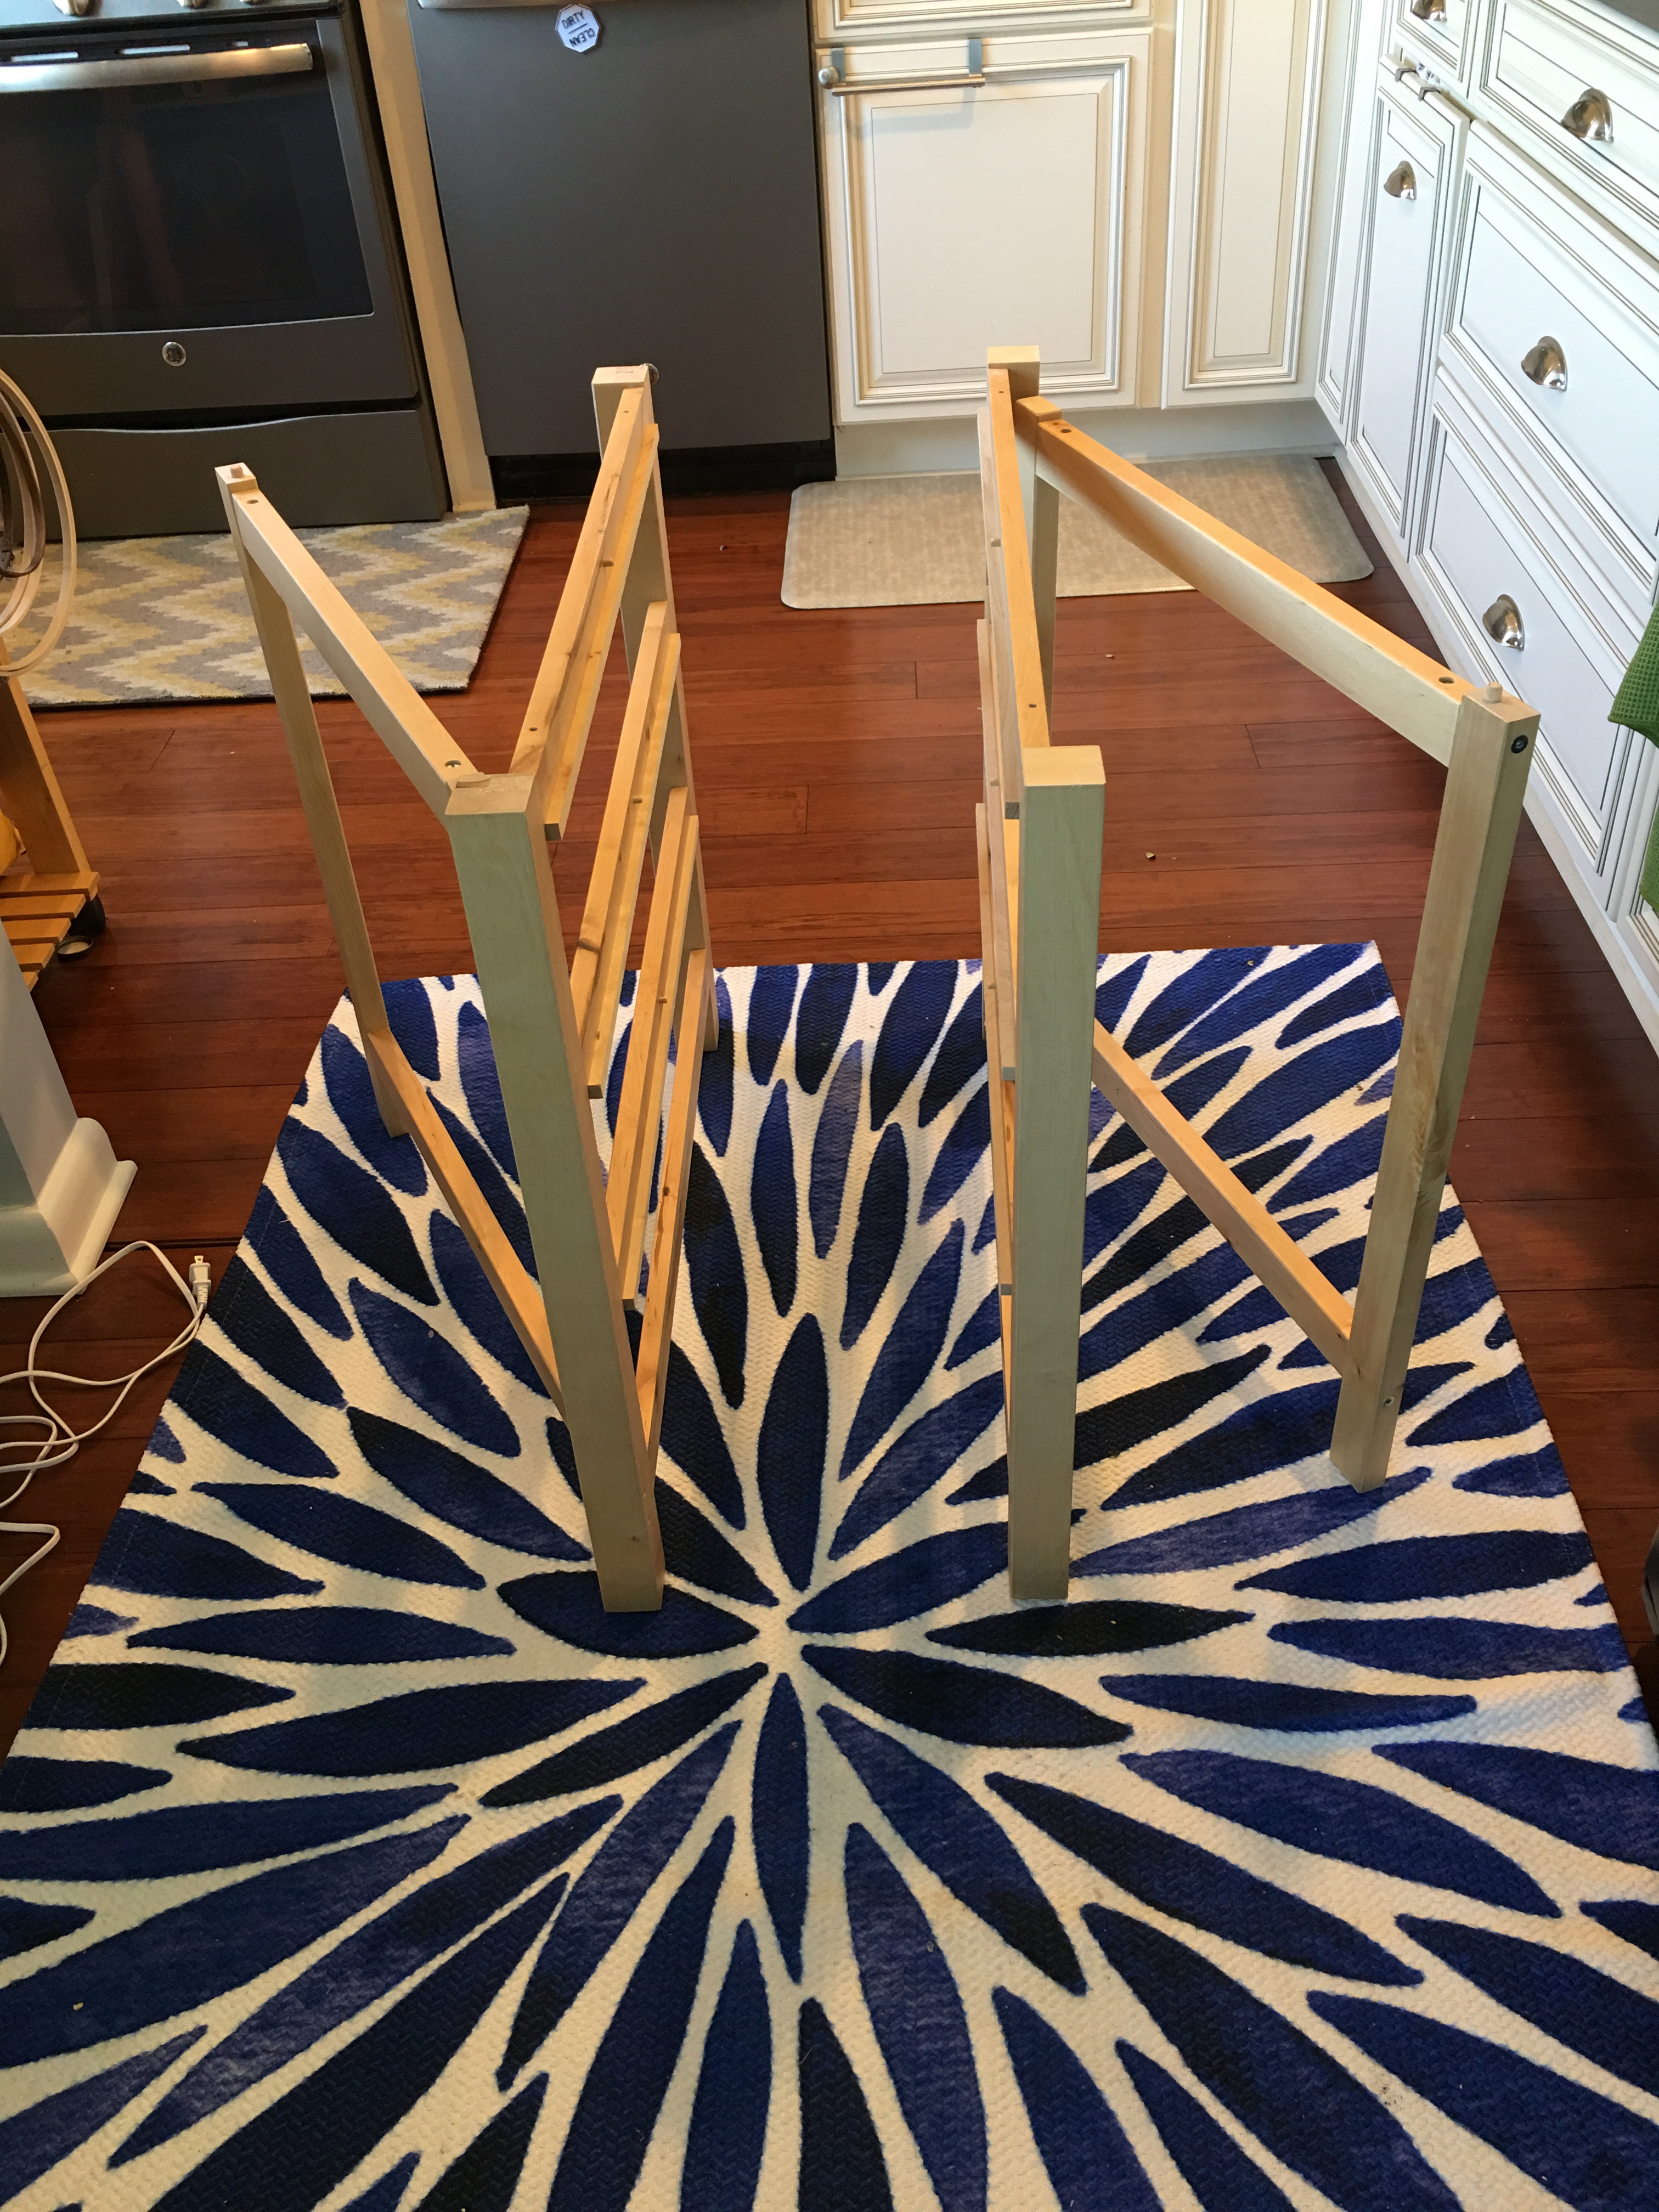
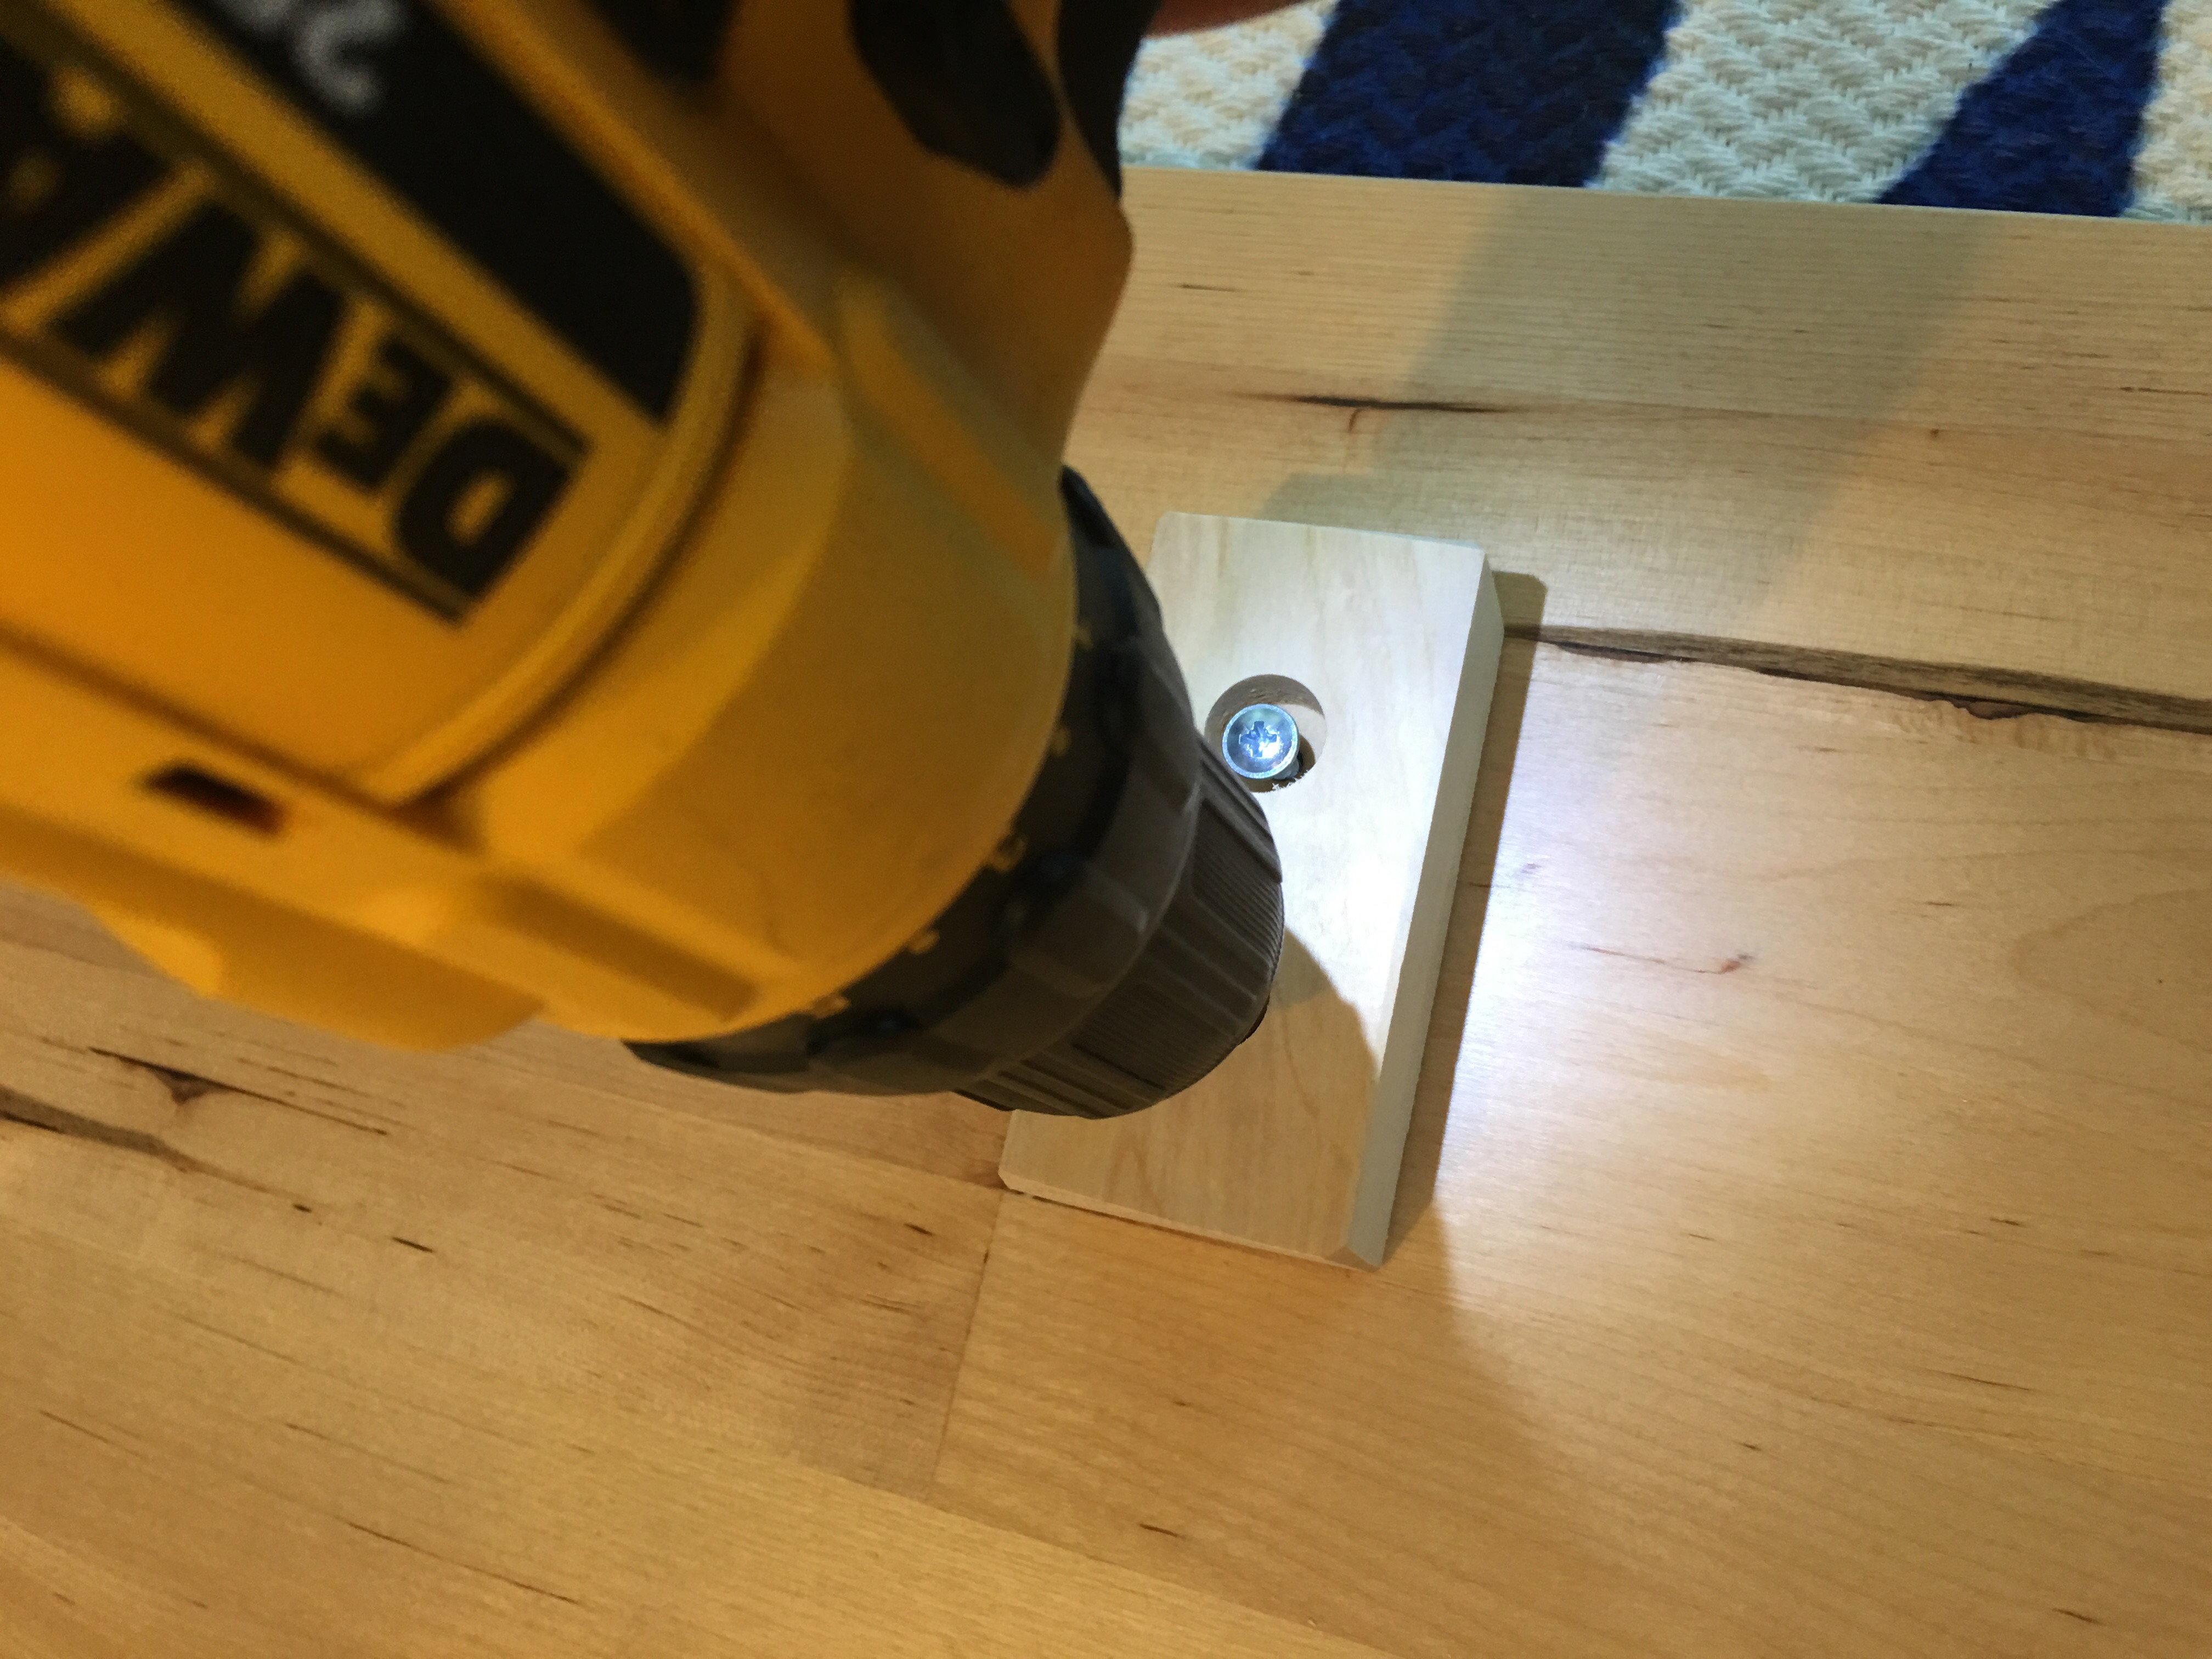
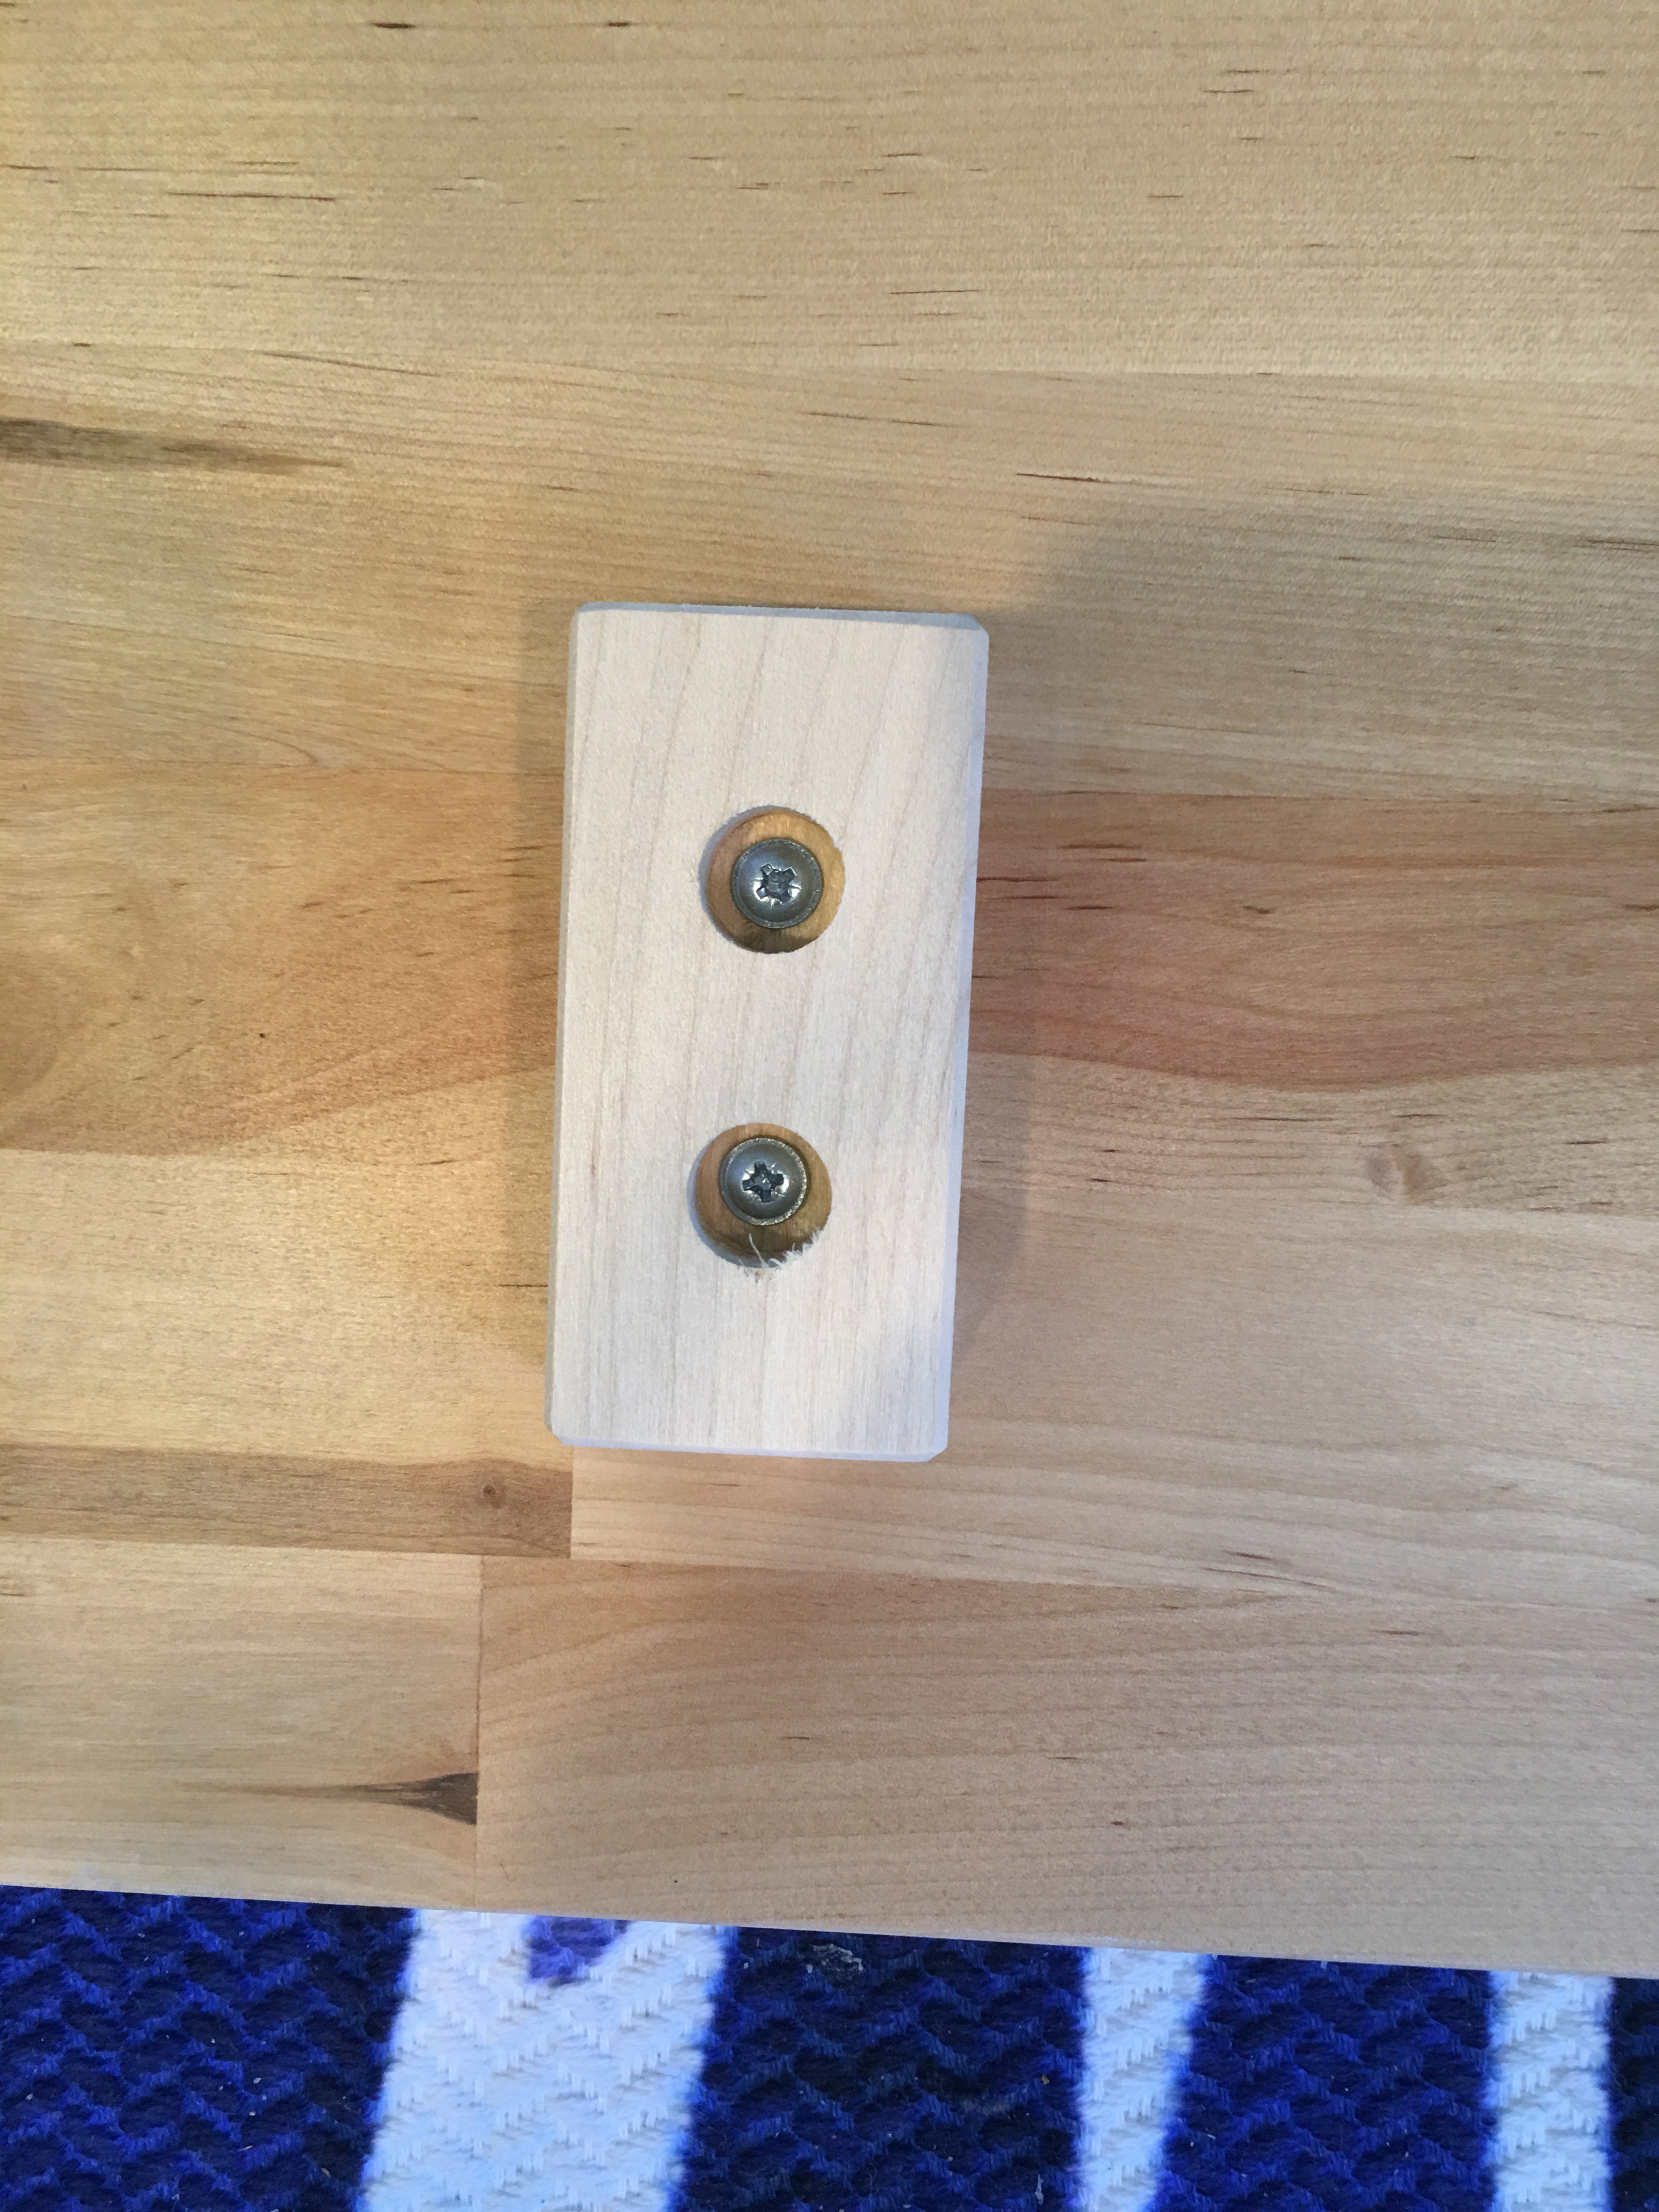
- Connect the drawer brackets together with two 6.5″ x 1.75″ x 3/4″ wood blocks – one on each side.
Secure with long screws (tightened with the allen wrench).
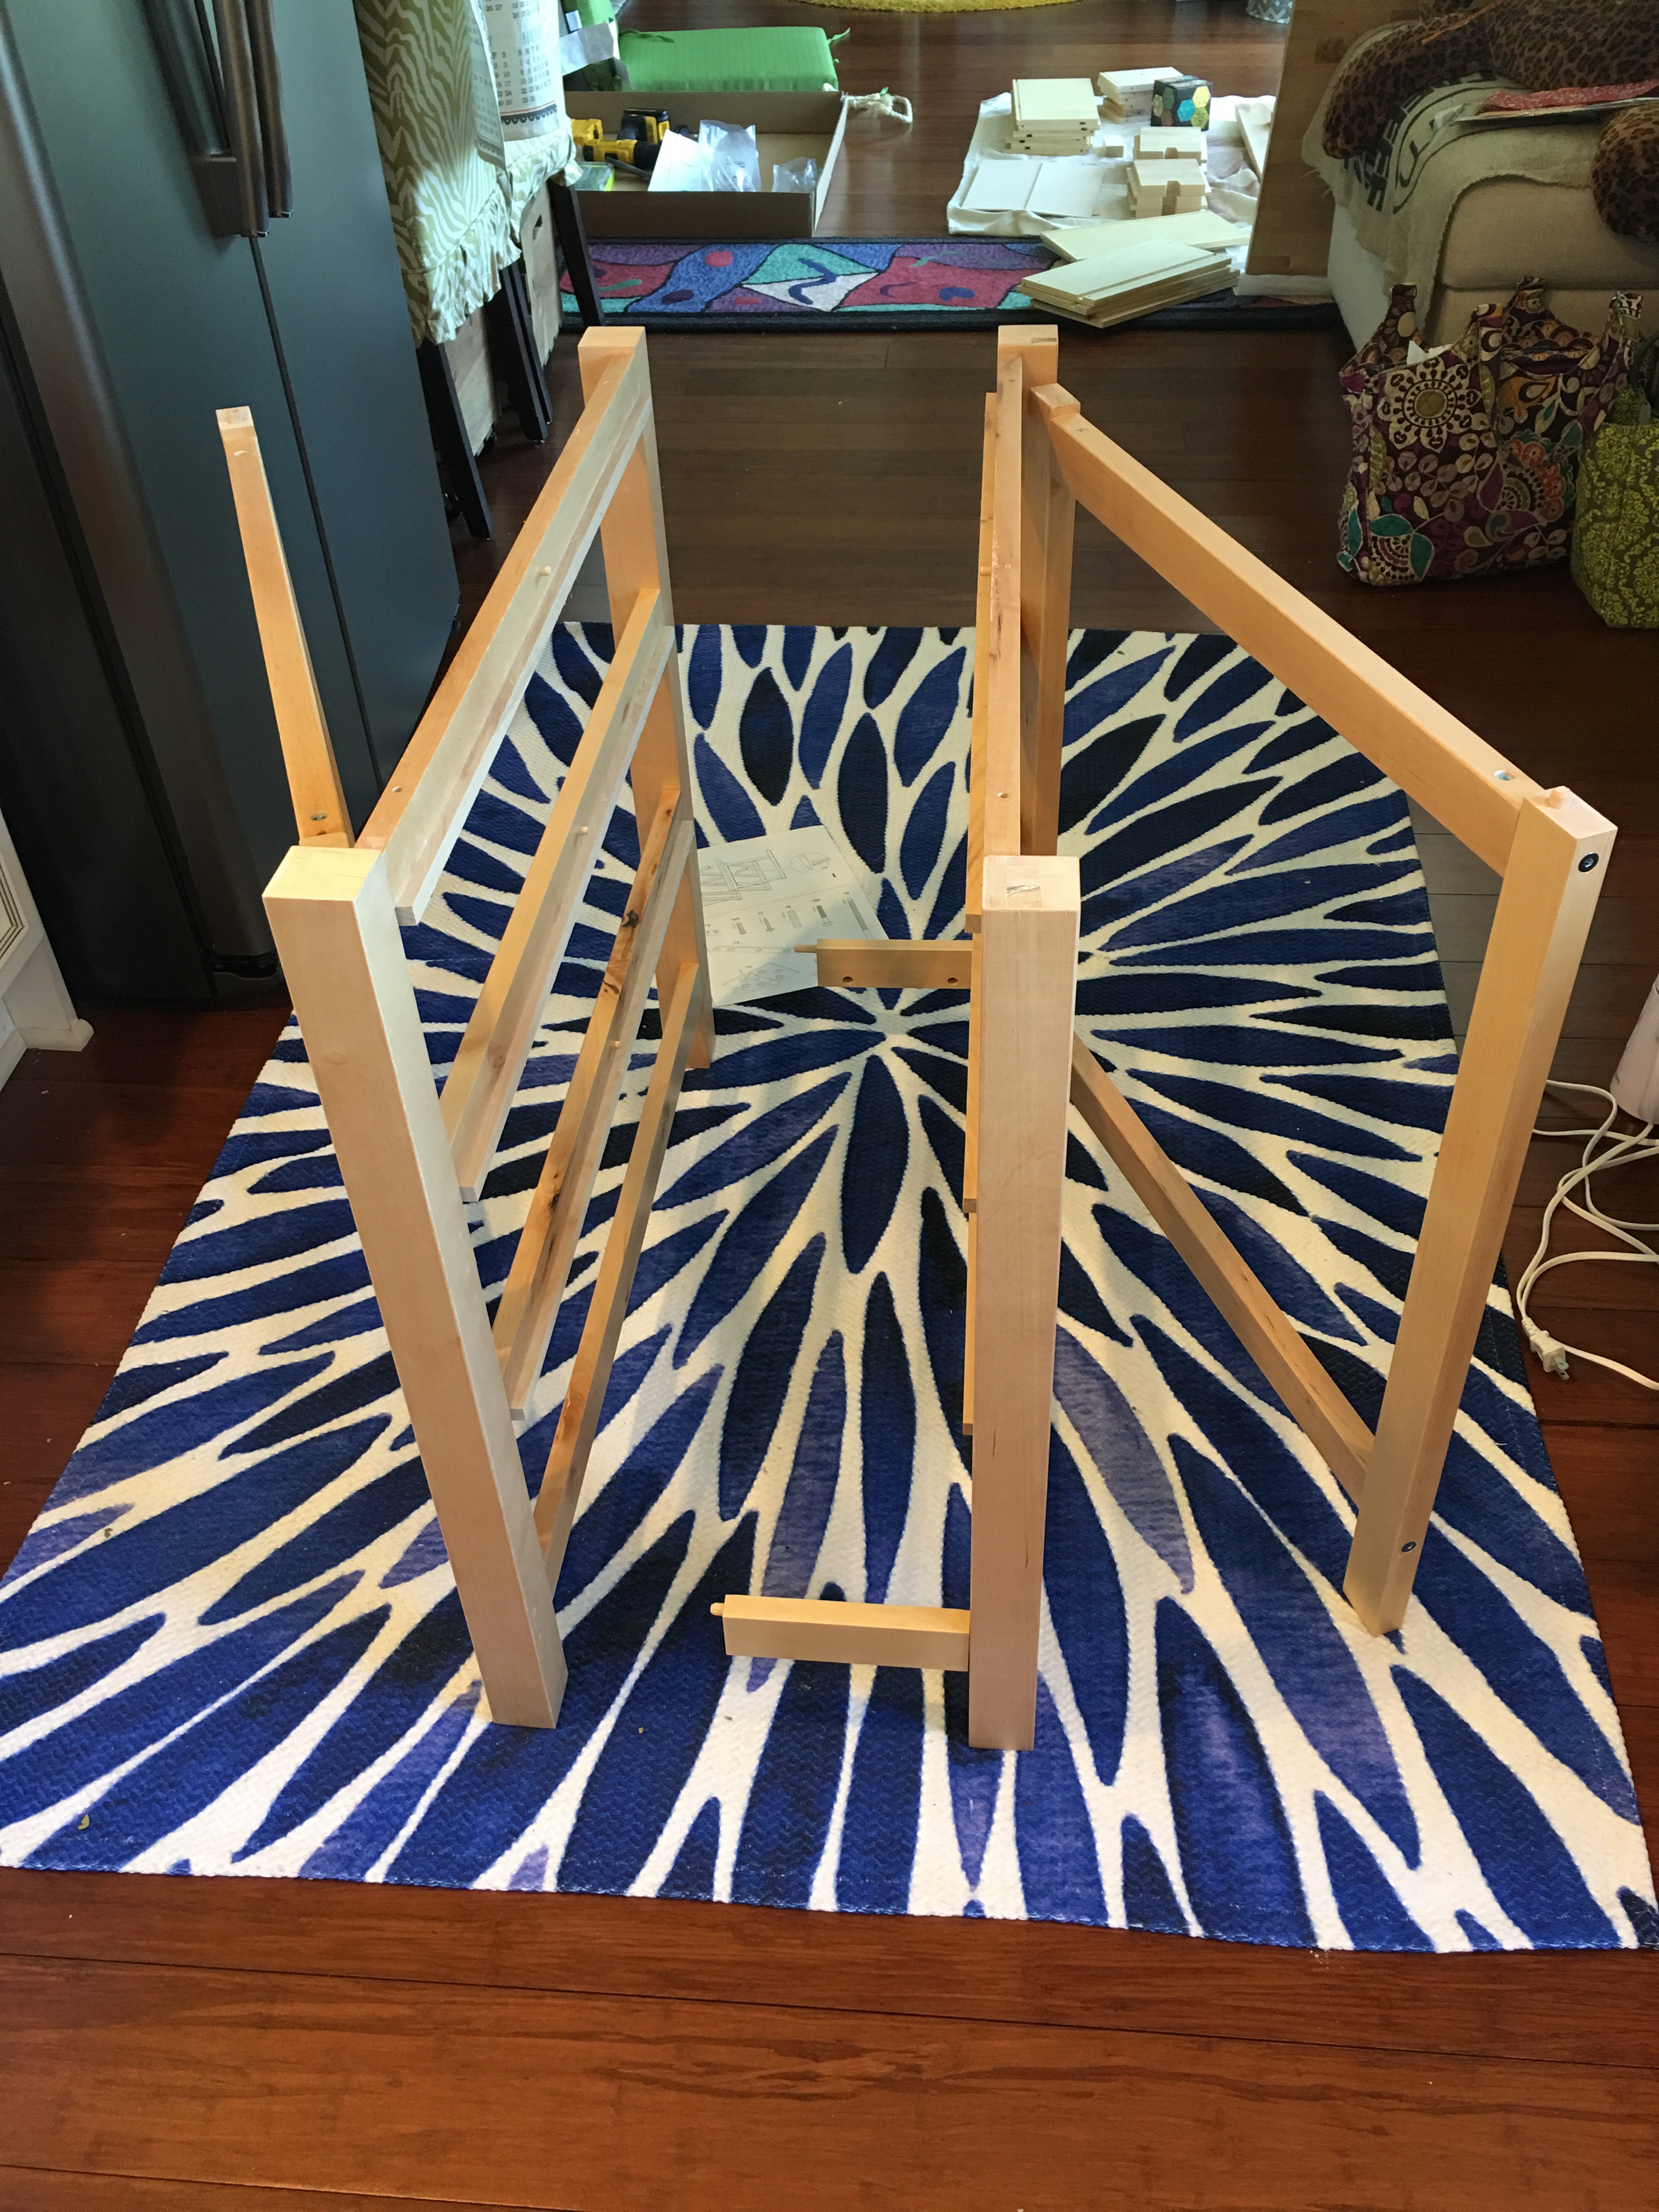
- Step three: Add the metal mending plates at the top of the drawer bracket.
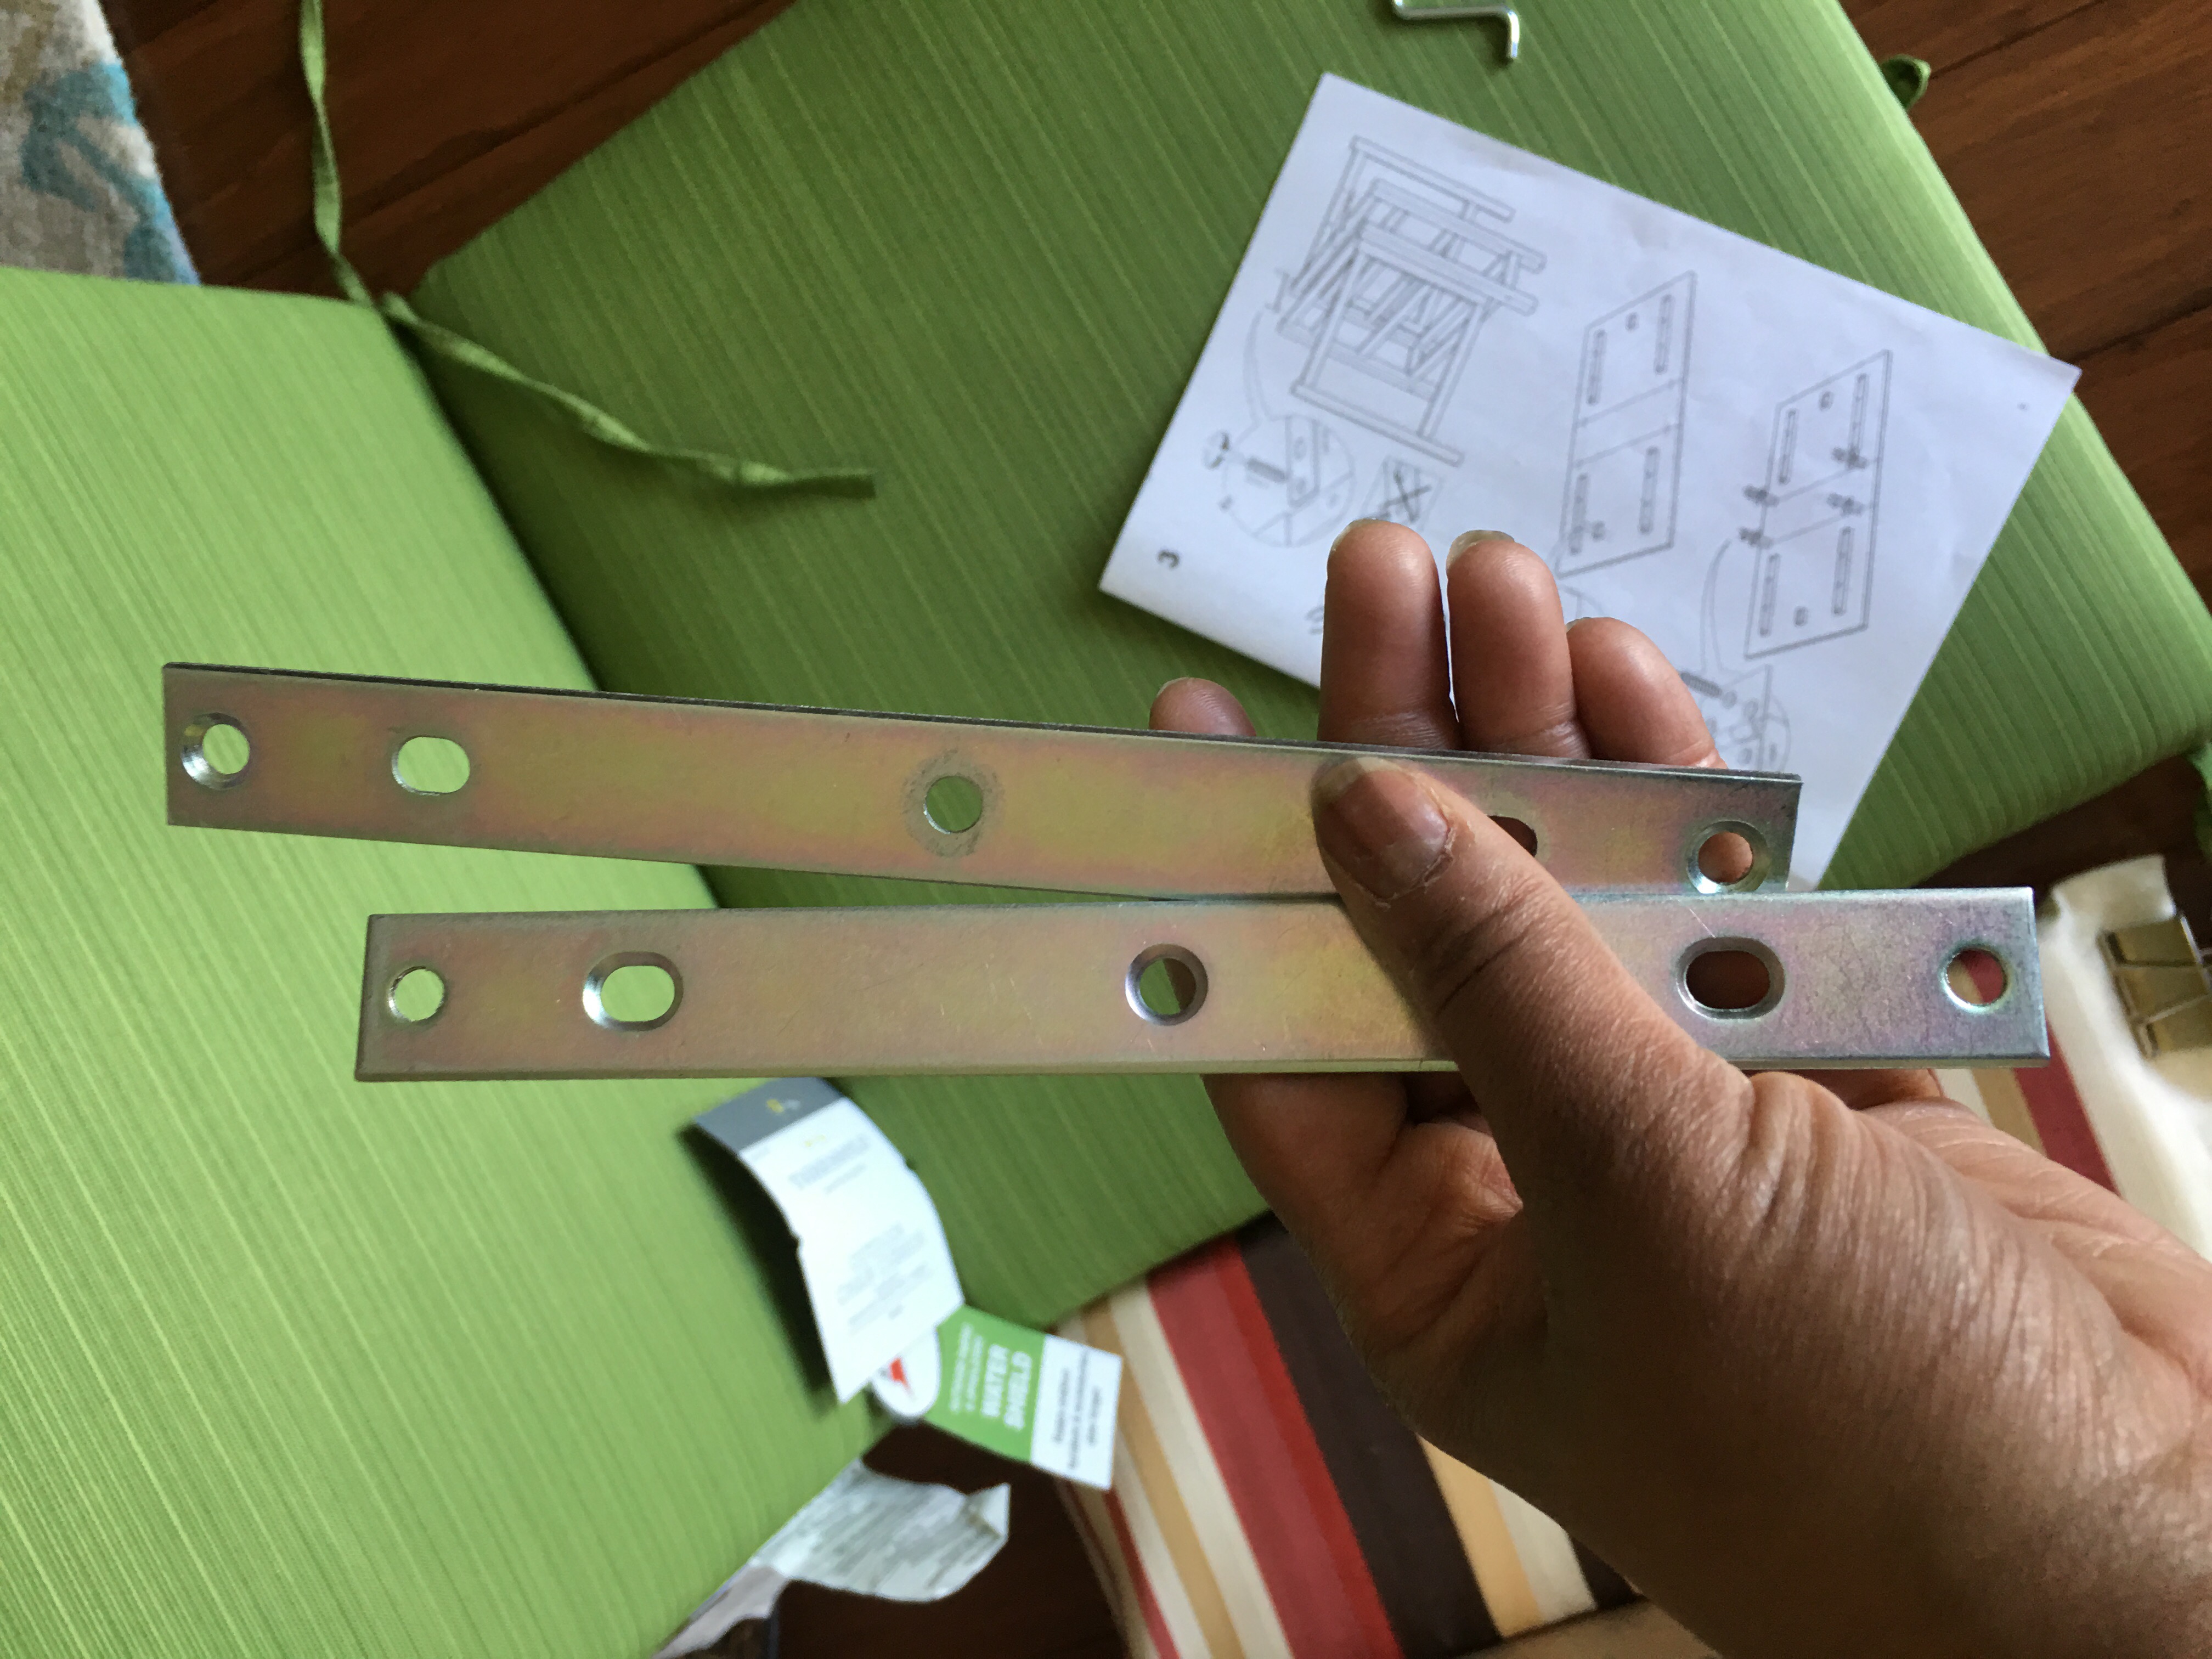
One on each side. Secure with provided screws.
Mending plate attachment done.
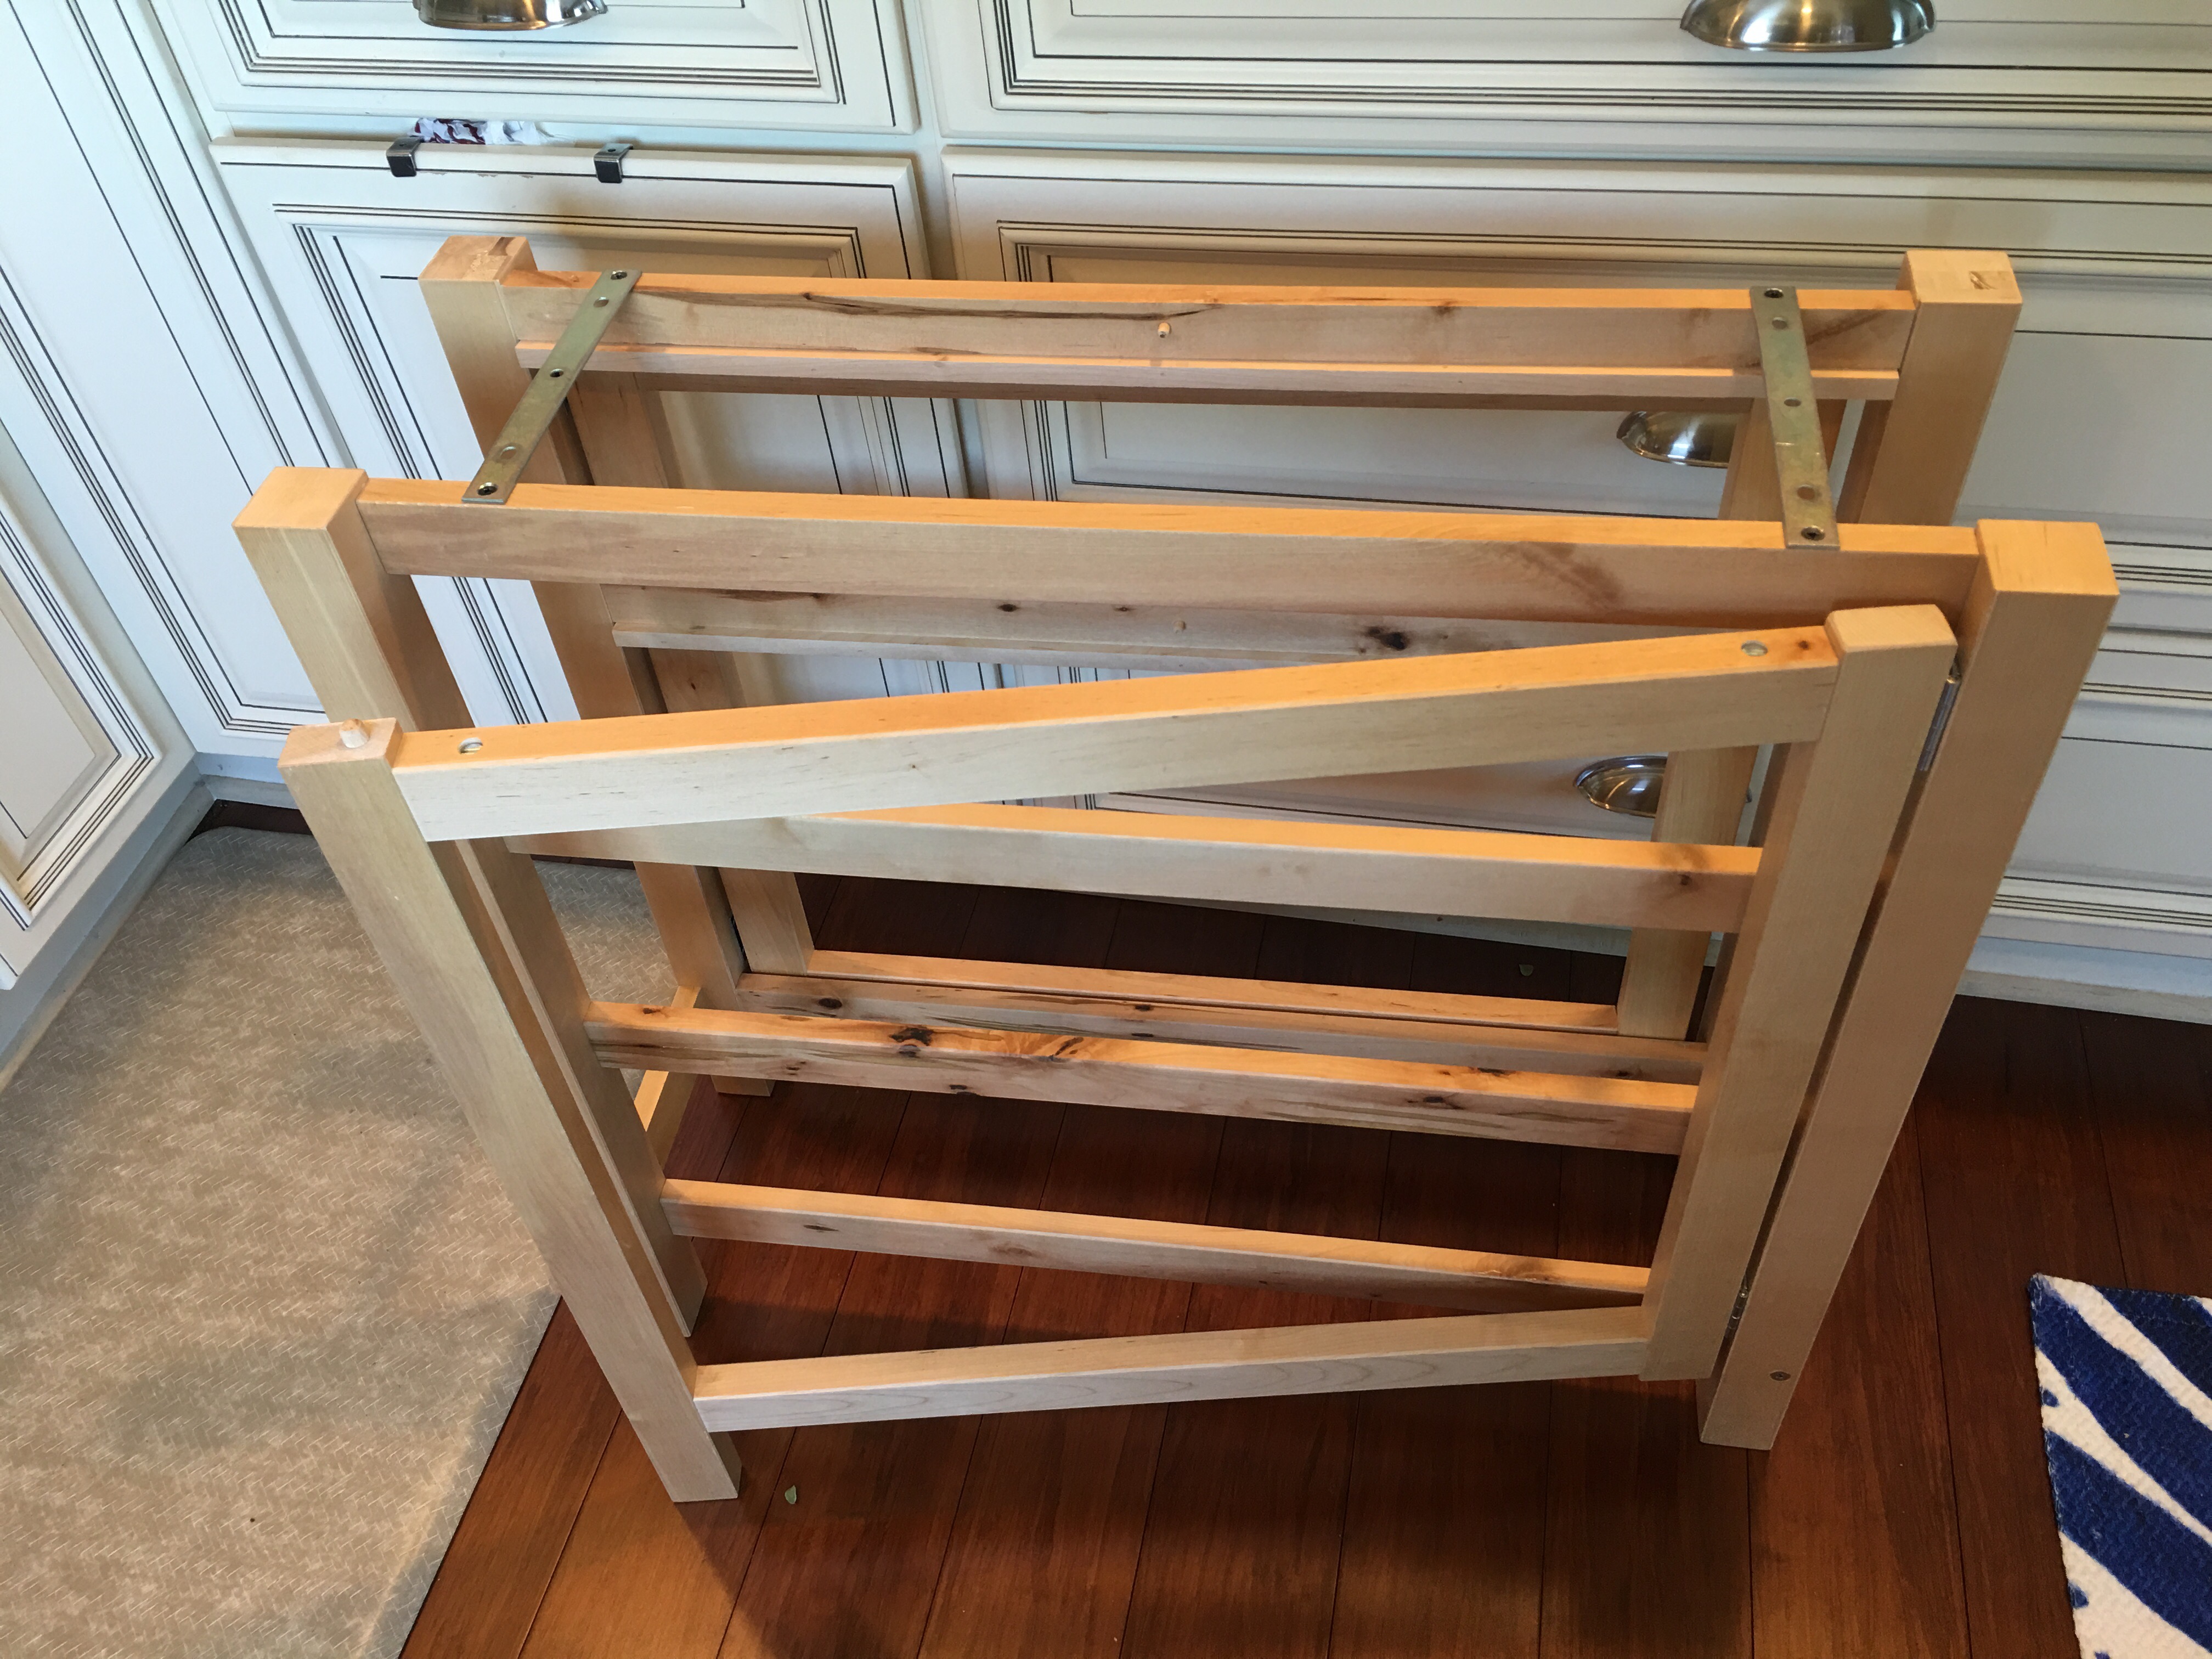
- Step 4: Lay out each table panel (both leaves and the top), and attach the leg locking block and hinges.
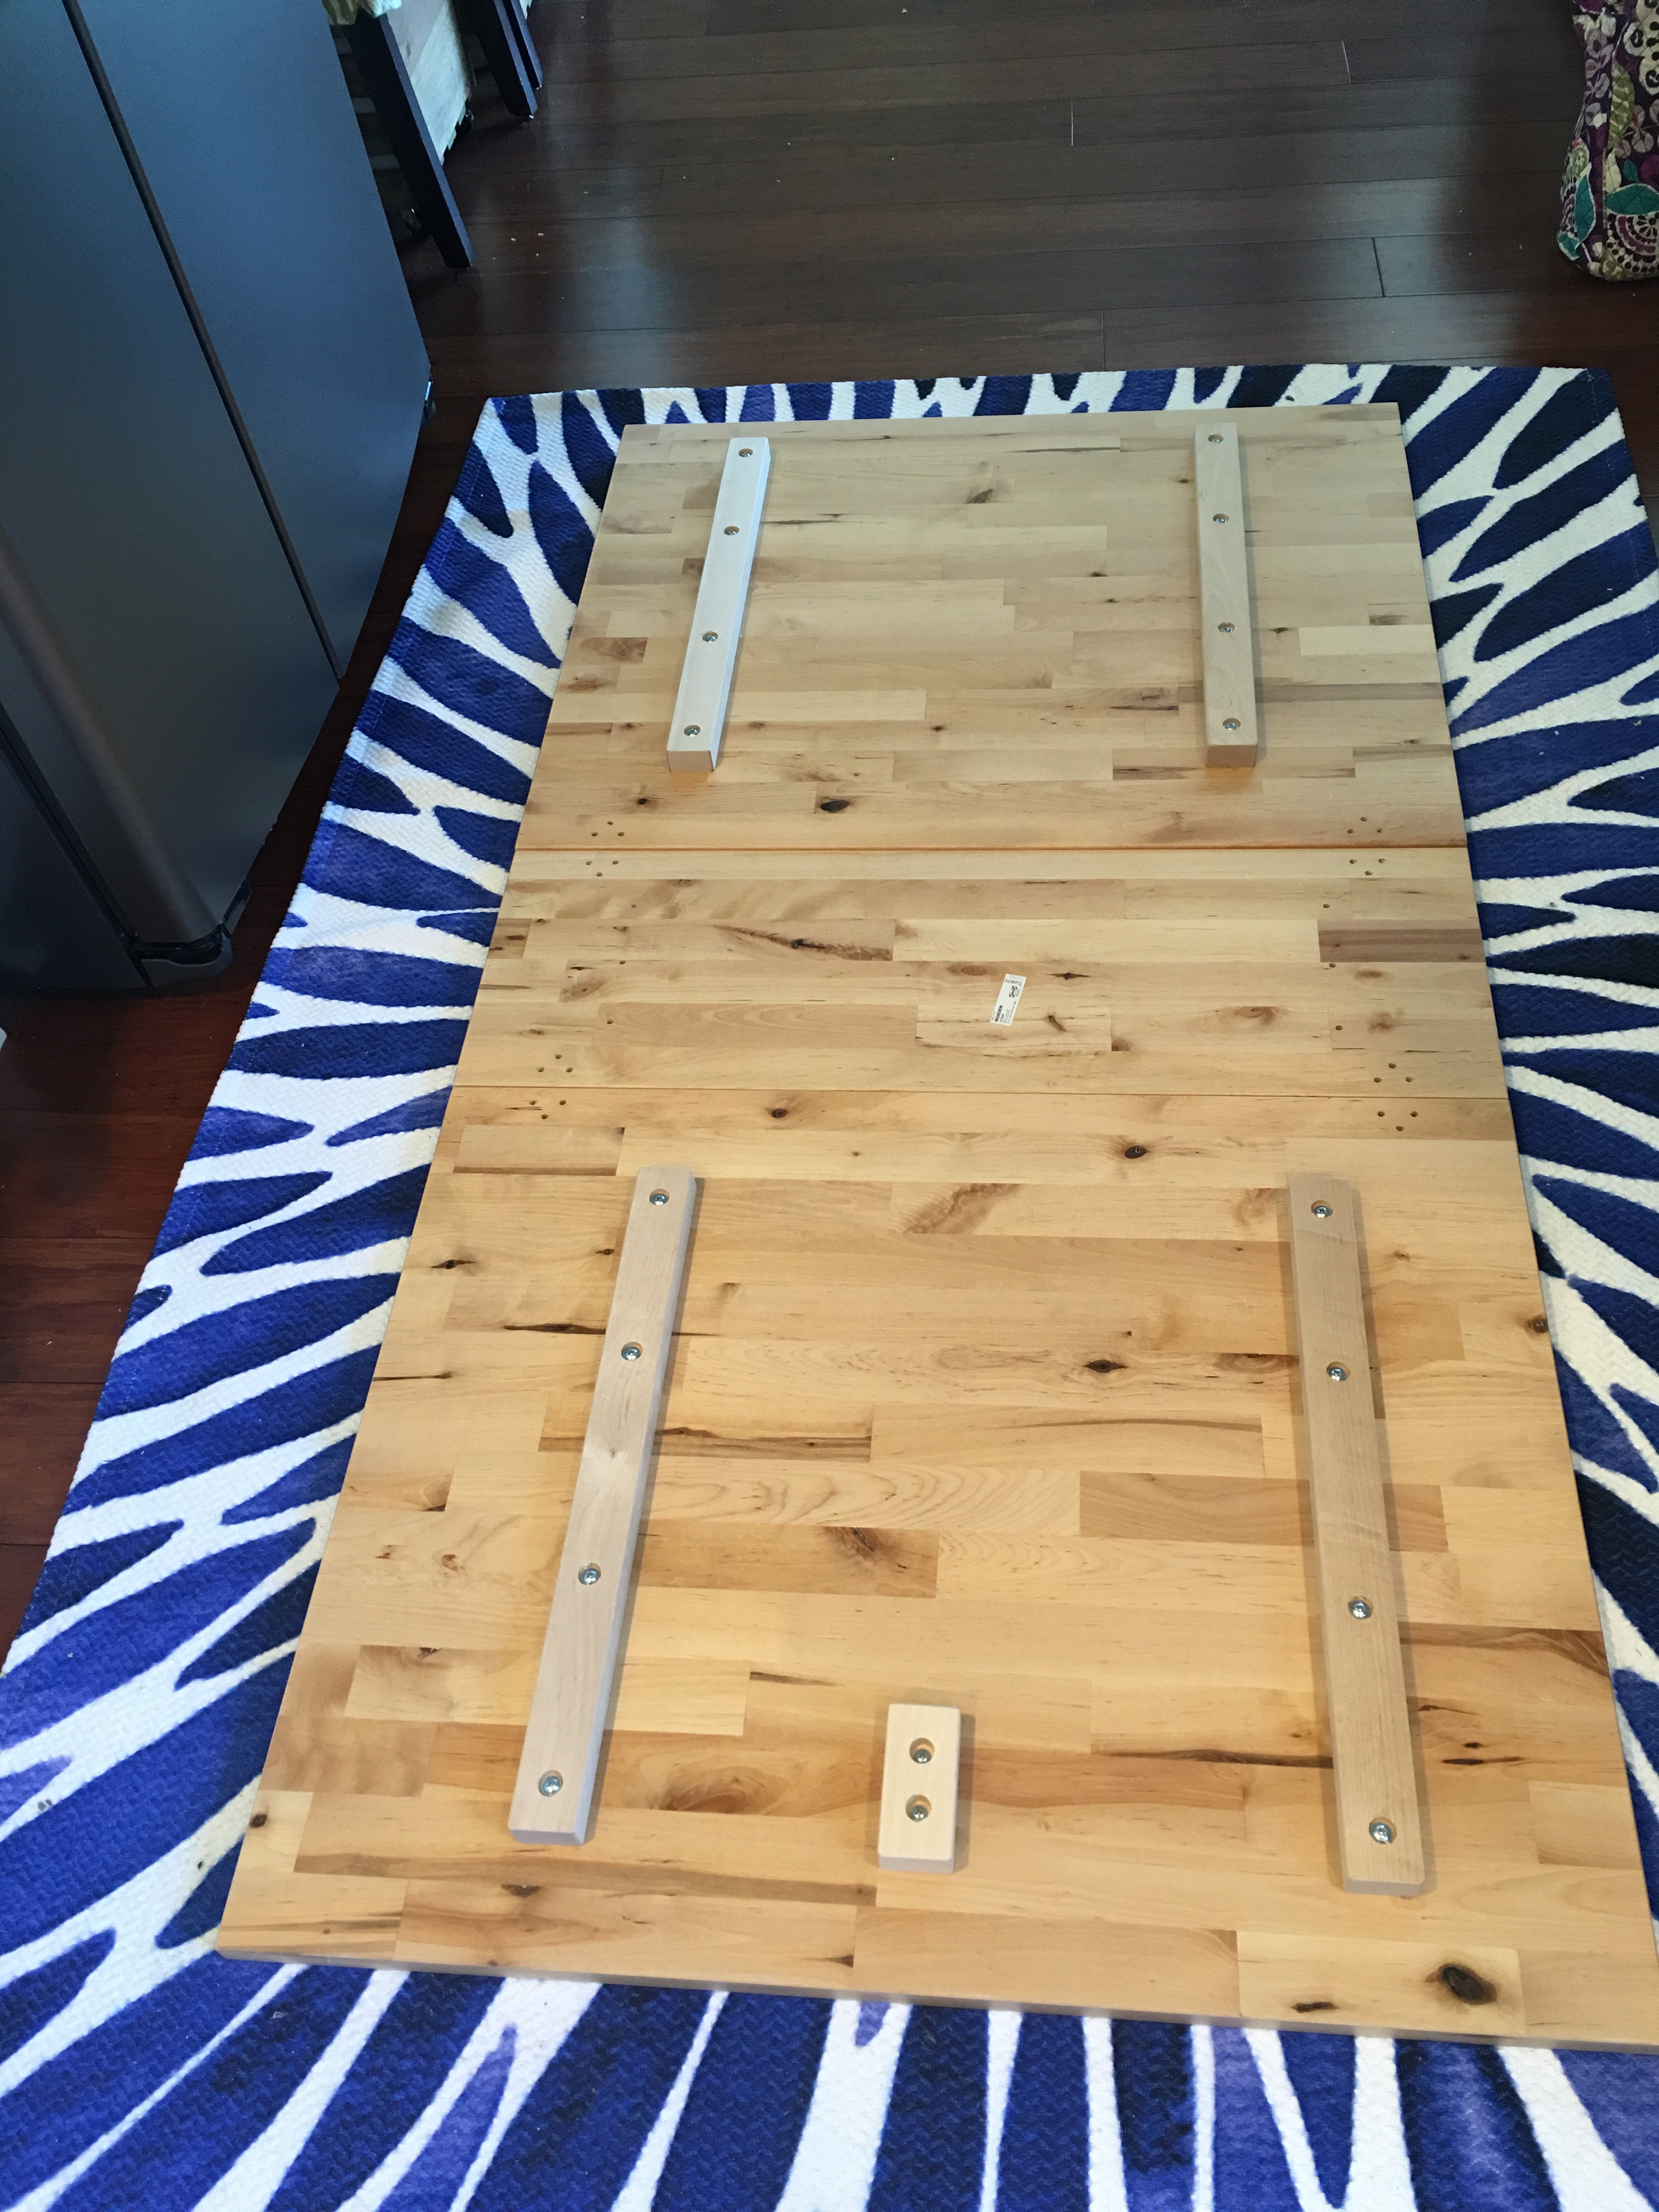
For whatever reason, only one of the blocks which locks in and secure the legs when the table is extended is pre-assembled. So in the picture above, only one block is added to the underside of the table. But they provide you with the block for the other side to add as part of the assembly.
Once you screw in the block using the provided screws…
…you now have two blocks for leg locking – one on each side.
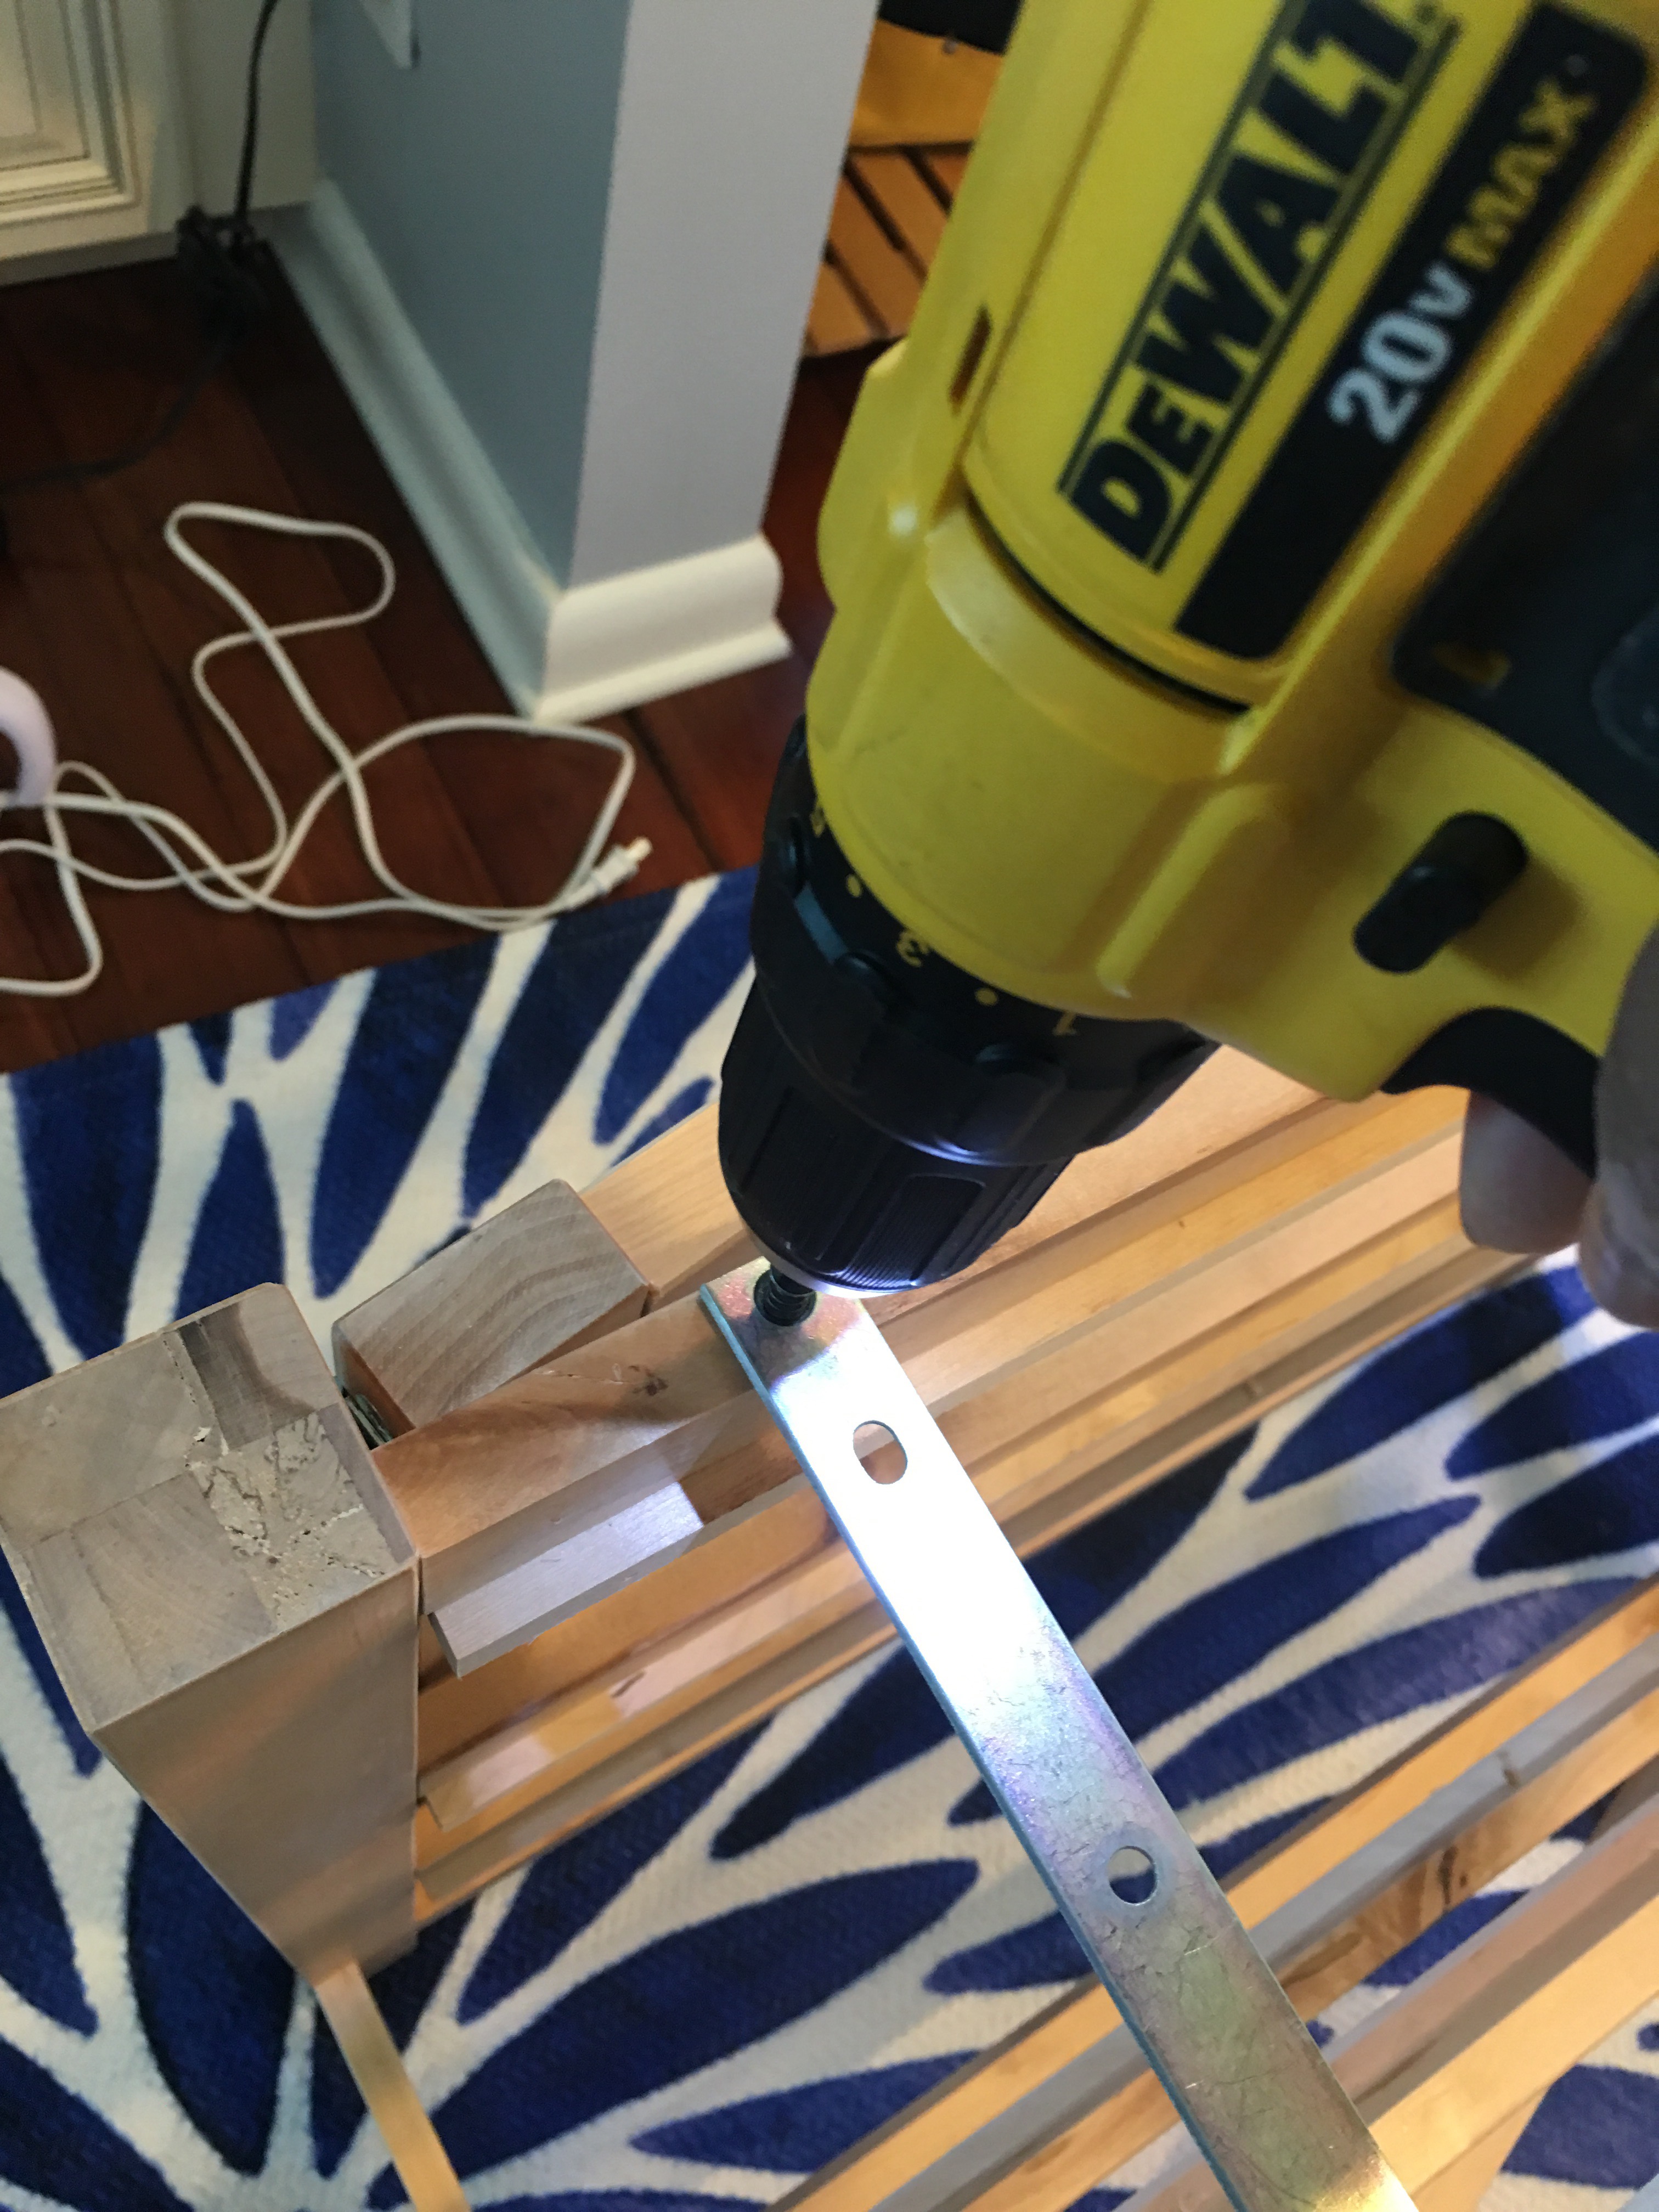
Per the diagram provided in the instructions, add the hinges next.
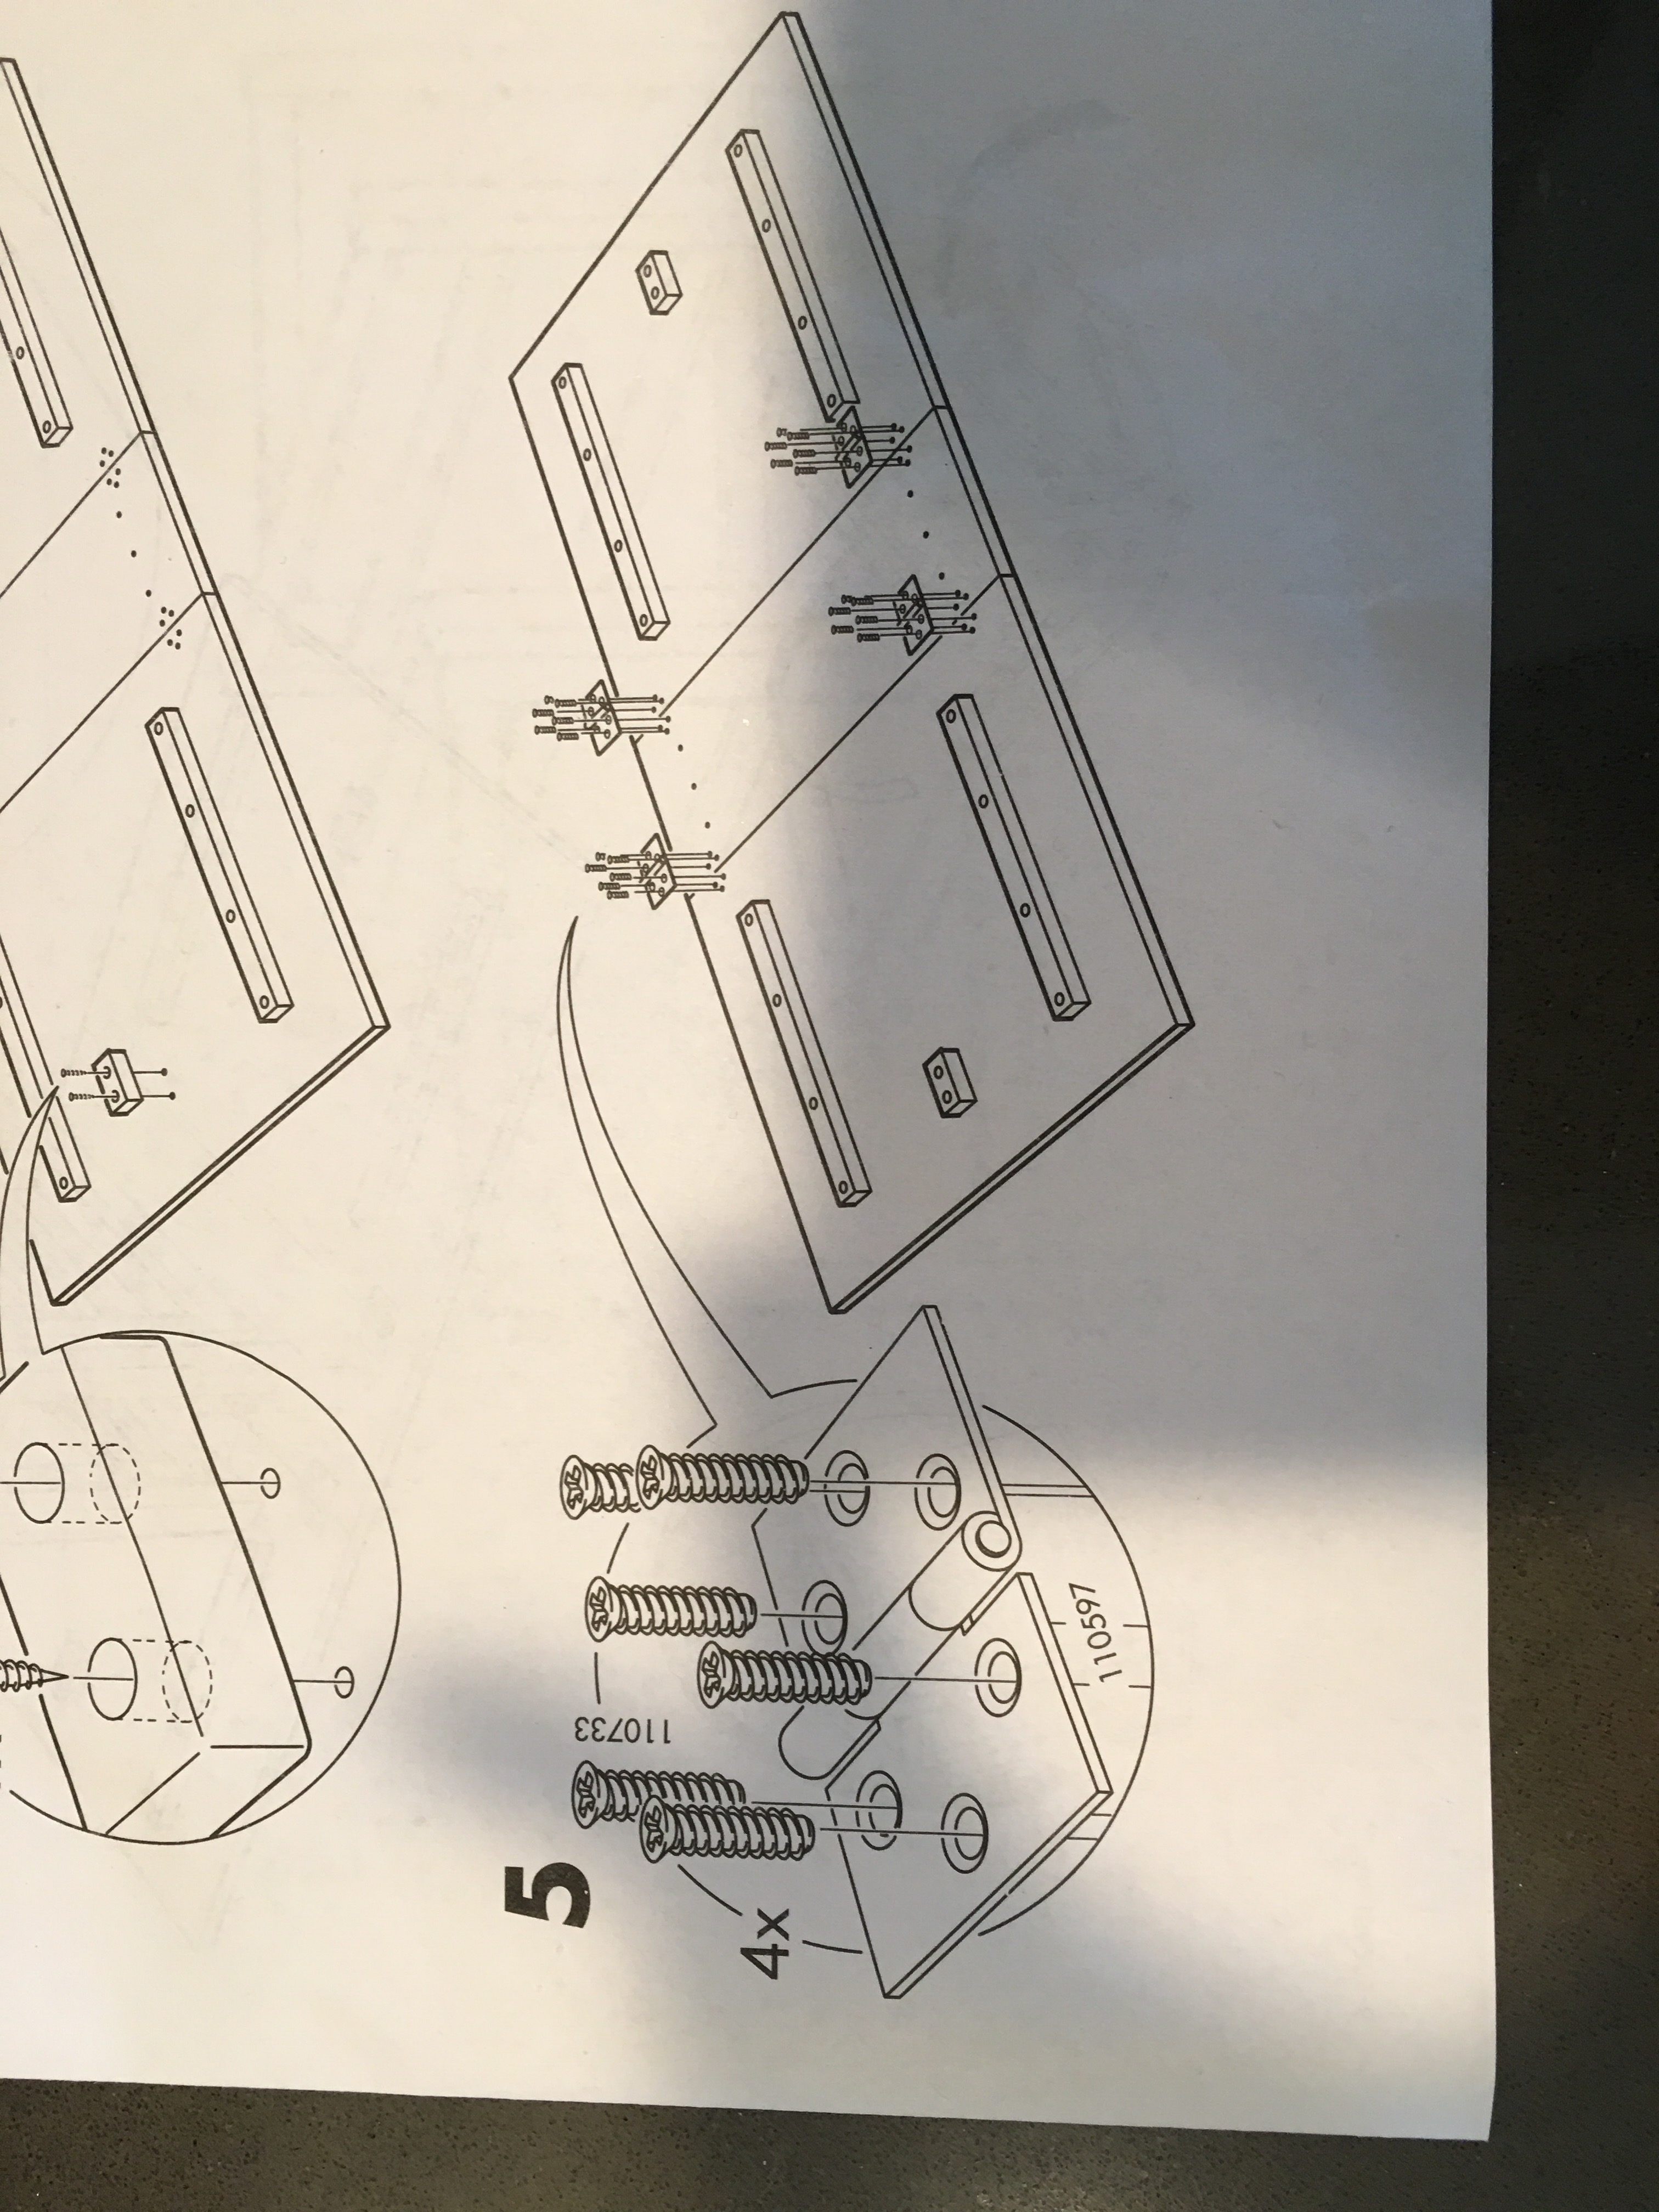
Line them up with the pre-drilled holes and add the screws.
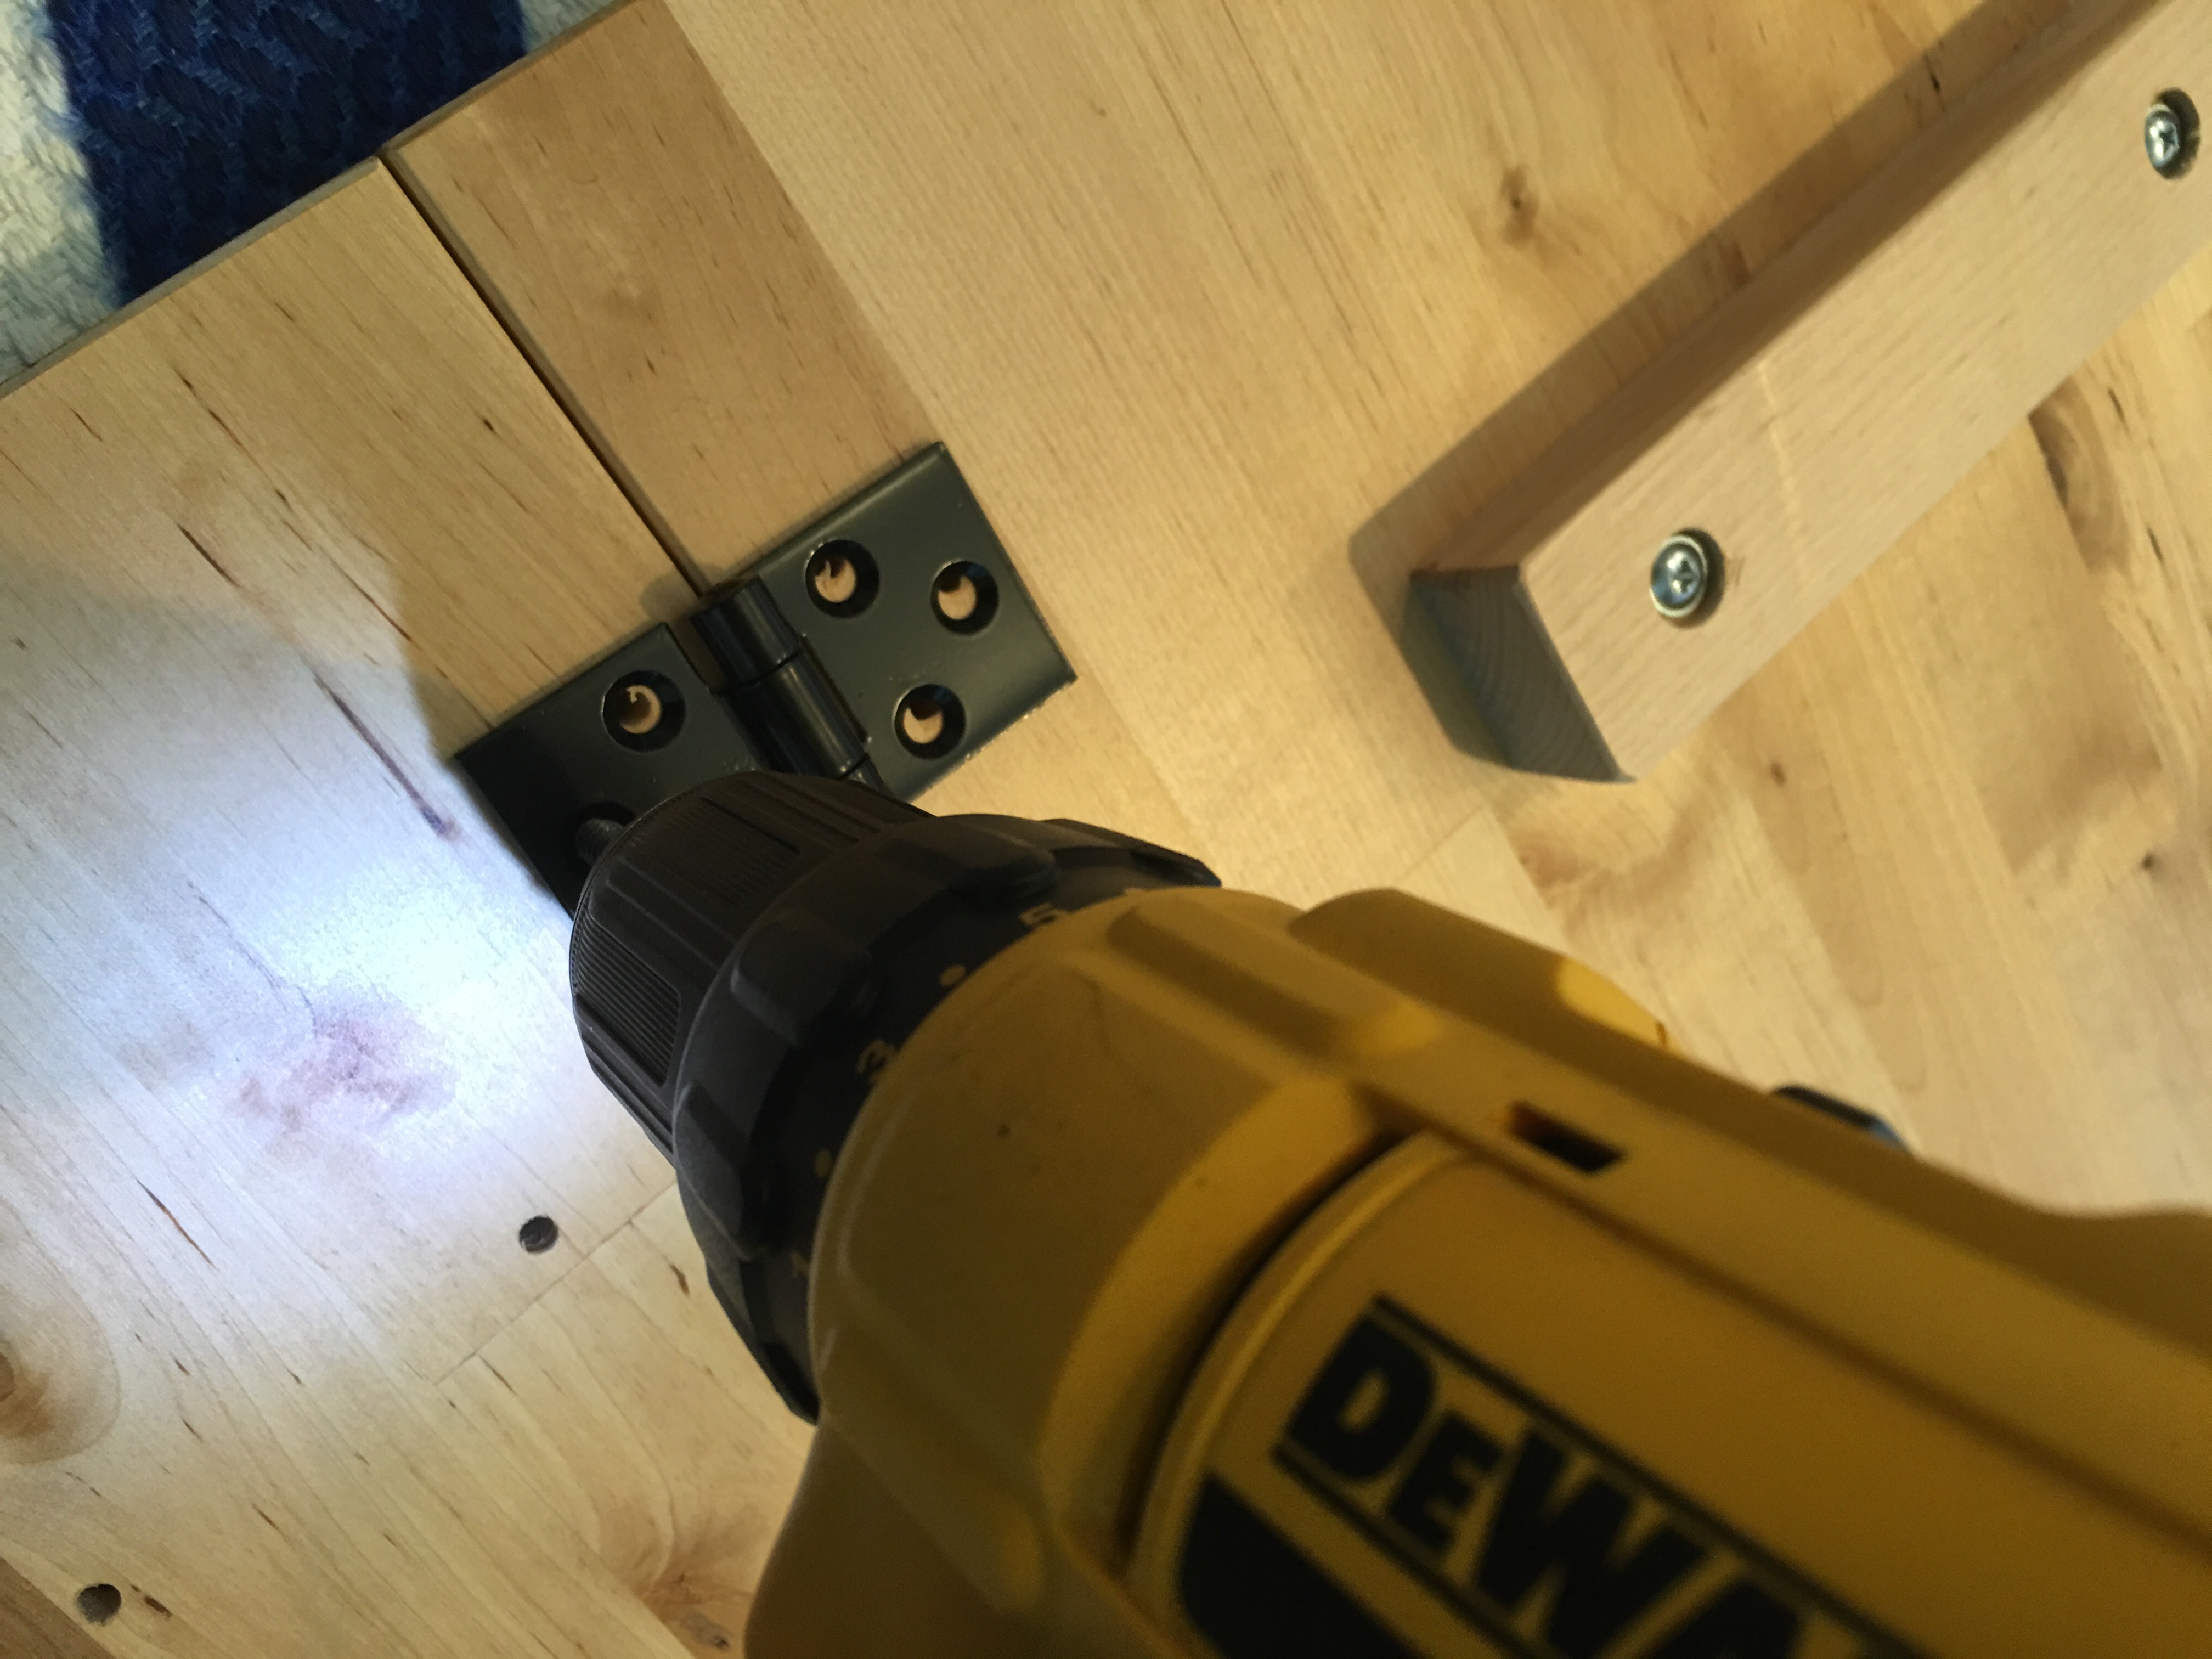
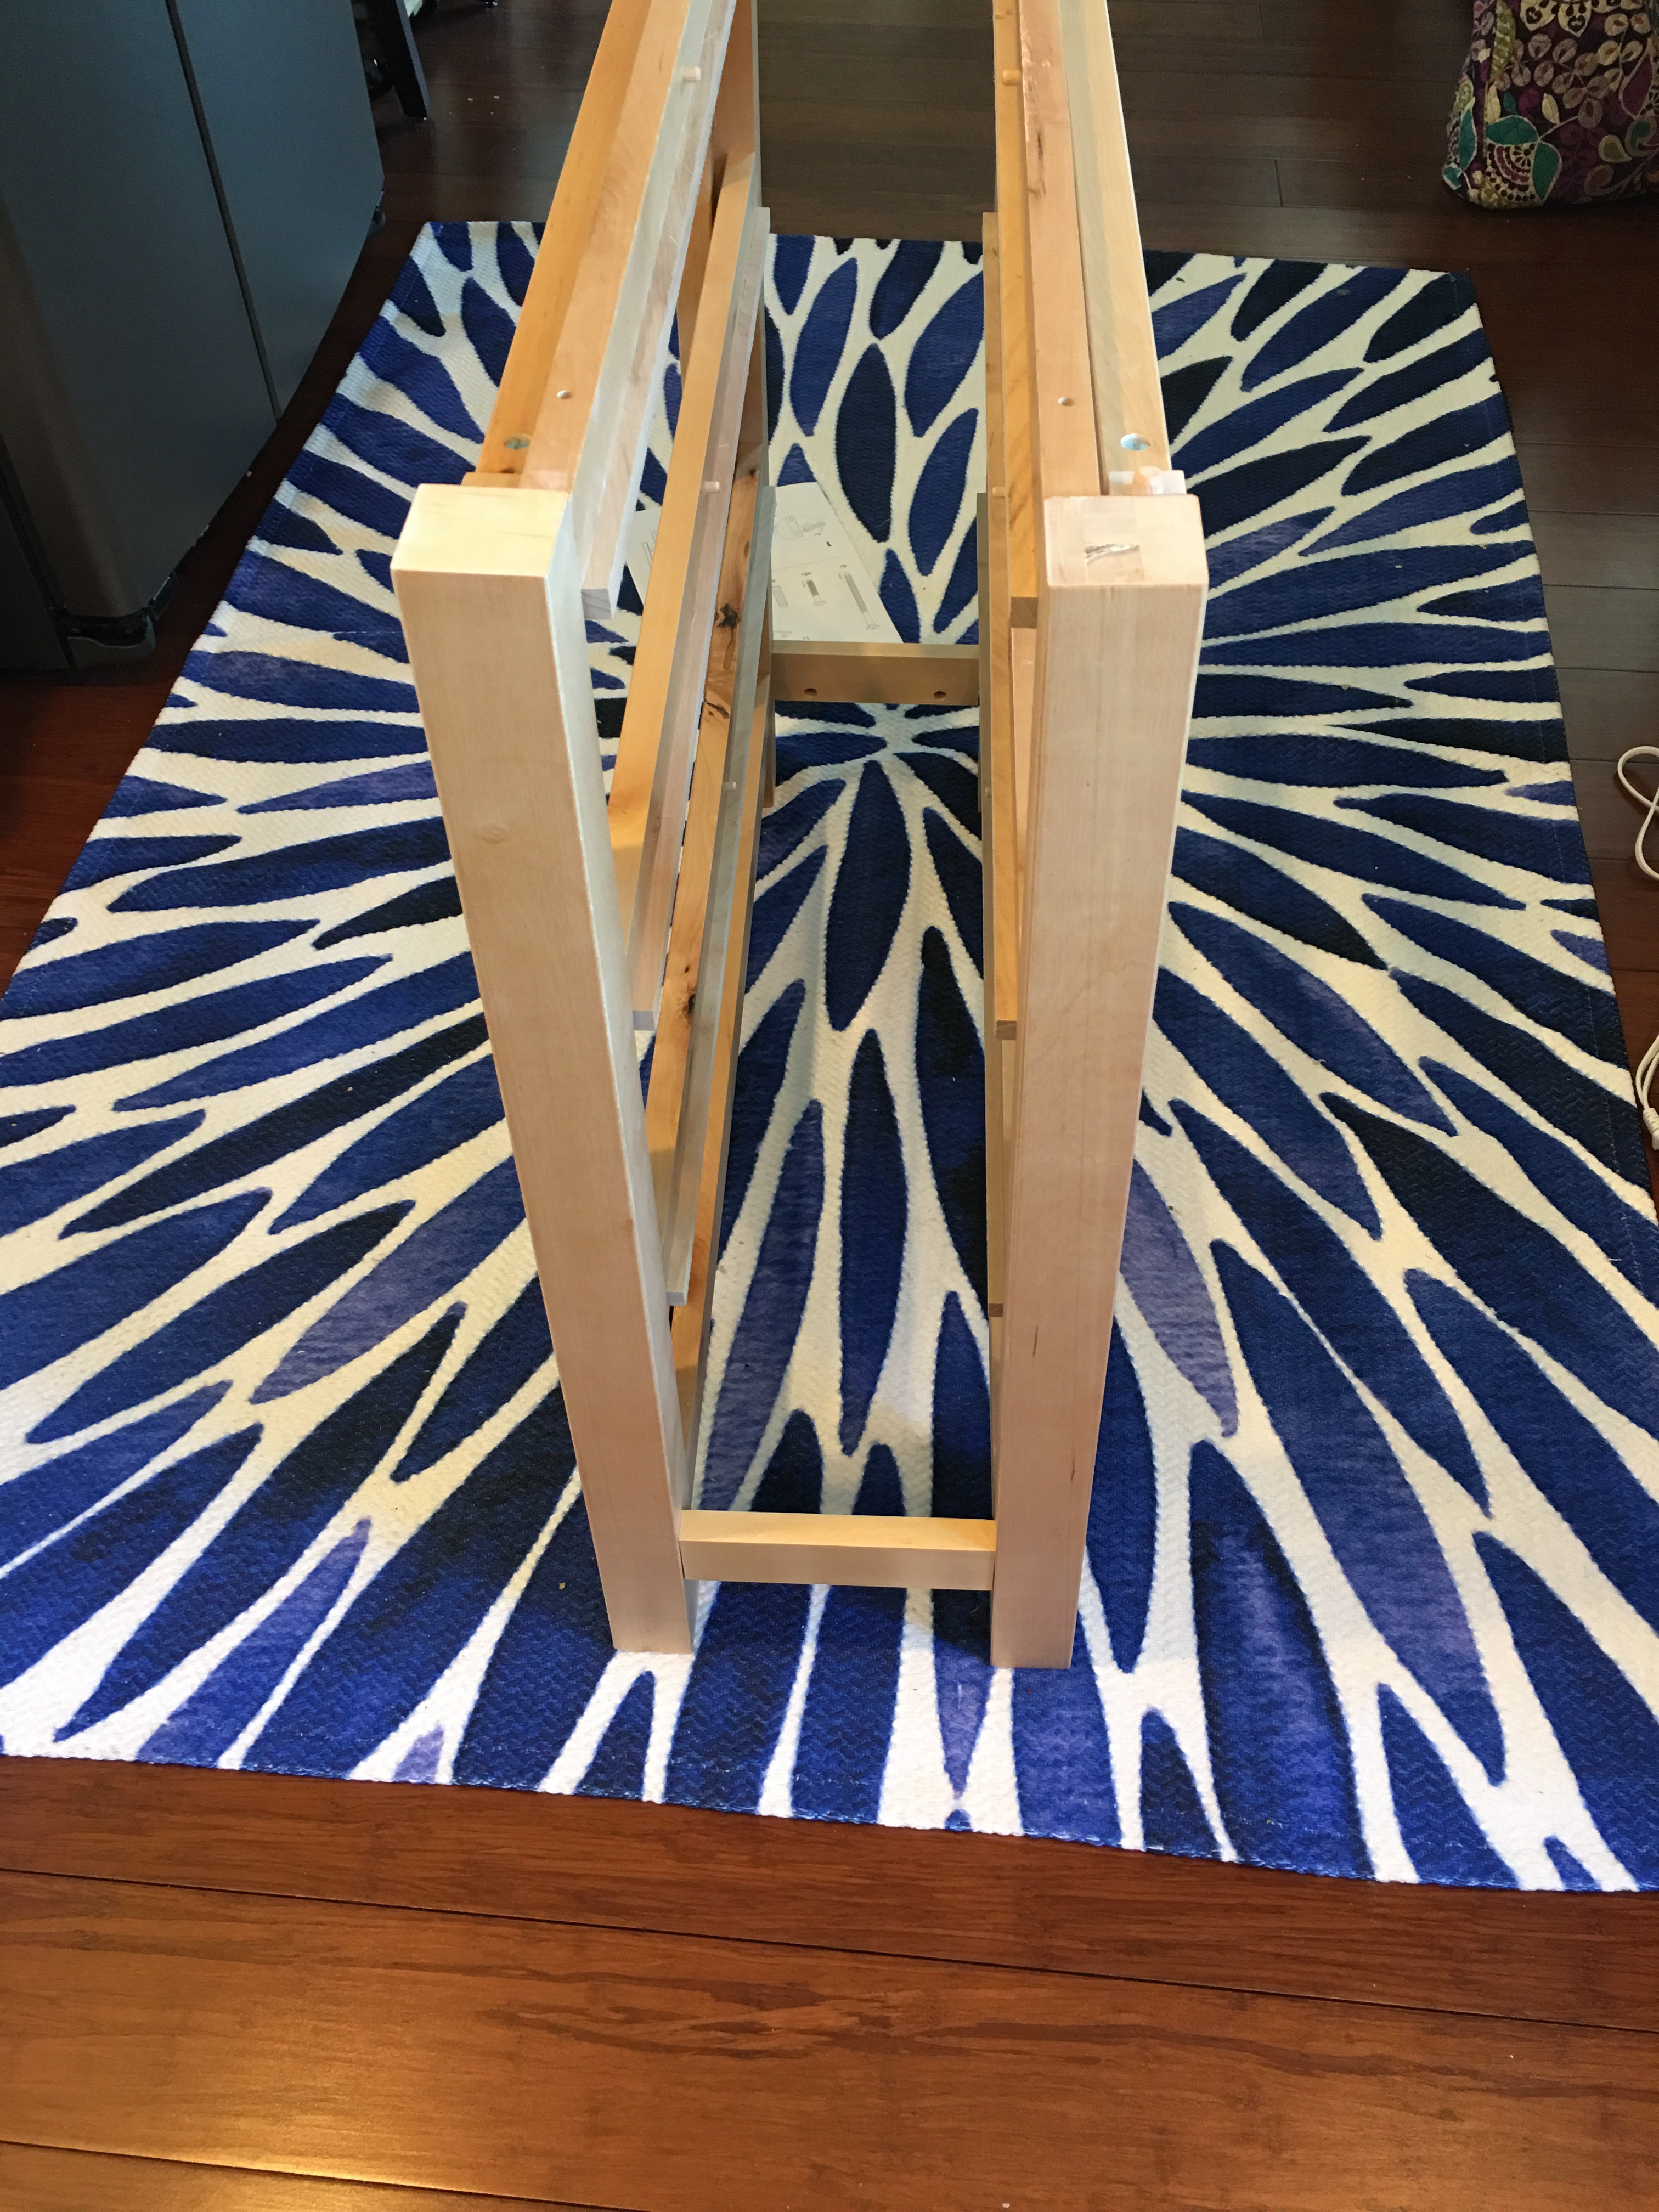
Done. Now the table super leaf is in place, ready for its base.
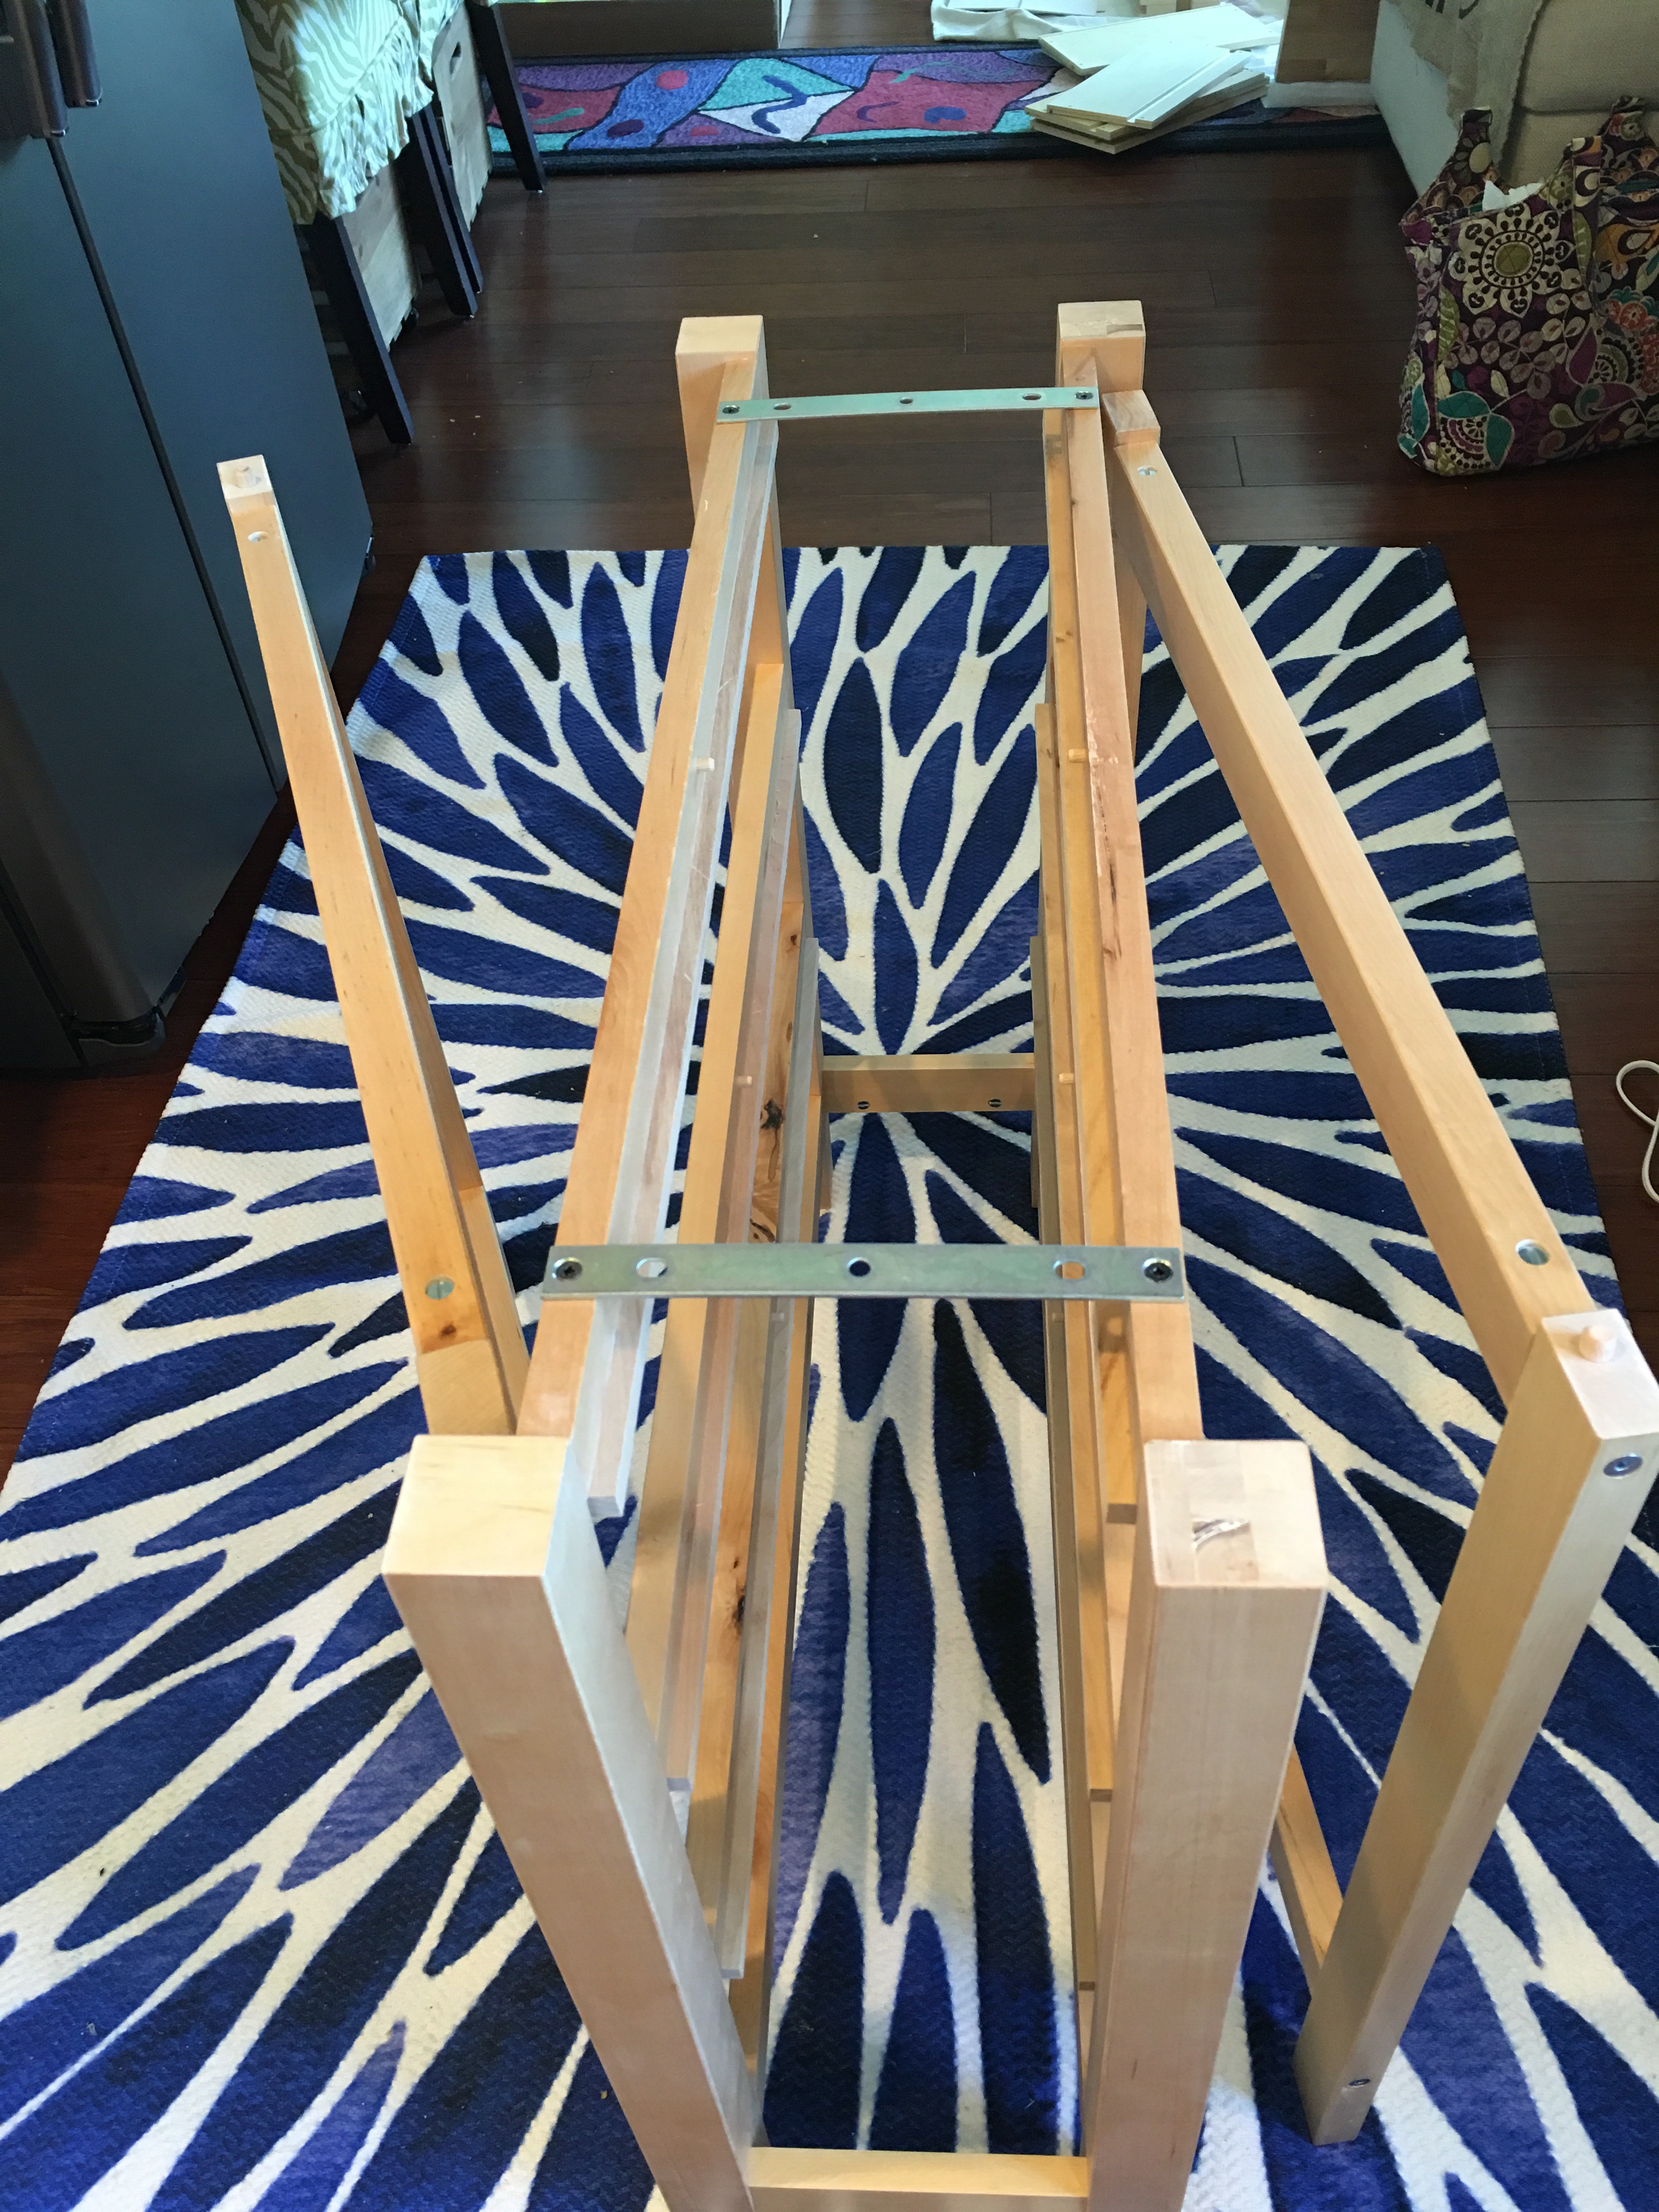
- Step 5: Add the base to the table top.
So the drawer brackets and swing out legs form the base of the table. But before we screw it on to the table…
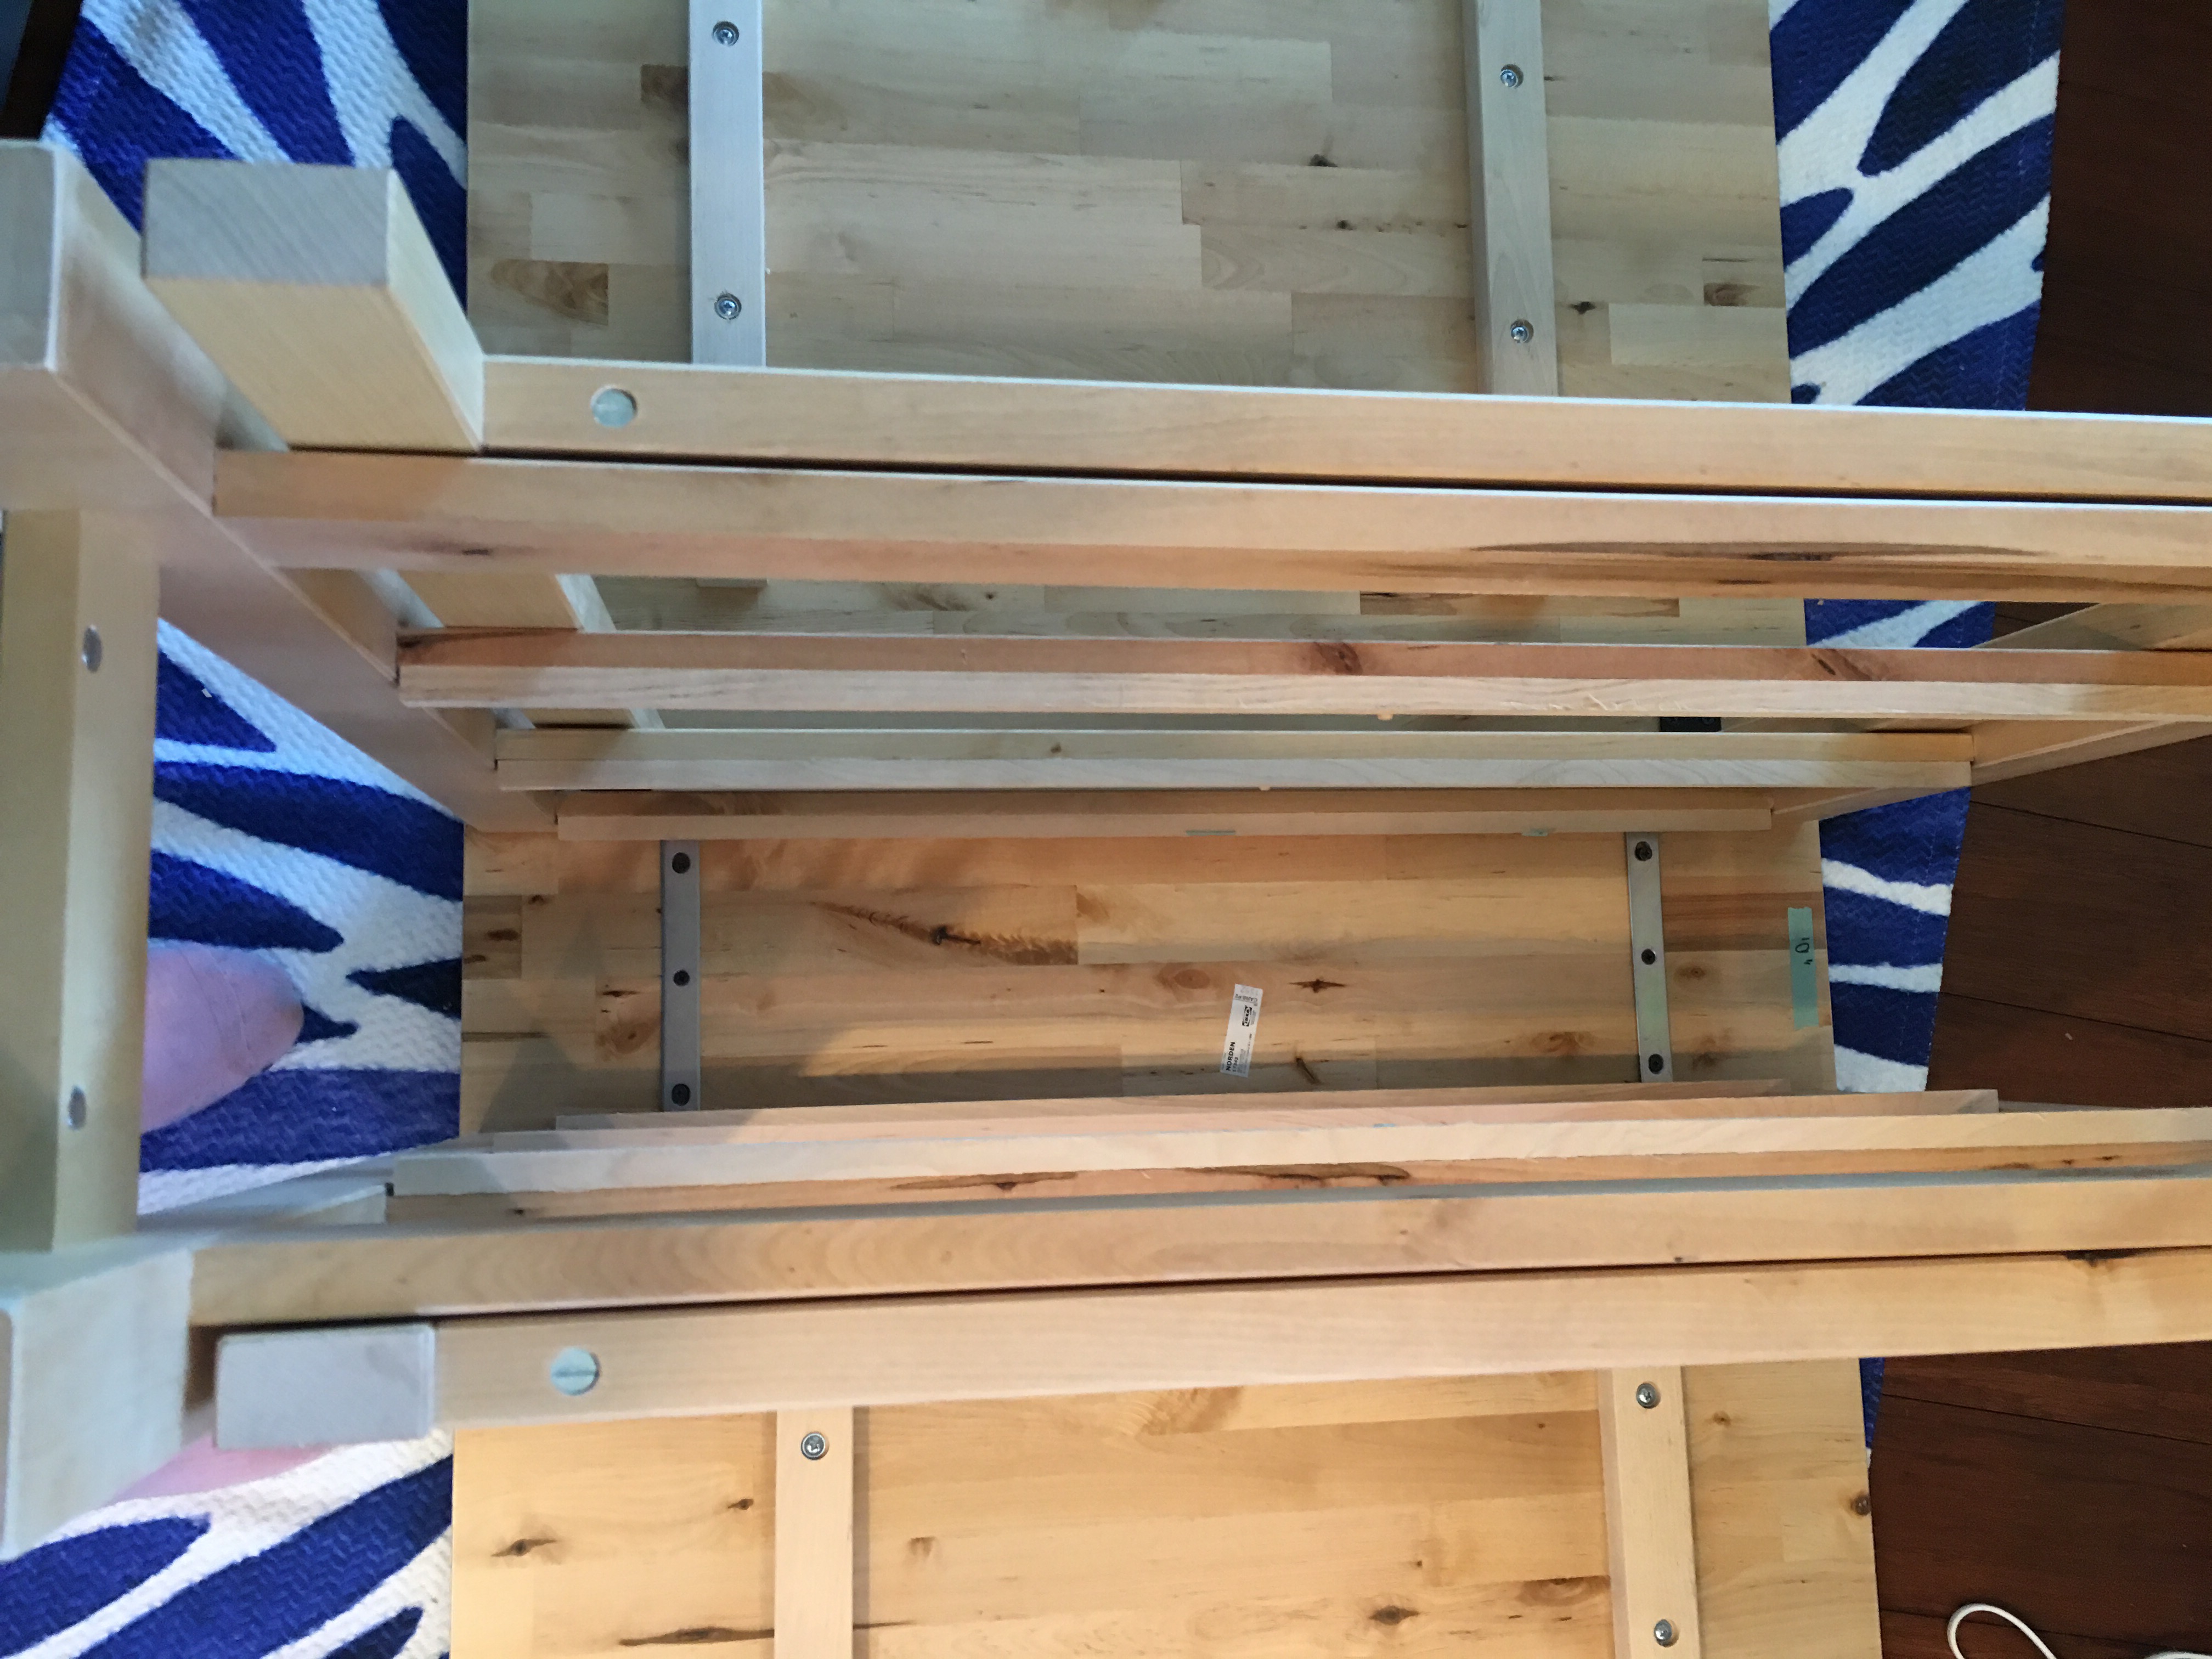
…it’s time to measure every inch of this. Because here’s where you can clearly see how this table is constructed. I can so DIY this table (and I’m definitely making it a point to do so).
So after using the tape measure and marking the measurements of every nook and cranny of the base and table top, I completed the assembly.
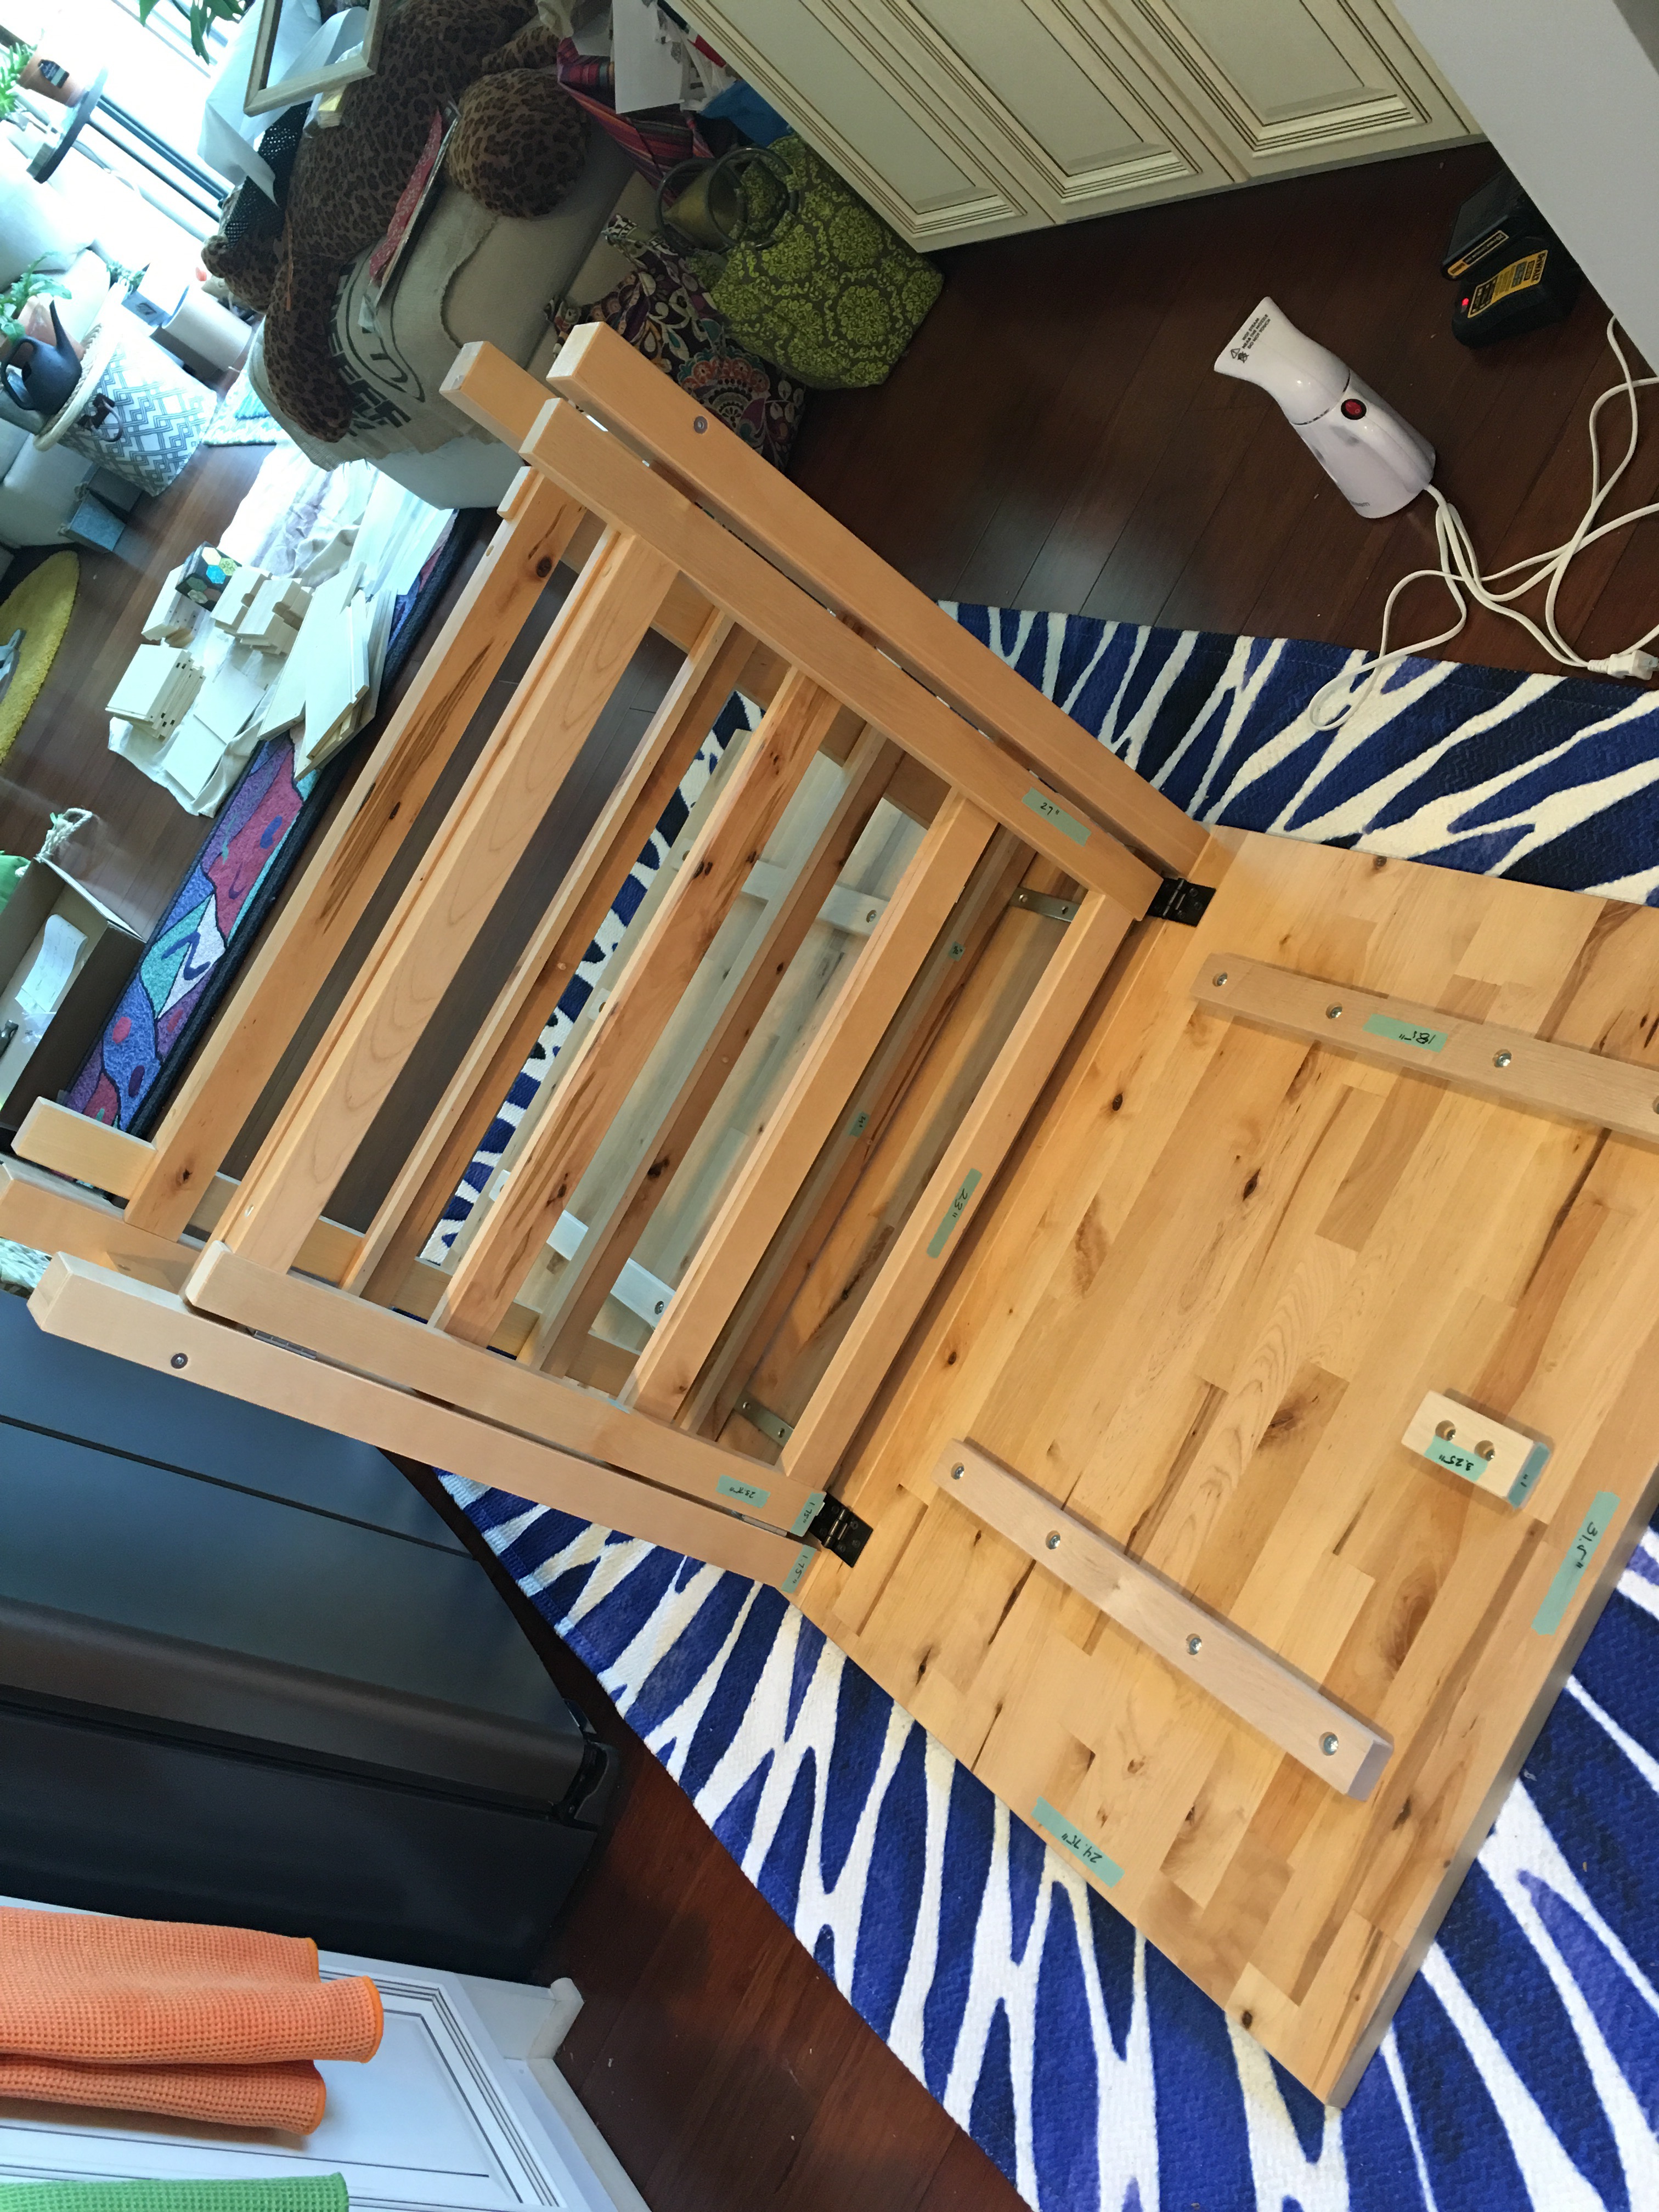
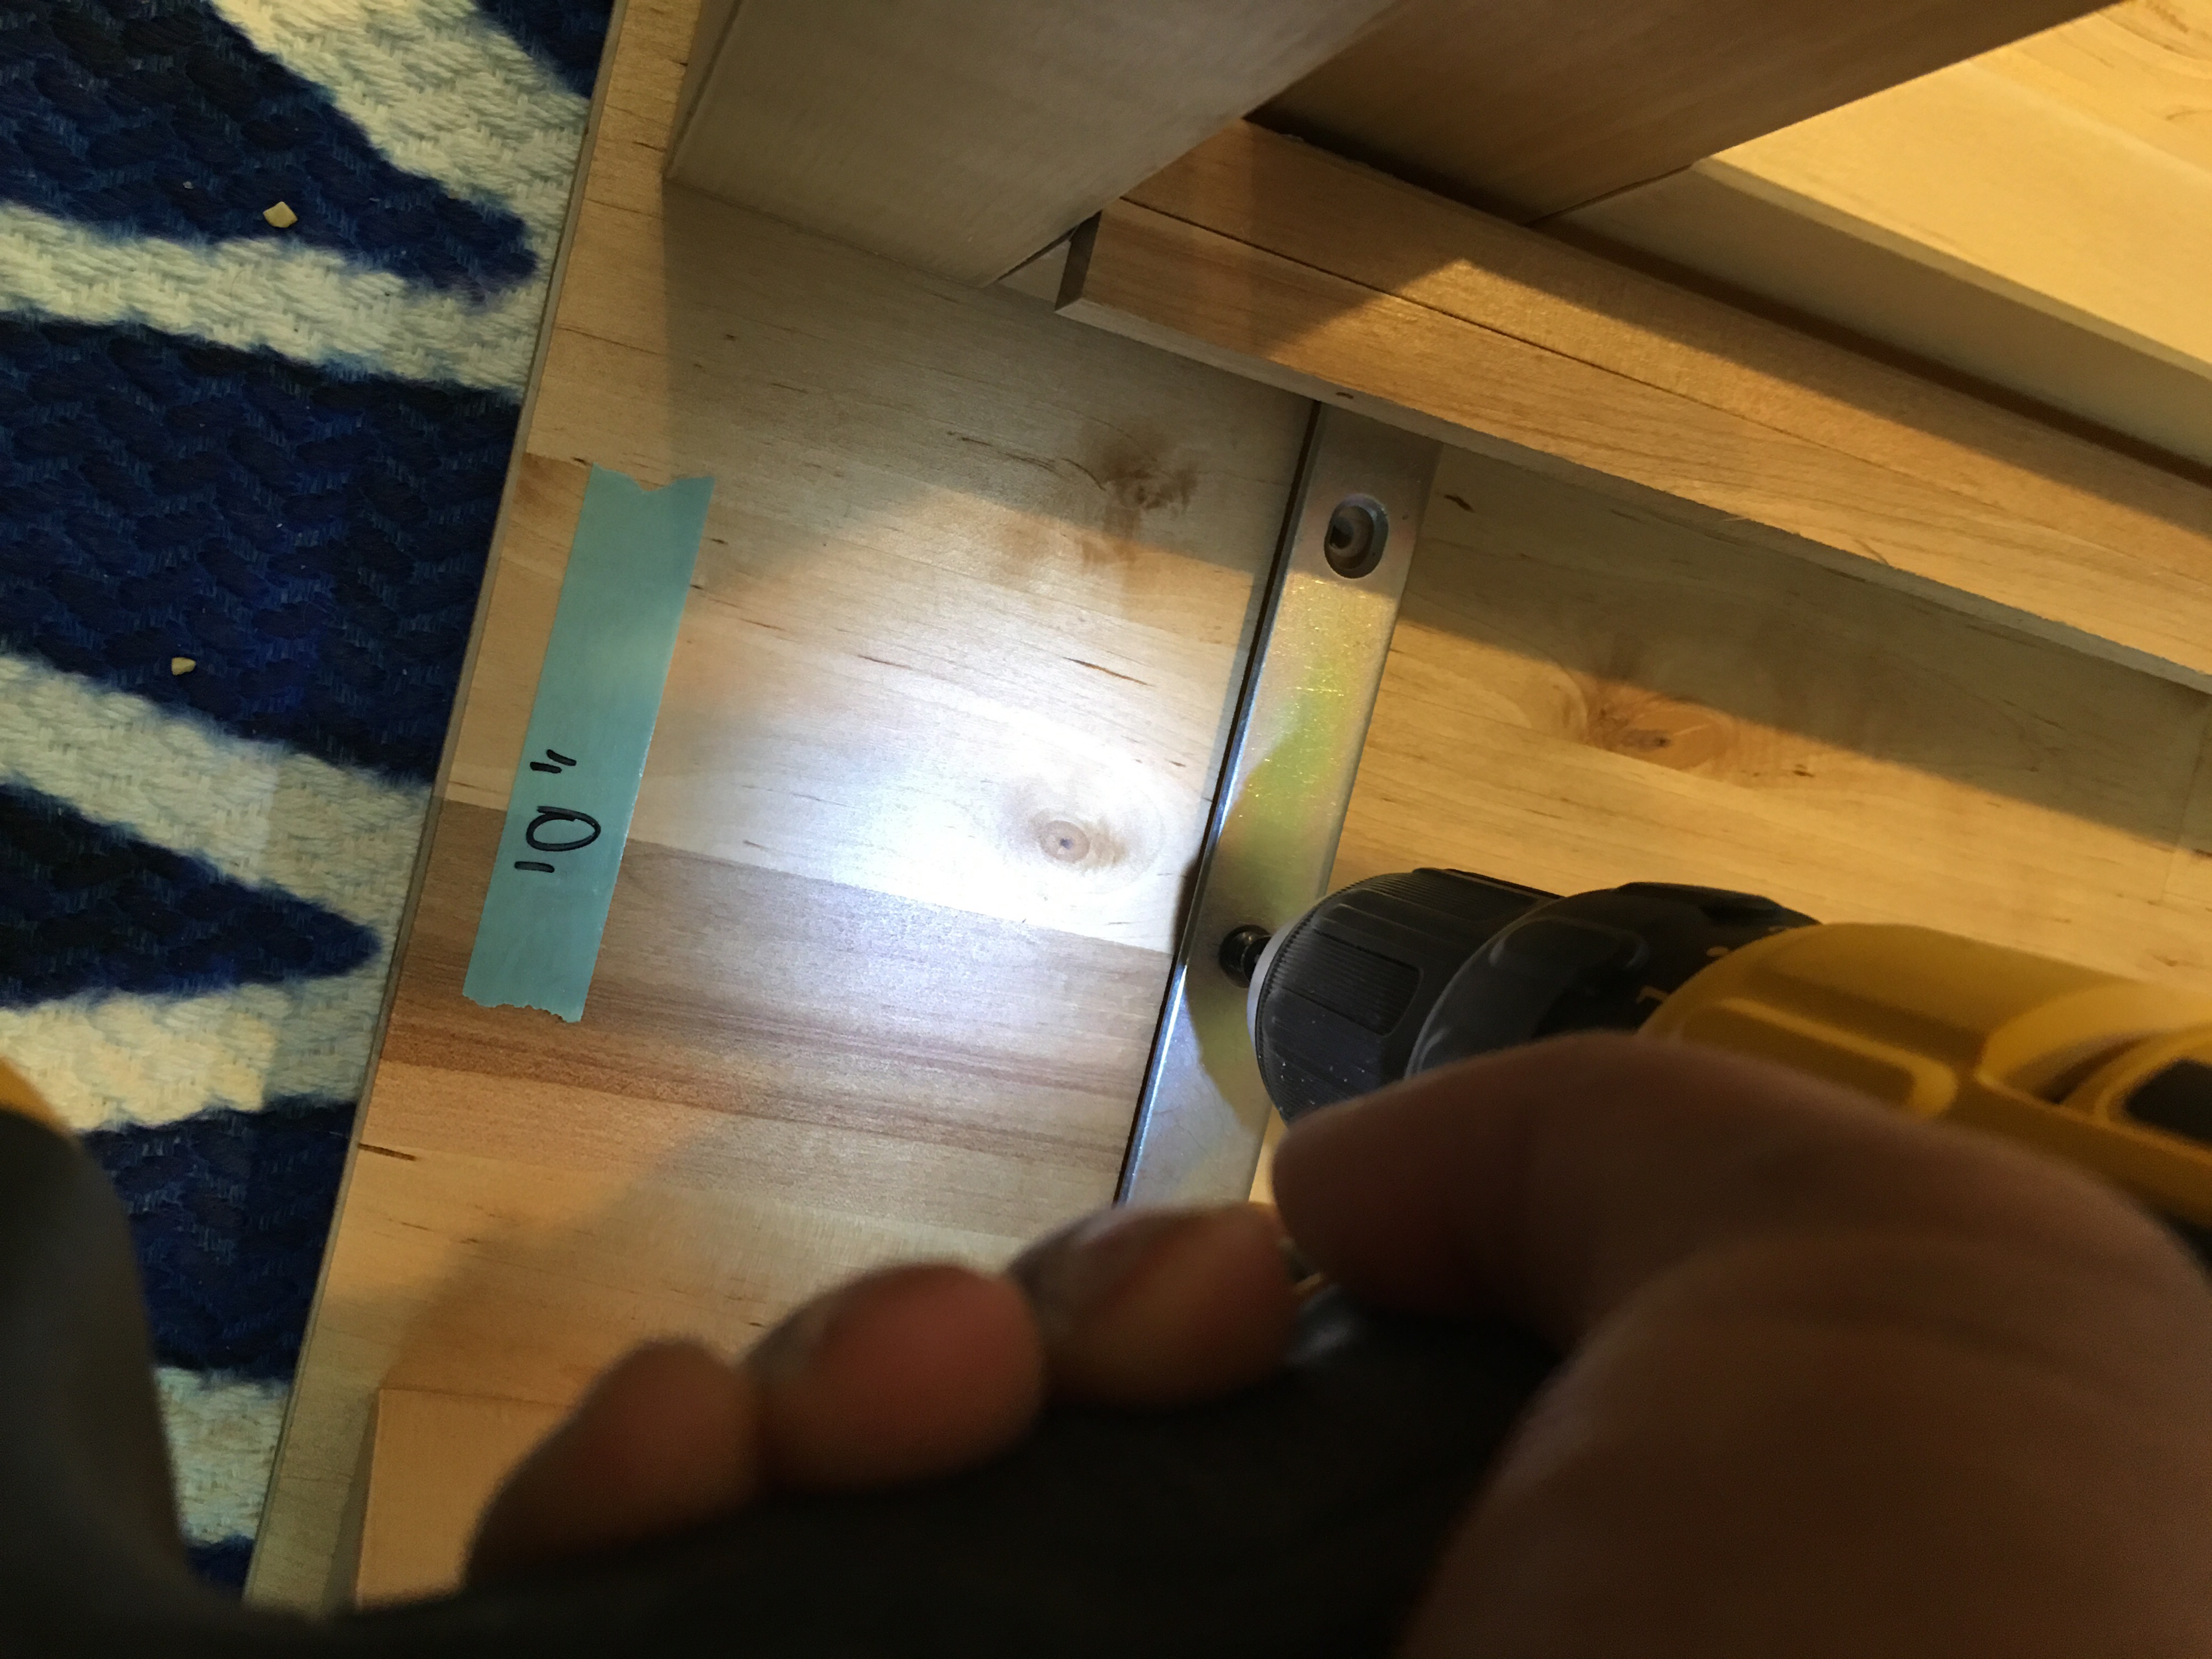
You invert the base and line up the mending plates with the pre-drilled holes. You then screw the base into place.
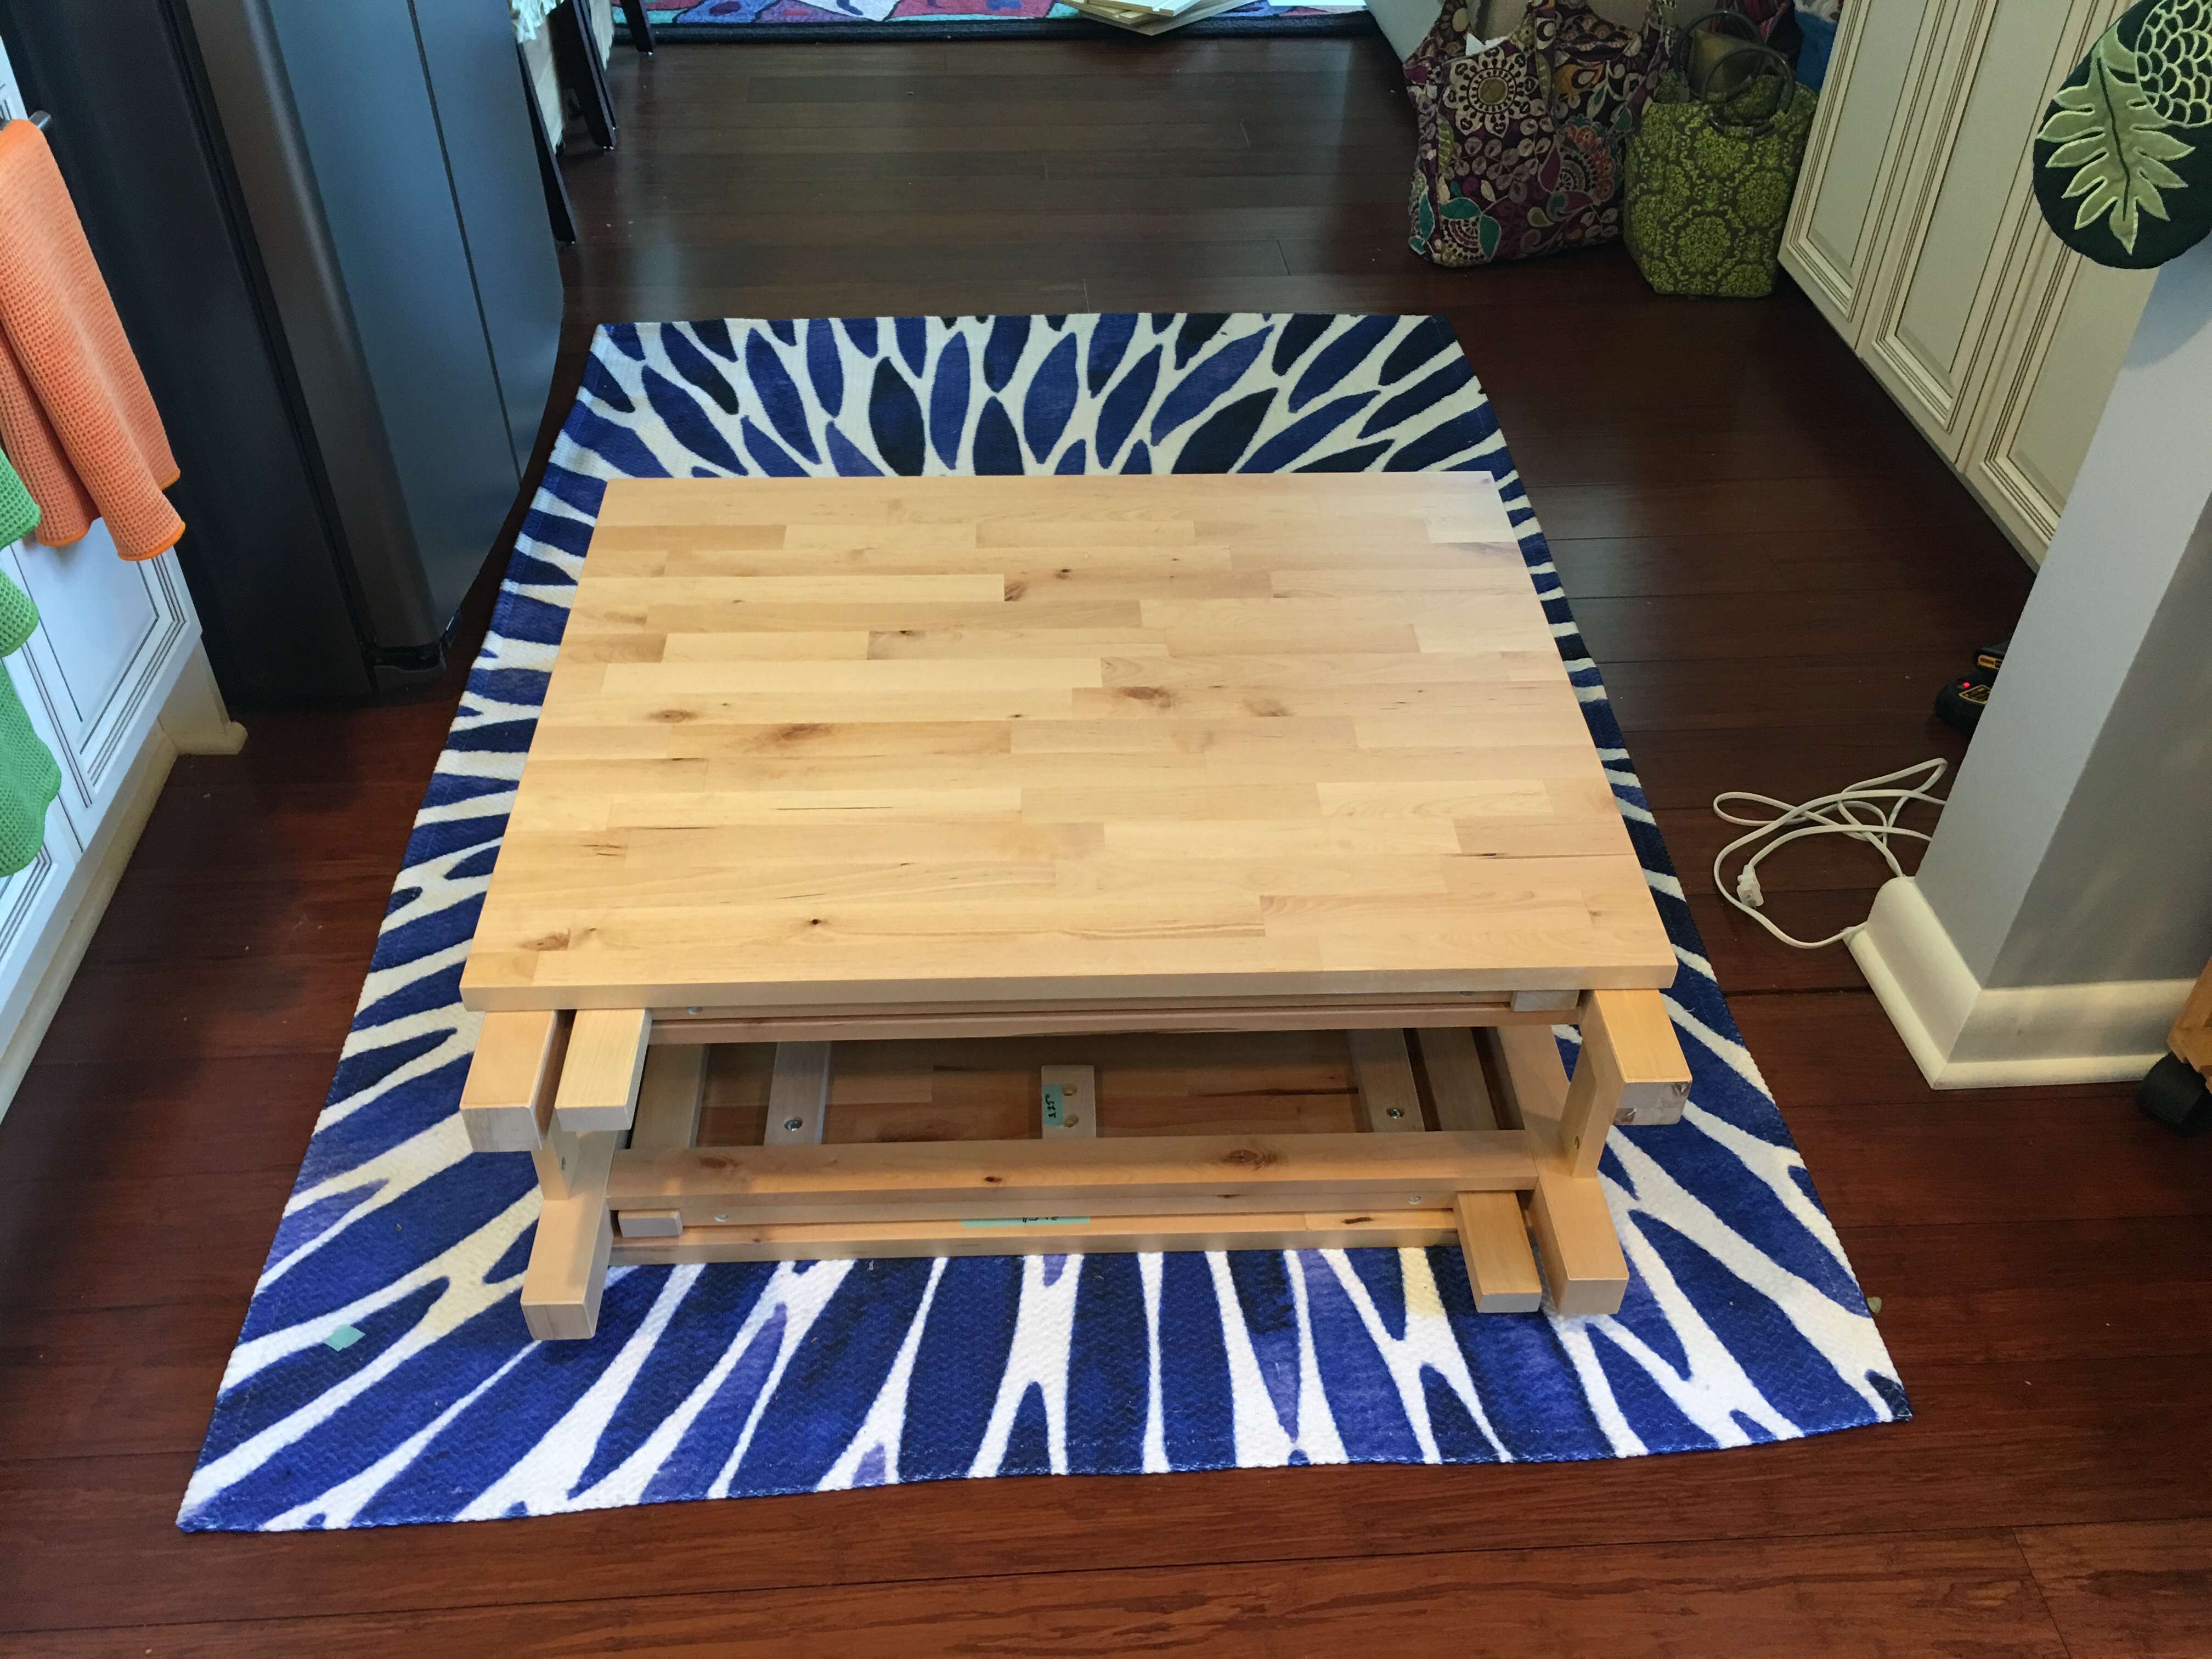
Assembly of table complete.
The table is pretty heavy by now. Most of the weight is in the table leaves and table top. I carefully folded each leaf up so that the table sat upright in an upside-down position. I then turned the table to lay it on the floor on one side.
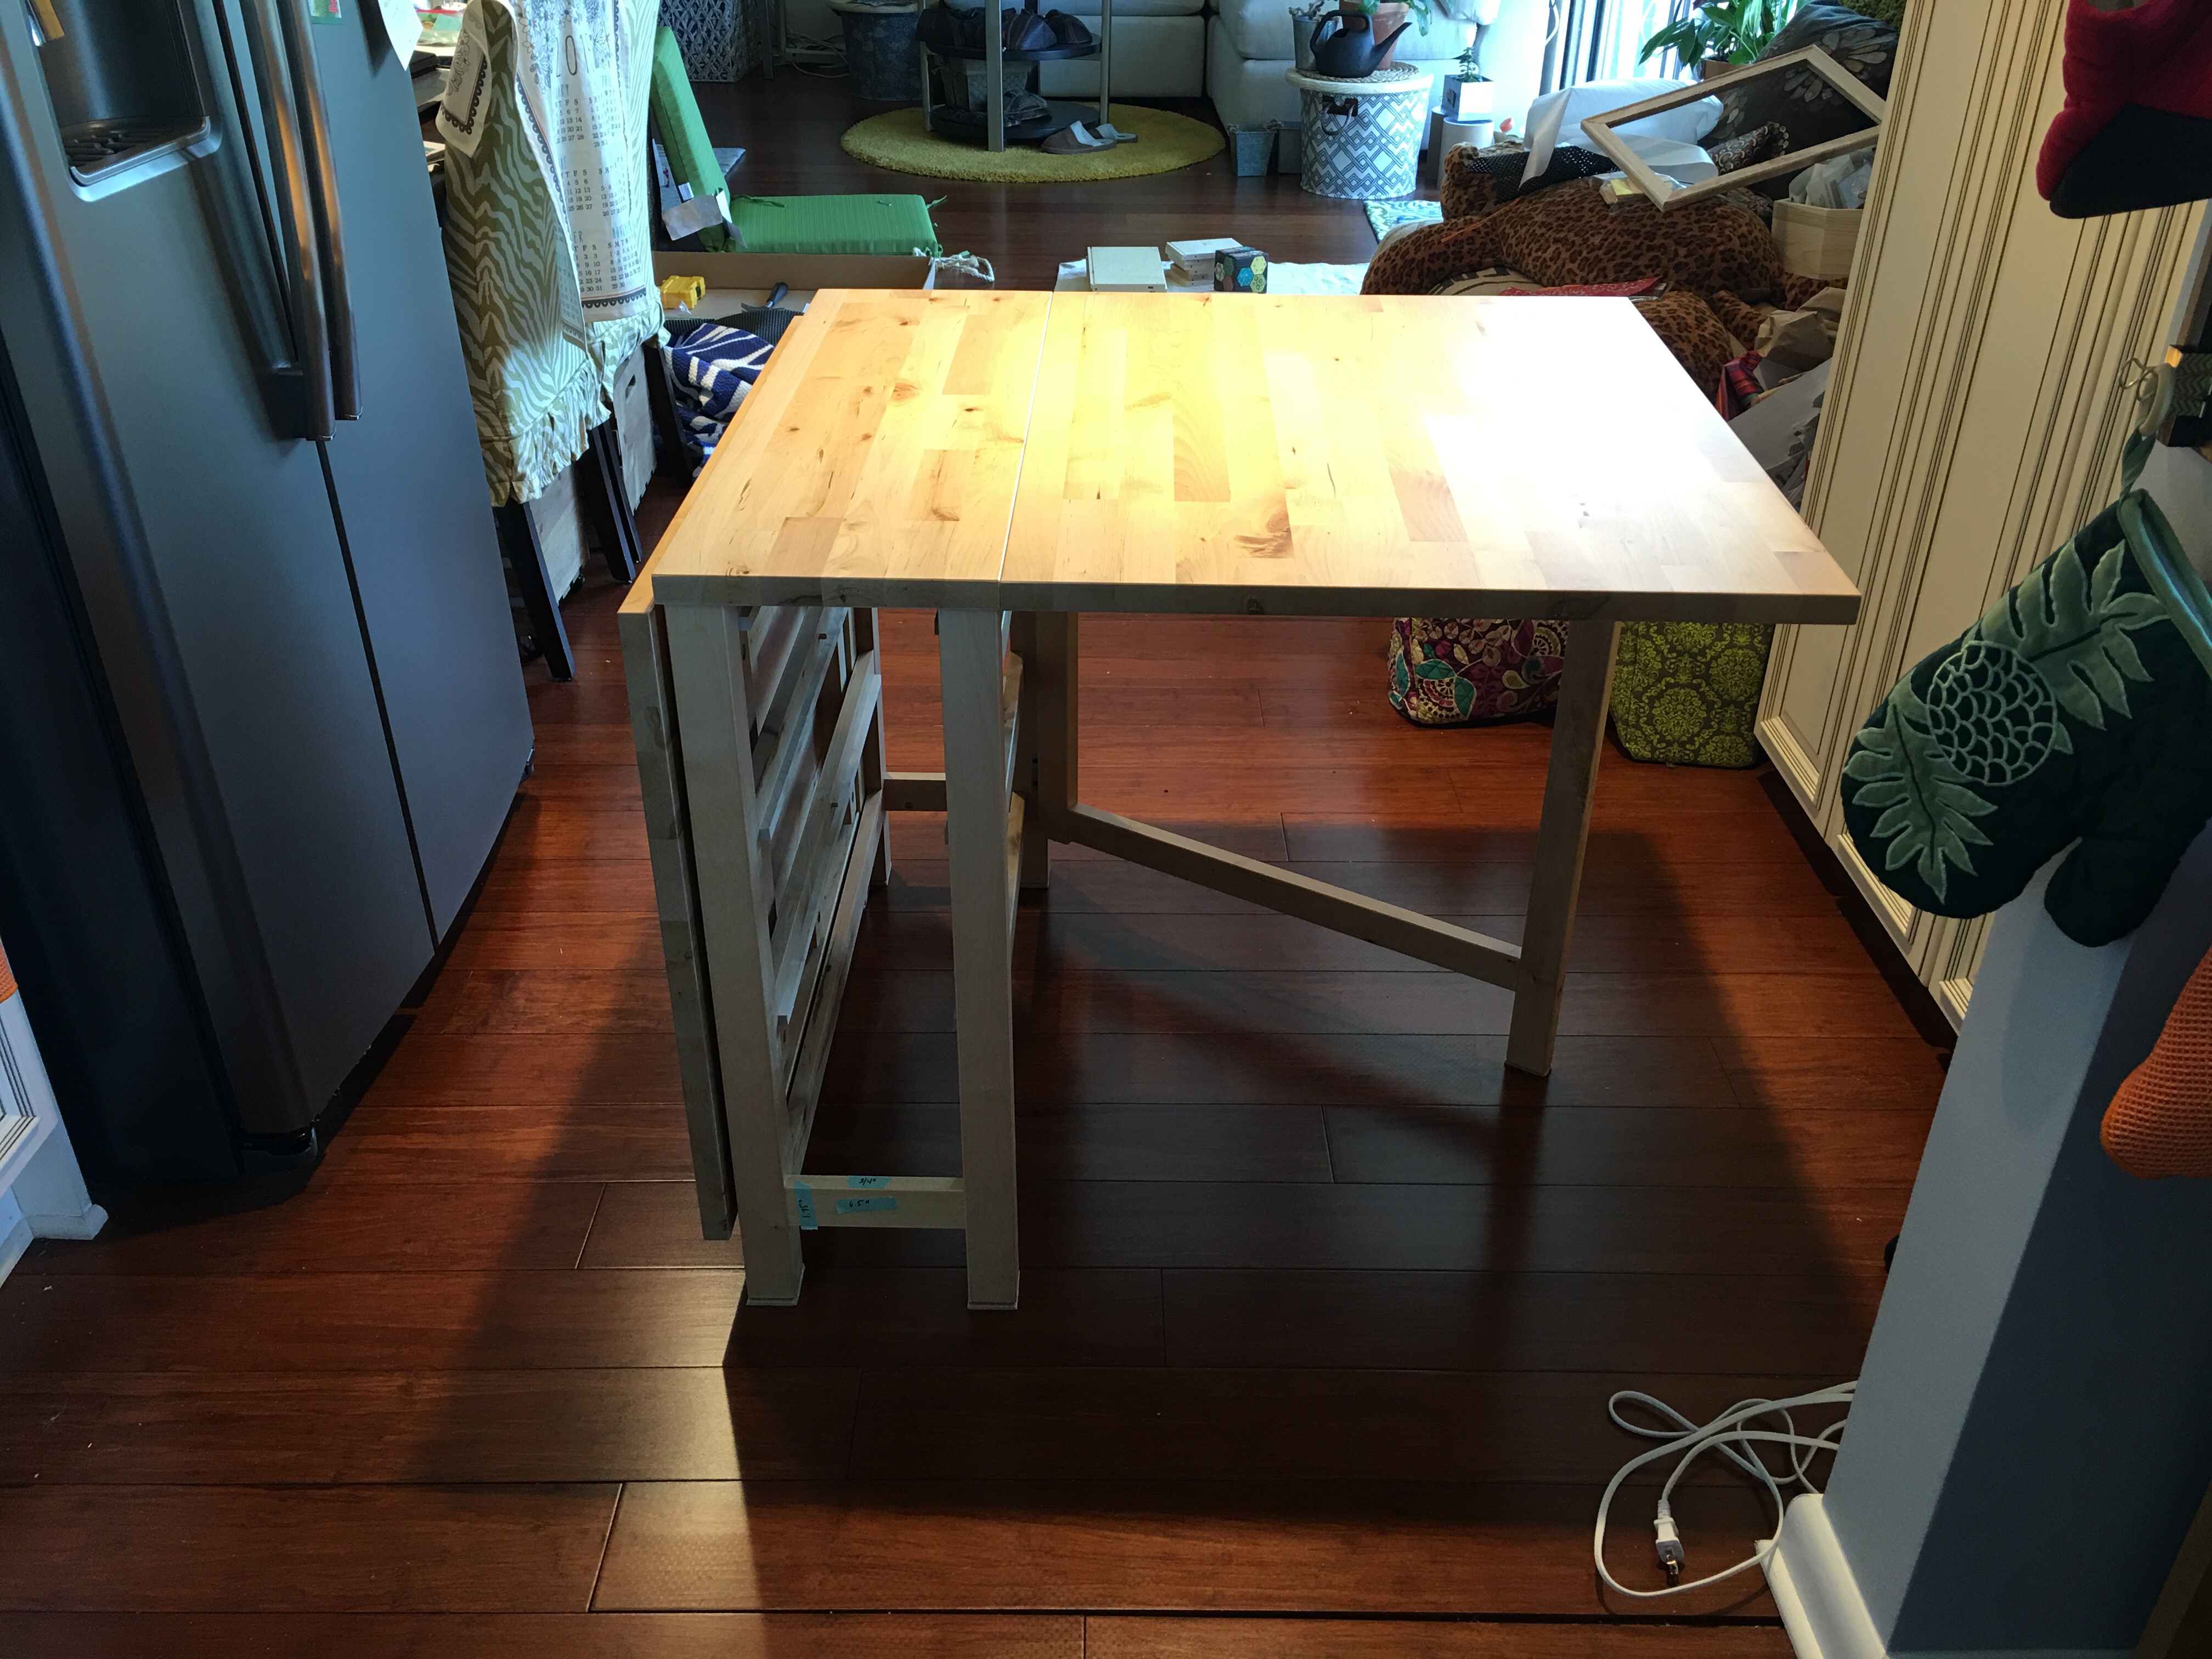
I then hoisted the table up from the table top side to stand it up.
And here’s how it looks with one leaf extended. Pretty big on it’s own, right. Each leaf is 31.5″ x 24.75″. That in and of itself is a nice size table. Fully extended, the table is 60″ x 31.5″.
I added some adhesive furniture felt pads to the four drawer brackets and the swing out legs (six pads total). And I picked up four caster dollies from the Home Depot so I can roll this table around.
Yes, it’s heavy.
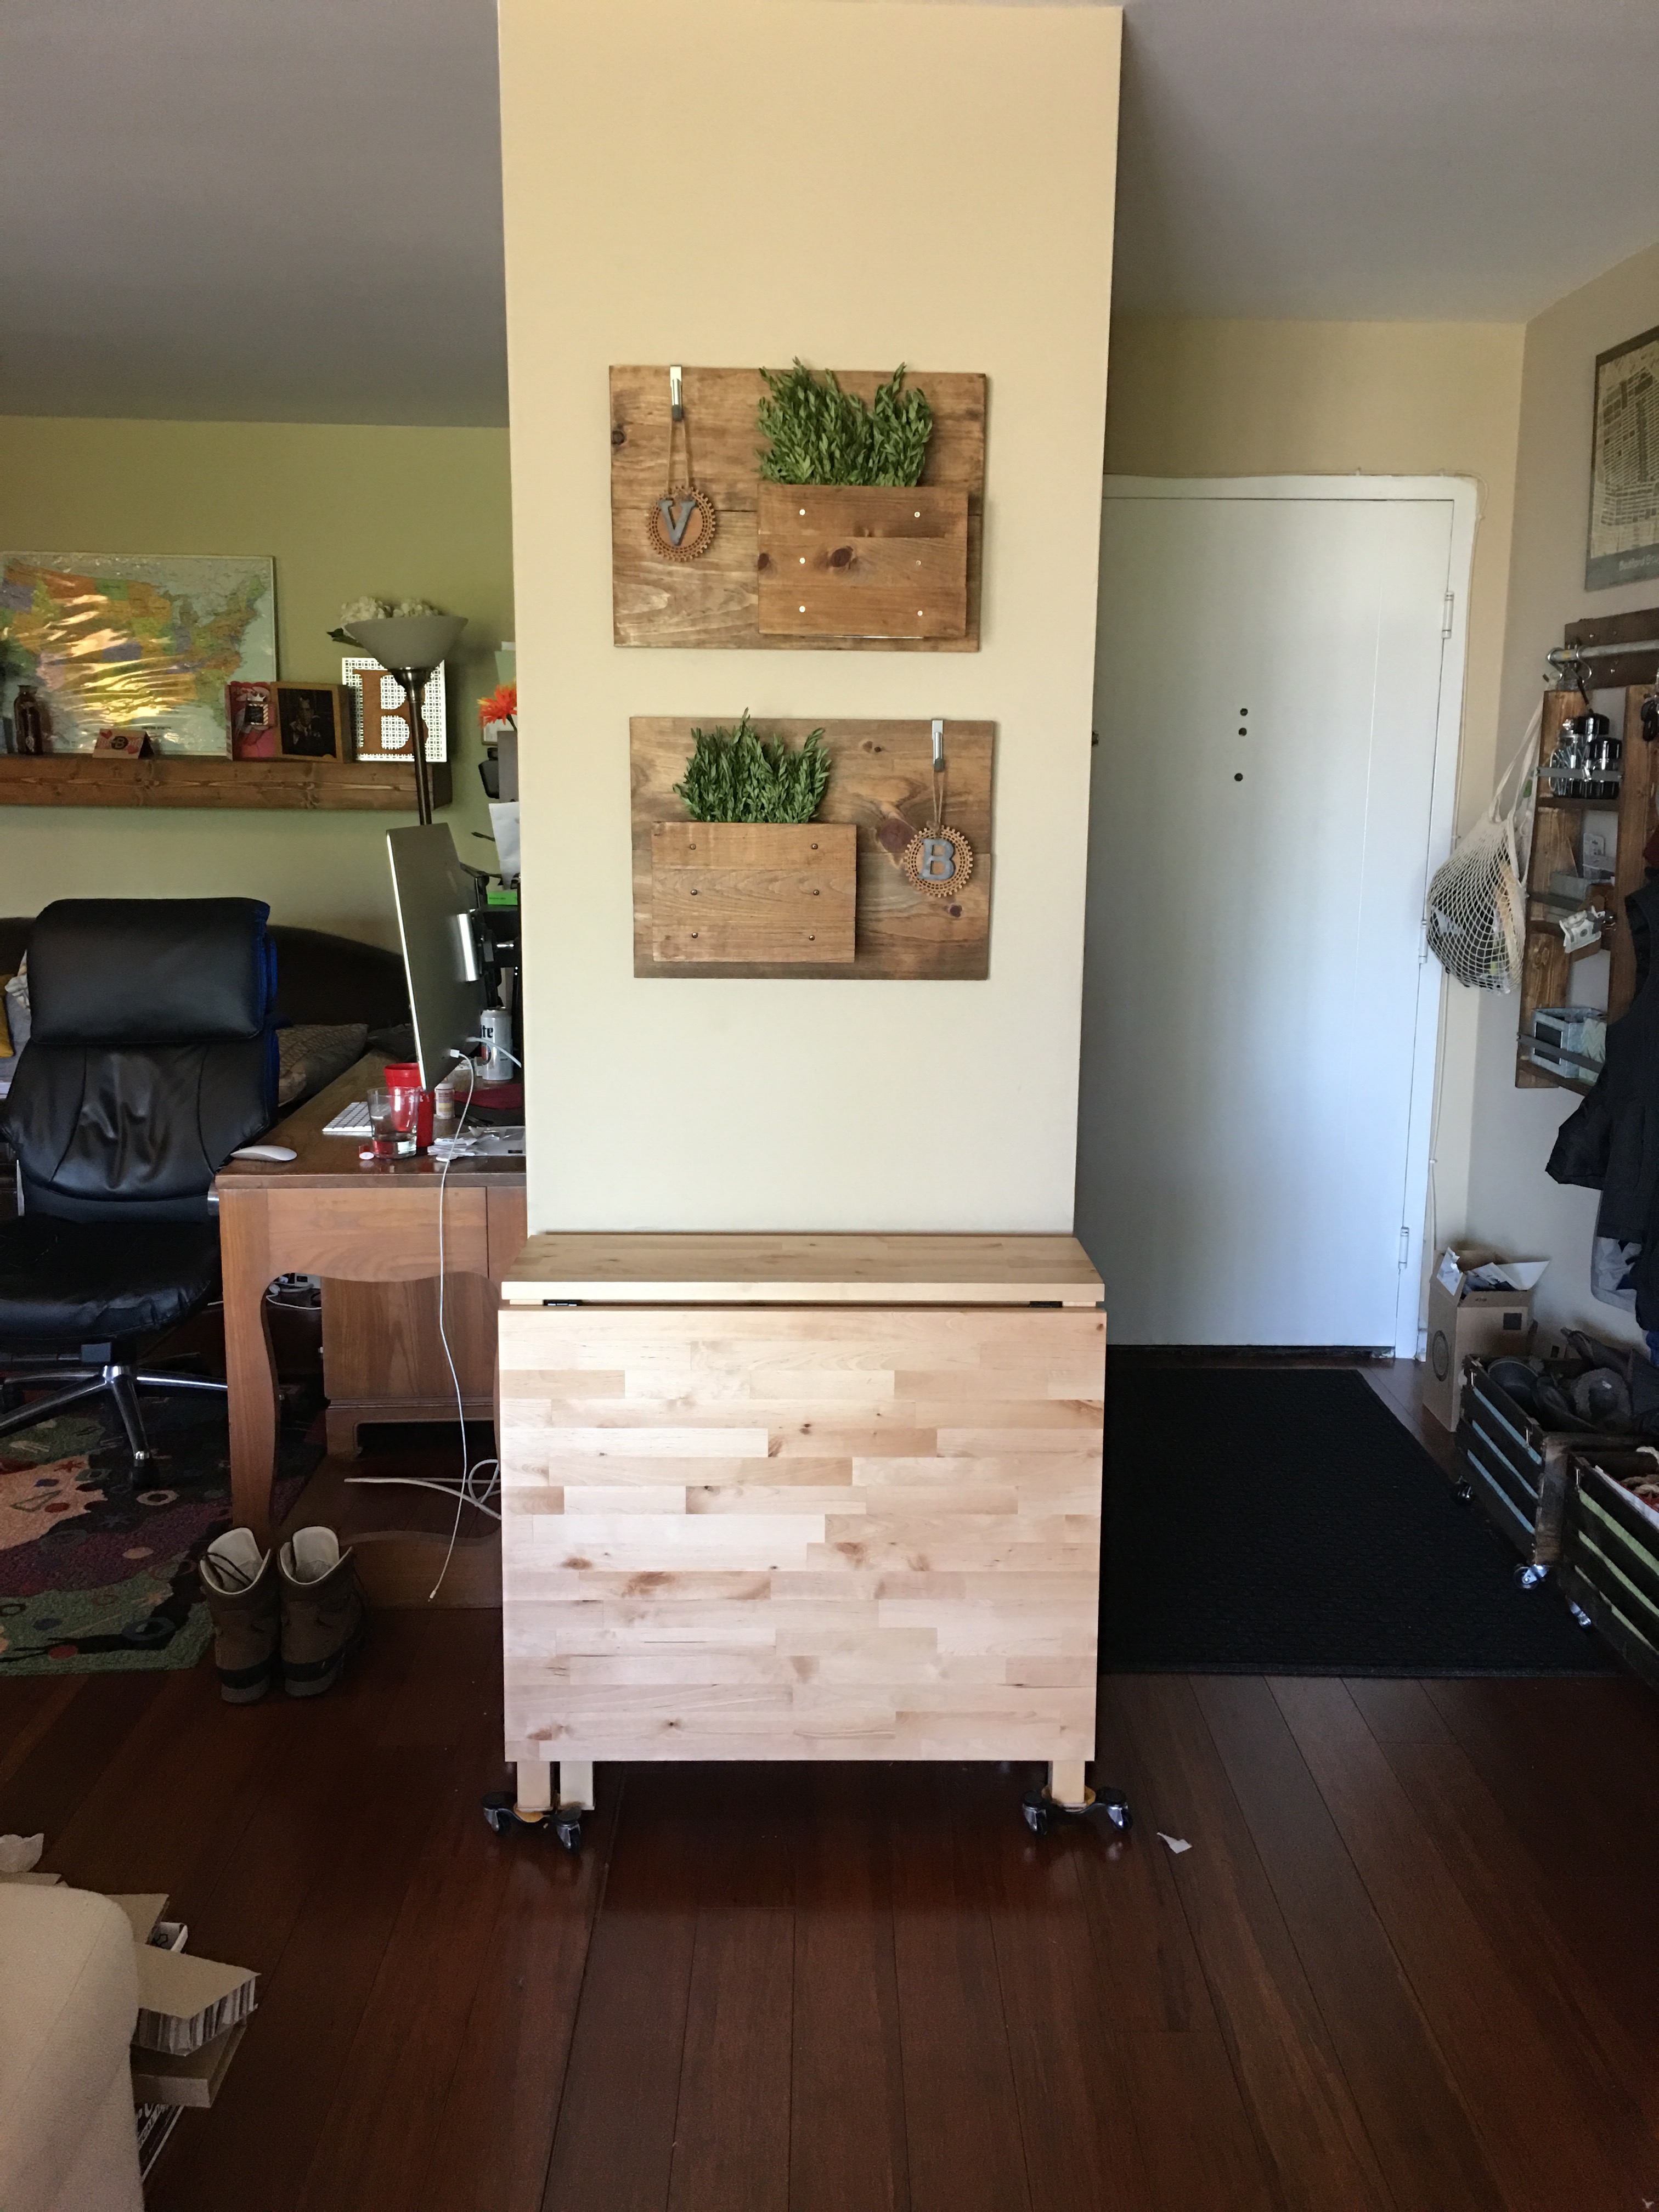
I initially placed it under my wood wall planters, just to try it out. But it won’t stay there. It’s too wide for the space (I’m still trying to figure out what to do with this wall, quite frankly).
I’ll move it table into the den outside of the bedroom. I think that’s where it should go. But I need to assemble the drawers first. And for that, I need to pull out the hammer.
Hammer + condo + neighbors…never good.
Here goes…! V-