DIY Centerpiece Wall Sconce Part 2
You may also like:
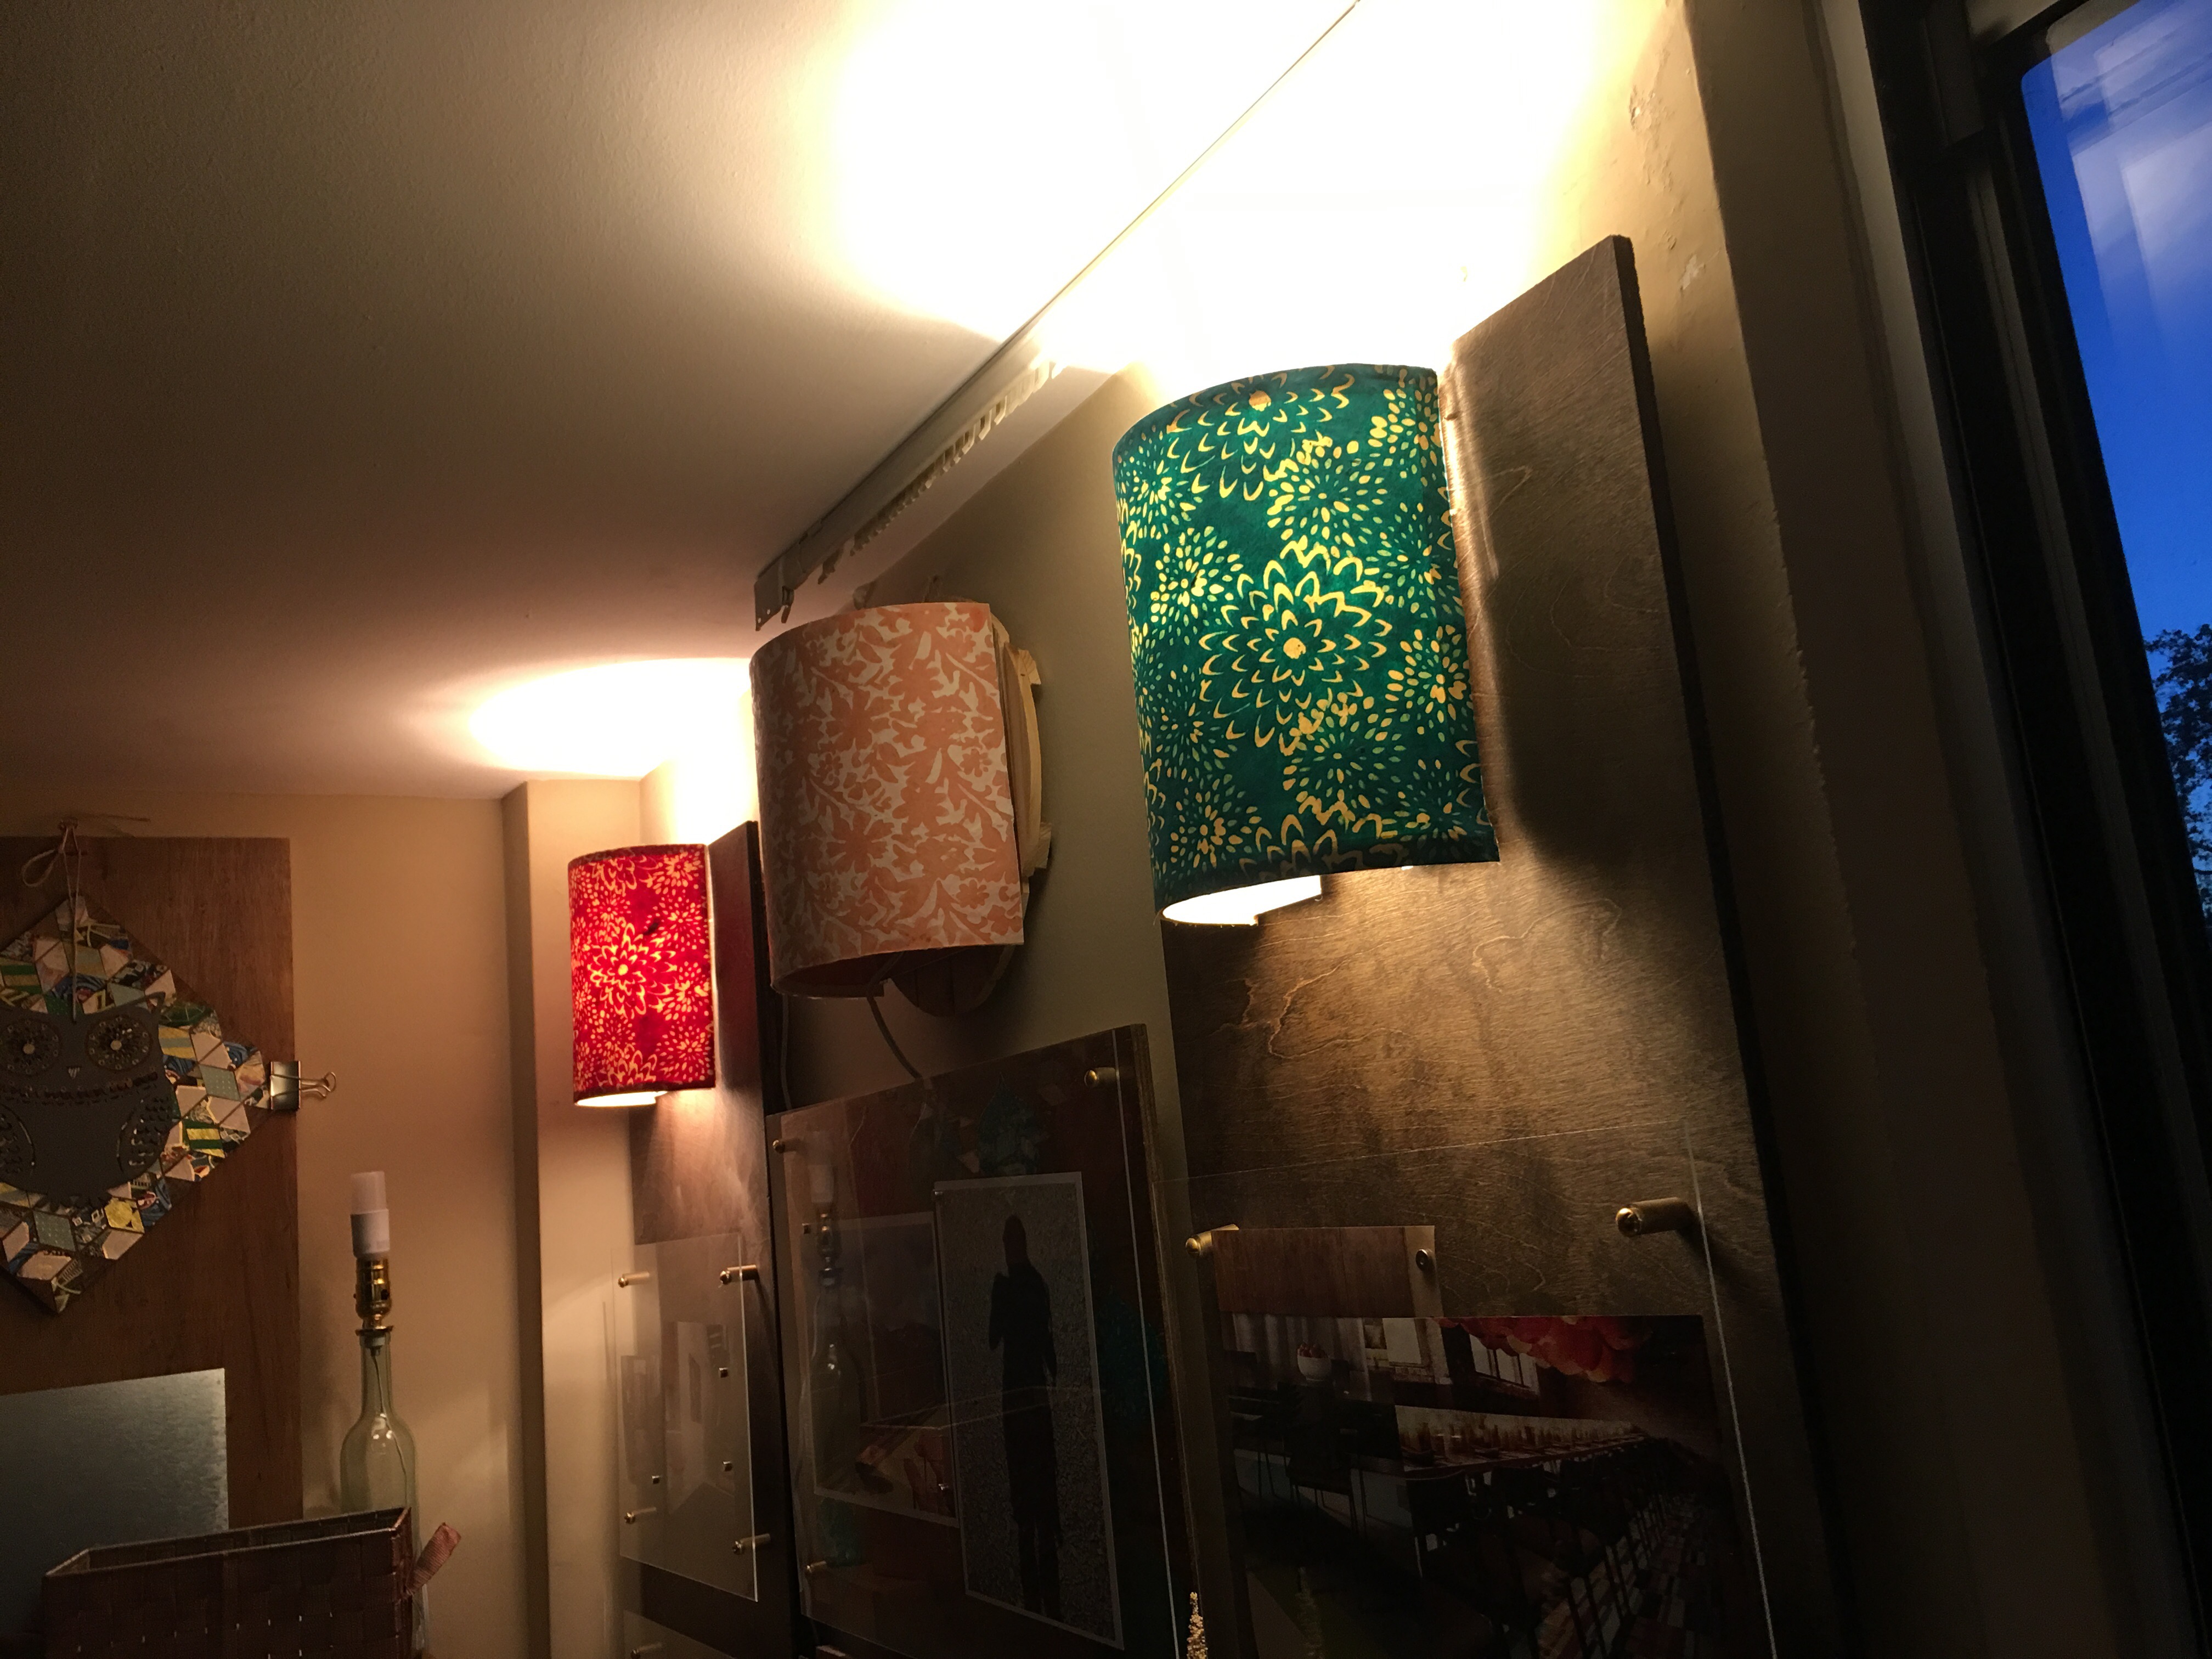
April 10, 2016: I finally got it up. The right center wall sconce for the living room wall gallery.
If you recall, my first attempt to make and mount a center sconce between my two wall panels did not turn out quite like I expected.
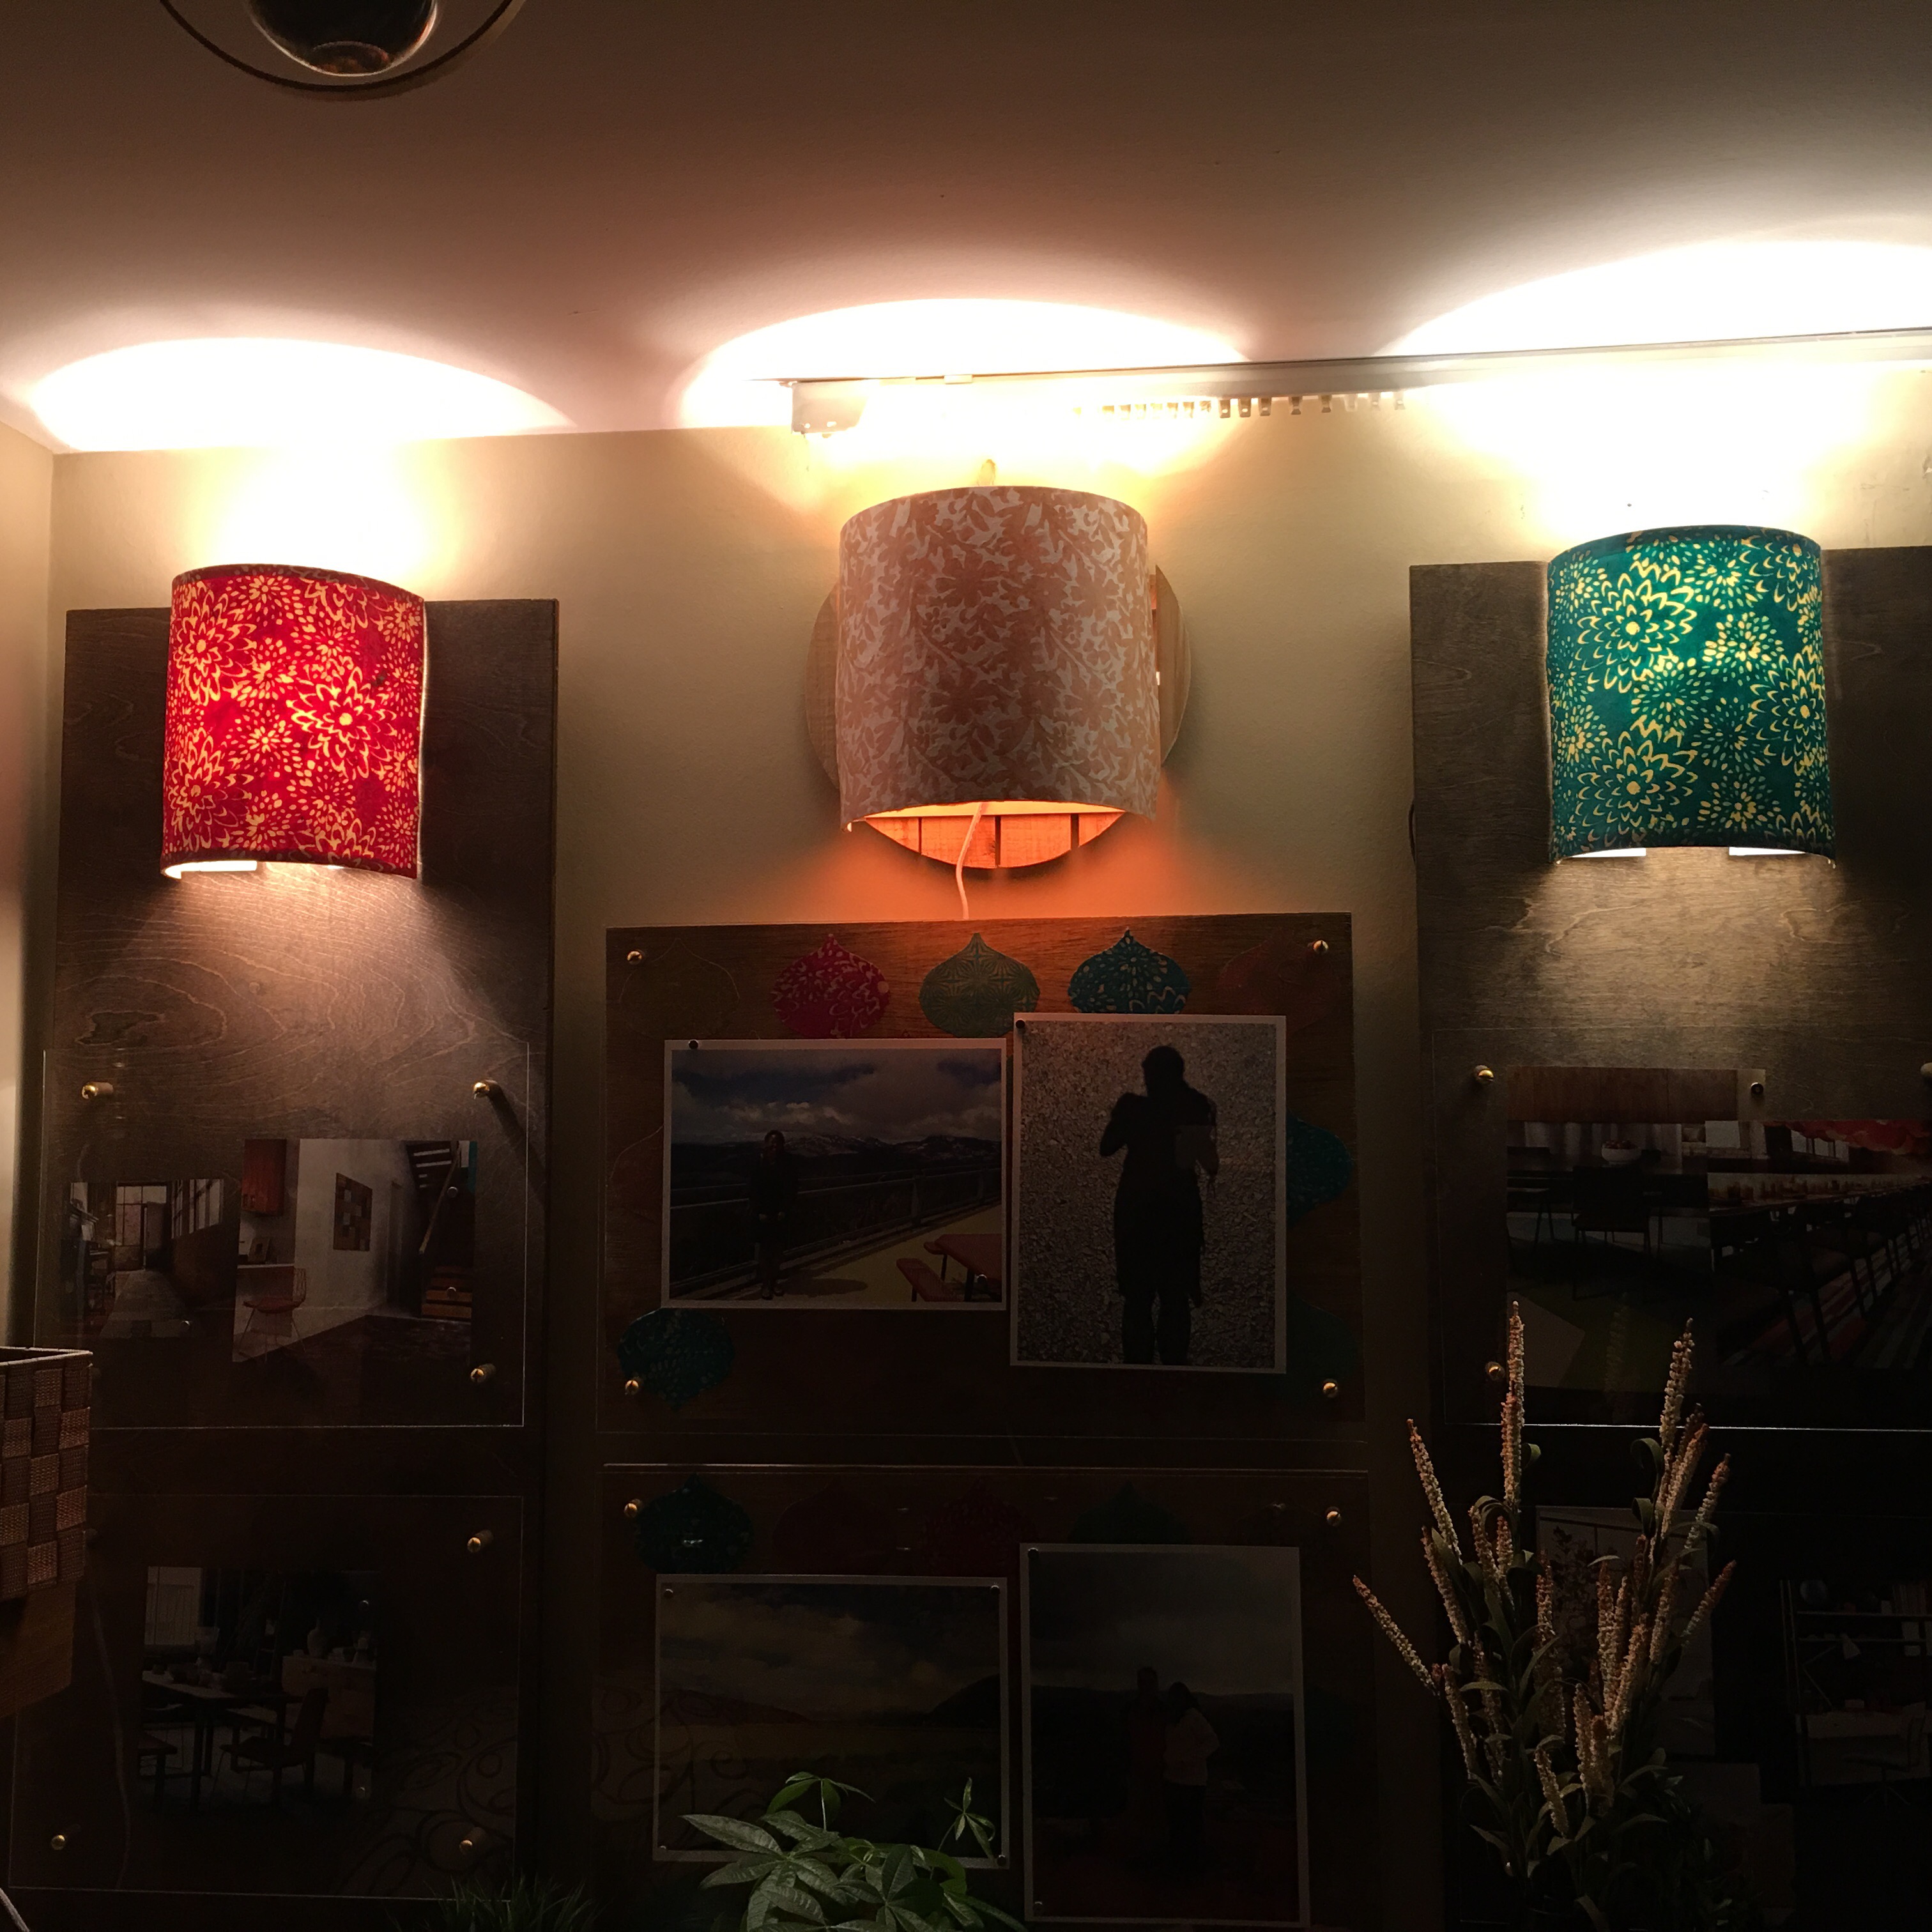
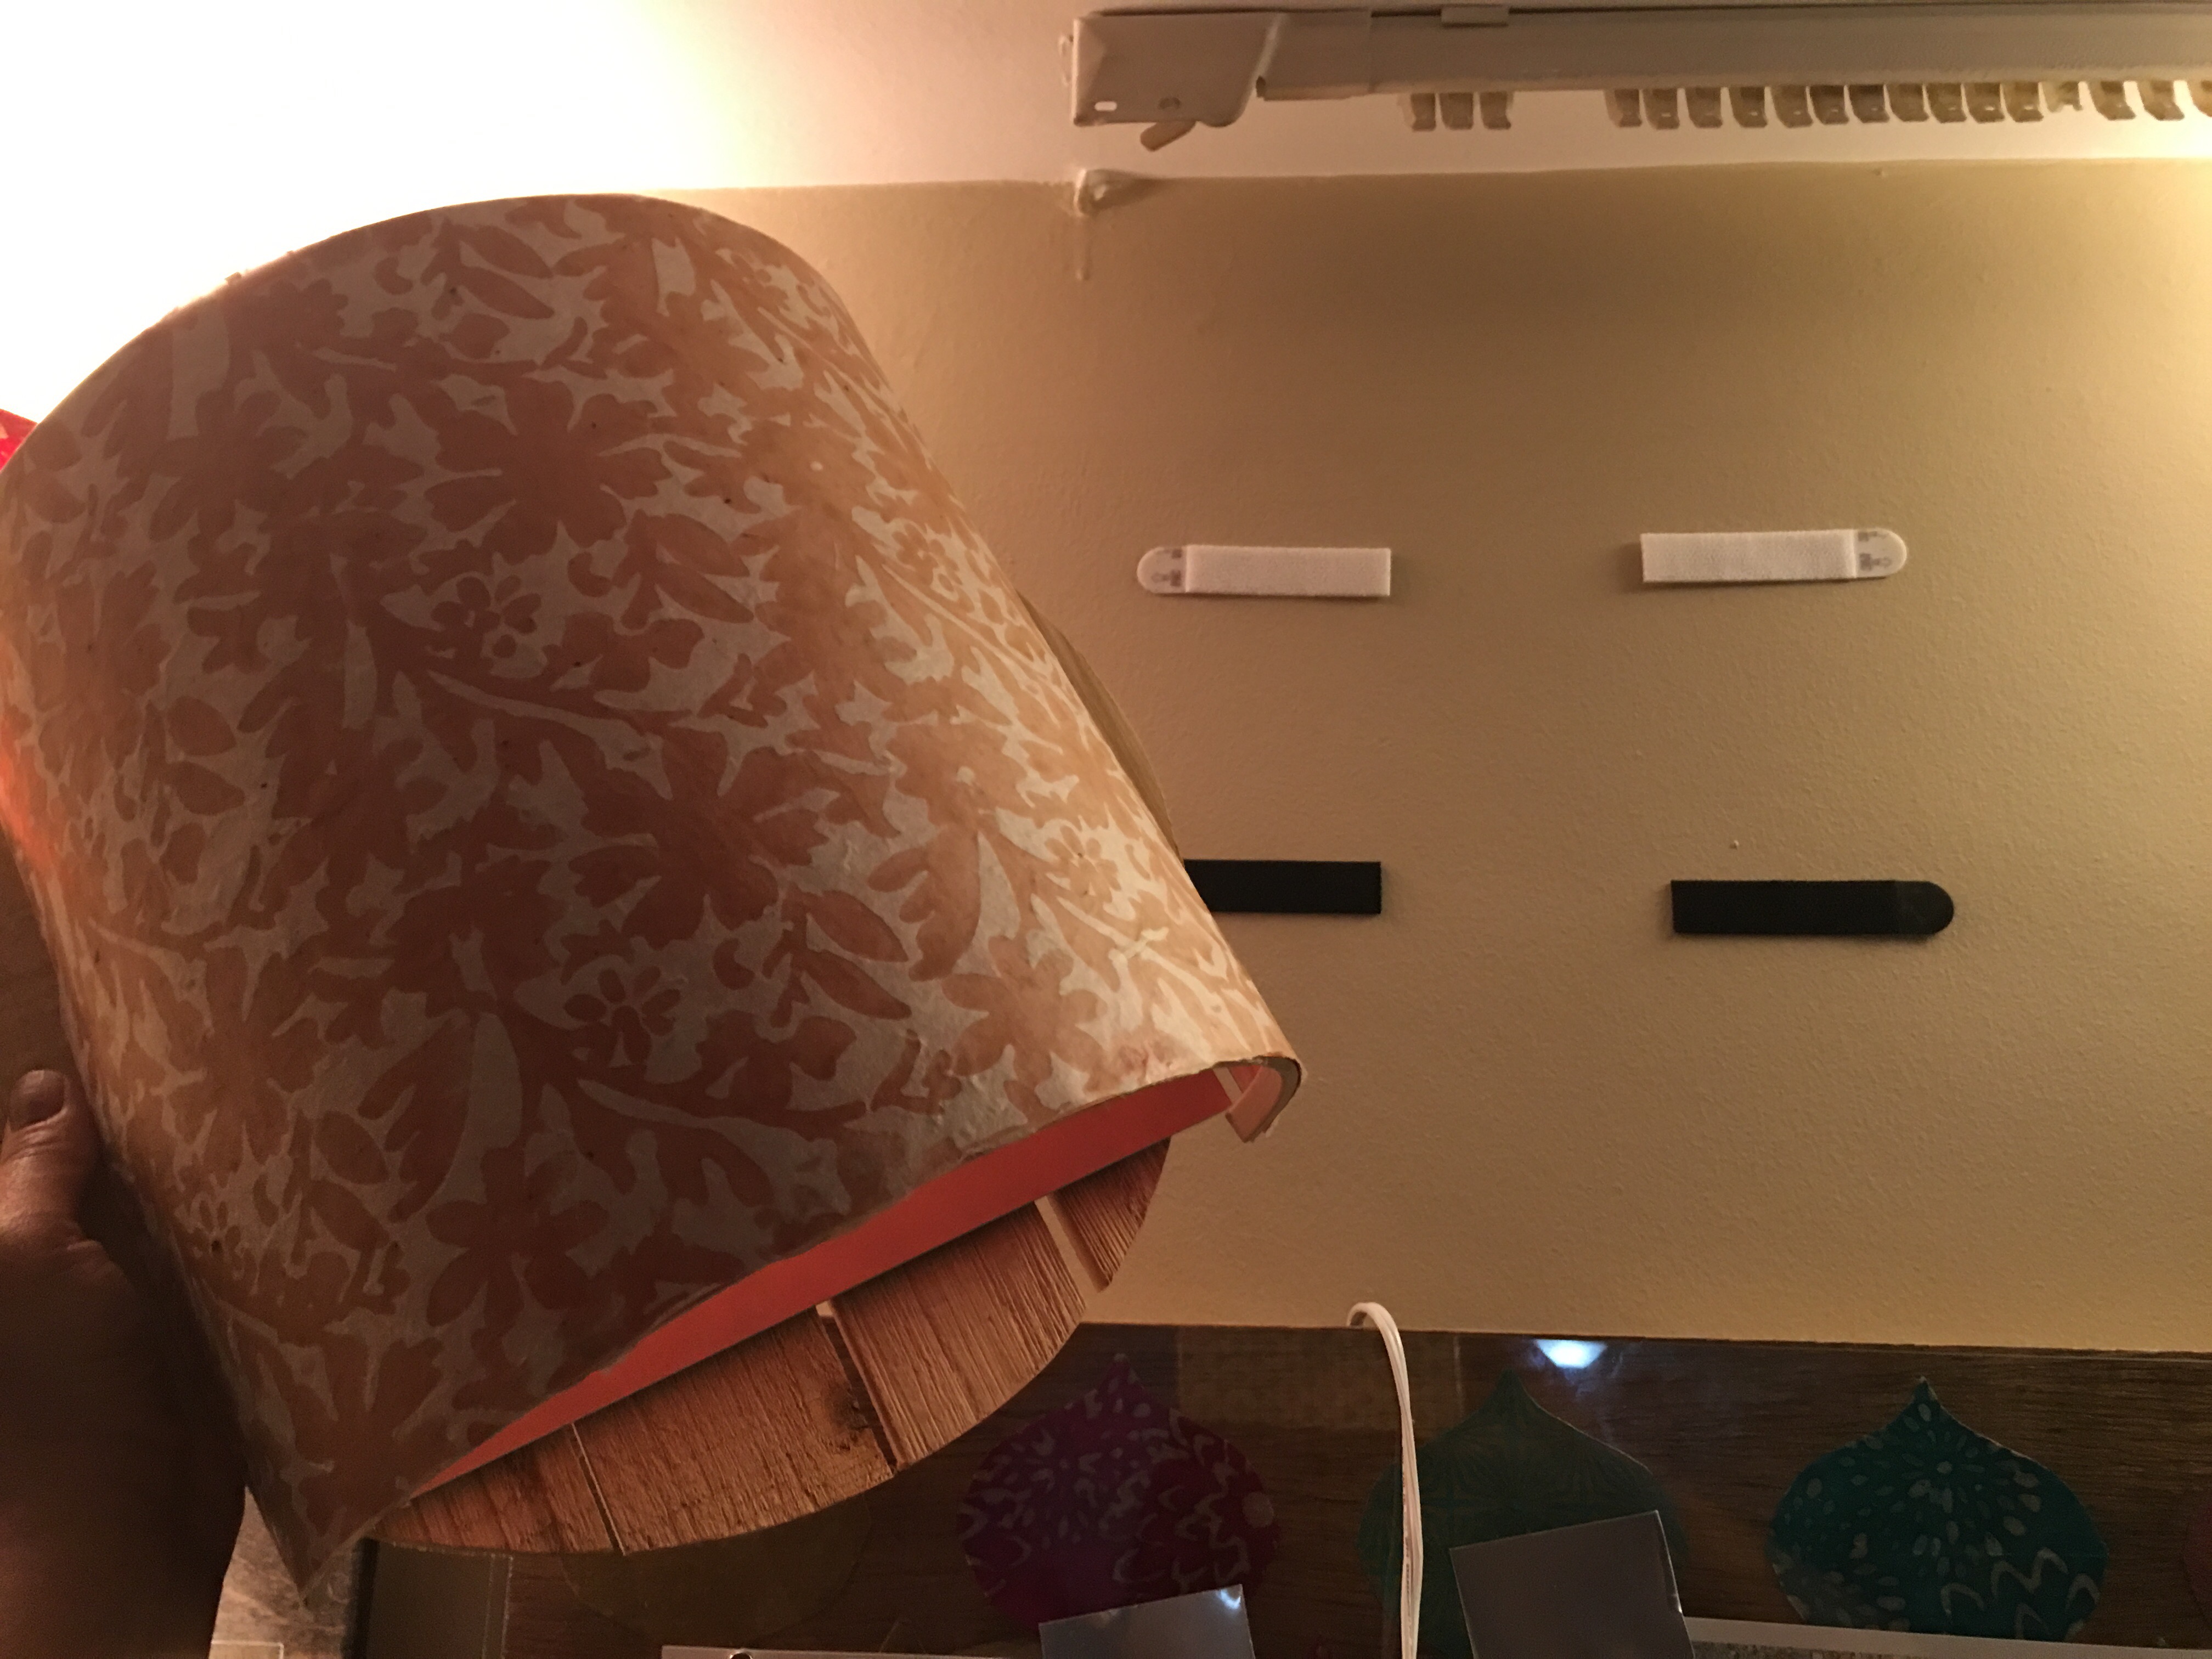
Although it looks great between the two smaller sconces, the light didn’t shine through the paper shade. I now know not to use colored poster board for the base of the shade.
In addition, the light that came from beneath the sconce had a dark, orange tint to it. So the floating frames beneath it got very little of it. Most of the light pointed up to the ceiling. So hardly any illumination was there for the gallery.
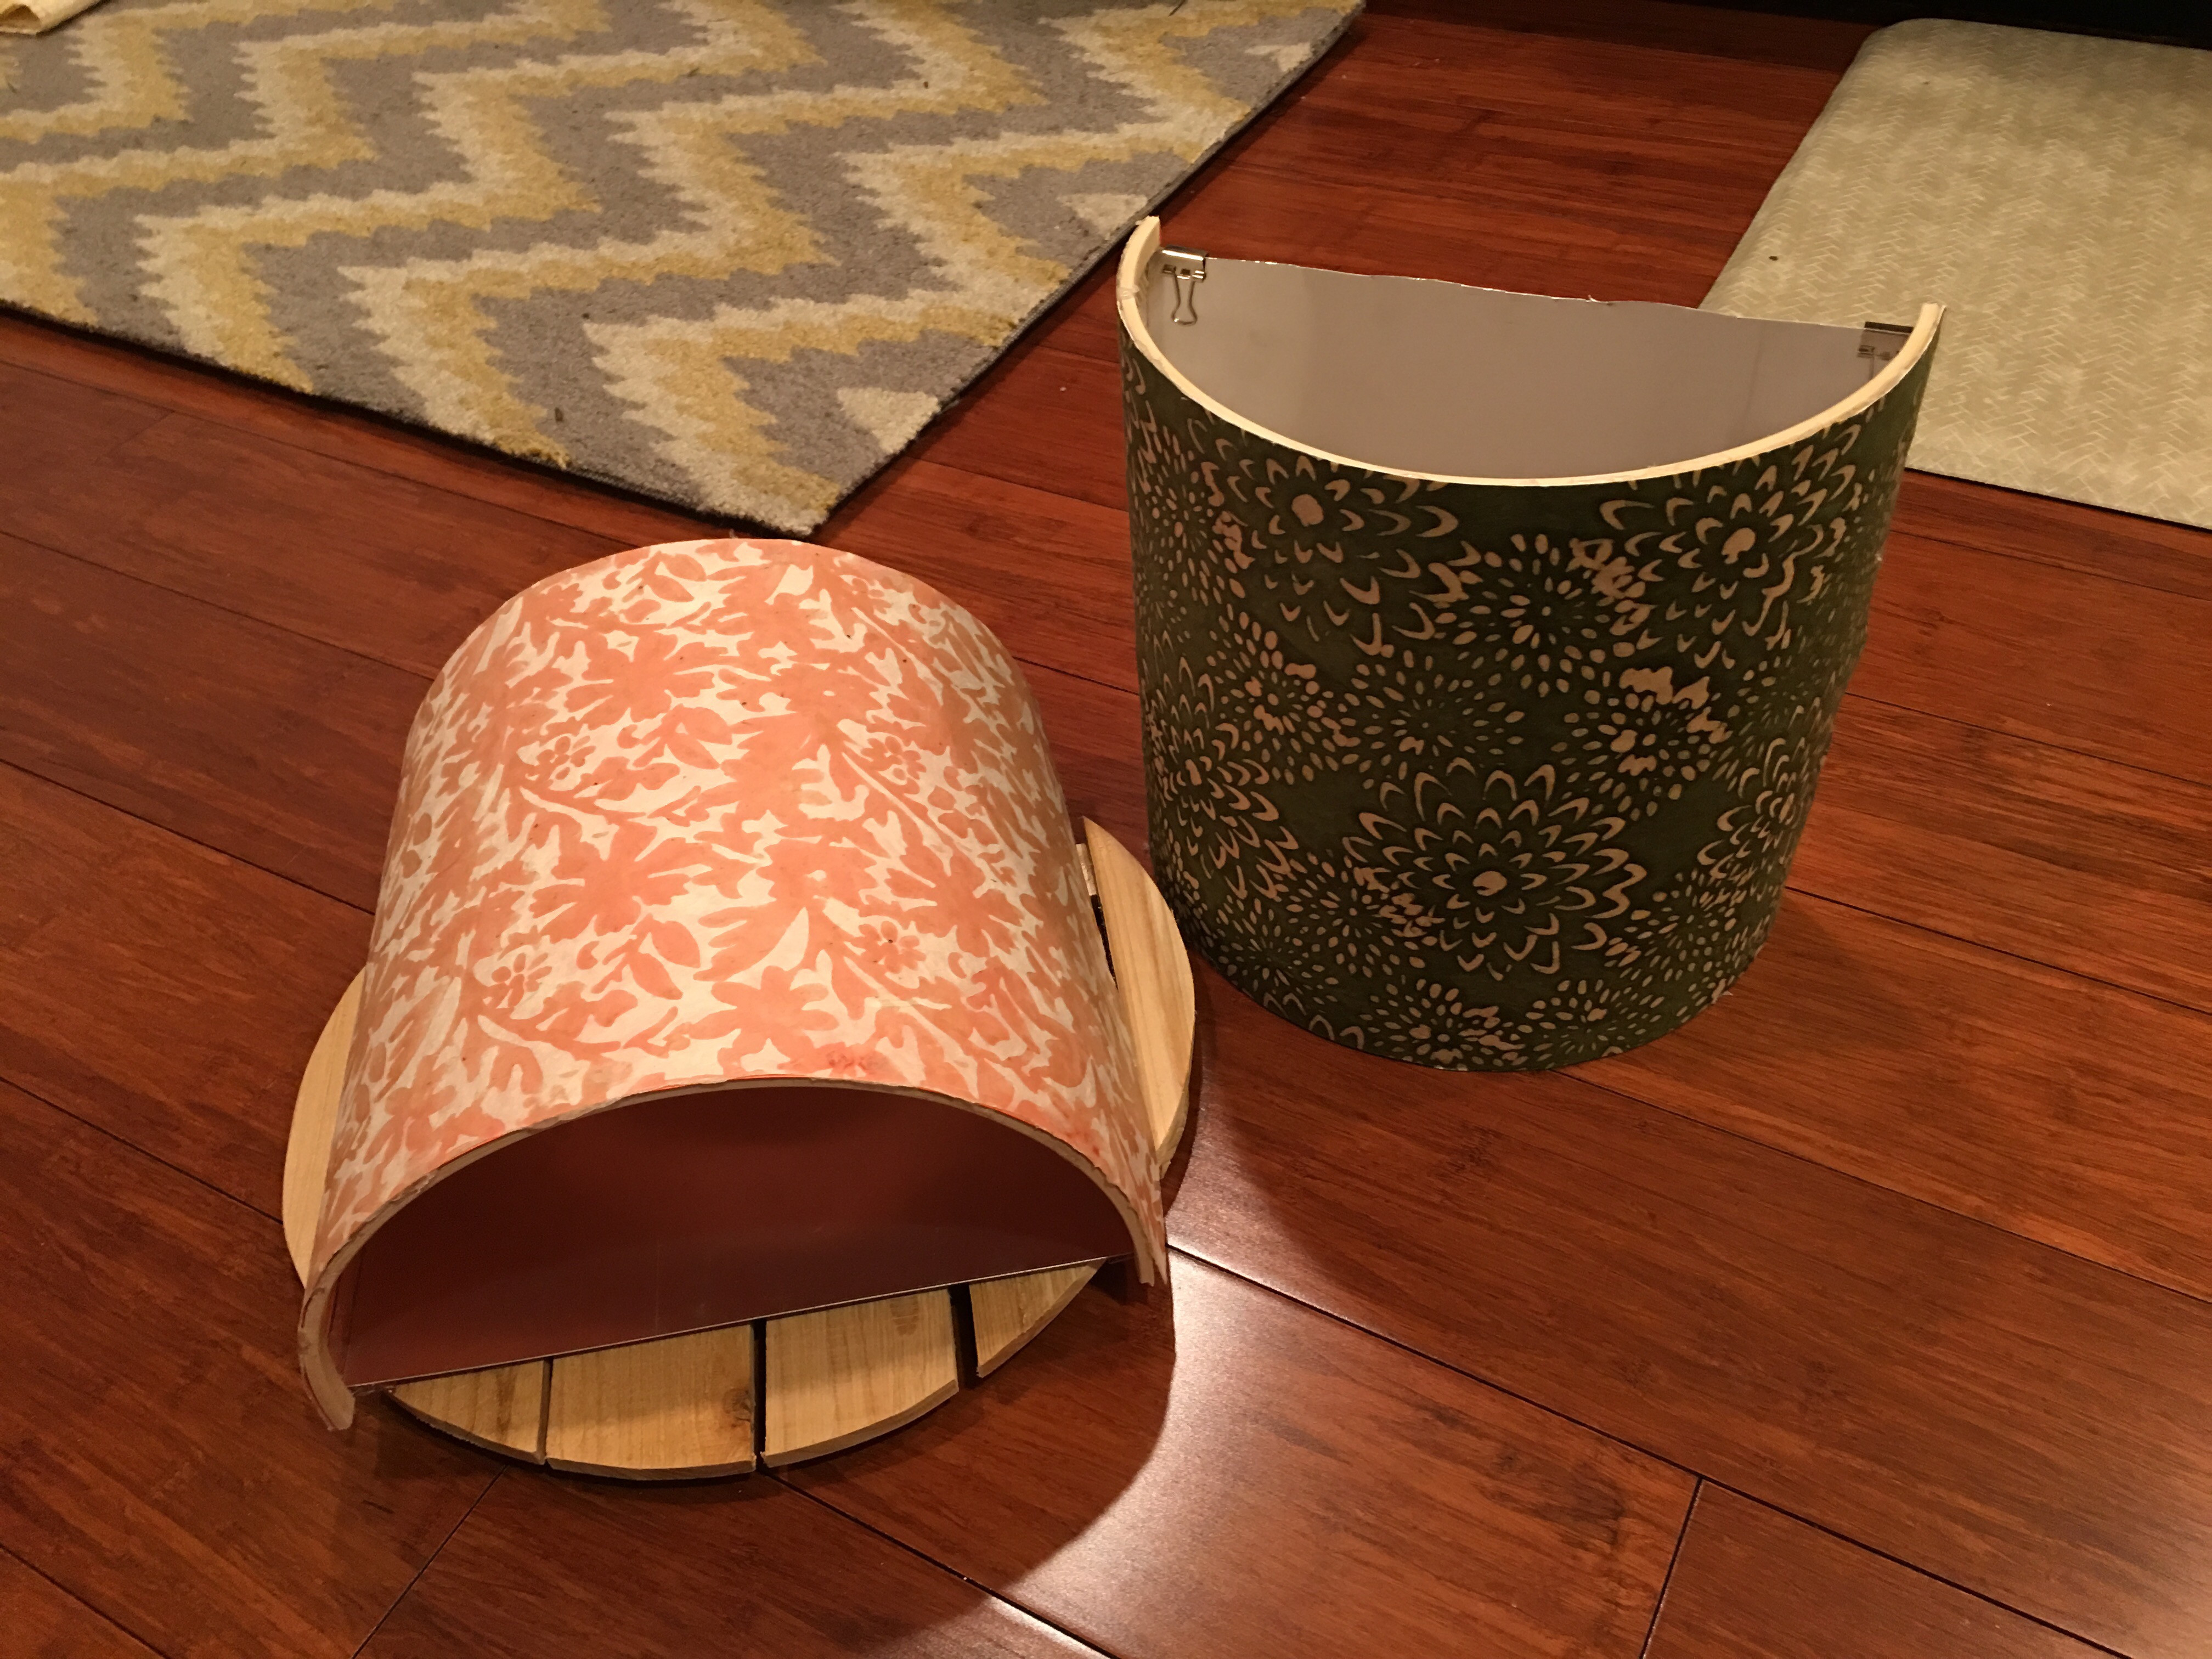
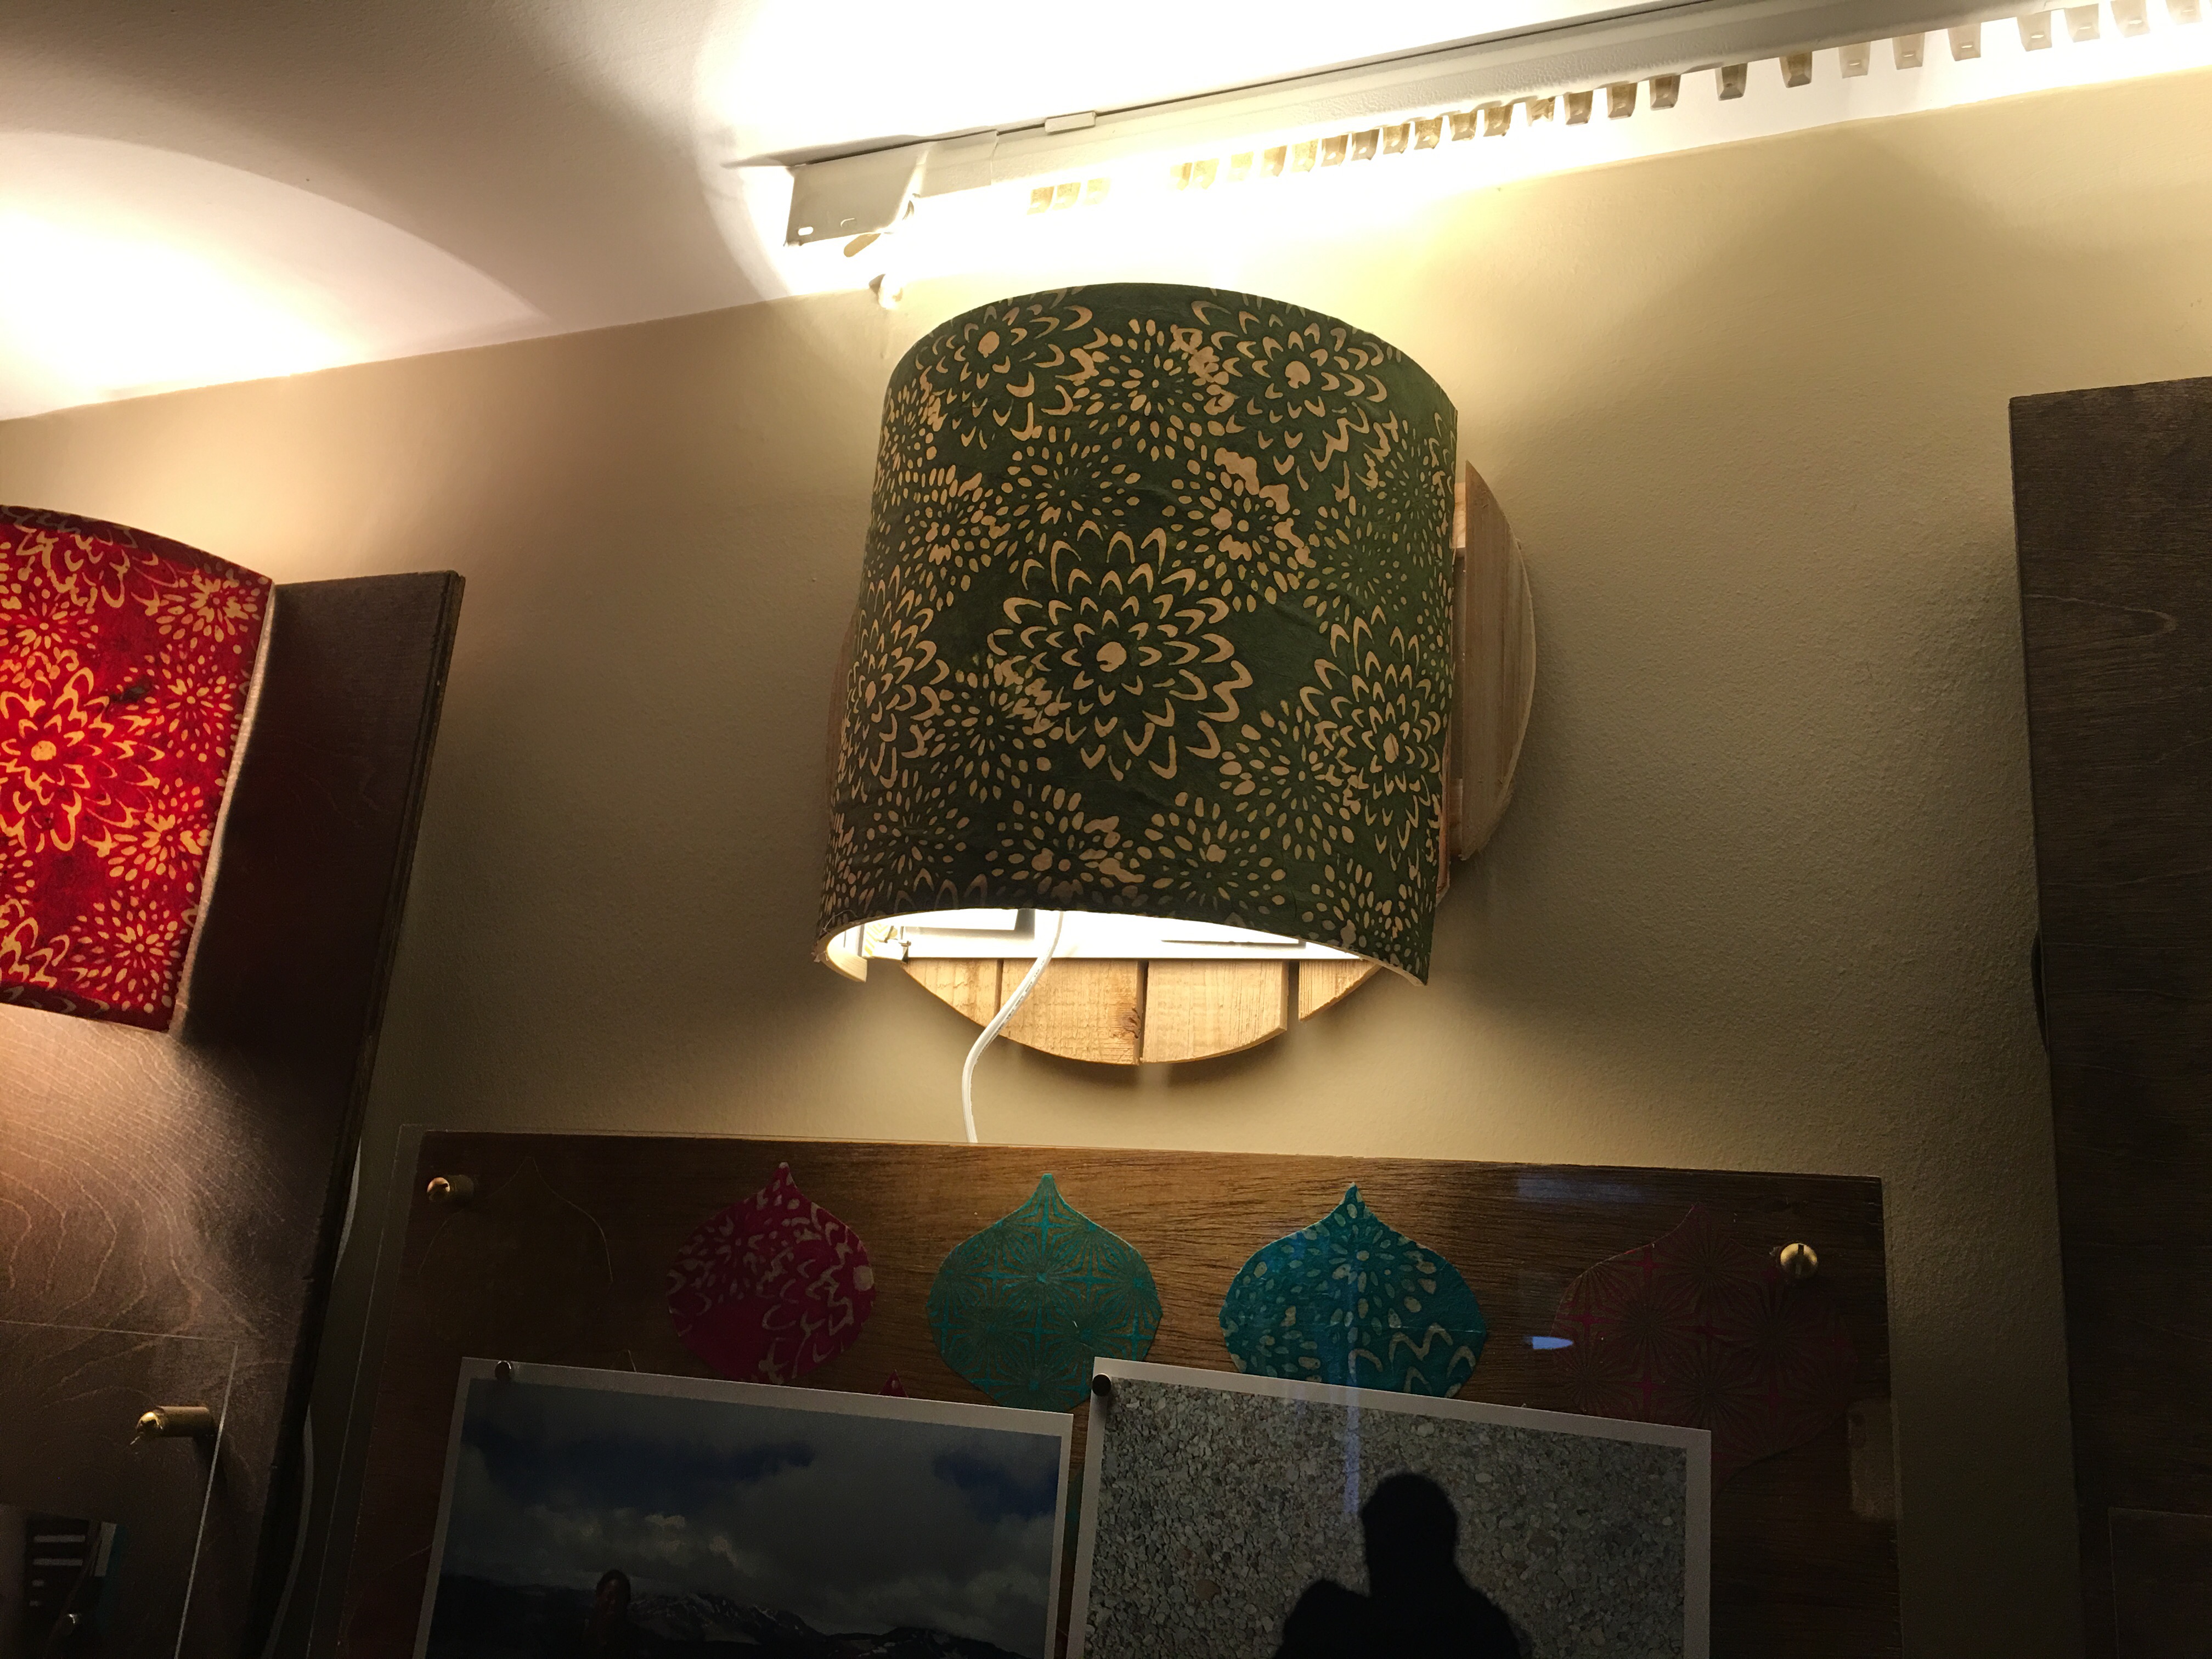
And, most importantly, a different paper pattern was used for the center sconce. This was intentional at the time…I wanted to experiment with another design…one that compliments the Lokta Batik mums pattern but would offer a bit of constrast.
Bad choice. Well…it didn’t look bad per se. But I knew as soon as I mounted the sconce that a matching design (but in a constrasting color) would have been perfect.
So here is take two on the DIY center wall sconce project.
Making the sconce (wall lamp):
Here’s the project materials list to make the sconce:
- 10″ embroidery hoop
- White poster board – 9.5 x 16″ (important: must be white)
- Decorative fine paper – 9.5 x 16″
- Plastic corner guard – 1/2″ per side
- 12 x 12″ aluminum sheets
- Metal snips
- Hot glue gun
- Binder clips
- Wood Pallet Plaque
- Large 3M Command picture strips (for mounting).
- Masking or washi tape (for measuring
Before going further, I must once again give thanks to the brilliant Isabelle LaRue who demonstrated how to make these sconces on her Engineer Your Space website.
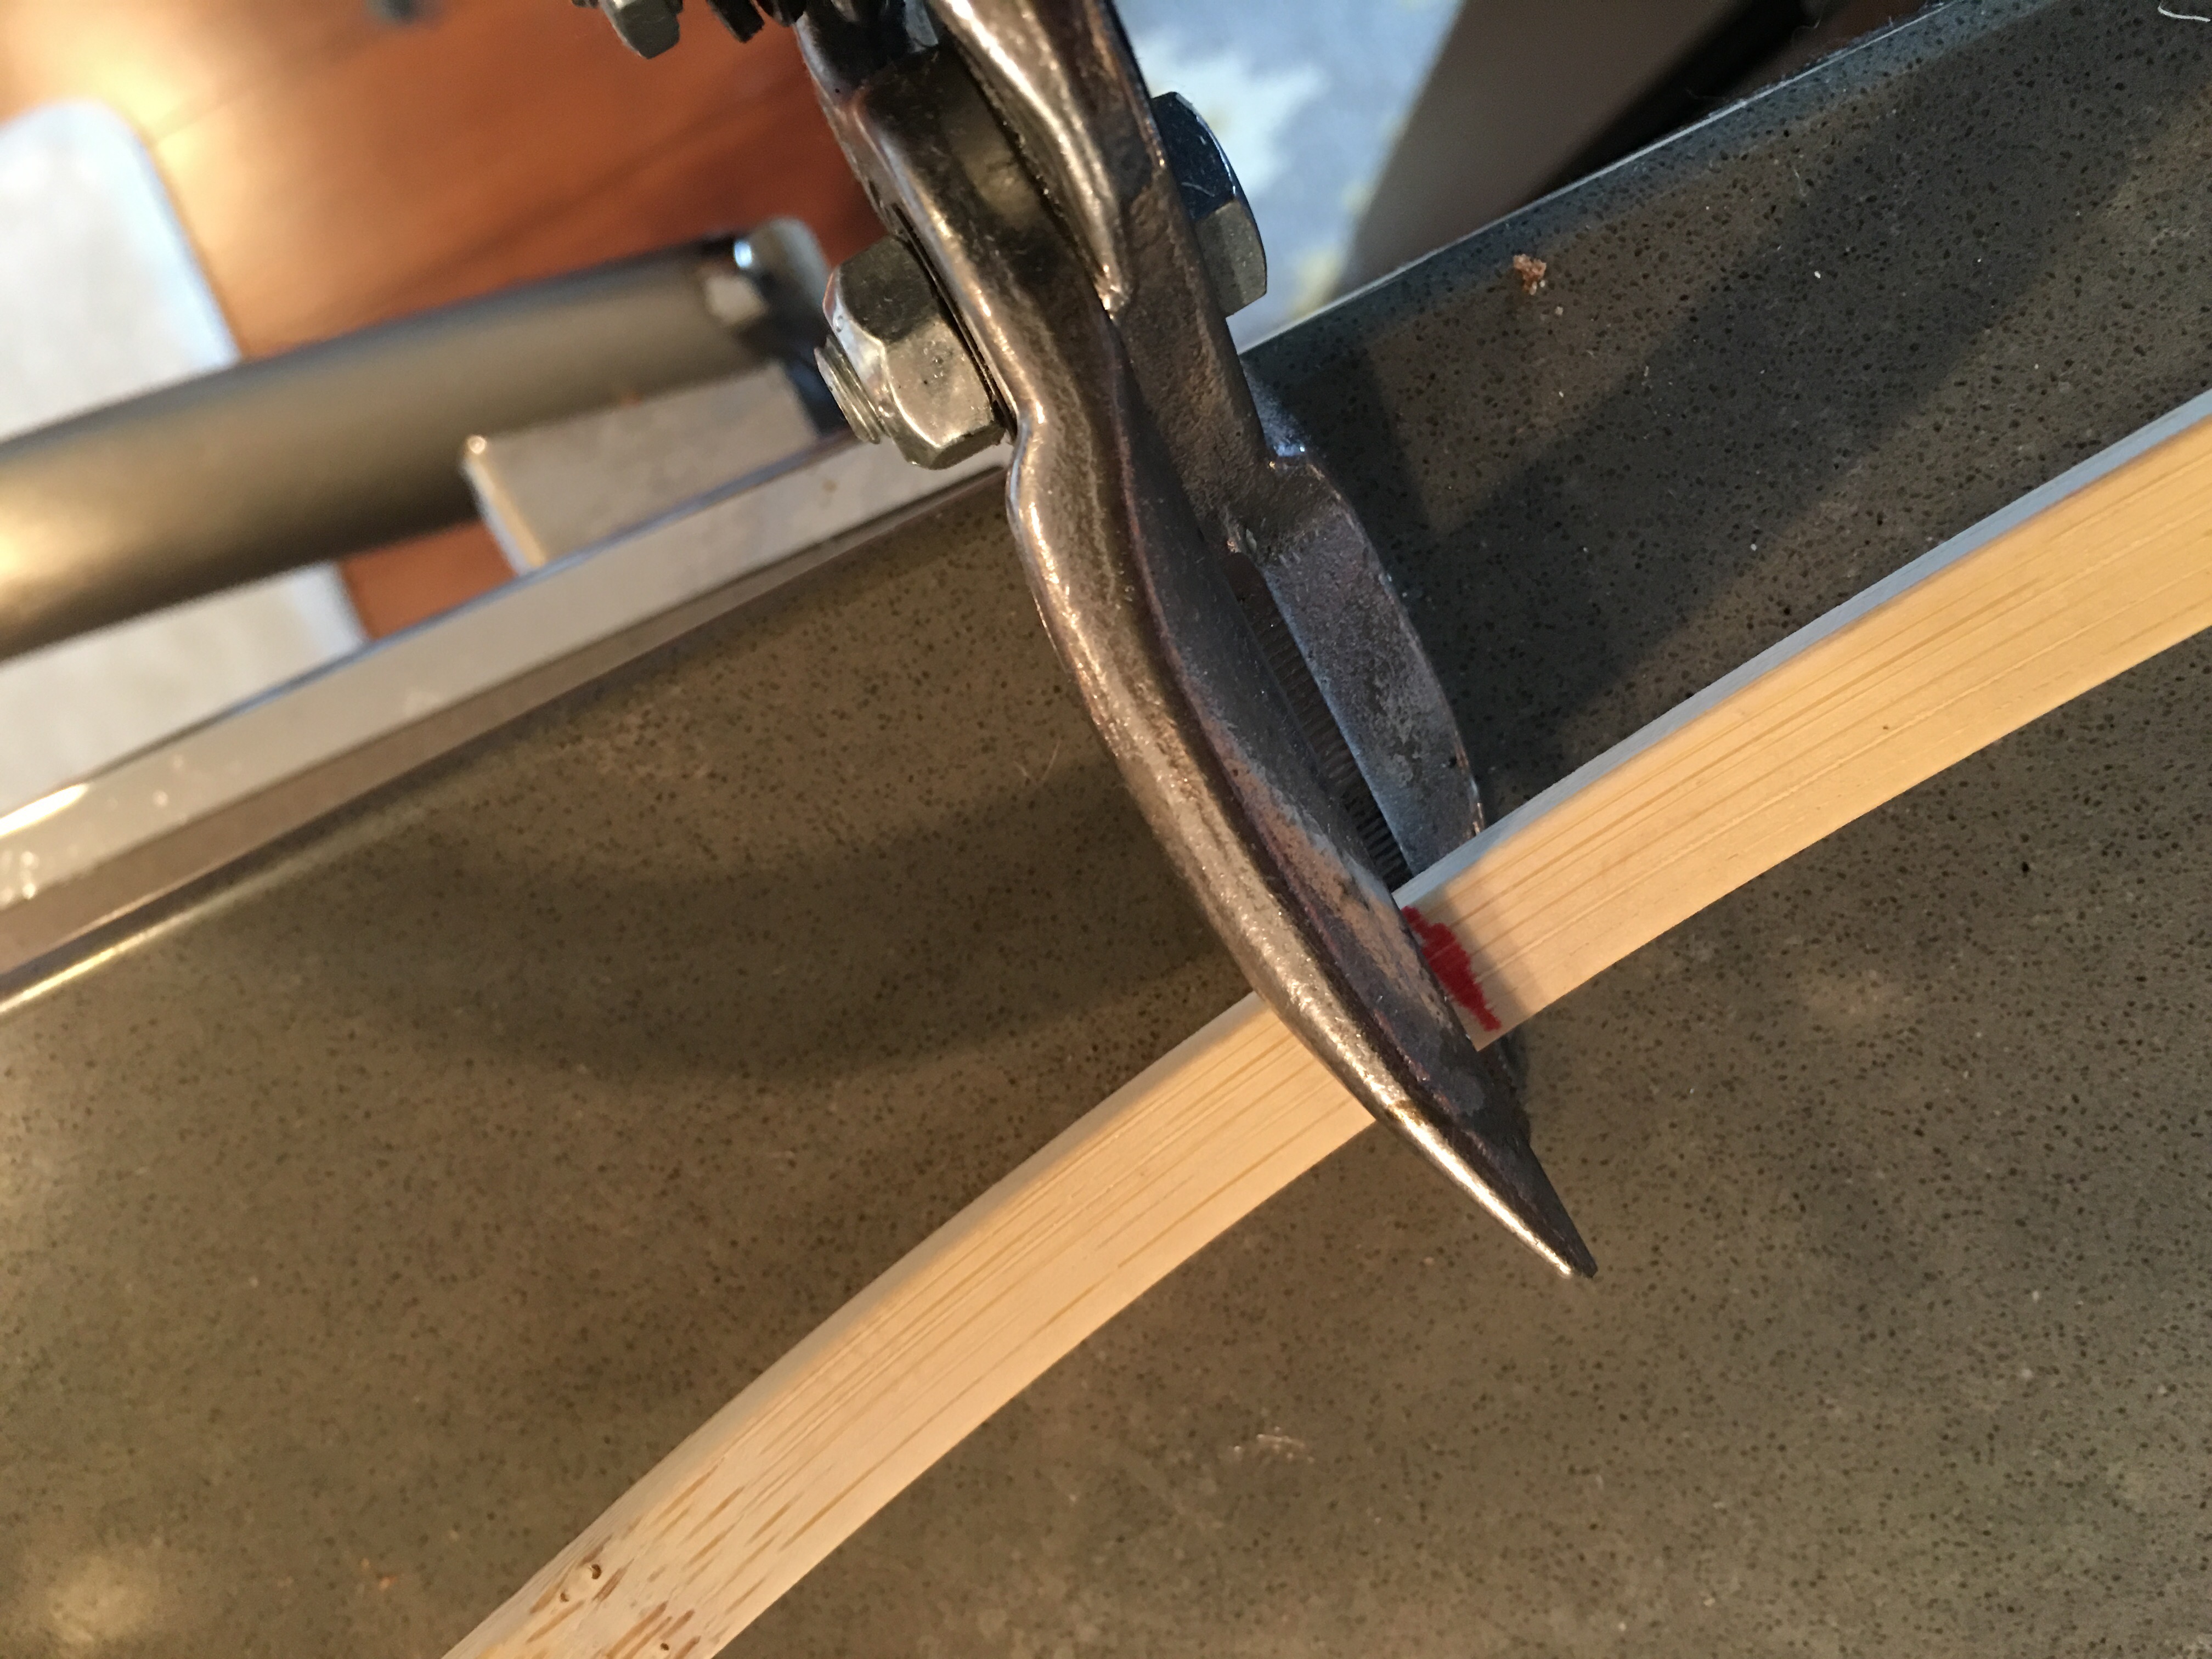
- Step 1: First I took the 10″ embroidery hoop and cut it in half.
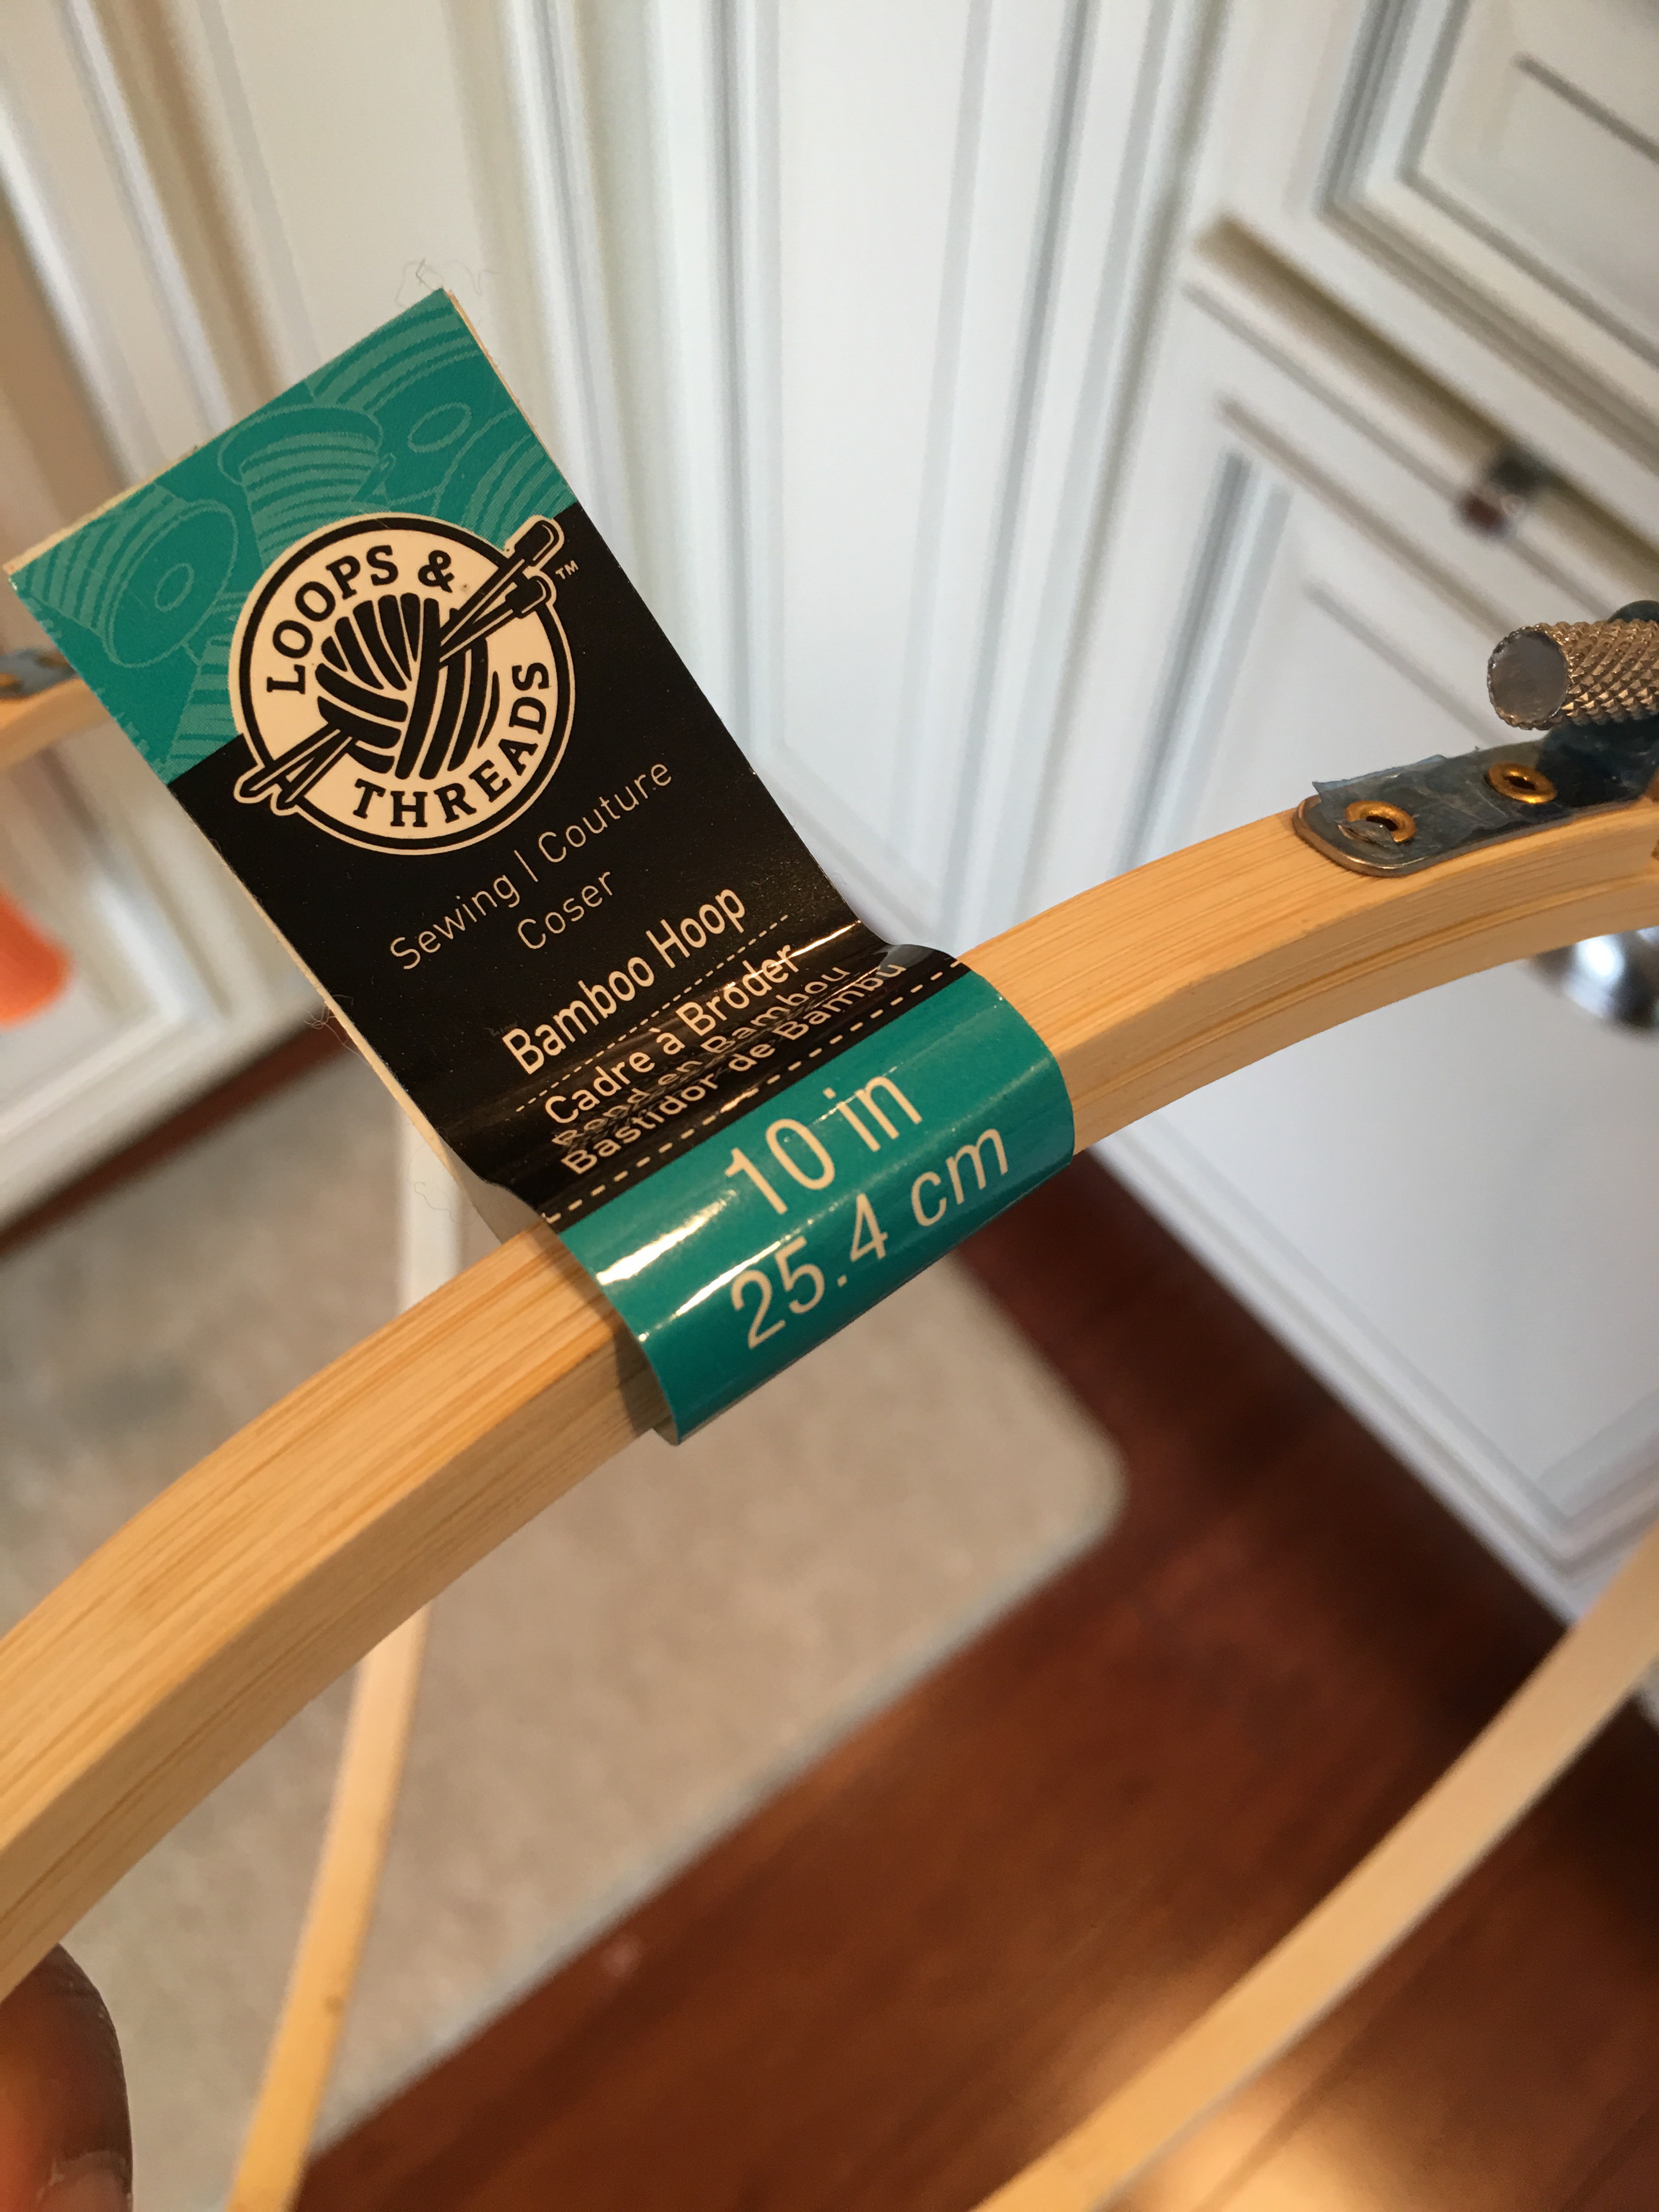
I used a piece of twine and looped it through the top of the hoop closure and tied a knot on the other side.
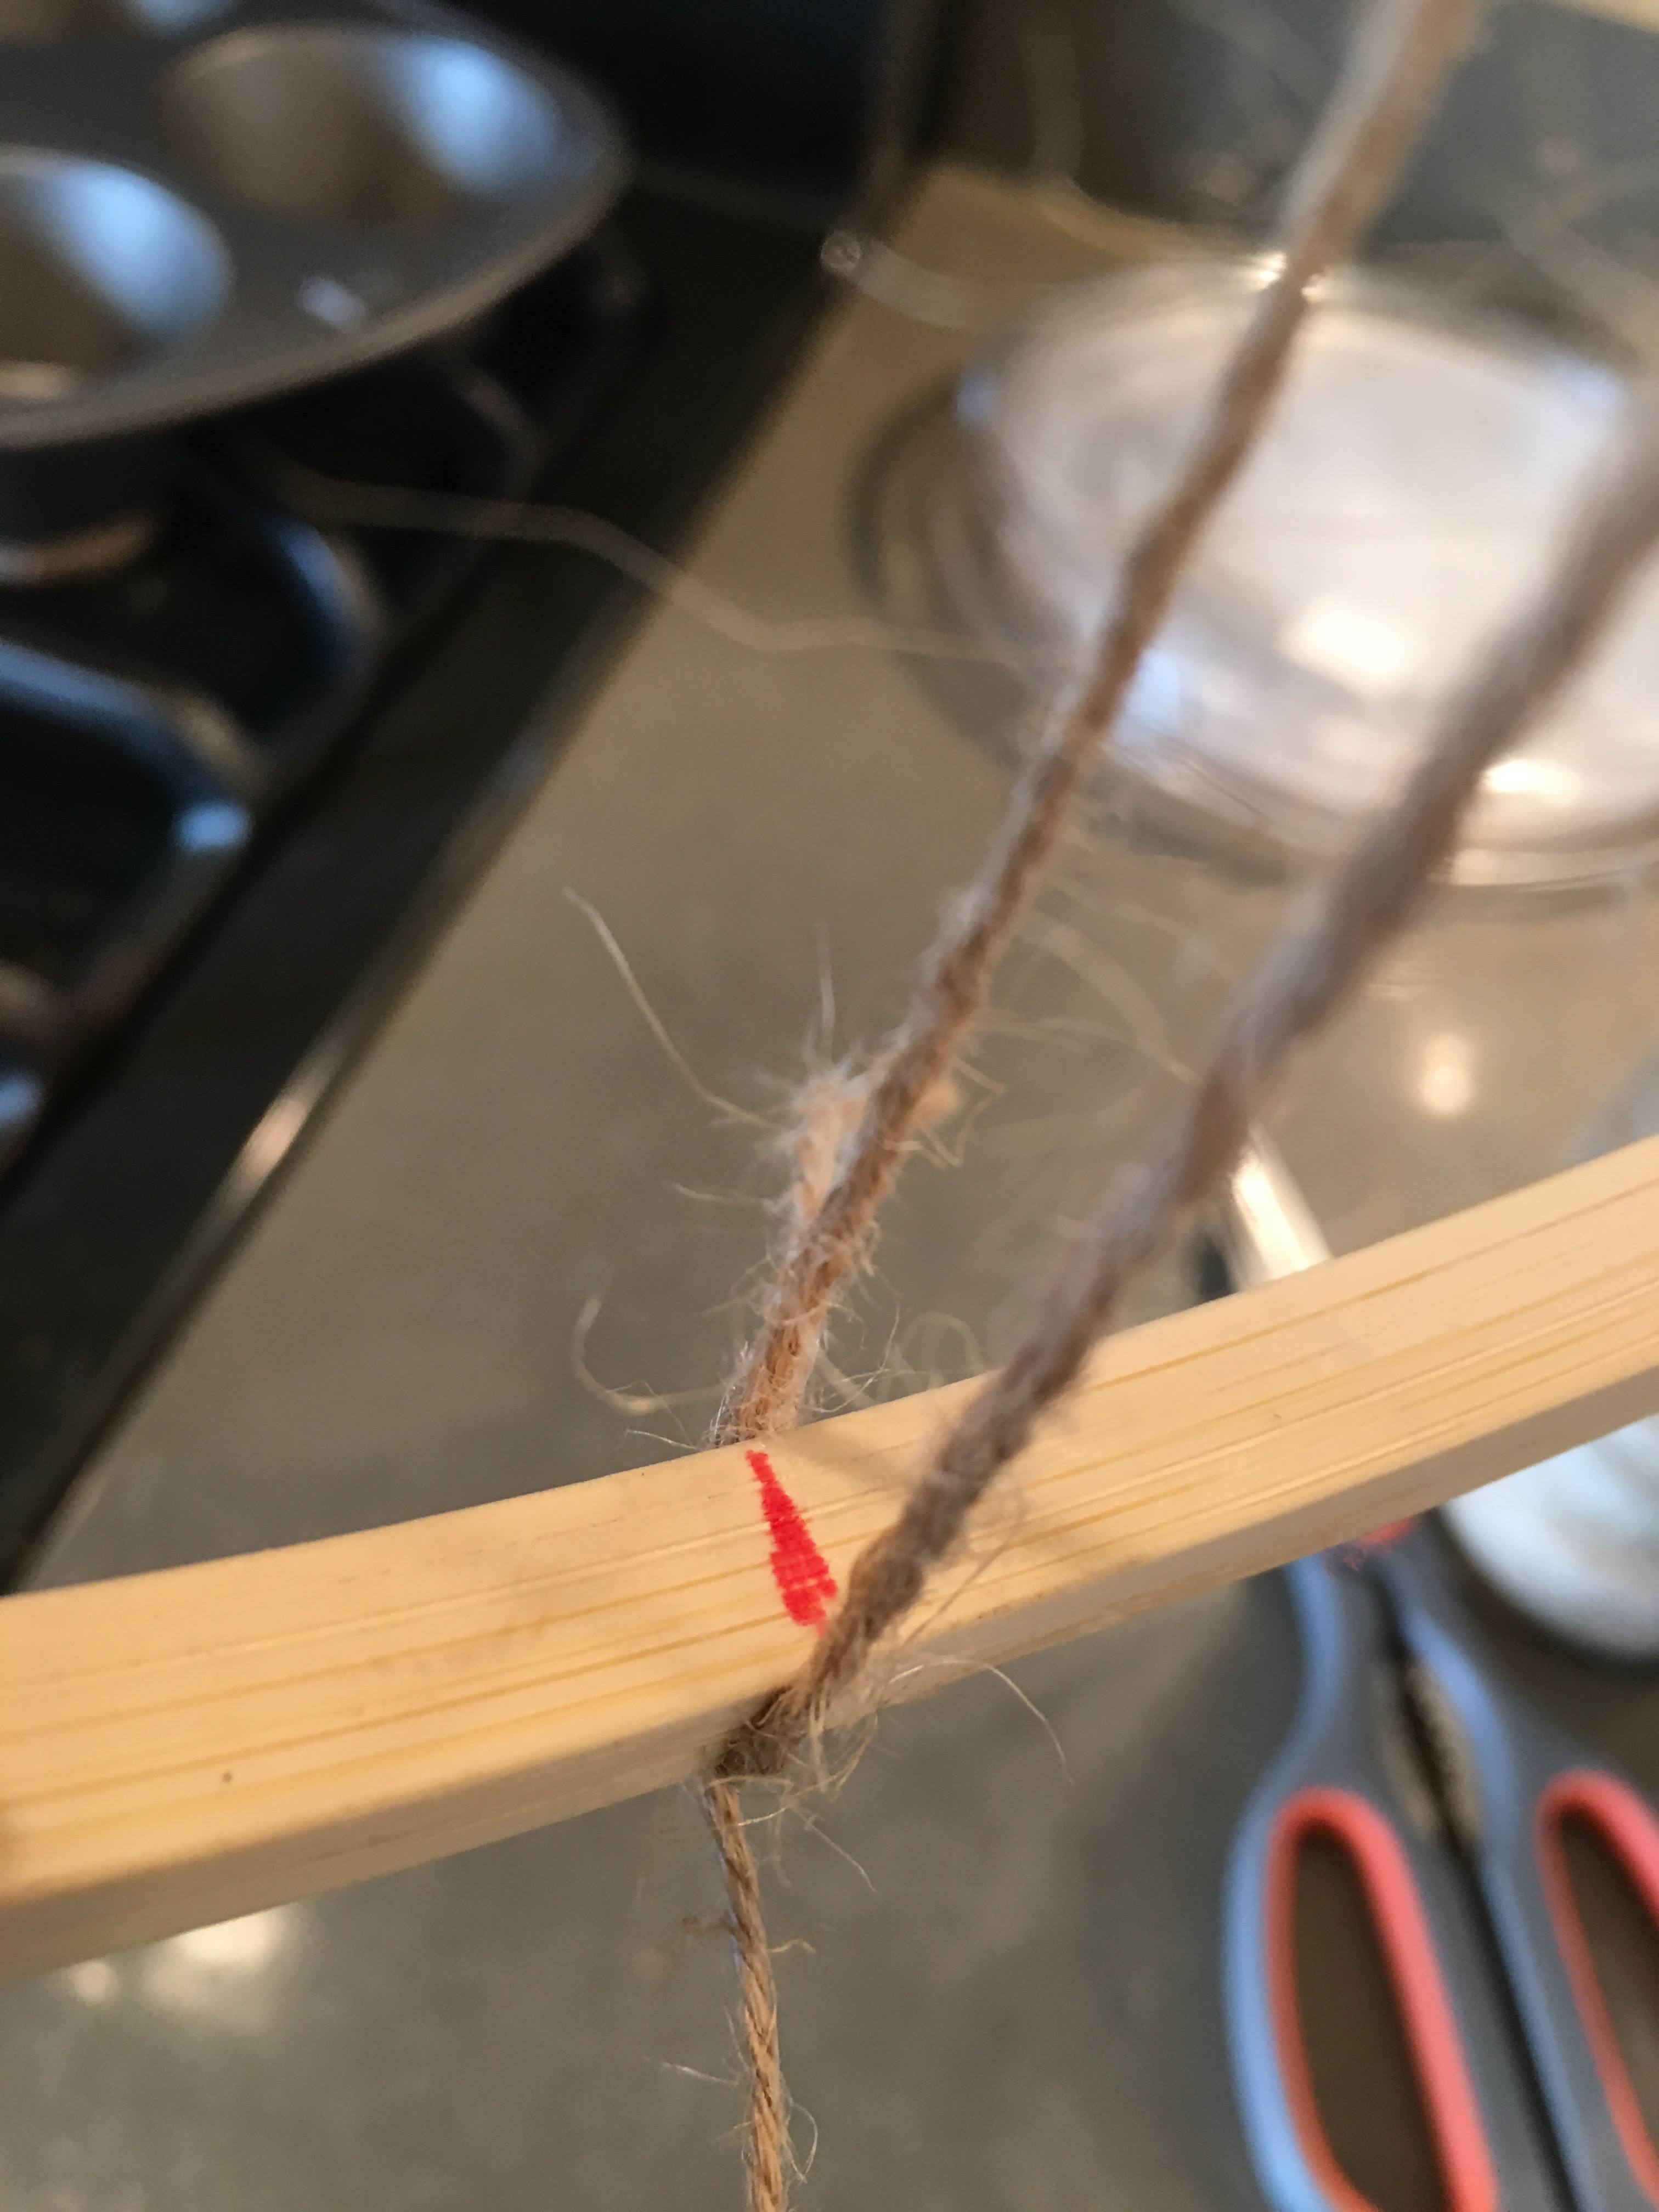
I used the twine to visually measure where to cut. I didn’t want one side to be bigger than the other…it’s important that the hoop is cut precisely in half.
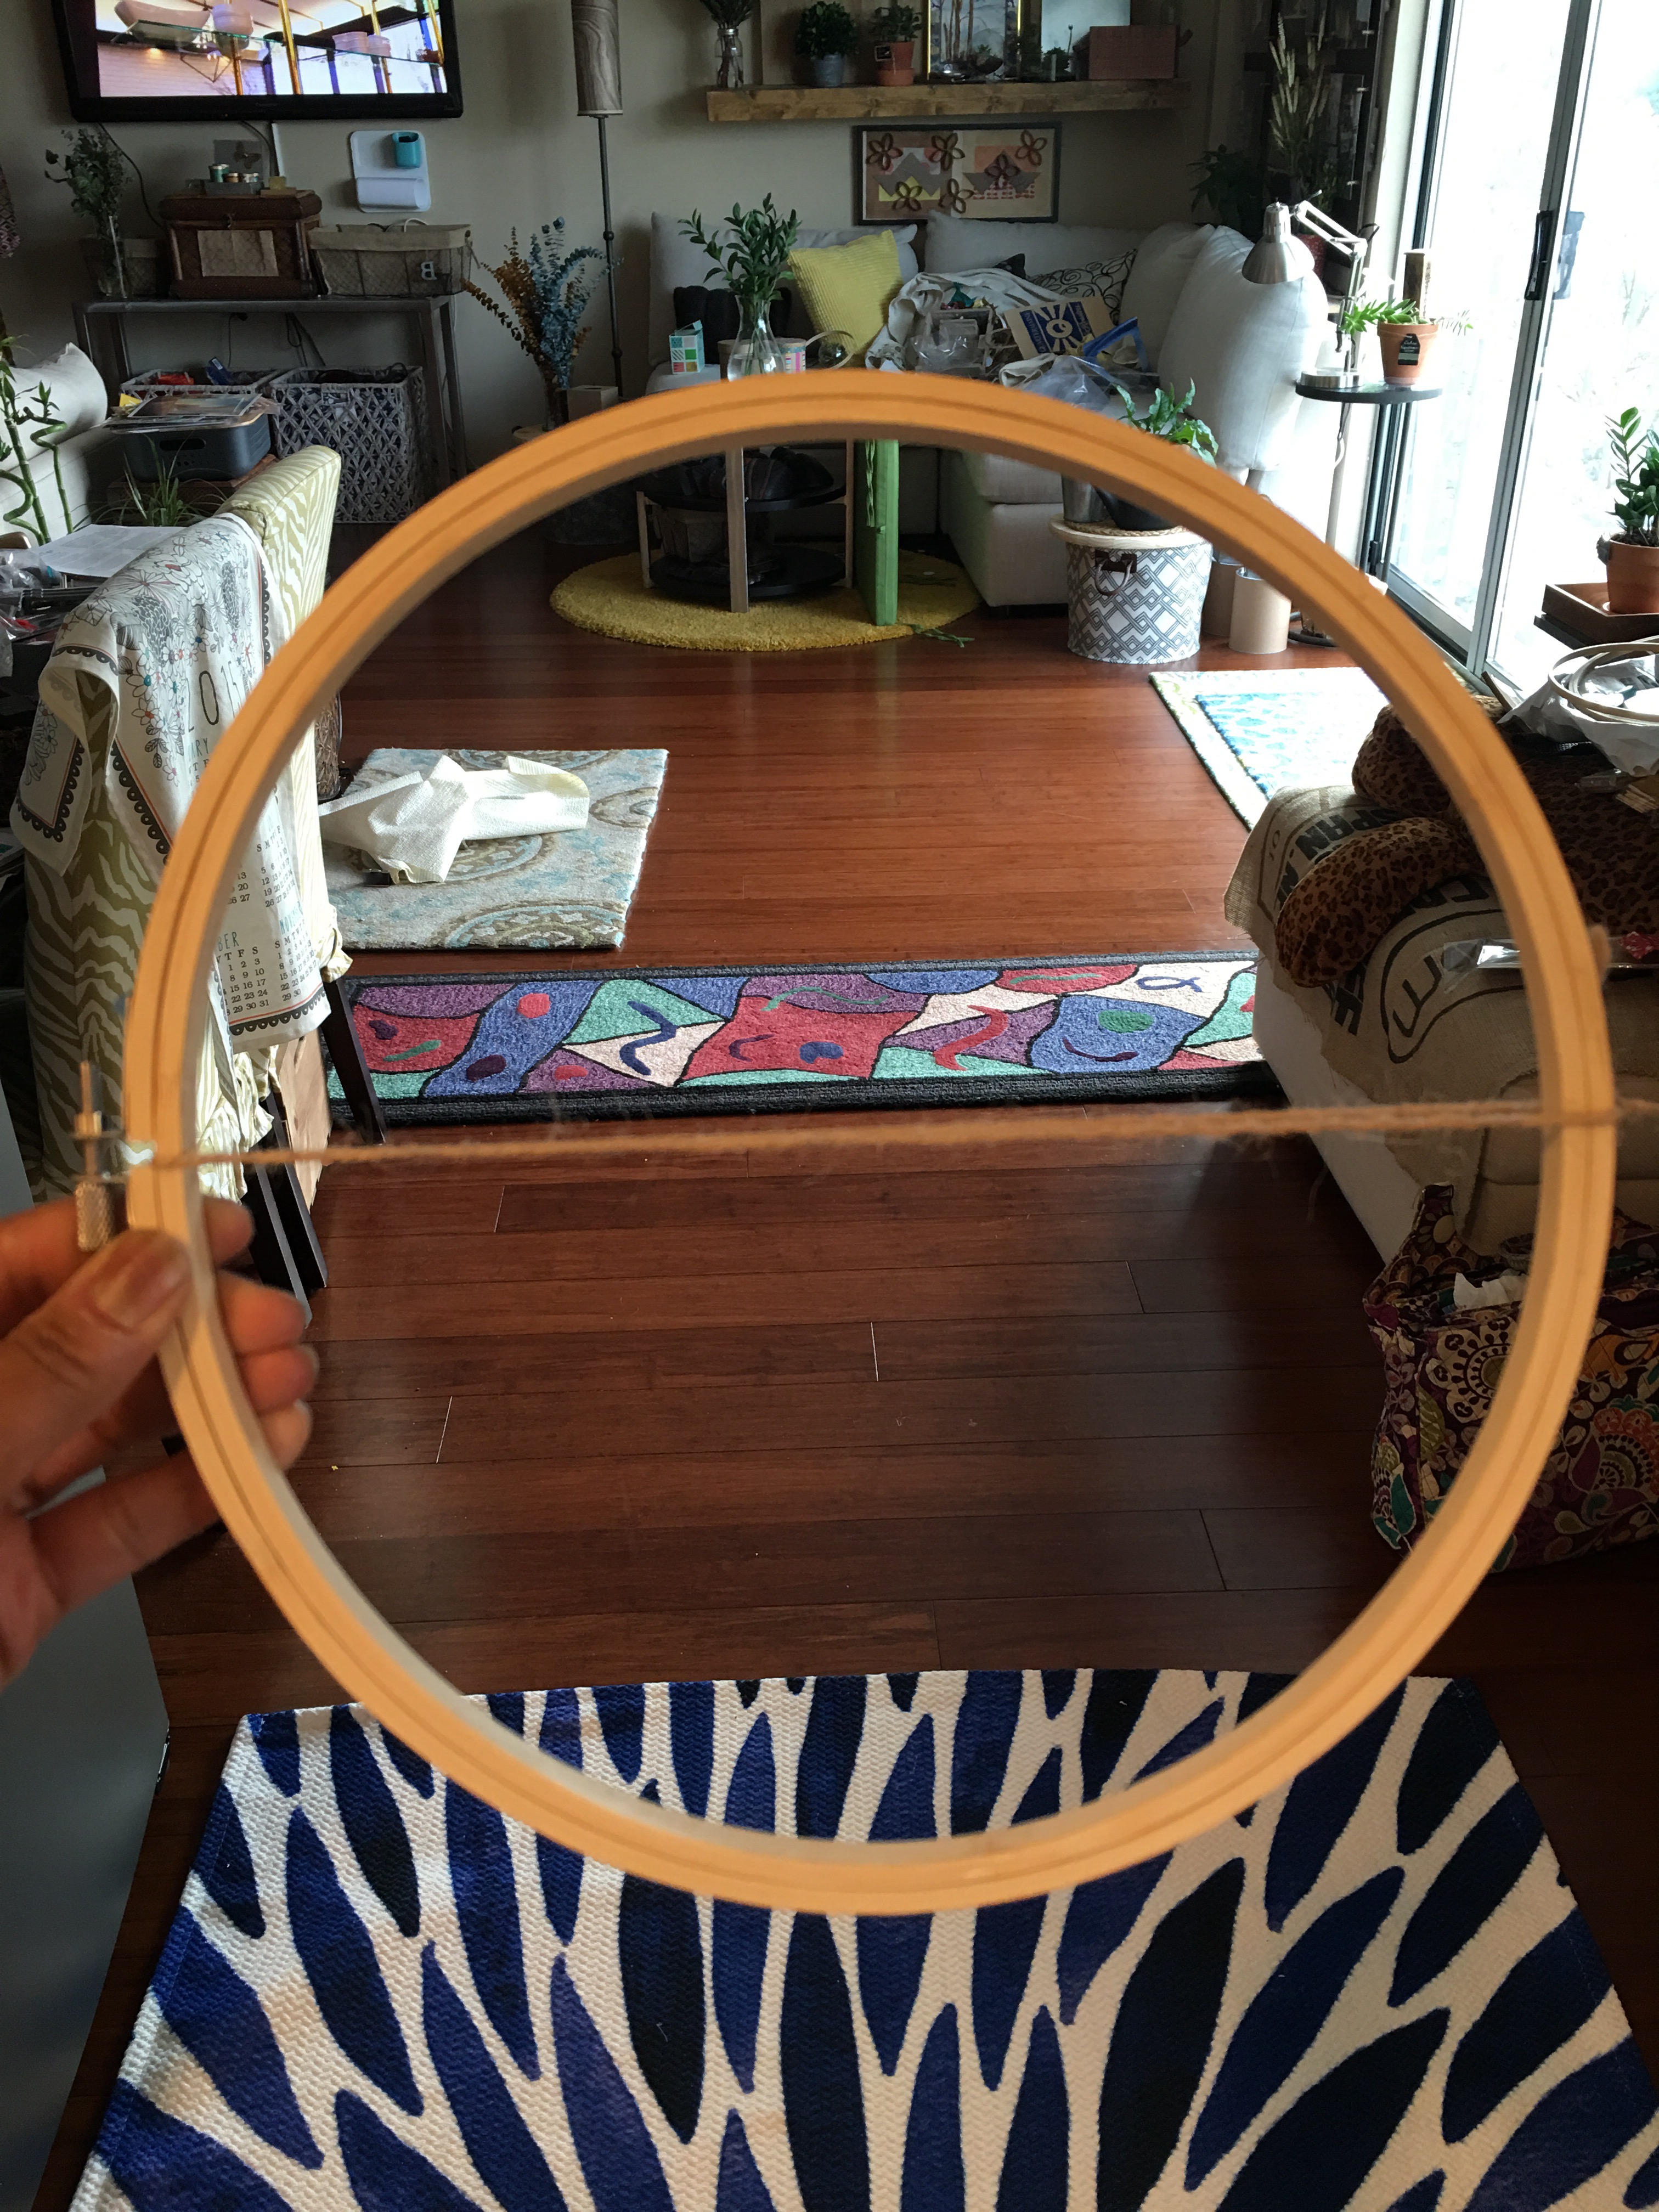
After marking at the position of the twine on both ends of the circle, I cut both sides.
- Step 2: Measure and cut the poster board and fine paper.
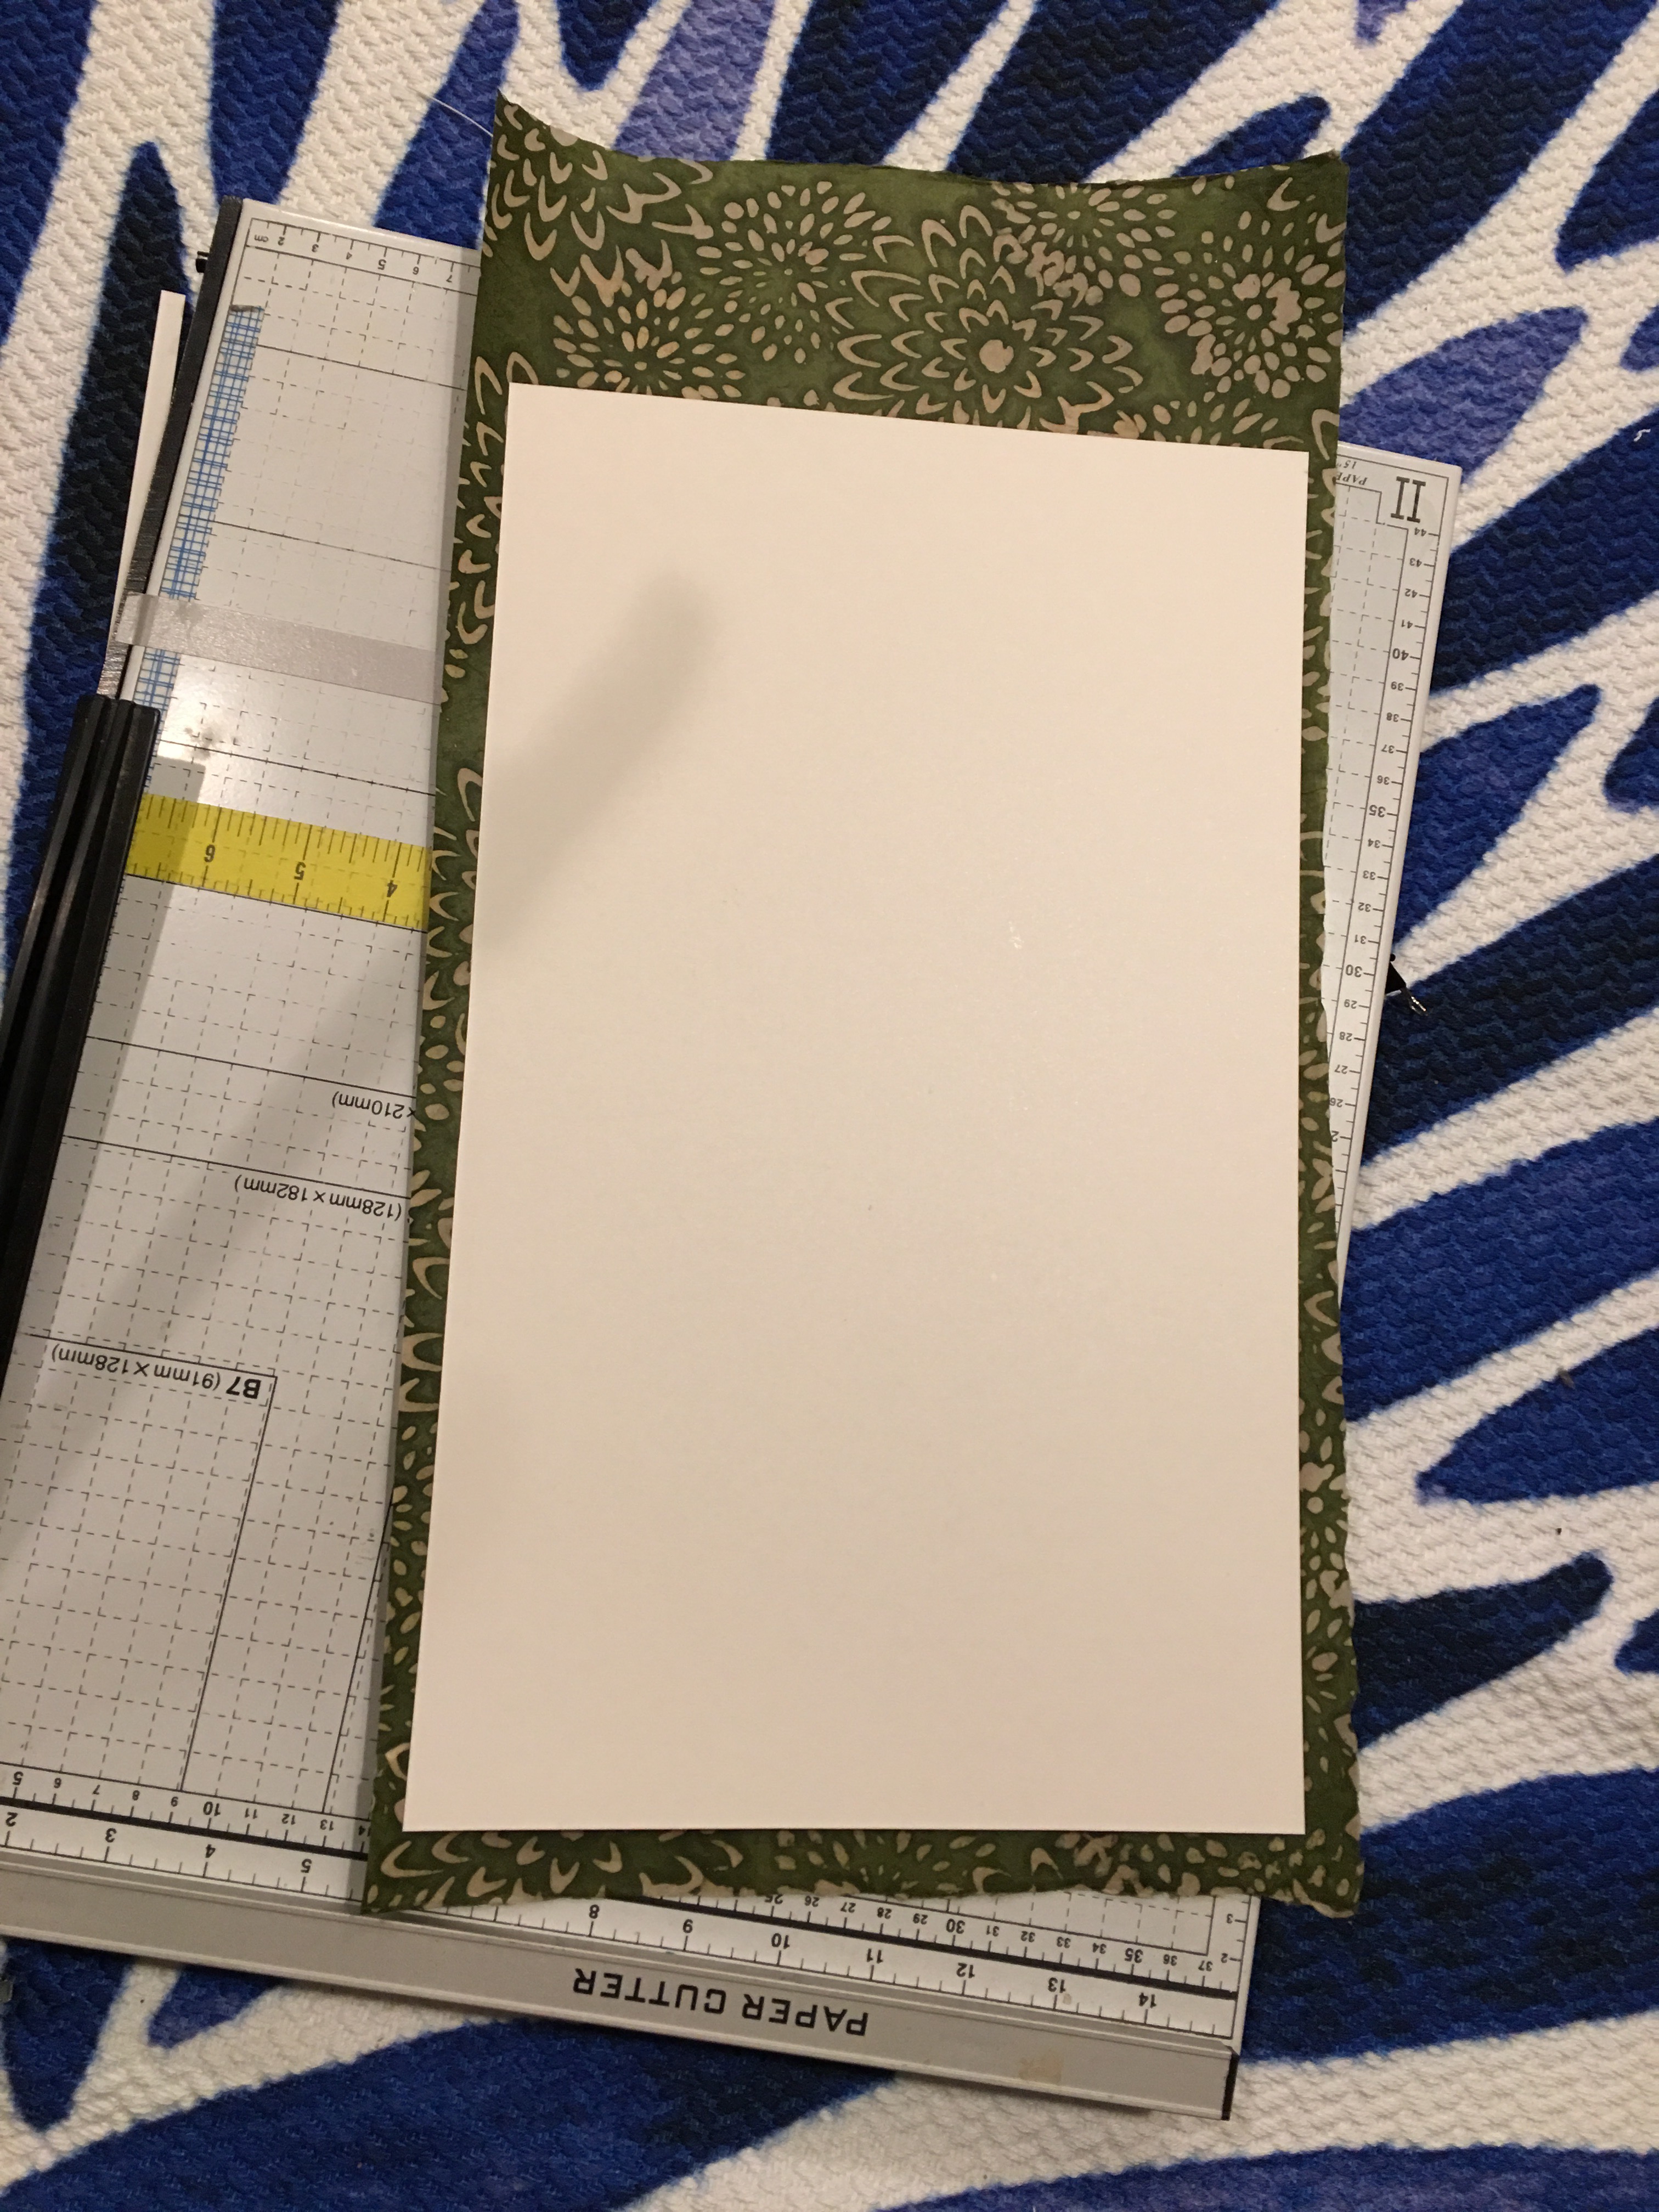
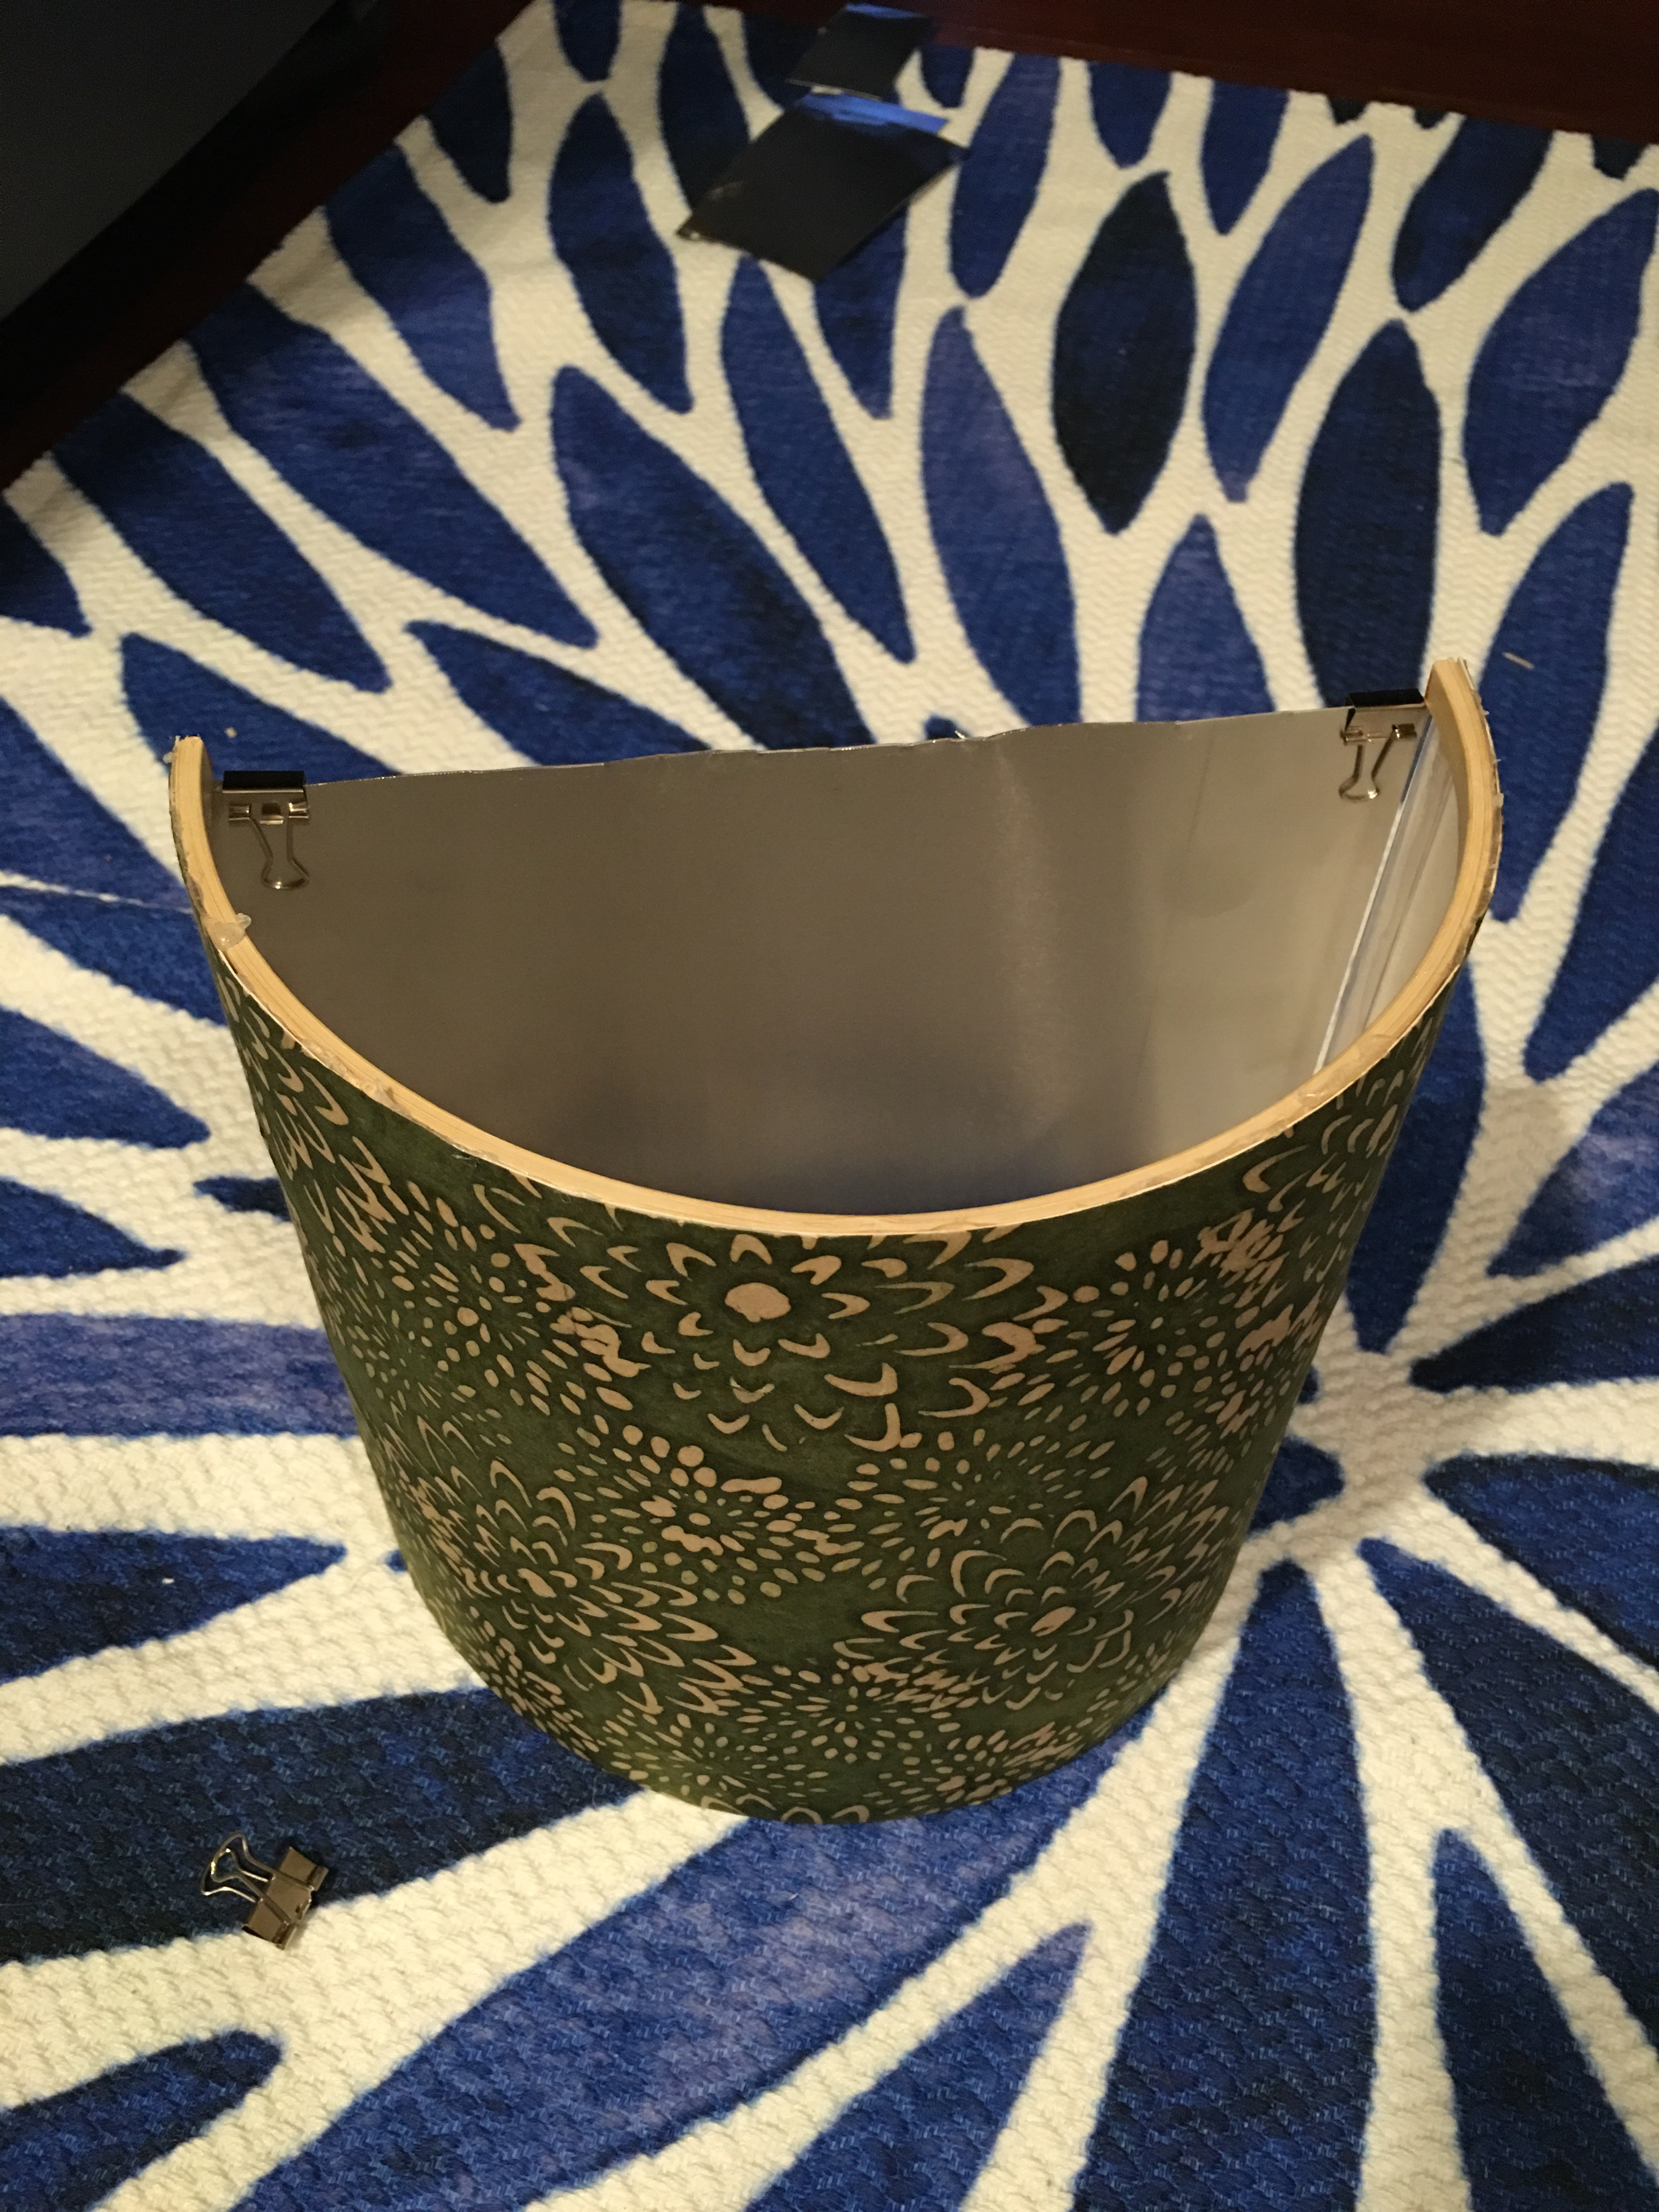
- Step 3: Decoupage the poster board with the paper.
- Step 4: Hot glue the decorated poster board onto the cut embroidered wood.
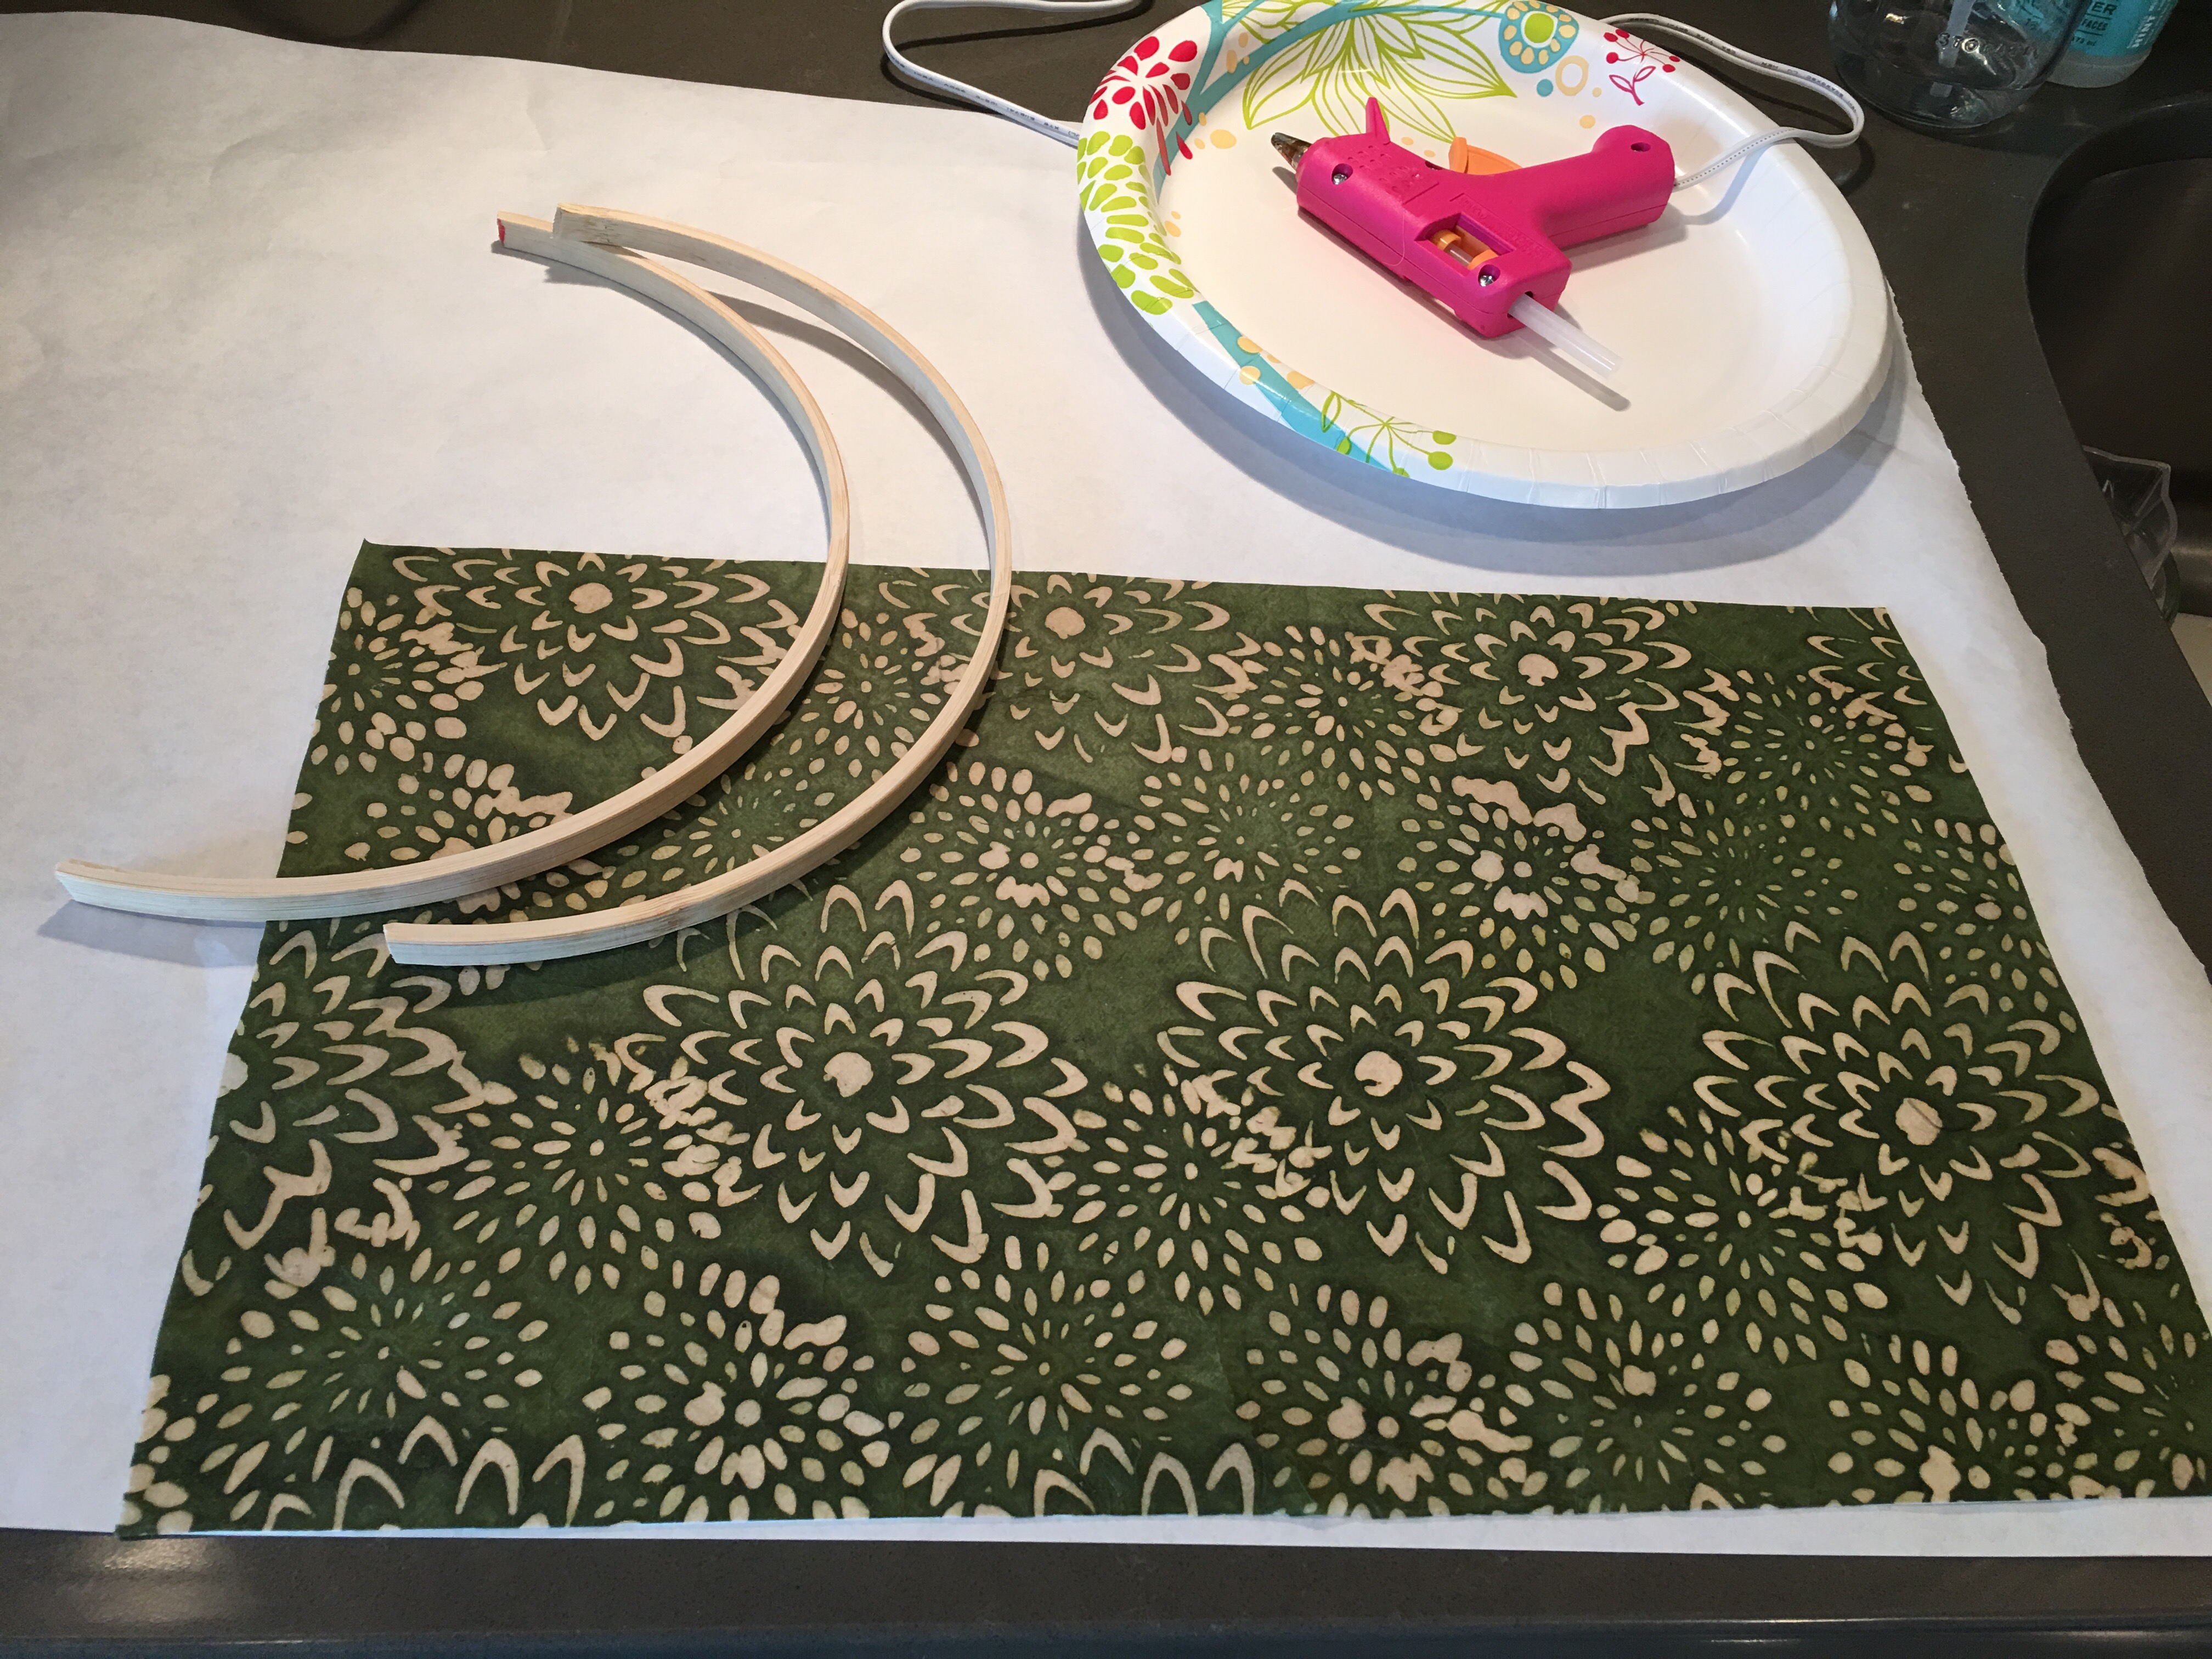
I started this step with applying a small dab of glue to the end of the paper and then lining it up with one of the cut hoops.
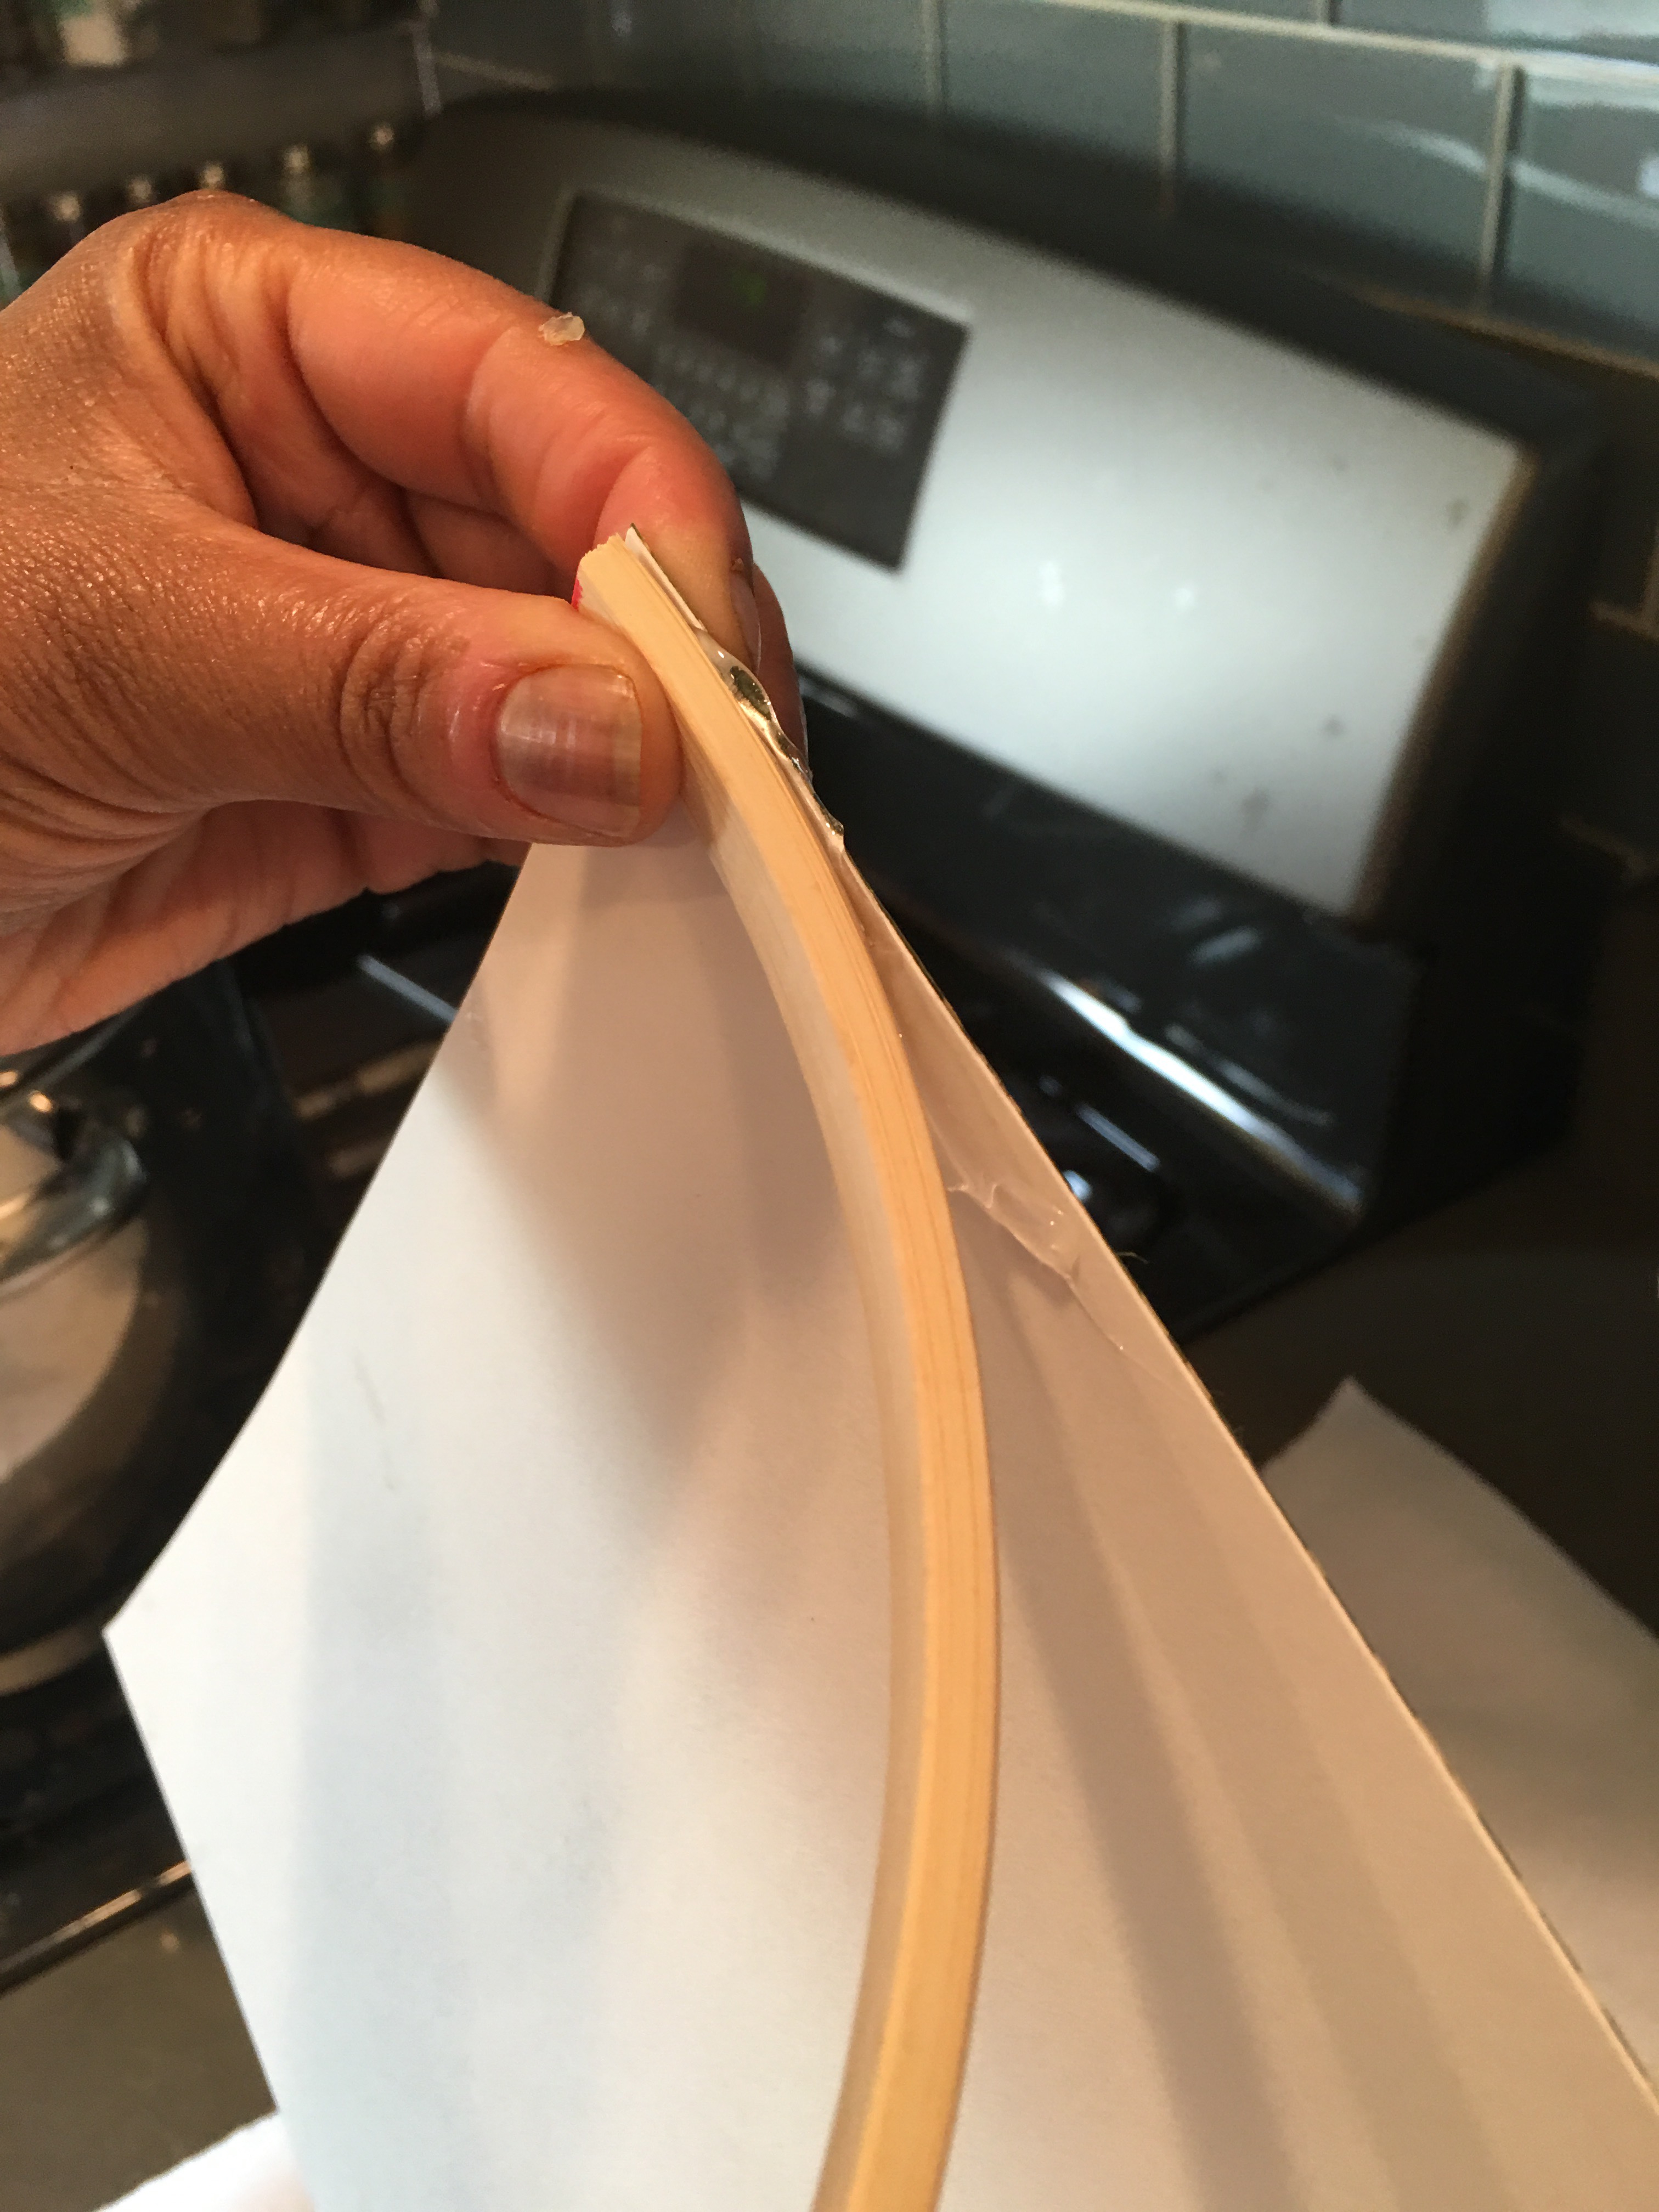
Working along the horizontal edges of the board, I continued applying hot glue and connecting the hoop.
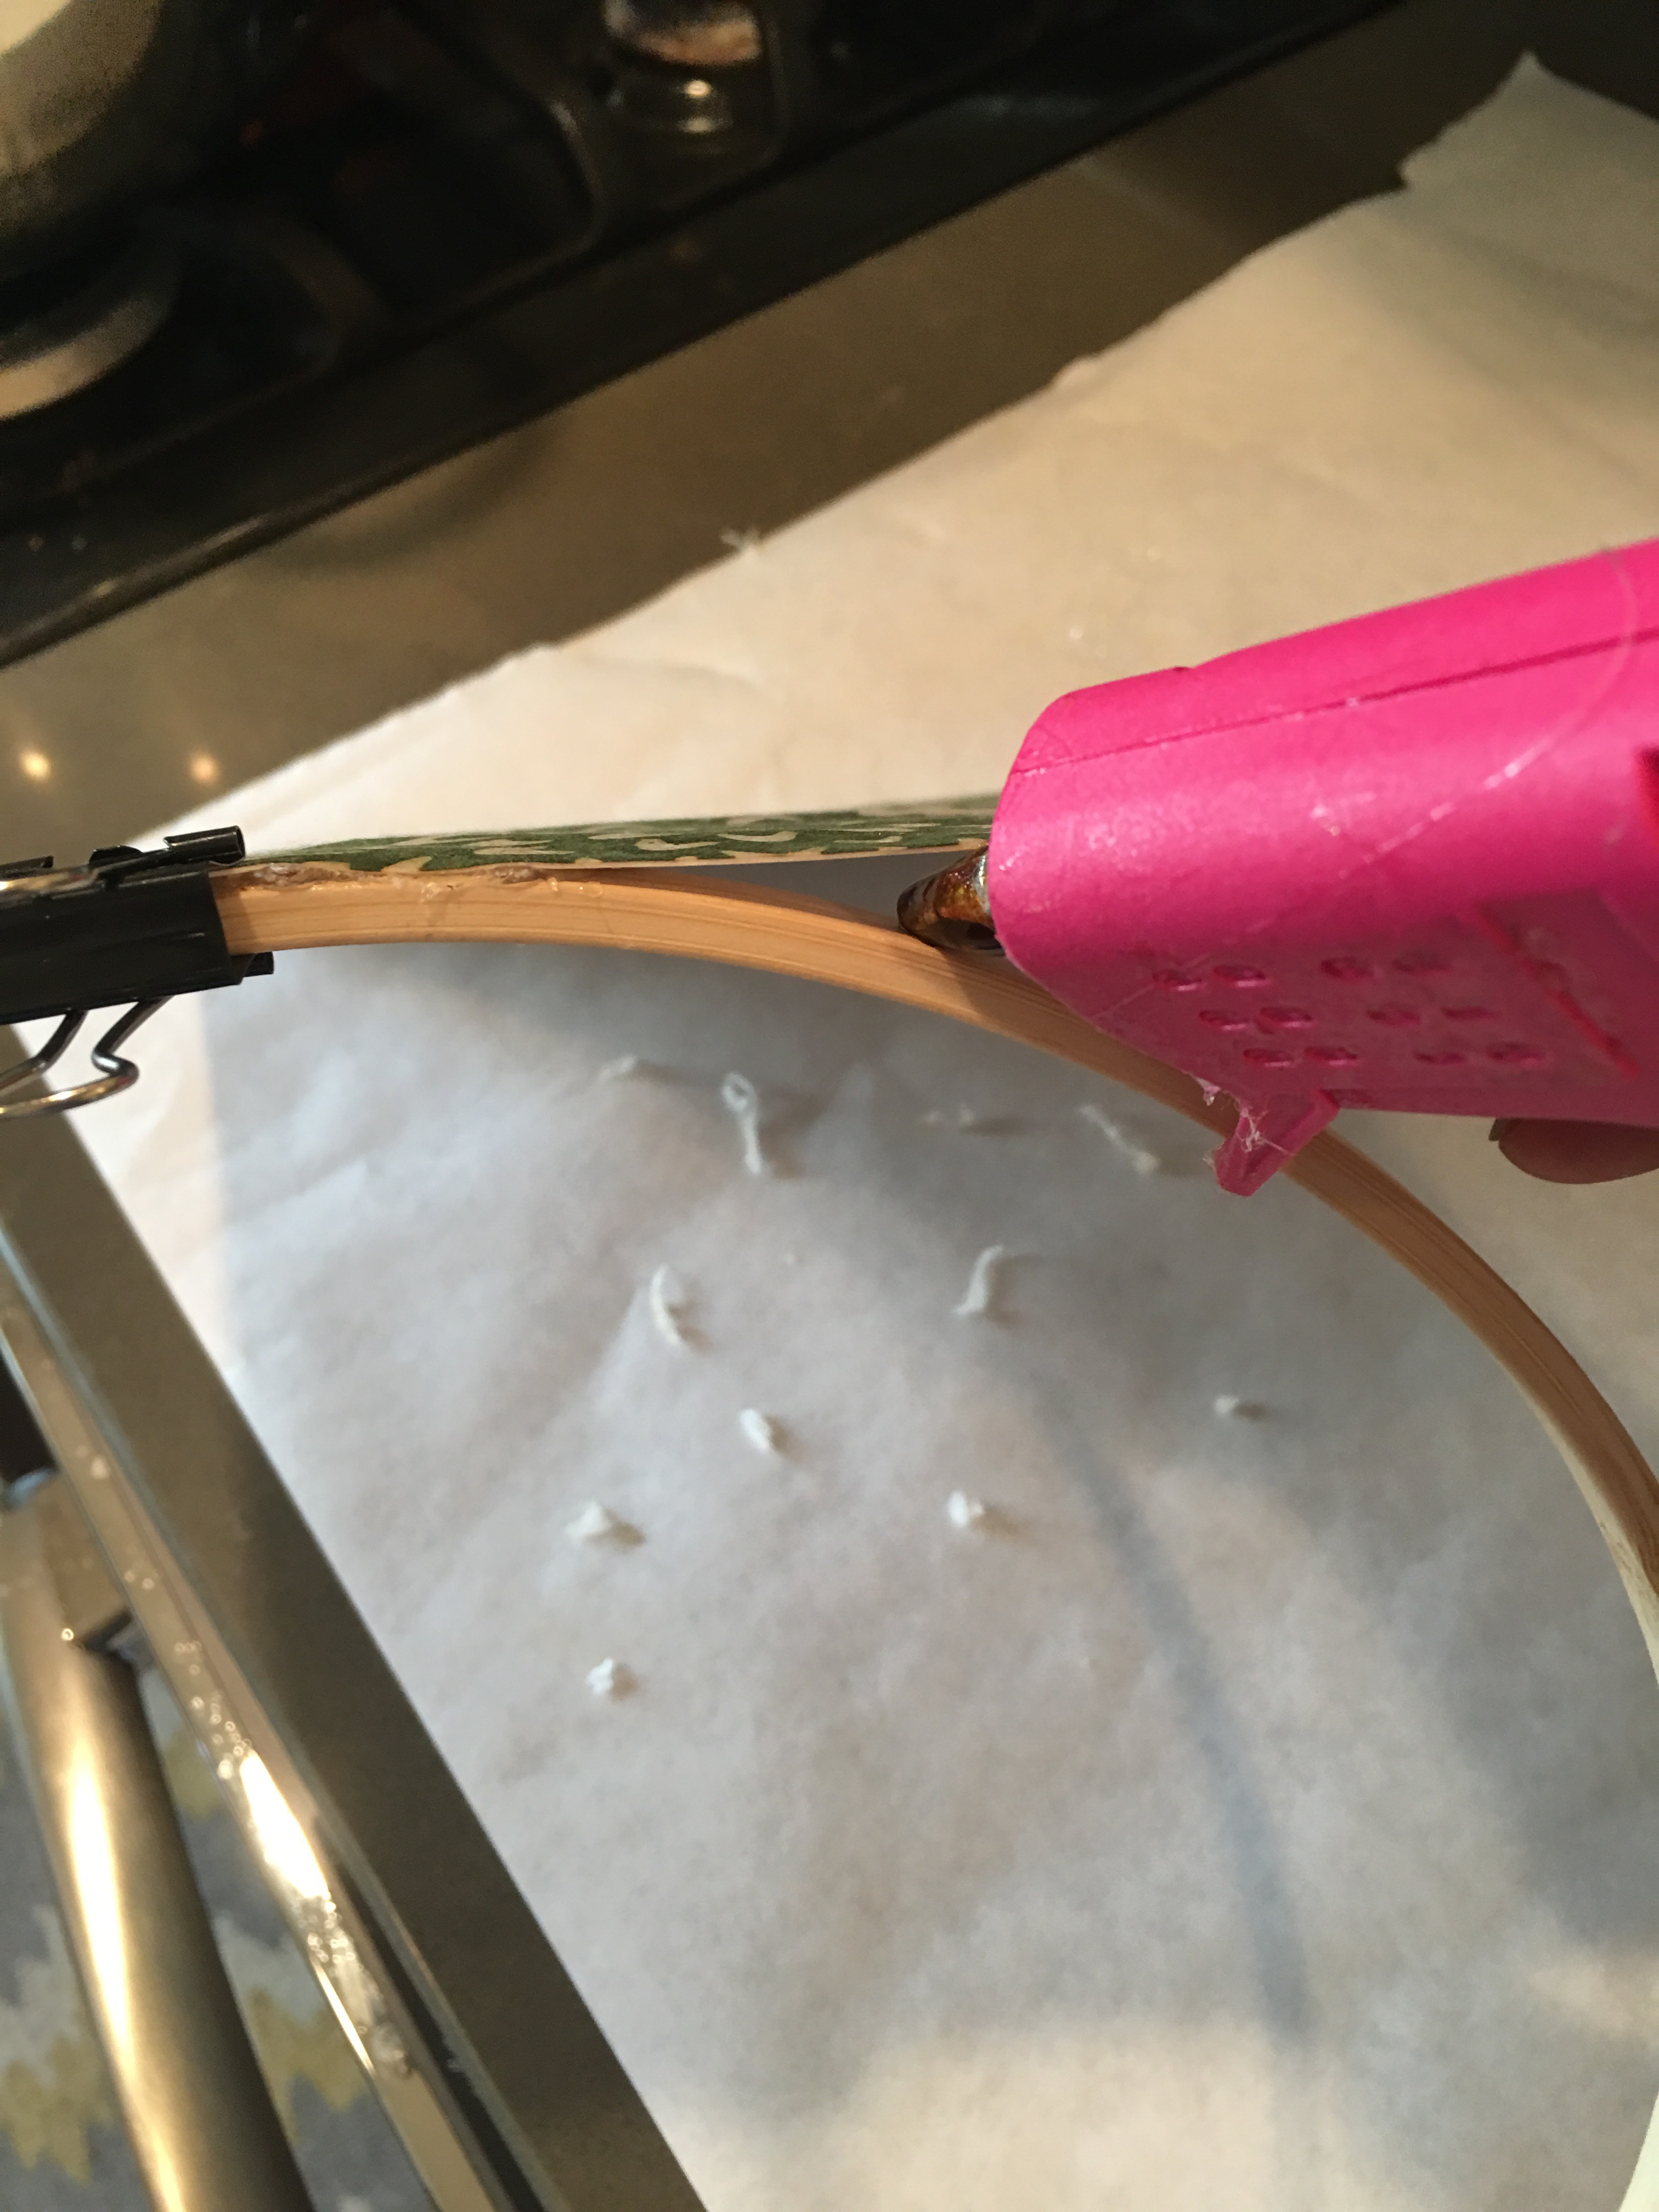
Repeat on the other side. And use small binder clips to hold the hoop in place until the glue sets.
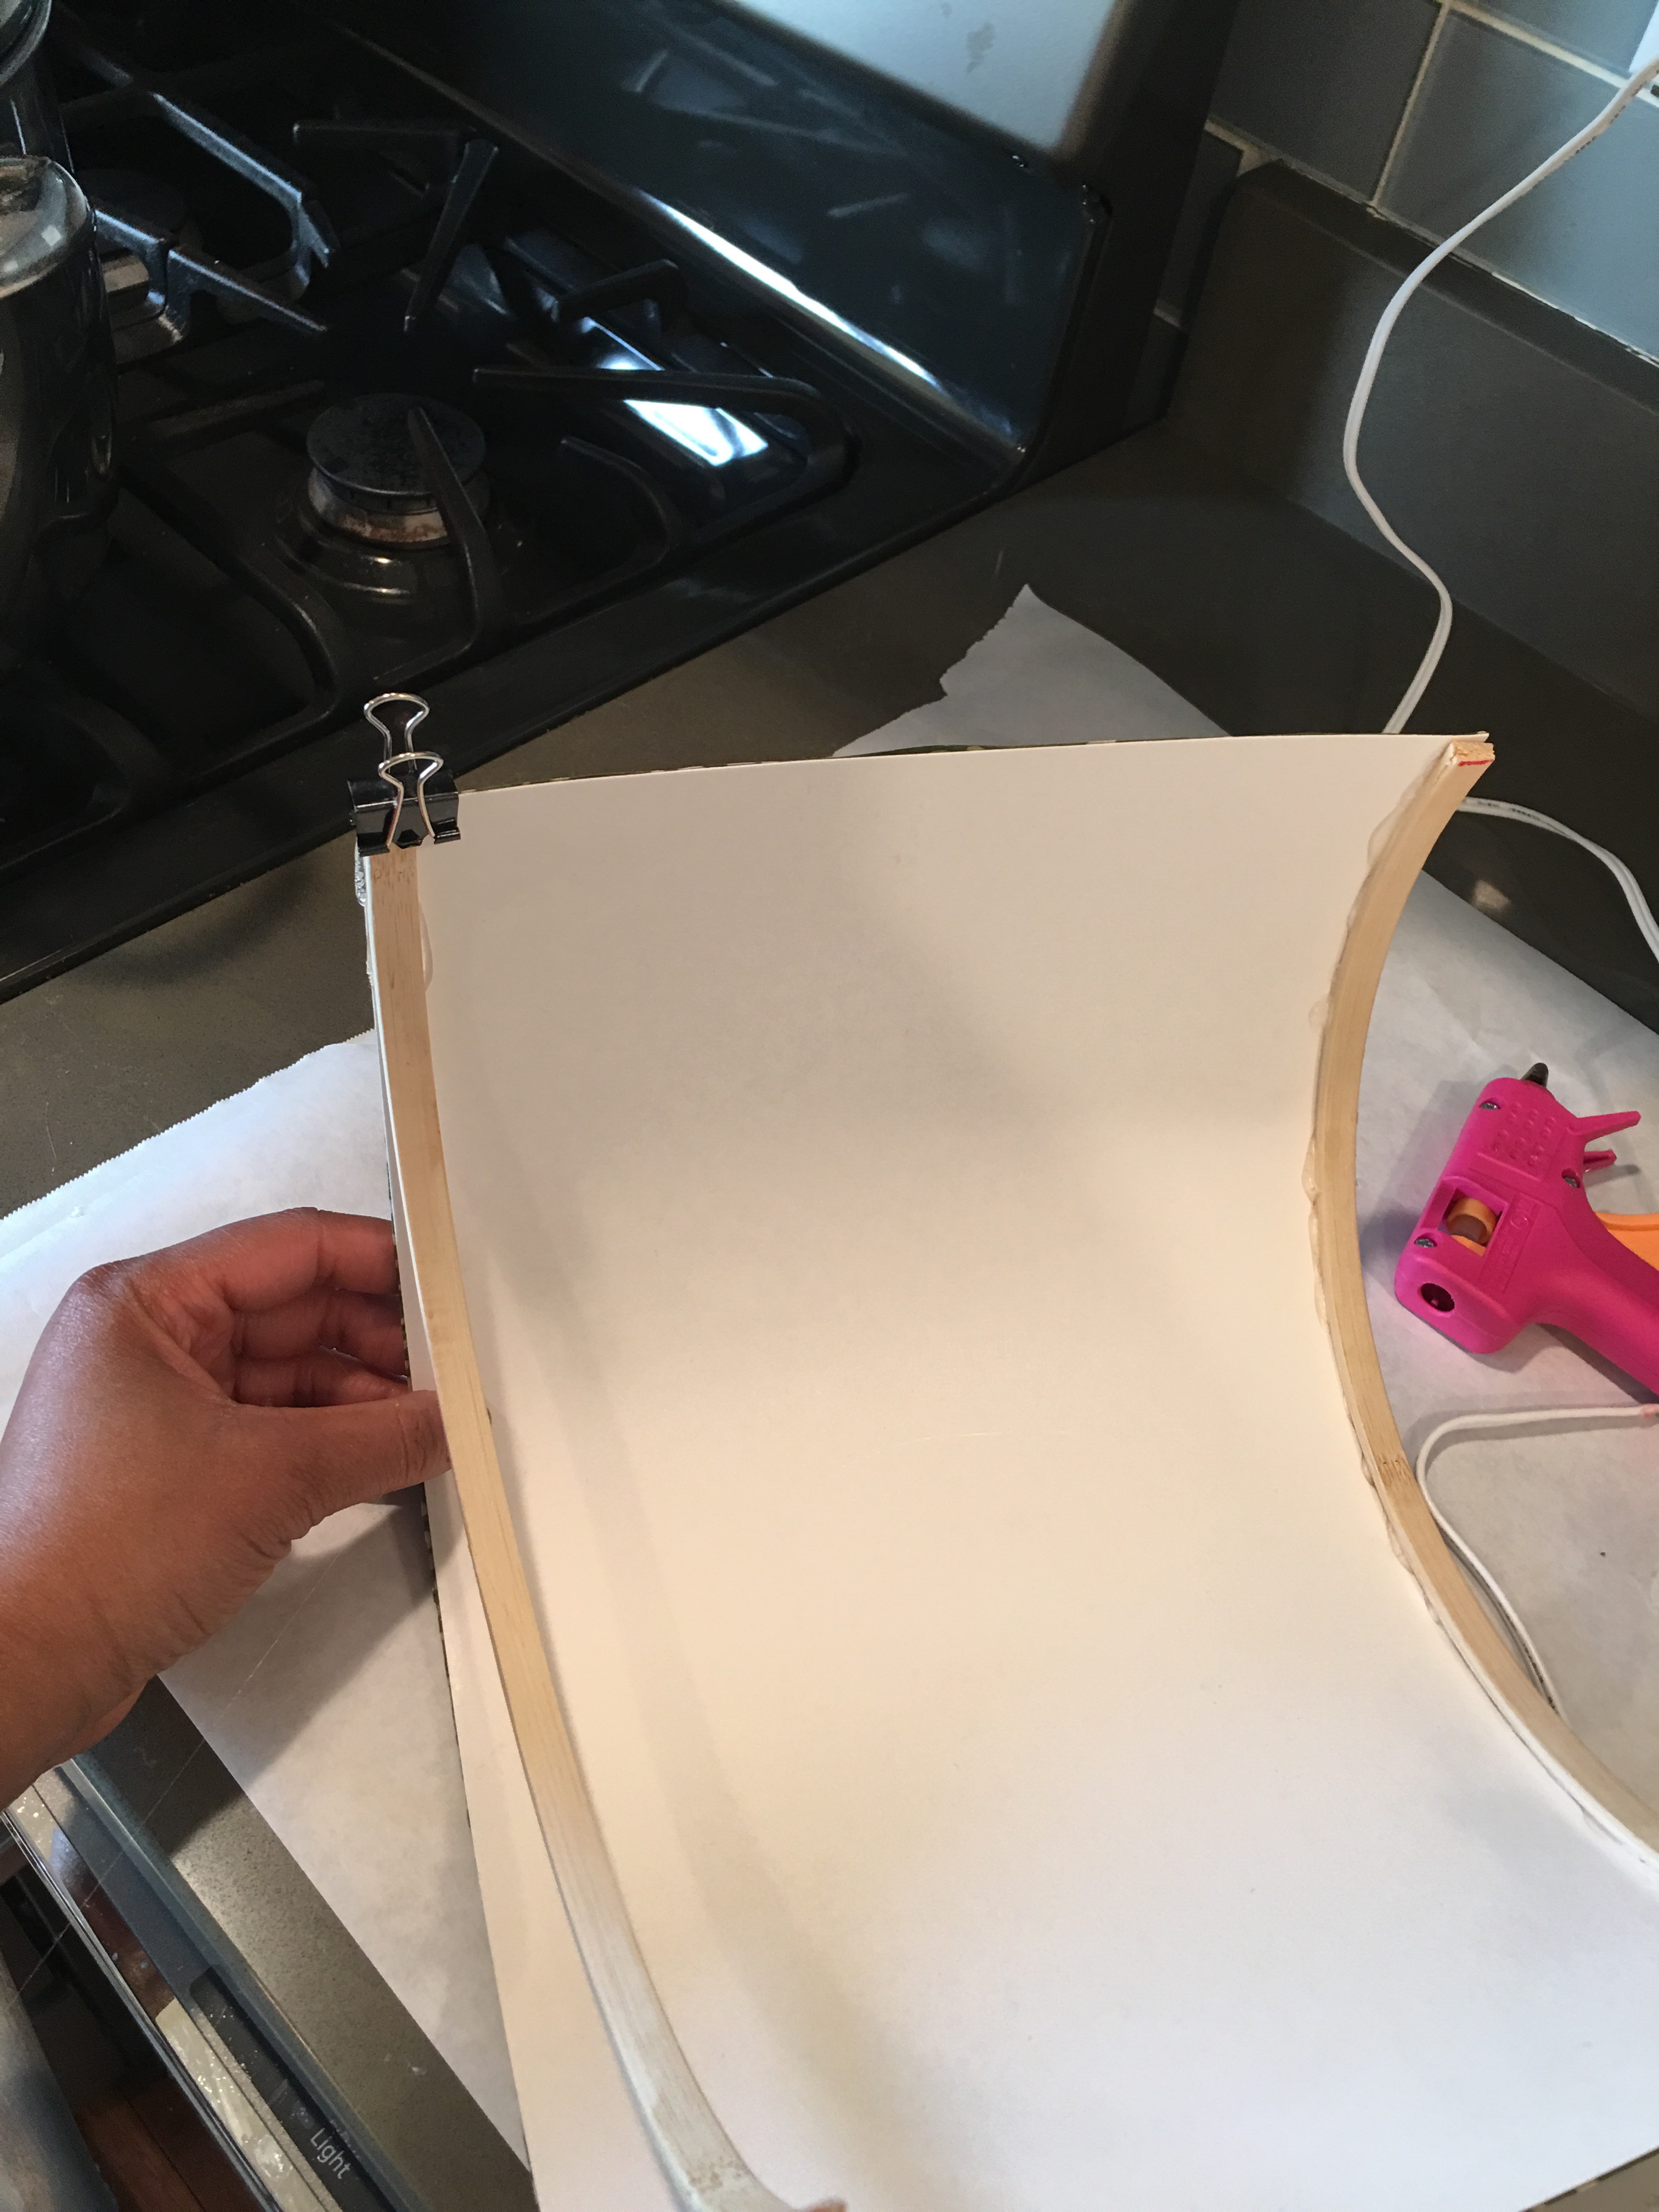

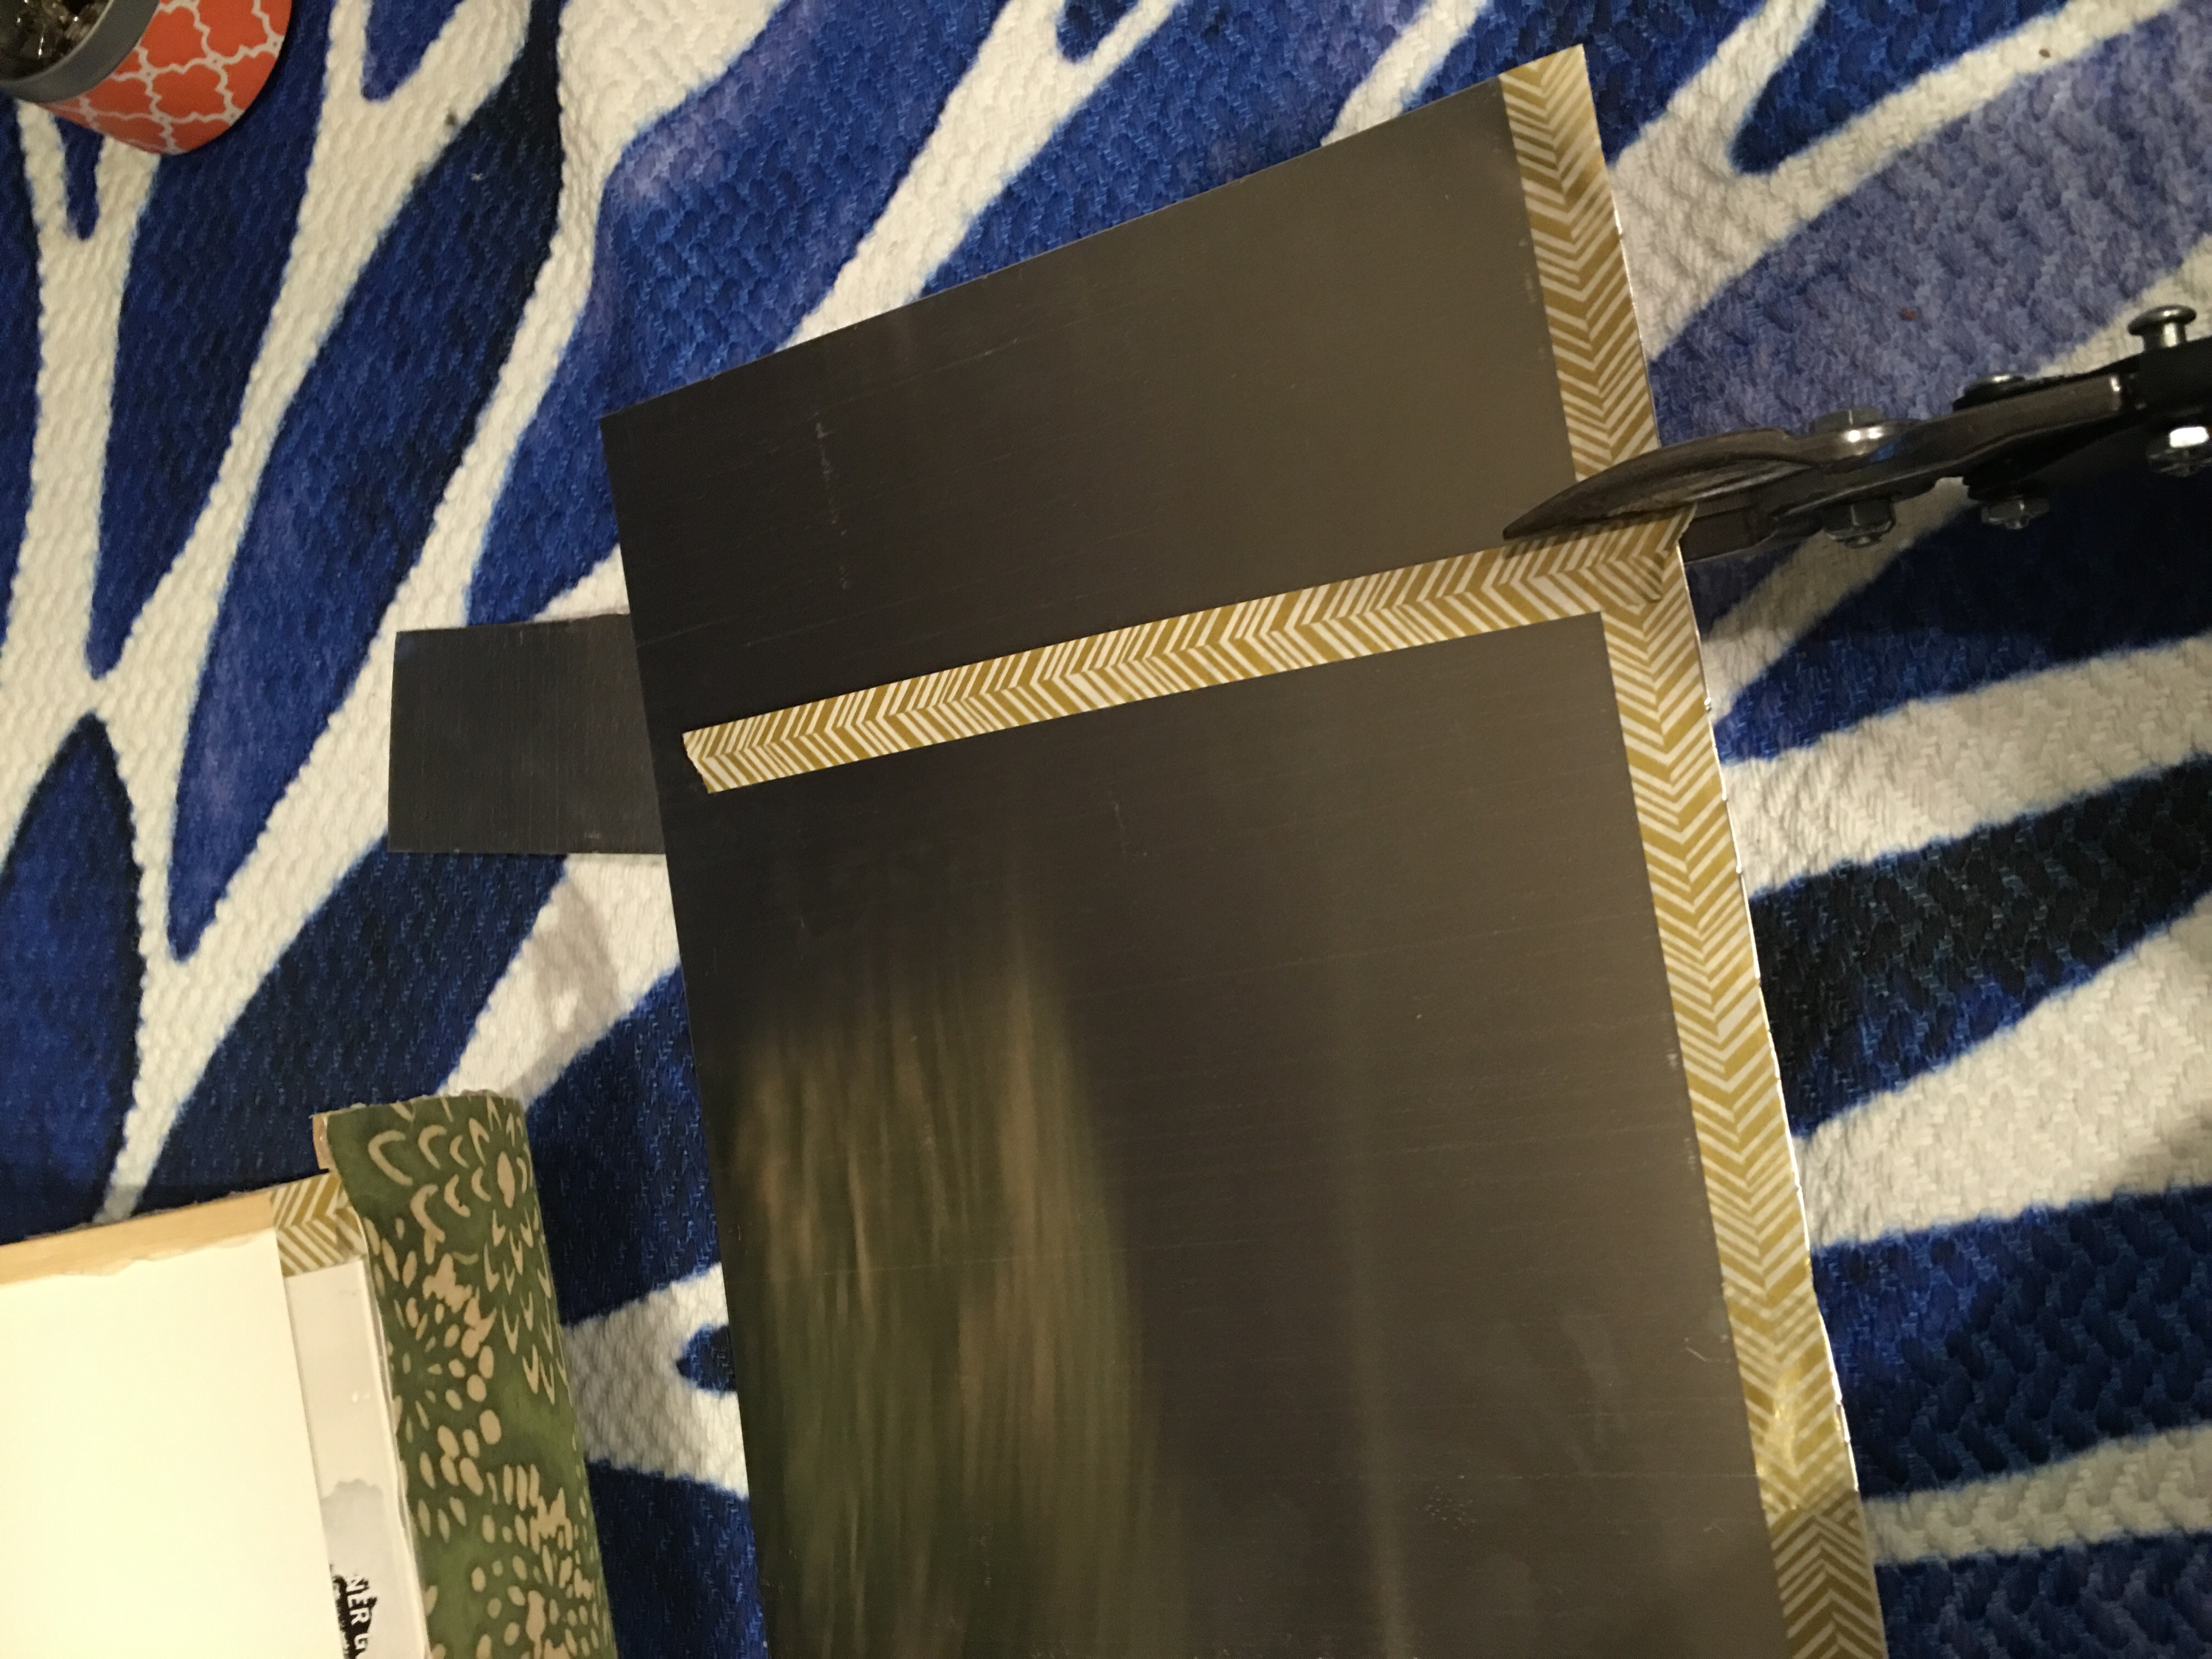
- Step 5: Cut and attach the corner guard pieces to the back of the board.
The plastic corner guard pieces are used to hold the back aluminum plate for the sconce in place. These usually come in 4′ length. So I first lined it up with one vertical side of the sconce…

…marked the place where I need to cut with tape. Then I used metal snips to make the cut.
I used hot glue to add the corner guard pieces to the board.
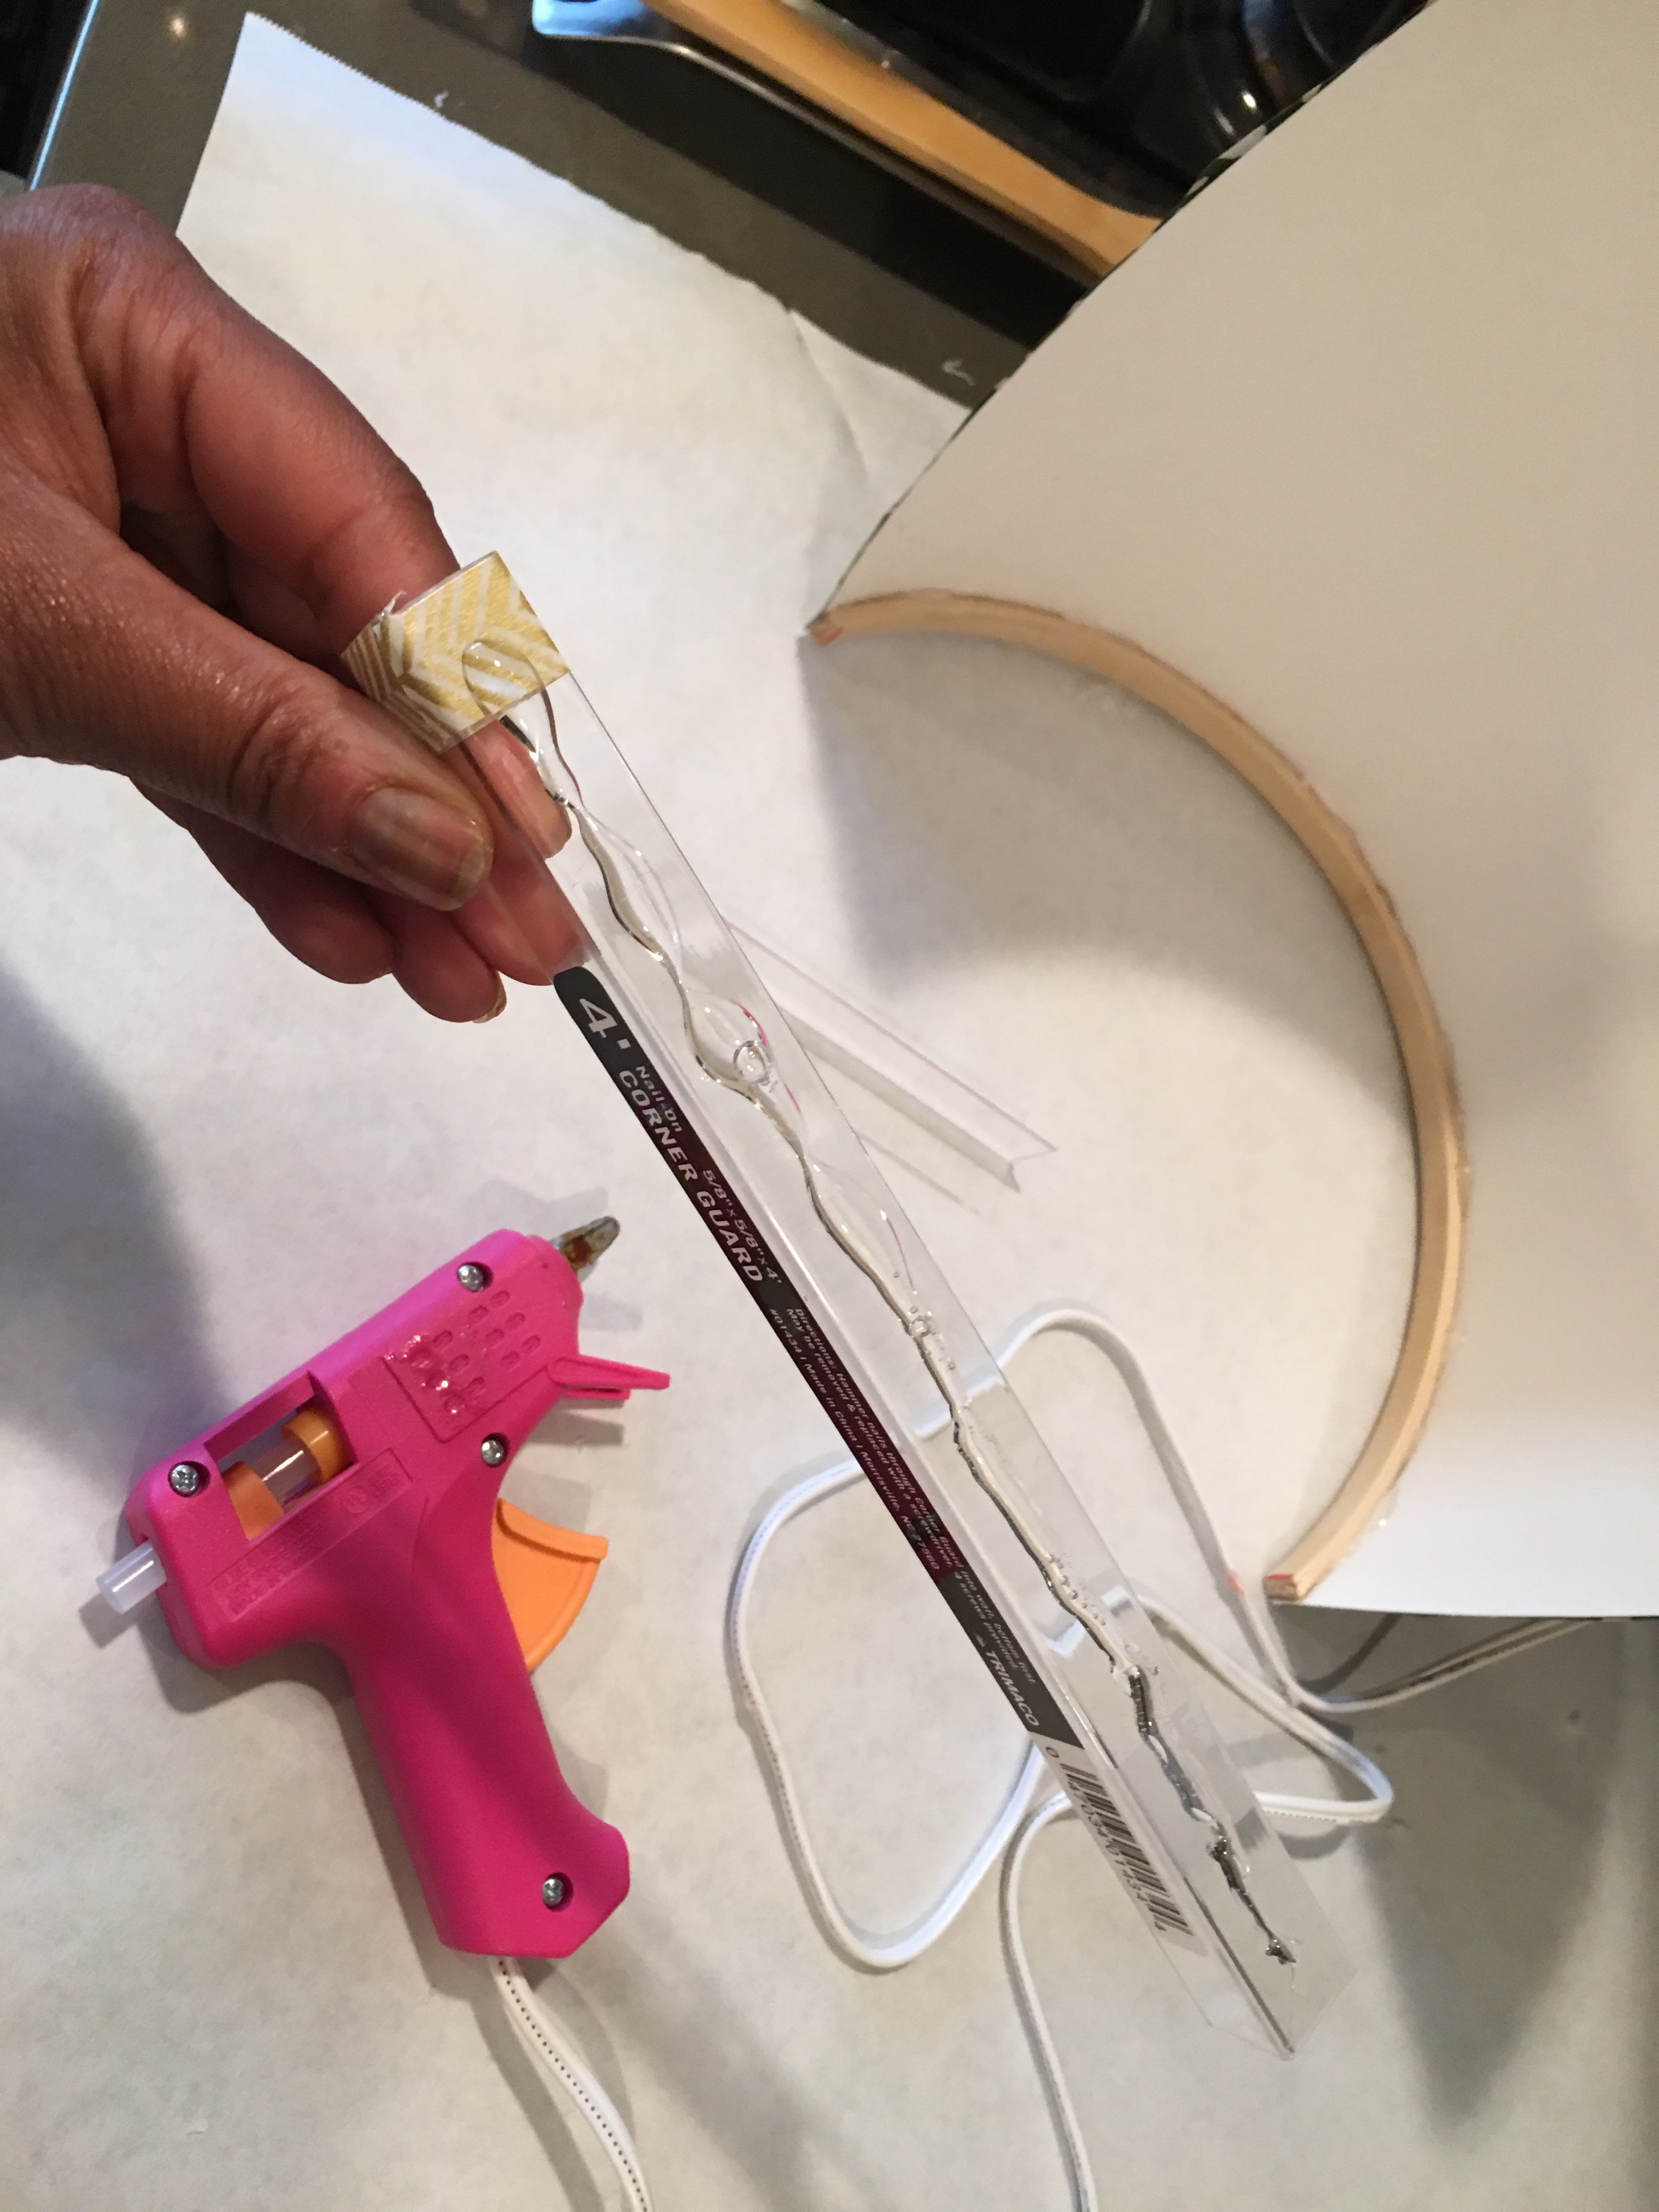
I was sure to apply pressure along the length of the corner guard for at least 10 seconds.
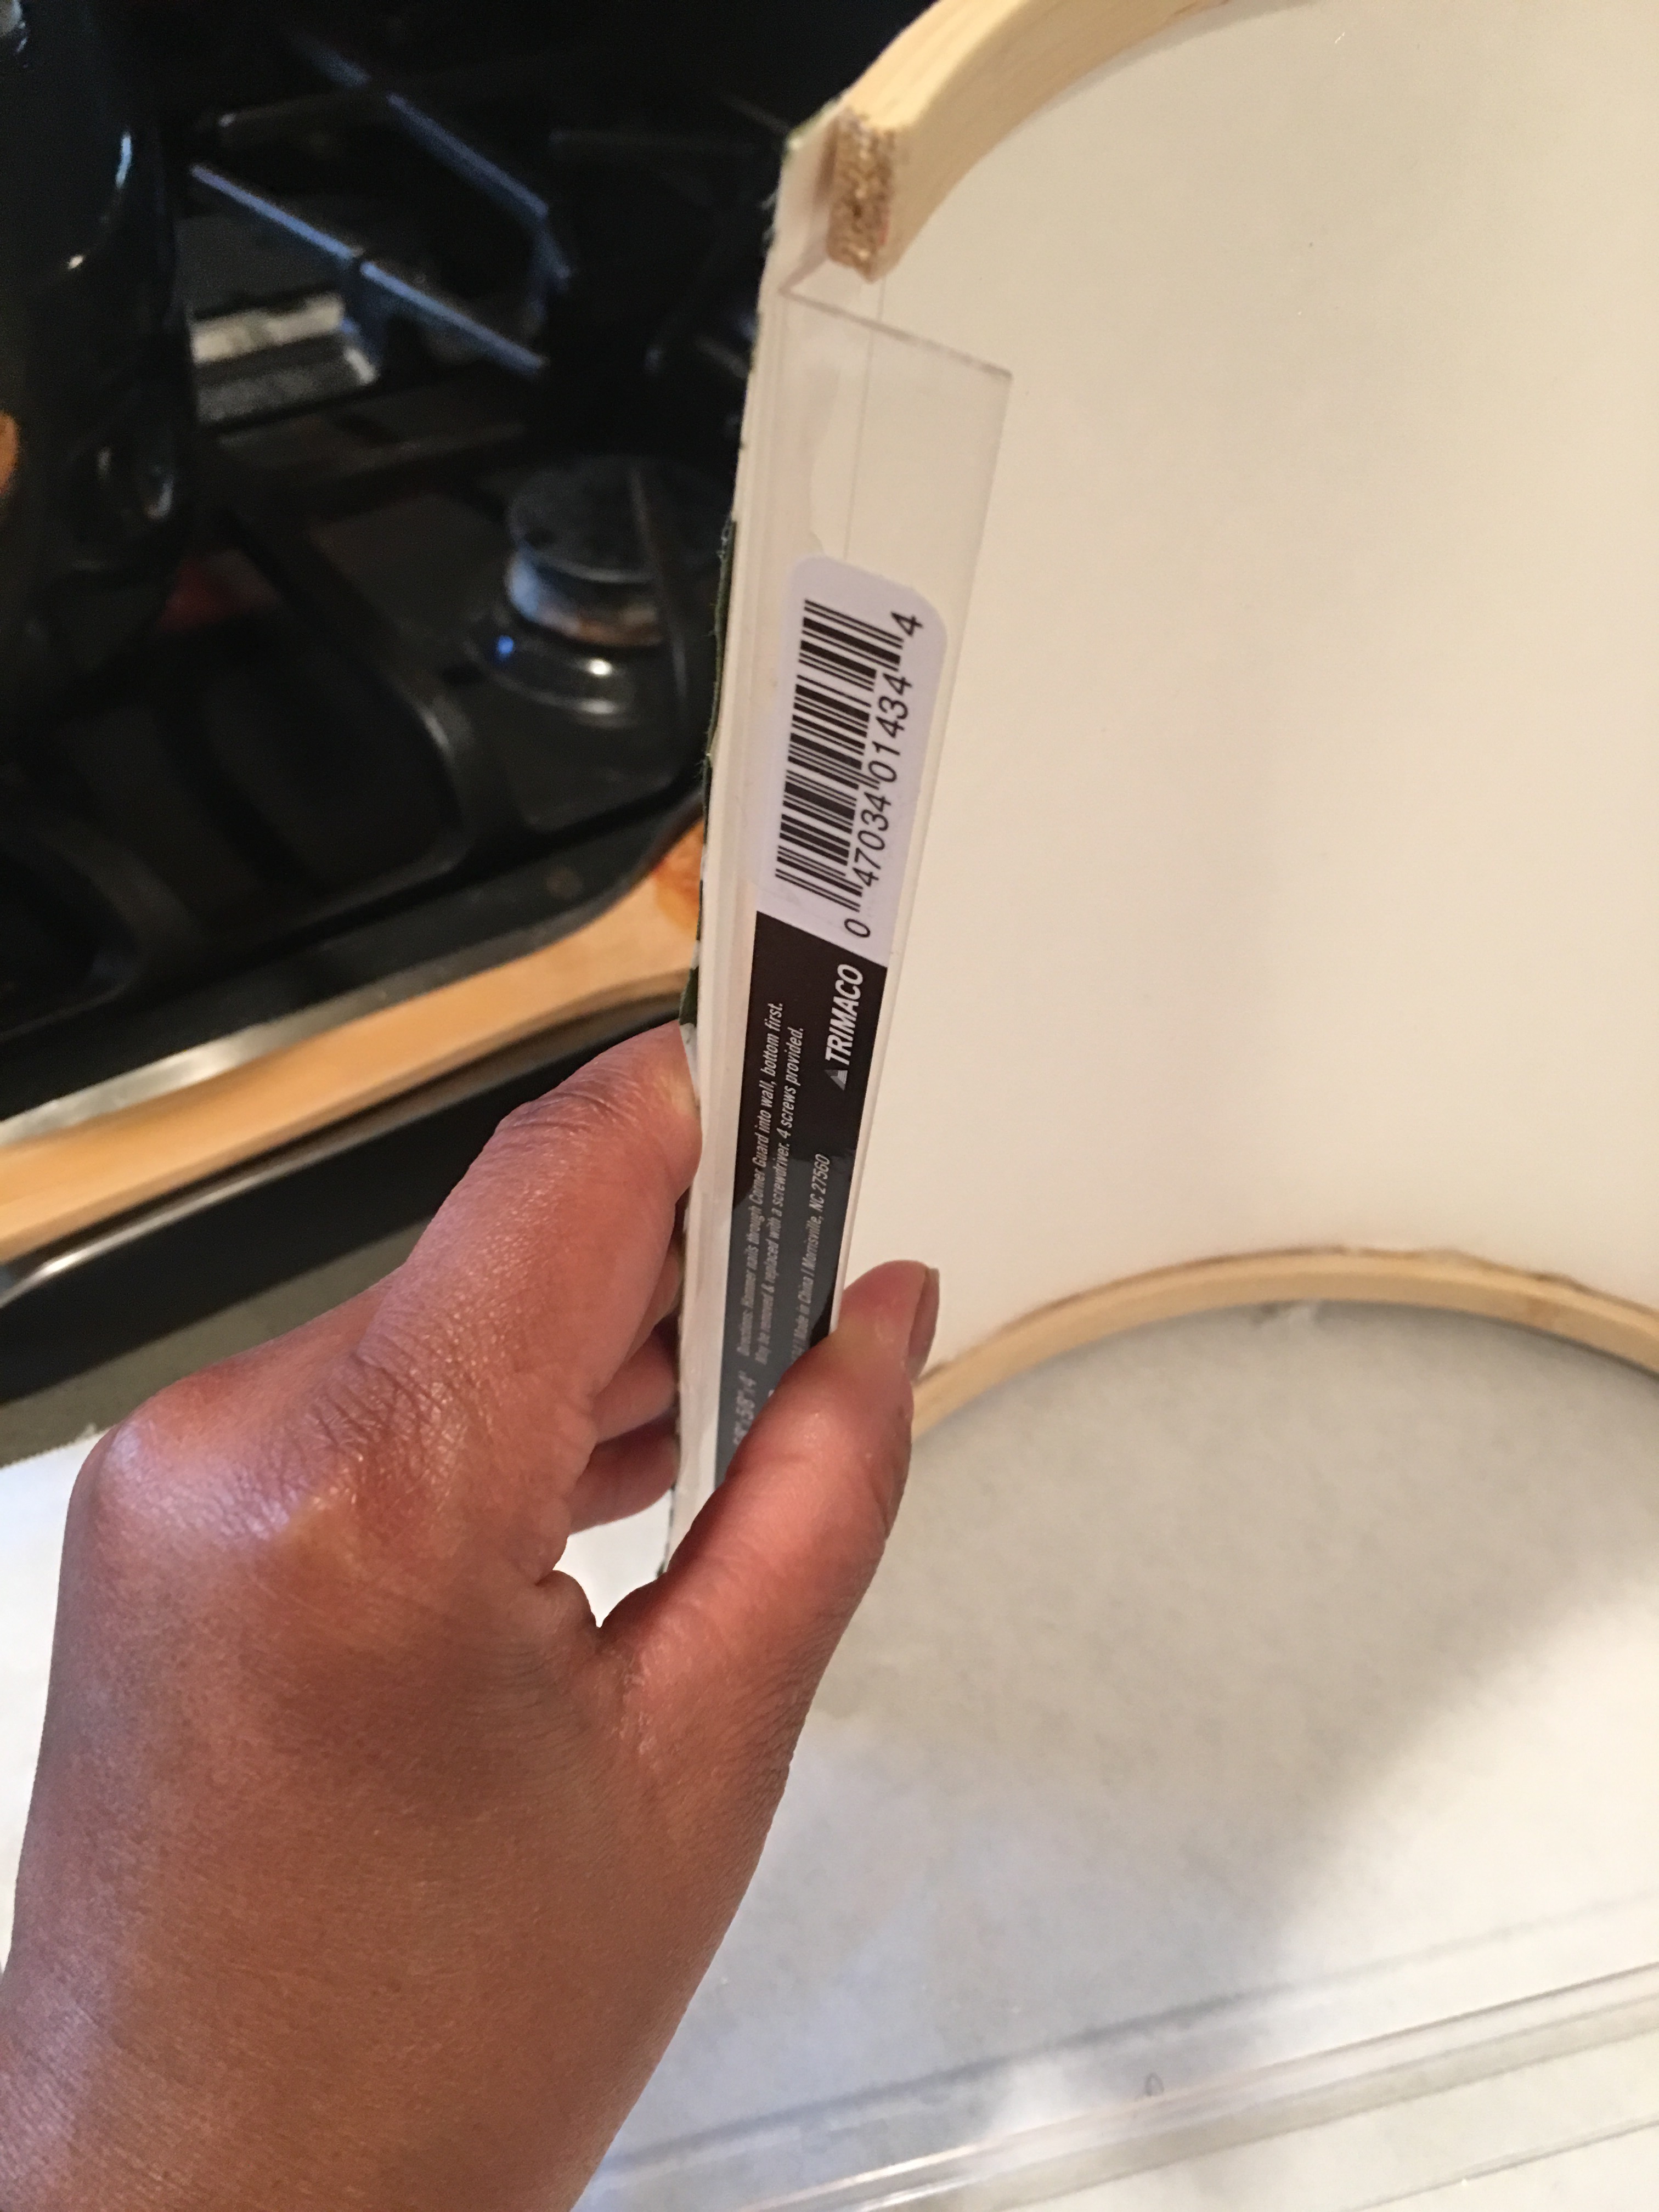
Once I have the corner guards in place (and the board begins to resemble a sconce) I move on to the next step.
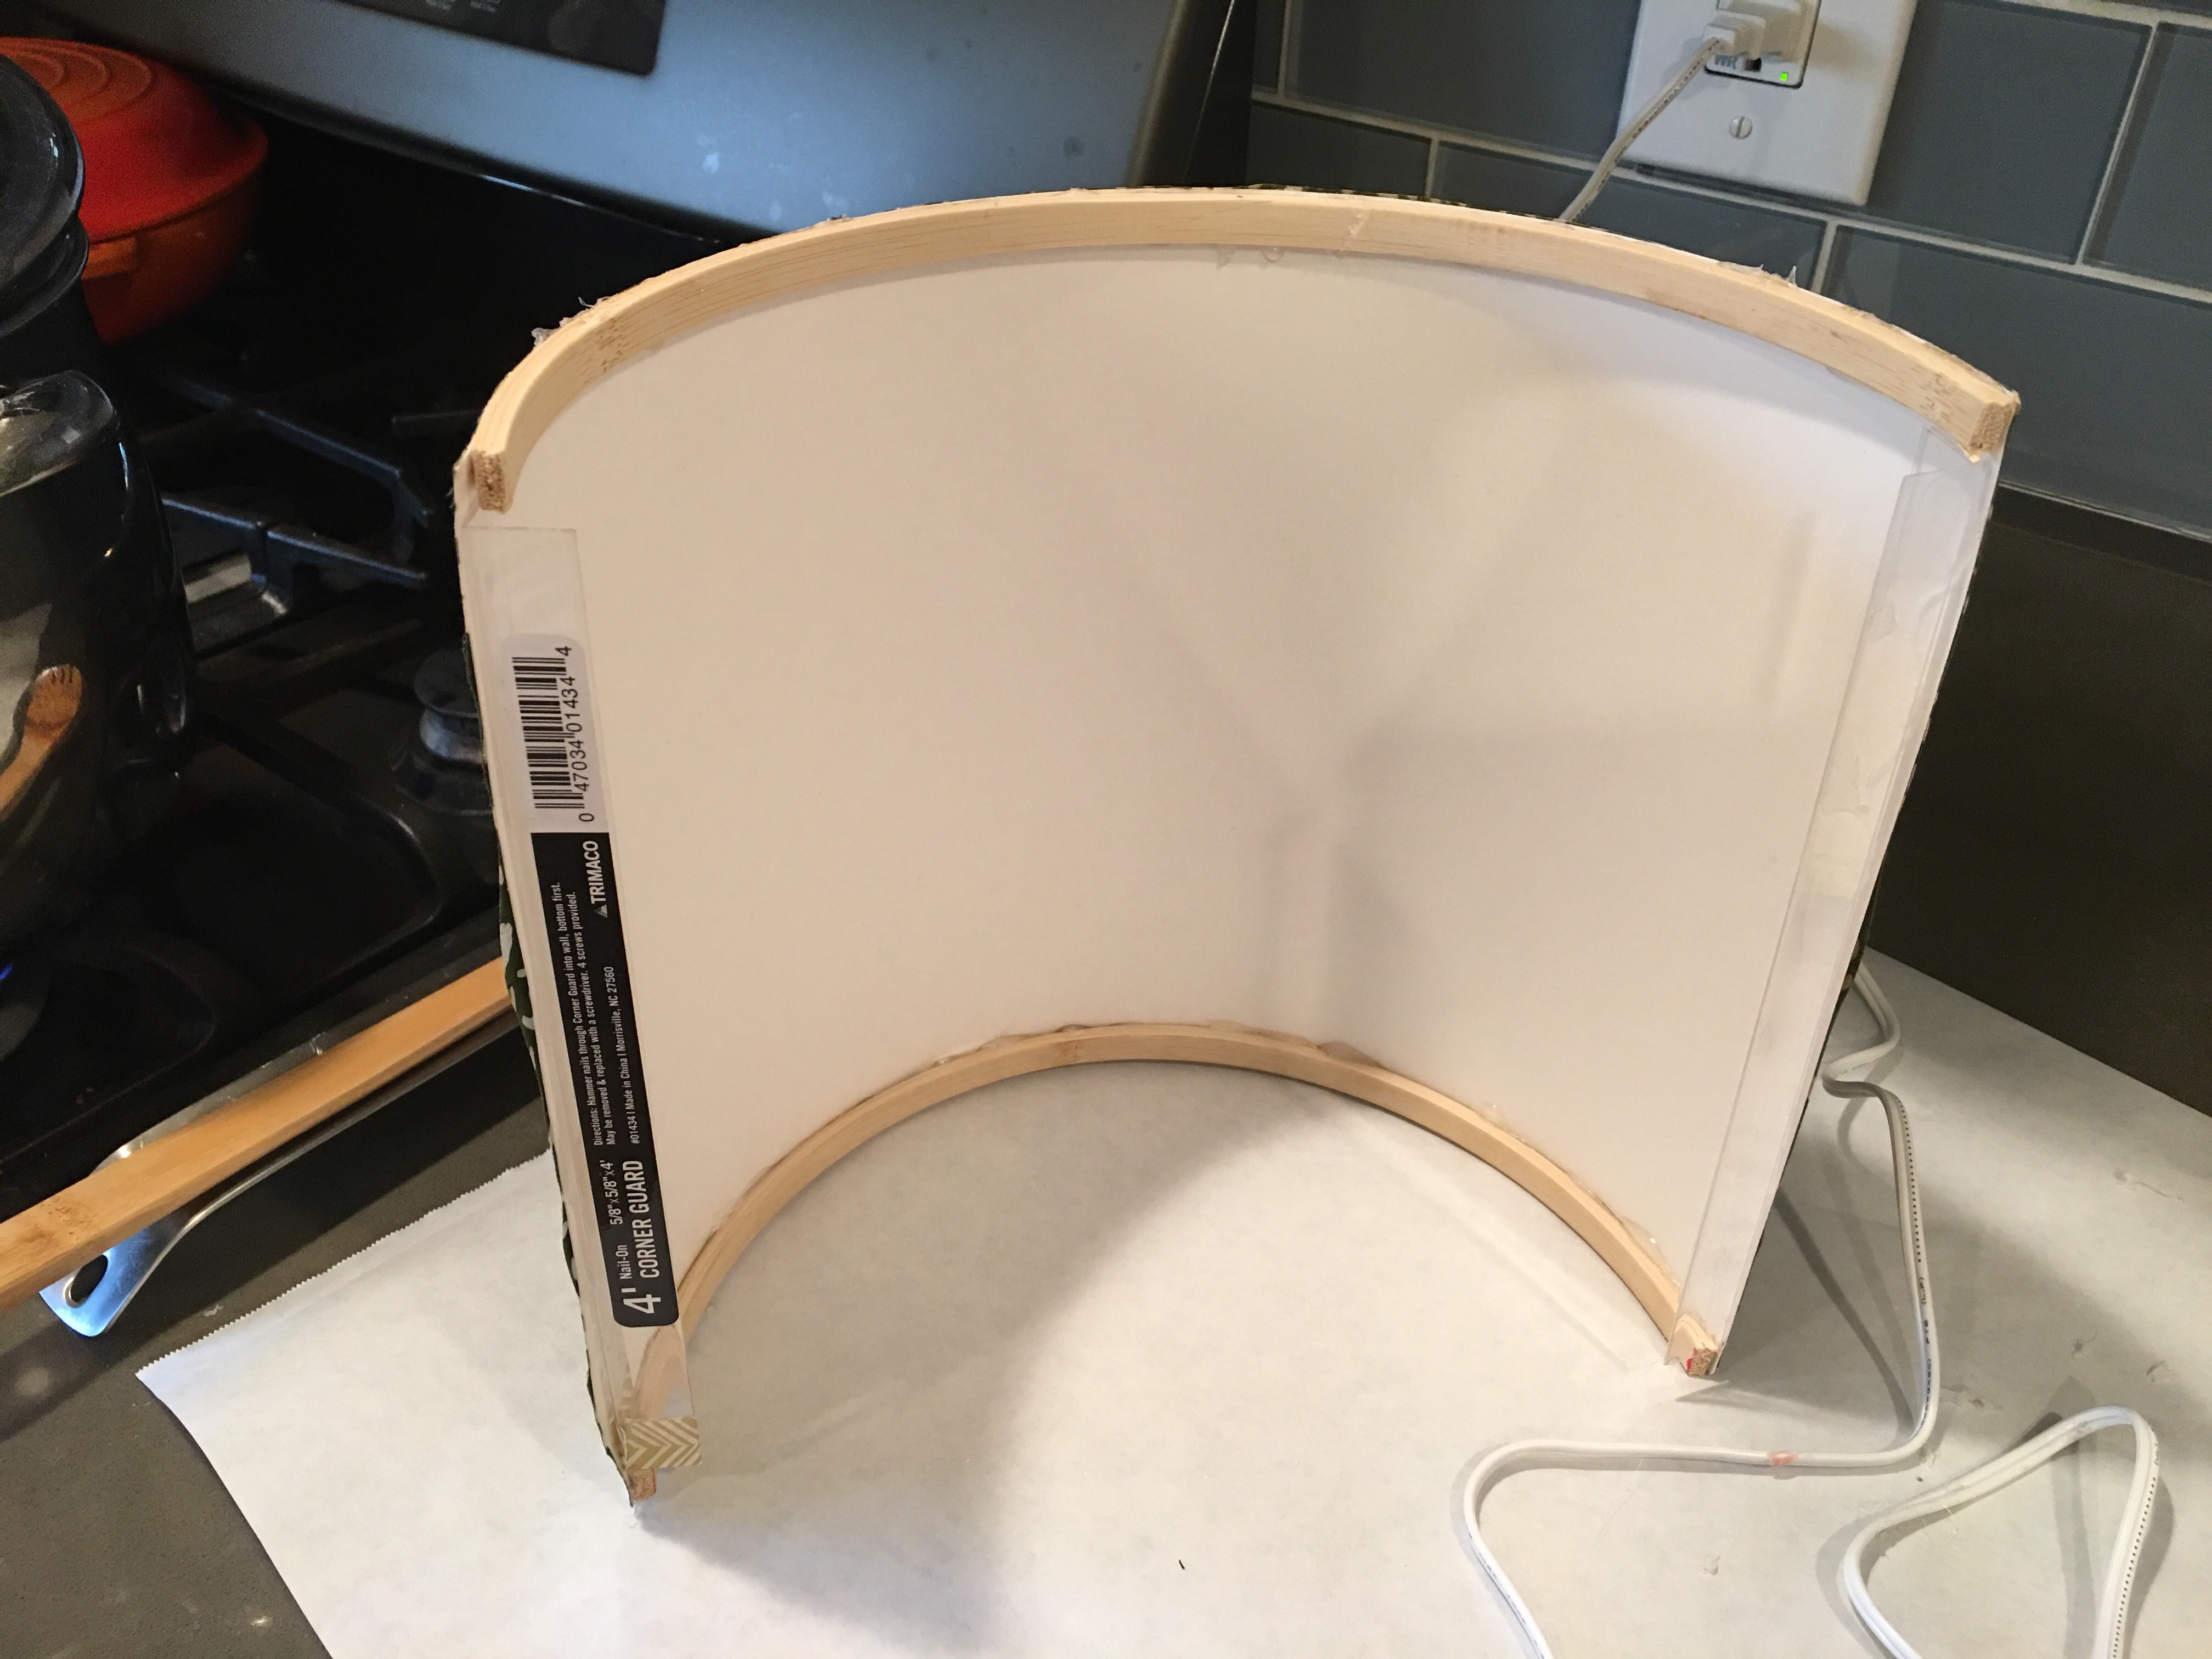
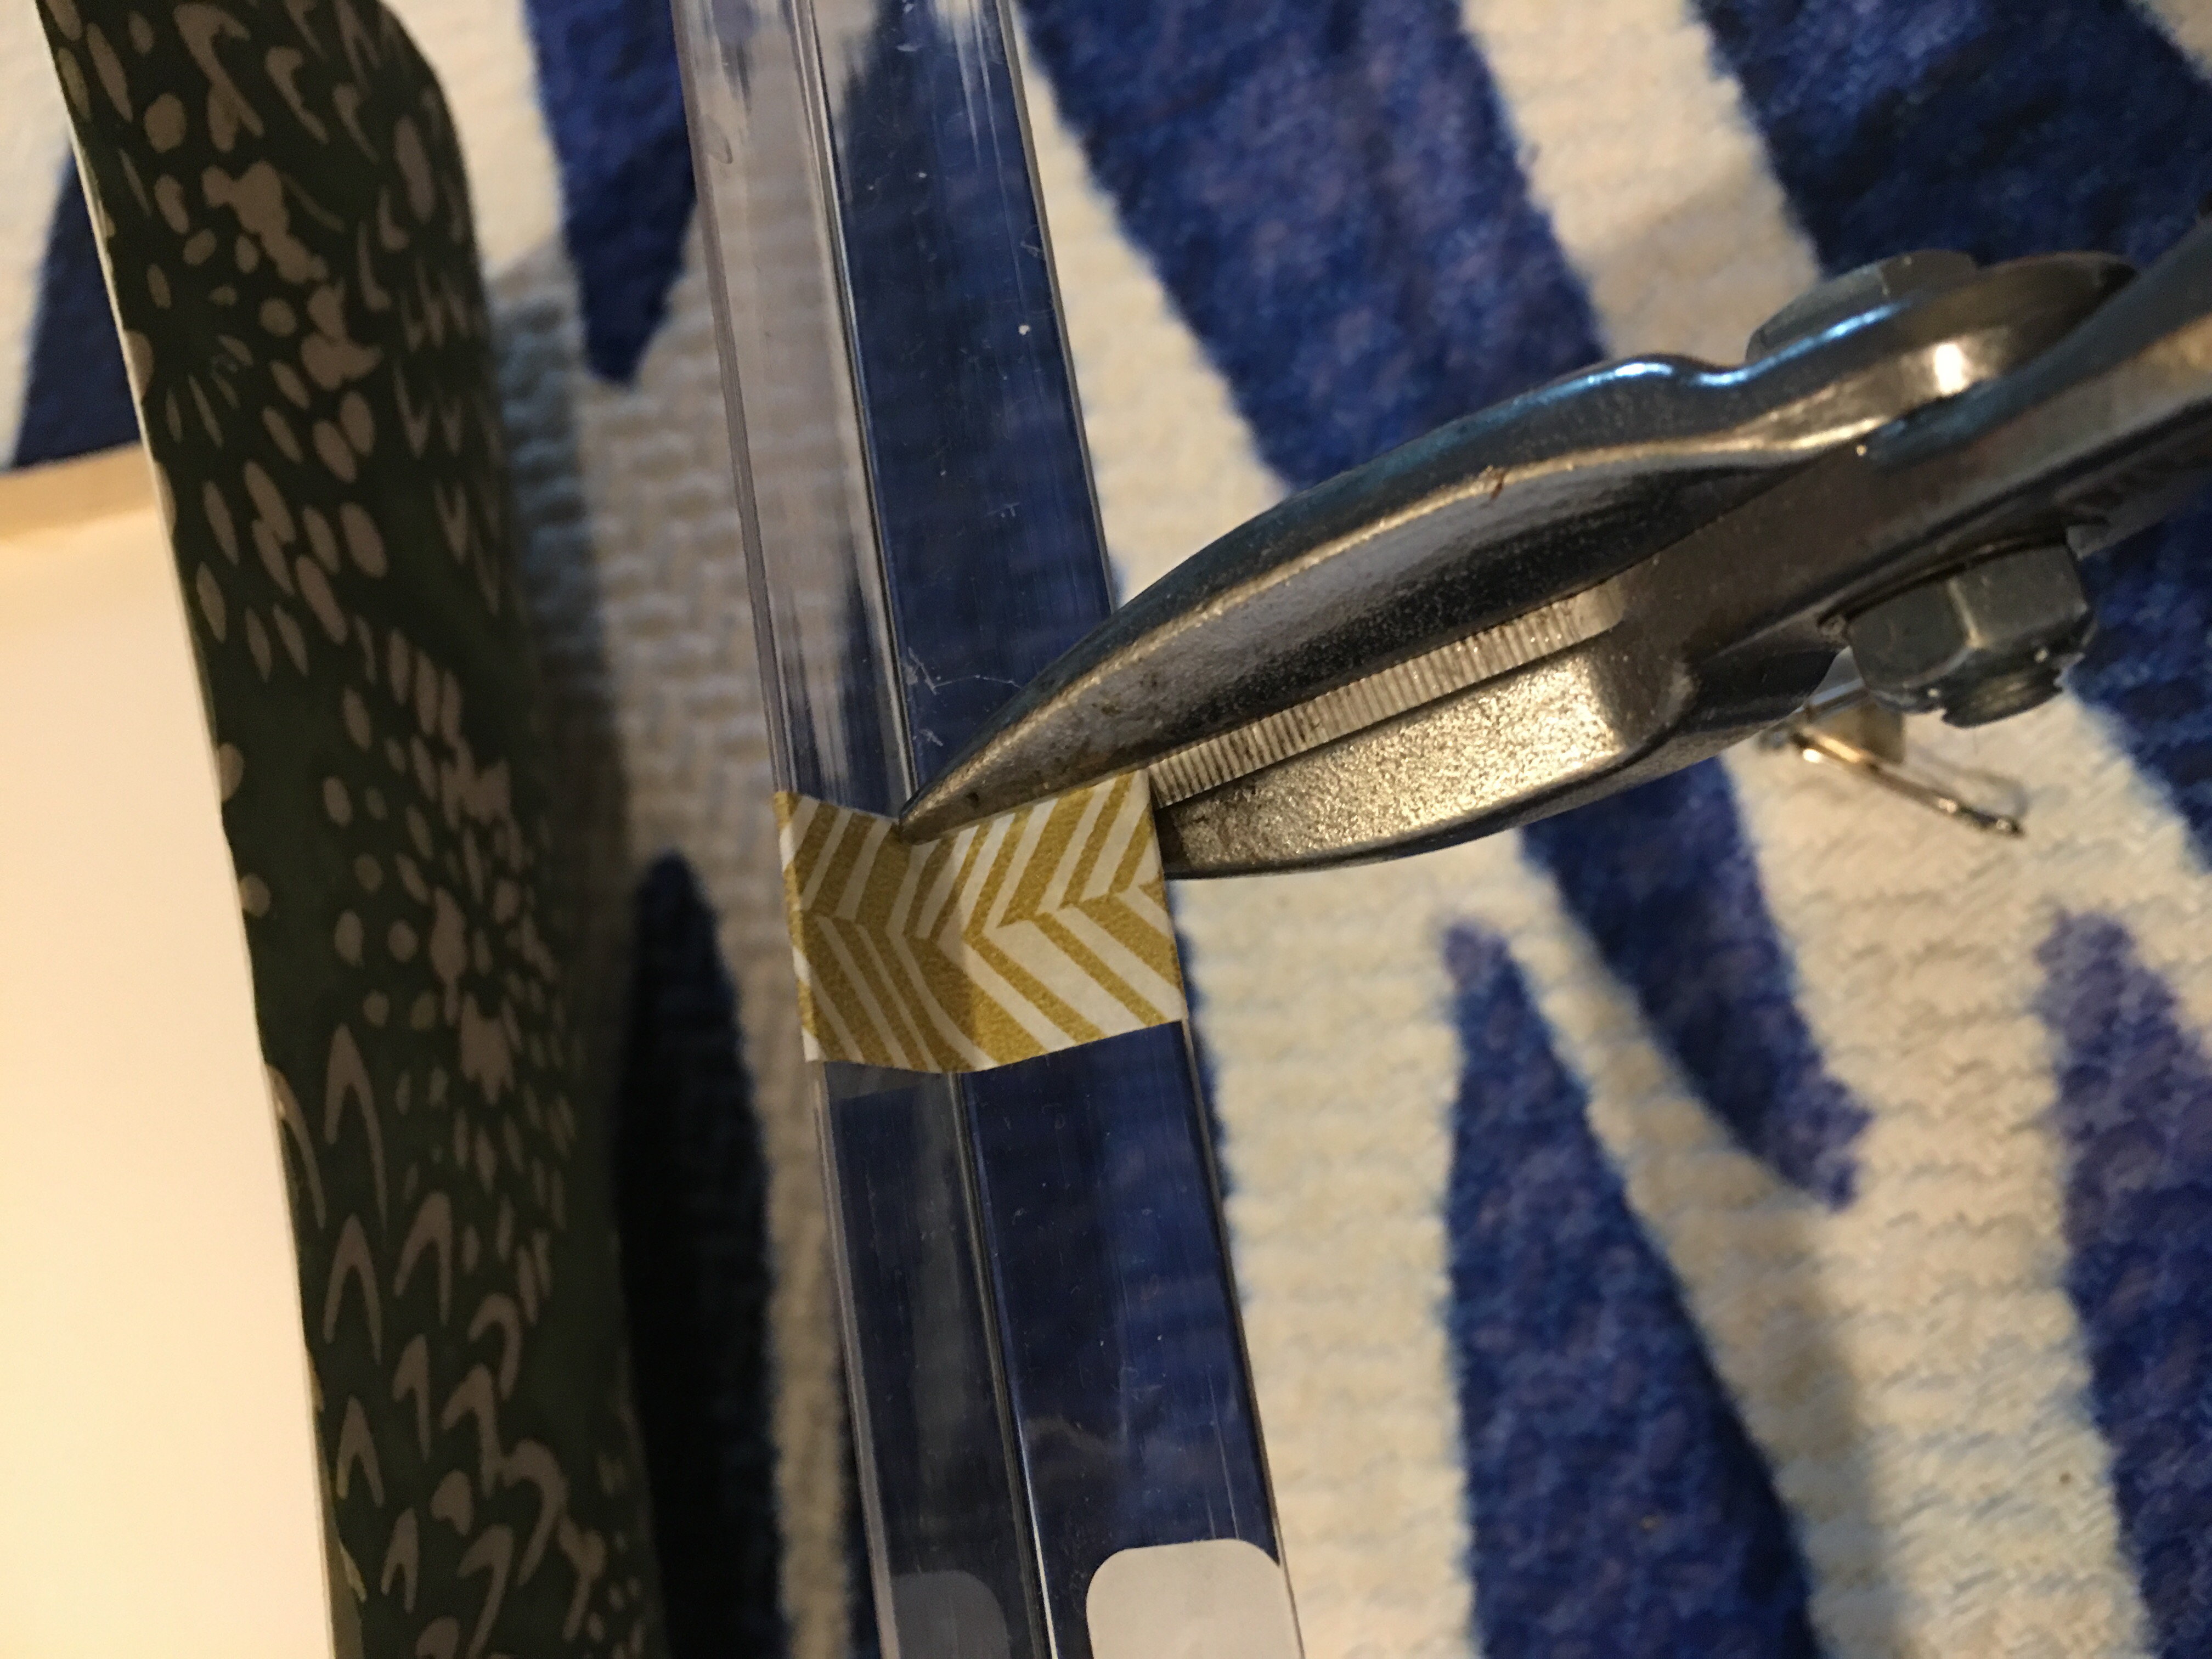
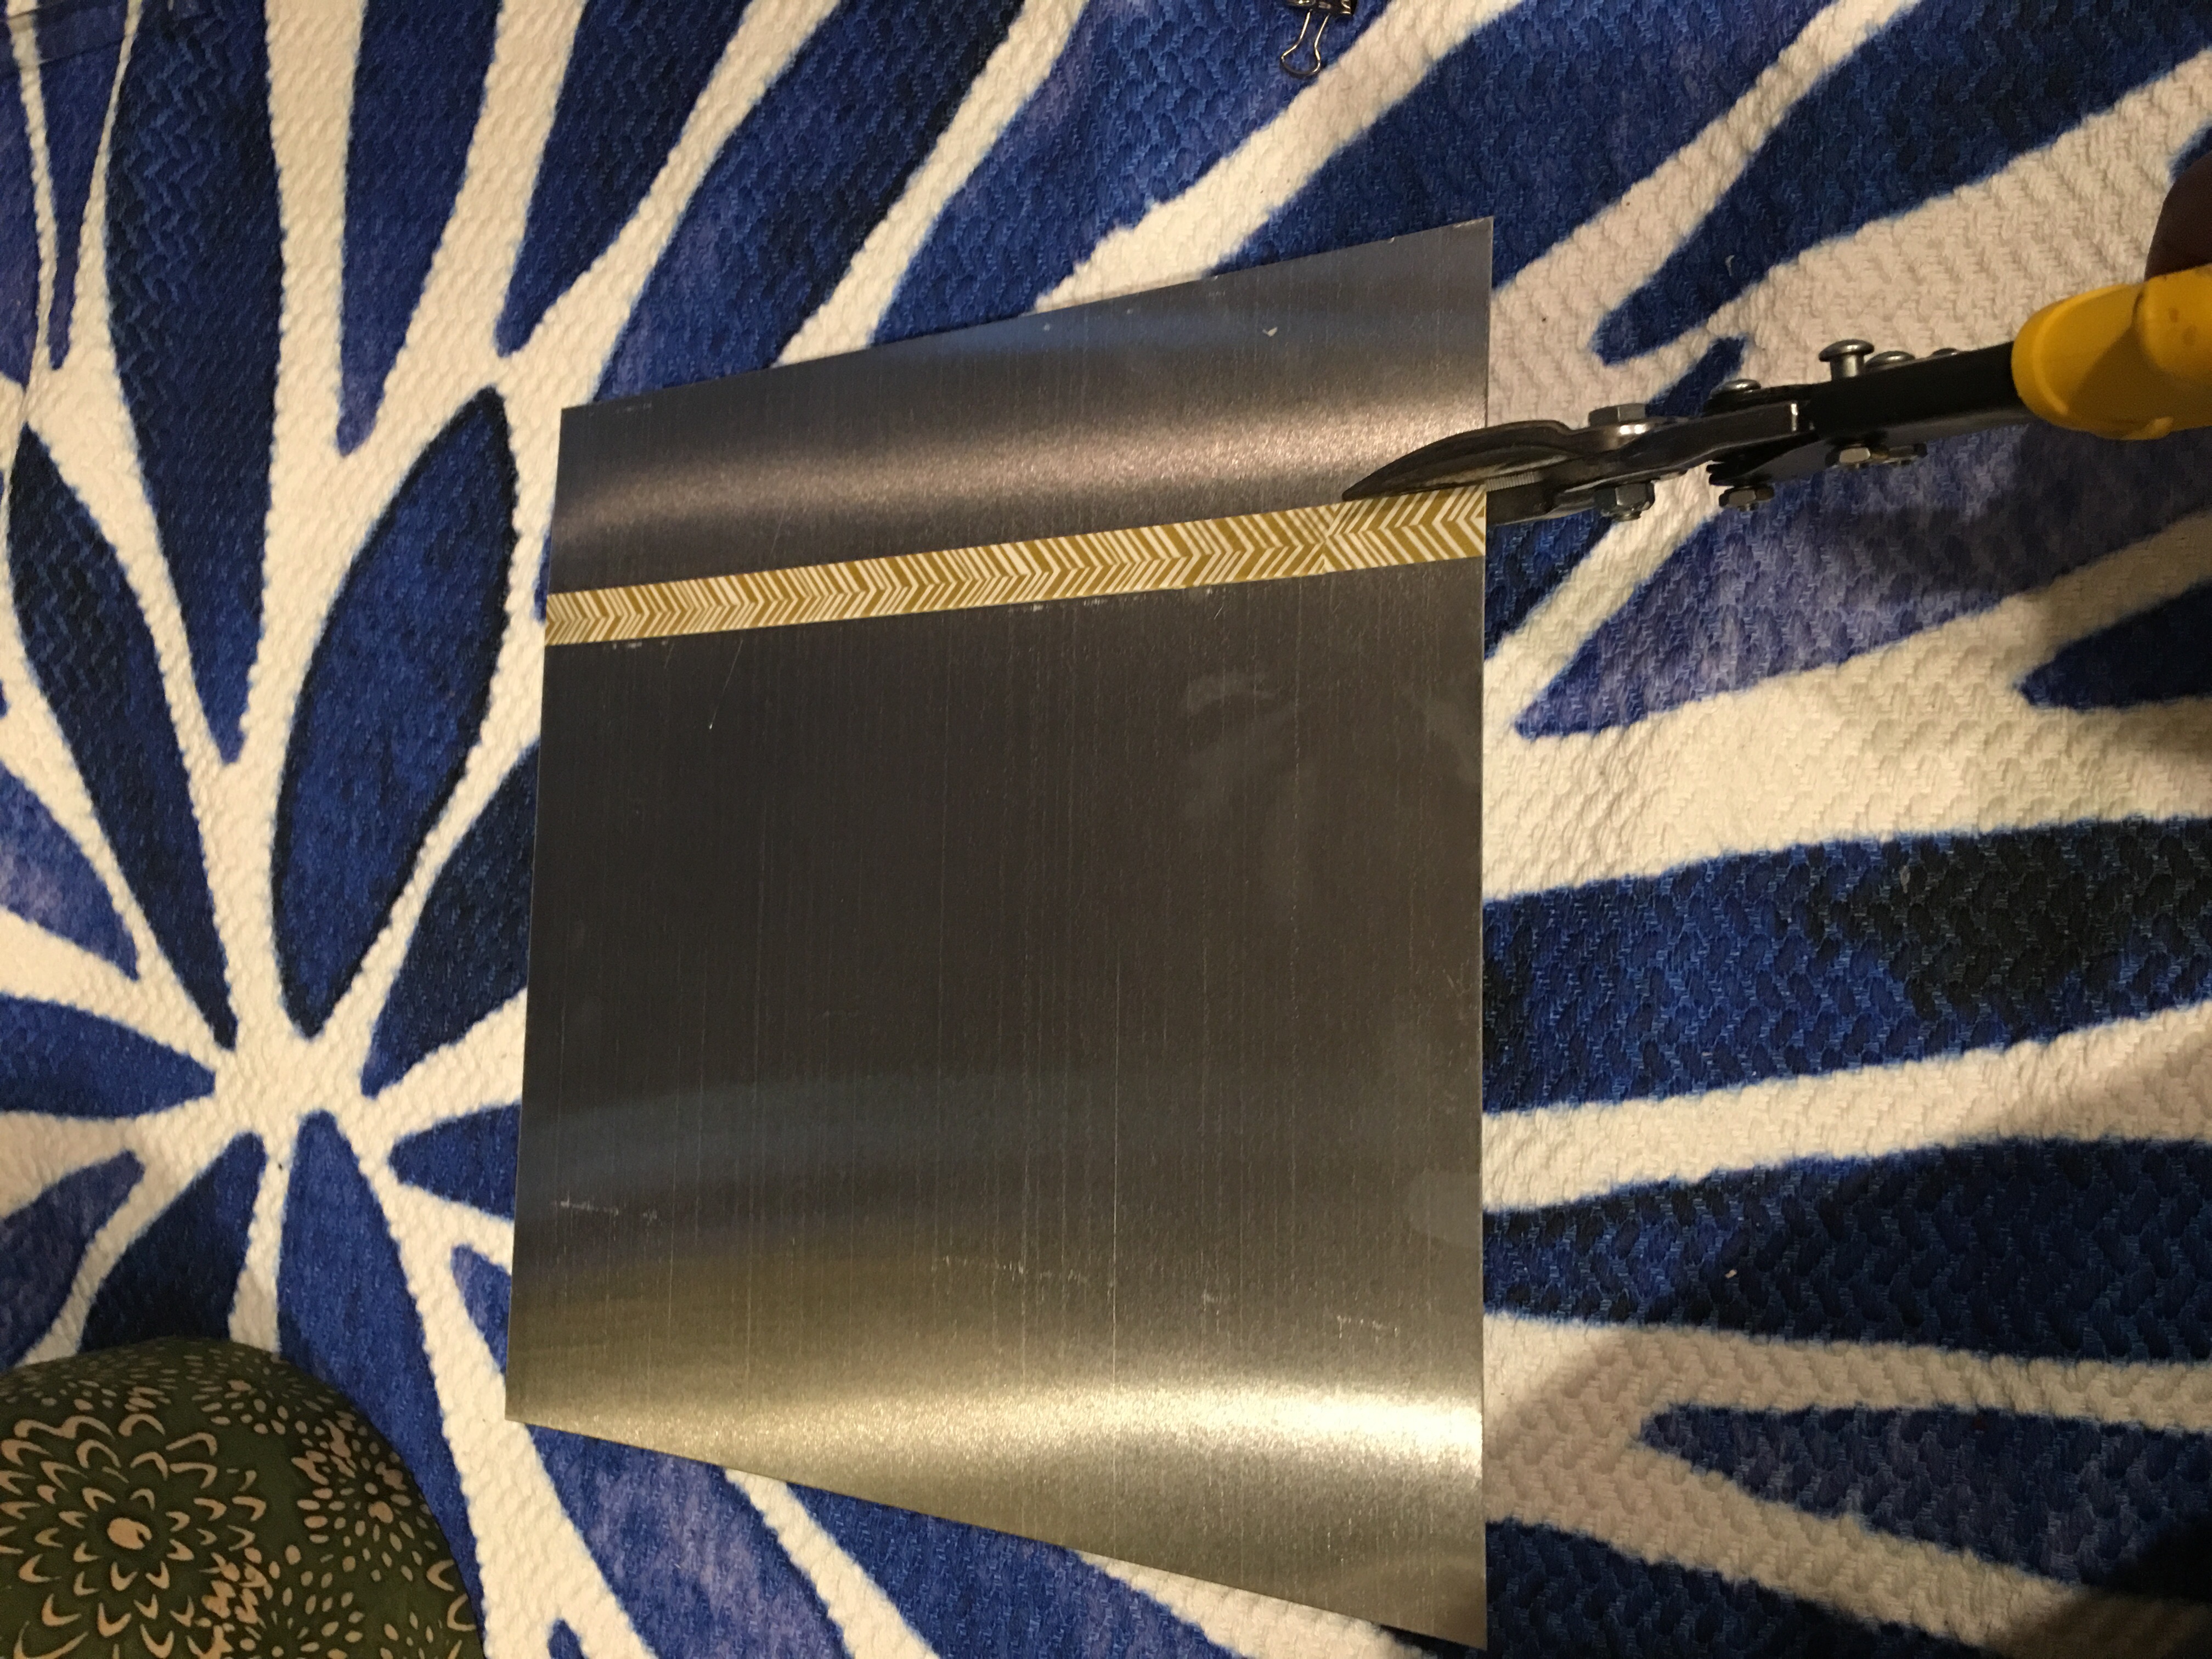
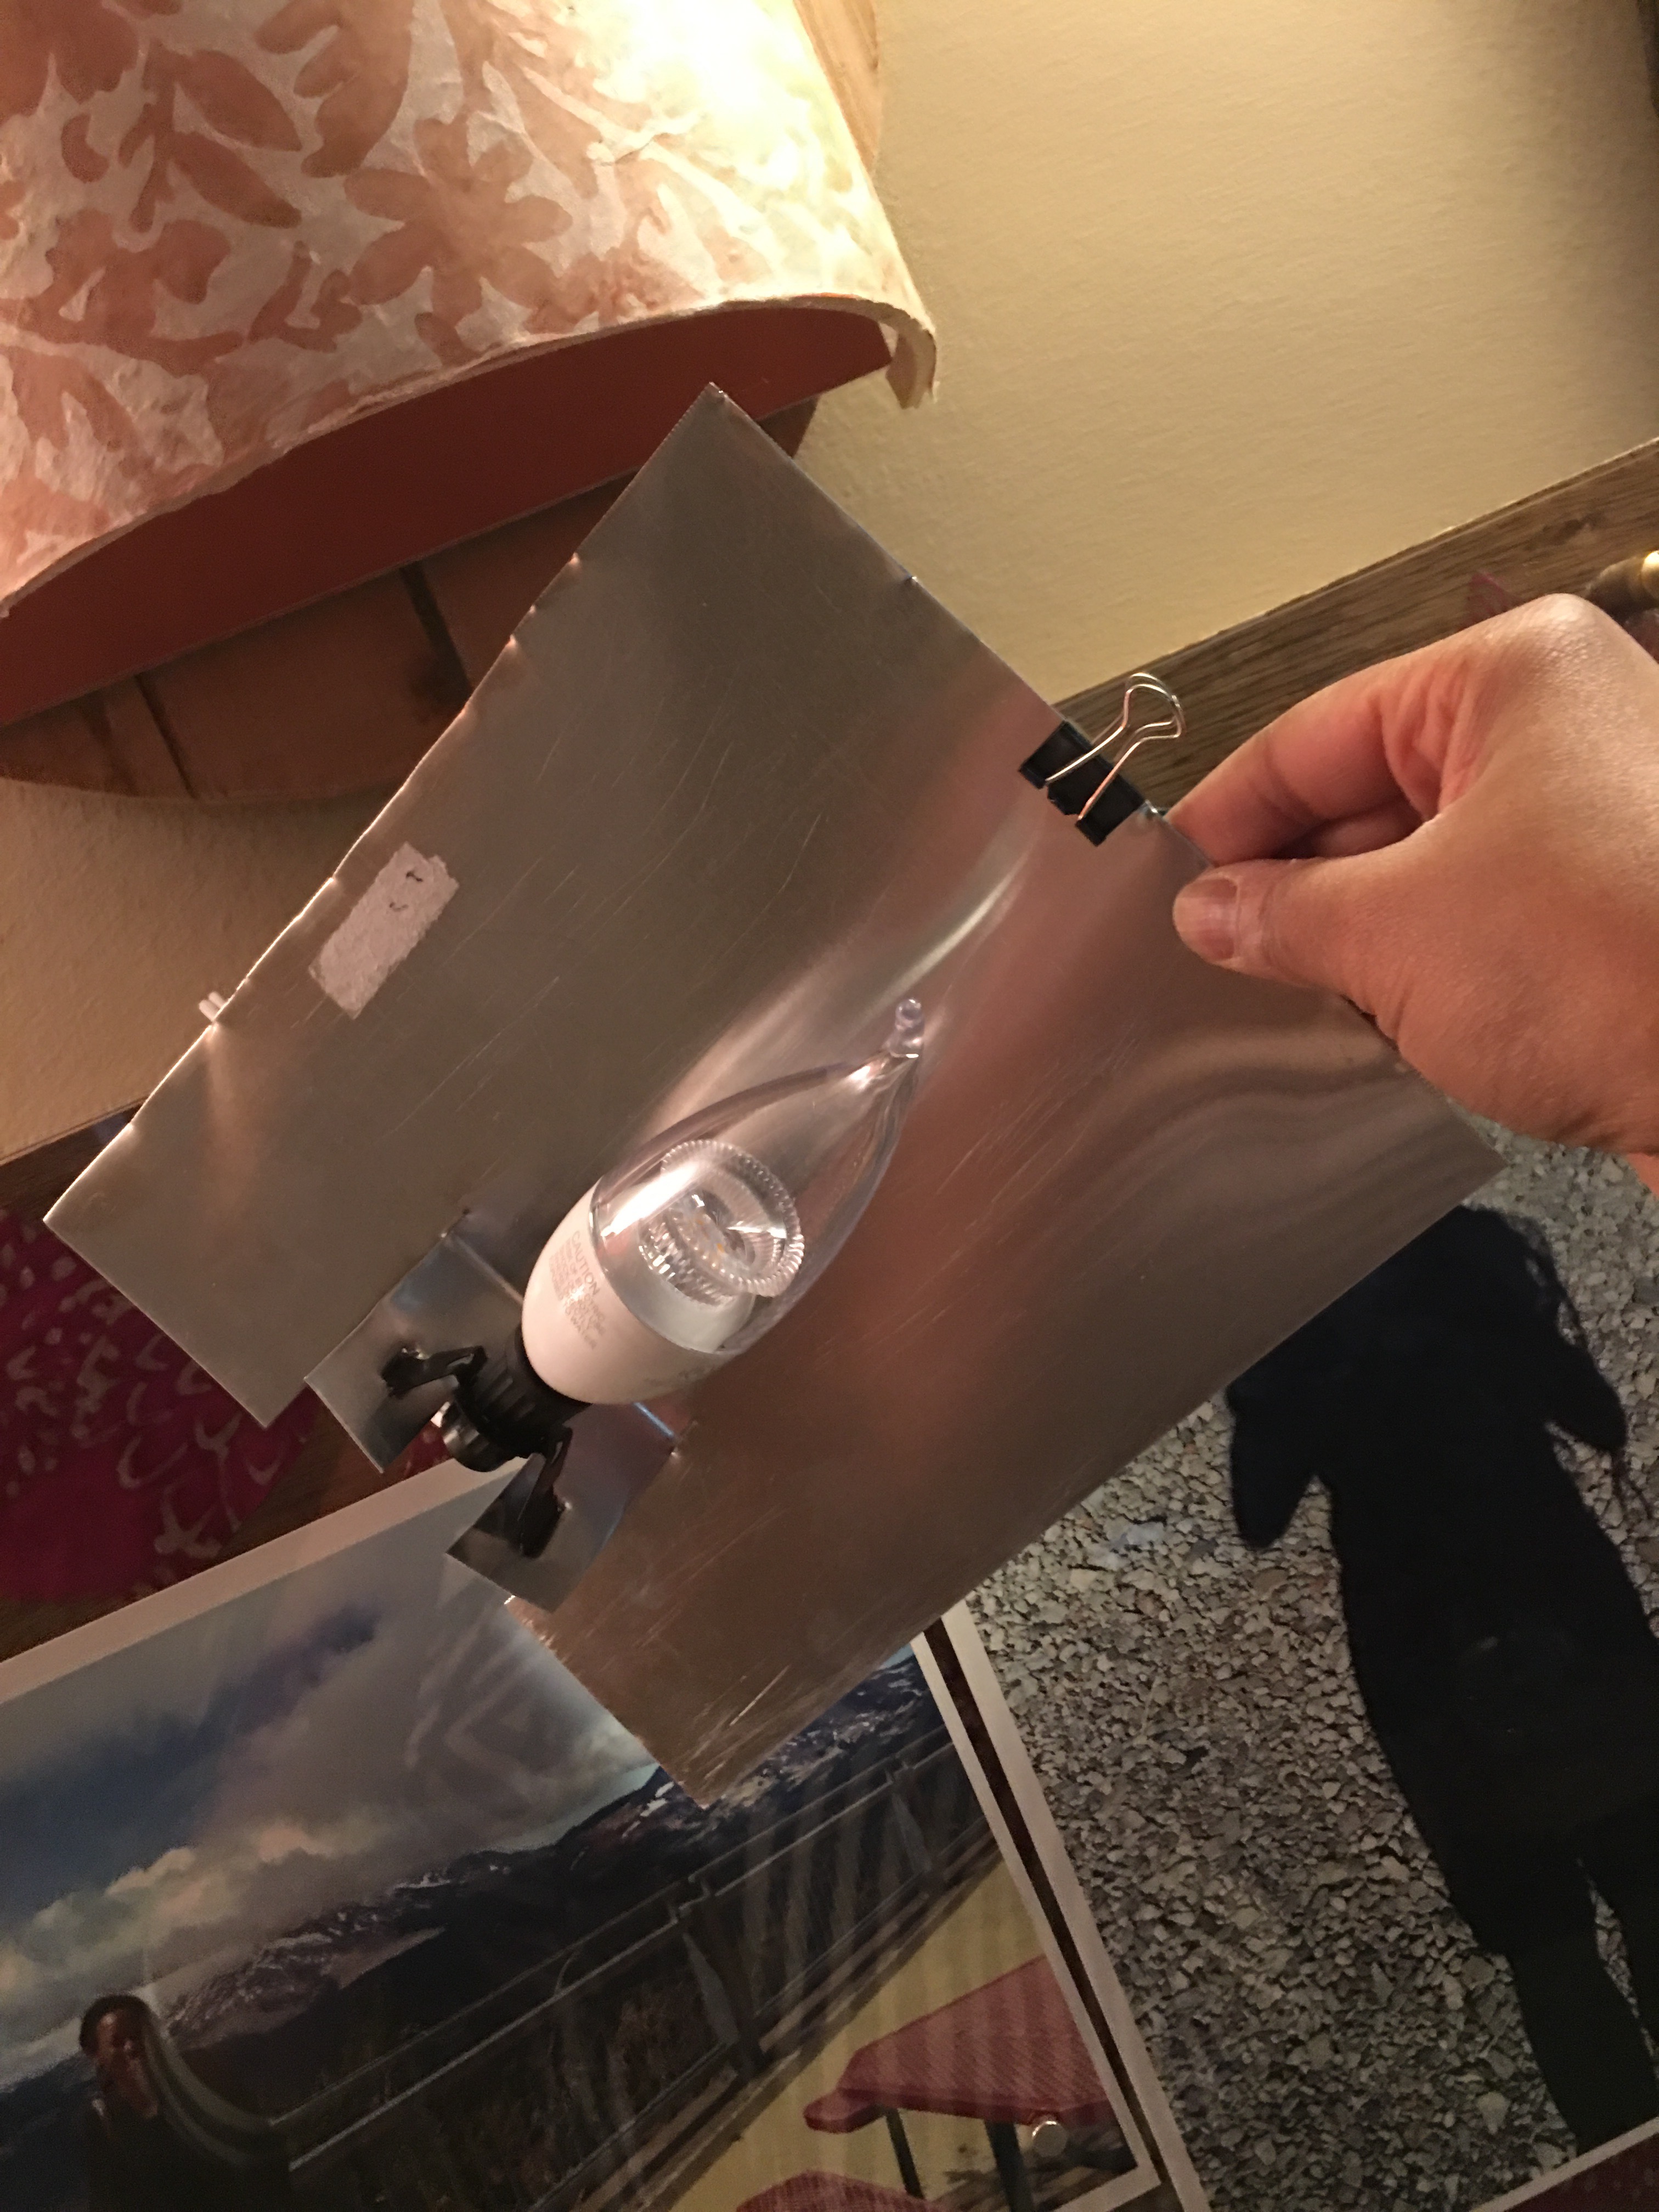
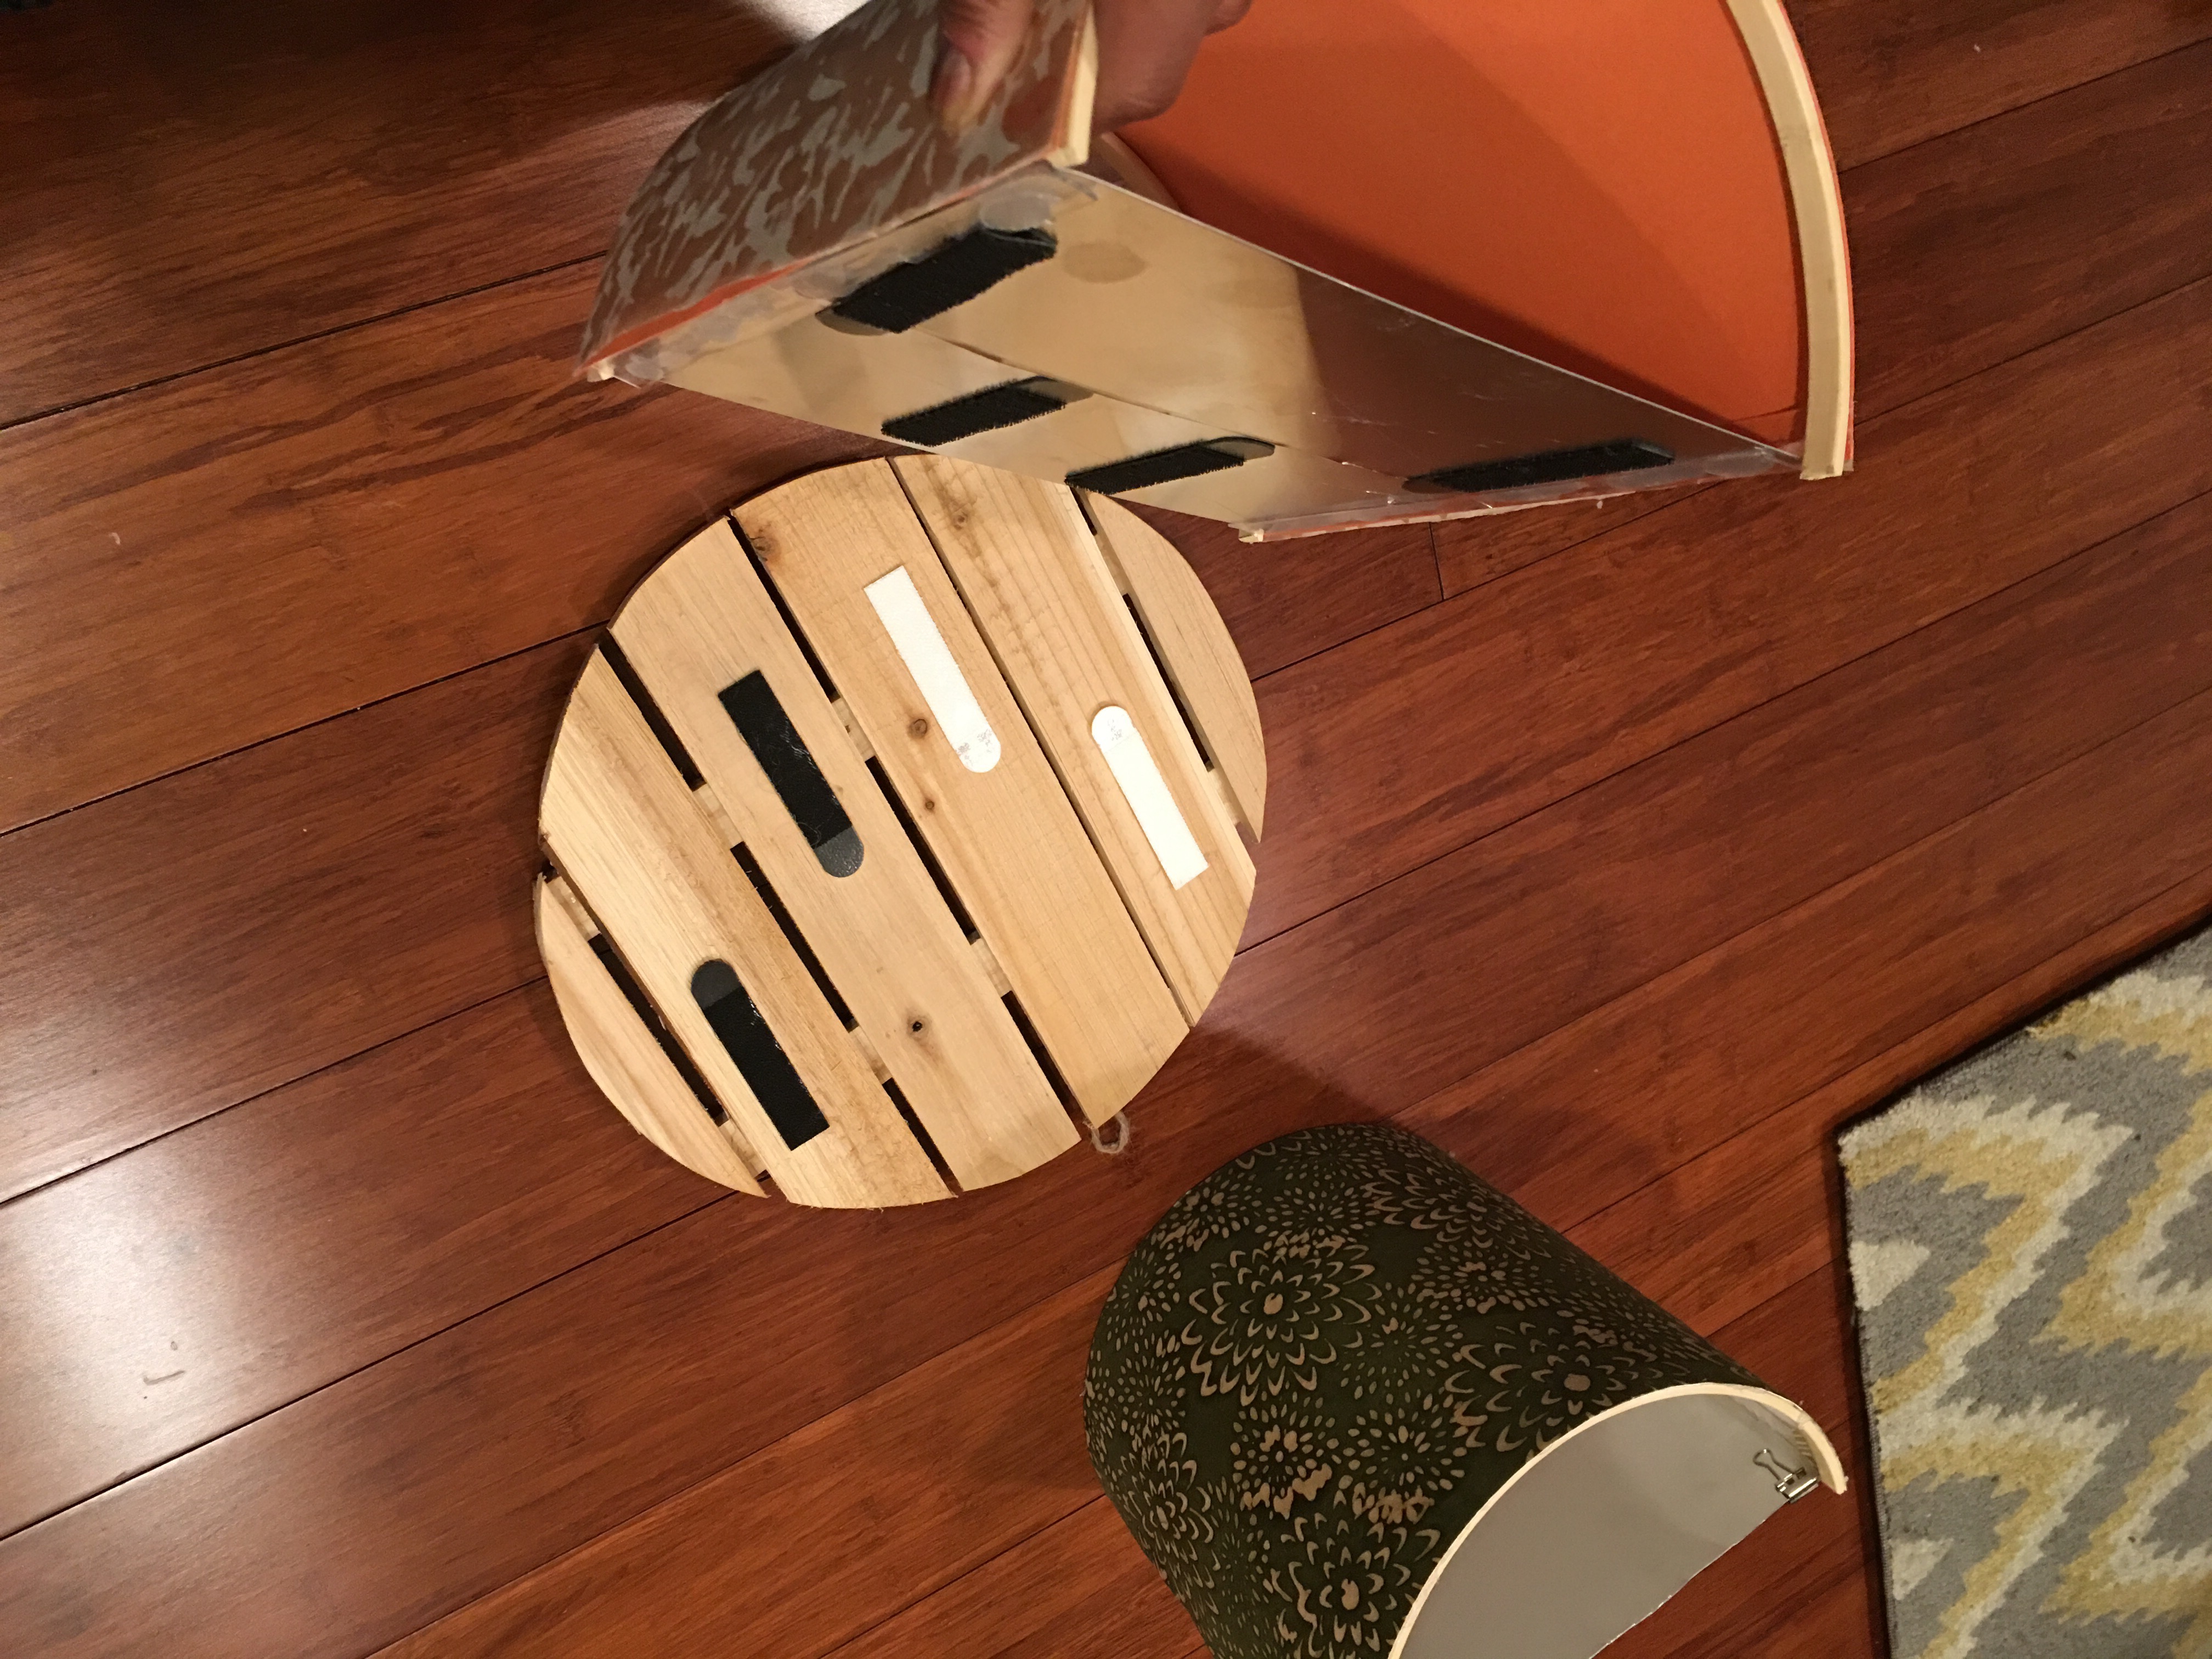
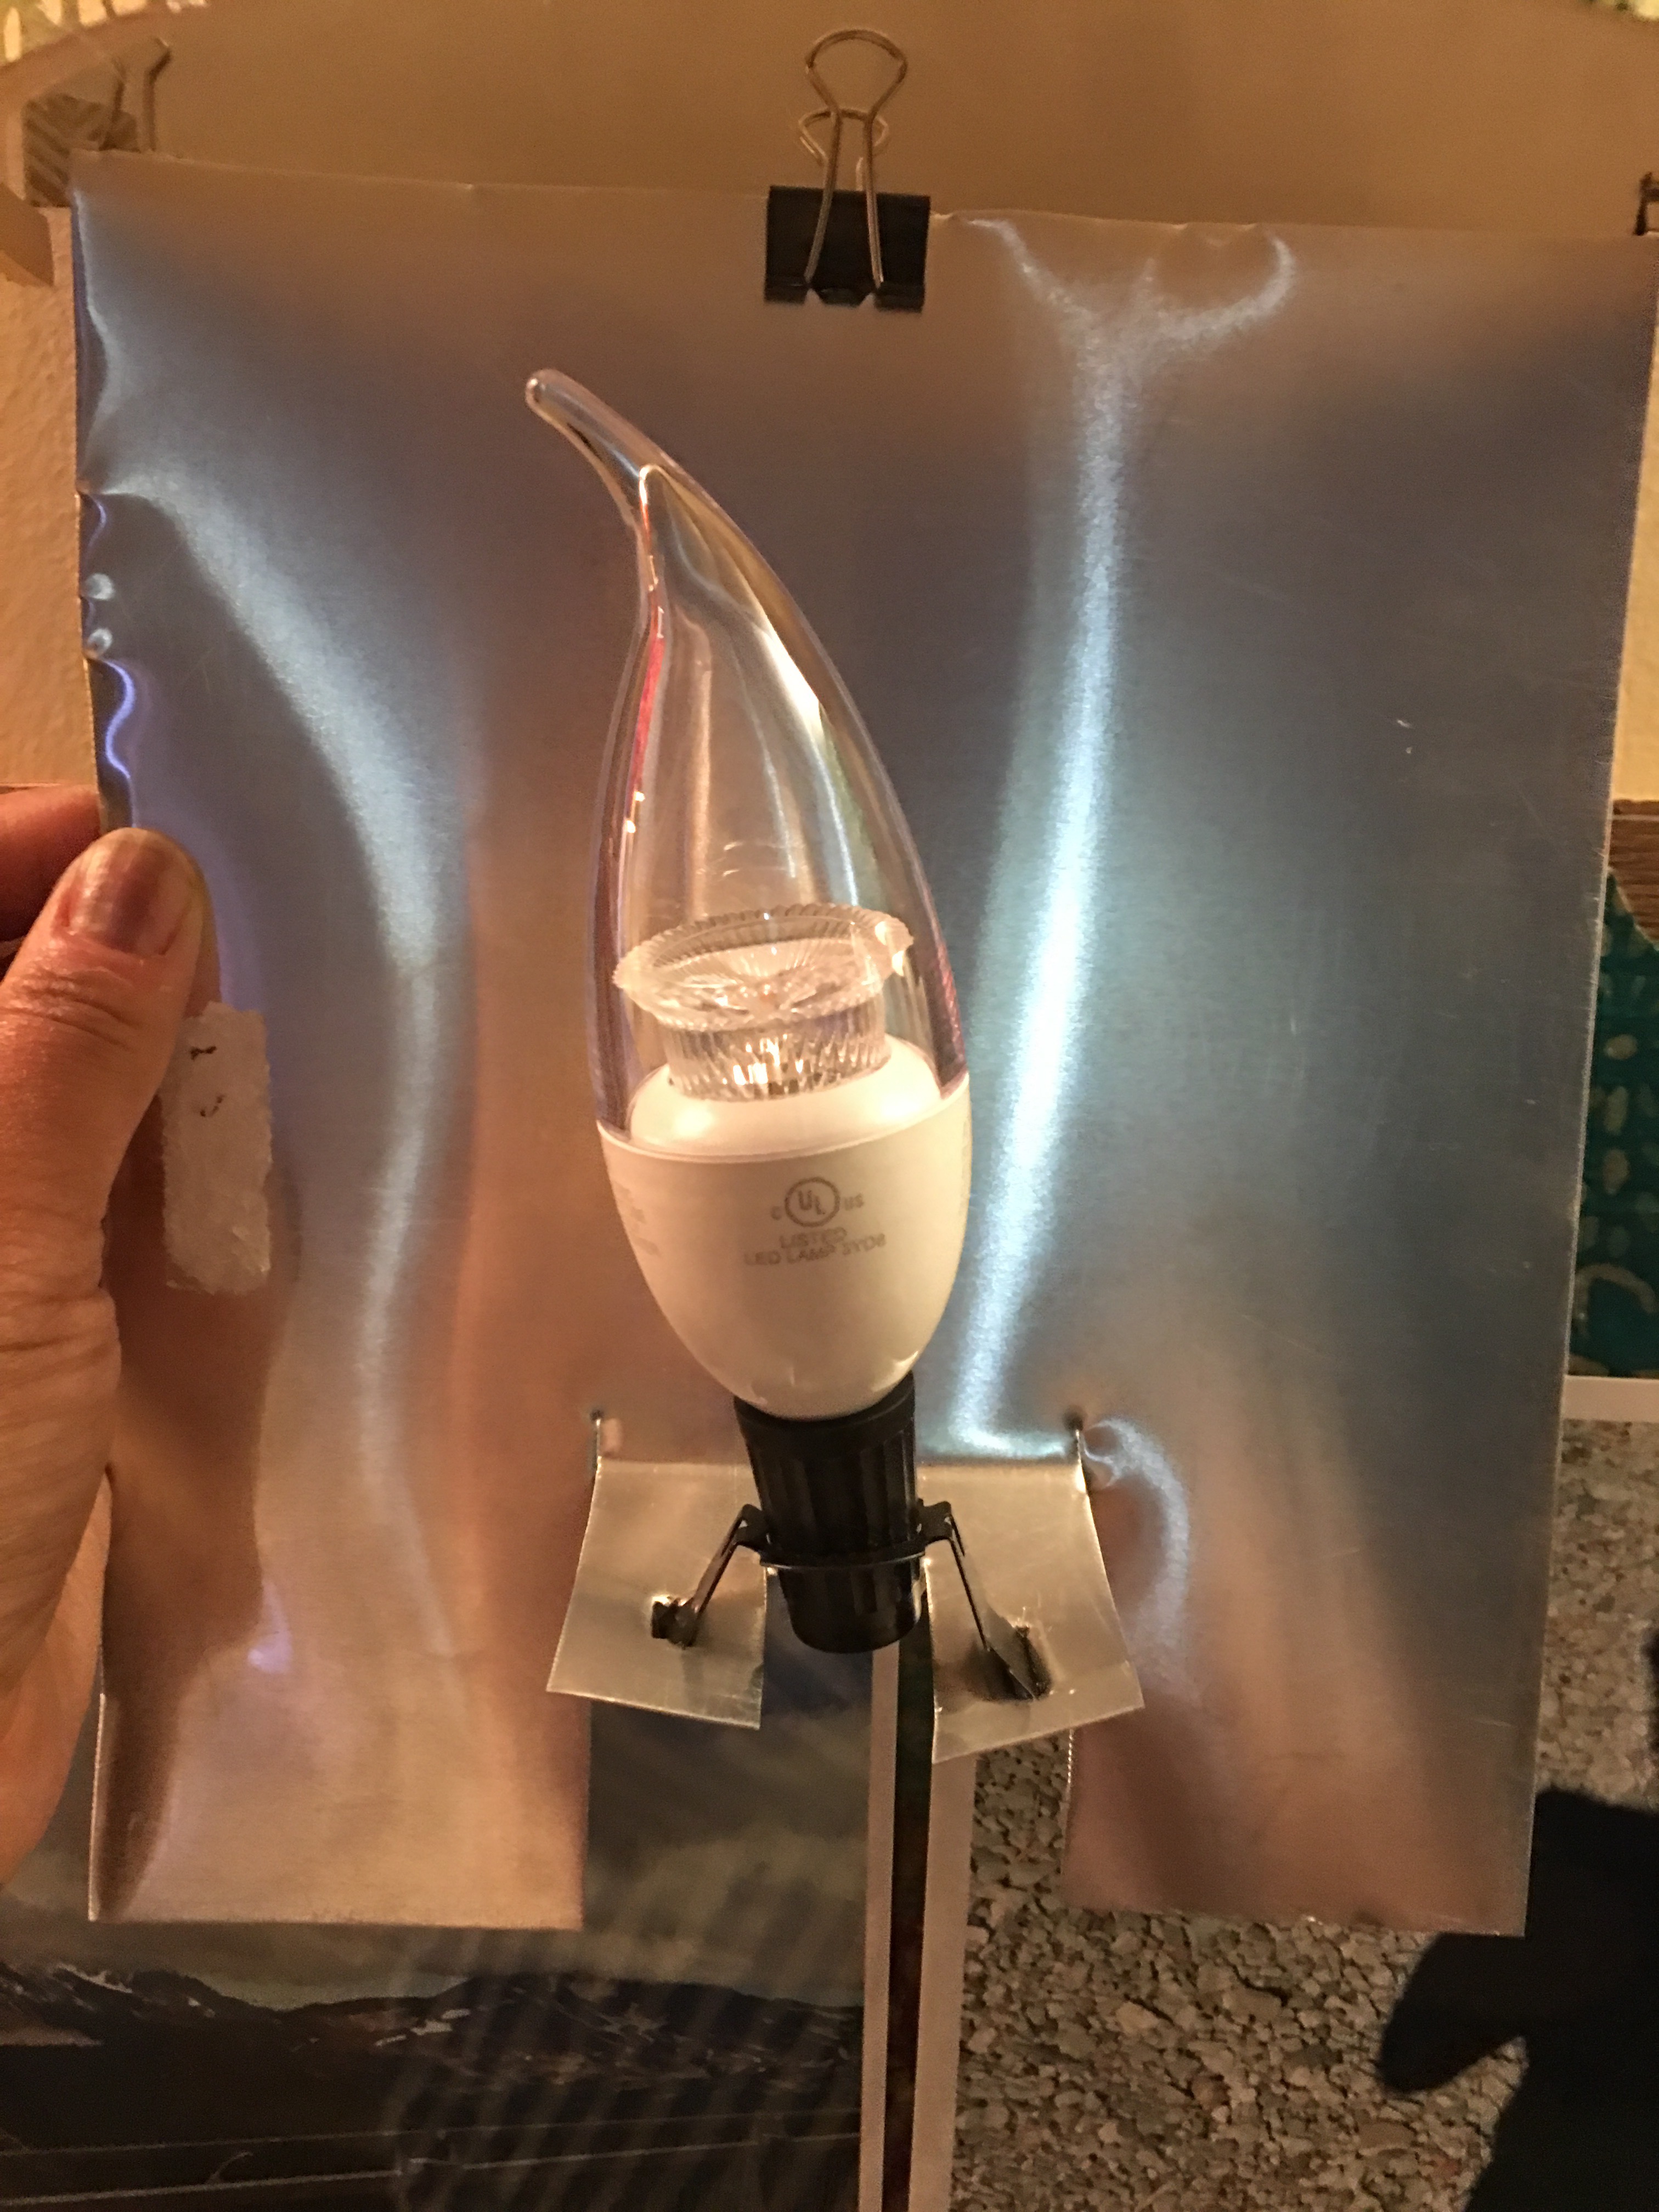
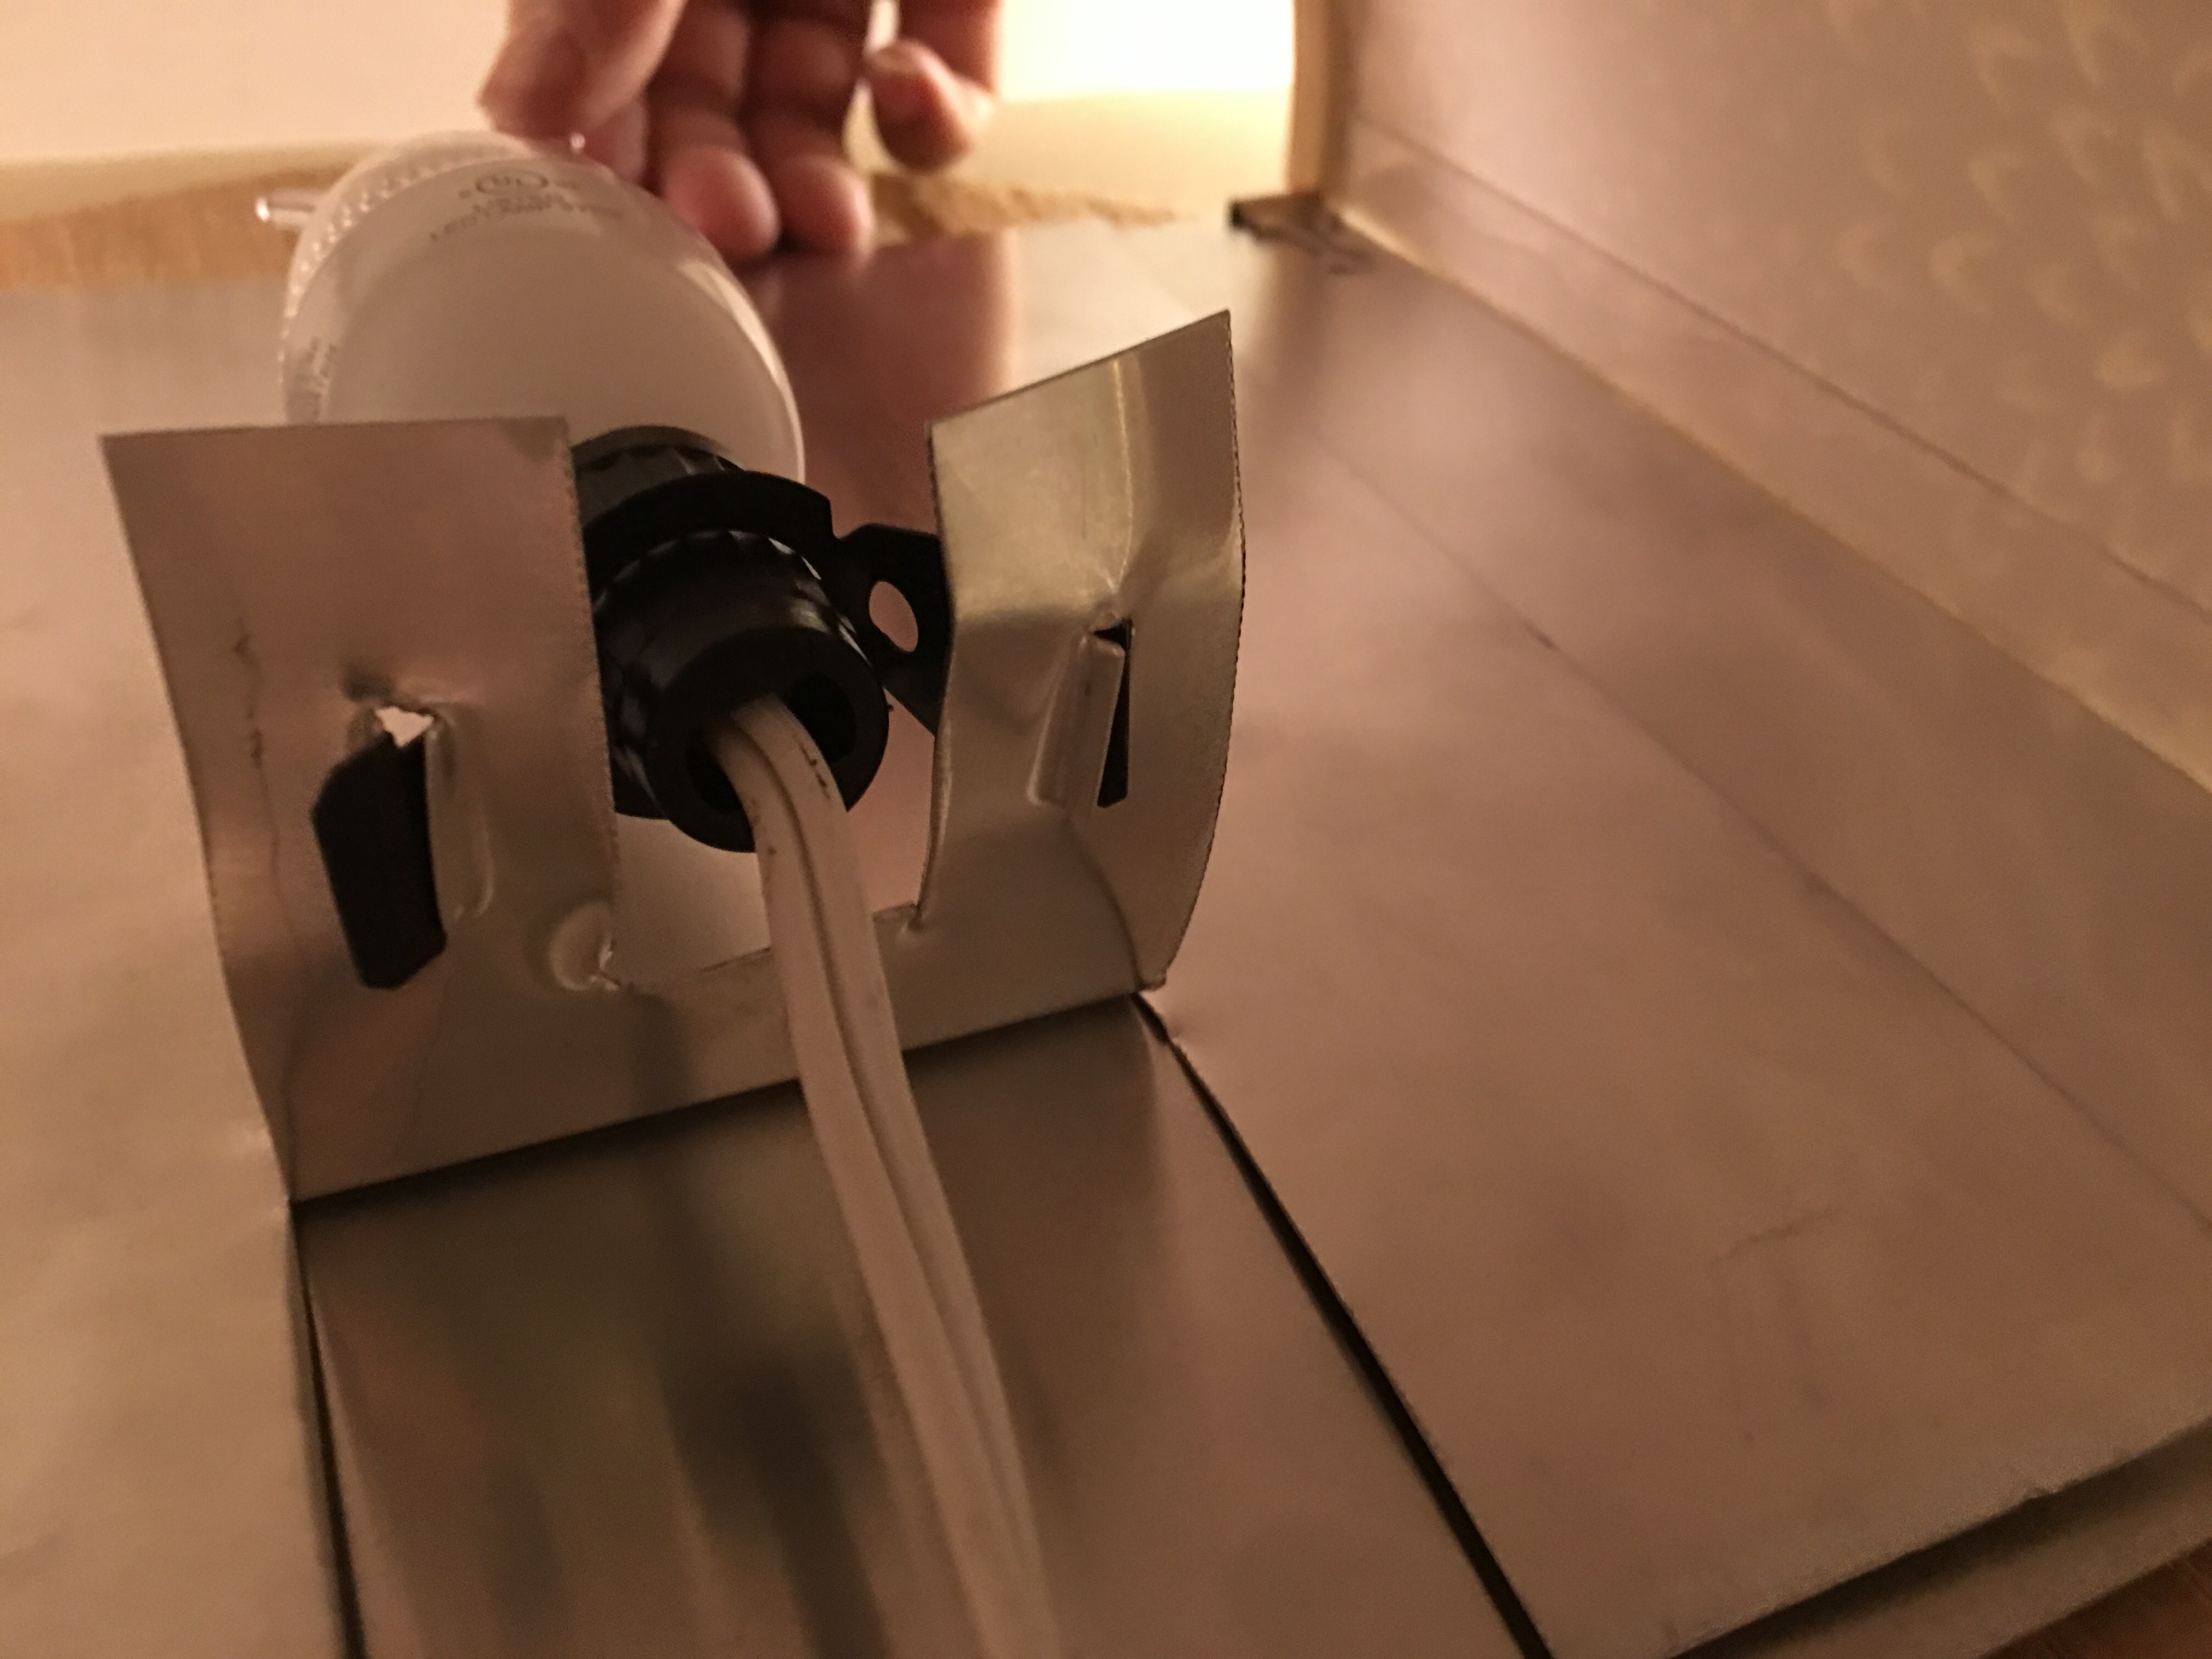
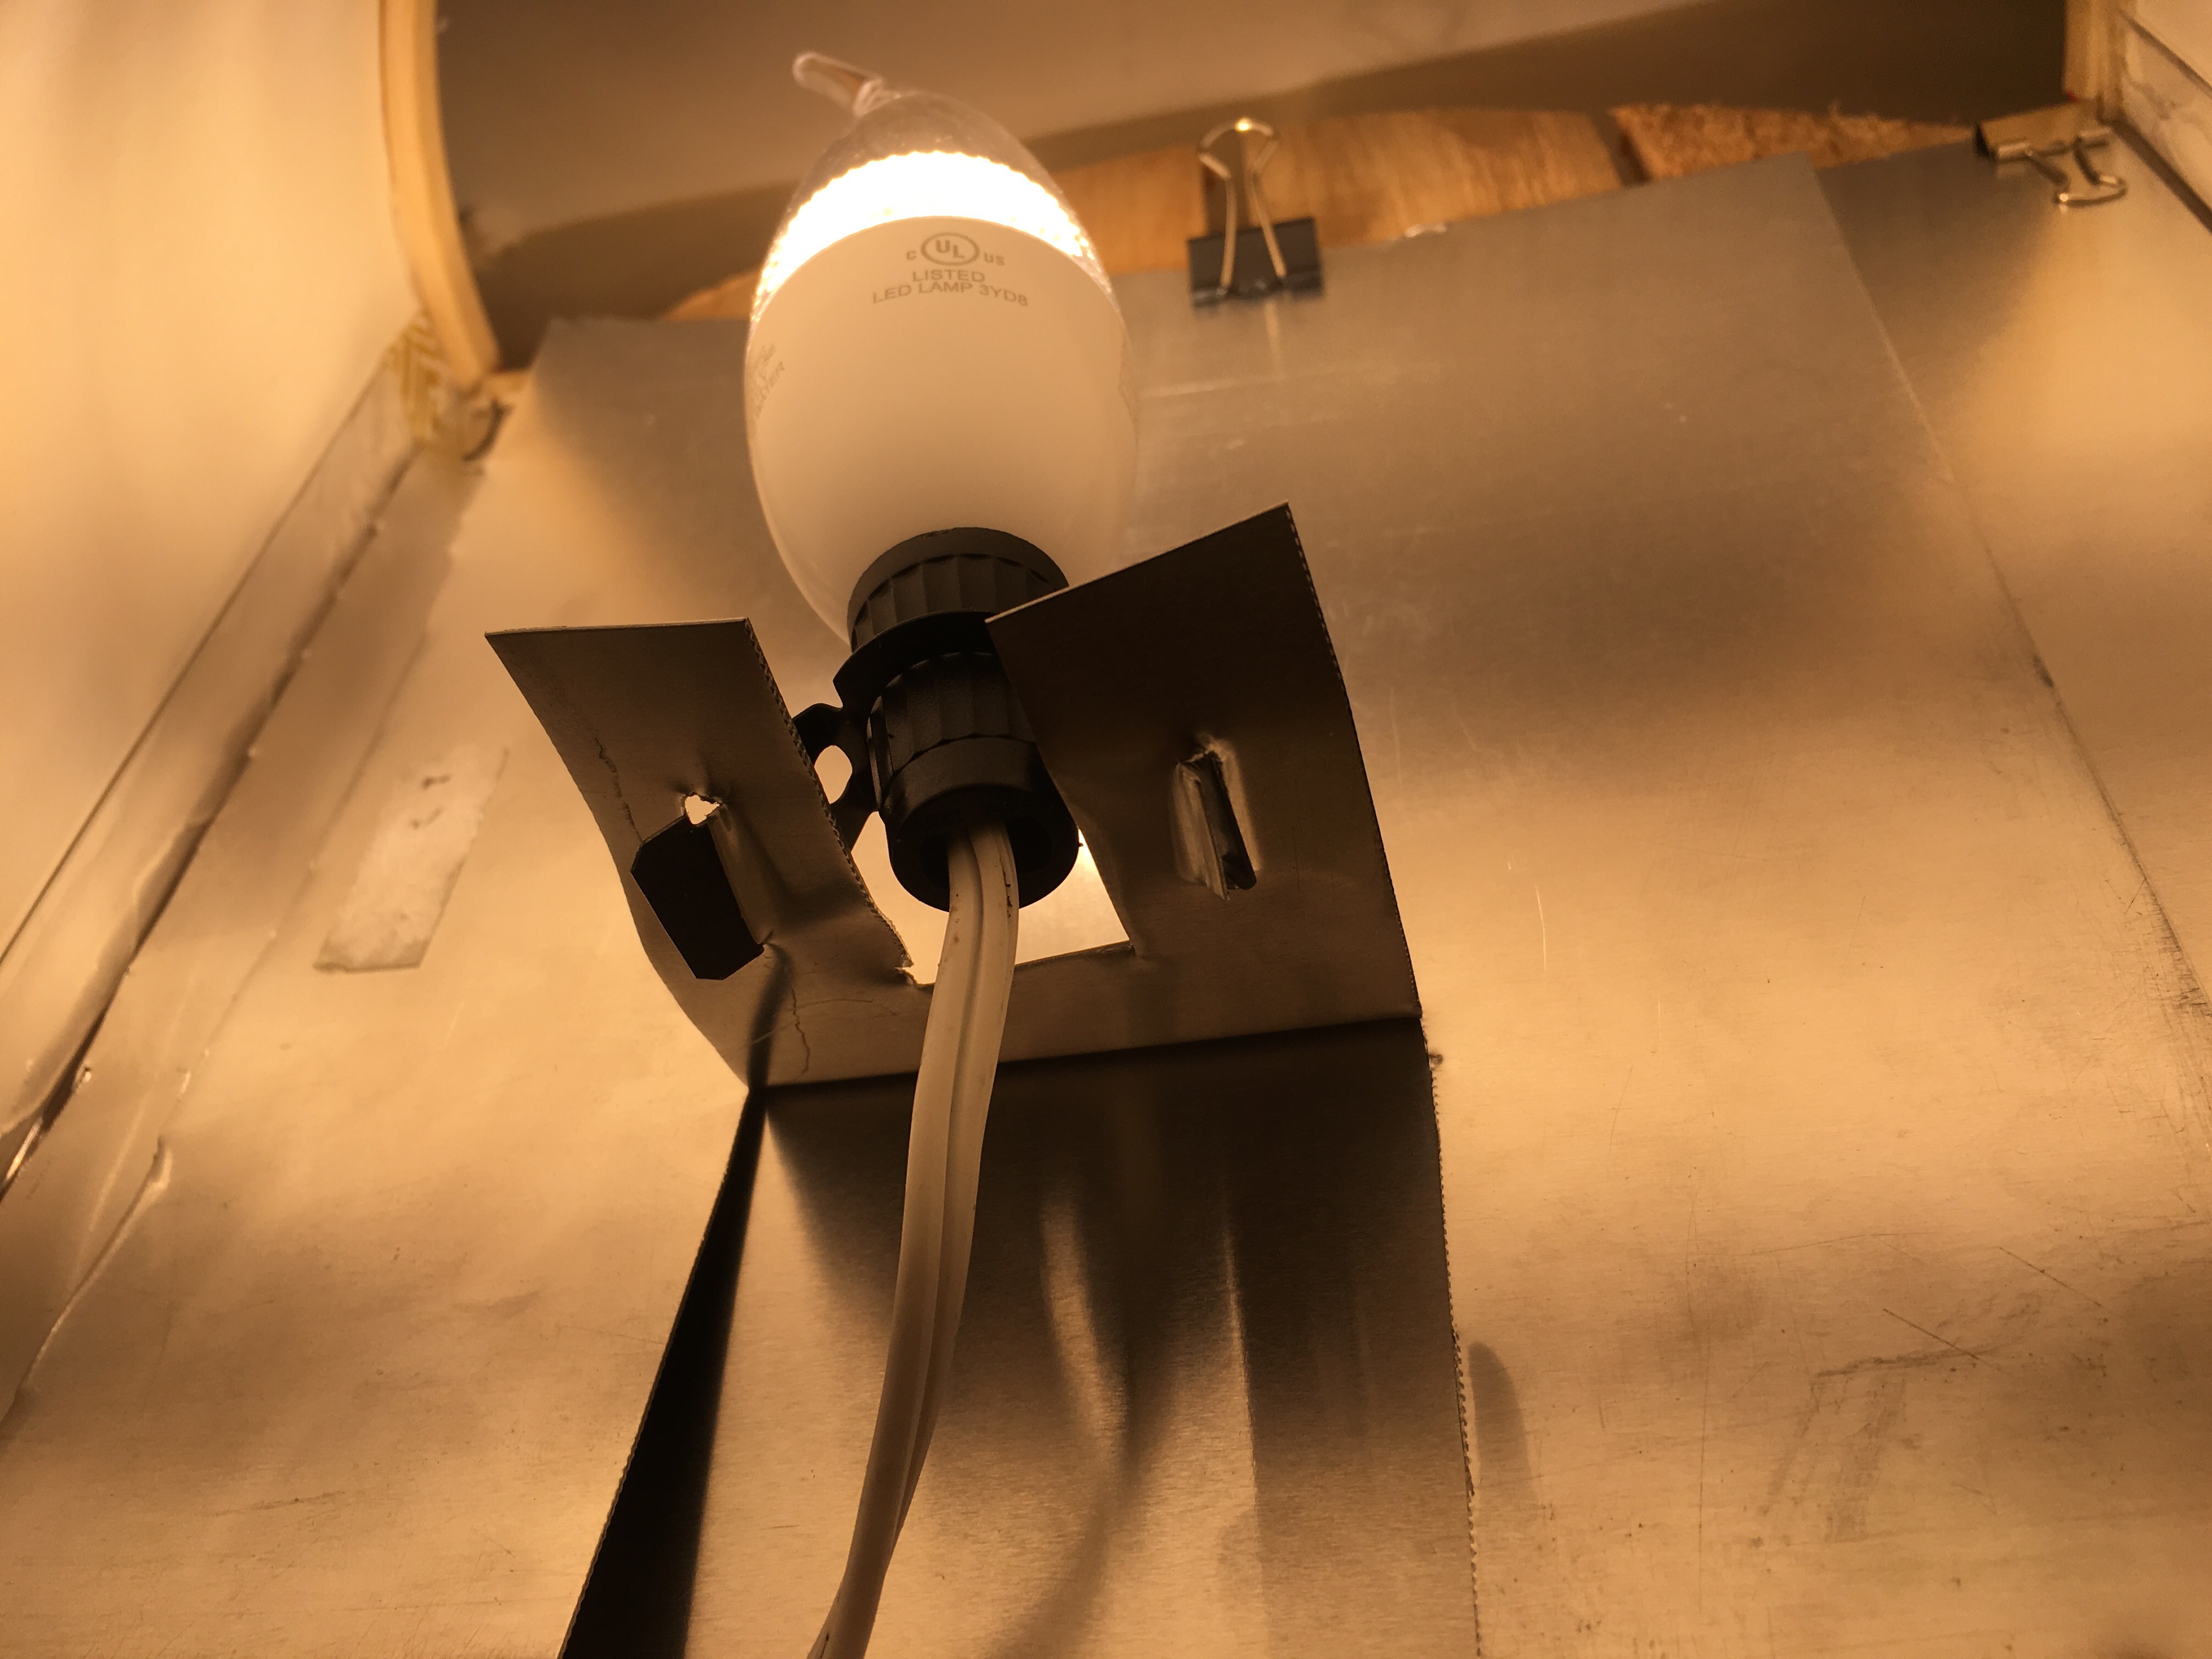
- Step 6: Add the aluminum sheet backing to the board.
I first lined up one corner of the aluminum sheet between the two hoop liners and marked where to cut with tape. I then used metal snips to cut the sheet down to size.
I then slipped the cut aluminum sheet between the corner guards and used tape once again to mark where to cut off the excess.
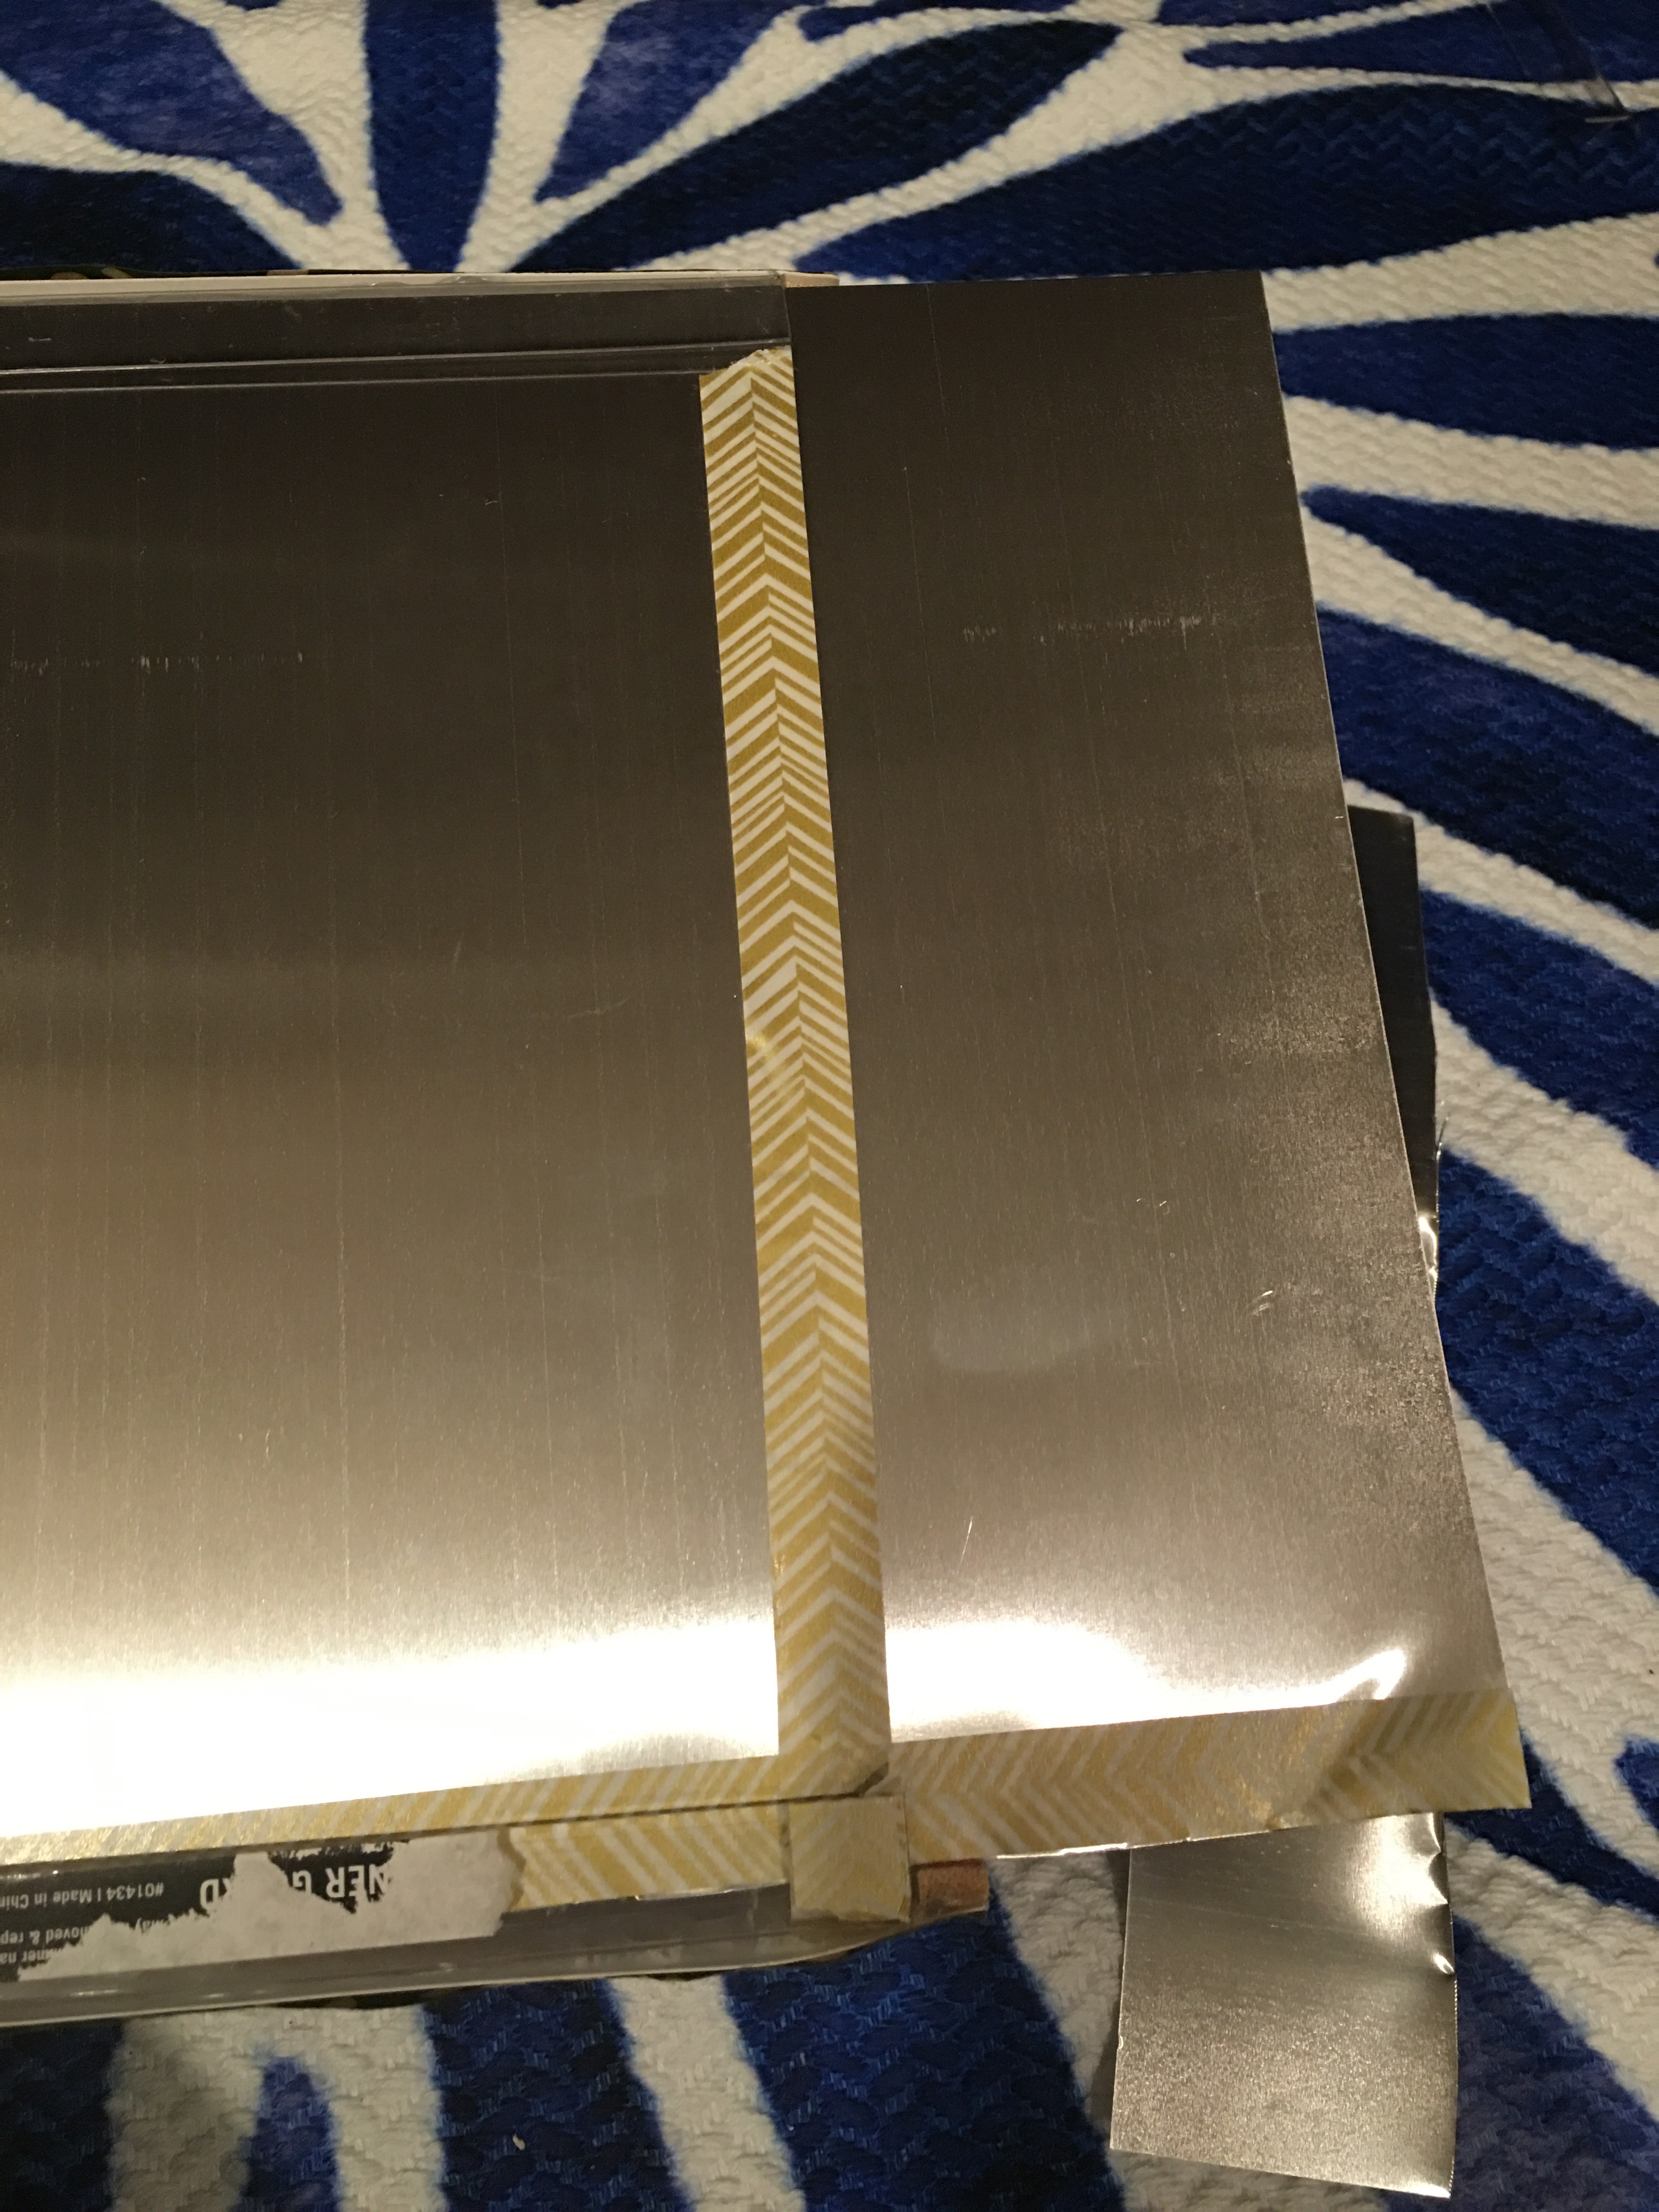
After marking the line, I slipped the aluminum sheet back out and cut along the tape line.
I slipped the aluminum sheet between the corner guards again and used four mini binder clips to secure the sheet to the corner guard.
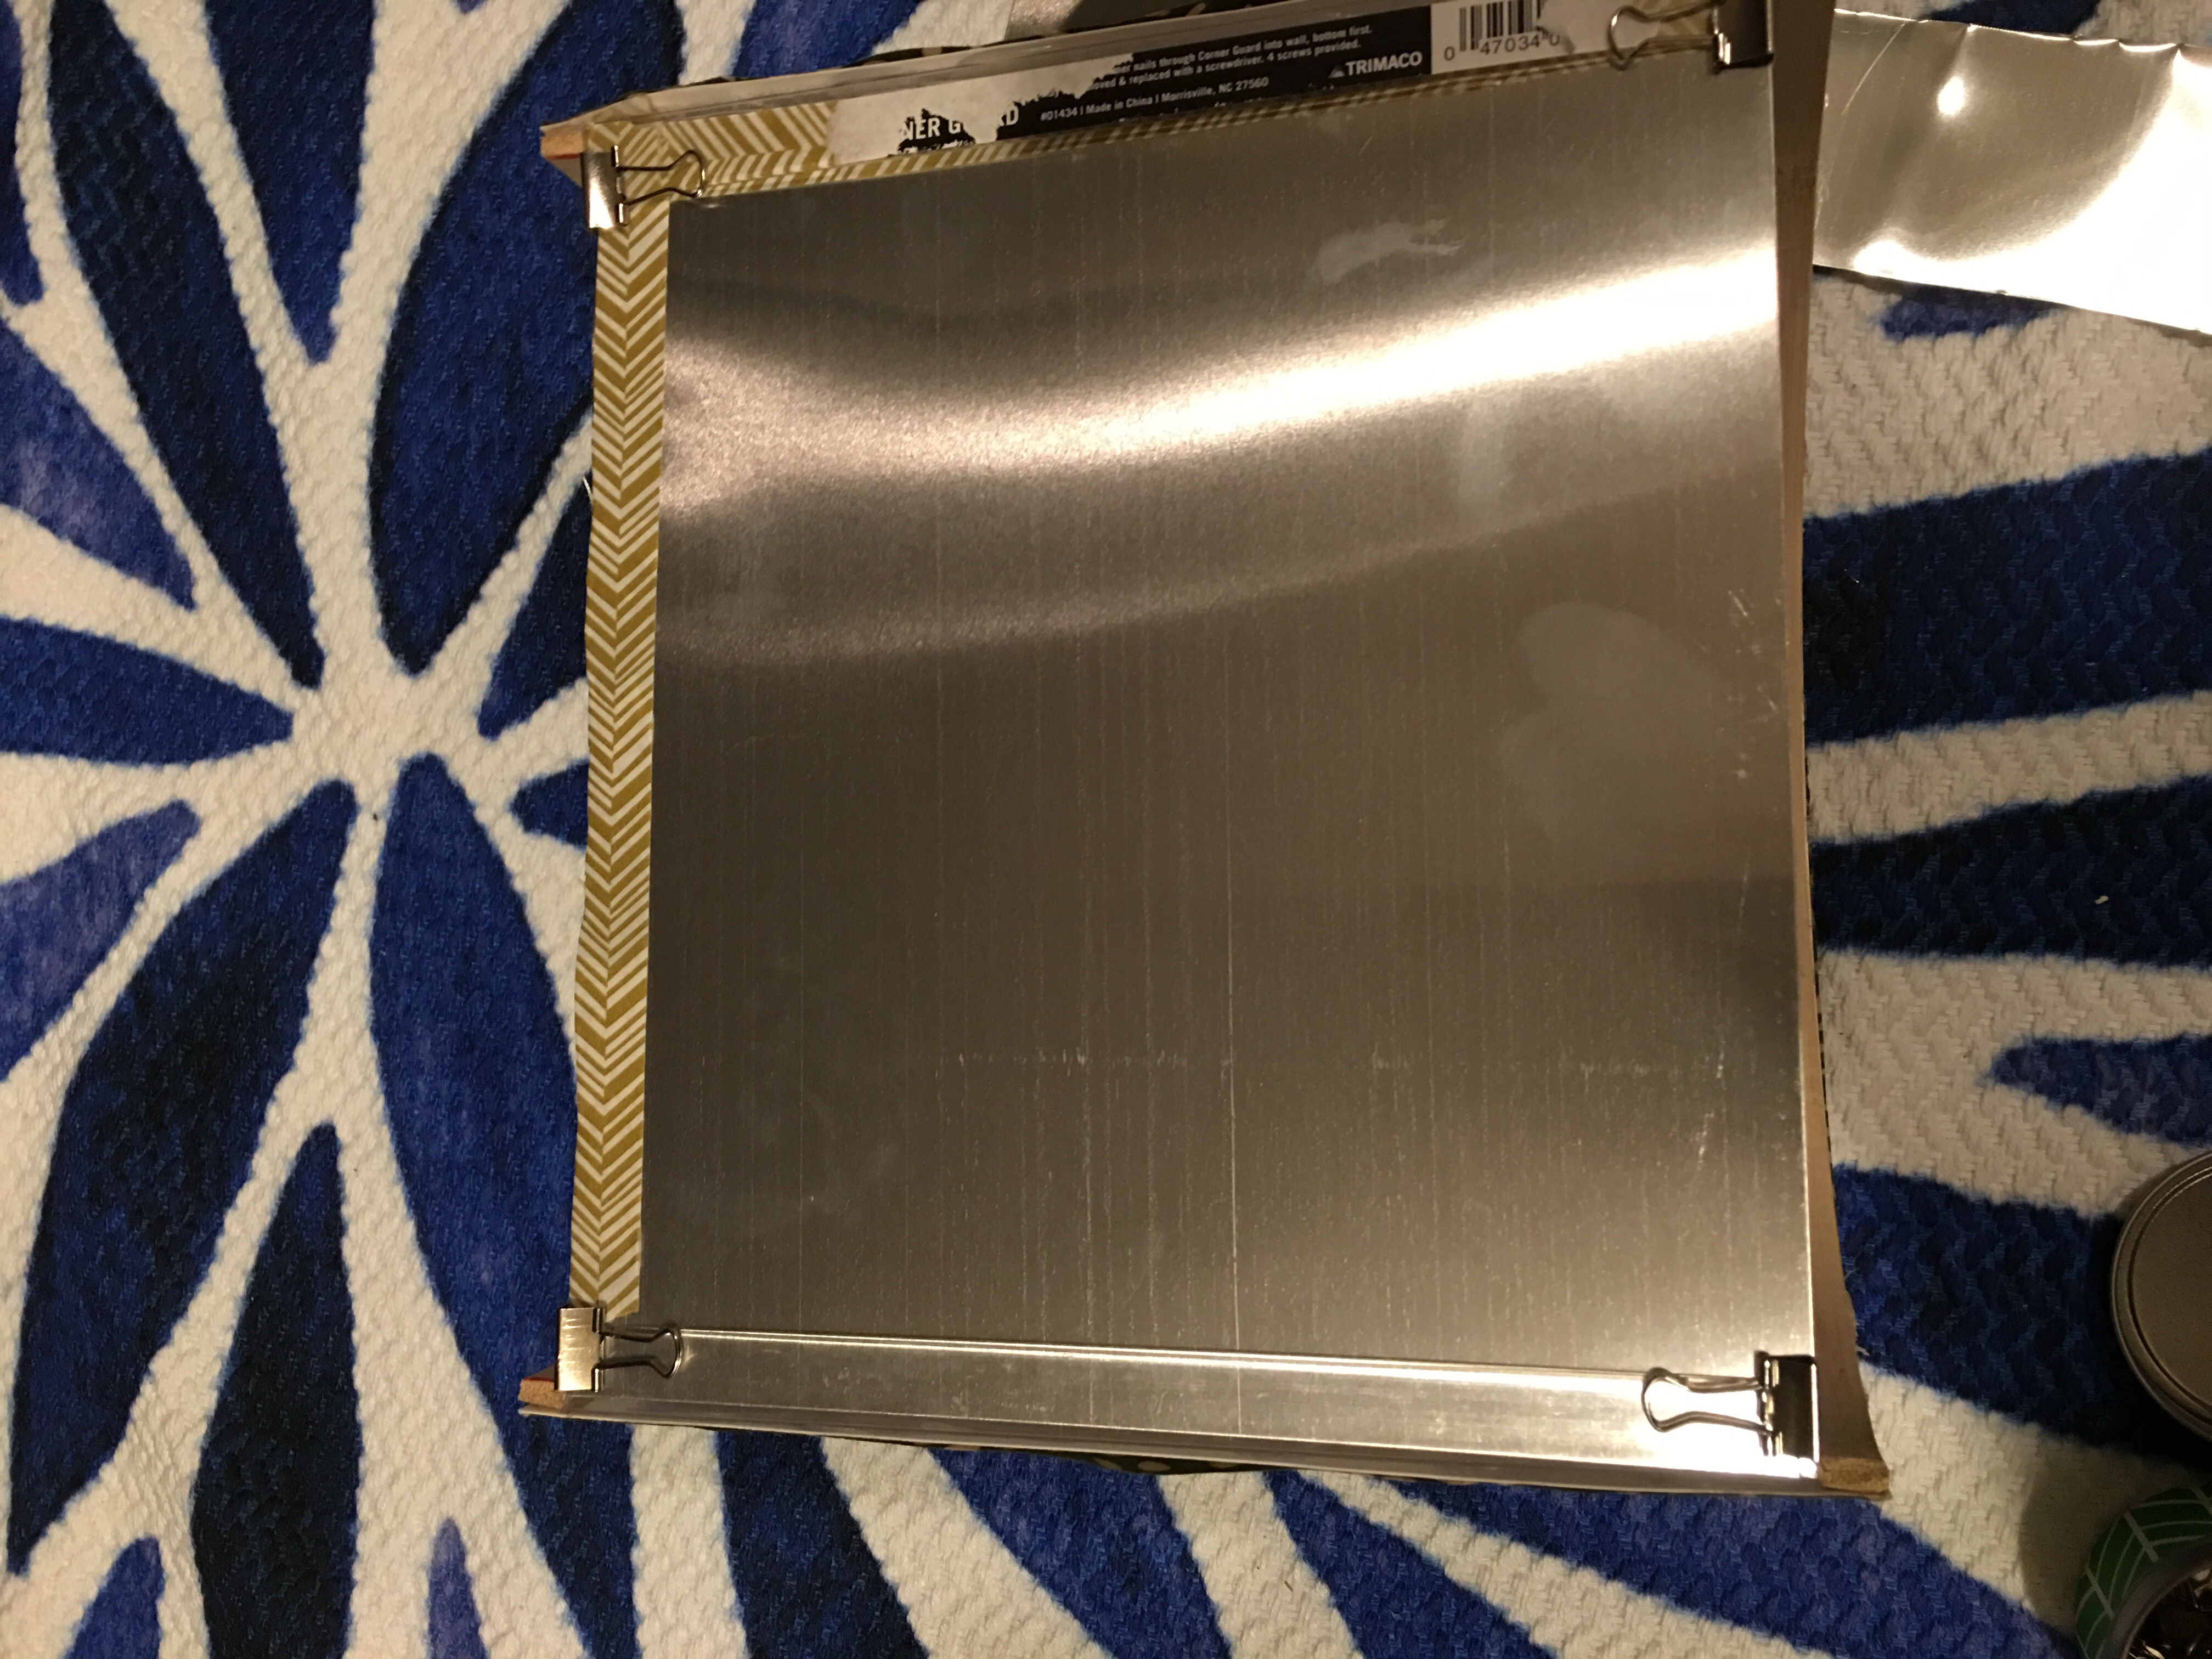
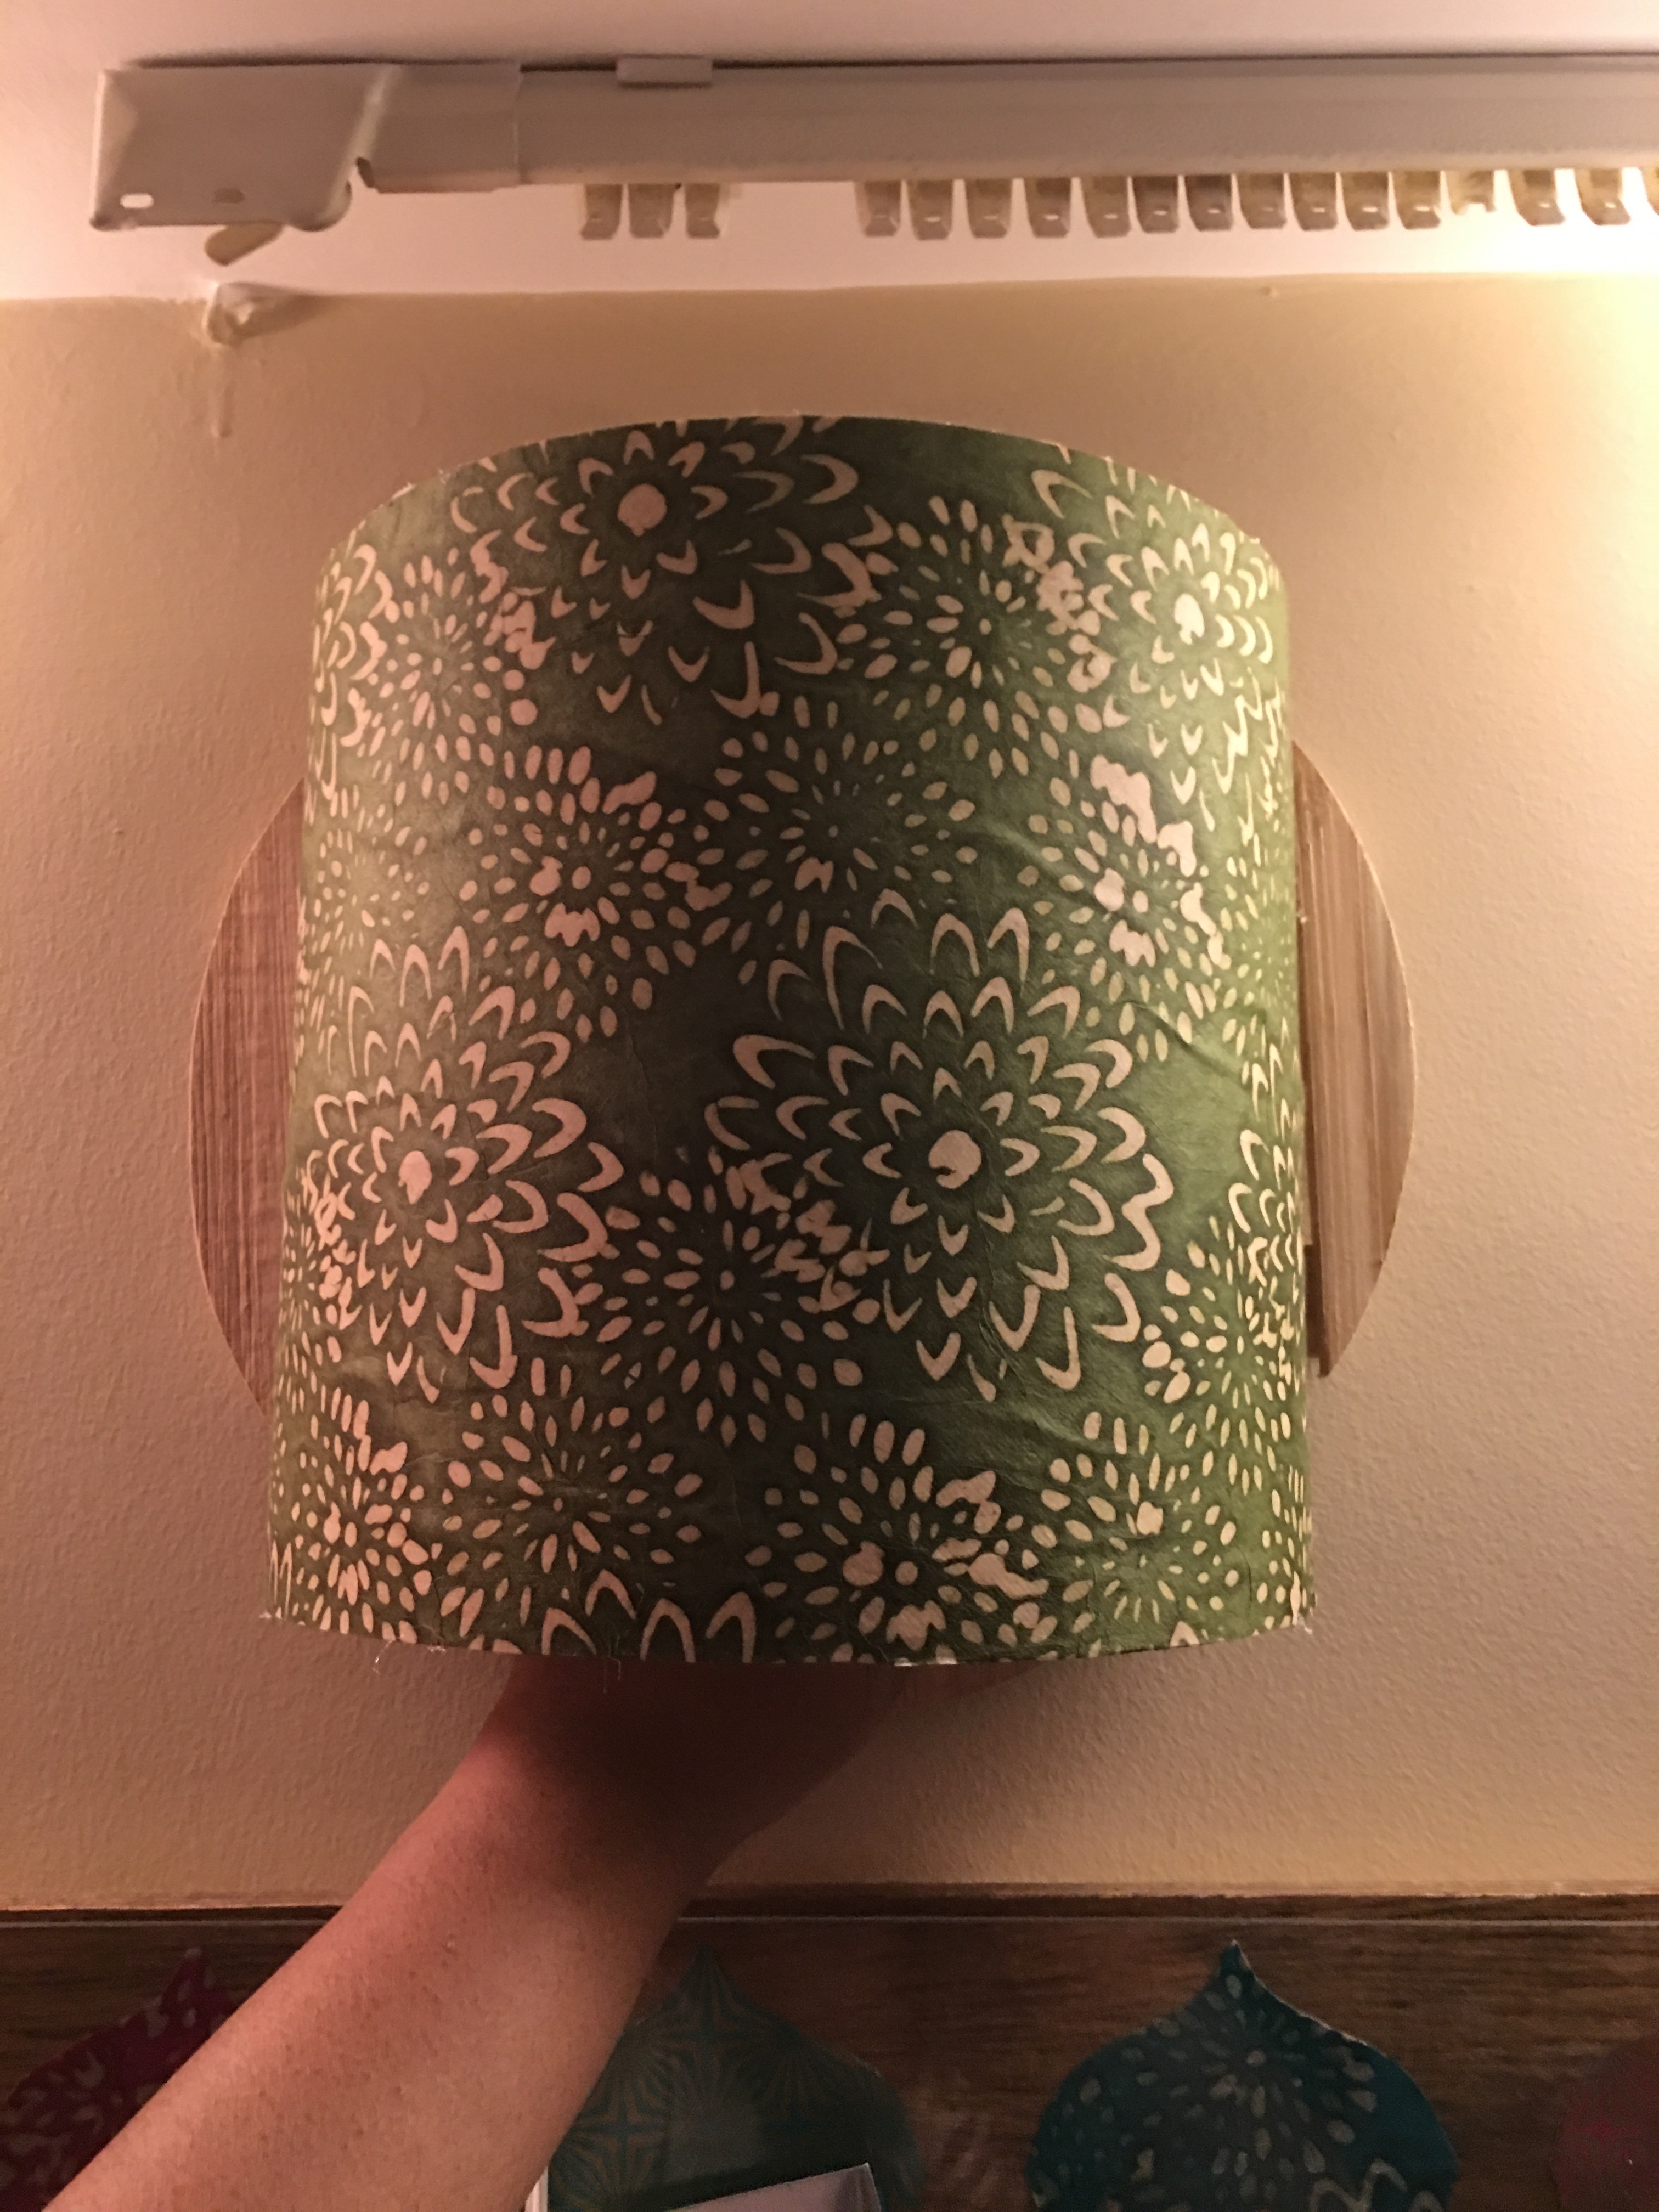
And once the aluminum backing is in place, the sconce shell is complete.
Mounting the new centerpiece sconce
So here’s where we swap out the centerpiece sconces.
I have the candelabra panel clipped to the aluminum backing of the mounted sconce using a binder clip. So I first remove this from the sconce on the wall.
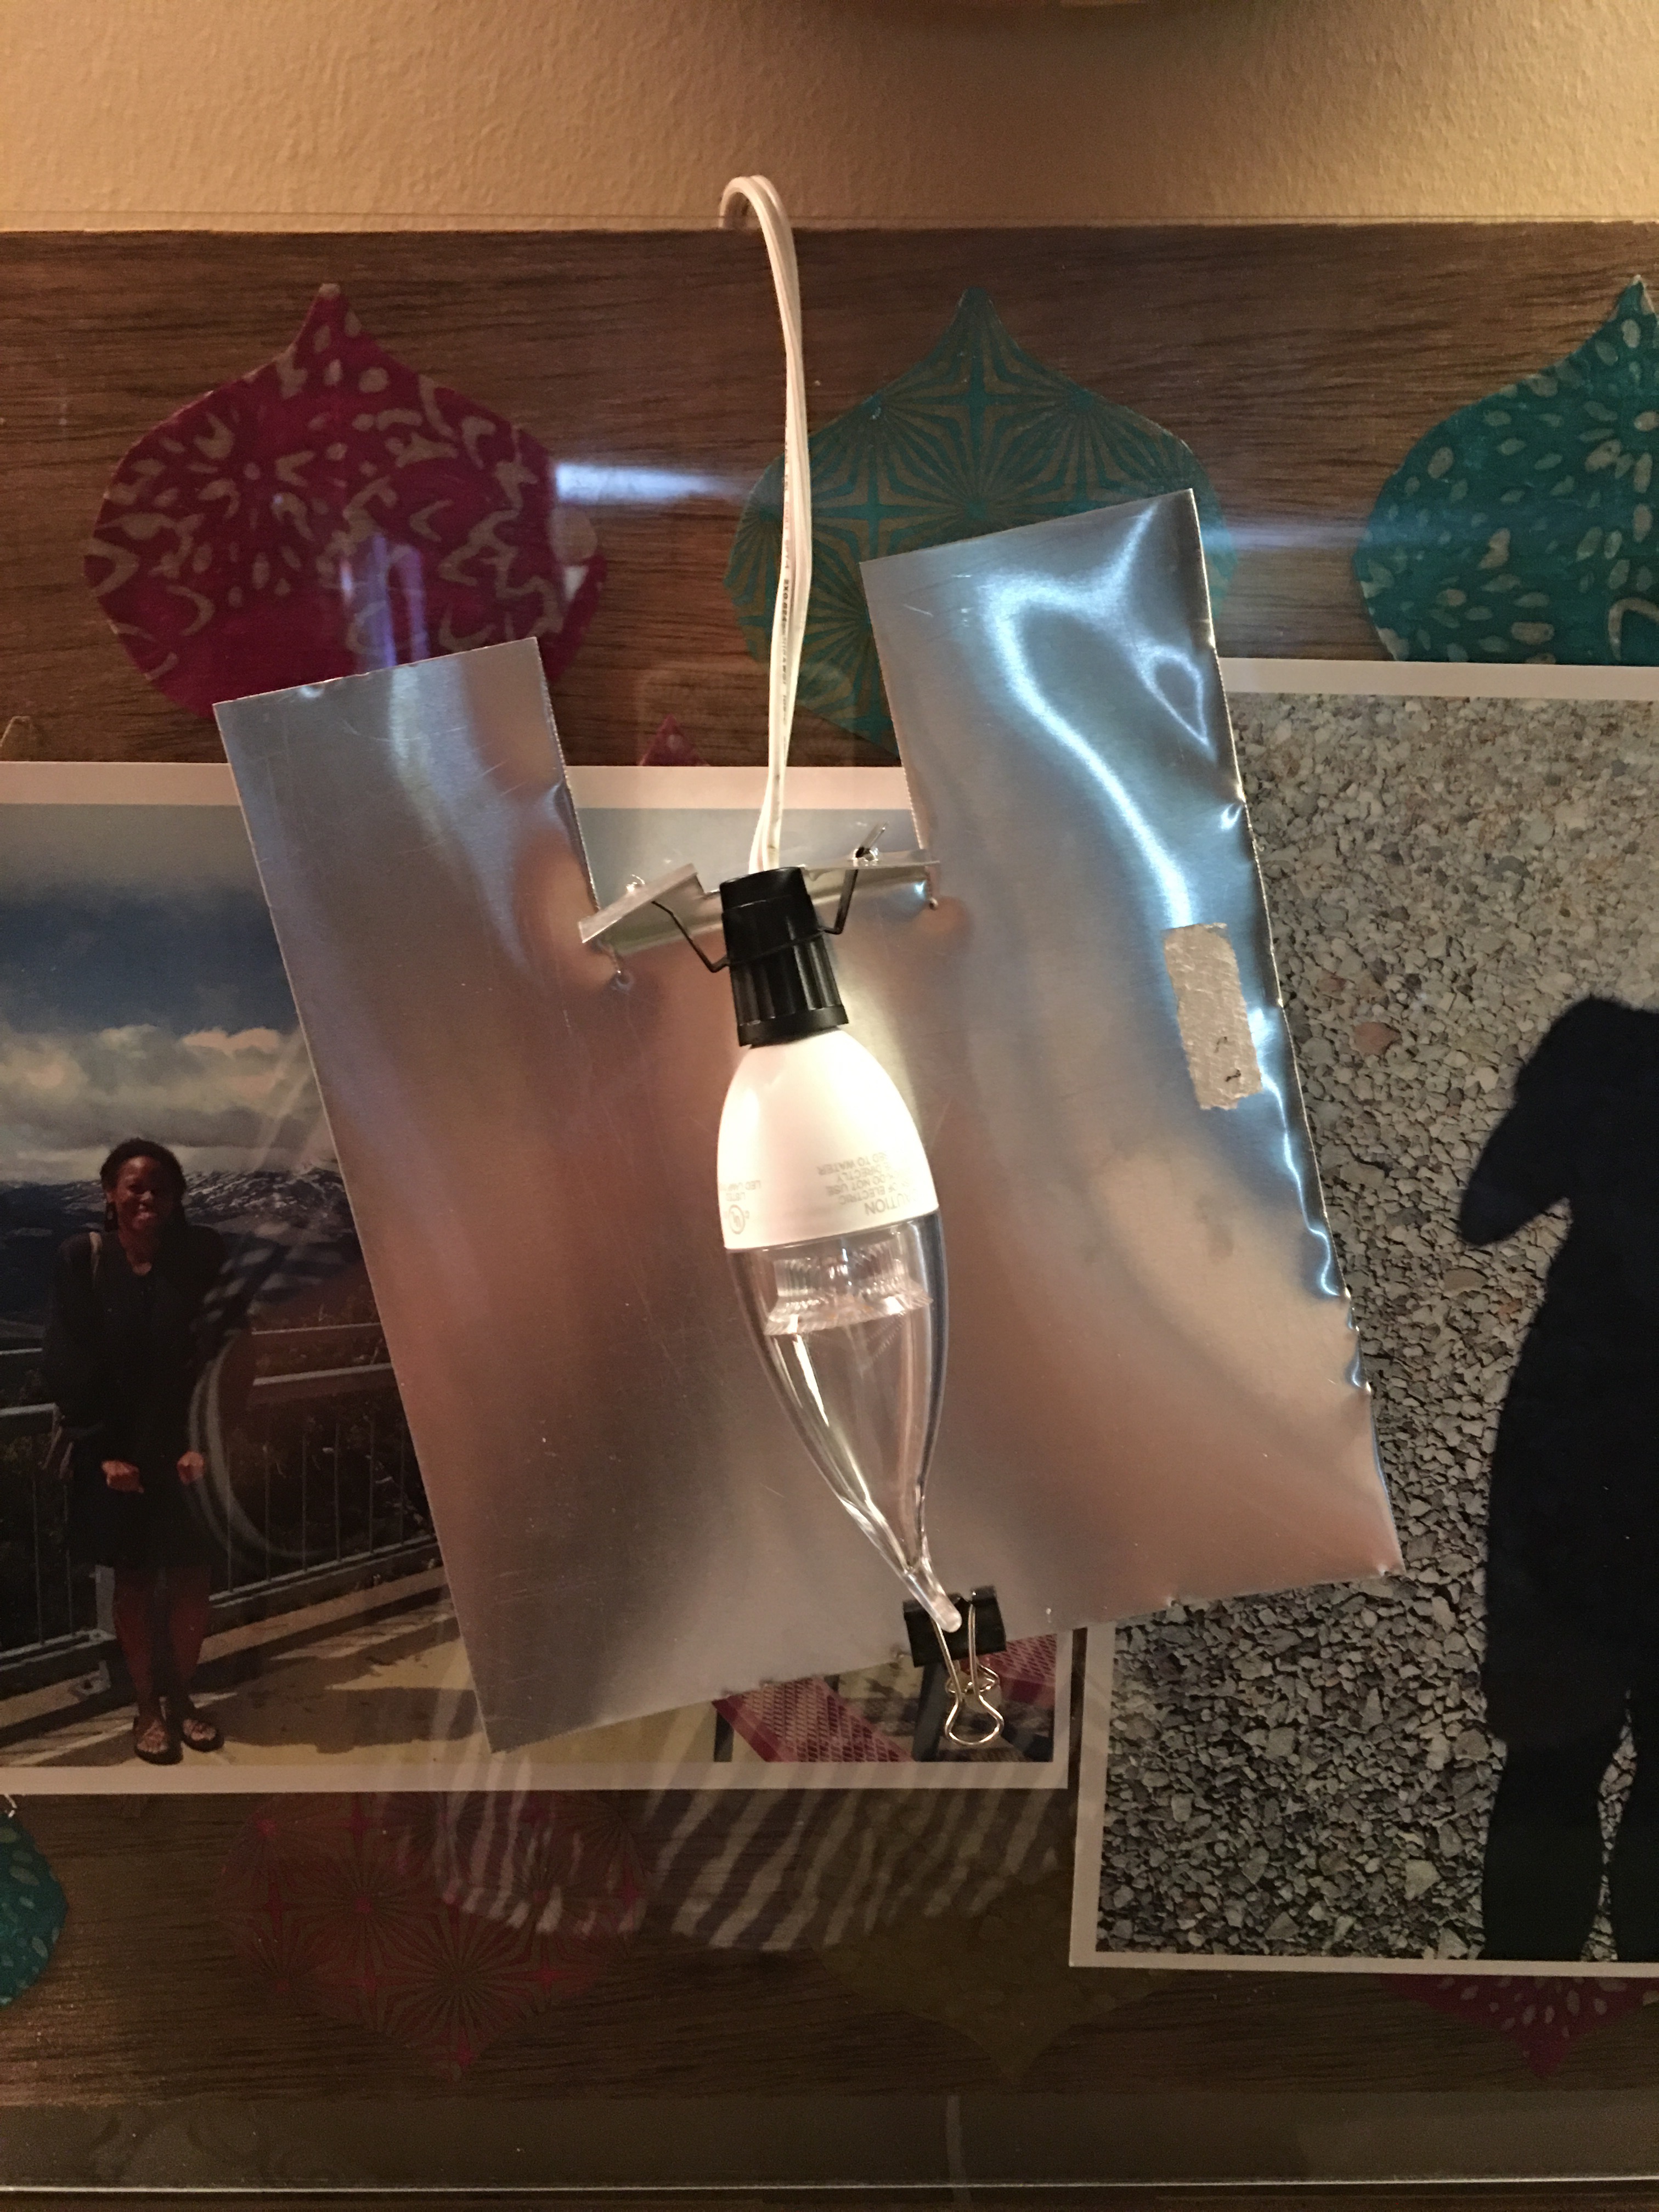
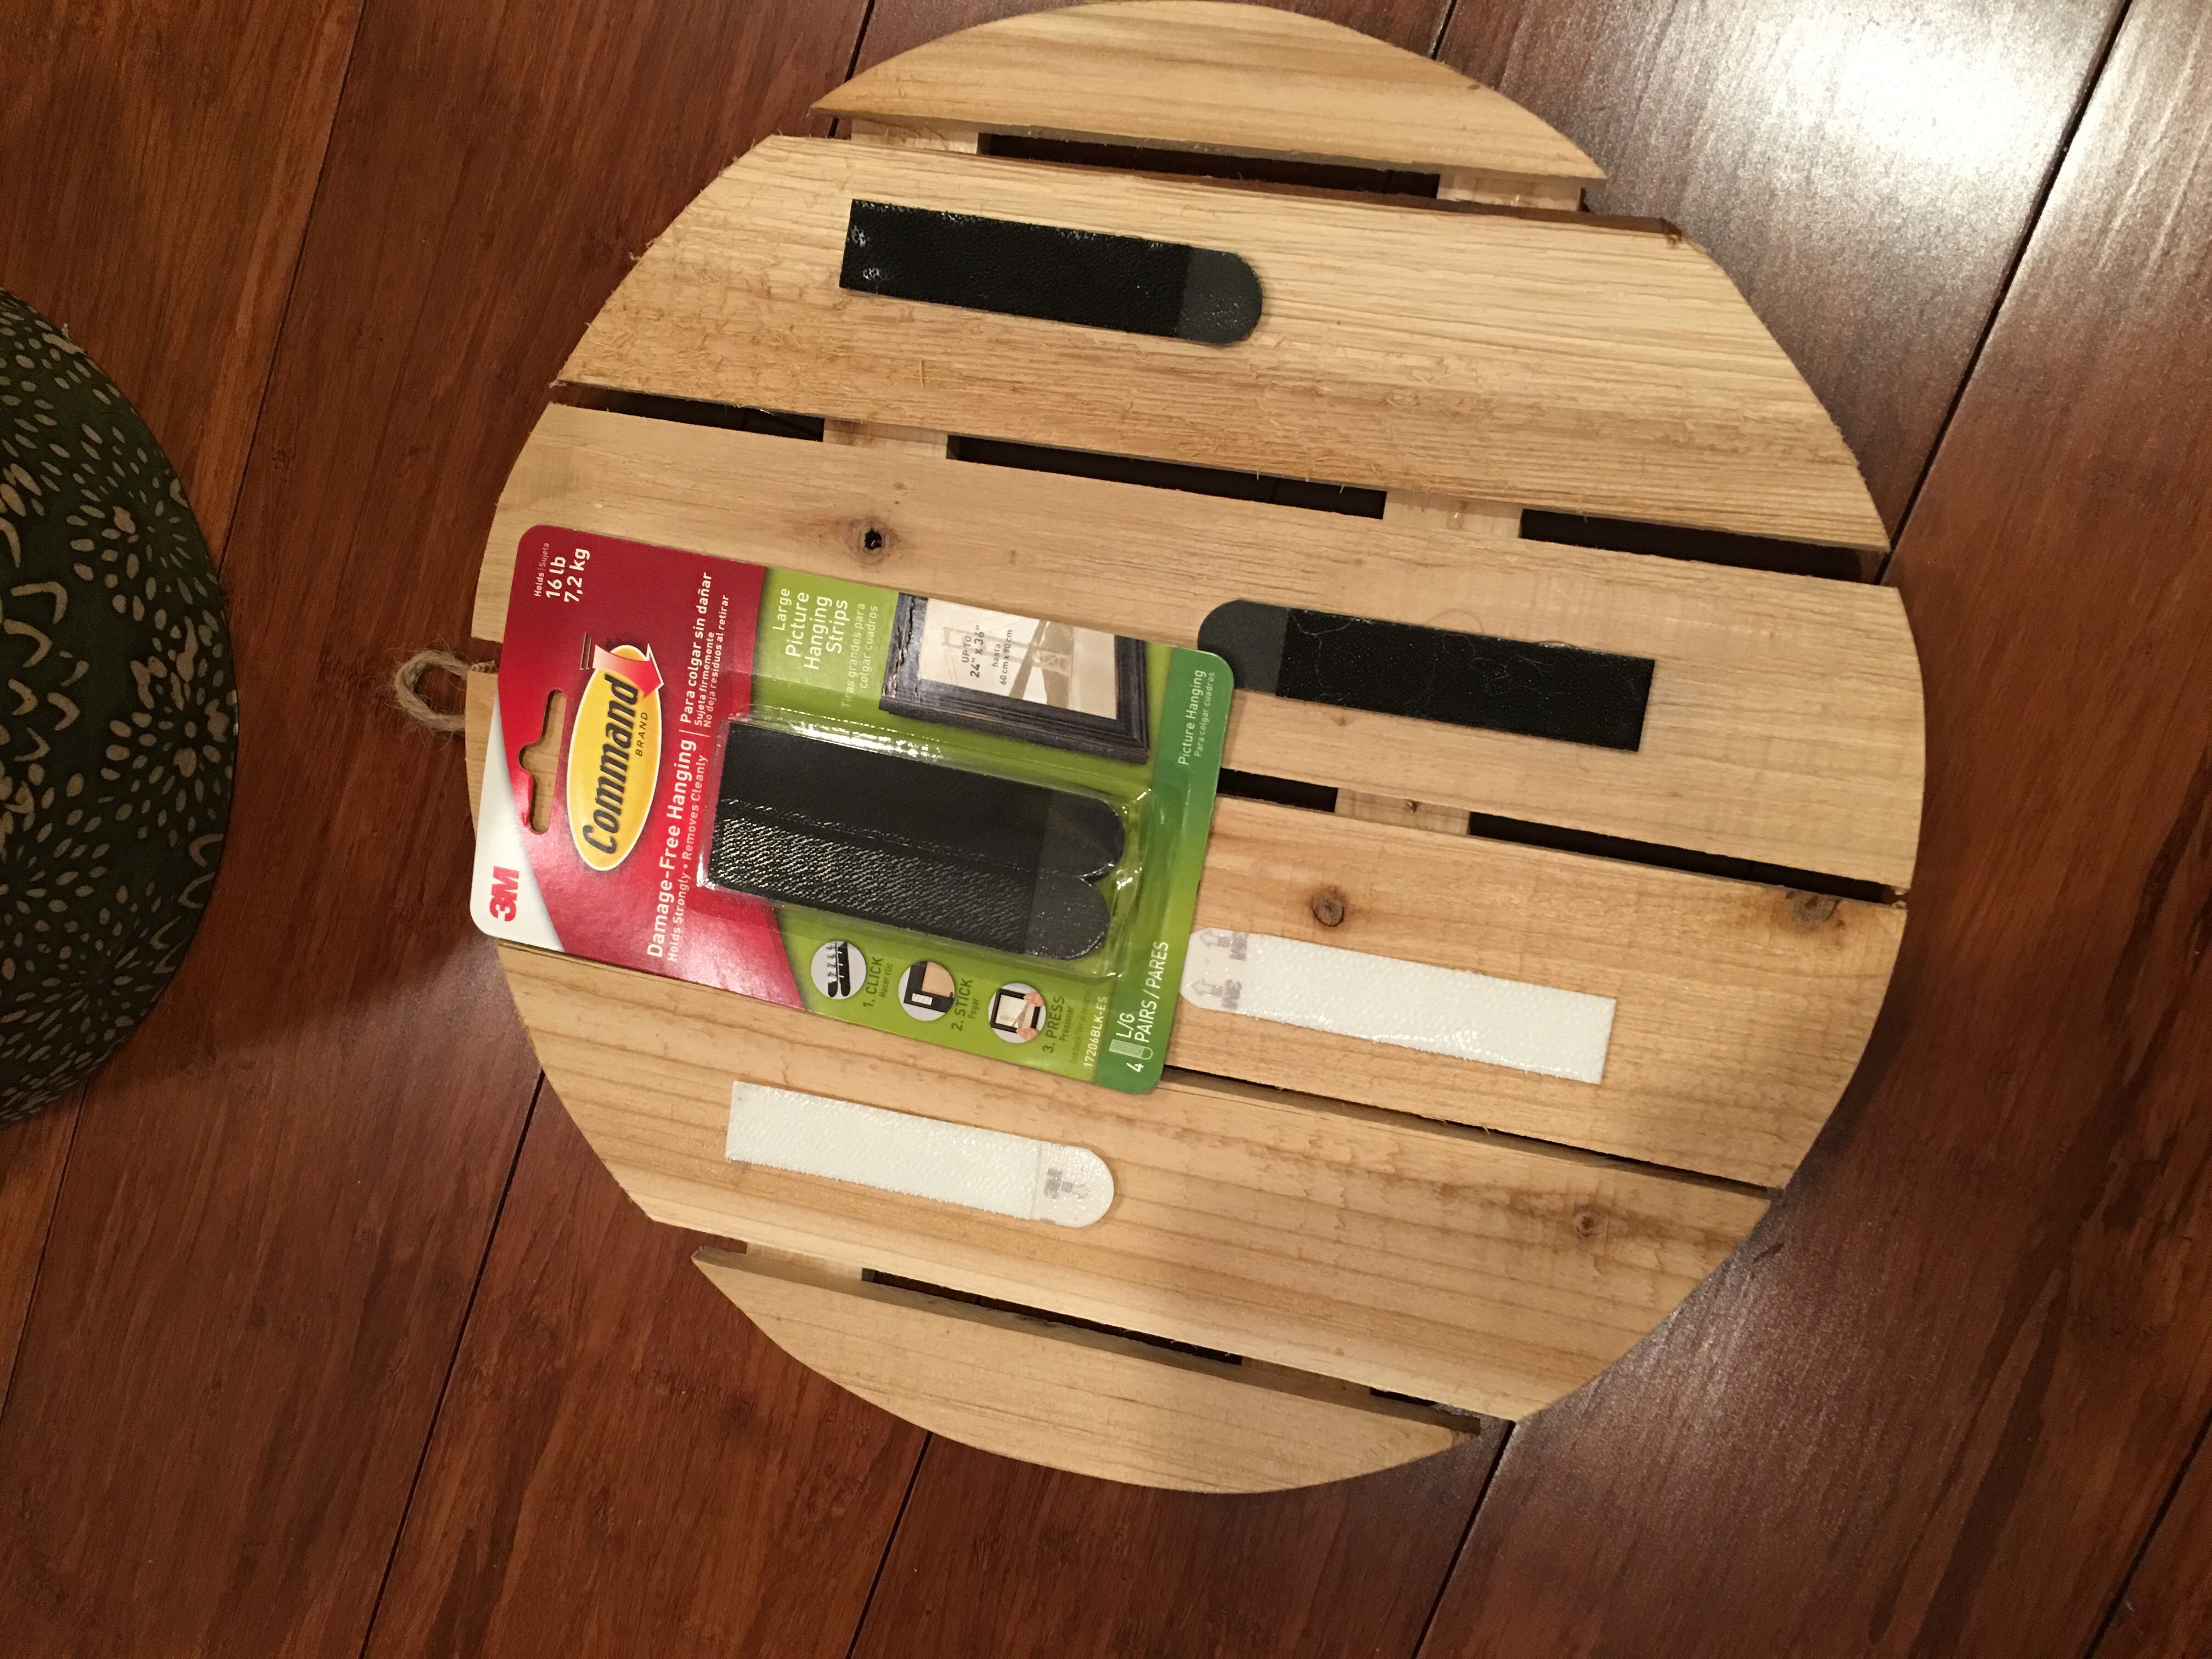
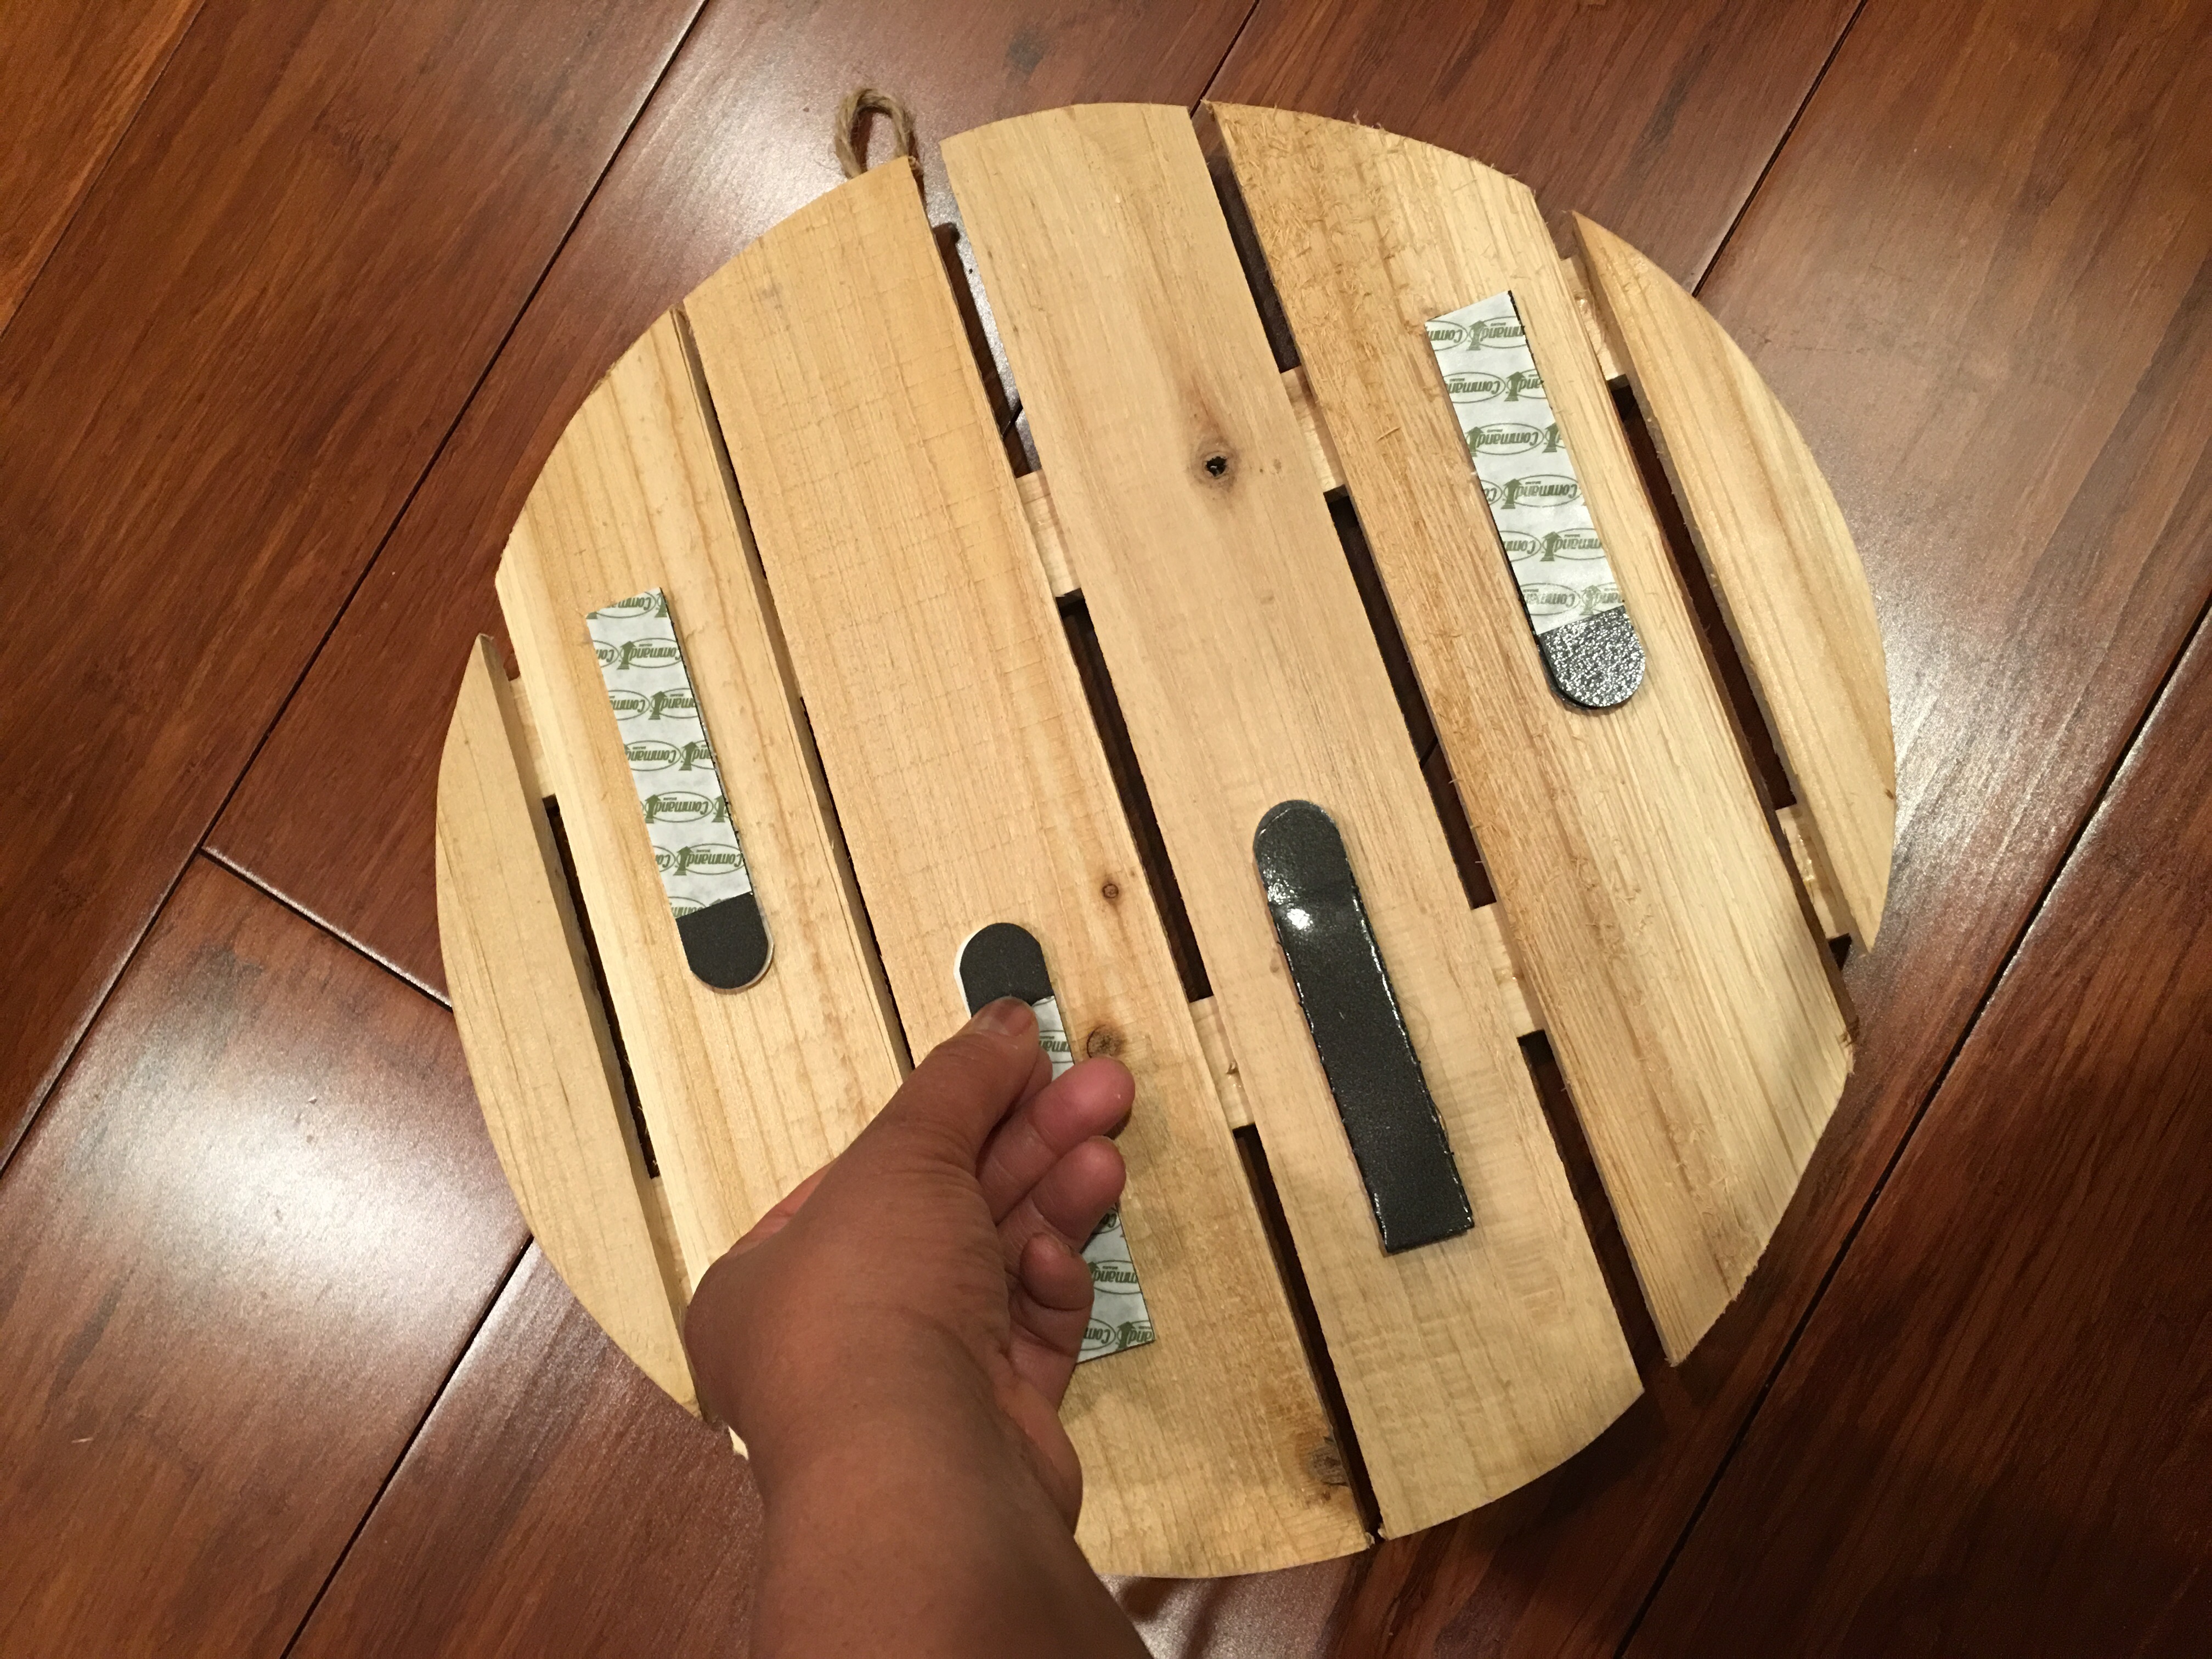
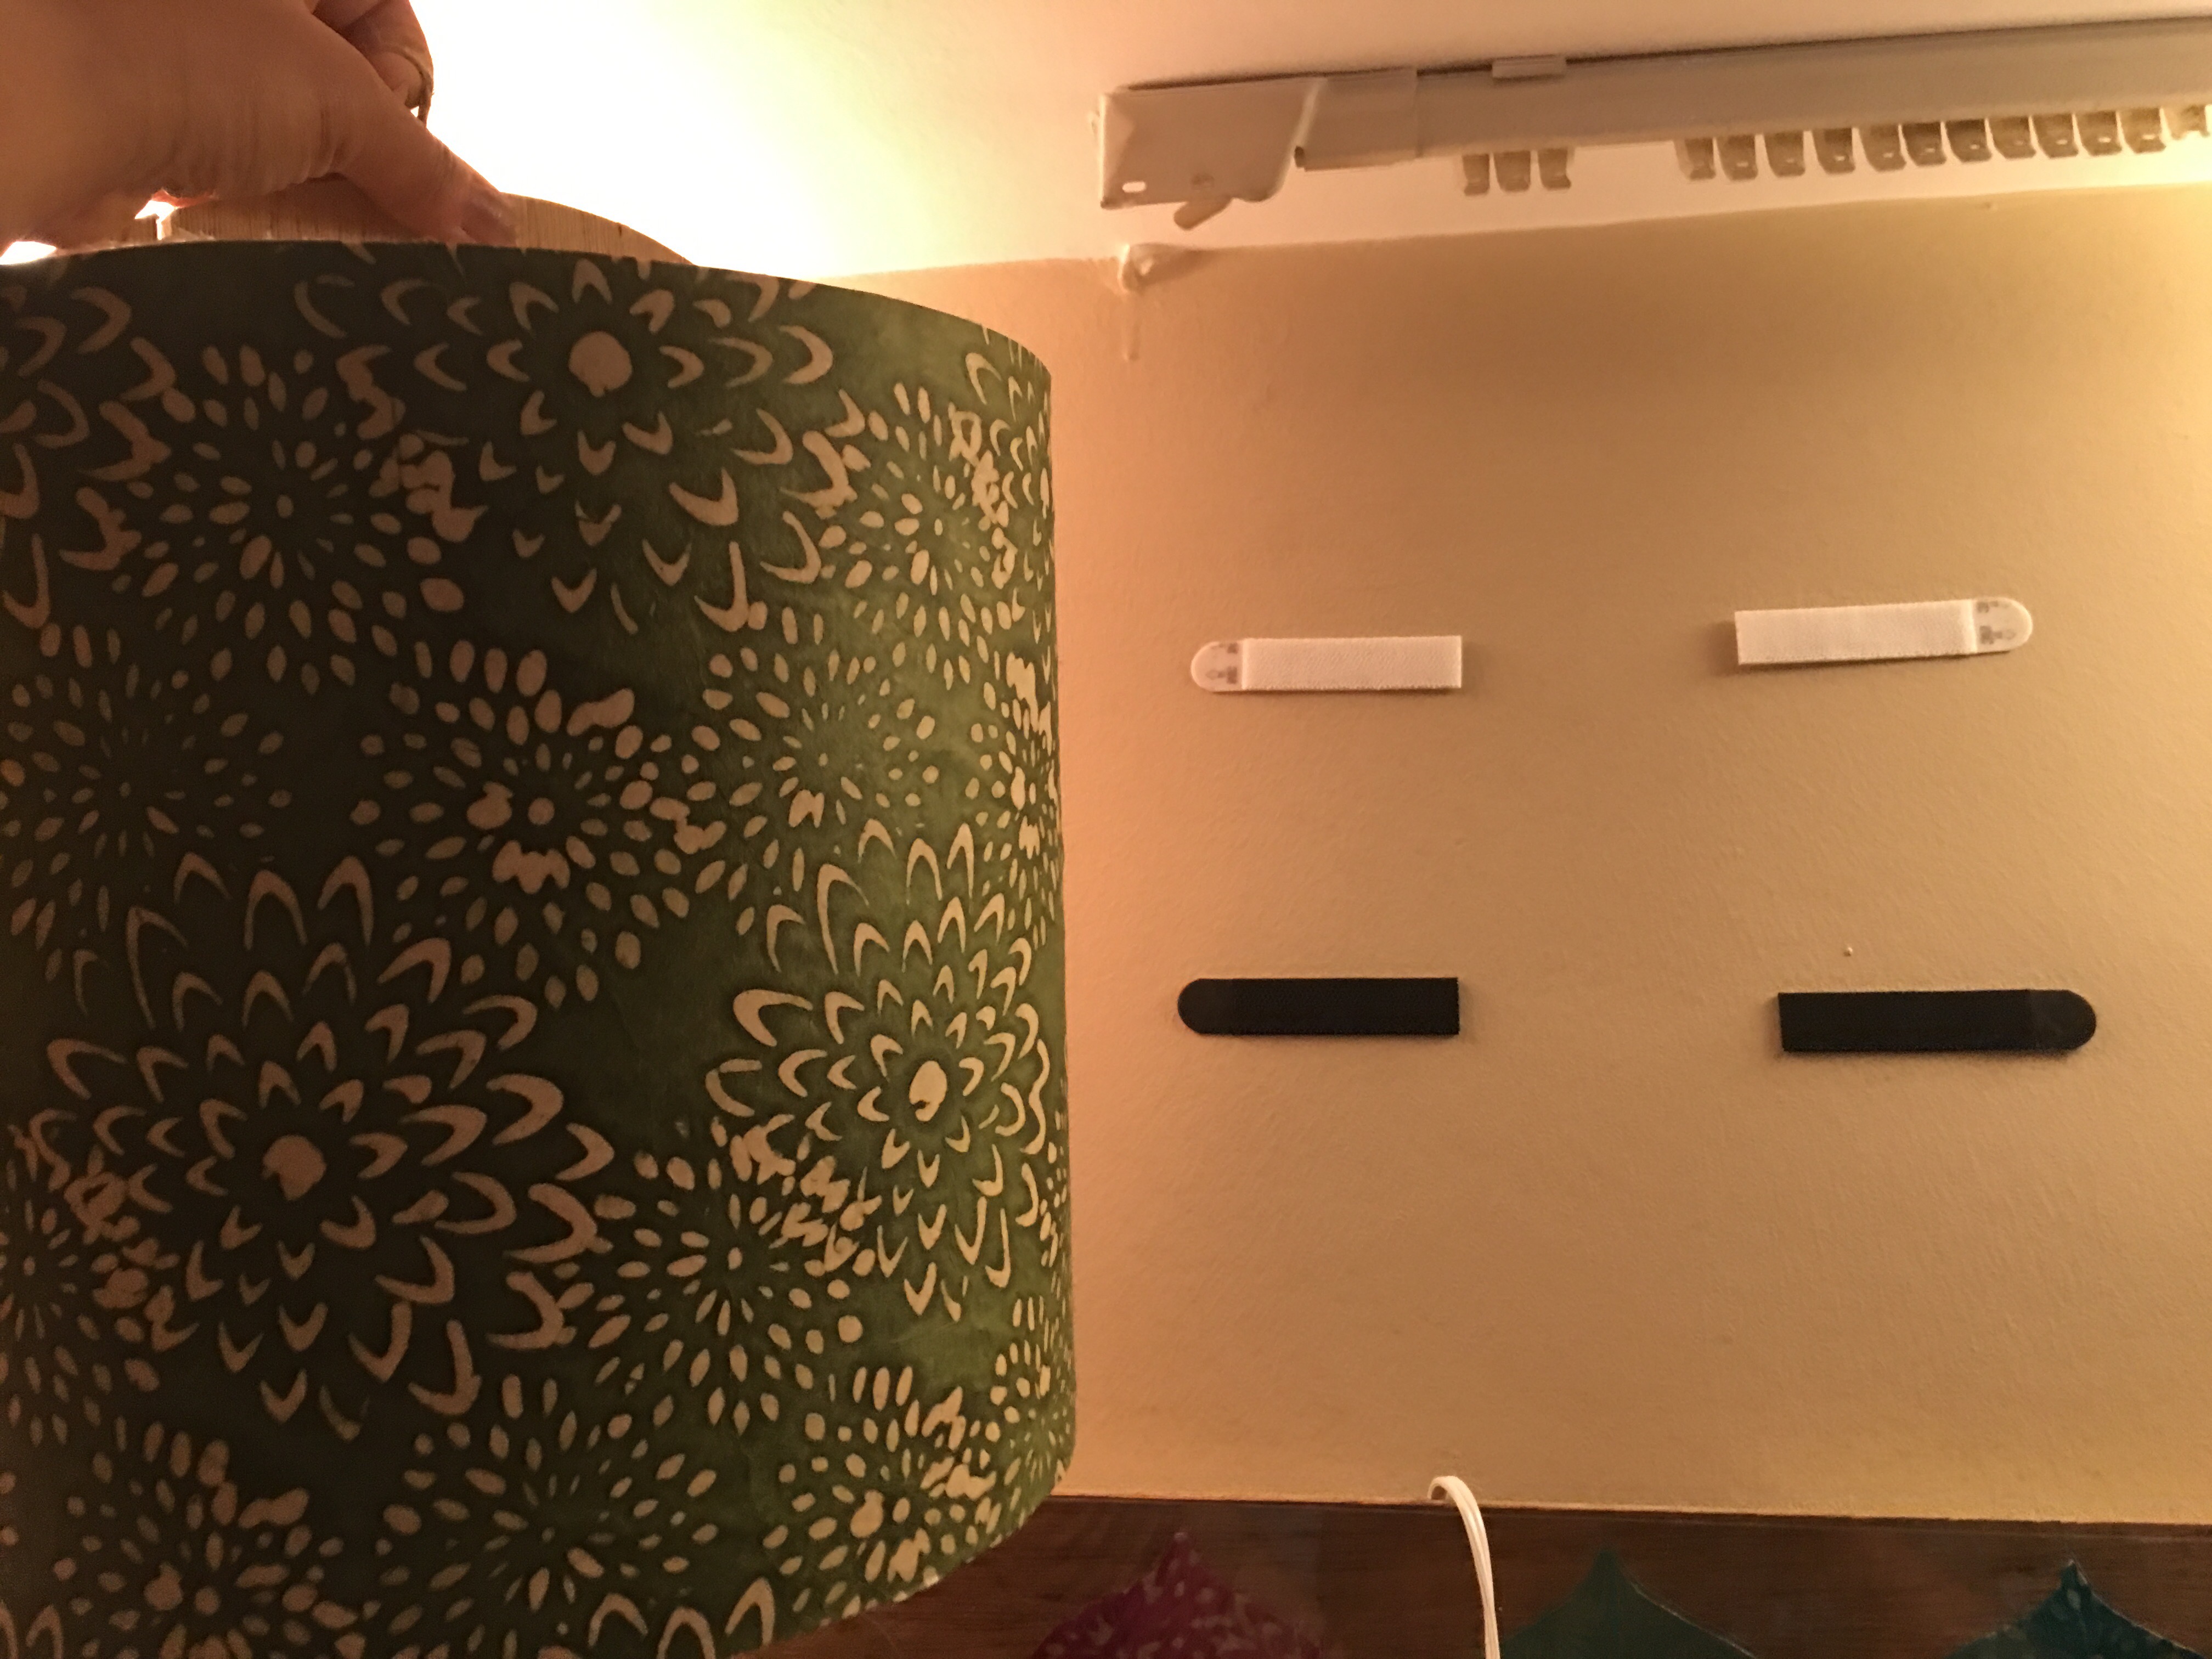
I then removed the sconce and circle pallet wood plaque from the wall. As shown below, I have this mounted on the wall using four 3M Command large picture strips.
I then removed the sconce from the pallet wood plaque.
I also use four Command strips to attach the sconces to the pallet wood plaque.
Using a fresh package of Command strips…
…I added the new sconce to the pallet wood plaque.
I added the pallet plaque with the new sconce to the wall using the same Command strips.
And, last, I clipped the candelrandra panel to the backing of the new sconce.
And I flicked the light on.
Much better!!! The light now shines through the sconce shade.
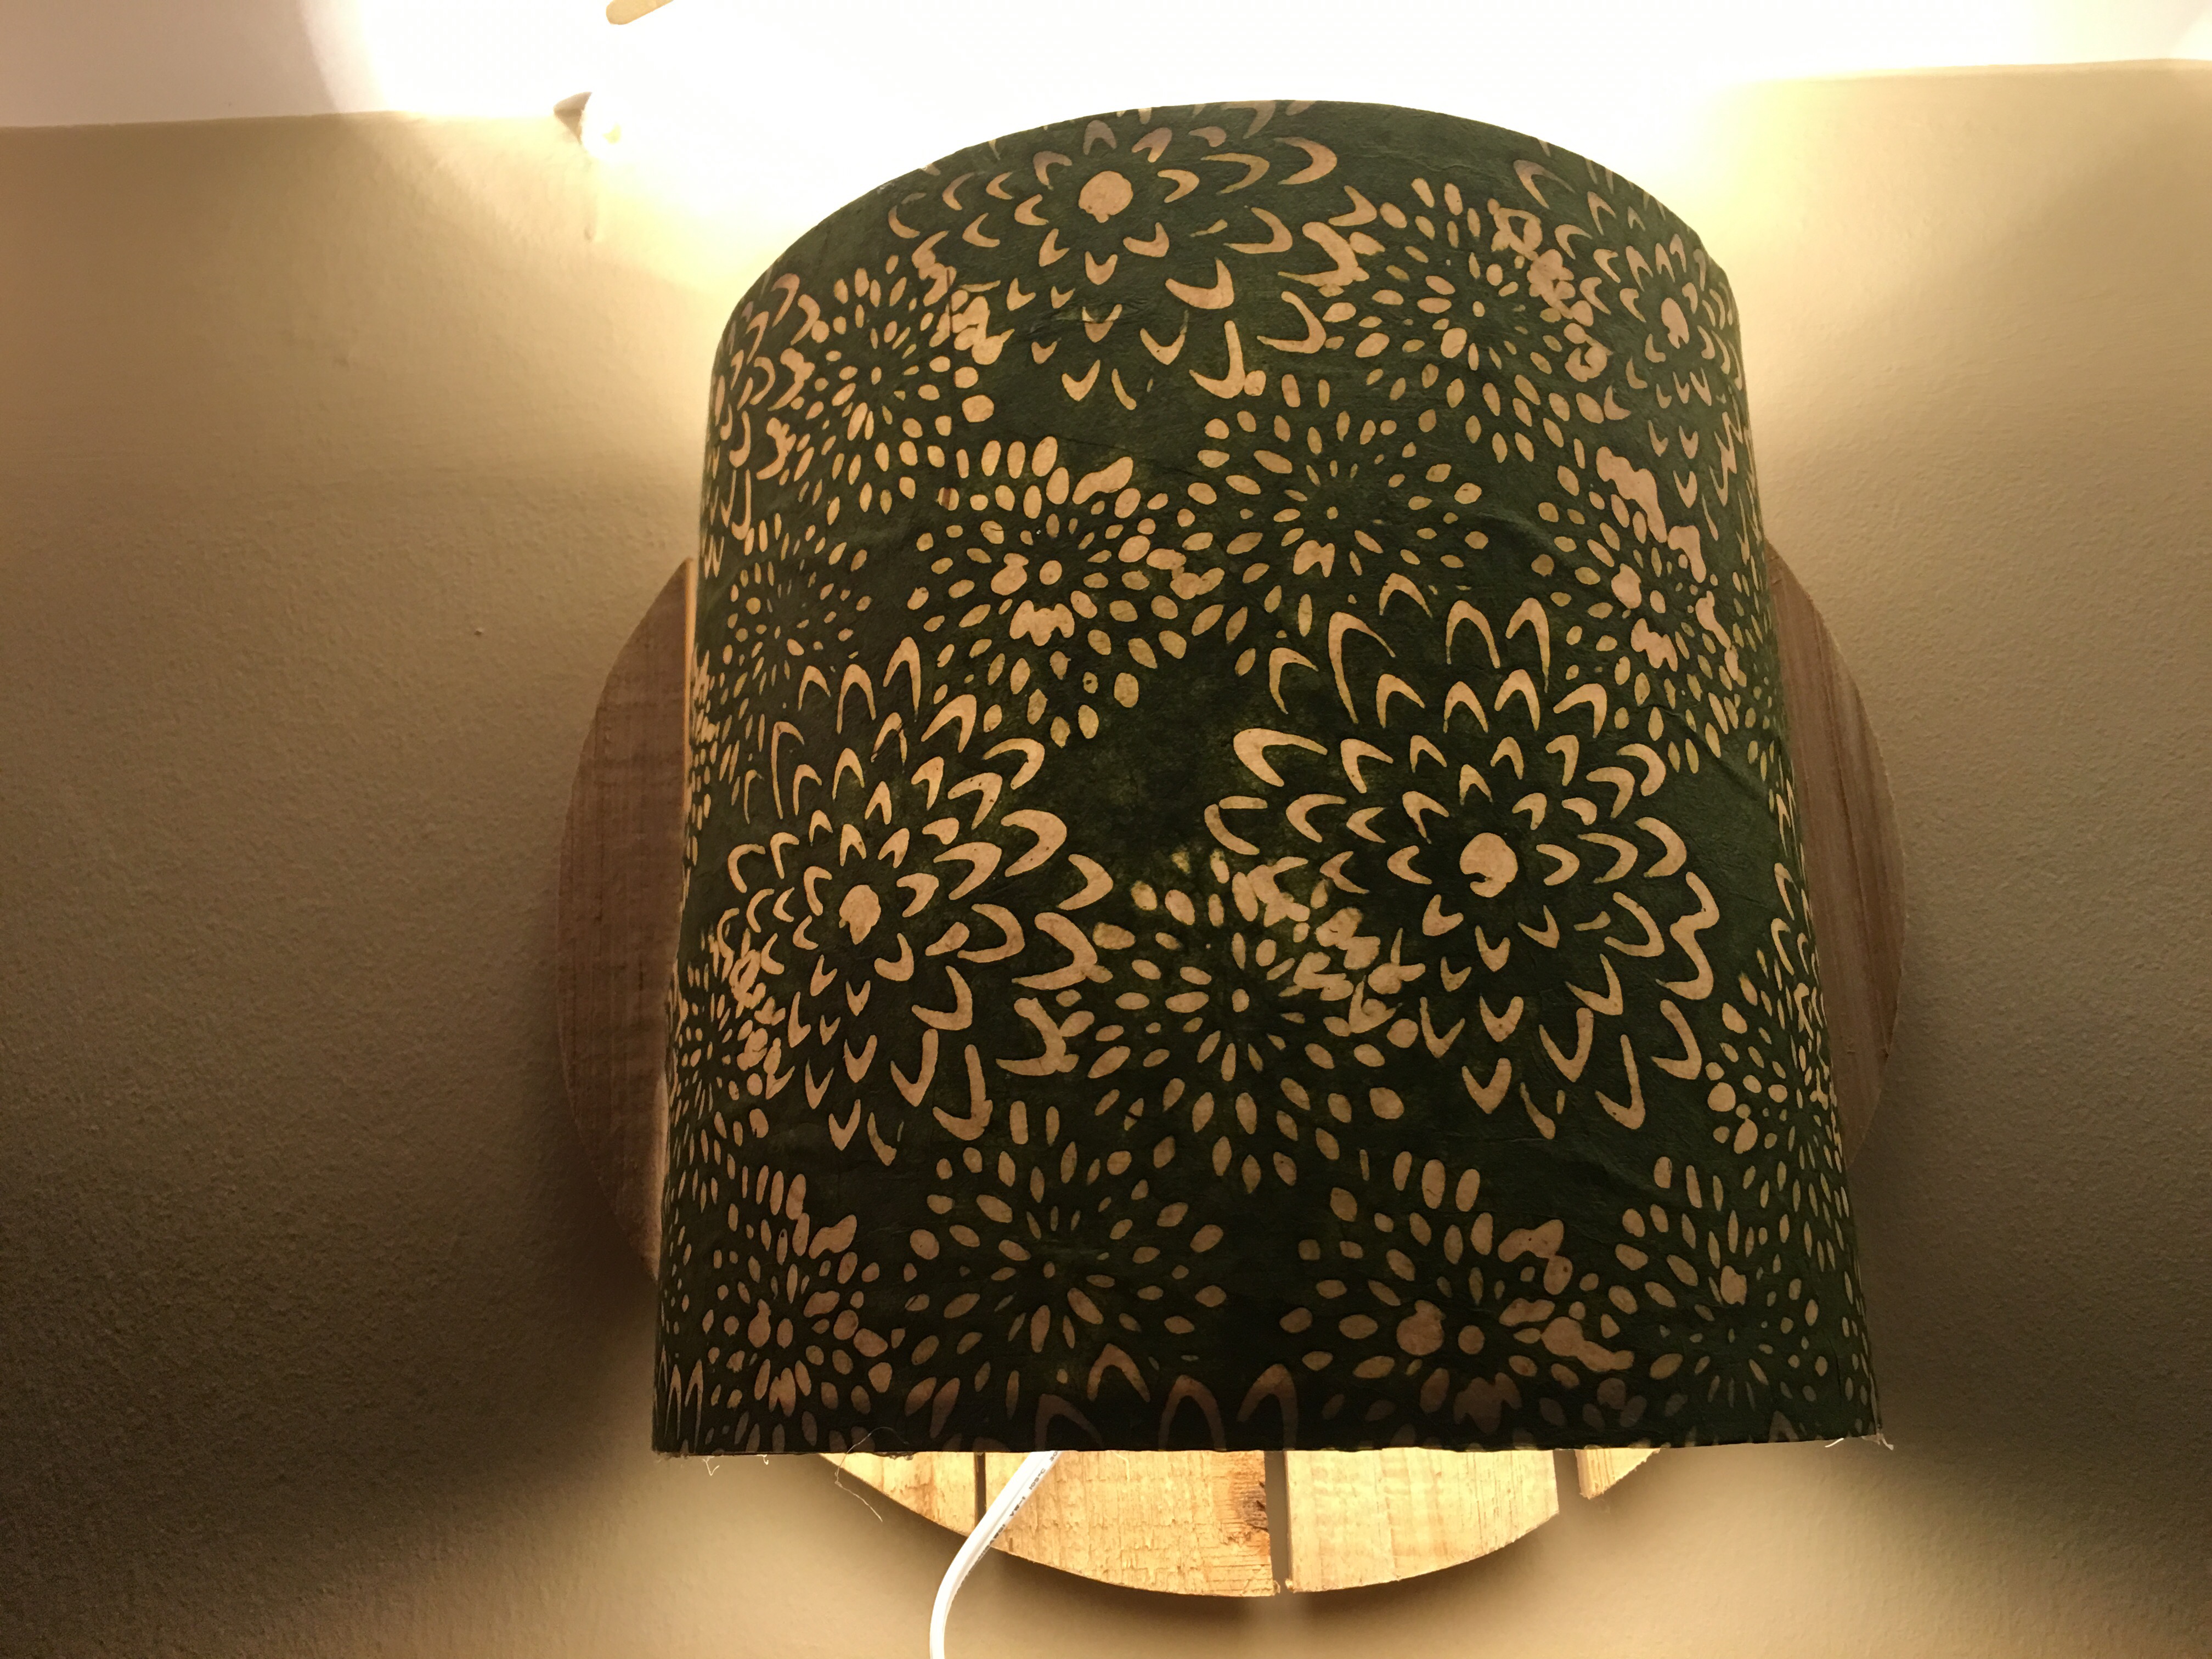
So now my living room gallery wall is truly complete. Three sconces with matching Lokta mums designs in three vibrant colors – red, olive green and sea green.
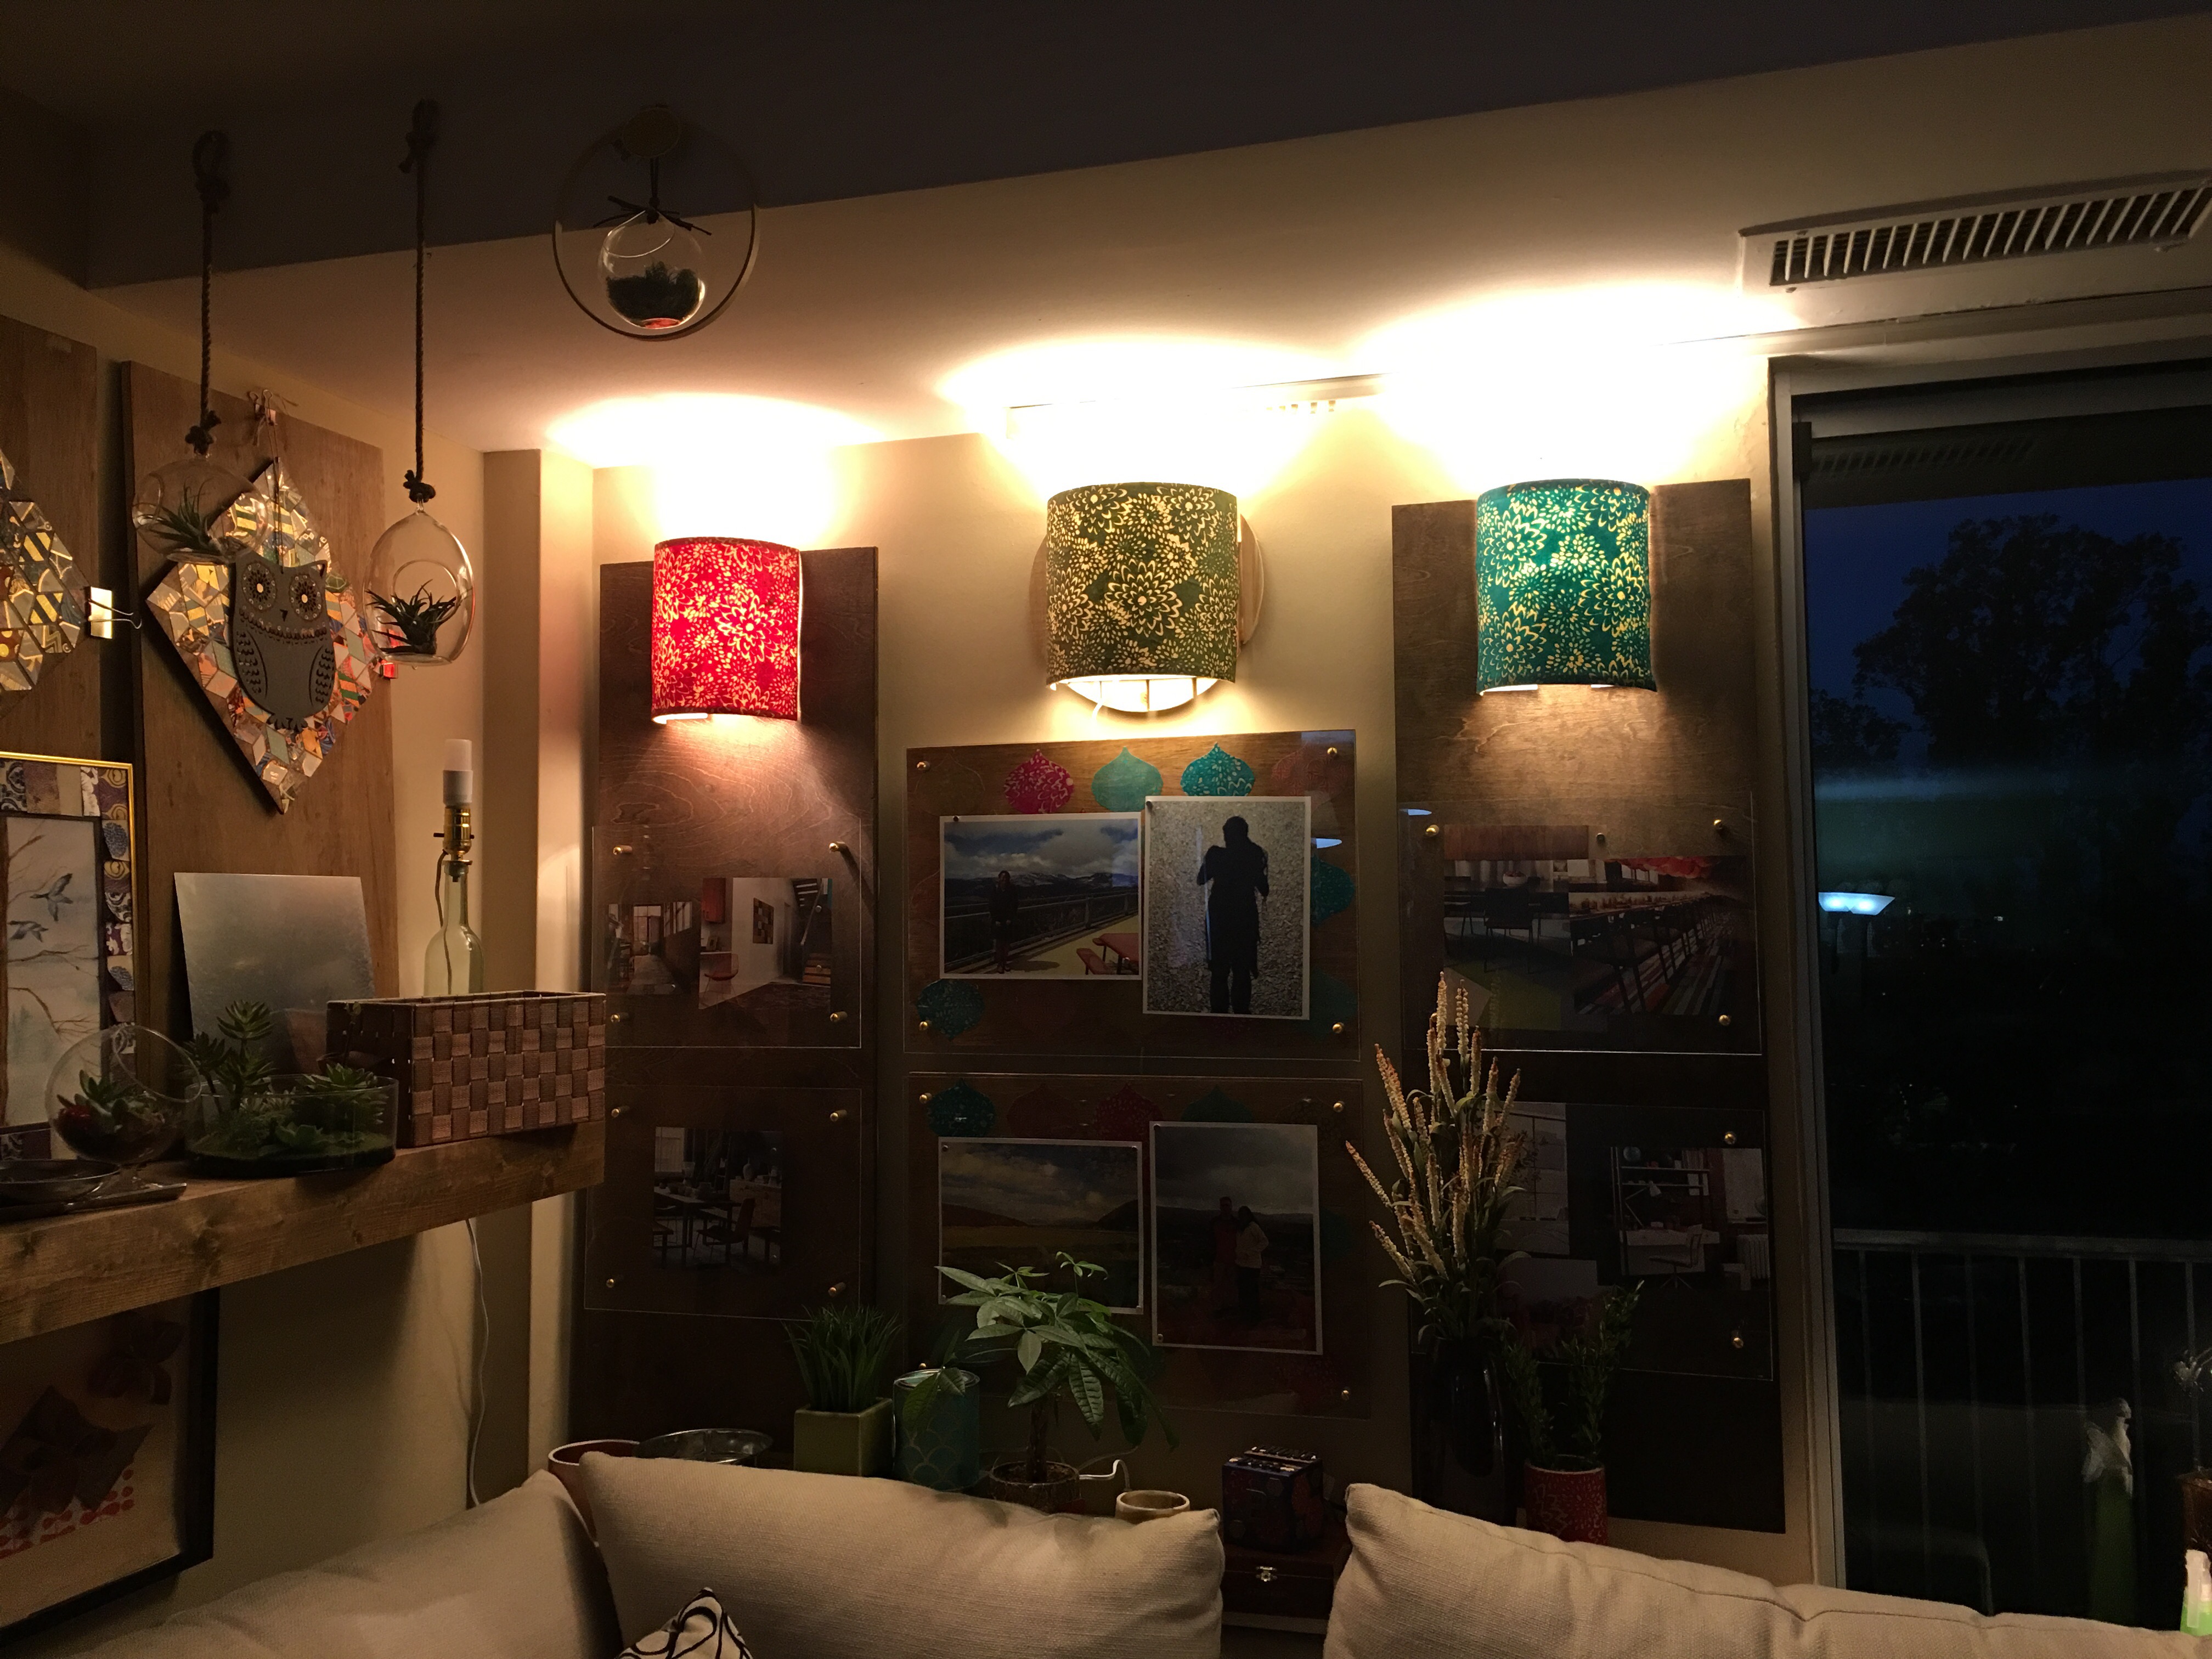
I truly love the way this project came out. And how lively the sconces look, especially when illuminated.
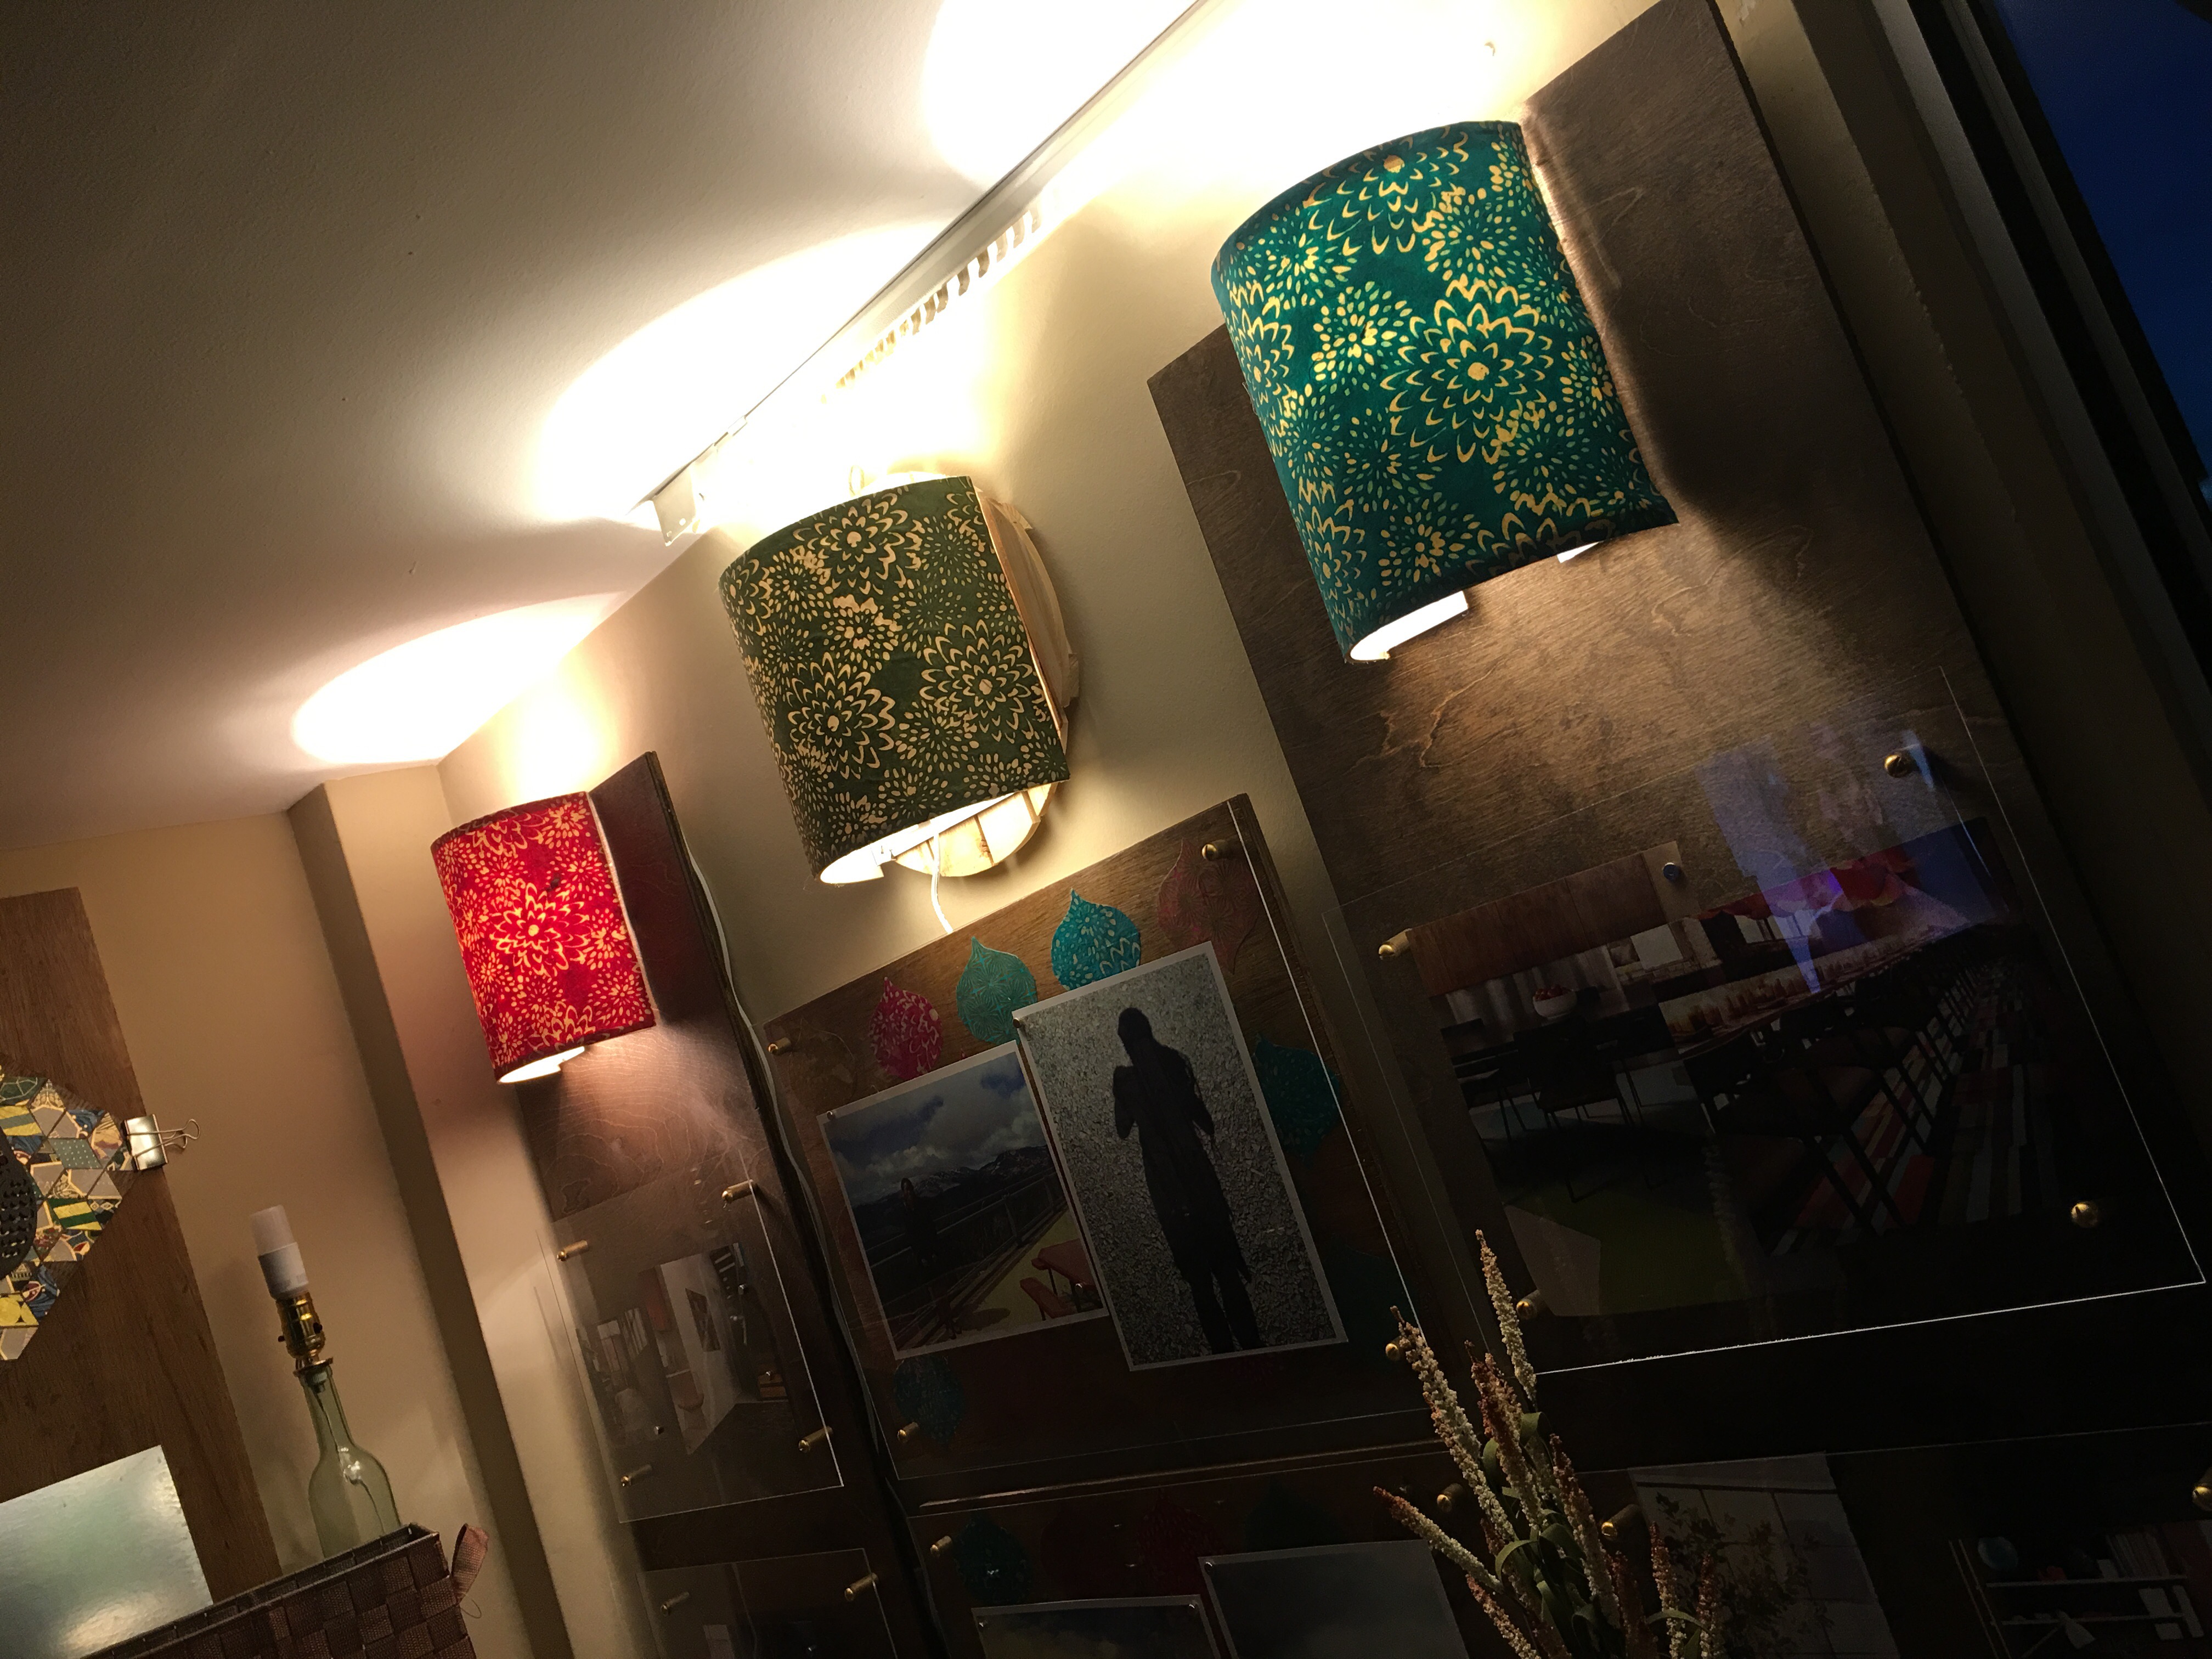
A true matching set…
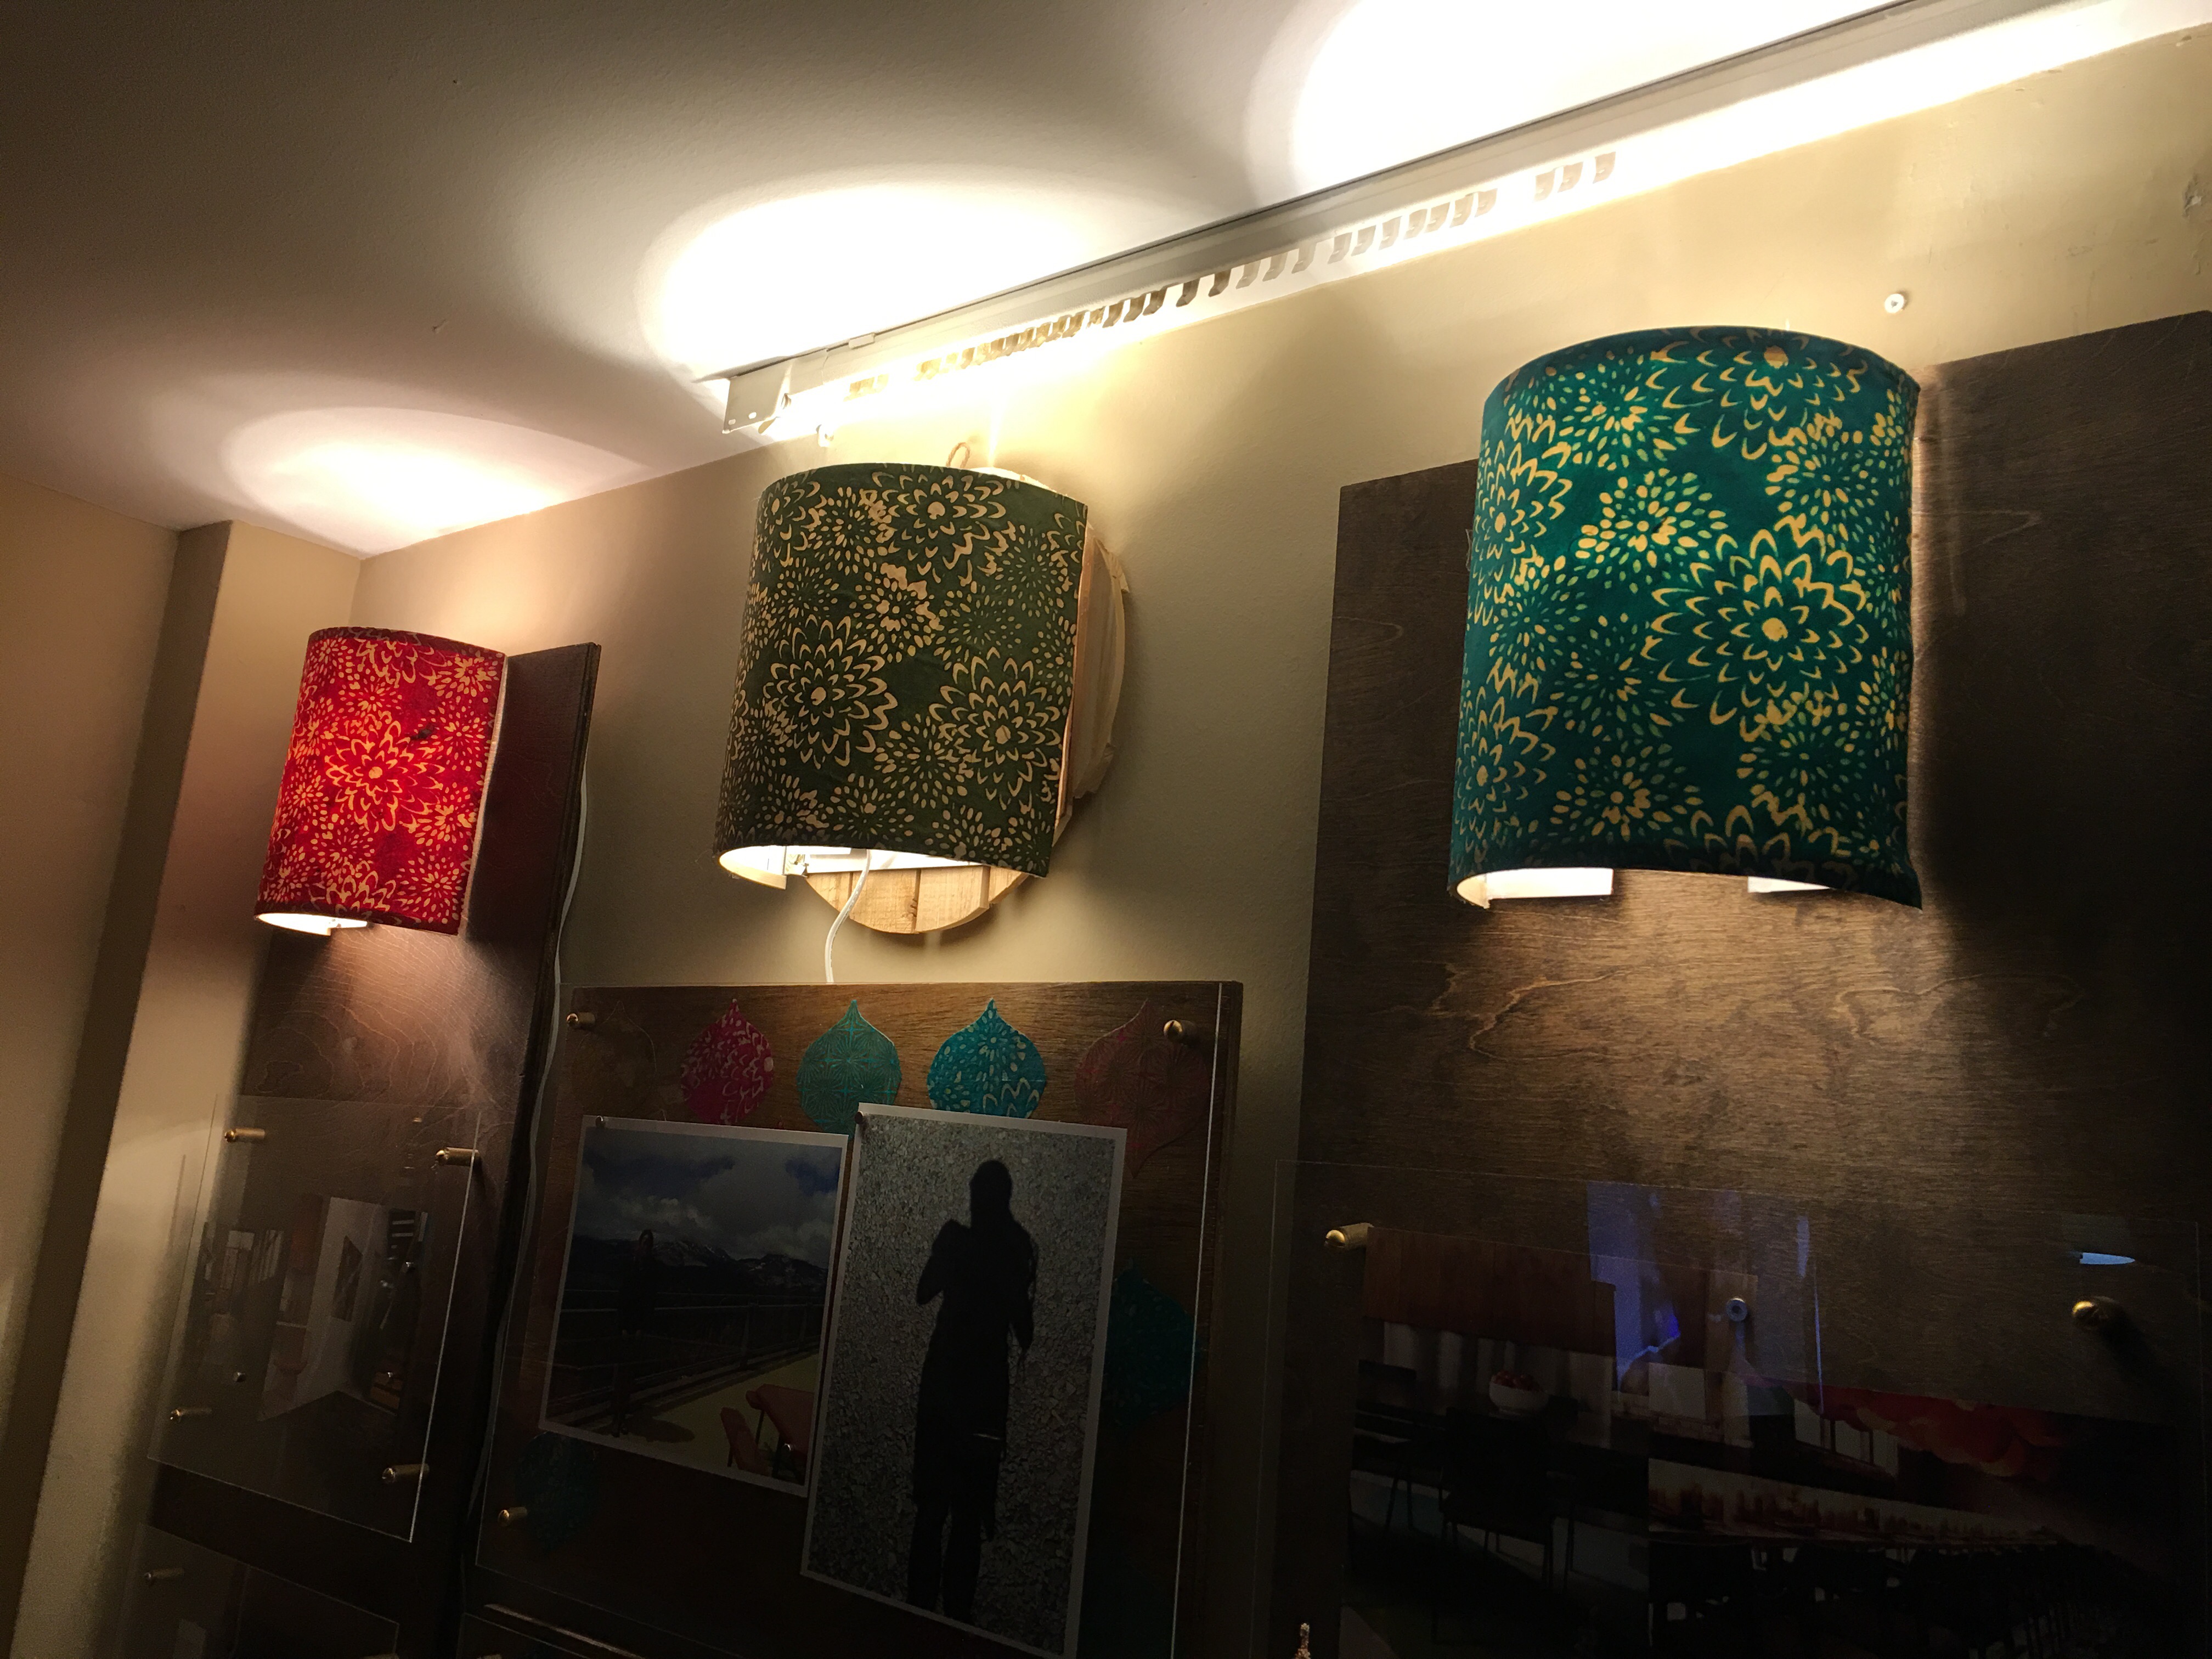
…which for me is pure perfection.
I hope you’ve enjoyed taking this trip down the sconce rabbit hole with me. Let me know what you think of these. ‘Til then! V-