
Decorated Cork Hexagon Canvas for Debbie
You may also like:
June 19, 2015: We’re heading up to Pittsburgh to see my good friend Debbie and her new husband Dino, DIY wood and magnet board gift in tow. But I wanted to make something pretty and personal for Deb.
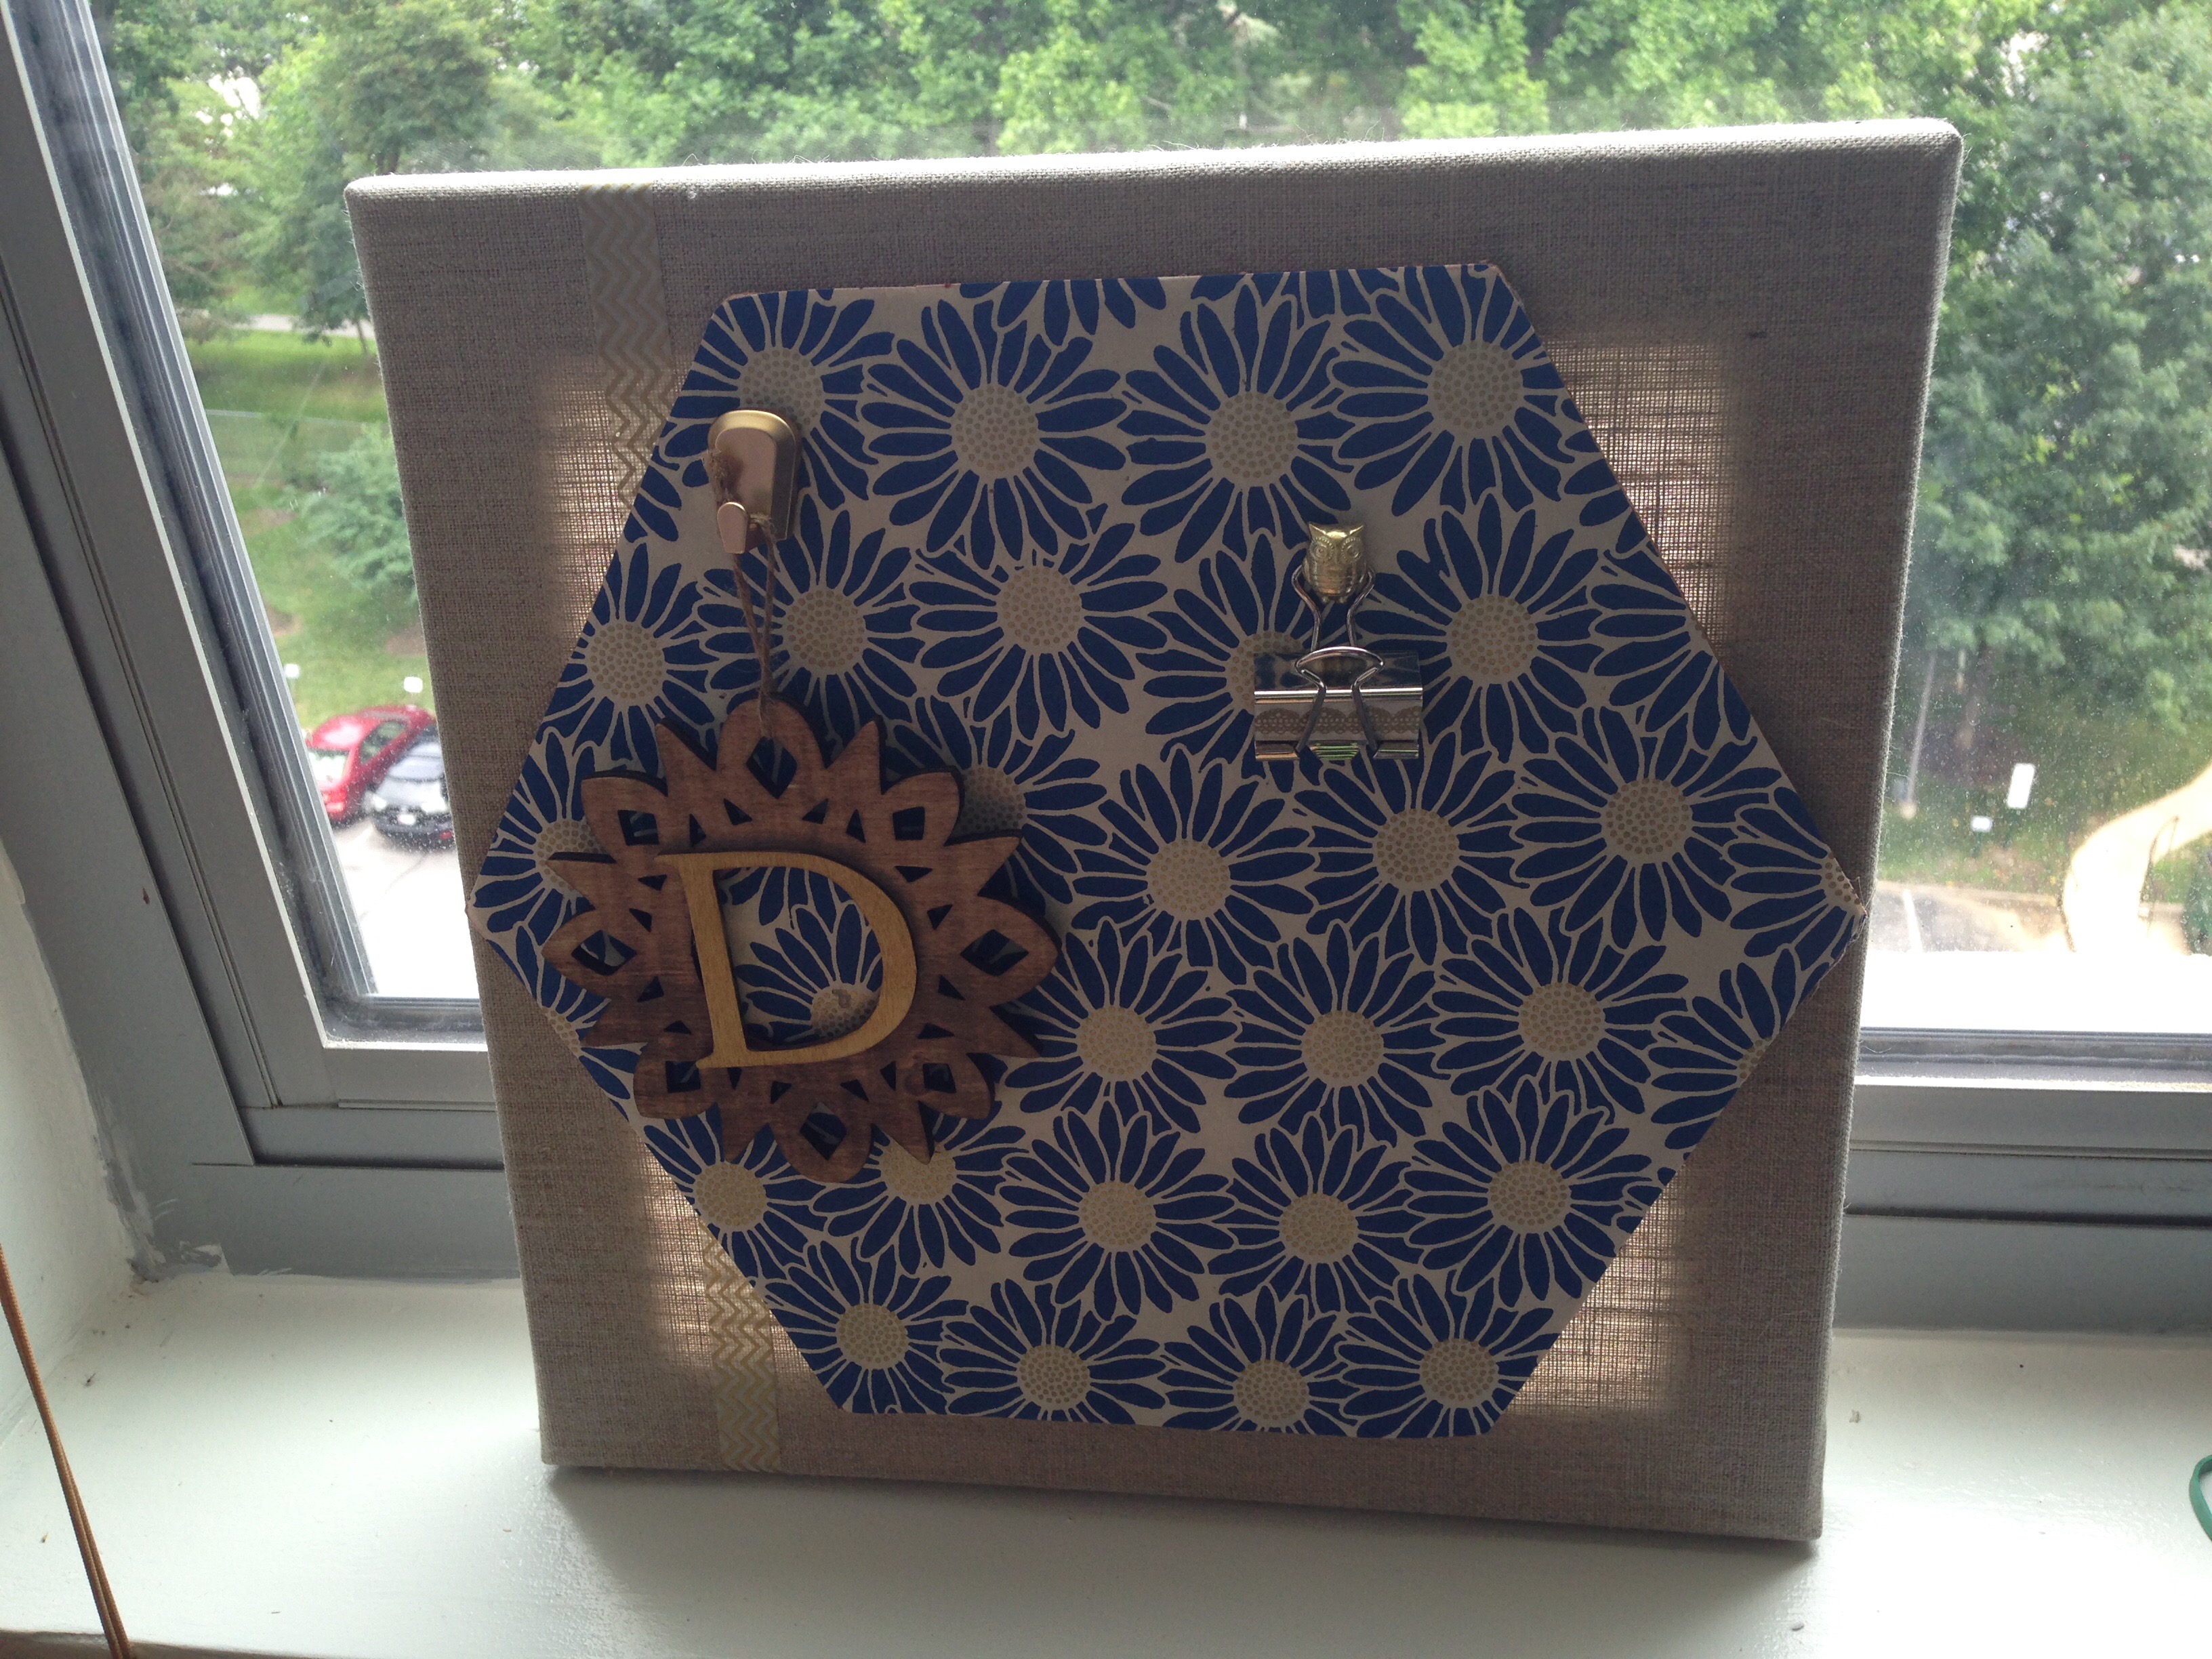
So I made her a personalized DIY decorated cork hexagon canvas.
Believe it or not, this one is a quick and crafty creation. This took me 10 minutes to make. Here’s the very short project materials and tools list.
- Linen canvas 12 x 12 board (1 inch thick).
- Hexagon cork tiles. (You can get these pre-cut from Target or trace out the hexagon shape from any 12 x 12 cork tile).
- Decorative paper. (Used my favorite at the moment – Blue and gold daisy lotka paper that I got from the Paper Source).
- Washi tape. (Also from the Paper Source).
- Push pin hook. (I got a set of six from the Board Dudes at Target).
- Owl push pin. (I used one from Threshold collection at Target).
- Celebrate It wood photo frame ornament (from Michaels).
- Artminds wood cut letter (D for Debbie).
- Hot glue gun.
- Scissors.
I had some Handmade Modern Metallic gold paint already out from the metal on wood magnet board project, so I used this to paint Deb’s wood letter D initial. The letter will be used for a monogrammed hanging ornament is added to the canvas as an embellishment.
To create the decorated cork tile canvas:
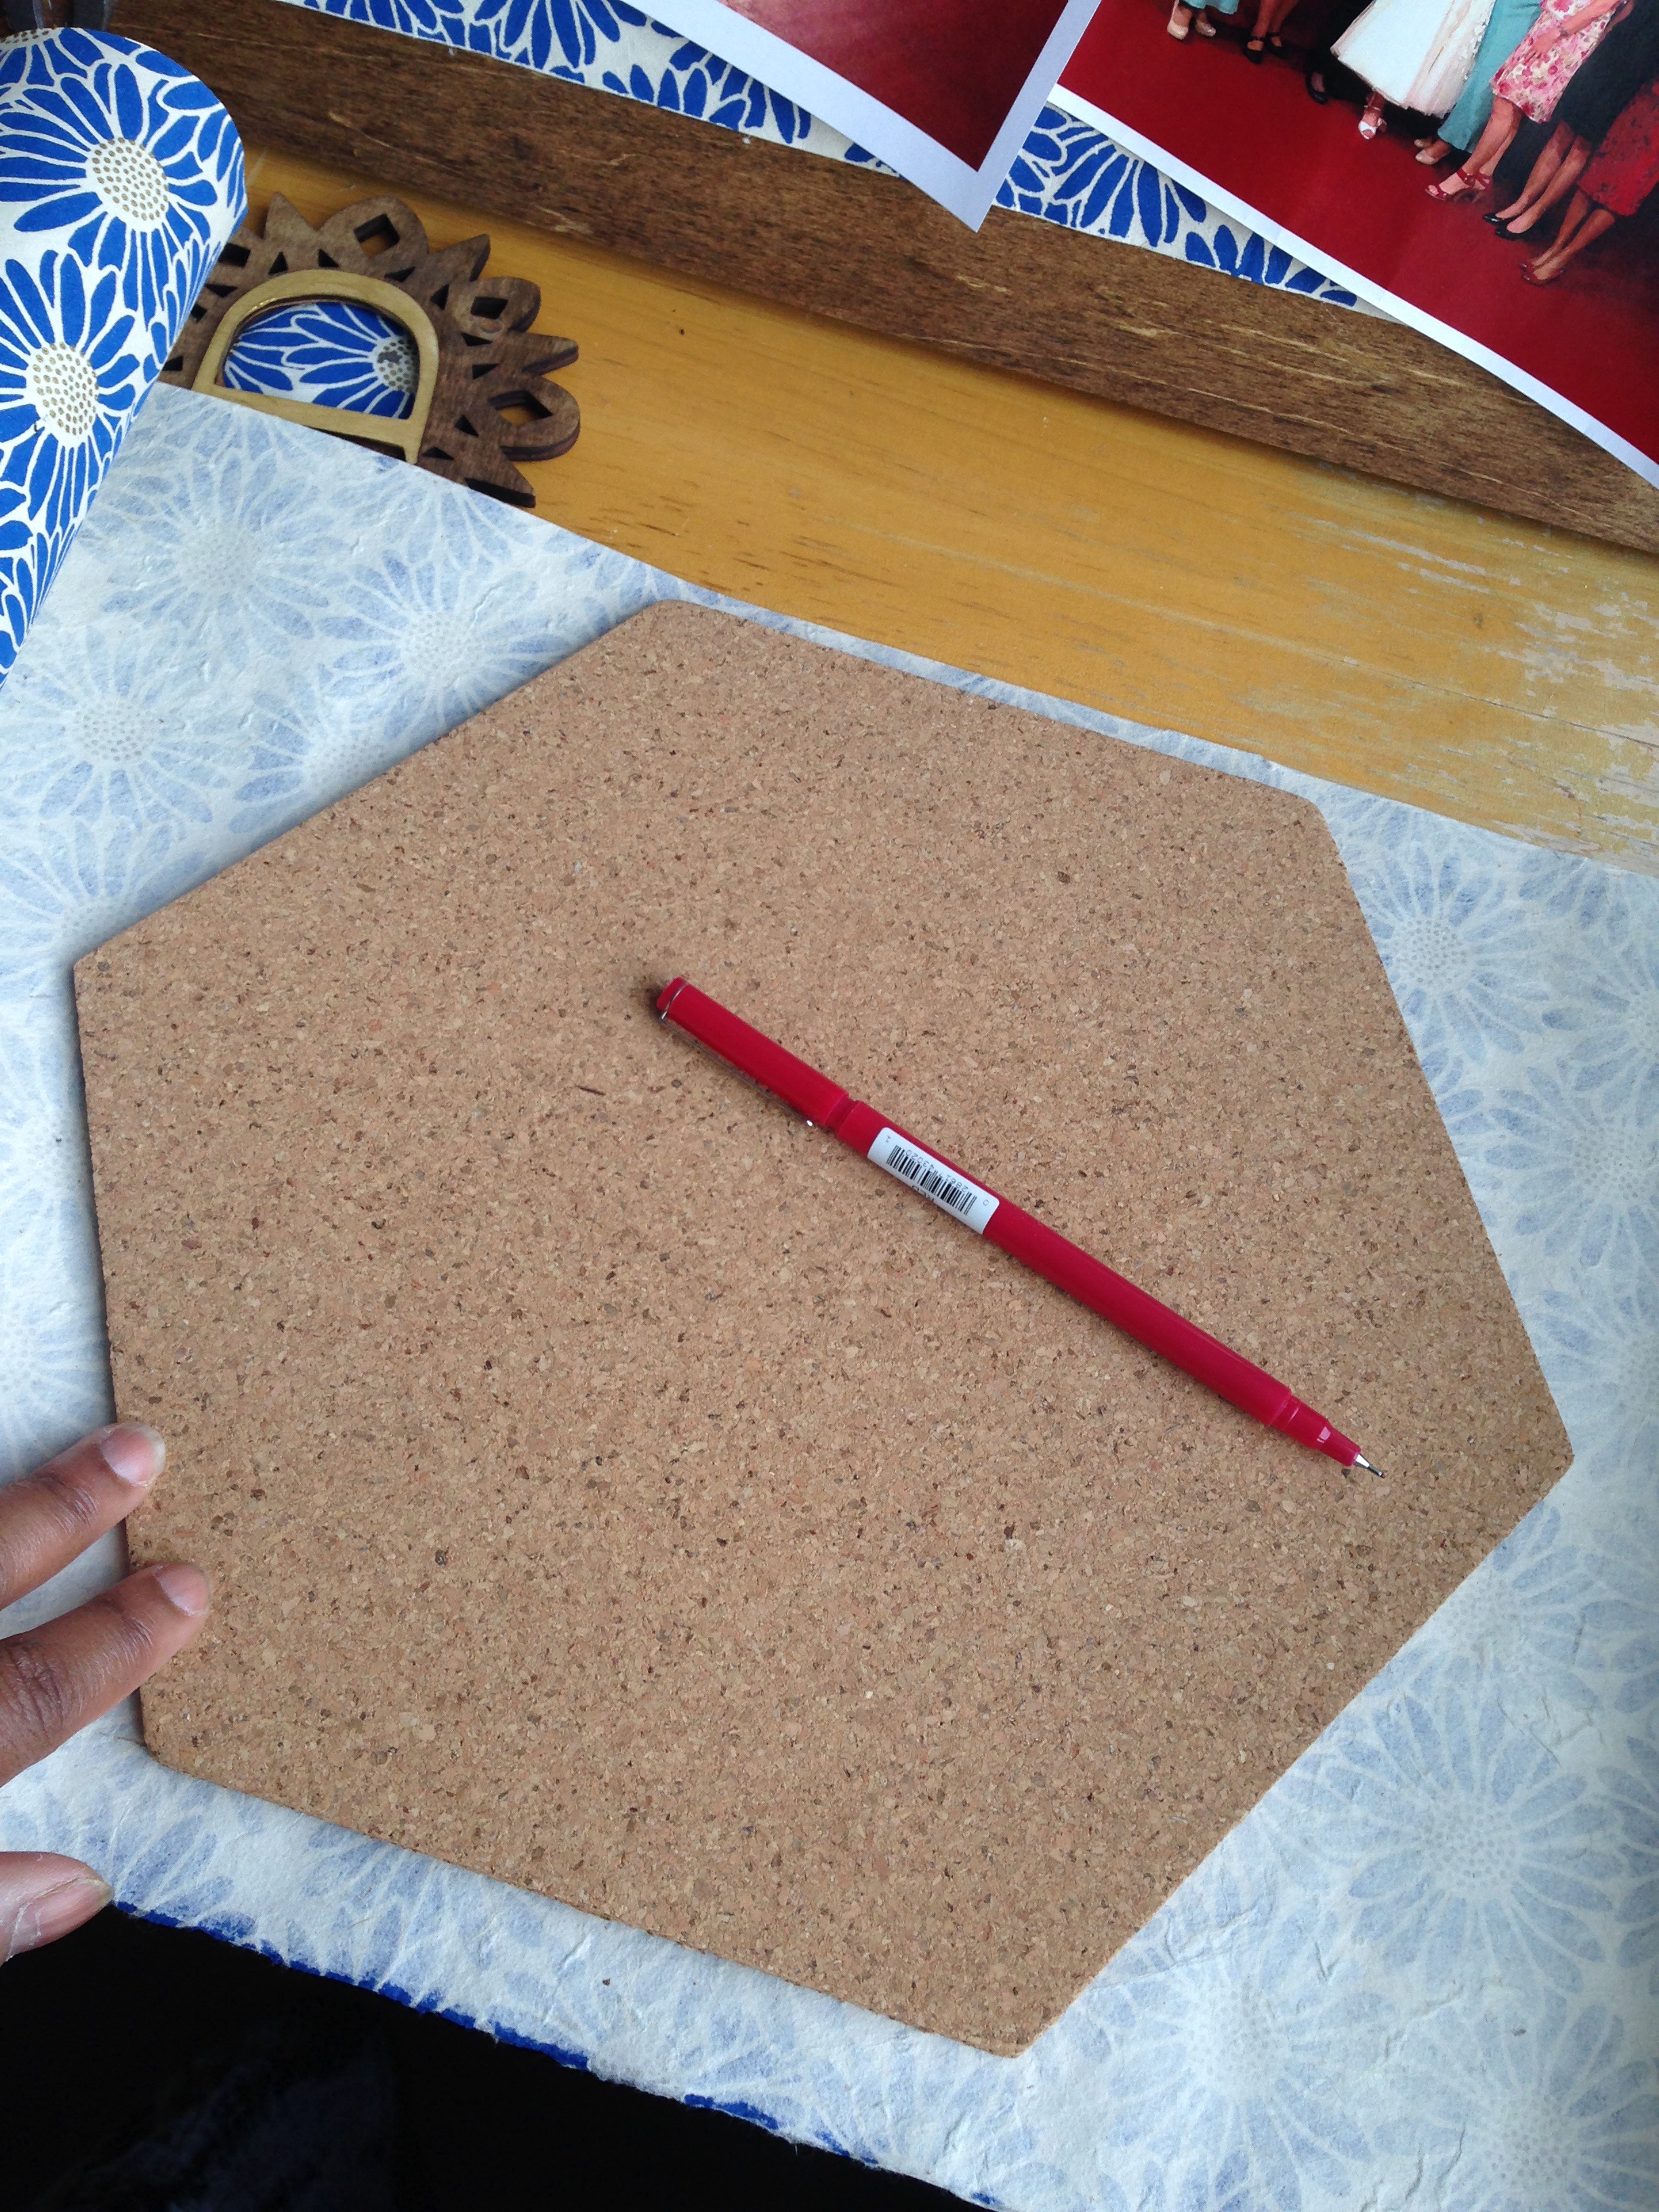
- Step 1: Use the hexagon cork tile to trace the shape on the decorative paper.
- Step 2: Cut the hexagon shape out of the decorative paper.
- Step 3: Affix the paper cut-out to the hexagon cork tile.
- Step 4: Add a strip of washi tape to the left side of the linen canvas (and secure each end in the back with the hot glue gun.
- Step 5: Add hot glue to the back of the decorated hexagon cork tile, and then place it on the front of the linen canvas.

For the monogrammed ornament, I folded scrap decorative paper into a 4×4″ square and hot glued it behind 3″ wood letter “D”. I then hot glued the decorated wood letter to the front of the laser cut wood photo hanging ornament.
The ornament was already stained with Early American Minwax wood stain. I learned this trick from Stephanie Lynn’s excellent post on wood filagree ornaments.
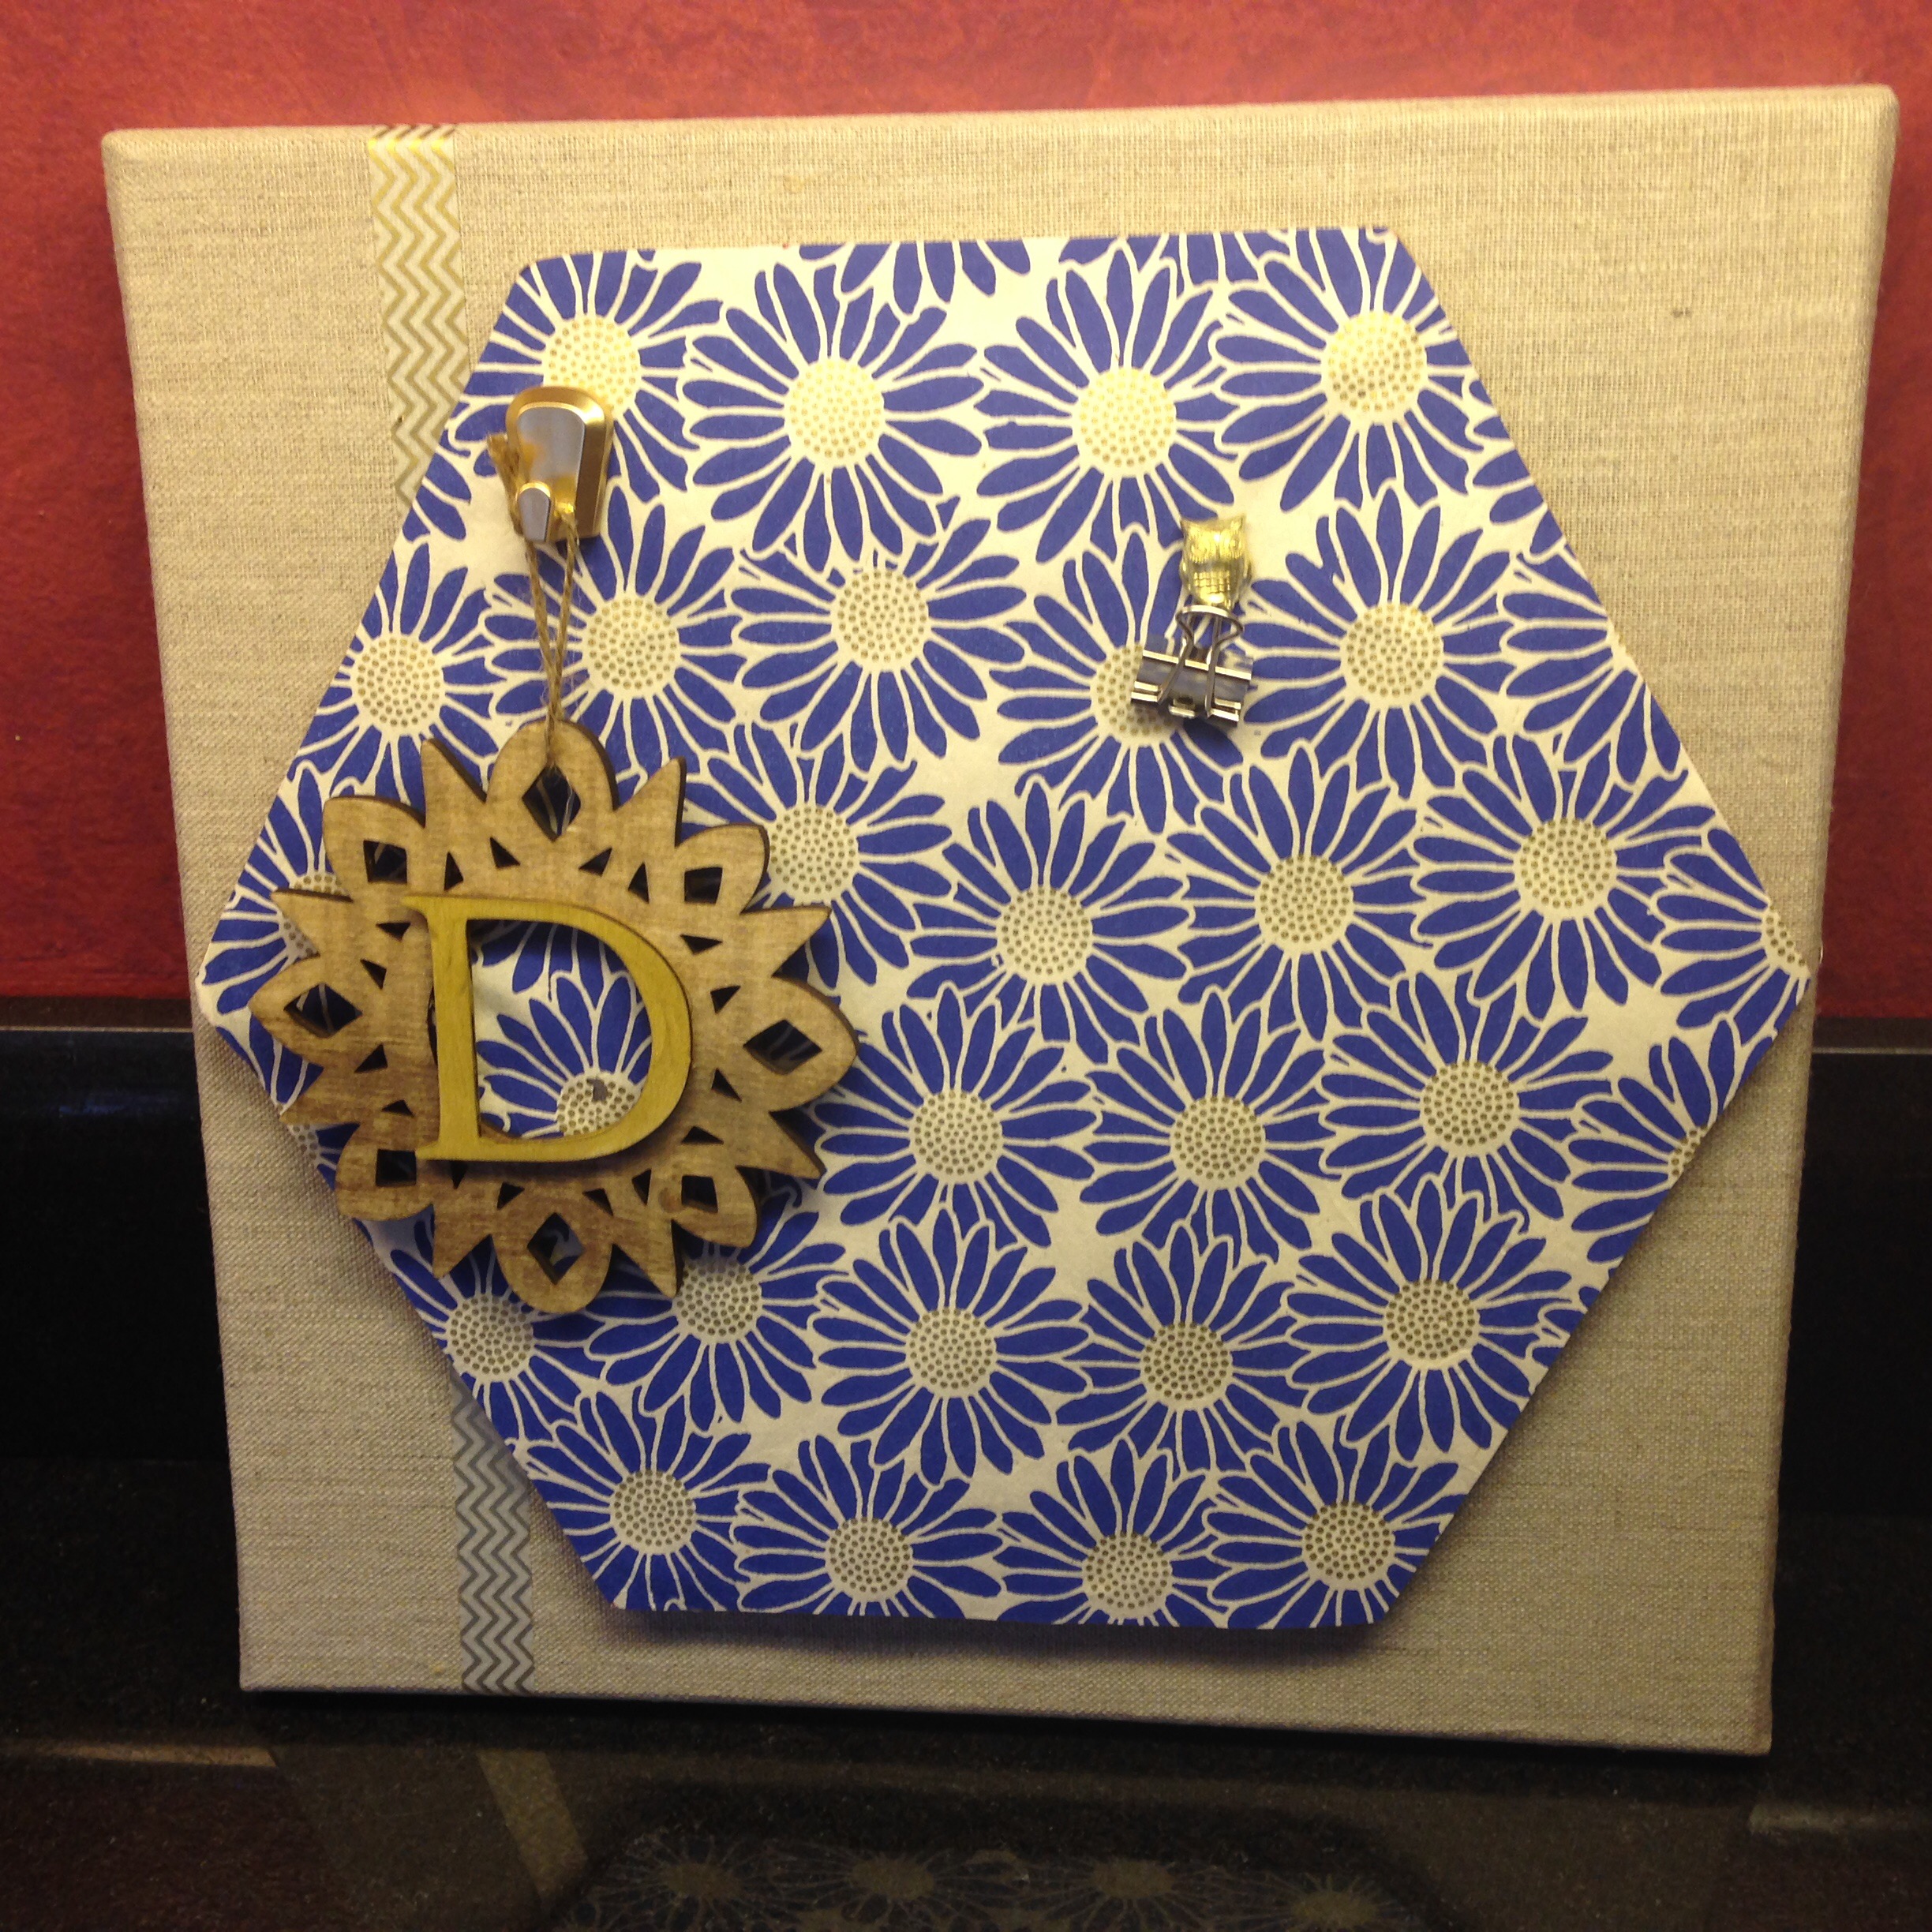
I added the push pin hook so that I can hang Deb’s monogrammed ornament from the canvas. And the owl push pin holds a binder clip (that was used to hold my personal notecard to Deb).
And that was it! Ten minutes. It was an idea that popped into my head 30 minutes before we were due to hit the road and head to Pittsburgh. I’m so happy I kicked this into high gear and made it out the door with this pretty offering for Deb. I just love this paper and how it looks against the linen fabric (and how it blends with the color of the stained and painted wood ornament).
I’m so happy this came out so nicely. Deb is very special to me (like the sister I never had), so this DIY gift had to be absolutely perfect (something simple and elegant that strikes just the right note). I smiled broadly when I whipped it all together, knowing that Deb will love it.
And very thankful for the fast drying time of hot glue as I dashed out the door with my VidaDIY gifts for Deb (and her Dino) in hand. V-